
JHCC
-
Posts
19,356 -
Joined
-
Last visited
Content Type
Profiles
Forums
Articles
Gallery
Downloads
Events
Everything posted by JHCC
-
The Blacksmith's Journal website offers back issues and archive copies for sale, even if only in electronic form.
-
I'm working on a similar blade and am encountering a similar problem. The simple answer is, keep grinding. If there's enough metal left in the blade, just grind down to the finished size and shape that exists within your blank. For my own knife, after investing a considerable amount of time in trying to flatten it post-hardening, I am about to re-anneal it, file it flat, and harden again. I'm regretting the loss of time (and sandpaper) invested, but without a proper knifemaking grinder, it's really my own best option. Don't be afraid to fall back and retrench, if necessary.
-

Just a box of dirt, or a simple side blast forge
JHCC replied to Charles R. Stevens's topic in JABOD - Just A Box Of Dirt
My very first forge (an old gallon-size juice can lined with clay -- a JACOD? -- that never once got up to forging temperature) used a blow pipe. Let's just say I abandoned that method the first time I got out of sync with myself and sucked on the pipe rather than blew.... -
Well put, George.
-
It's going to take a lot more than 55 calories to get steel to forging temperatures.
-
The "Tuyere Two-Step"!
-
Thanks for the update, Charles. Prayers continue.
-
Rowan Taylor has a great series of YouTube videos about recreating Viking and Anglo Saxon tools and other metalwork.
-
What did you do in the shop today?
JHCC replied to Mark Ling's topic in Blacksmithing, General Discussion
No photo, but put in some time cutting and grinding pieces for the next portable hole. -
Pretty sweet!
-
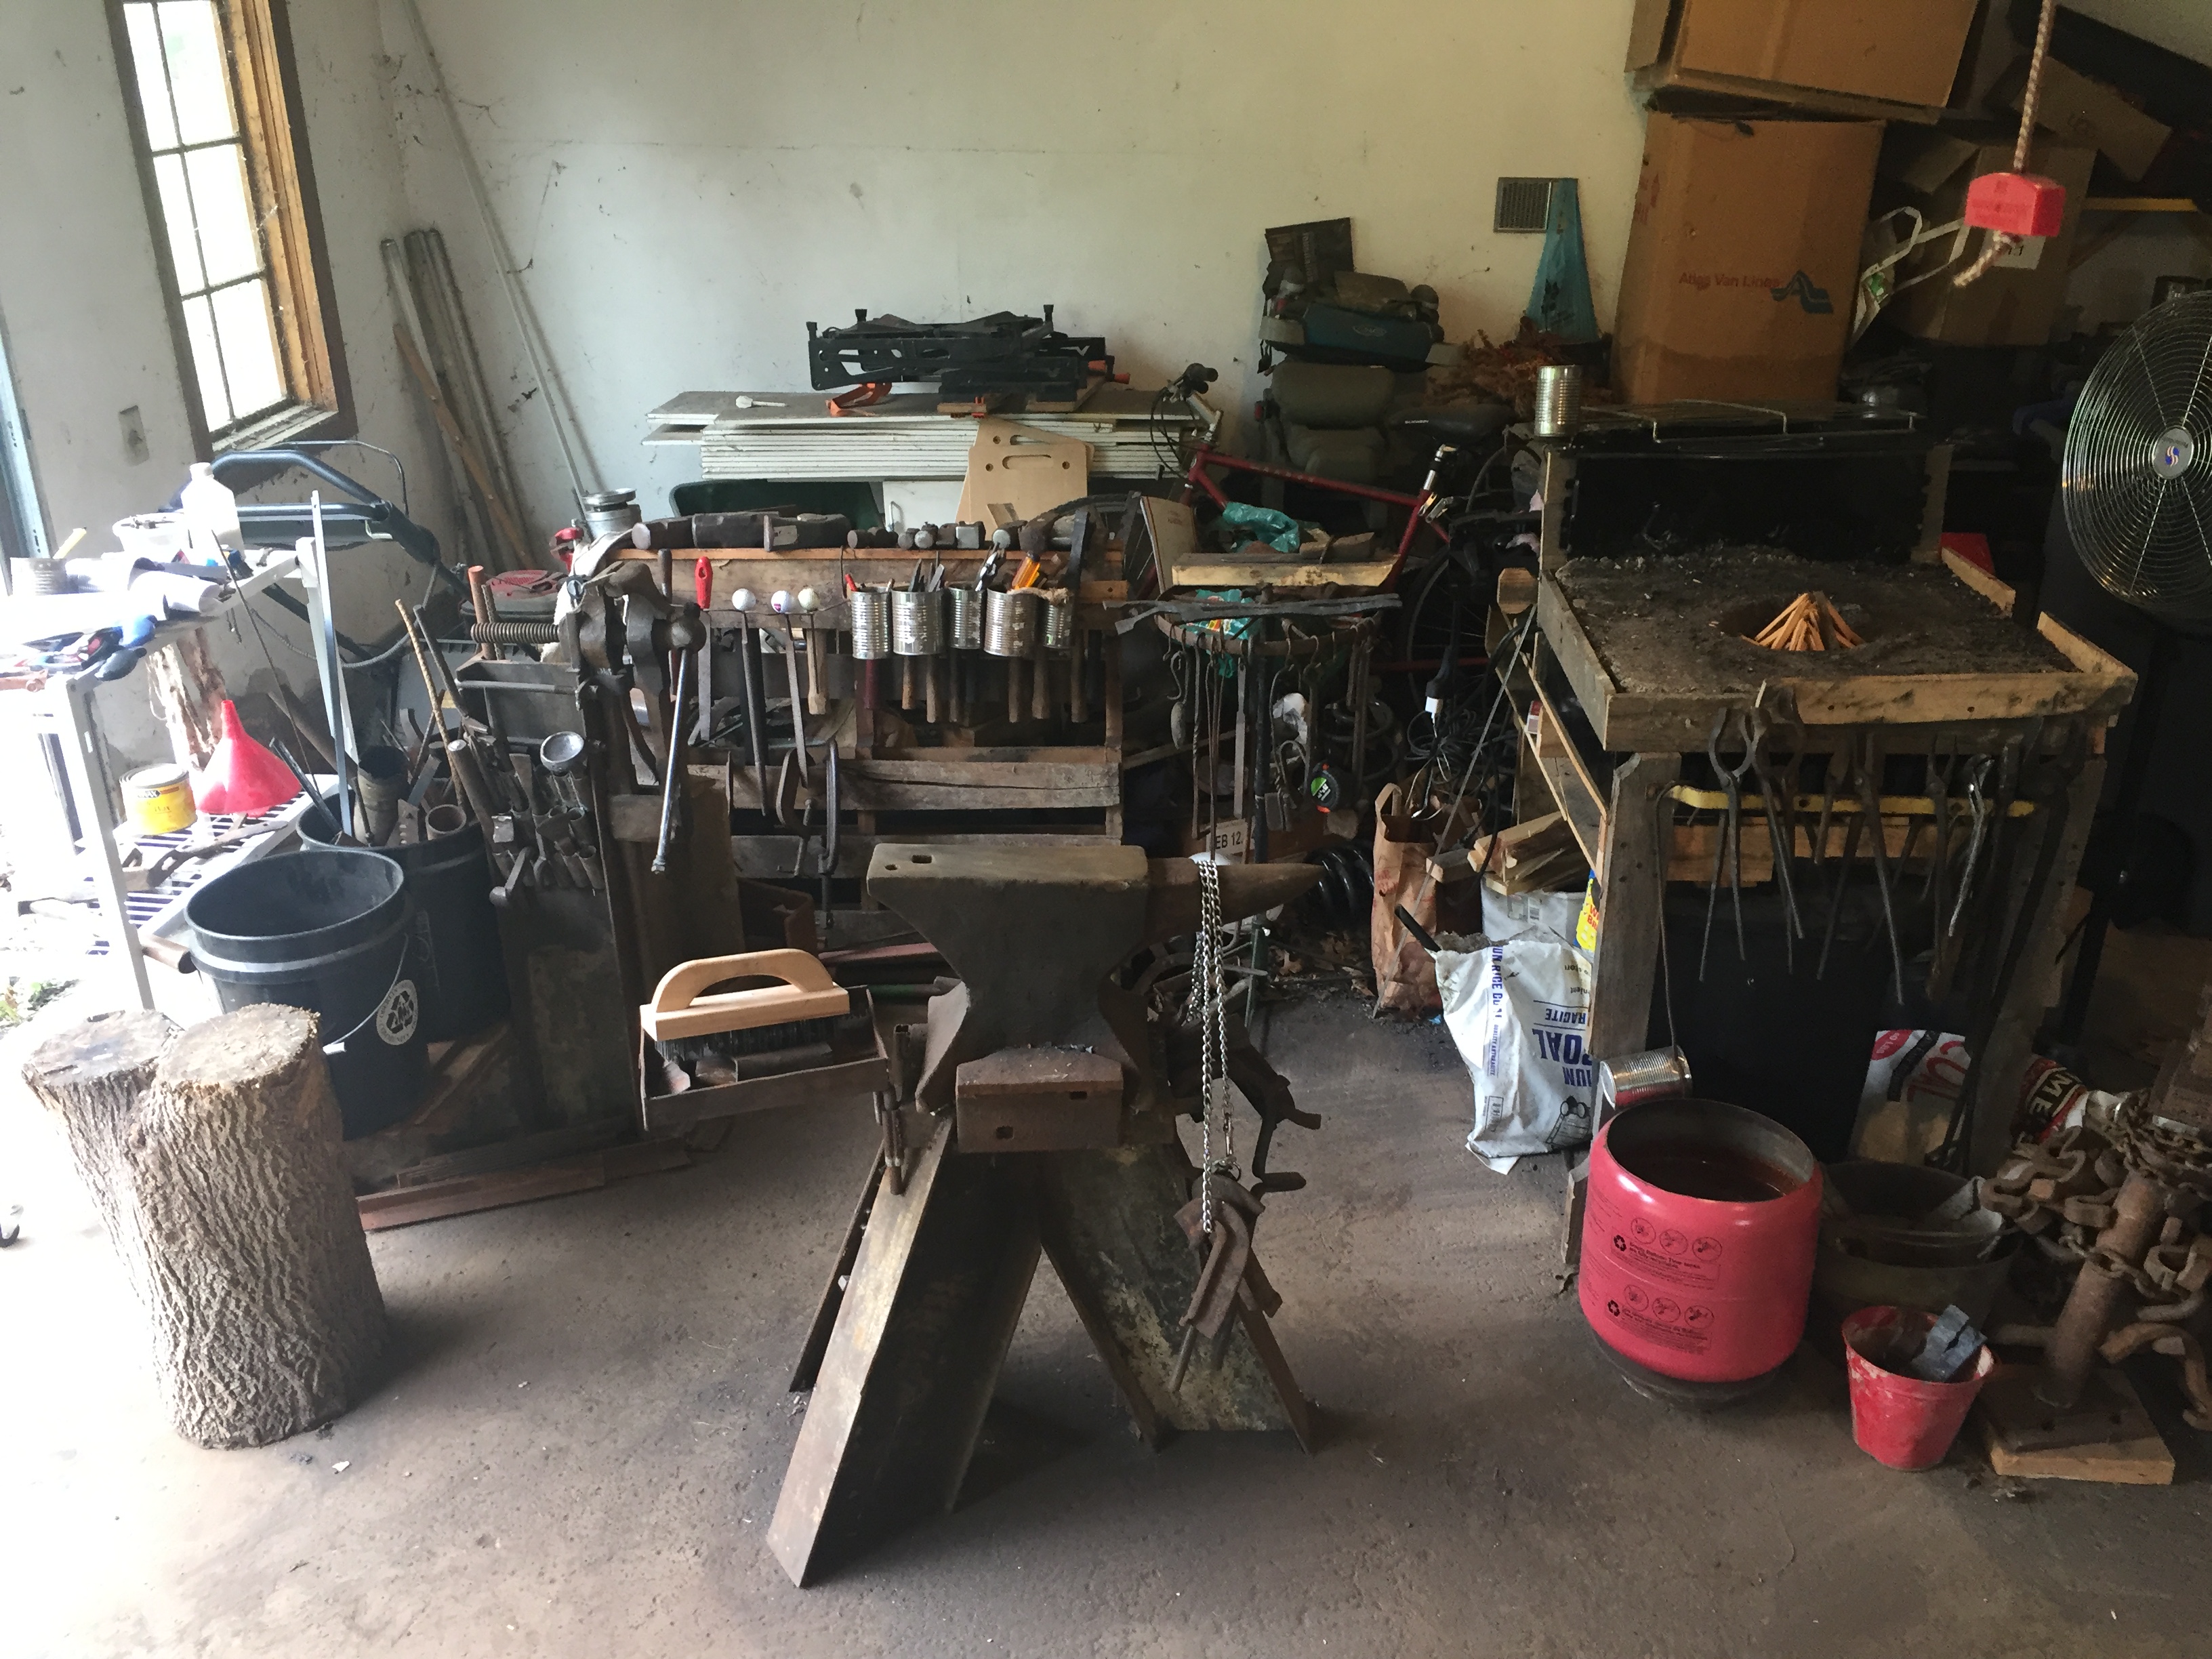
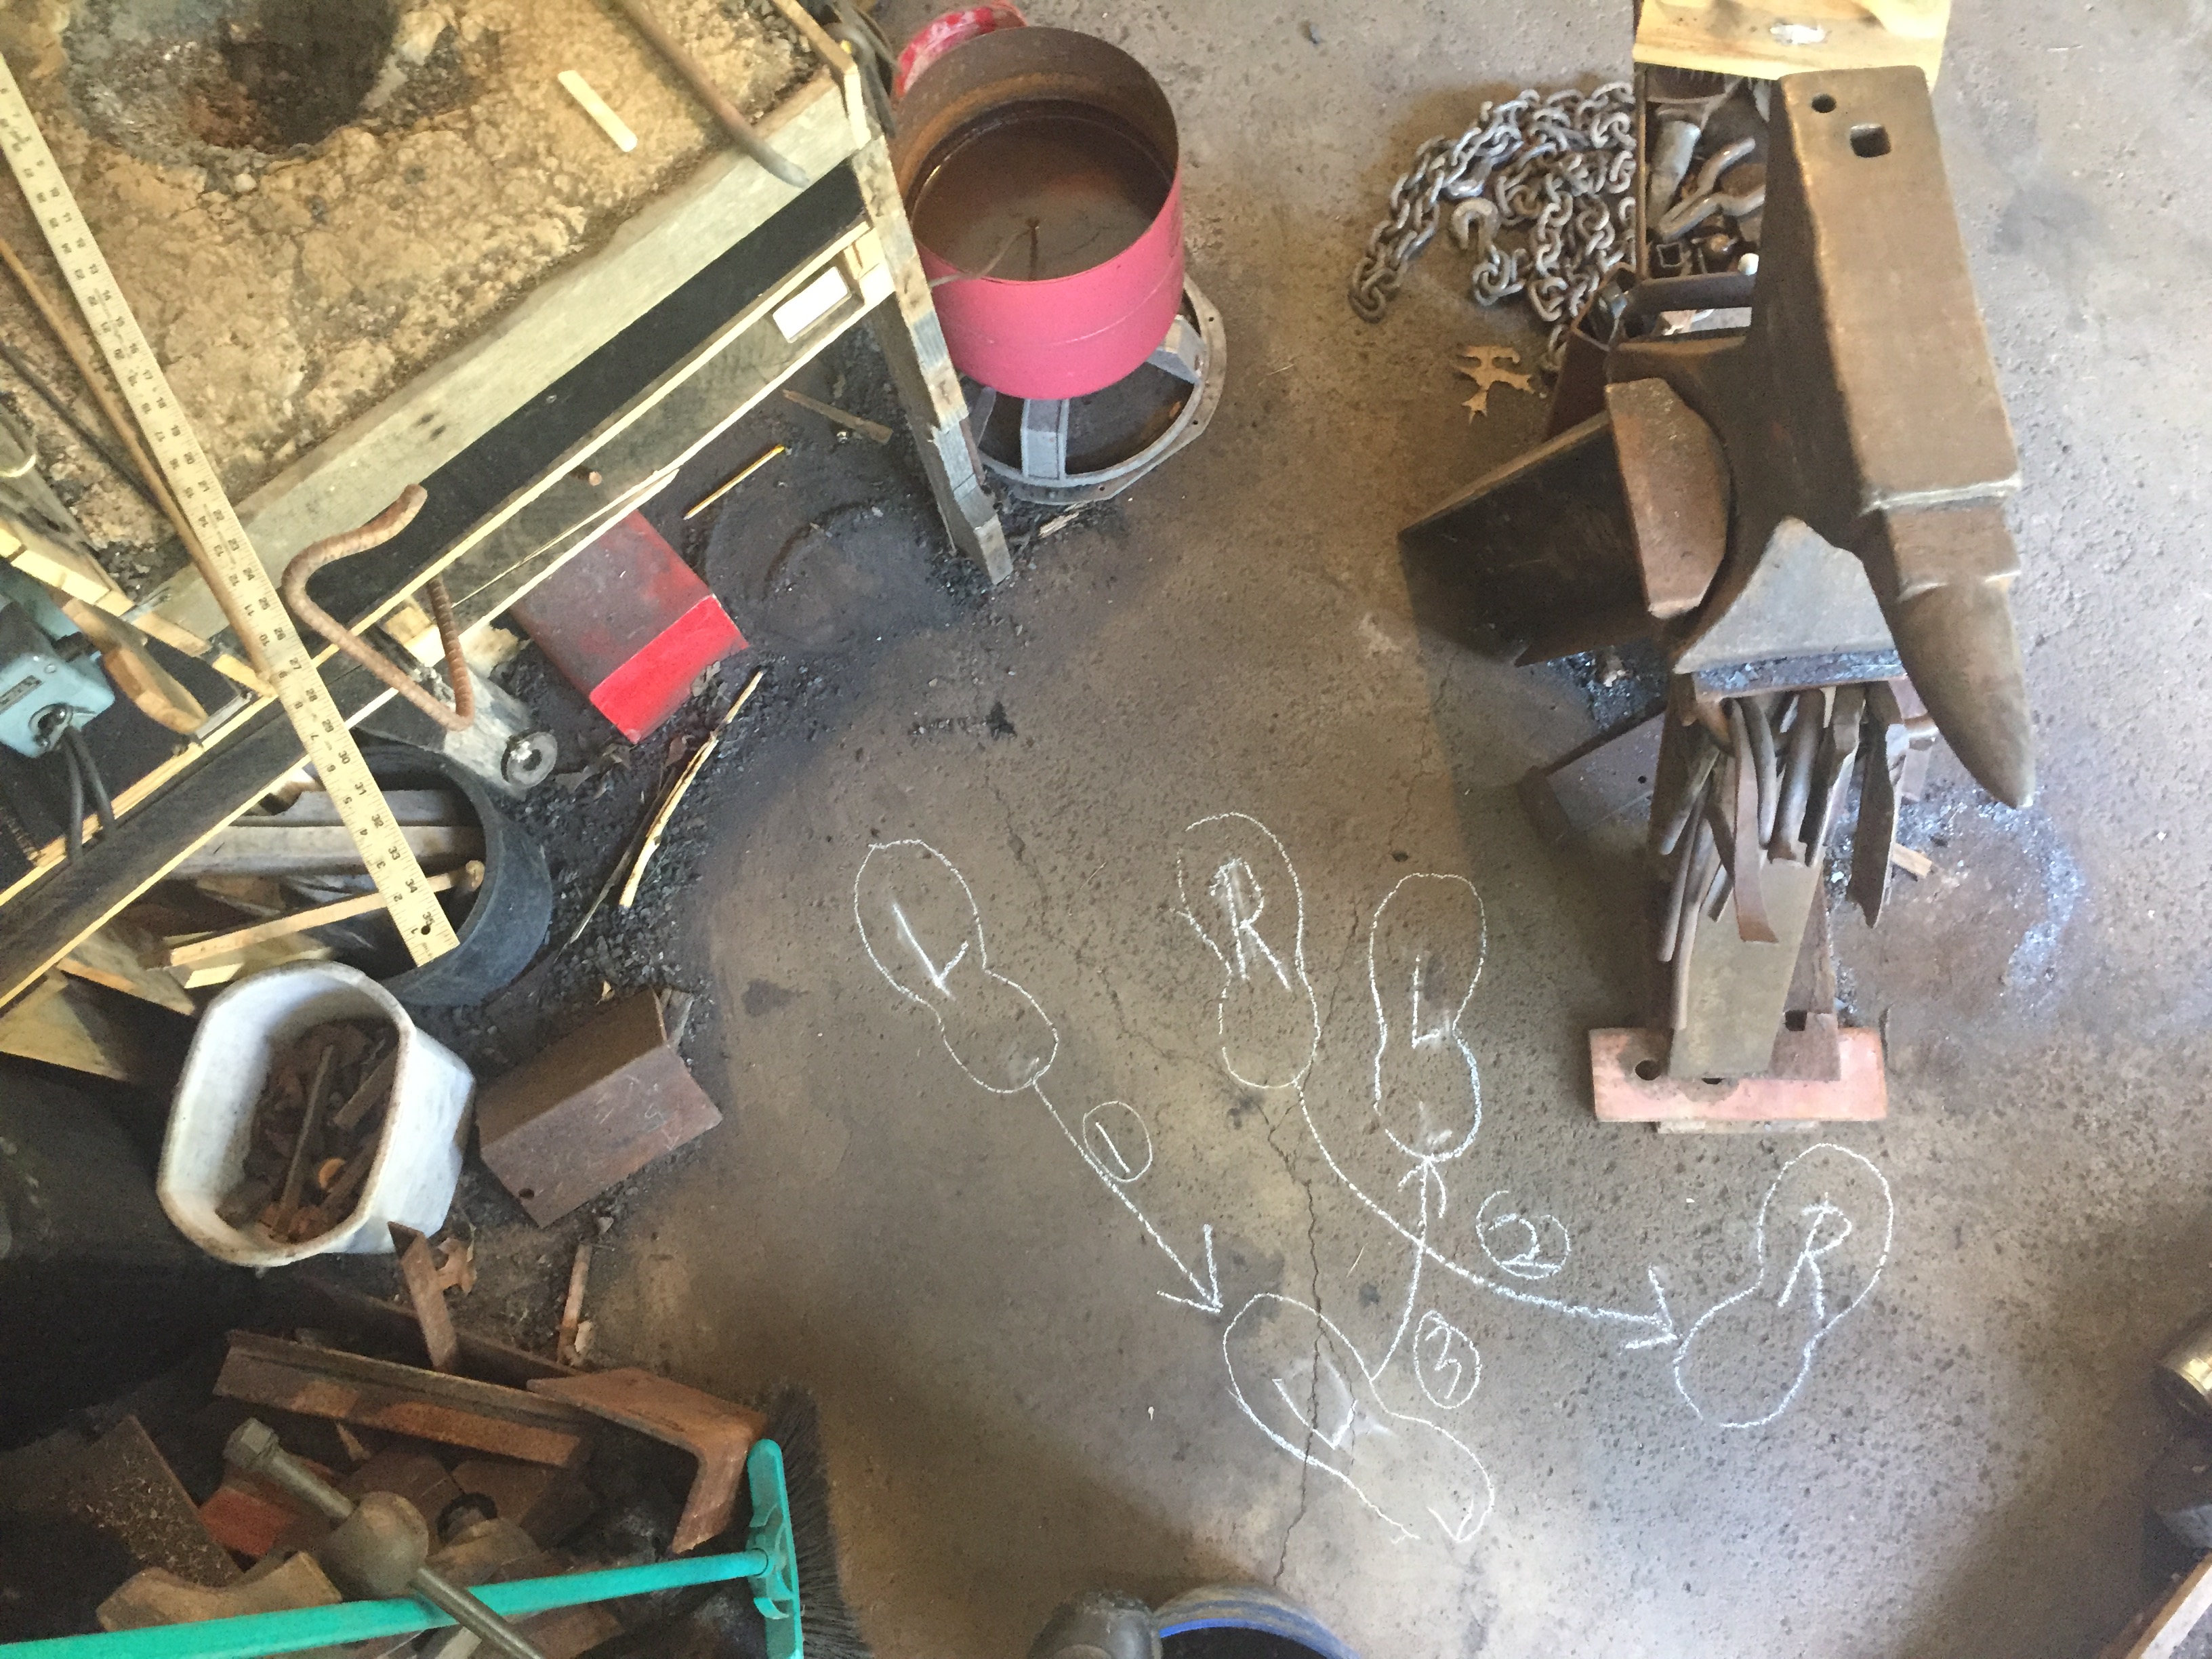
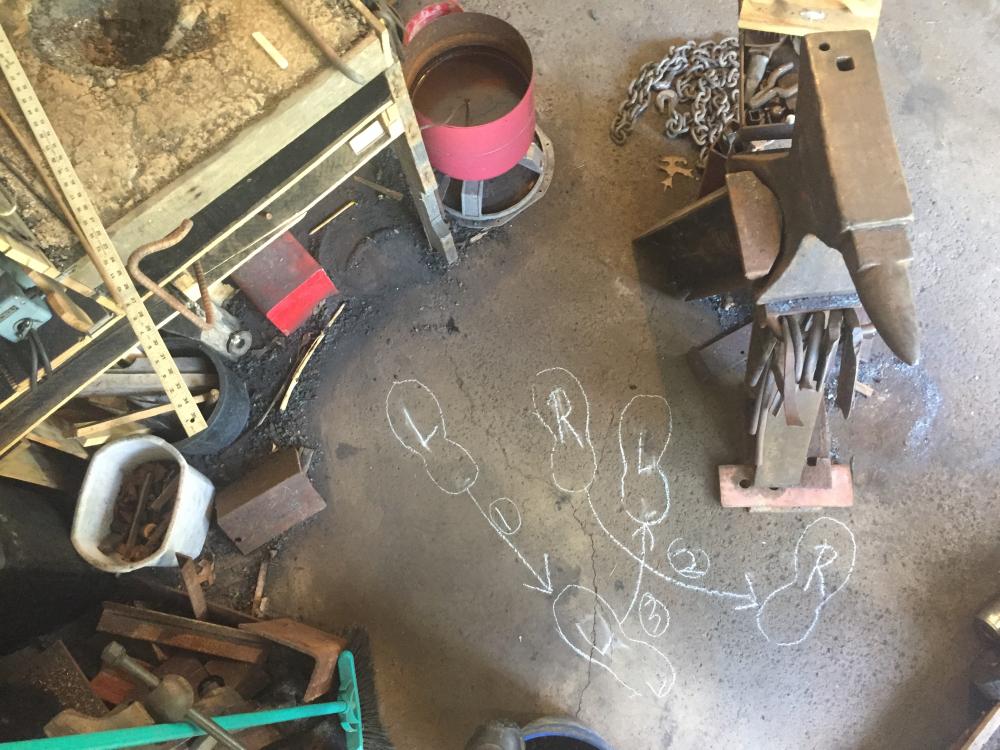
When I first started and for many years after, I worked with the horn of the anvil to my left and the heel to my right (I'm right-handed), with the center line of the anvil at right angles to the front of the forge, thus: Recently (as noted elsewhere), I converted to horn-to-the-right, but with the anvil still at 90°. I've been doing a lot more fullering over the far edge of the anvil, both for drawing out and for shaping, so it's made a lot more sense to stand at the end of the day anvil, with the the horn pointing towards my right hip joint. This has worked very well for forging, but it's awkward stepping all the way around the anvil. Today, I decided to rotate the anvil 45° and put it a little closer to the forge, thus: This makes it much easier to move to the anvil with a hot workpiece in three quick steps: step back with the left foot (1), step sideways with the right foot (2), and step in with that left foot (3). This may require some tweaking, but it already feels better than the old setup.

-
New JABOD box of dirt forge (picture heavy)
JHCC replied to JHCC's topic in JABOD - Just A Box Of Dirt
Dirt cheap! -
New JABOD box of dirt forge (picture heavy)
JHCC replied to JHCC's topic in JABOD - Just A Box Of Dirt
Here's a view from another angle. The tip of the 1/4" rod is pointed towards the tuyere. There were some pretty big lumps of clinker and vitrified clay stuck to the walls of the bowl. I broke these off with a hammer and chisel before taking the photos.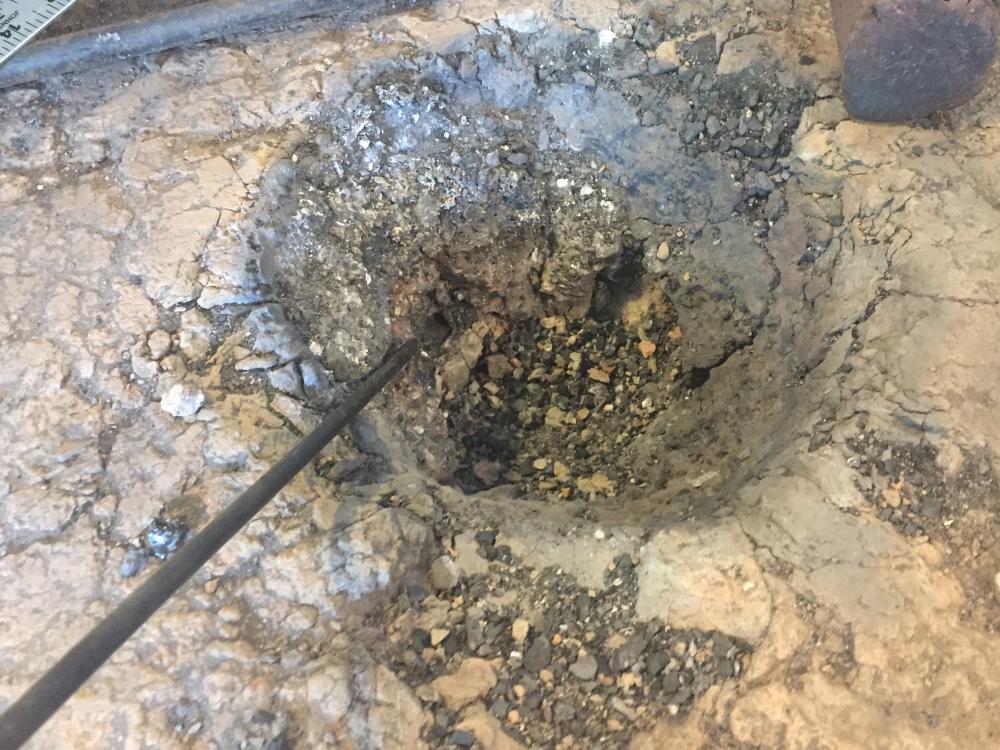
-
New JABOD box of dirt forge (picture heavy)
JHCC replied to JHCC's topic in JABOD - Just A Box Of Dirt
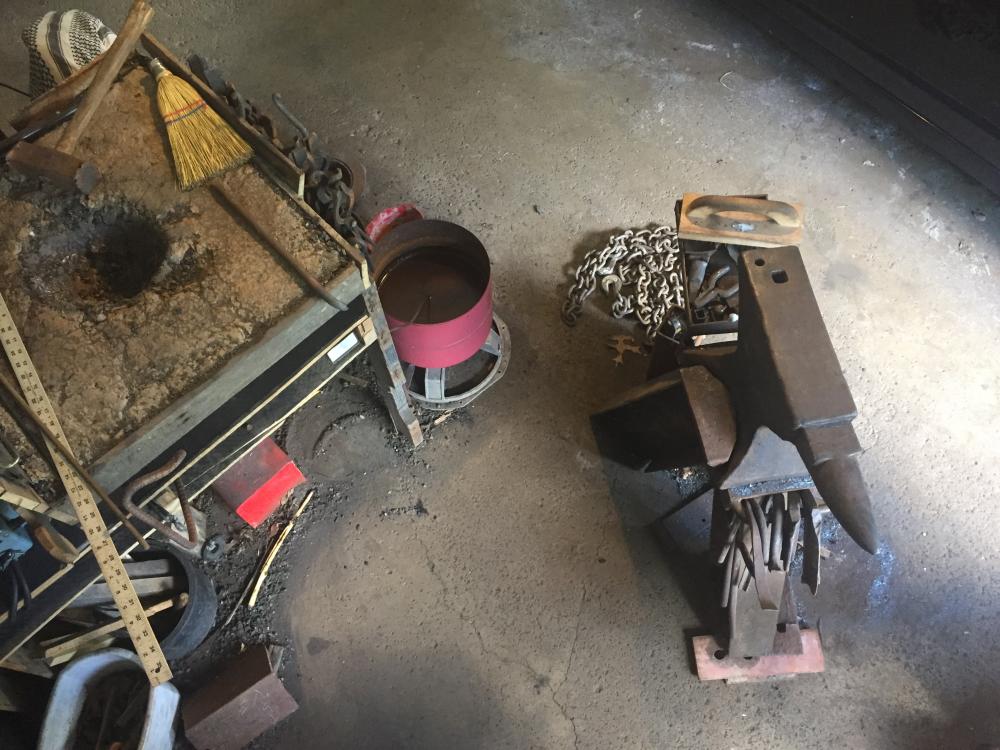
Bit of an update. I took some time today to clean out the firepot on the JABOD, and here's what it looks like after a few months of somewhat sporadic use. As you can see, the firepot has taken quite a beating and is now about 8" across and 6" deep. The opening of the tuyere is behind the 3-1/3" mark on the ruler.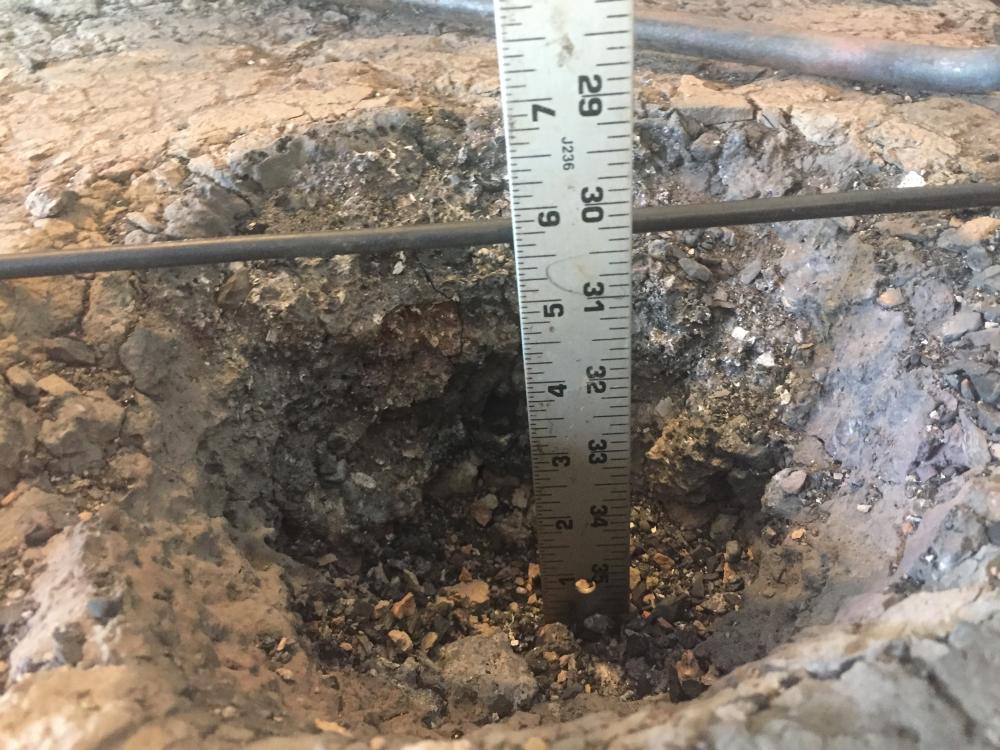
-
I've visited @njanvilman's museum in New Jersey and found it mind-blowing and enormously educational. I for one am grateful that he has the time, money, and inclination to dedicate to assembling, curating, and making his collection available to the public. I can also understand the frustration of someone who might not have the time and money to dedicate to finding quality anvils (someone just starting out on a limited budget while working full-time, for example), especially when collectors' willingness to pay premium prices tends to reduce the supply of old anvils in circulation and to increase the price of those remaining (even the ones that are not collectible or of museum quality). However, given the relative ease with which one can fashion a non-London-pattern anvil from any convenient hunk of steel (as we have seen many times here on IFI) and also given the availability of high-quality NEW anvils, the investment of time, money and legwork in sourcing an antique anvil really is not a necessity for getting started in blacksmithing. All that said, I suspect that @John in Oly, WA was not (entirely) serious in his post about anvil hoarders -- the little laughing face is a bit of a give-away.
-
Suggestions for Beginner Projects to Sell
JHCC replied to Fratoni's topic in Blacksmithing, General Discussion
It's in the profile settings. -
Maybe if we call one of them "Gary" and the other one "Ross"....
-
Good to know, but you should still put it in your profile settings, for the benefit of those who won't know to come back to this thread to learn where you are. Sounds like a great set of tools for getting started. We will watch your progress with interest!
-
-
"How do I cast a sword like in [movie title]?"
-
Oh, dear -- another Glenn....
-
"I've never tried this, but I've watched a lot of YouTube videos...."
-
Shining a low-angle light across the surface will help. Turn off the flash on your camera, too. Some people do a light dusting with chalk or flour to show up faint markings, too.
-
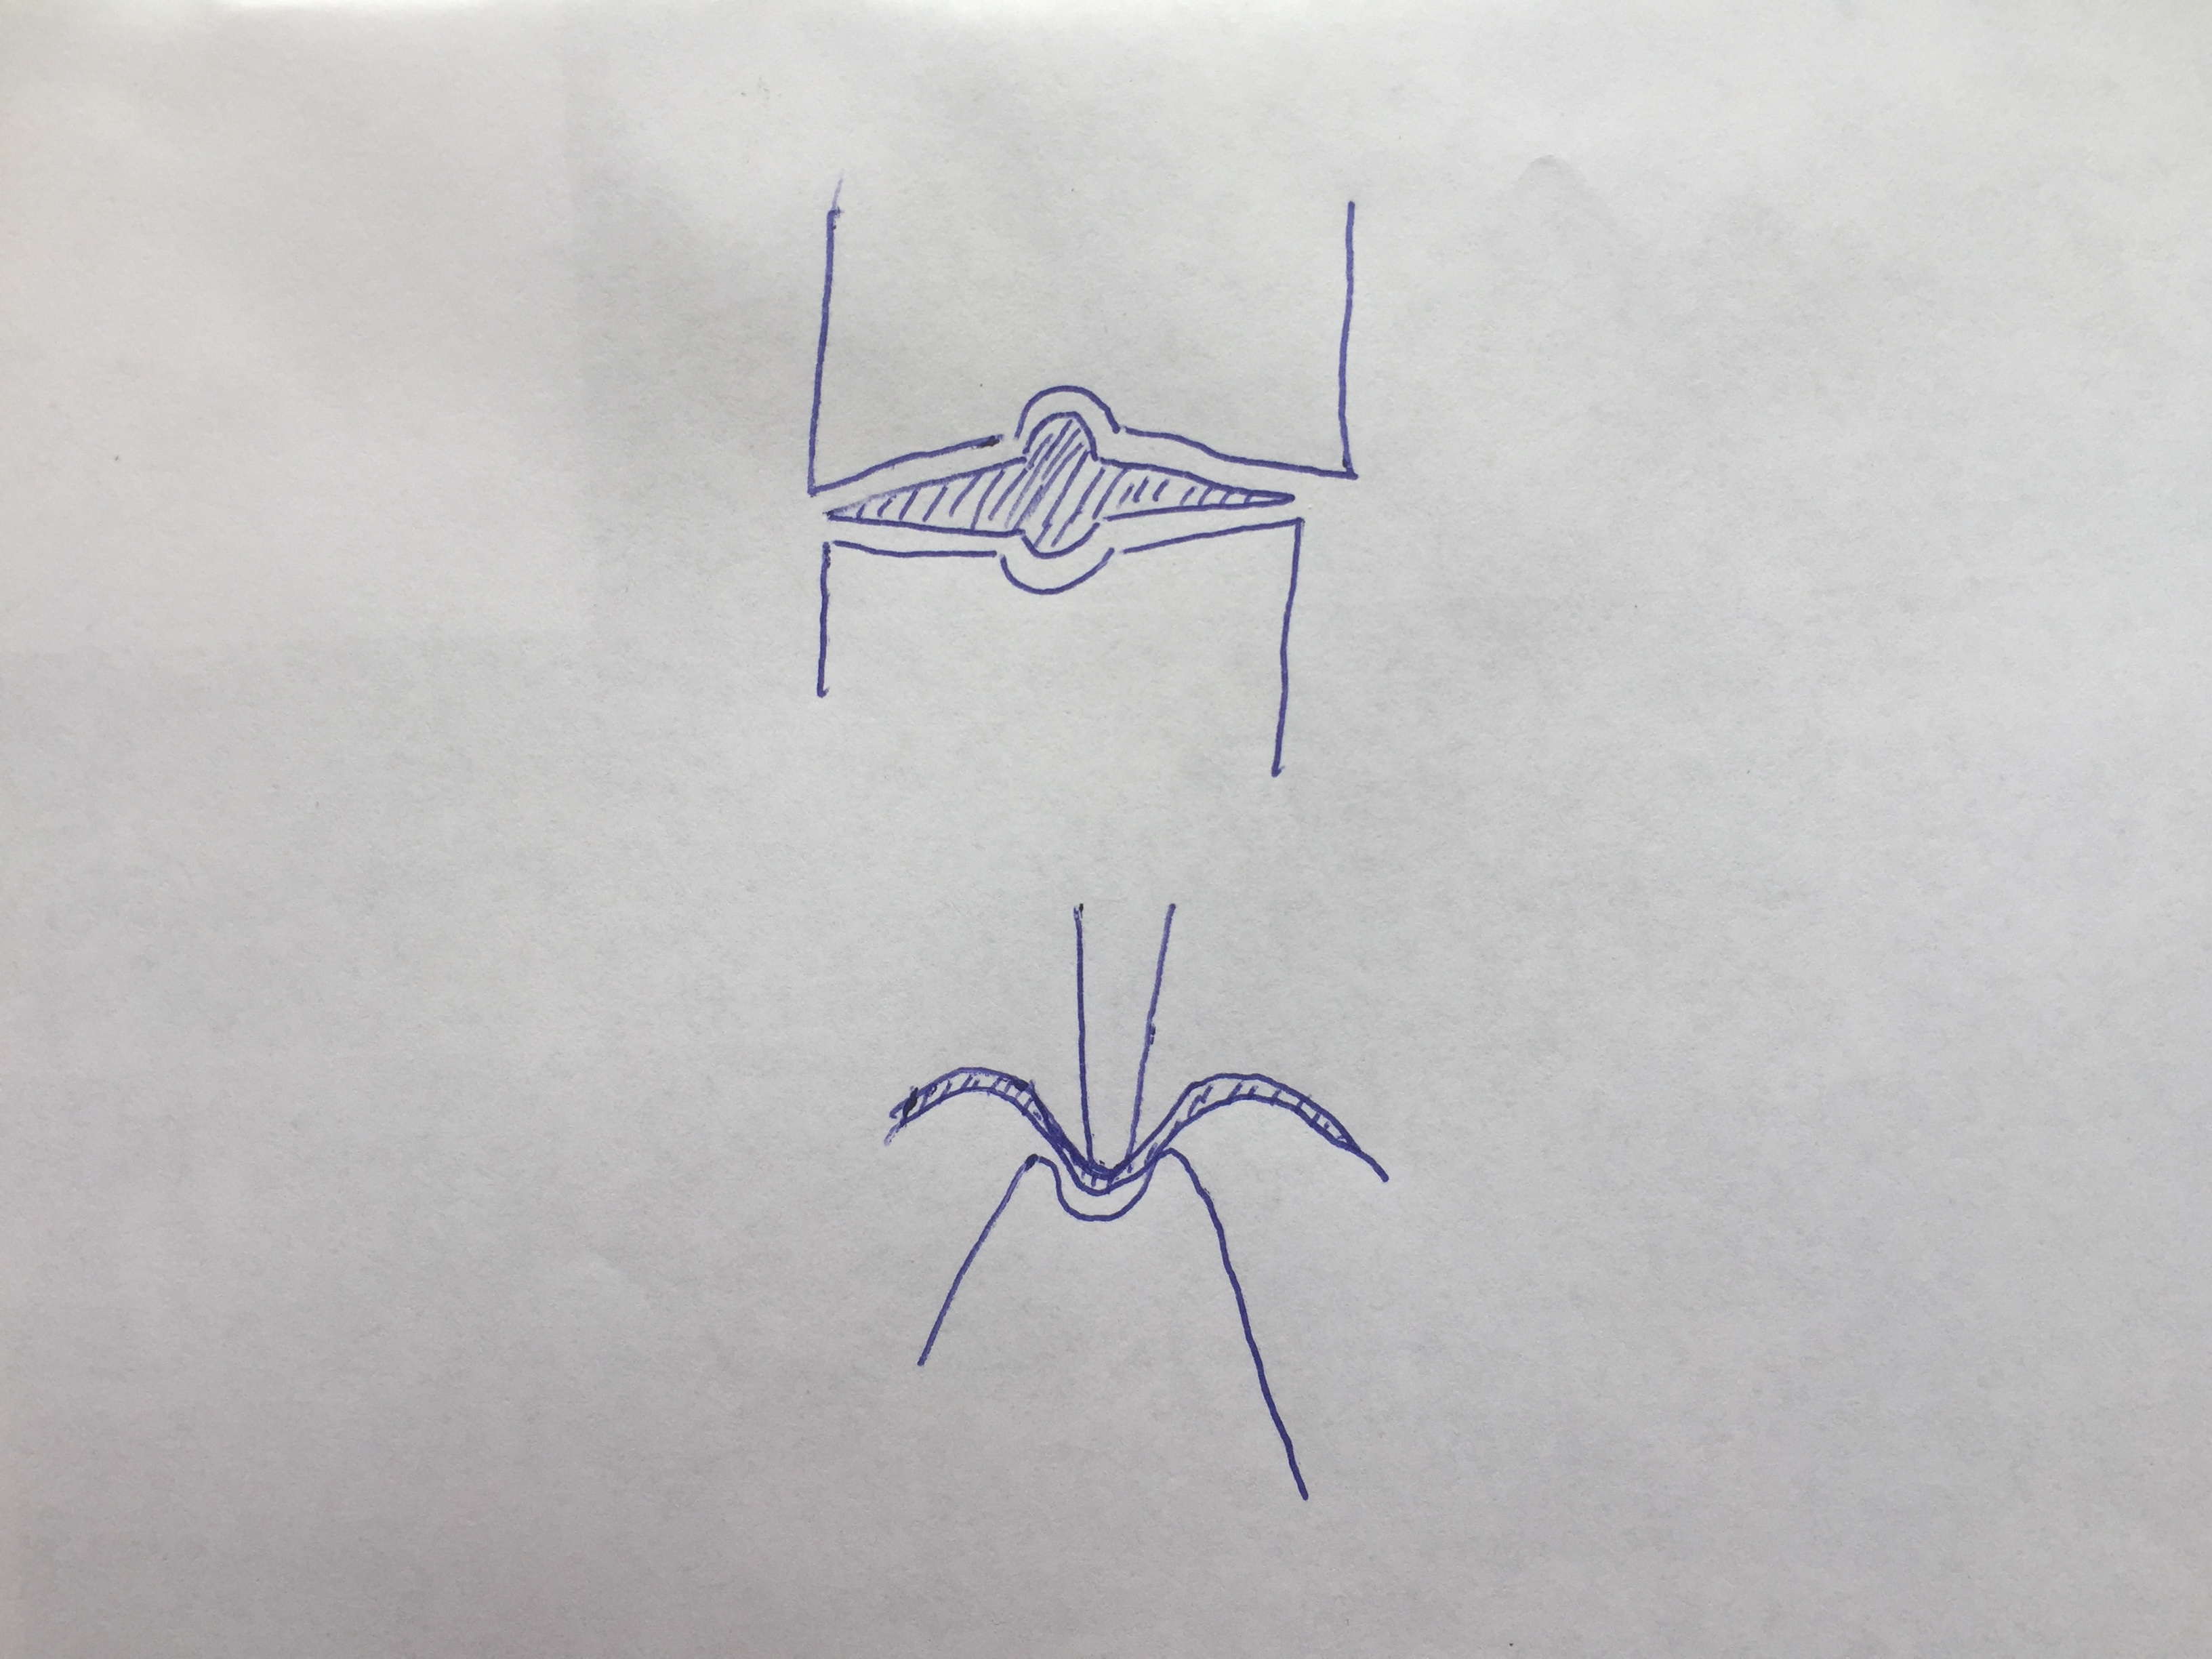
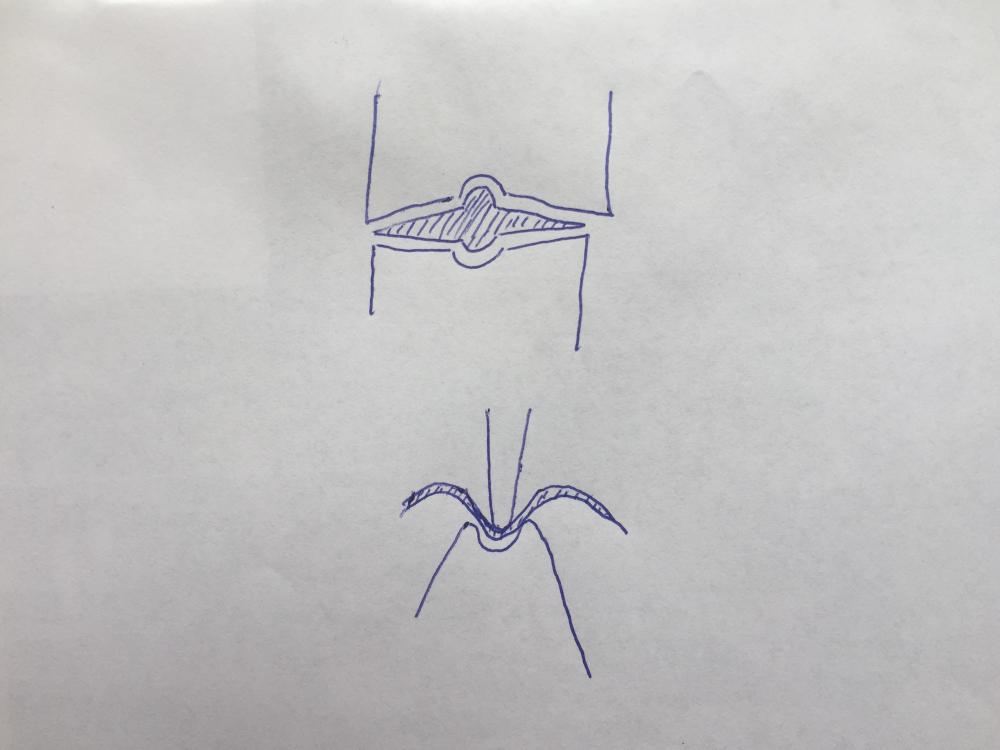
Couple of thoughts: First, what kind of leaf are you thinking about? Something complicated with branching veins like an oak leaf or a maple leaf would be a very different matter from a willow or a ginkgo. Second, for tooling, I'd think about two sets of dies: one for creating top-and-bottom veins, and the other for fluting the edges of the leaves, like these: These could be either a set of a hardy tool and a hand-held top piece, or a one-piece tool (spring-loaded or guillotine) that sits in the hardy hole and leaves your other hand free to swing the hammer. Another option would be to forge as best you could hot, and then chase the details in cold, perhaps using a lead block as backing to keep from damaging the other side.
-
Something like that was started over on anvilfire a while back, but I don't think it went very far.