Stash
-
Posts
887 -
Joined
-
Last visited
Content Type
Profiles
Forums
Articles
Gallery
Downloads
Events
Everything posted by Stash
-
I'm still looking for DB Cooper- he owes me half a suitcase of cash. Any info for me? Steve
-
Good looking stand, my friend. Steve
-
Bryn Athyn College. Near Philadelphia Pa
Stash replied to coolhand's topic in Blacksmithing, General Discussion
Former IFI member DSW (RIP) took some classes there and spoke very highly of the place. IIRC, he also did a photo thread you could find here. Could be up to 4-5 years ago. Steve -
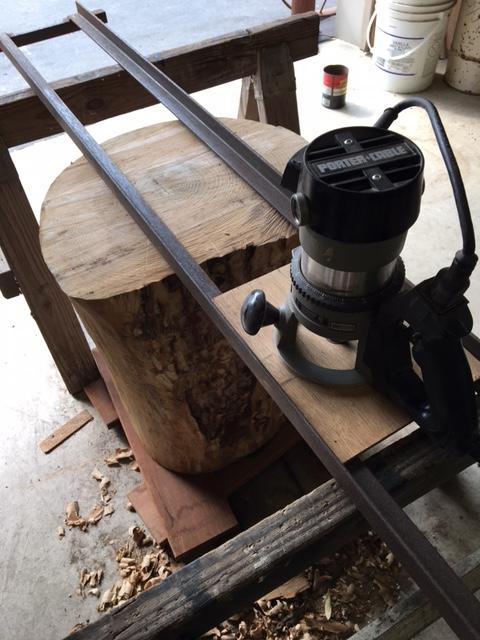
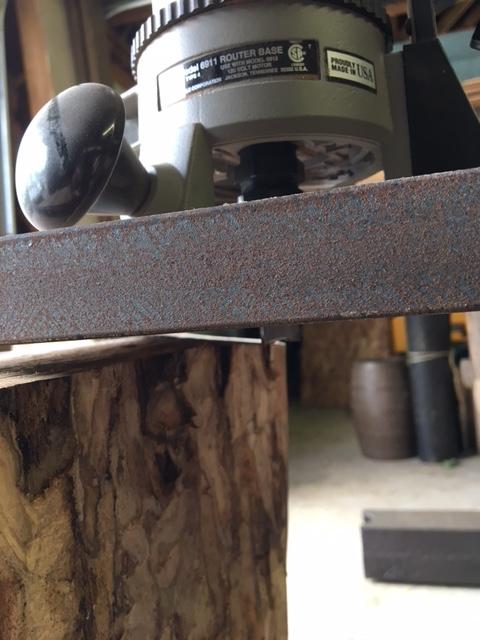
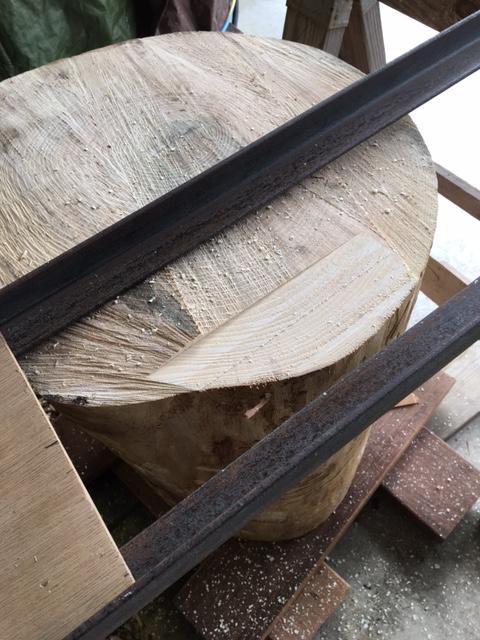
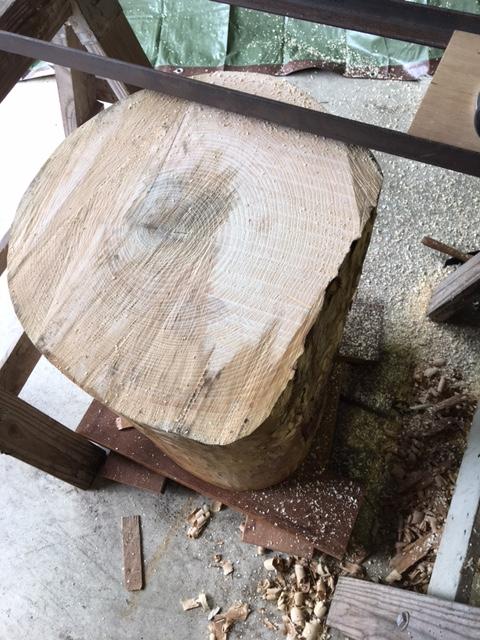
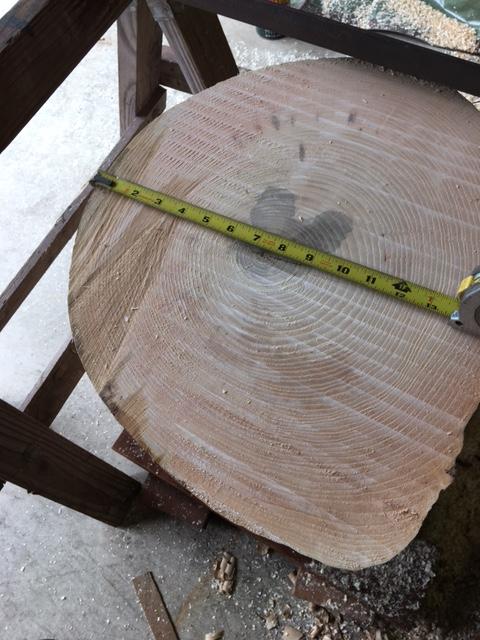
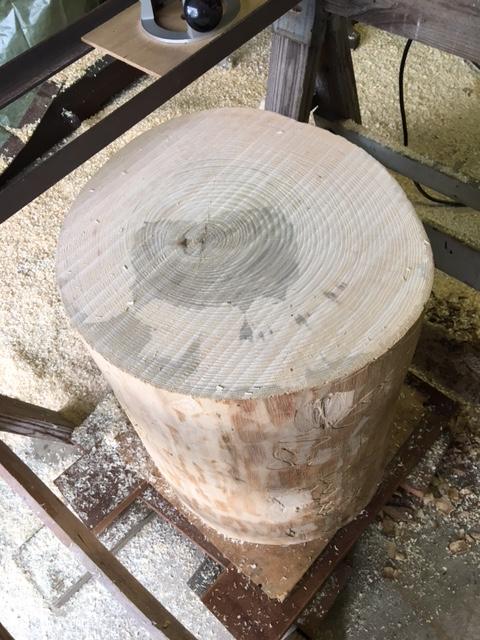
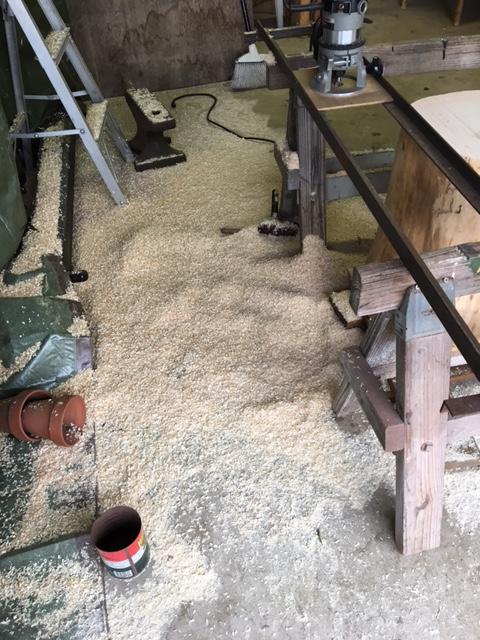
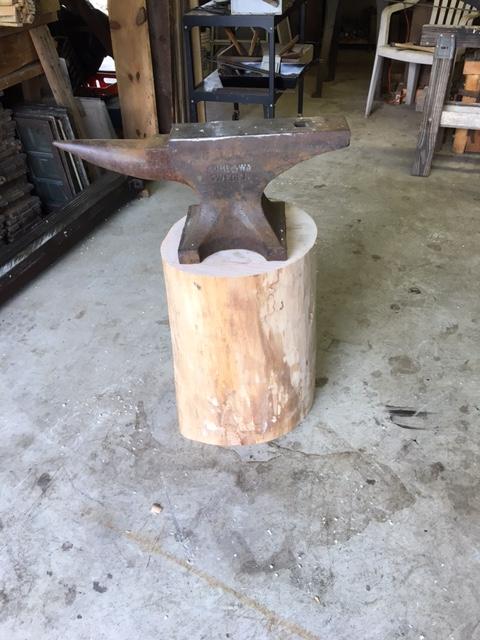
That's right, "I did it myyyyy wayyyyy...". I mentioned my technique a few threads back, and due to a harmonic convergence, will show how I did it. I acquired a new anvil, got a few nice ash logs ( drat you, Emerald Ash Borer) and happened to have my phone in my pocket, so here goes. First image shows the whole rig ready to fly. The router sled is sitting in the frame, the log is shimmed up so it's just under the frame, the router bit is set to take a 1/4" bite from the high spot (2nd image). The frame is riding on saw horses, but can be anything to be level to each other and higher than the log. The router bit is 3/4" straight, and the sled base is just a piece of 1/4" luan. Next we see the first few passes. I work from right to left- run the sled across the top, trigger off, pull it back and shift the whole sled over ~3/4", make your next pass. Next image shows the end of the first pass over the whole log. You can see it didn't take a lot of the surface. UNPLUG THE ROUTER, drop the bit down 1/4 ", plug in and take another pass. That leaves about 4" left of the rough surface. Might as well drop down 1/8" more (UNPLUG THE ROUTER) to finish that side, flip the log over, shim up as needed. The 2nd side took 1 bite to completely flatten, but I took a few more bites at 1/4" to tweak the final height. From this point you can do whatever you want to finish. You can rout the bottom to leave a rim of wood to sit on the floor. You can rout an inset the size of your anvil's footprint in the top, or just mount your anvil with your preferred method. Hope this helps. Looks like a happy coleslaw to me! Steve I tried twice to get the images in order to no avail. Hope you can figure them out. Sorry. Steve Mod note: images put in the right order.
-
Now, scone lighting is a completely different category. That is what is used to illuminate your afternoon tea! Steve
-
I flatten anvil stumps with a jig I cobbled up for my router that I originally made for flattening large slabs of wood. I made and attached a larger rectangular base to my router, and welded 2 pieces of angle spaced the width of the base with some flat bar, so the router and base rides in the angle like a sled. I then set the frame on whatever I need to set it just above the height of the stump- concrete block, or large timbers, etc. Chuck up a 3/4" flat bit and set the depth to take ~ 1/4" max cut, run it in the sled to cut a flat channel, slide the whole rig over, and take another cut. Keep doing it till the log is flat, flip it over and do the other side, et voila, you have a flat top and bottom. I could have done a log in the time it took me to type this. Hope this was clear as mud. Steve Mod Note: Link to the related post with photos Flattening a stump, Sinatra style
-
I would call that a sconce lamp. A very nice one, too. Steve
-
Look up Wayne Coe- he is a member here, his website has great info, ideas and parts to do a complete grinder. He'll probably check in here soon. Steve
-
Finally got rid of my flip phone, and this is the first app I got. All I gotta say is 'Yee haw'. Steve
-
Craigslist Fisher just picked up? Whatya think?
Stash replied to King187's topic in Anvils, Swage Blocks, and Mandrels
At $.10 per pound, I could spring for an 800# er. Steve -
I had 5' ramps on my equipment trailer, and every time I went to load my Kubota backhoe the frame of the back of the hoe would drag on the ground as the front end hit the top of the ramp.After getting a quote for over $500 (US) for fabricated ramp extensions, I set the ends of the ramp on a chunk of 6x6 timber and set a few 5' heavy planks on the 6x6. Presto change-o I had a 10' ramp at a lesser angle. Problem solved, with stuff I had lying around. I had a ready source for 6x6 chunks and heavy planks so when they wore out , ....... 'If all you have is a hammer, everything starts to look like a nail' Steve
-
You're on the list, Thomas. Good luck and quick recovery. Steve
-
As Frosty said, welcome aboard. Have you looked into New England School of Metalwork? They're right there in Auburn, and have some great opportunities in black and blade smithing. I drove over 450 miles to take a class. You could probably ride a bike. Steve
-
I dunno- maybe I'll be the wet blanket here. I've never used a shopsmith, but over the years I've come to the opinion that any, repeat ANY tool that purports to 'do it all' has the ability to 'do it all' but just not very well. Kind of like the 'jack of all trades, master of none'. It all really depends on what you ask your tool to do. I bought a quality ( single purpose) tablesaw as my first tool purchase many moons ago, and worked it and tweaked it so I can get a high level of precision from it. I have done the same over the years with the other equipment I have purchased. I have had some multi tasking tools, but as I said previously, they didn't meet my standards for performance. That said, you have the unit, might as well do what you can to make it fit your needs. Just be aware if limitations. Steve
-
Oh man. Back in my ole tree climbing days I had a foreman who was constantly whistling "This old man", out of tune, no less. Cringe... 'This old man, he played 1, he played knick nack......... aaaaaaaaaaaaaahhhhhhhh it's back! Steve
-
Re: the oil- you're not filling up the crank case- just putting a few drops in the top now and then. That's after you clean out years worth of grease crud. Steve
-
Thank you. I really appreciate the level of detail you gave us, both in the tooling, and the work itself. Very much appreciated, and looking forward to the rest of the presentation. Steve
-
If you don't know anything about motors, why are you trying to take it apart? I don't know anything about motors either, but I would look at the wire- is the insulation cracked? You might just have a wiring problem. Wire is pretty simple to replace, even for a knucklehead like me. If the wire seems ok, my next step would be to take it to a motor shop and start by getting an estimate. Also, see if you can pull the motor and replace it with something that works. As far as your manual blower, pix would be nice. Then we can offer some thoughts. Might not be a bad idea to add your location to your profile. Someone here could live right up the street from you. Also, take some time to read through the site, especially the stickies. A lot of your questions have probably been answered multiple times. Welcome to the sight, enjoy the addiction. Steve
-
Yo Vaughn- I'd be interested in seeing your chisels and a quick rundown on how you do it. What are the chances of starting a separate thread on it? Steve
-
Years ago I cut down a large walnut (Juglans nigra) for a client in prep for some garden construction. I was hoping to replant with some species I knew were sensitive to the toxin 'juglone'. I went to a trade show, where they had an 'expert' there to answer all our questions, and posed the question " How long is the toxin viable in the soil before it breaks down" or words to that effect. The expert couldn't answer my question, so I won a tee- shirt for 'stumping the expert'. Didn't answer my question, though. I did the planting ~ 1 year after the tree was cut, with no ill effect. I do have a list if plants that are not affected, just in case. Steve
-
The one on the right looks like a mason's stone trimming hammer. Steve
-
Counterfeit Yellin Ironware
Stash replied to Antiqueman's topic in Blacksmithing, General Discussion
My late father-in- law had a house full of Yellin work- 50 lf of stair railing, 360 degrees, 2 levels. Shorter railings, a Juliette balcony, 11 sconce lamps and a 5' tall 5 sided chandelier. I spent a lot of time examining and fondling it, but never saw any kind of stamp. The house was built in 1926 in a Phila. suburb by an architect who had a business relationship with Yellin, and I found the job number in a reference. I believe Clair Yellin still has a copy of the prints. No stamp, but plenty of documentation. Steve -
No winch on that rig- what are you looking at? There's a loader on the front, and a backhoe on the back that got framed out of the photo. What kind of project do you have going on? Steve
-
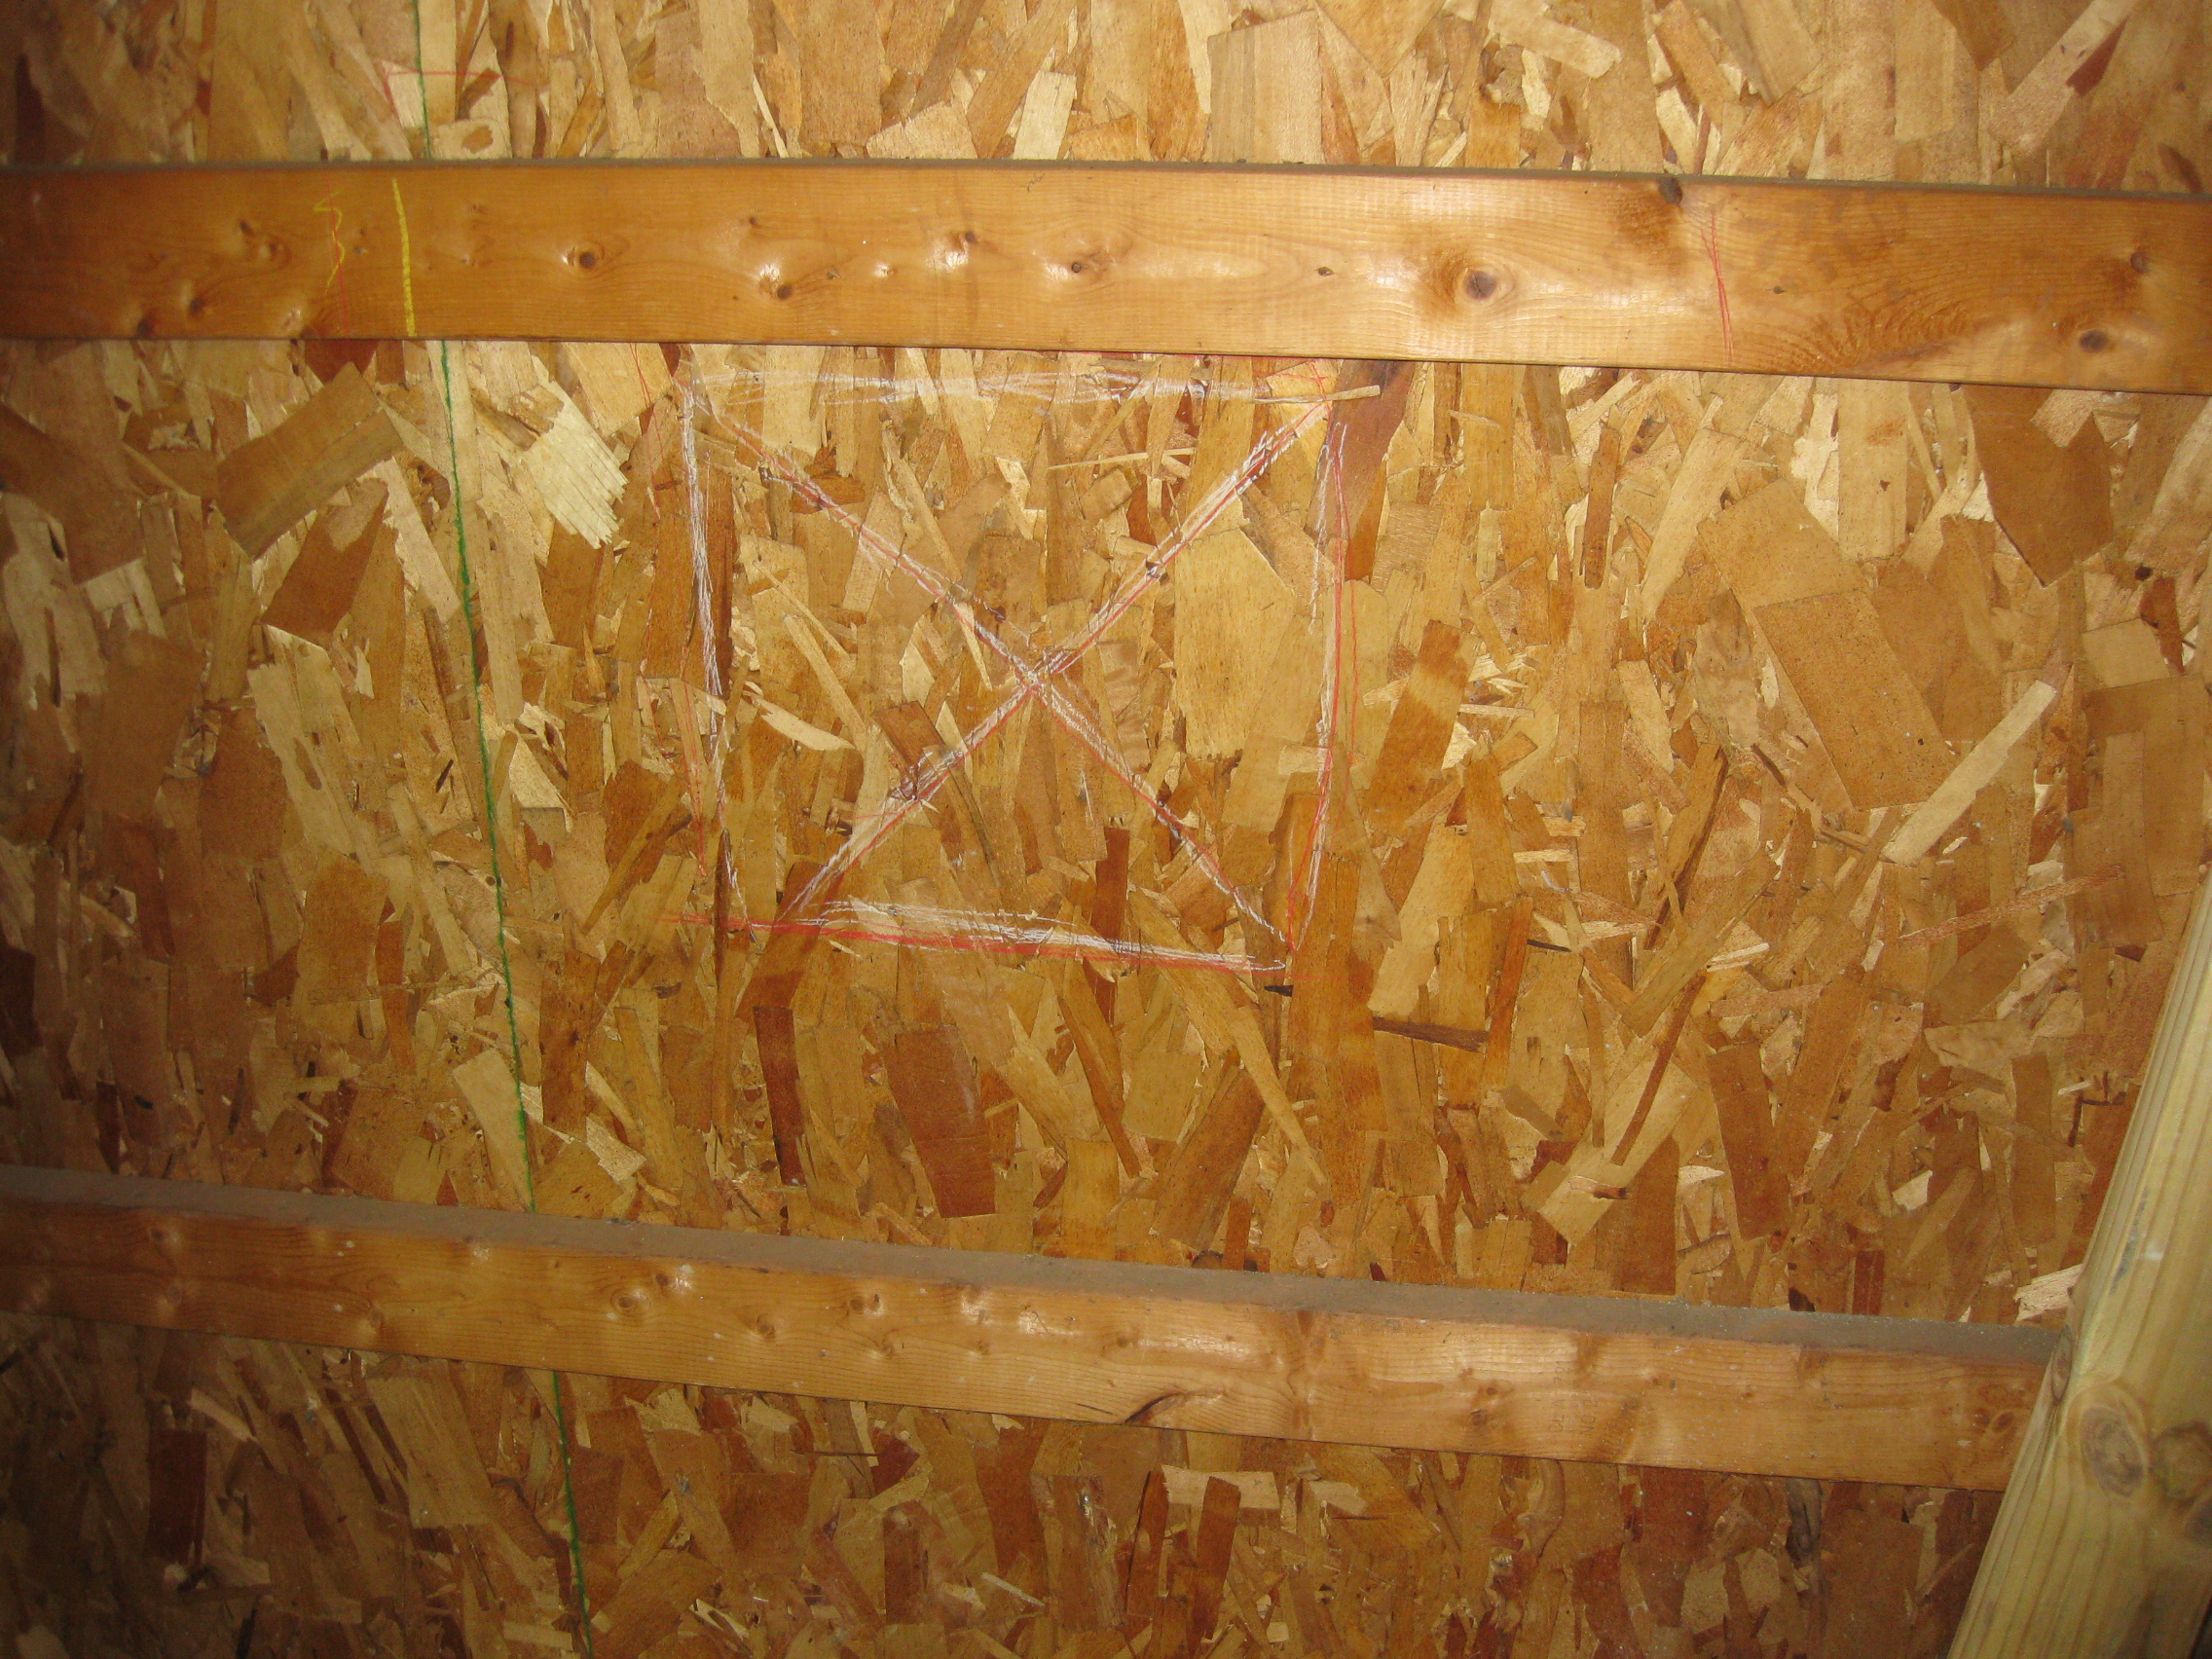
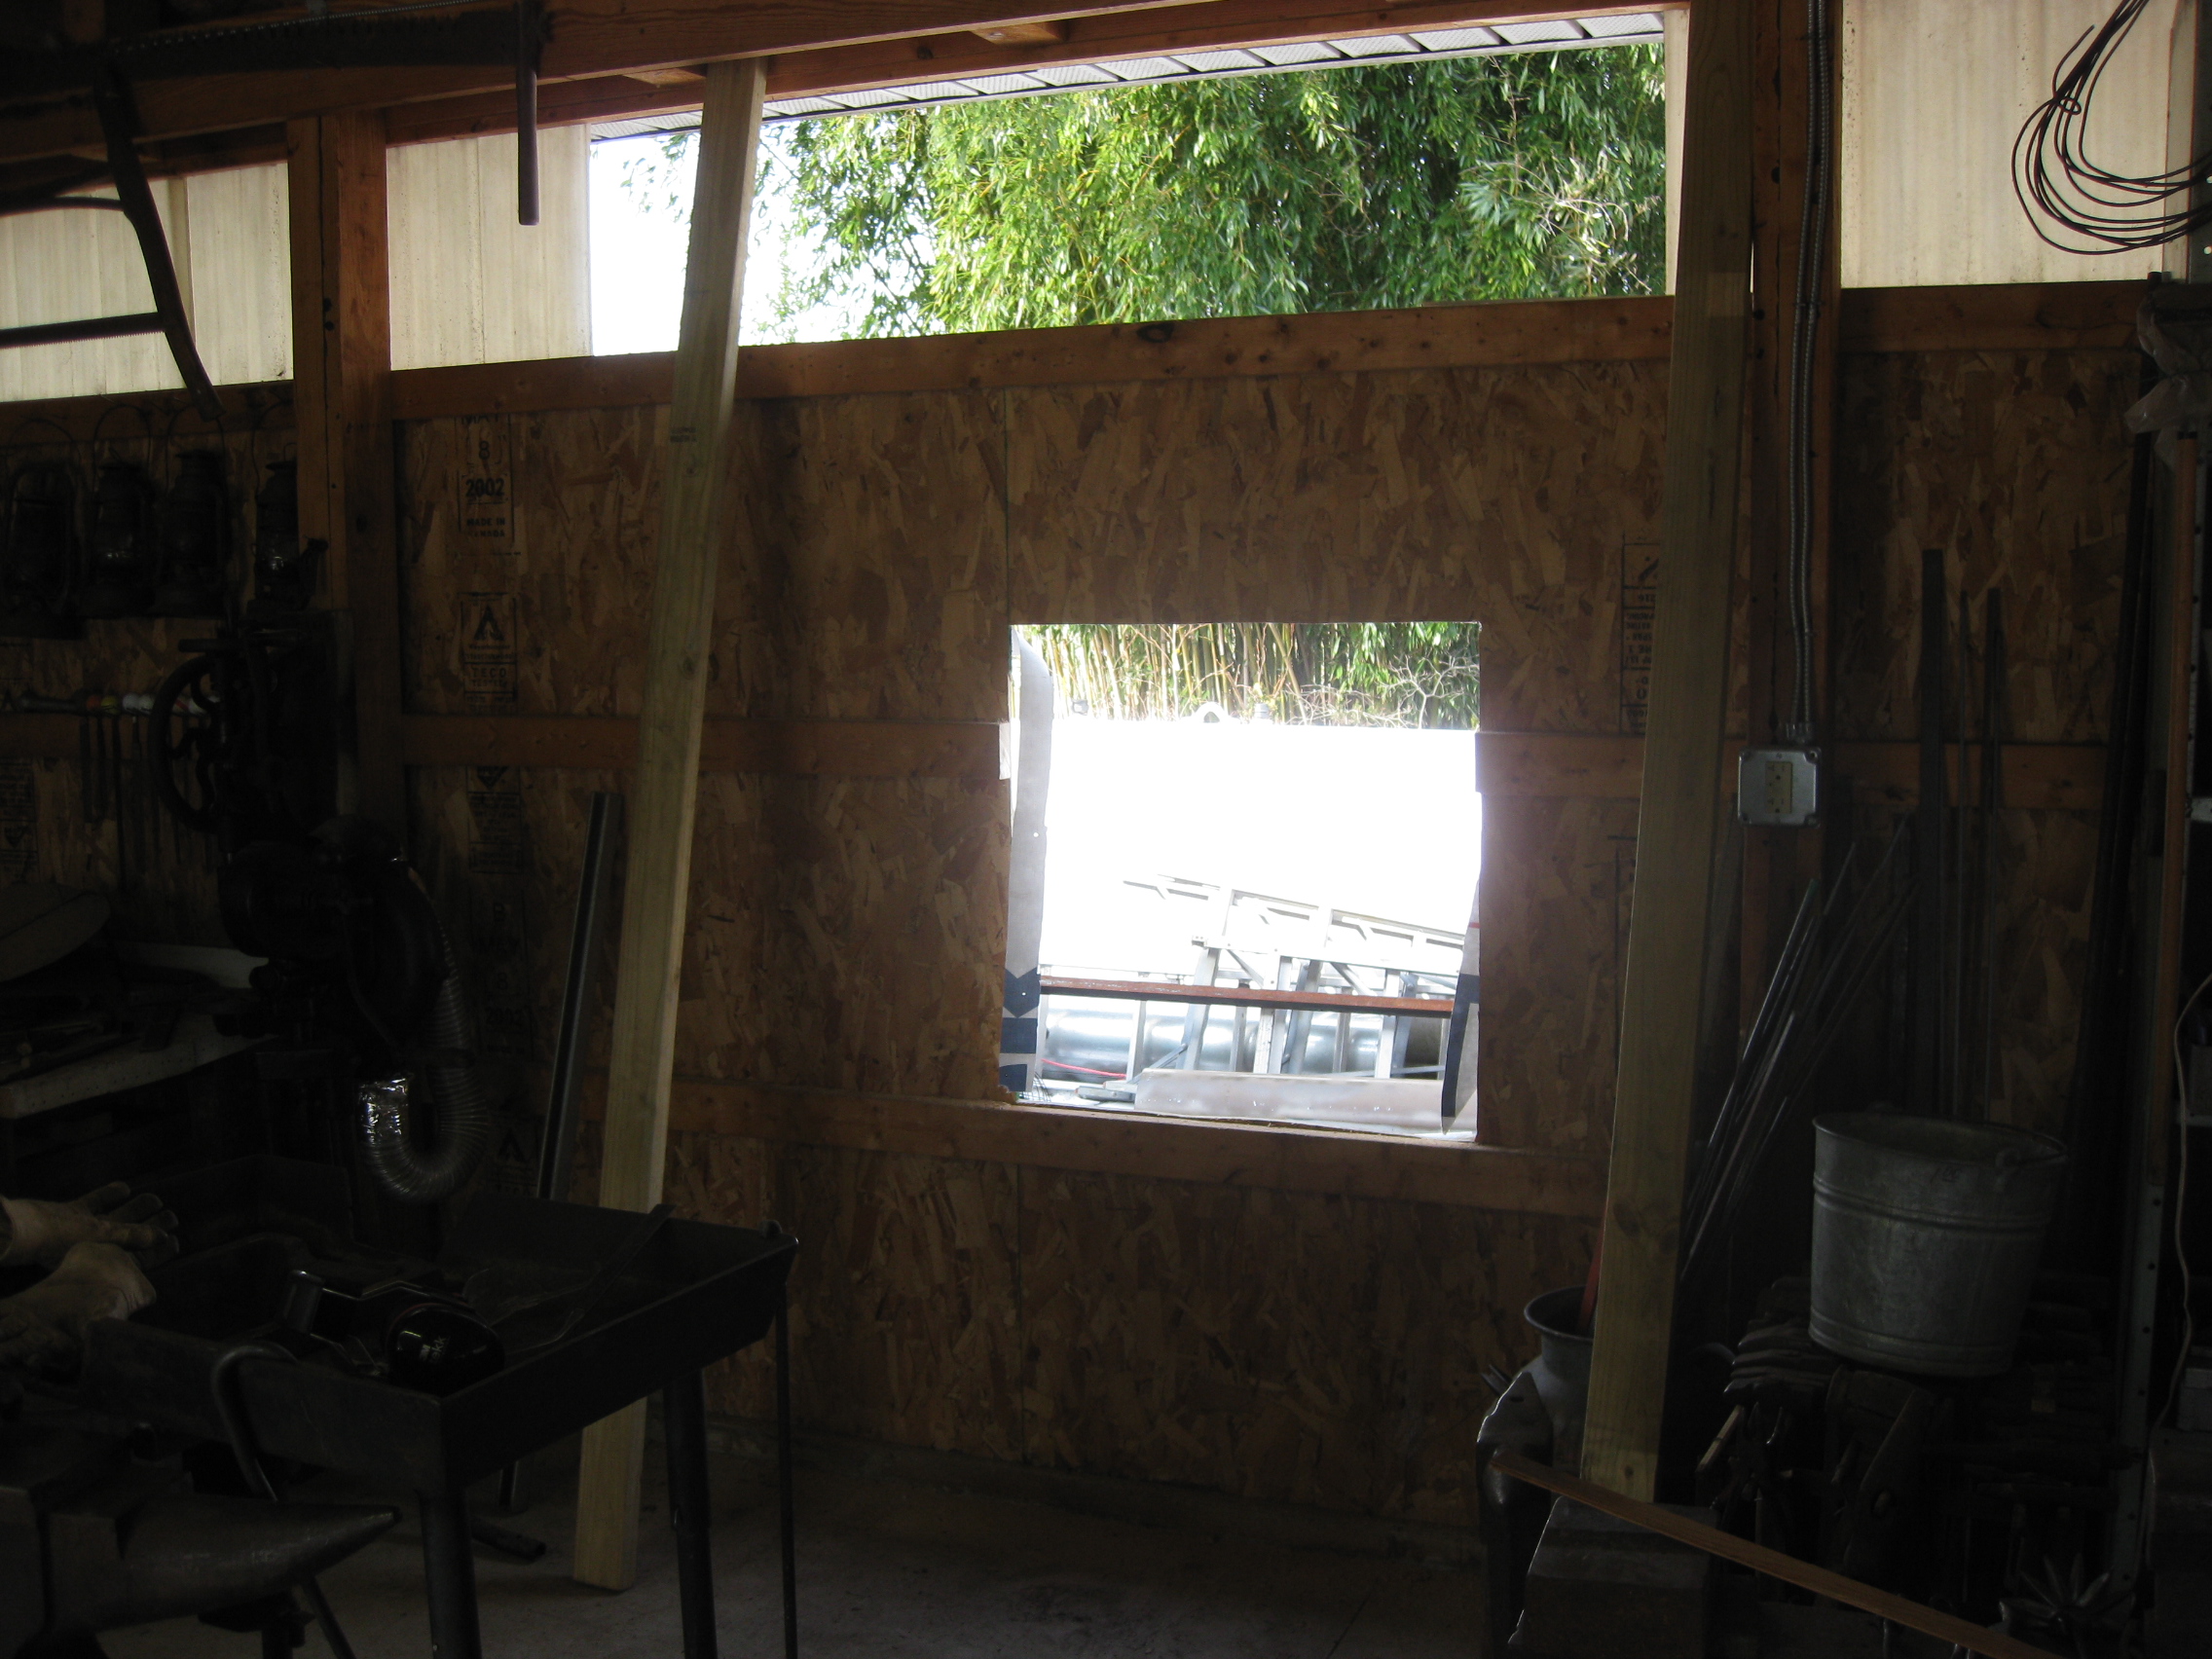
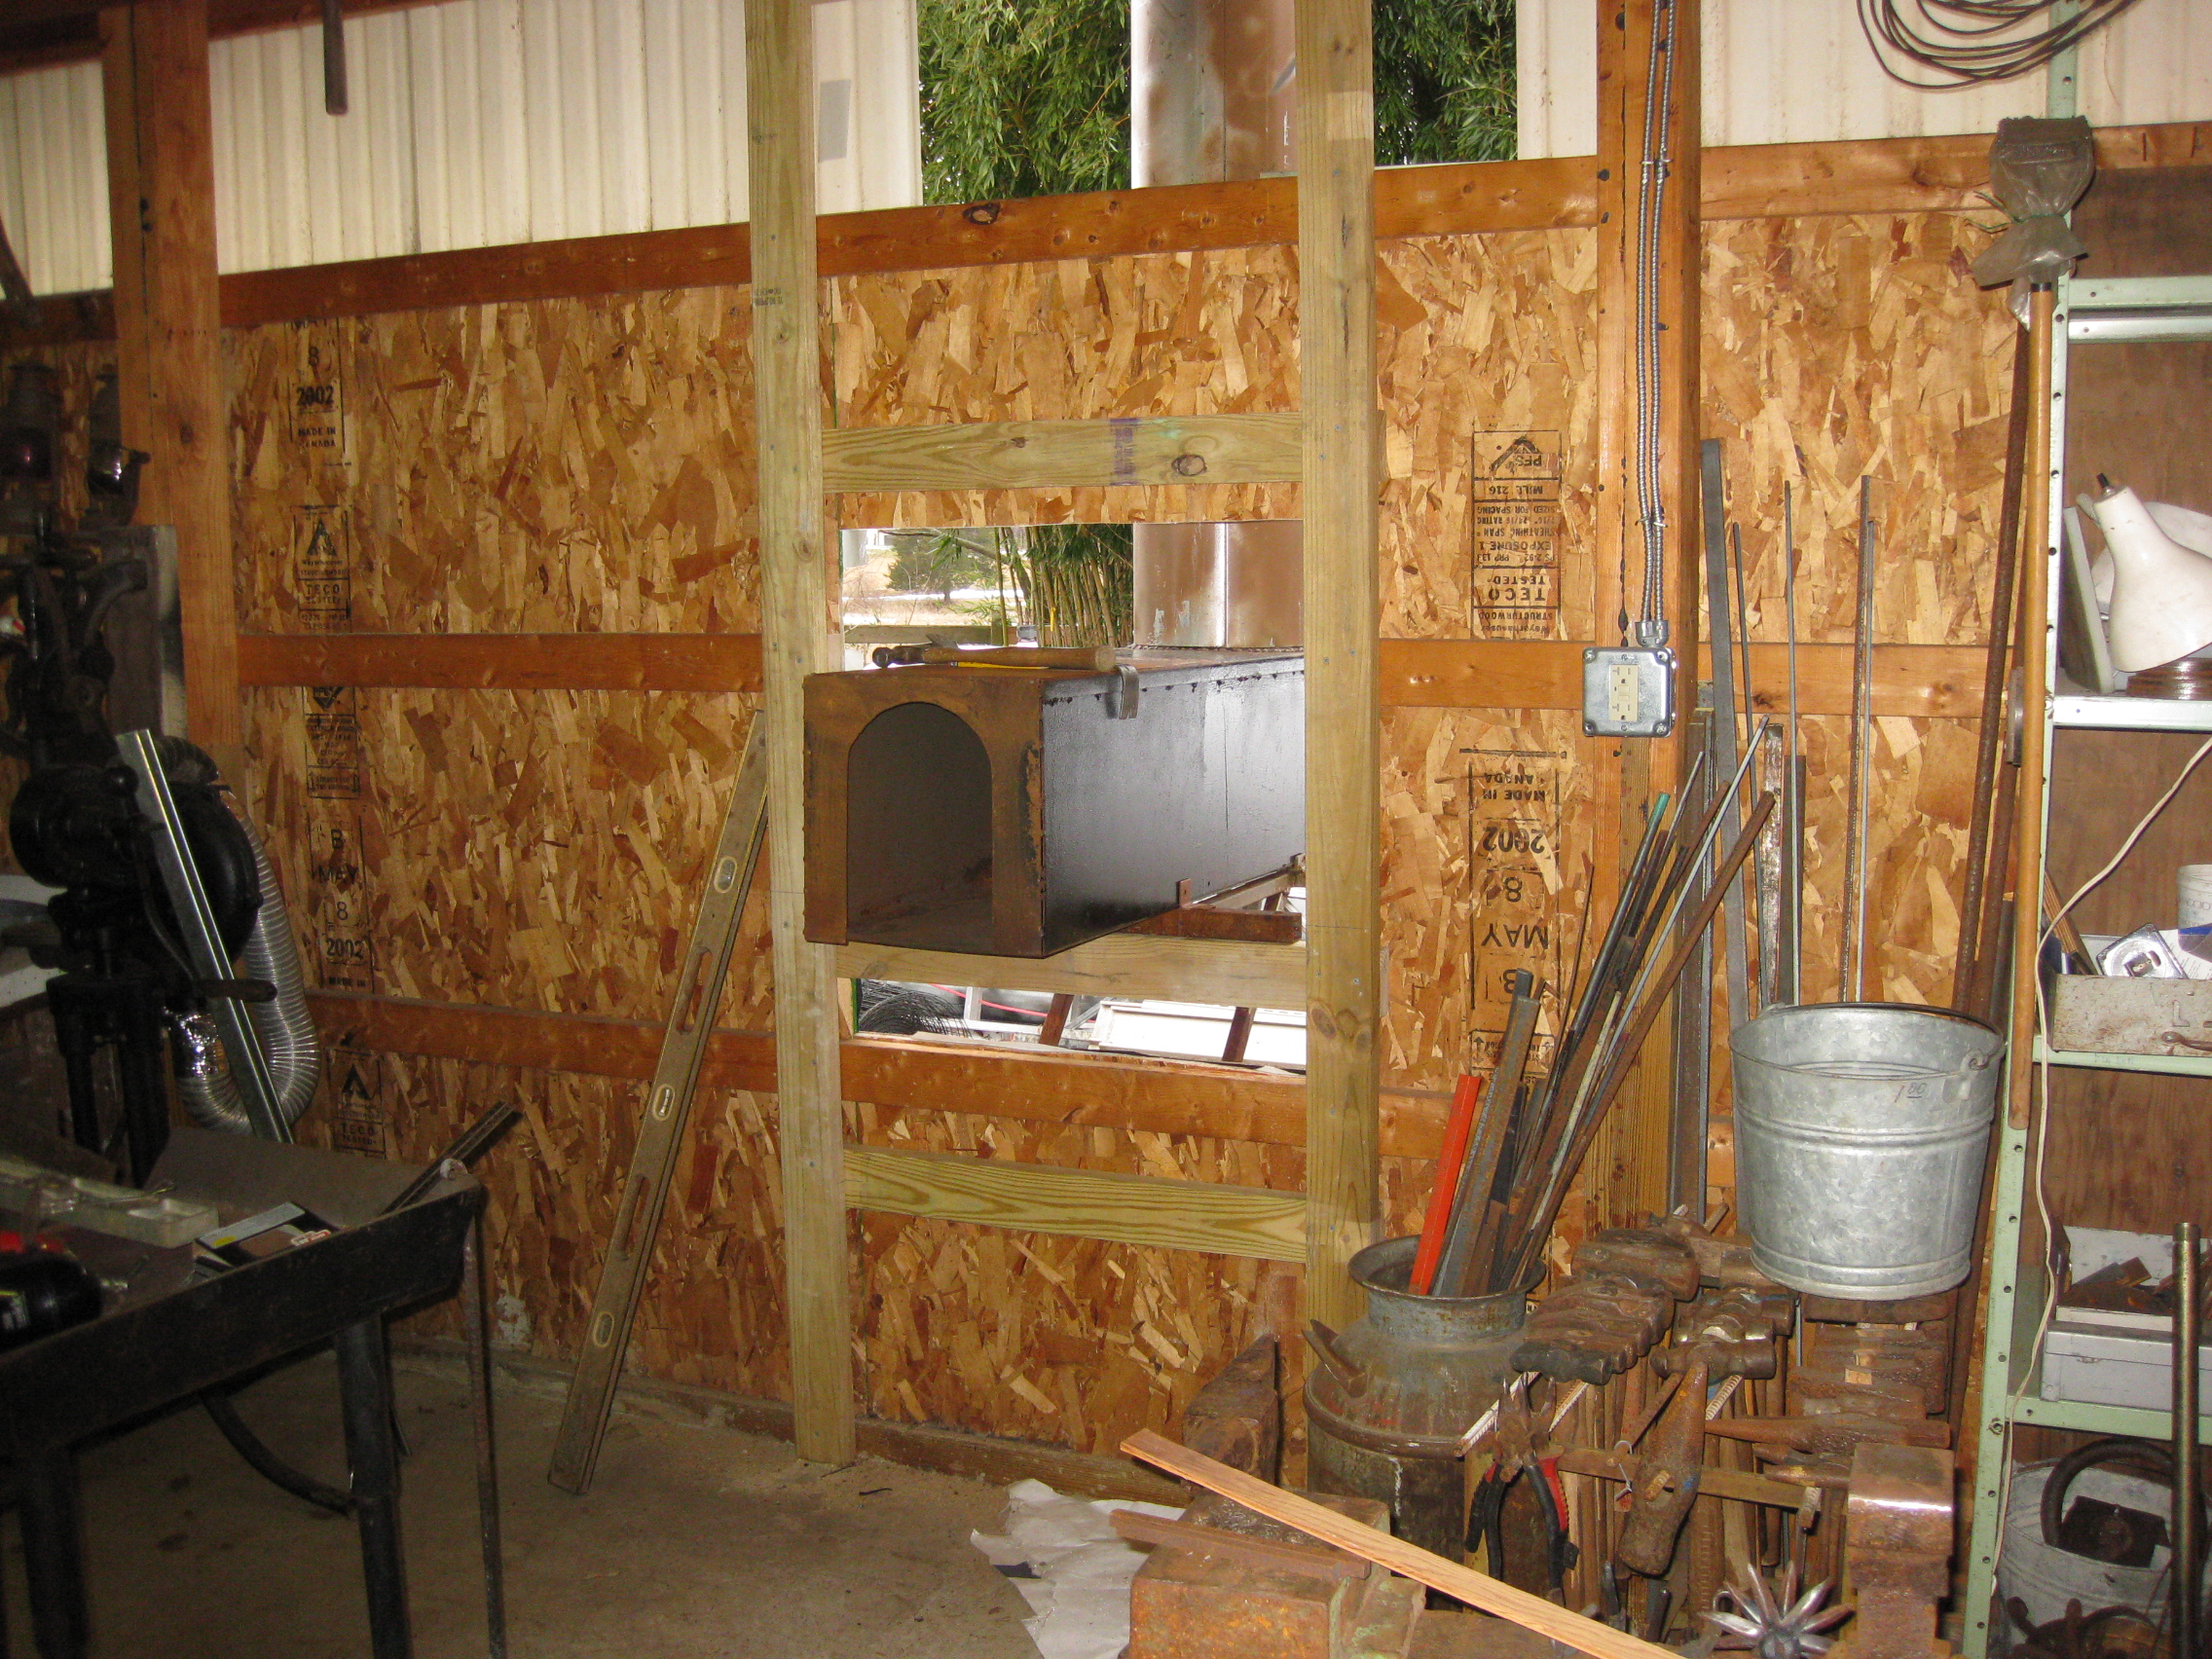
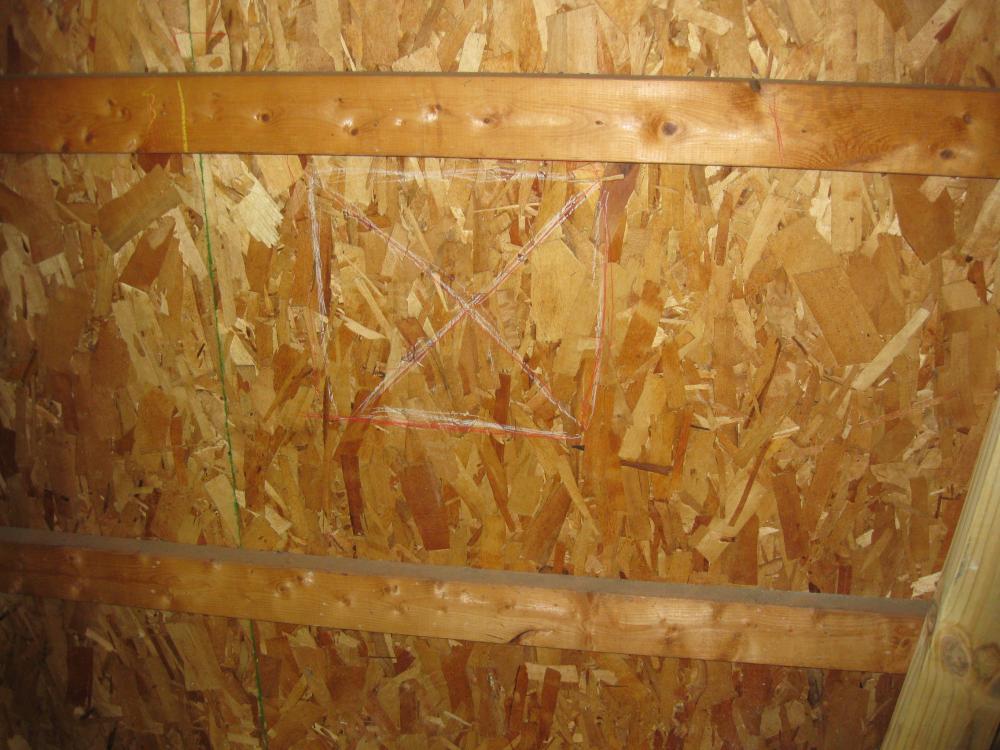
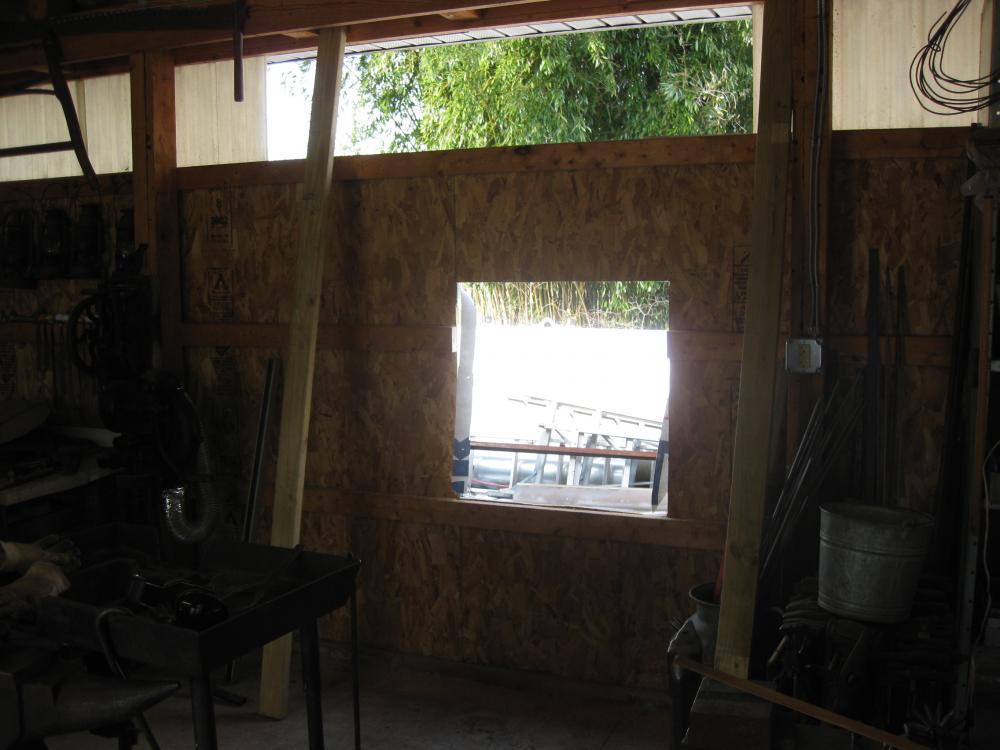
Here is today's project. You might be able to see on the flakeboard- x marks the spot. I pulled some translucent panels out of the way, and made the hole in the wall. My side sucker box is 13" square, and 4'long. Plenty poking in to give good clearance, and plenty outside to miss the gutter and overhang. I have at least 8" spacing from the box to any combustibles. When the forge is going all day, it doesn't get too hot to touch, but I still wanted some separation. I added some bracing inside after cutting and shifting one of the horizontal purlins, and beefed things up for the angle steel bracing holding it all up outside. The box in in place, and I set the first section of 12" flue pipe. The next step tomorrow is to get the outside braces set, finish the pipe and lid, and then flash and weatherproof it all. It has been a long time coming, but the end is (somewhat) in sight. Steve

-
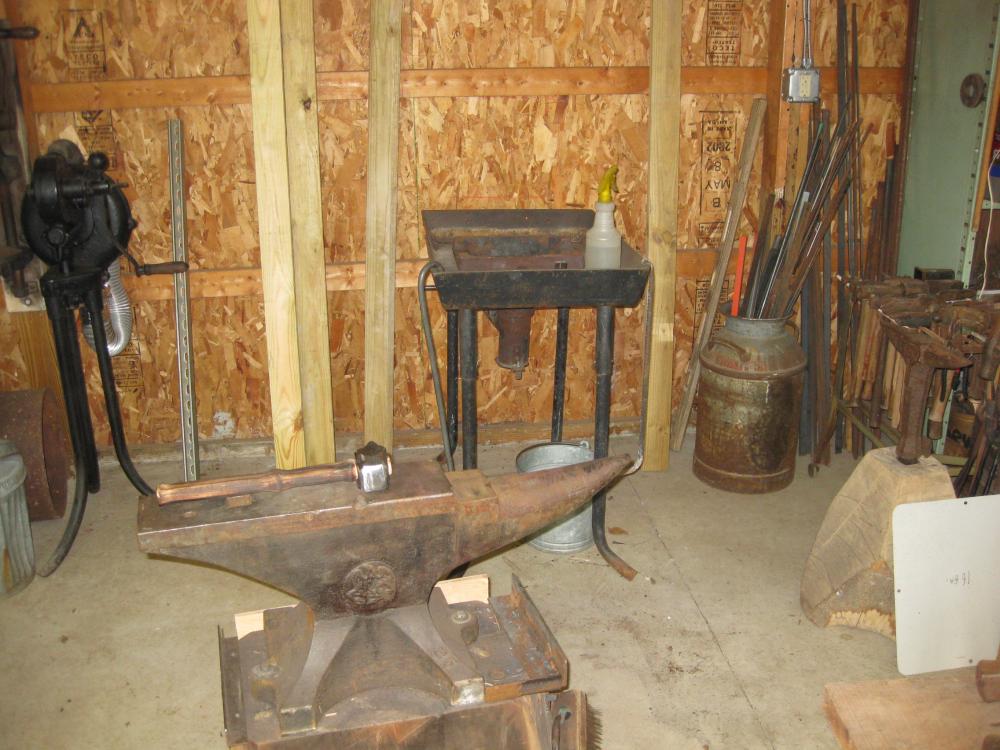
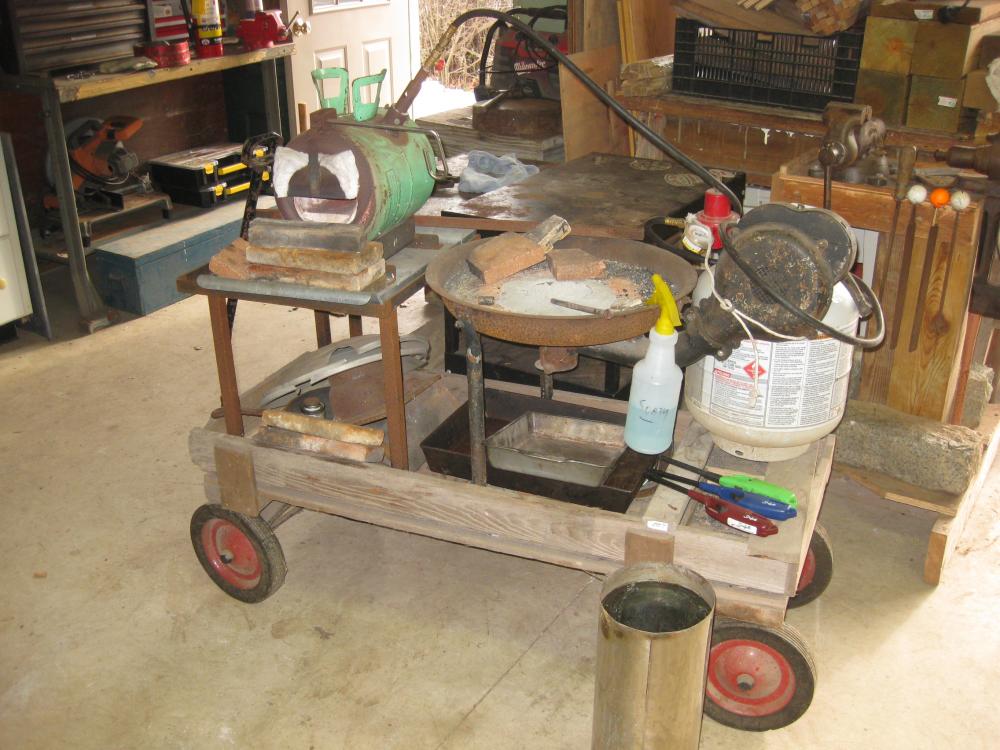
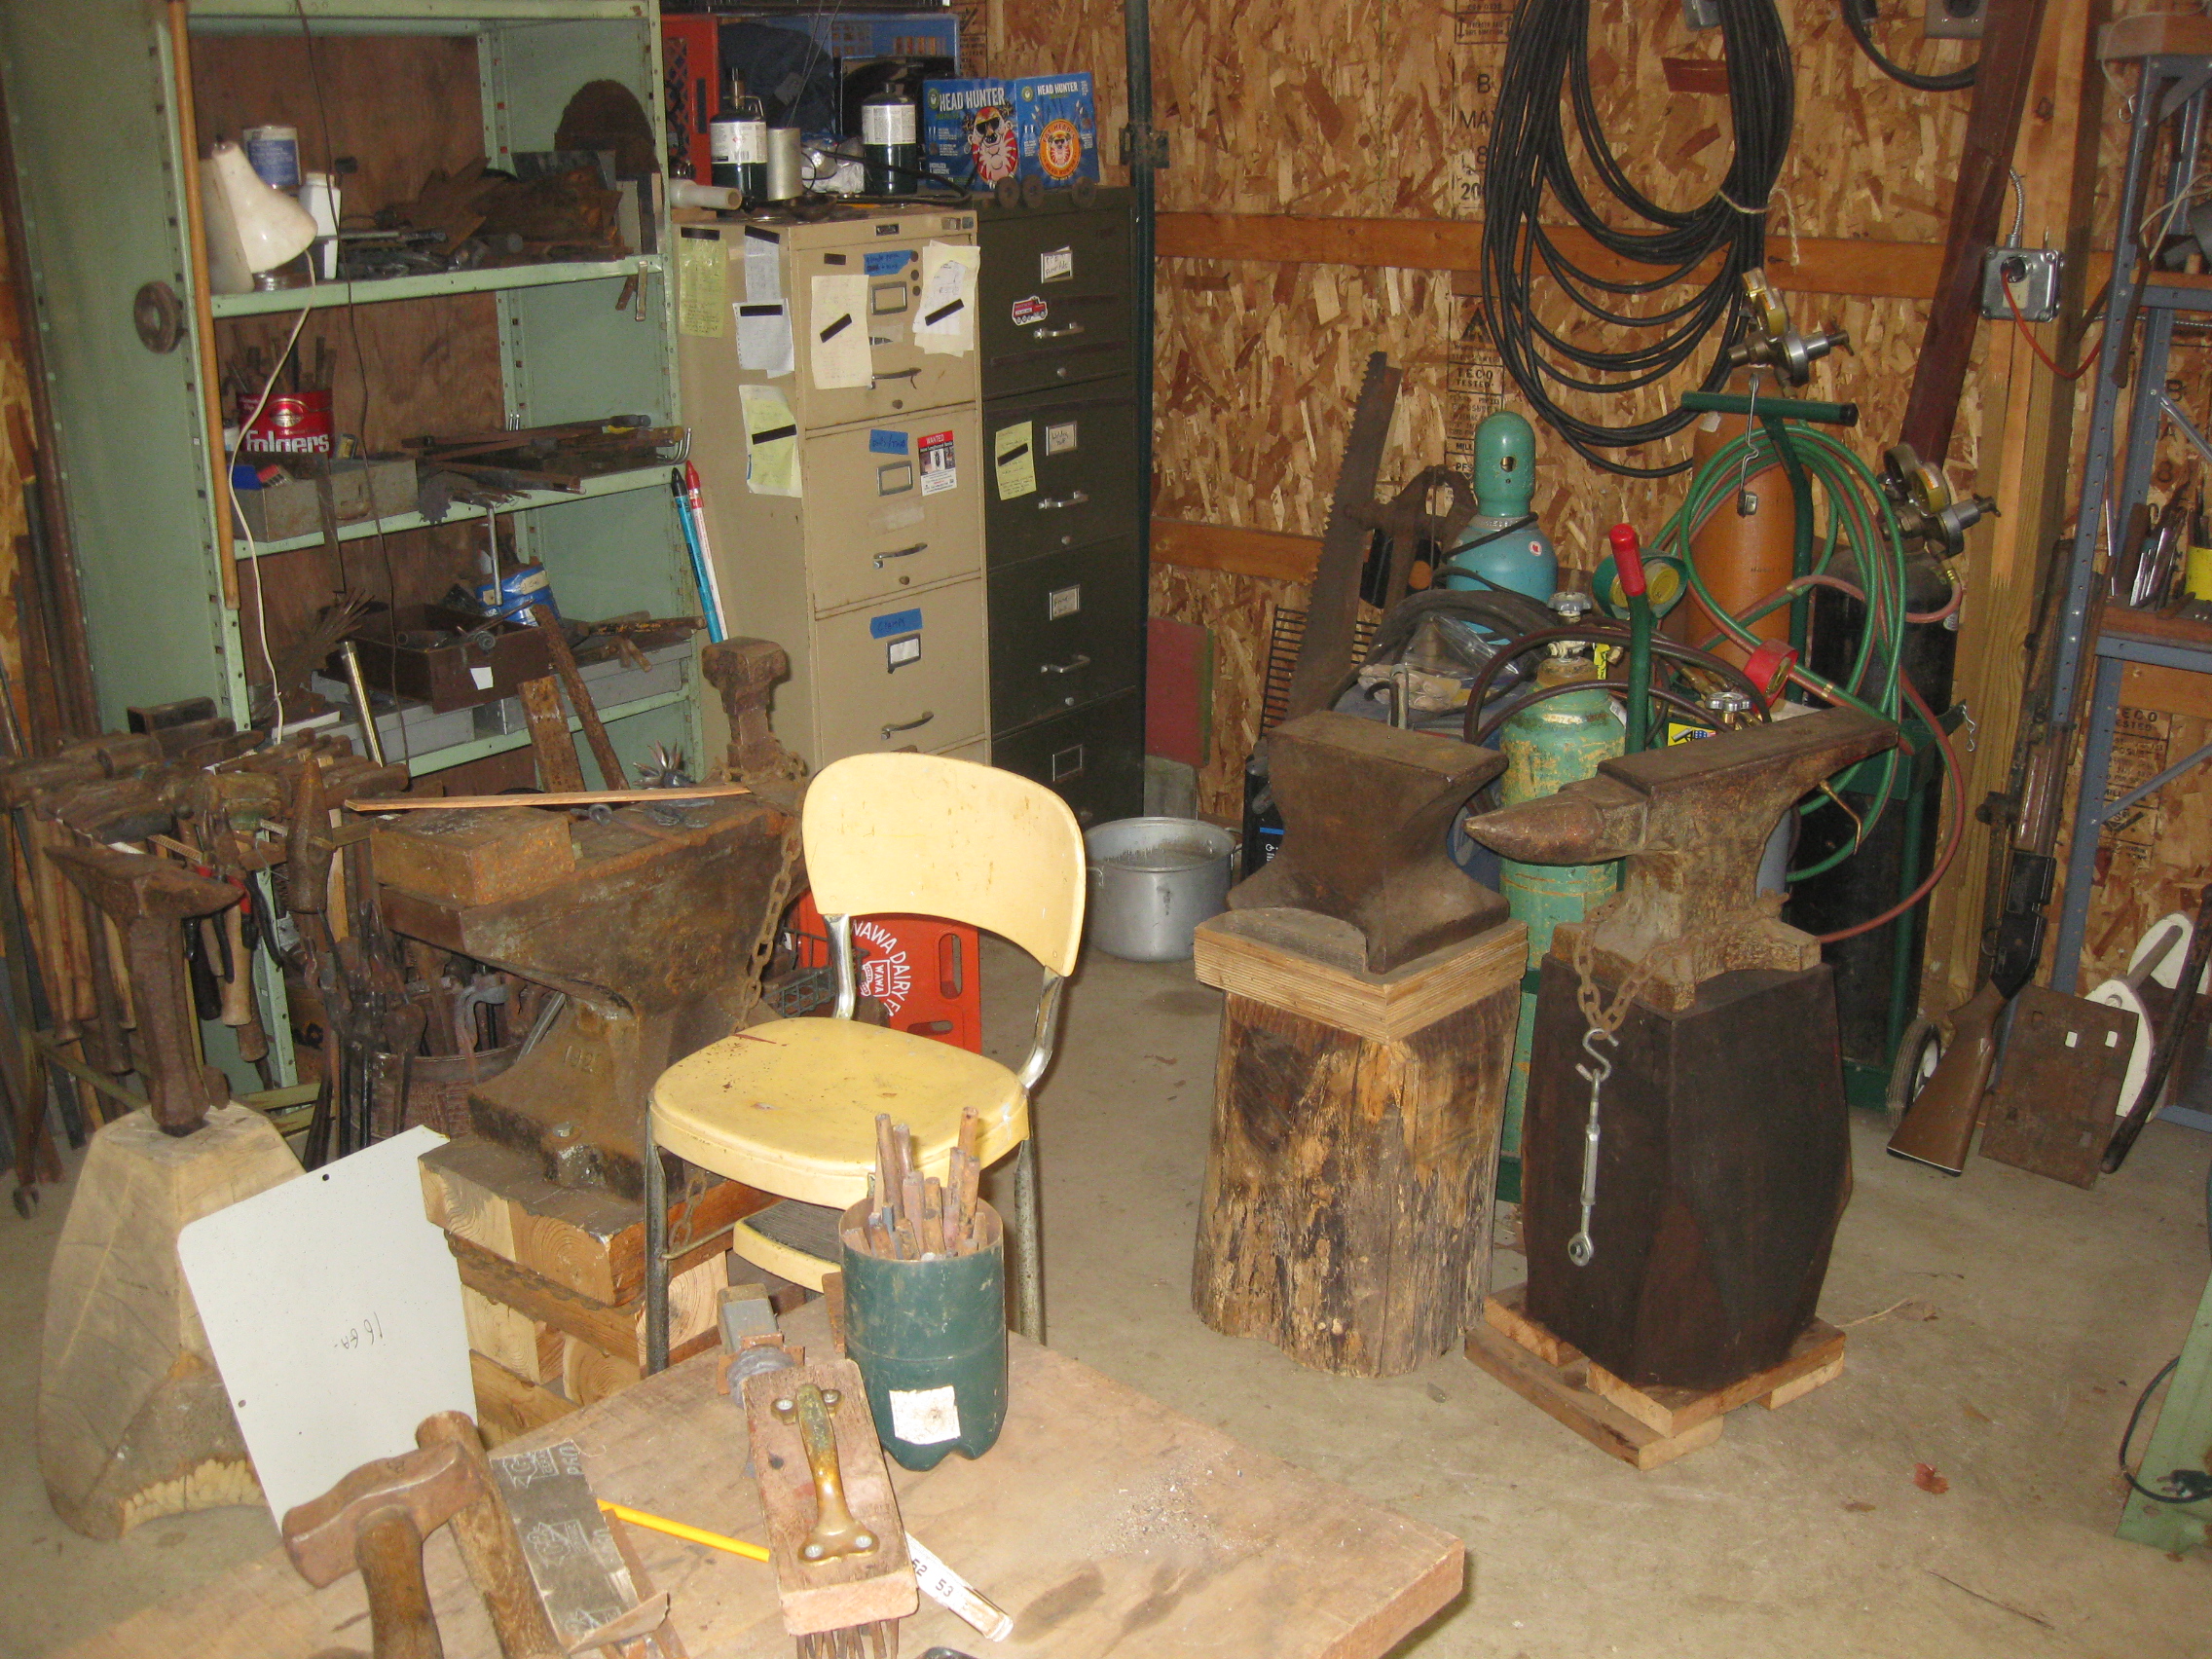
Moving back into the shop you can see the coal forge roughly in place against the back wall, then I start spinning clock-wise to see the space. The final shot is my portable rivet forge with the propane forge also mounted on it. I haven't used the rivet forge in a while, so the propane is a semi- permanent fixture on the cart. I can roll it where ever I want it, and can roll it out of the way when I'm done. I did fire it up last week- I was really jonesing for some hot steel, and I got my fix. I really enjoy how quick I can be up and running, without the mess of the coal, but I'm still anxious to get the coal forge going. I've had the propane for ~ 5 years or so, a basic freon tank 2" of kaowool and a burner by Steve Genscheimer of the local PA group, PABA.