Stash
-
Posts
887 -
Joined
-
Last visited
Content Type
Profiles
Forums
Articles
Gallery
Downloads
Events
Everything posted by Stash
-
I do have some heavy duty shelving I'll be moving that should take care of most of my storage needs, I also have a few filing cabinets. I'll have some time before the big move to get some of my stuff in and somewhat organized. I should be in pretty good shape. When we were looking at houses, my wife accepted that there were certain parameters that I needed , amongst them is a forging area, or the space and access to build one. I'll have a ready to move in space that just needs to be loaded in and set up. Steve
-
Touch up your grind with a file, give the whole thing a little cold hammer texture. Steve
-
I have a ton or so of scrap that I'll take to the scrap yard next week- lots of unusable stuff. I still have plenty in my usable pile. Truckload of mixed aluminum I gotta get rid of, too. Had a small project in the woodshop today, had to undo half my packing. Oh well. First world problem. I figure once it's over, I'll hate moving too. My last move was in 1983 when we moved here from a 2 bed apartment. I borrowed a liftgate truck from work, and had about 3 buddies with pickemups. I guess I'm not counting college move-ins and my son's 2 moves. Steve
-
Thomas- it's about 60 miles from where I am now, due north, up the NE Ext. of the PA Tpk. Nothing I really need a rigger for. 1200 lbs or so of anvils and swage blocks will go on 1 pallet. I have a set of forks for my Kubota loader, pop it on my dump truck and throw most of the rest of the stuff around it. I have a 5 ton equipment trailer to haul my mini loader to the new place in one trip, leave the loader there and keep the Kubota here till the last trip. I have quite the collection of stone slabs I will also haul- probably 5 trips or so to get it all there, unless I get access to a larger truck. Probably 2 or 3 loads of wood, also. Gonna be quite the adventure. Steve
-
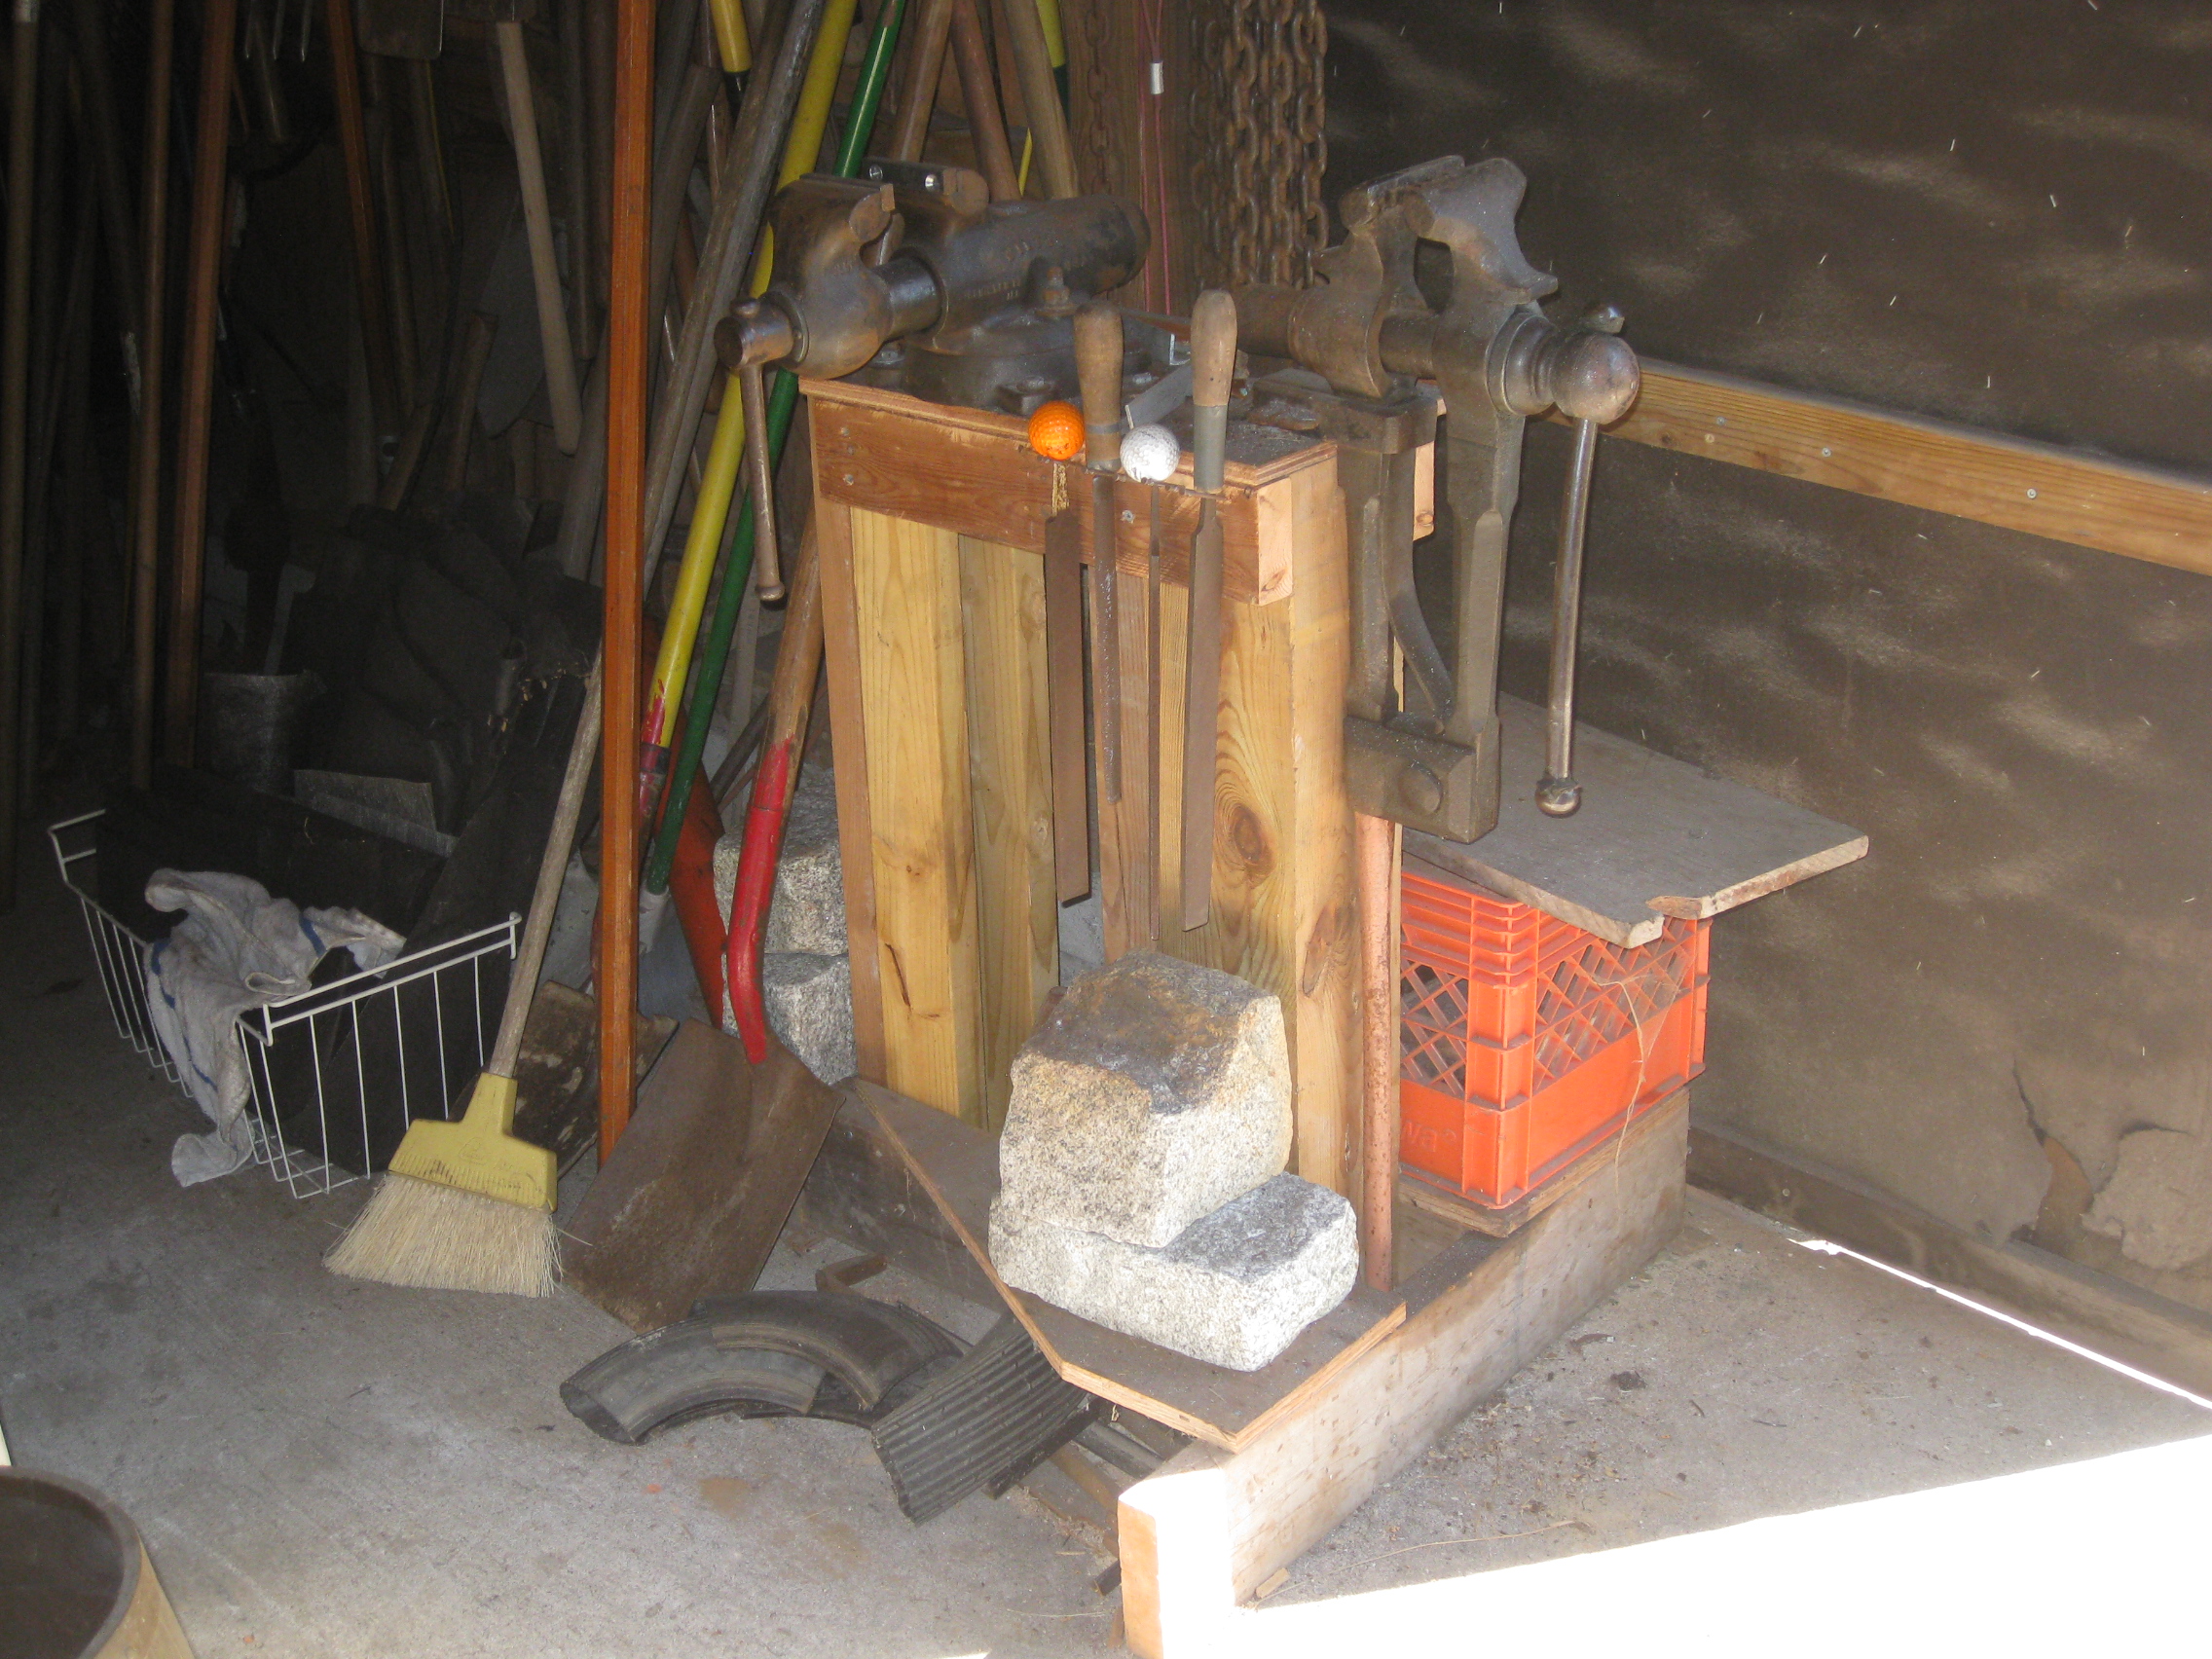
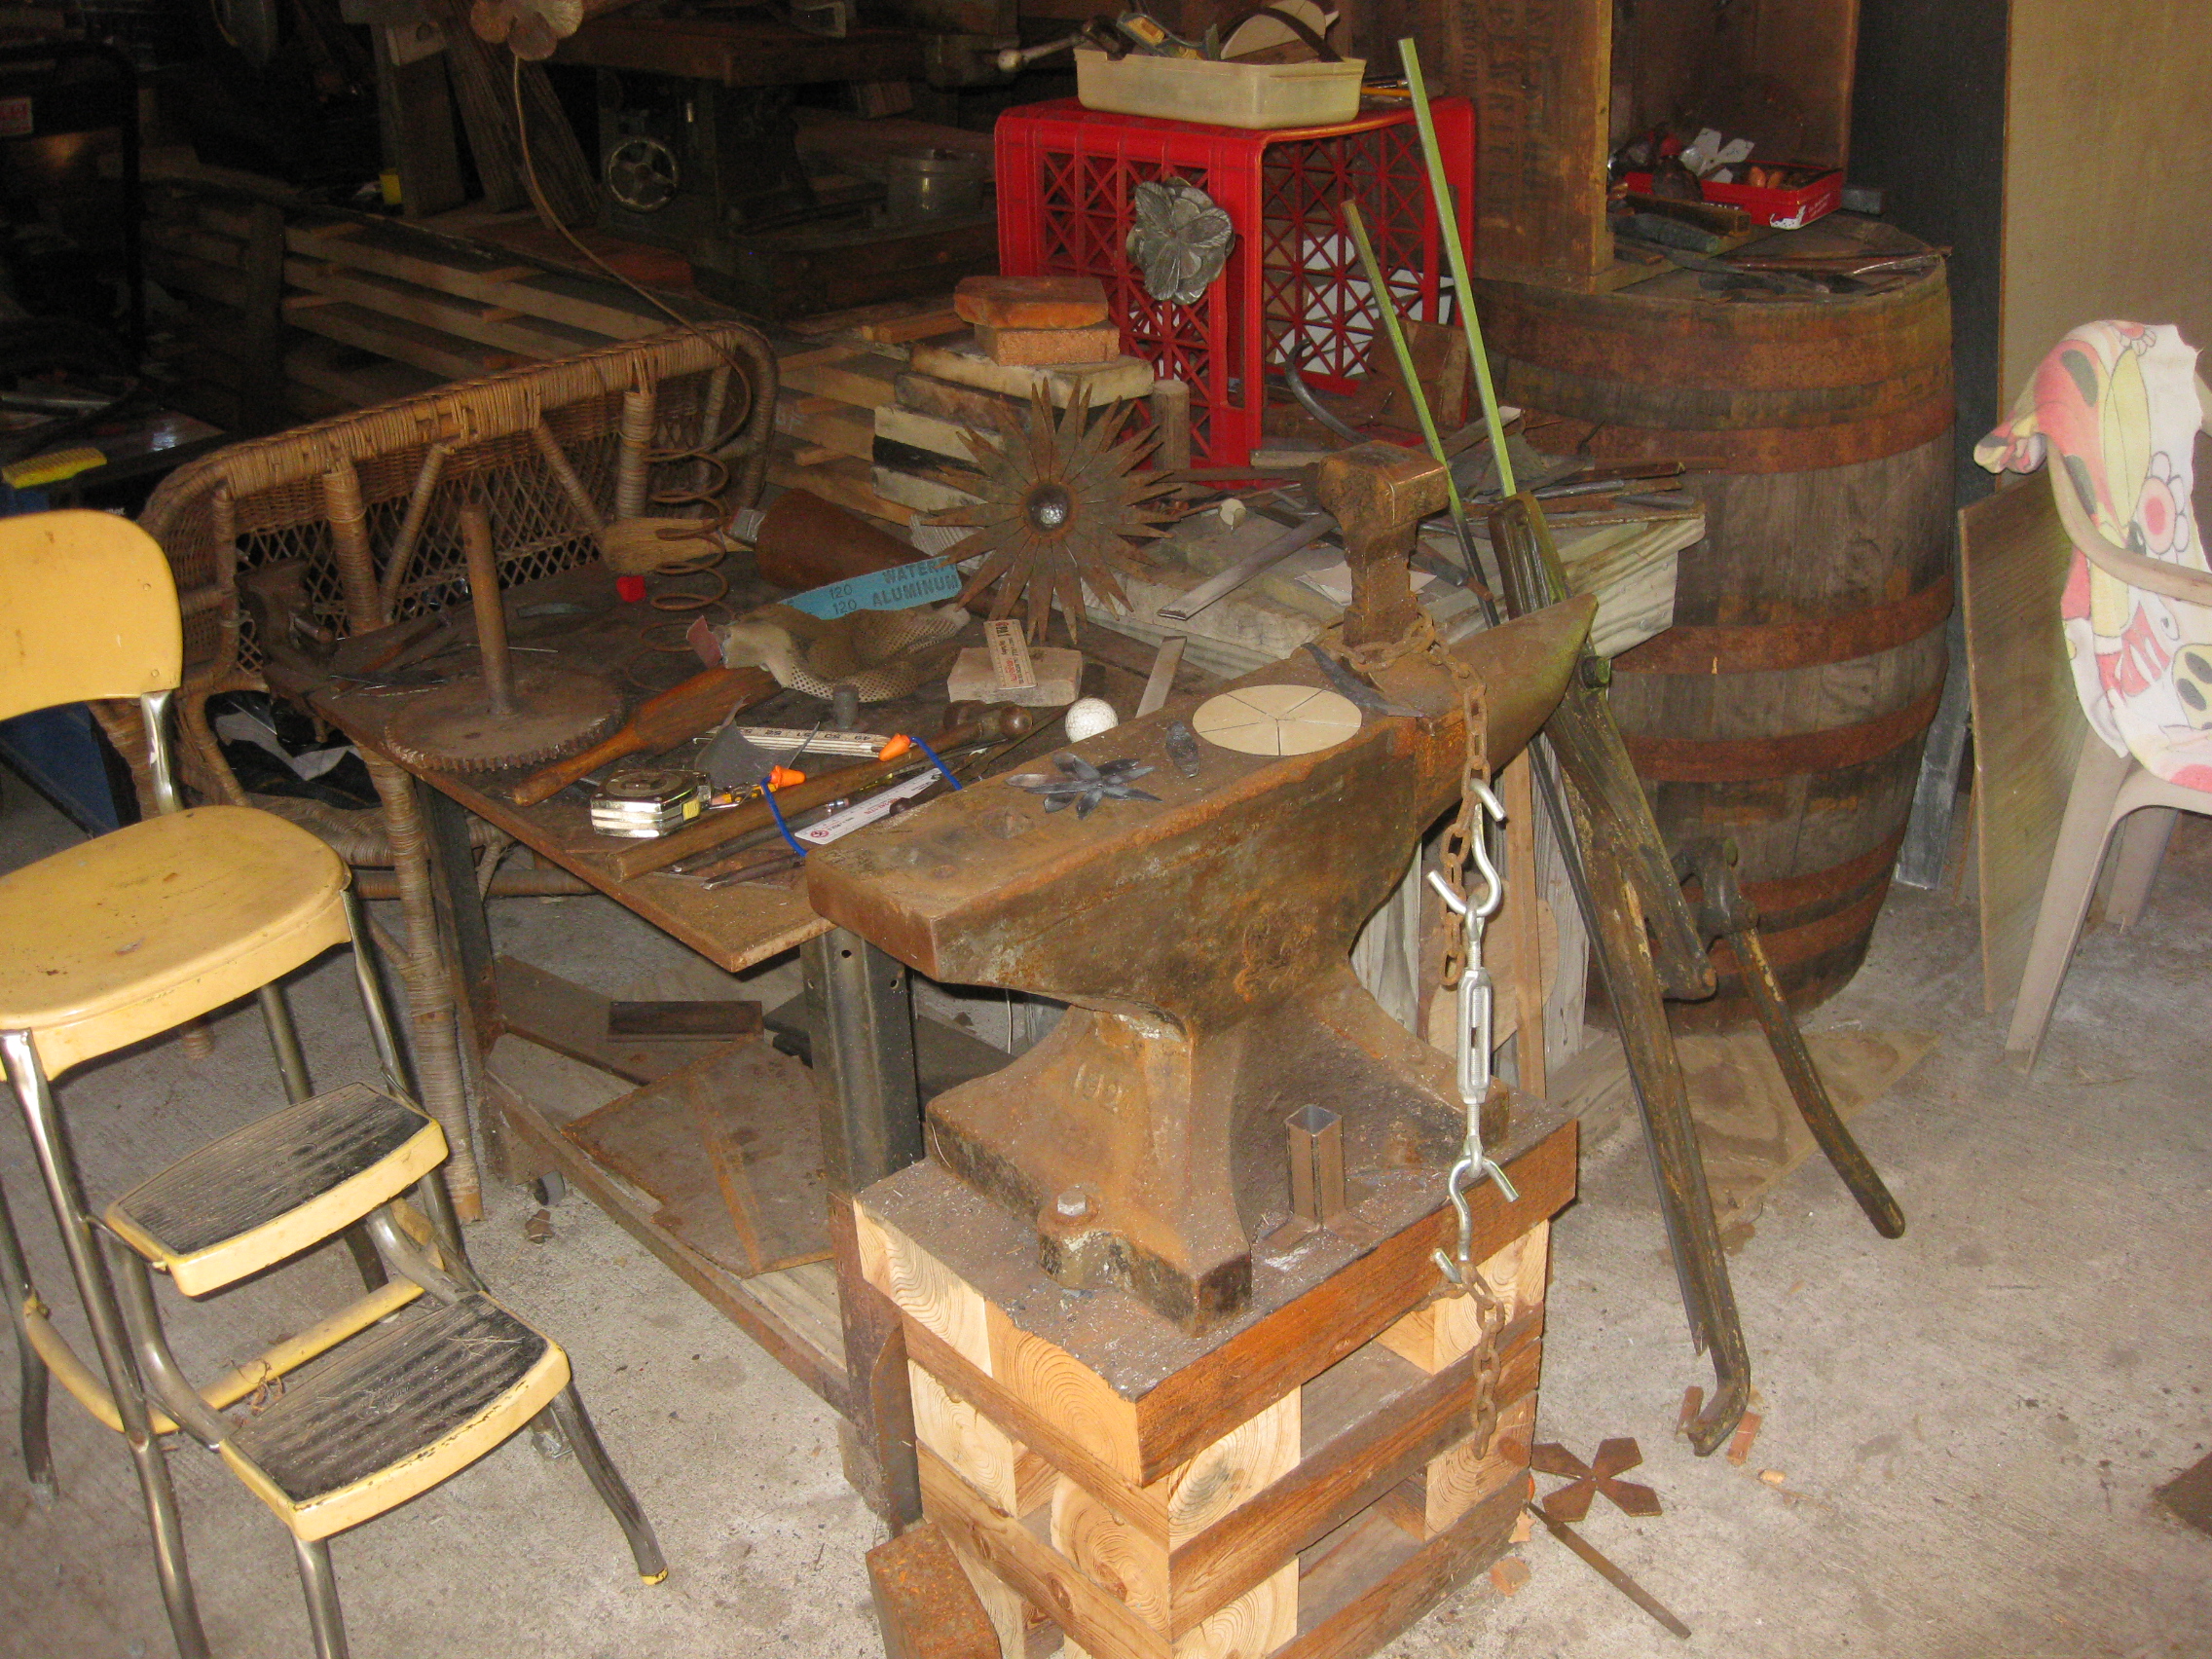
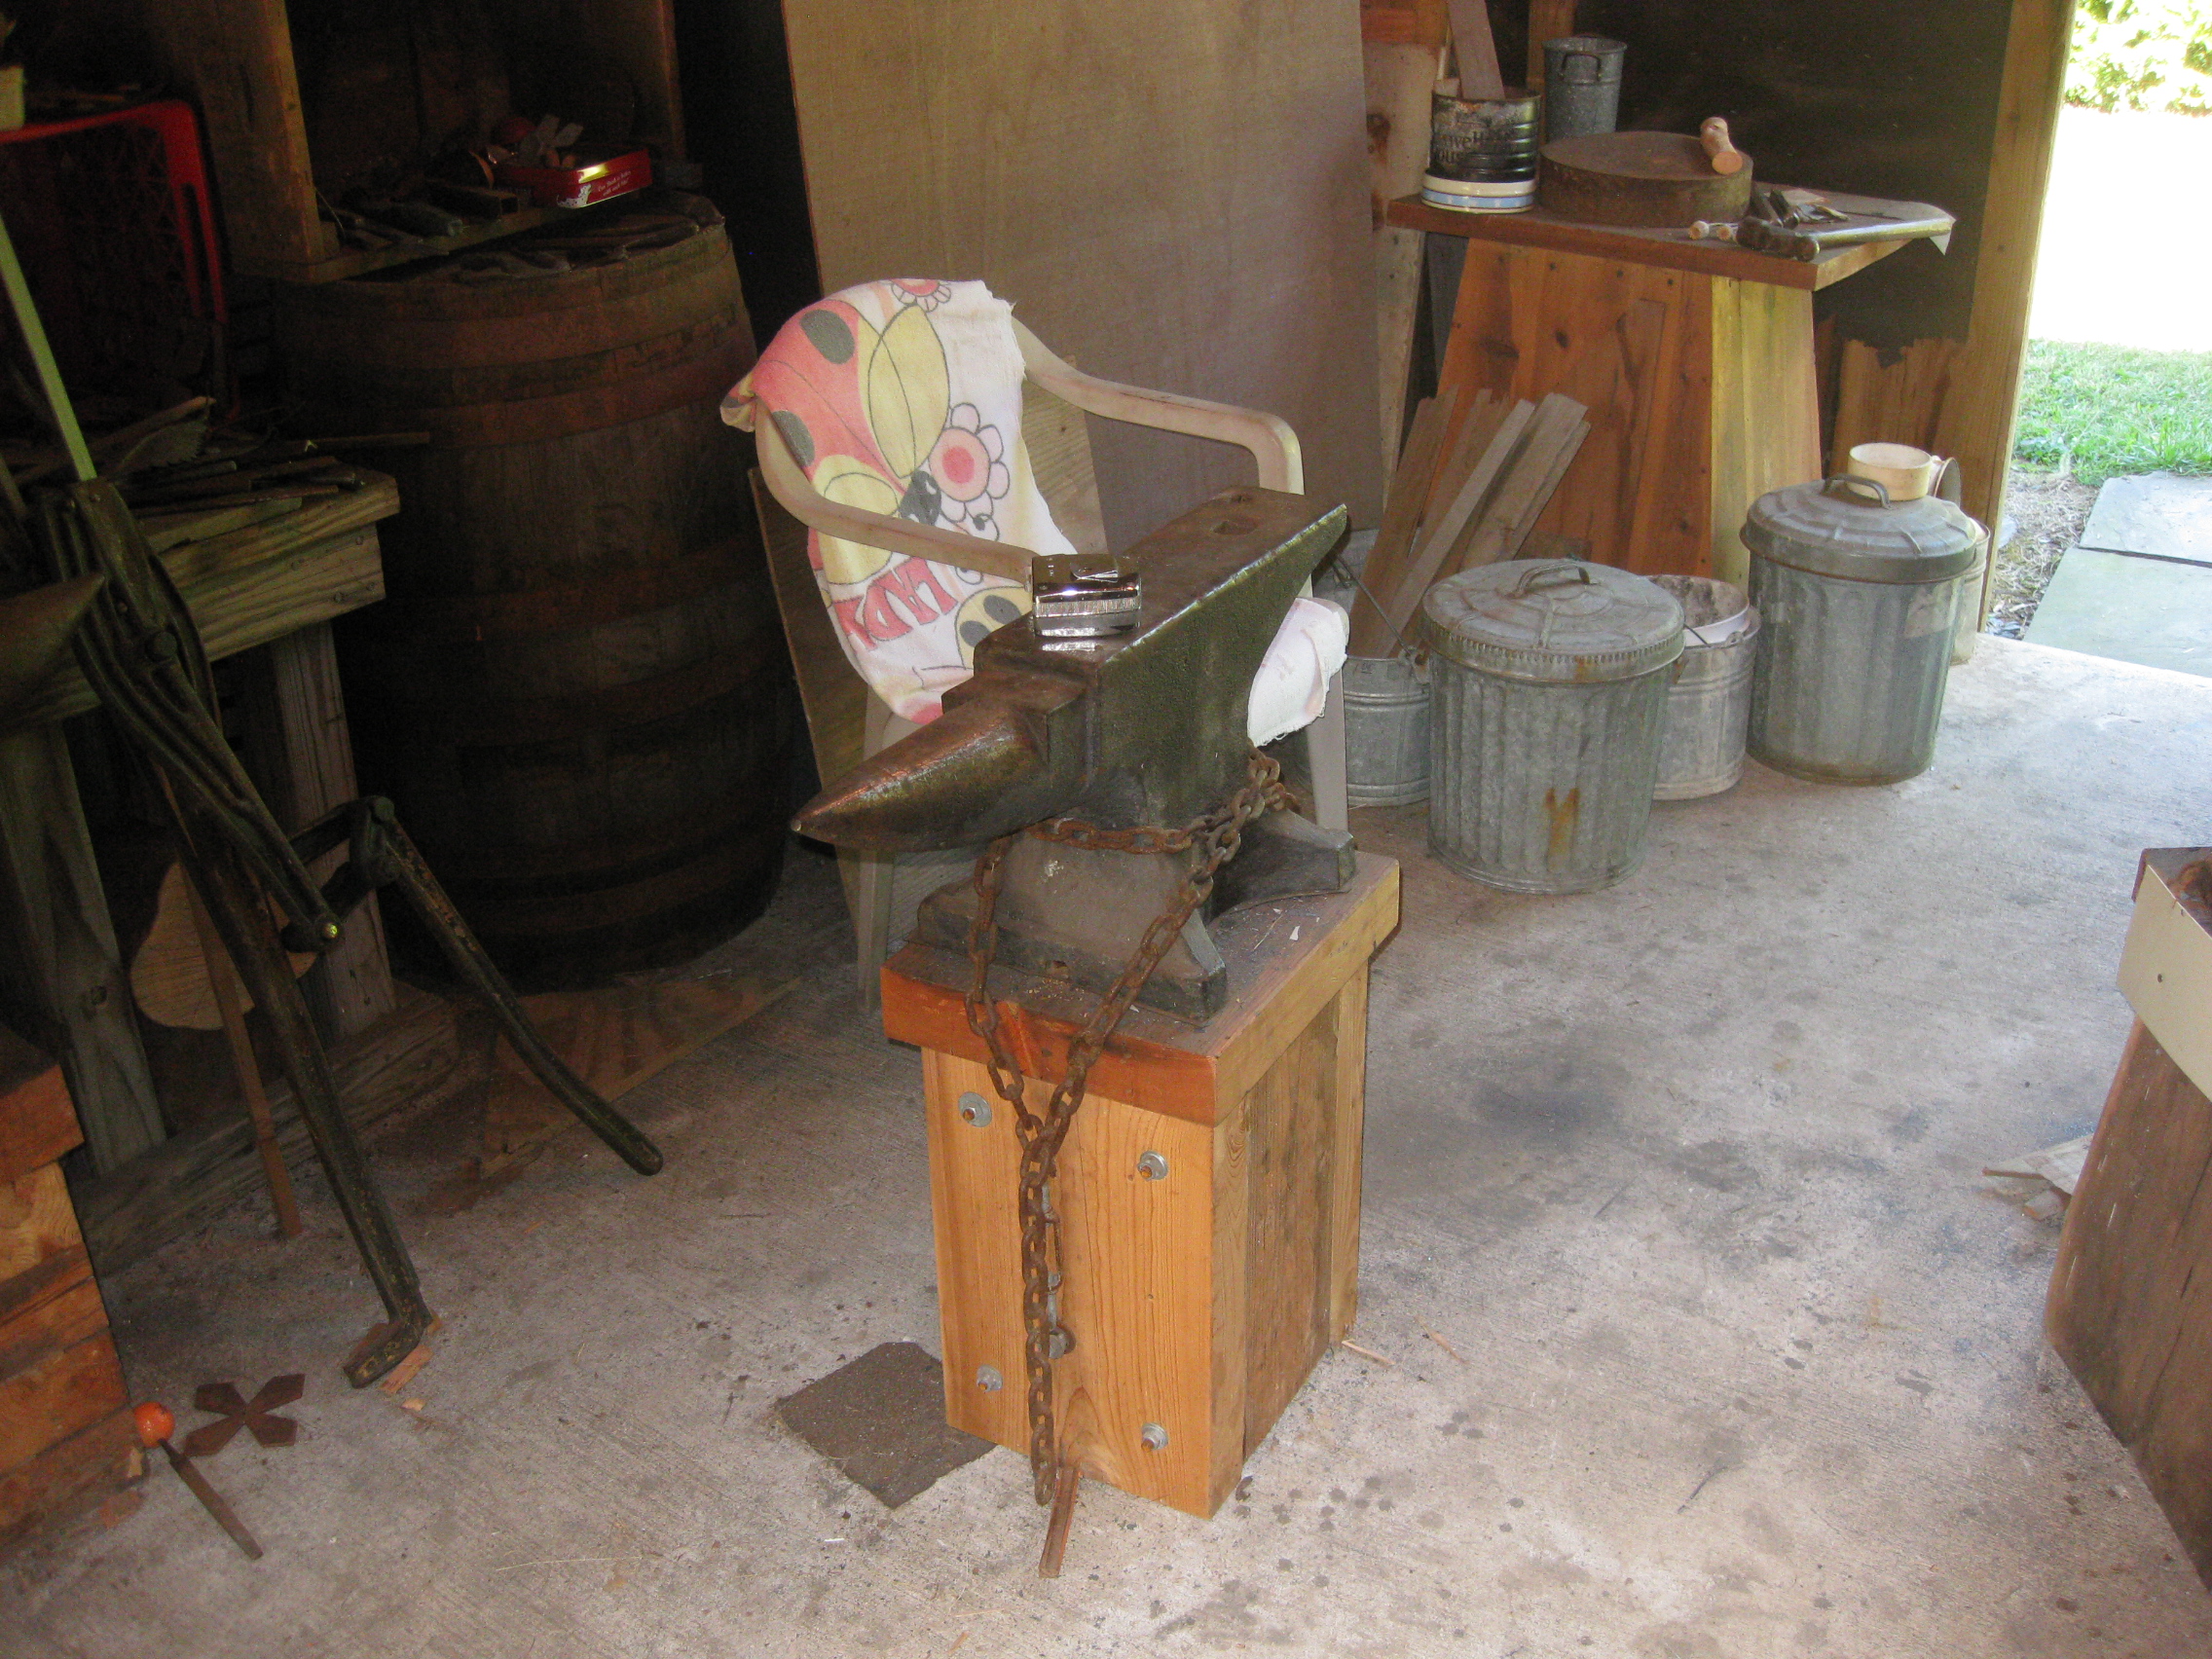
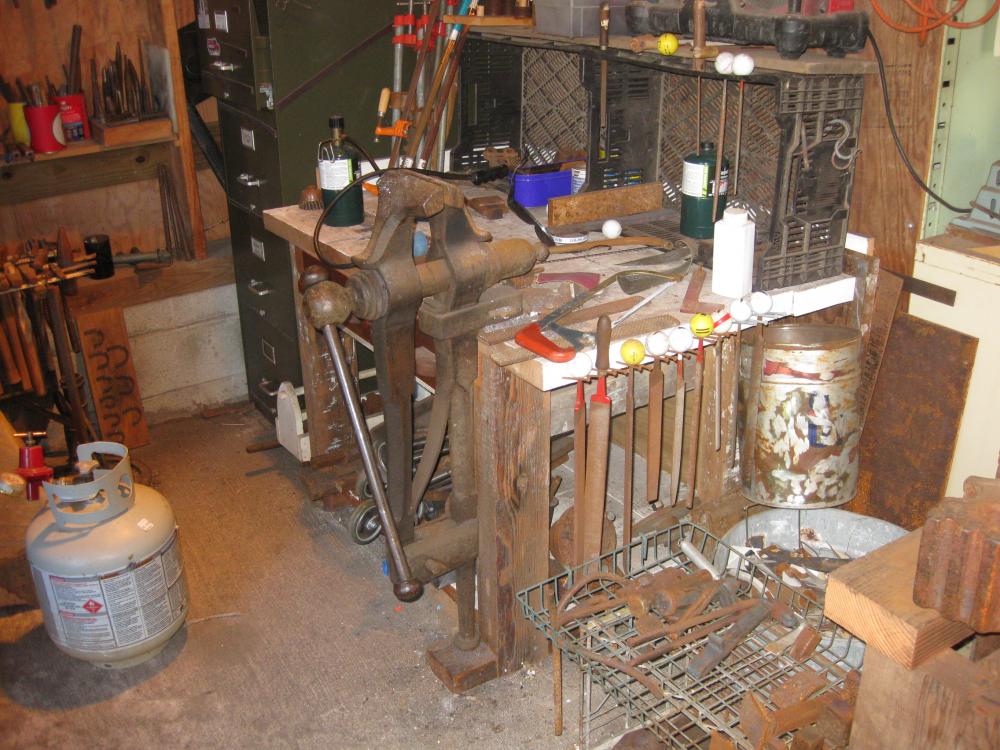
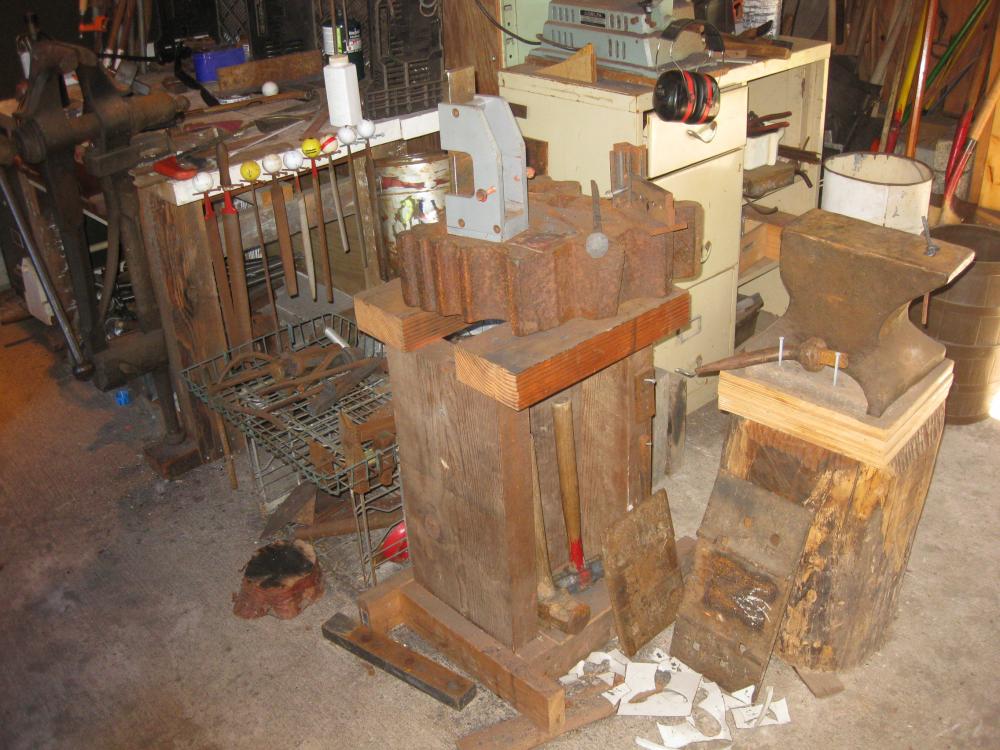
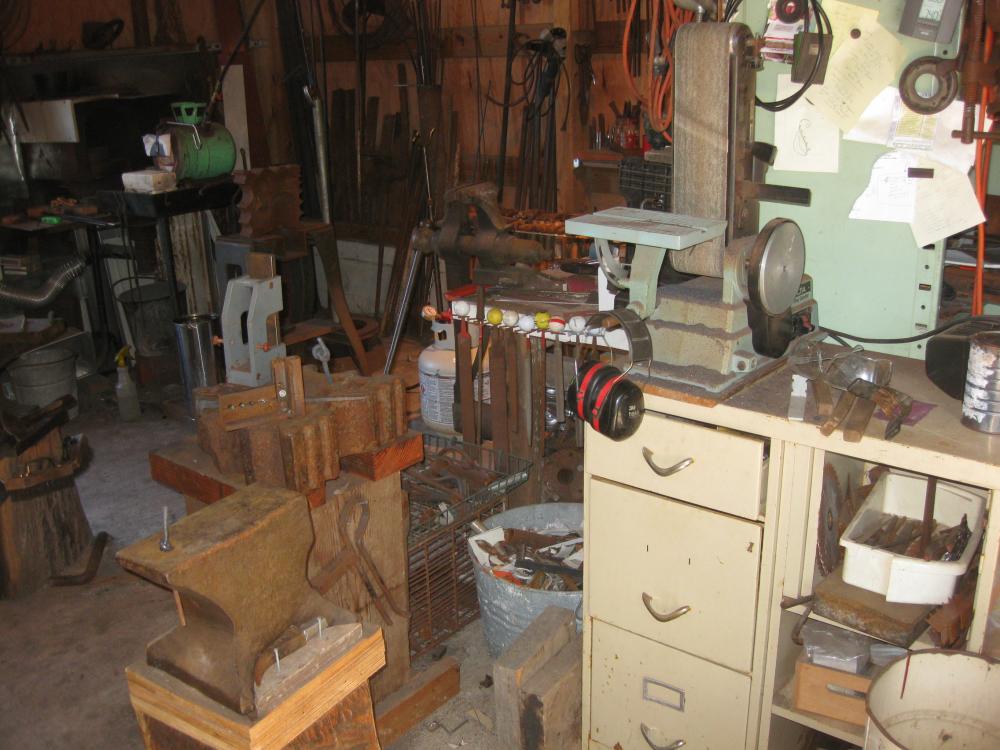
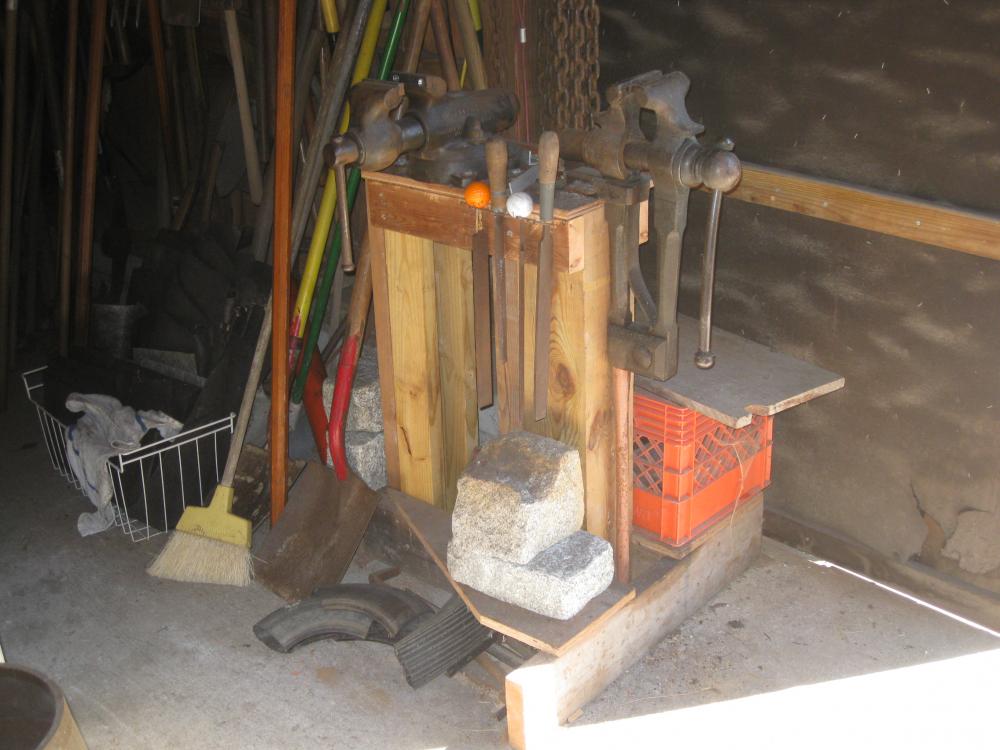
Almost done here. Turning a little more we see the workbench with a 6" vise mounted to it. When I built the bench, I extended the foot out and bored the hole to receive the foot of the vise, and built the height as needed. I had the vise before the bench, so no retro fitting. There's a swage block that I mainly use to hold tooling- guillotines ect, and a hornless (broken) colonial anvil. The belt grinder is a basic Porter cable thing I got from my Dad. It won't die. Heading back out the door is a filing station with a post and a machinist vise. It's a simple wood stand with a few chunks of granite for some extra weight. Finally, a shot from the back, looking in the rear door. The flue box and flue and a little more water. So there we have it. I've tweaked at this thing over the years and am pretty pleased- it works well for me. This most recent manifestation is less that 1 1/2 years old and is basically the 3rd way I've set up since I started in this thing ~ 6 years ago. Now it is time to pull it all apart, pack it up and move to a new location. I'm going to miss what I have in this shop, as well as I will miss the rest of the 4 1/2 acres that I've gotten to know real well in the last 33 years. I will next start showing progress when the truck and trailer are getting loaded. Just a teaser- there is a building at the new site, but I'll let you know more of that later. Steve
-
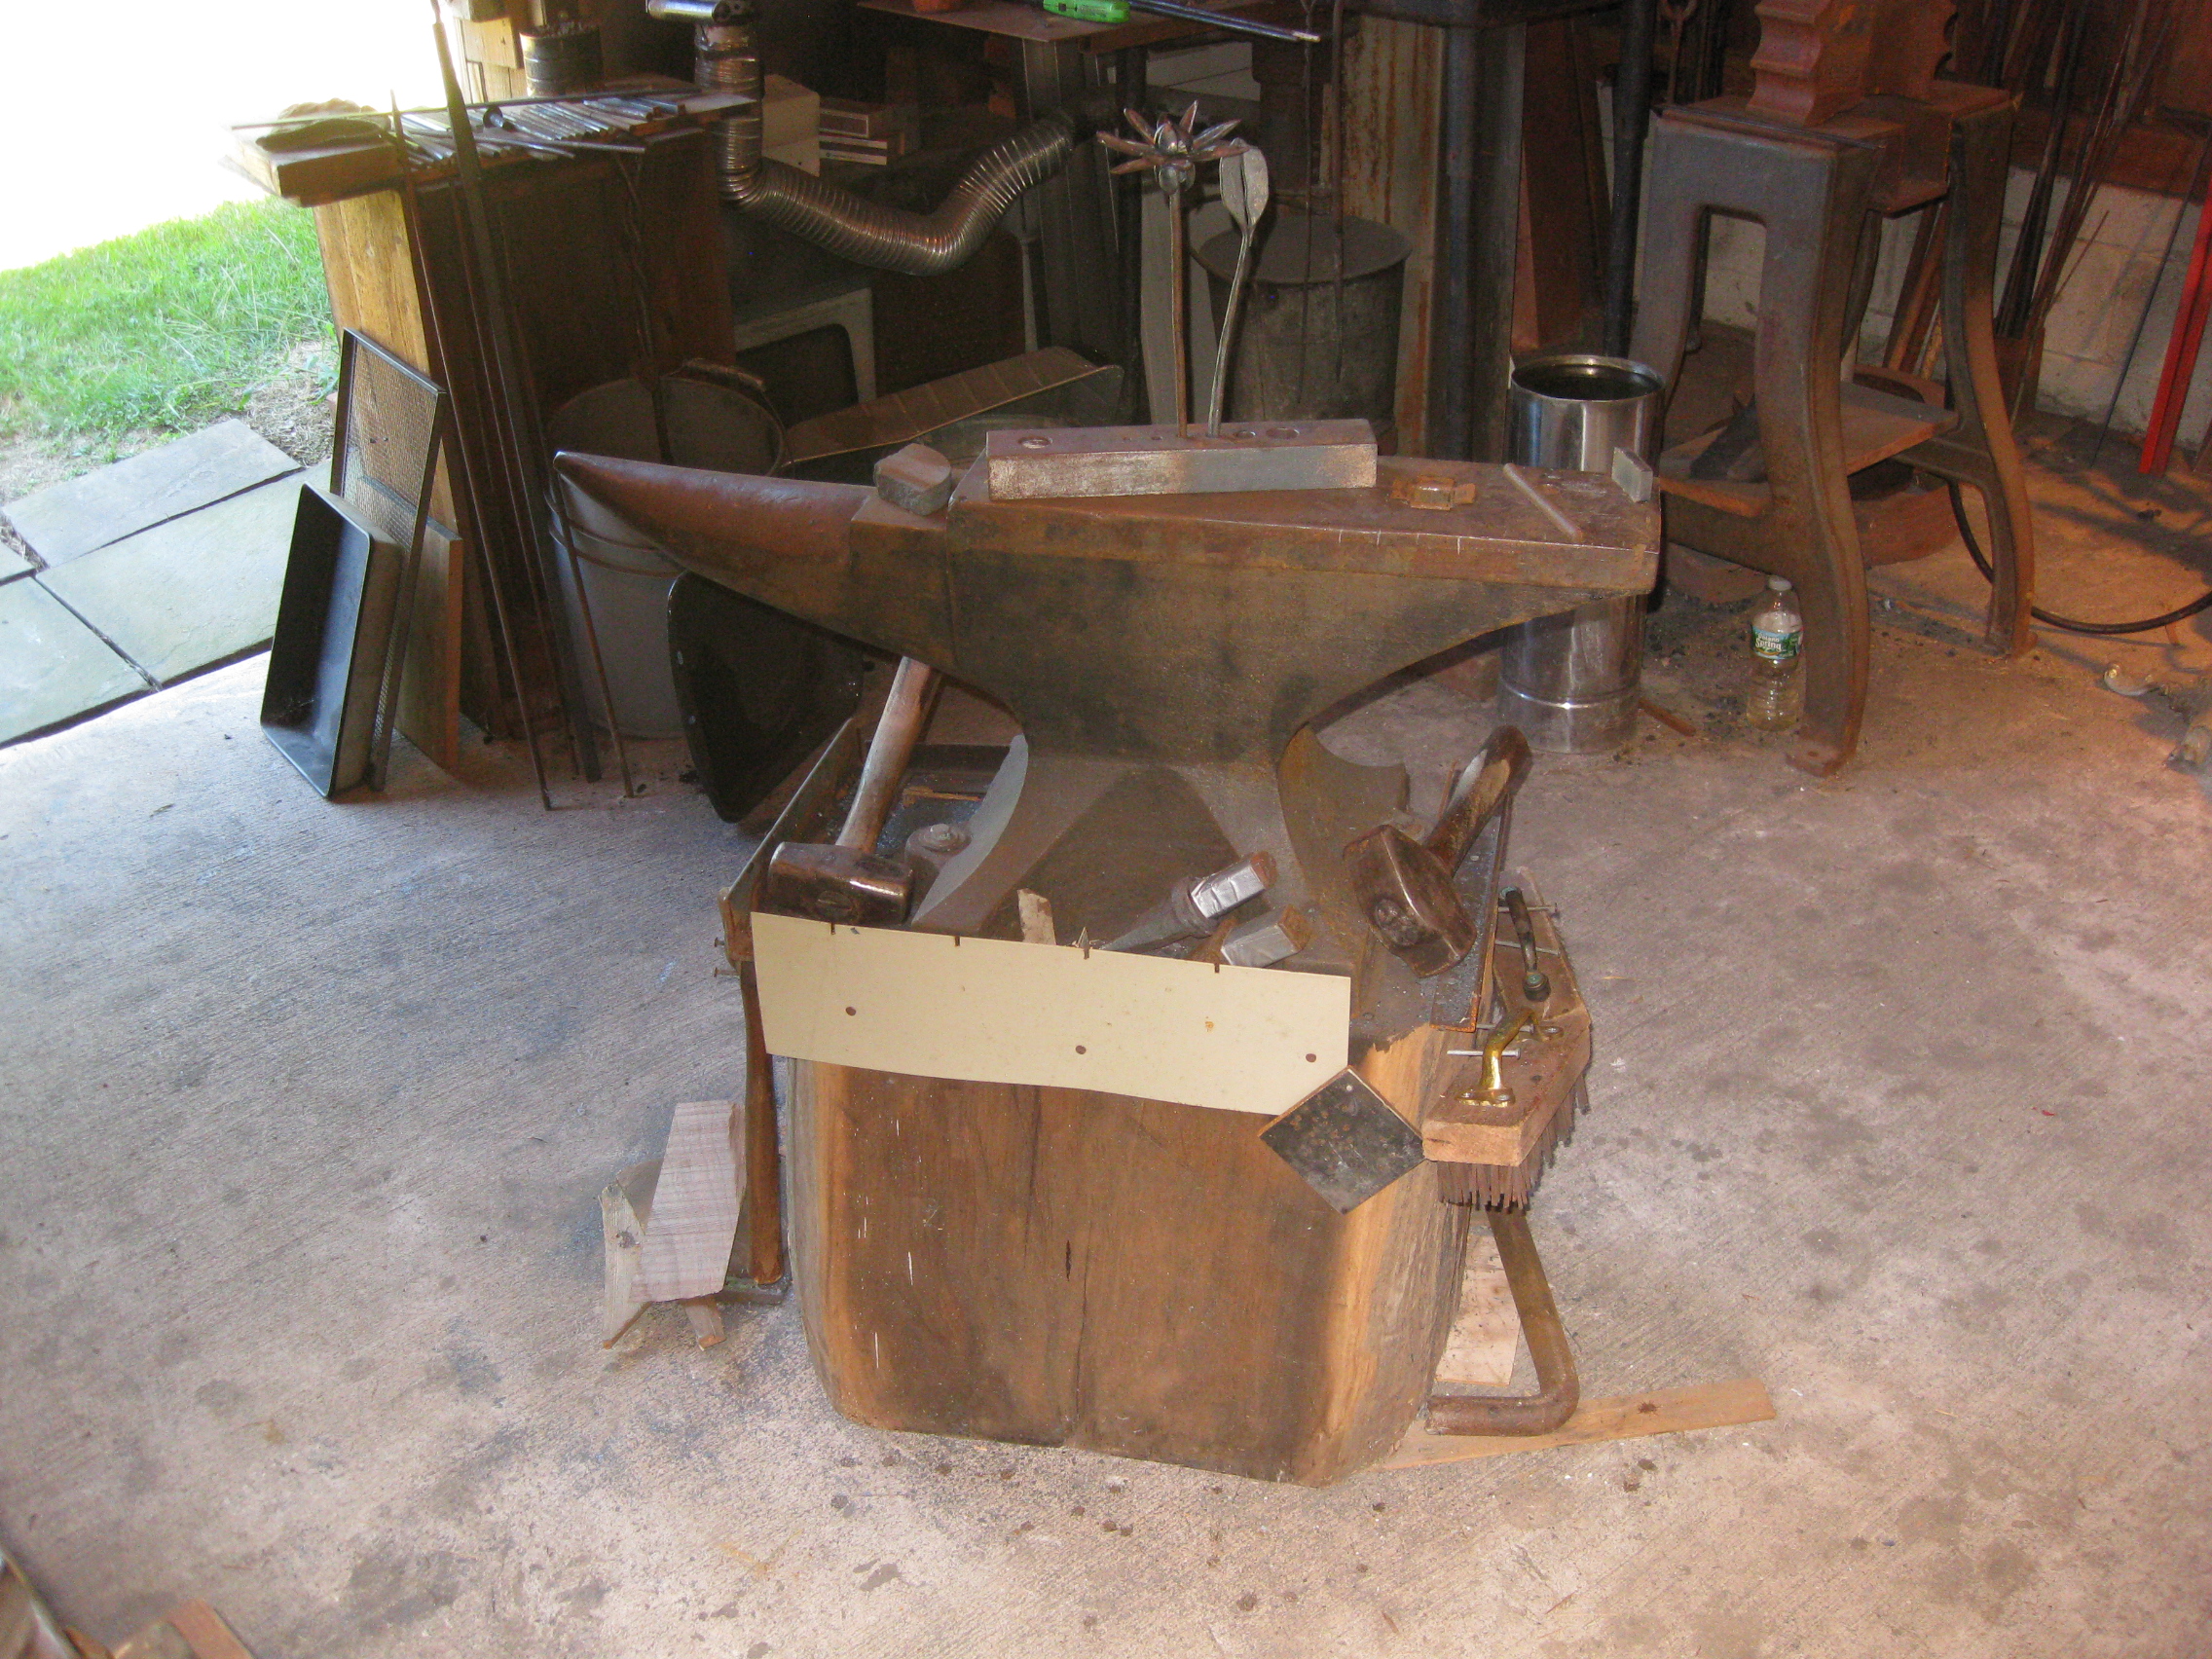
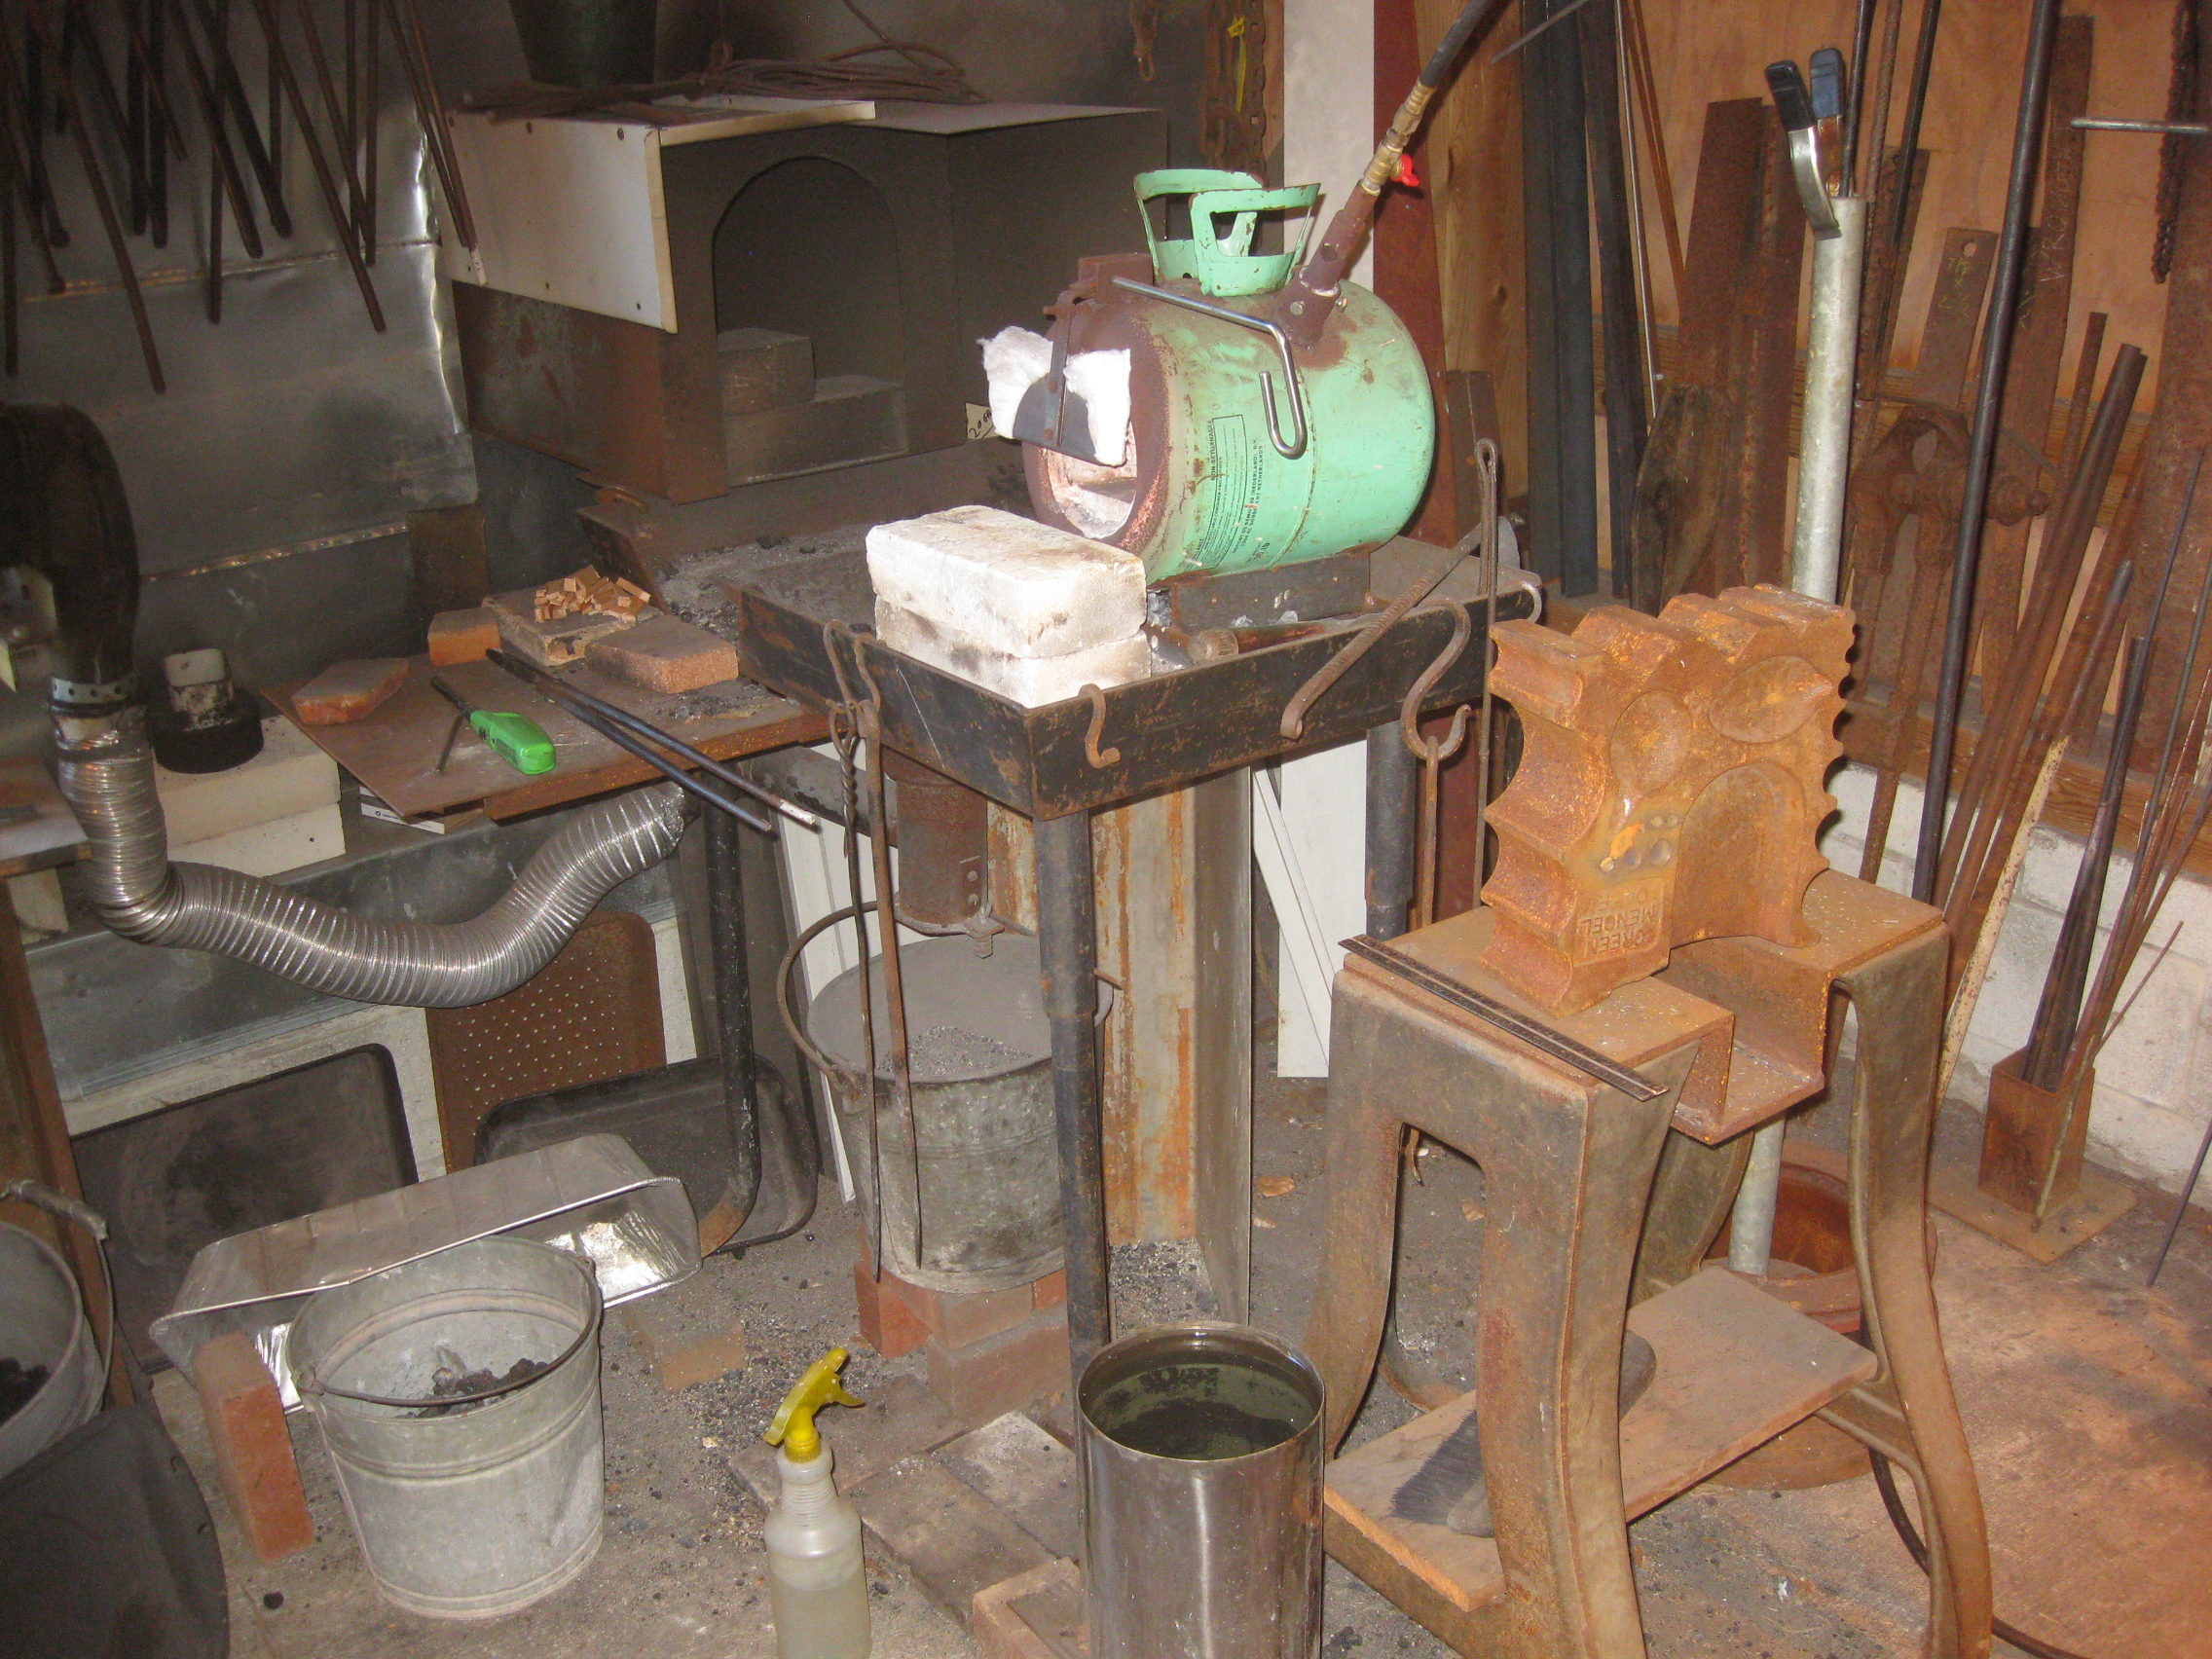
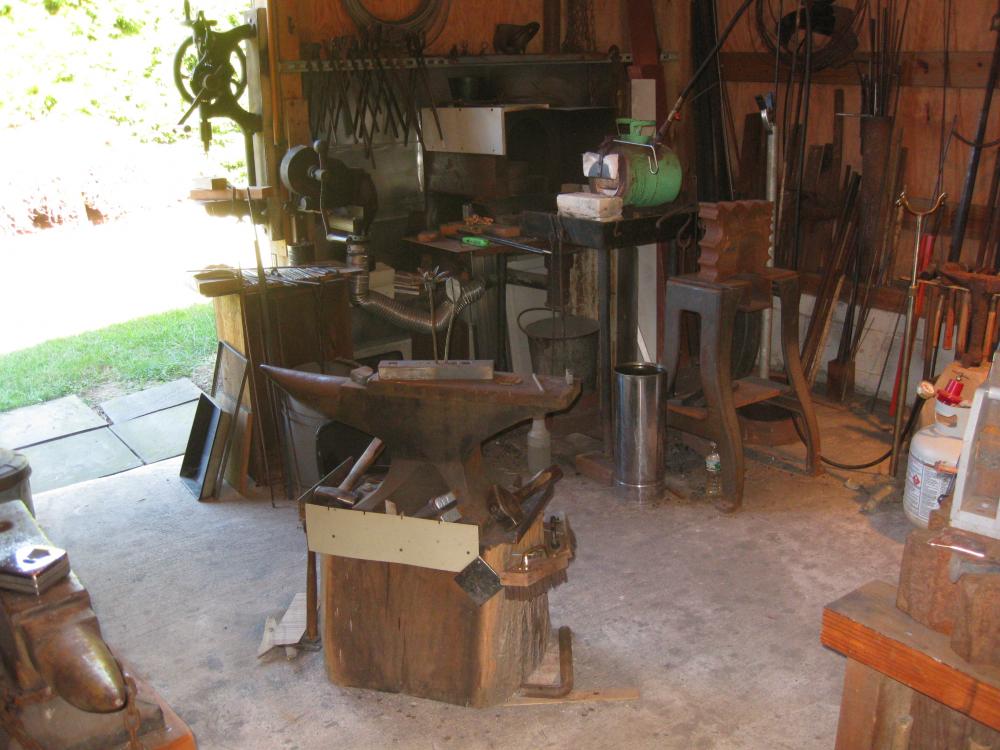
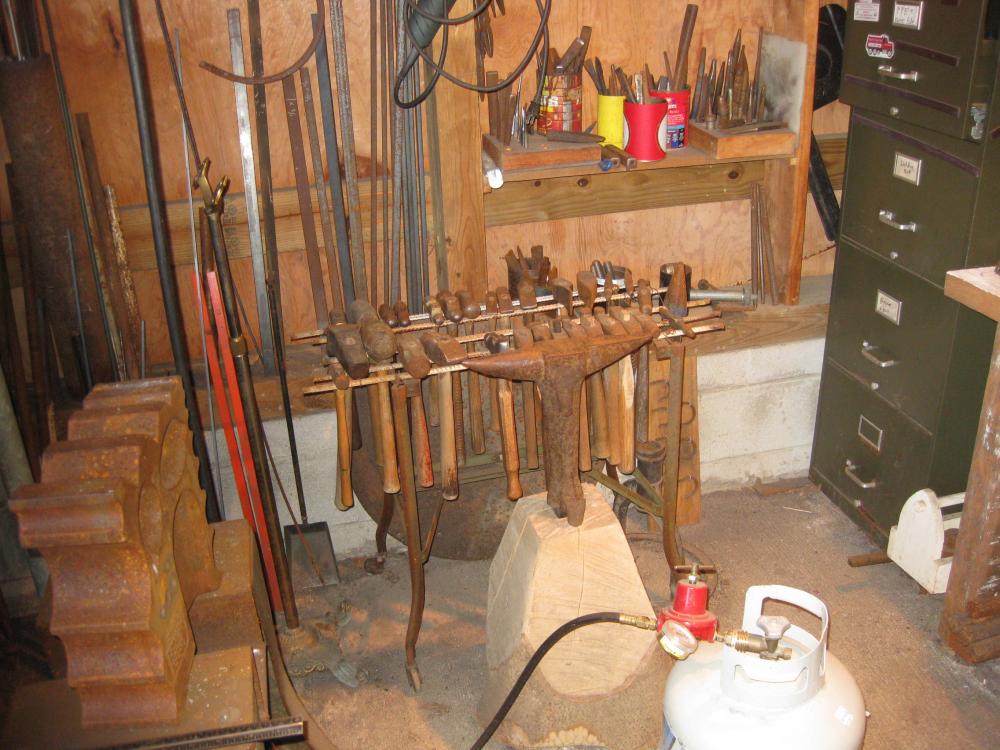
OK, so I got an early start today, maybe I'll wrap up the tour of the current shop. I'm kinda on light duty for a while anyway- still recovering from eye surgery. I didn't mention previously that the shop is not wired up. I run a HD ext cord from the house to run the machinery. Nothing with a heavy draw here, and even with the long ext, I still have 122V at the end of the plug. I have a 6.5kW genny to run my welder. Yeah, I really like the welder- it is very forgiving of an incompetent like me. So, let's continue. We now come to my main forging station with my 250# Fisher. I currently have the propane forge set on the coal forge table. The forge table is kinda small, ~ 20x 32 or so, so I put on wing extensions off the side cutouts. I have ~ a half sheet of 10ga sheet that will probably become my new table. Firepot is cast iroin from Laurel, in Miss. and I fabbed up the tuyre. The Champion 400 blower is mounted to one of the posts- it came my way without legs. The Hofi -style side sucker is a 13" sq 10ga box 4' long, poking thru the wall with a 12" chimbley on the outside. My main tongs are on the wall above the blower. Chisels punches fullers etc and hammers are in easy reach and you can see some of my steel storage. Filing cabinets are scattered thru the shop.


-
I think the proper term for this would be 'sleeper'- at least that is what I have always used for this kind of construction. In doing this on sandy soil, I would lay the sleepers (?) flat to give more bearing surface on the base. Treated lumber would also be prudent. Steve
-
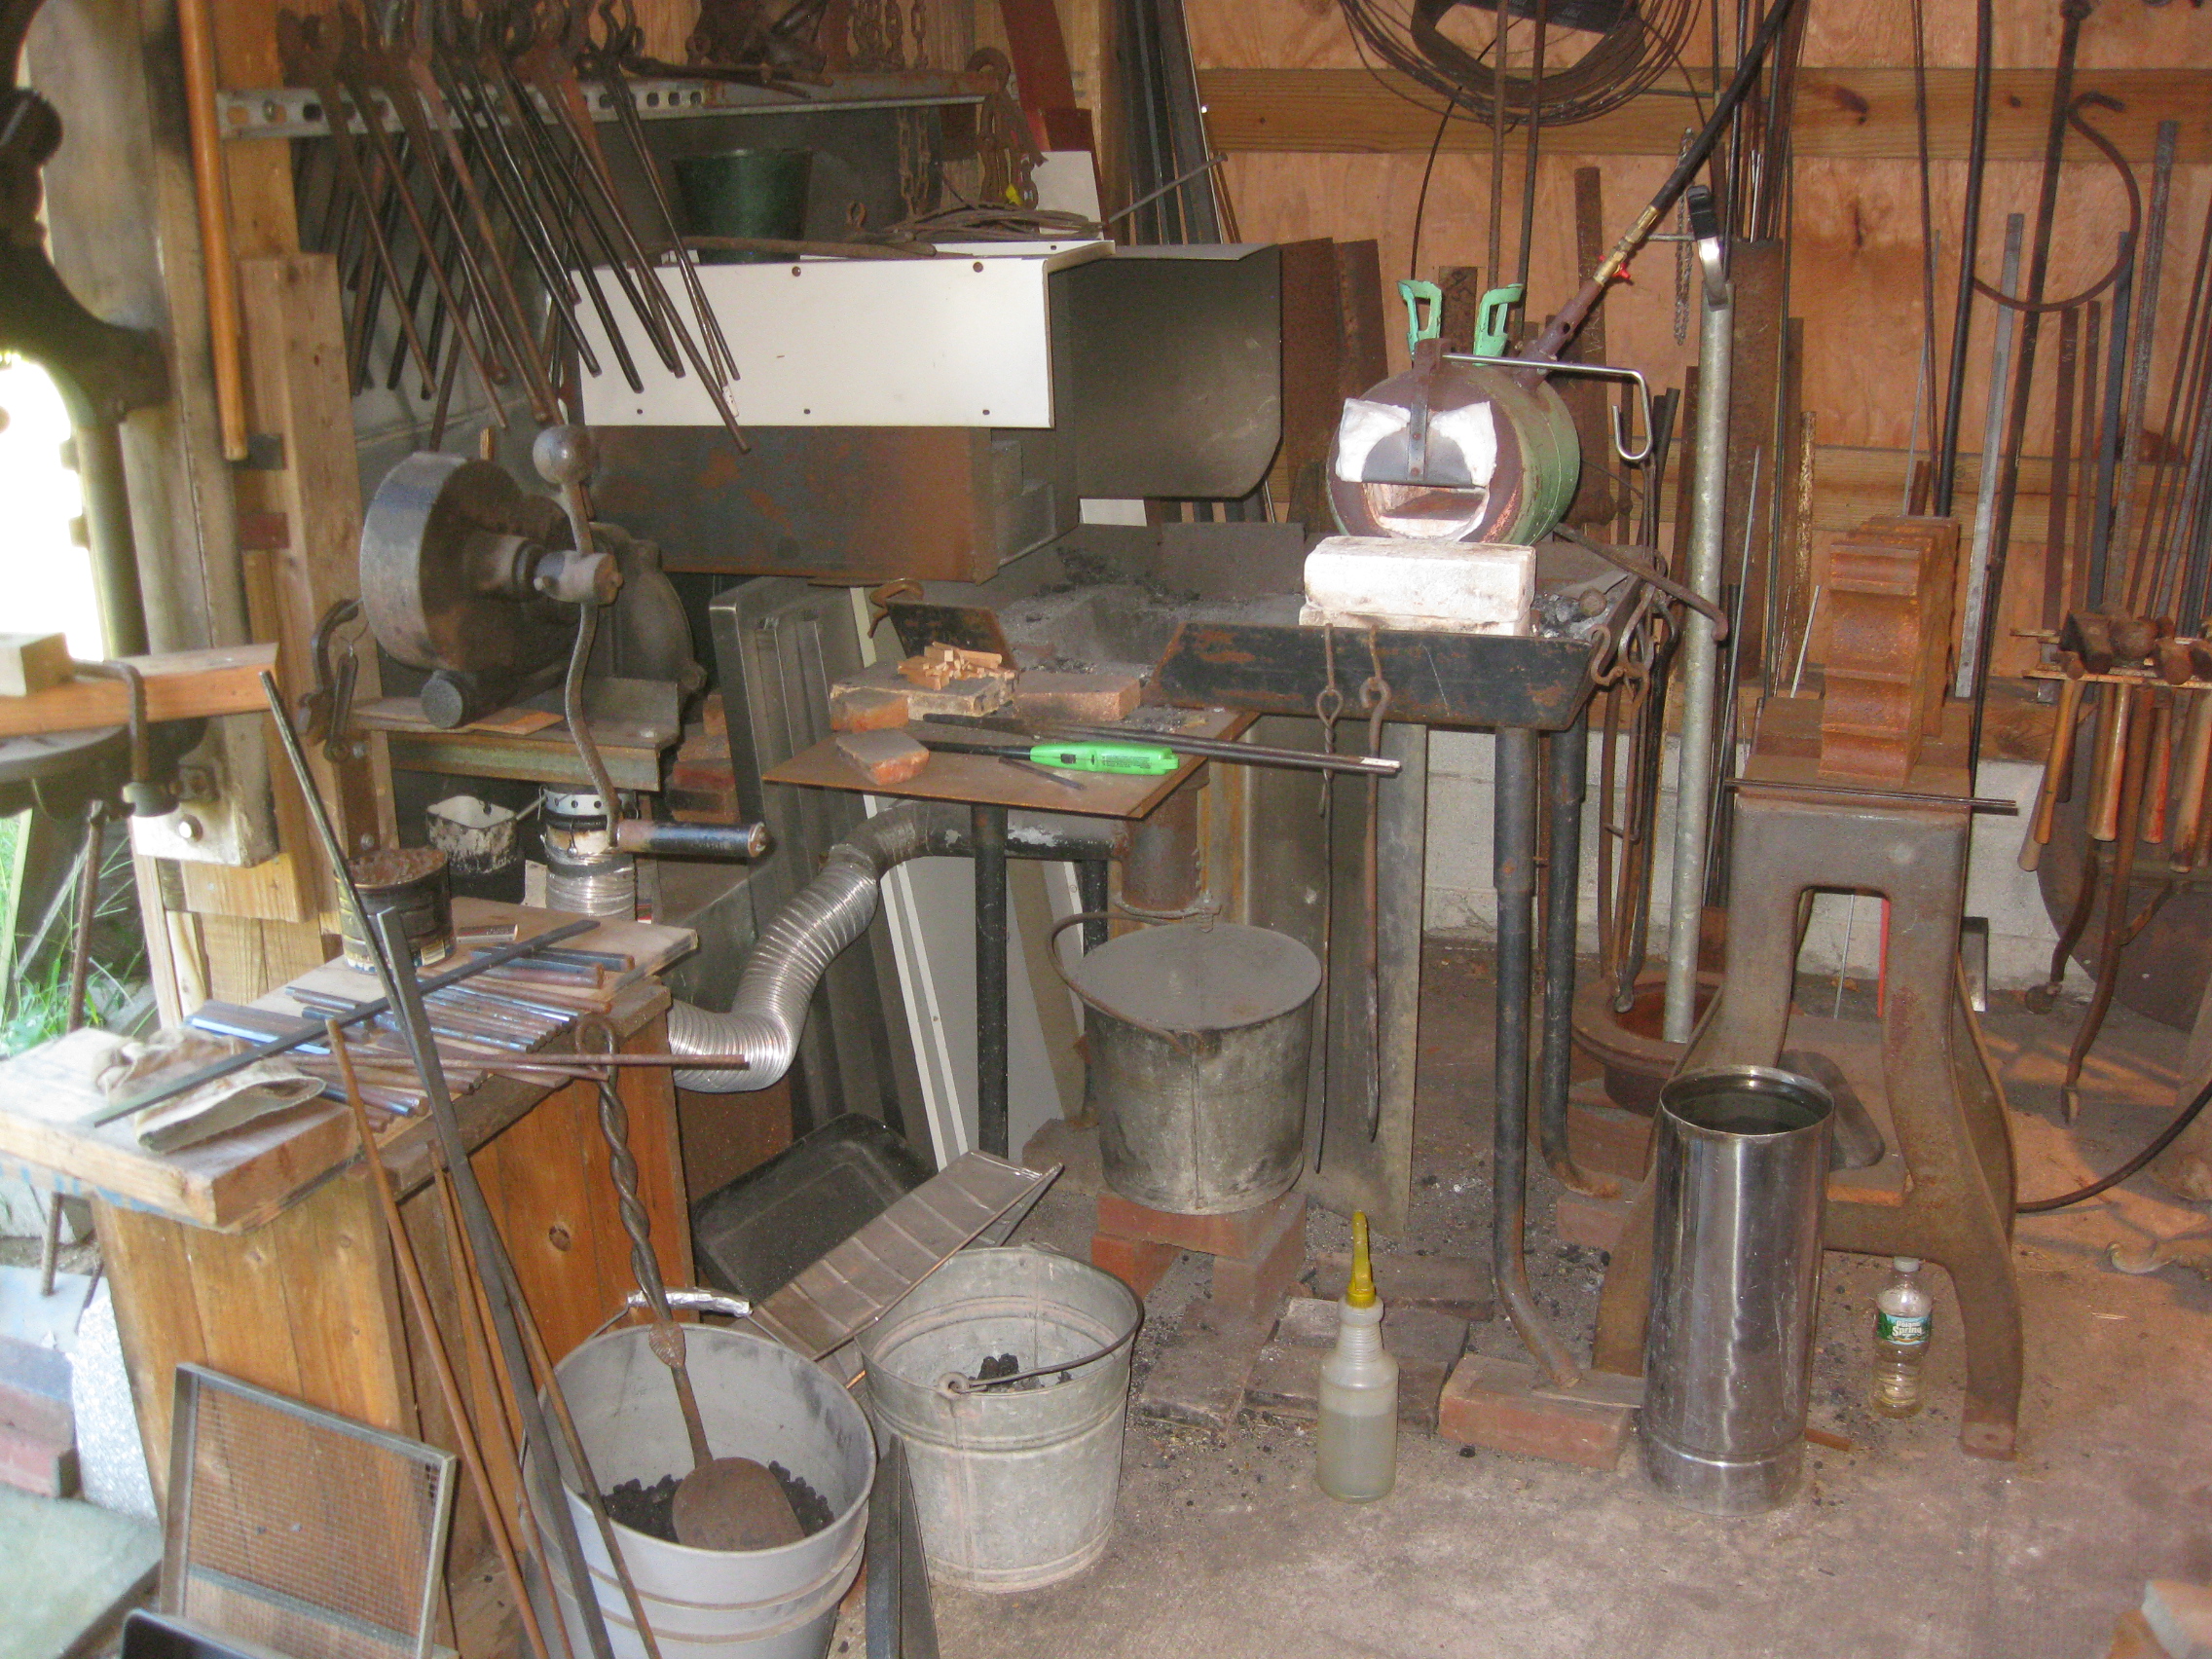
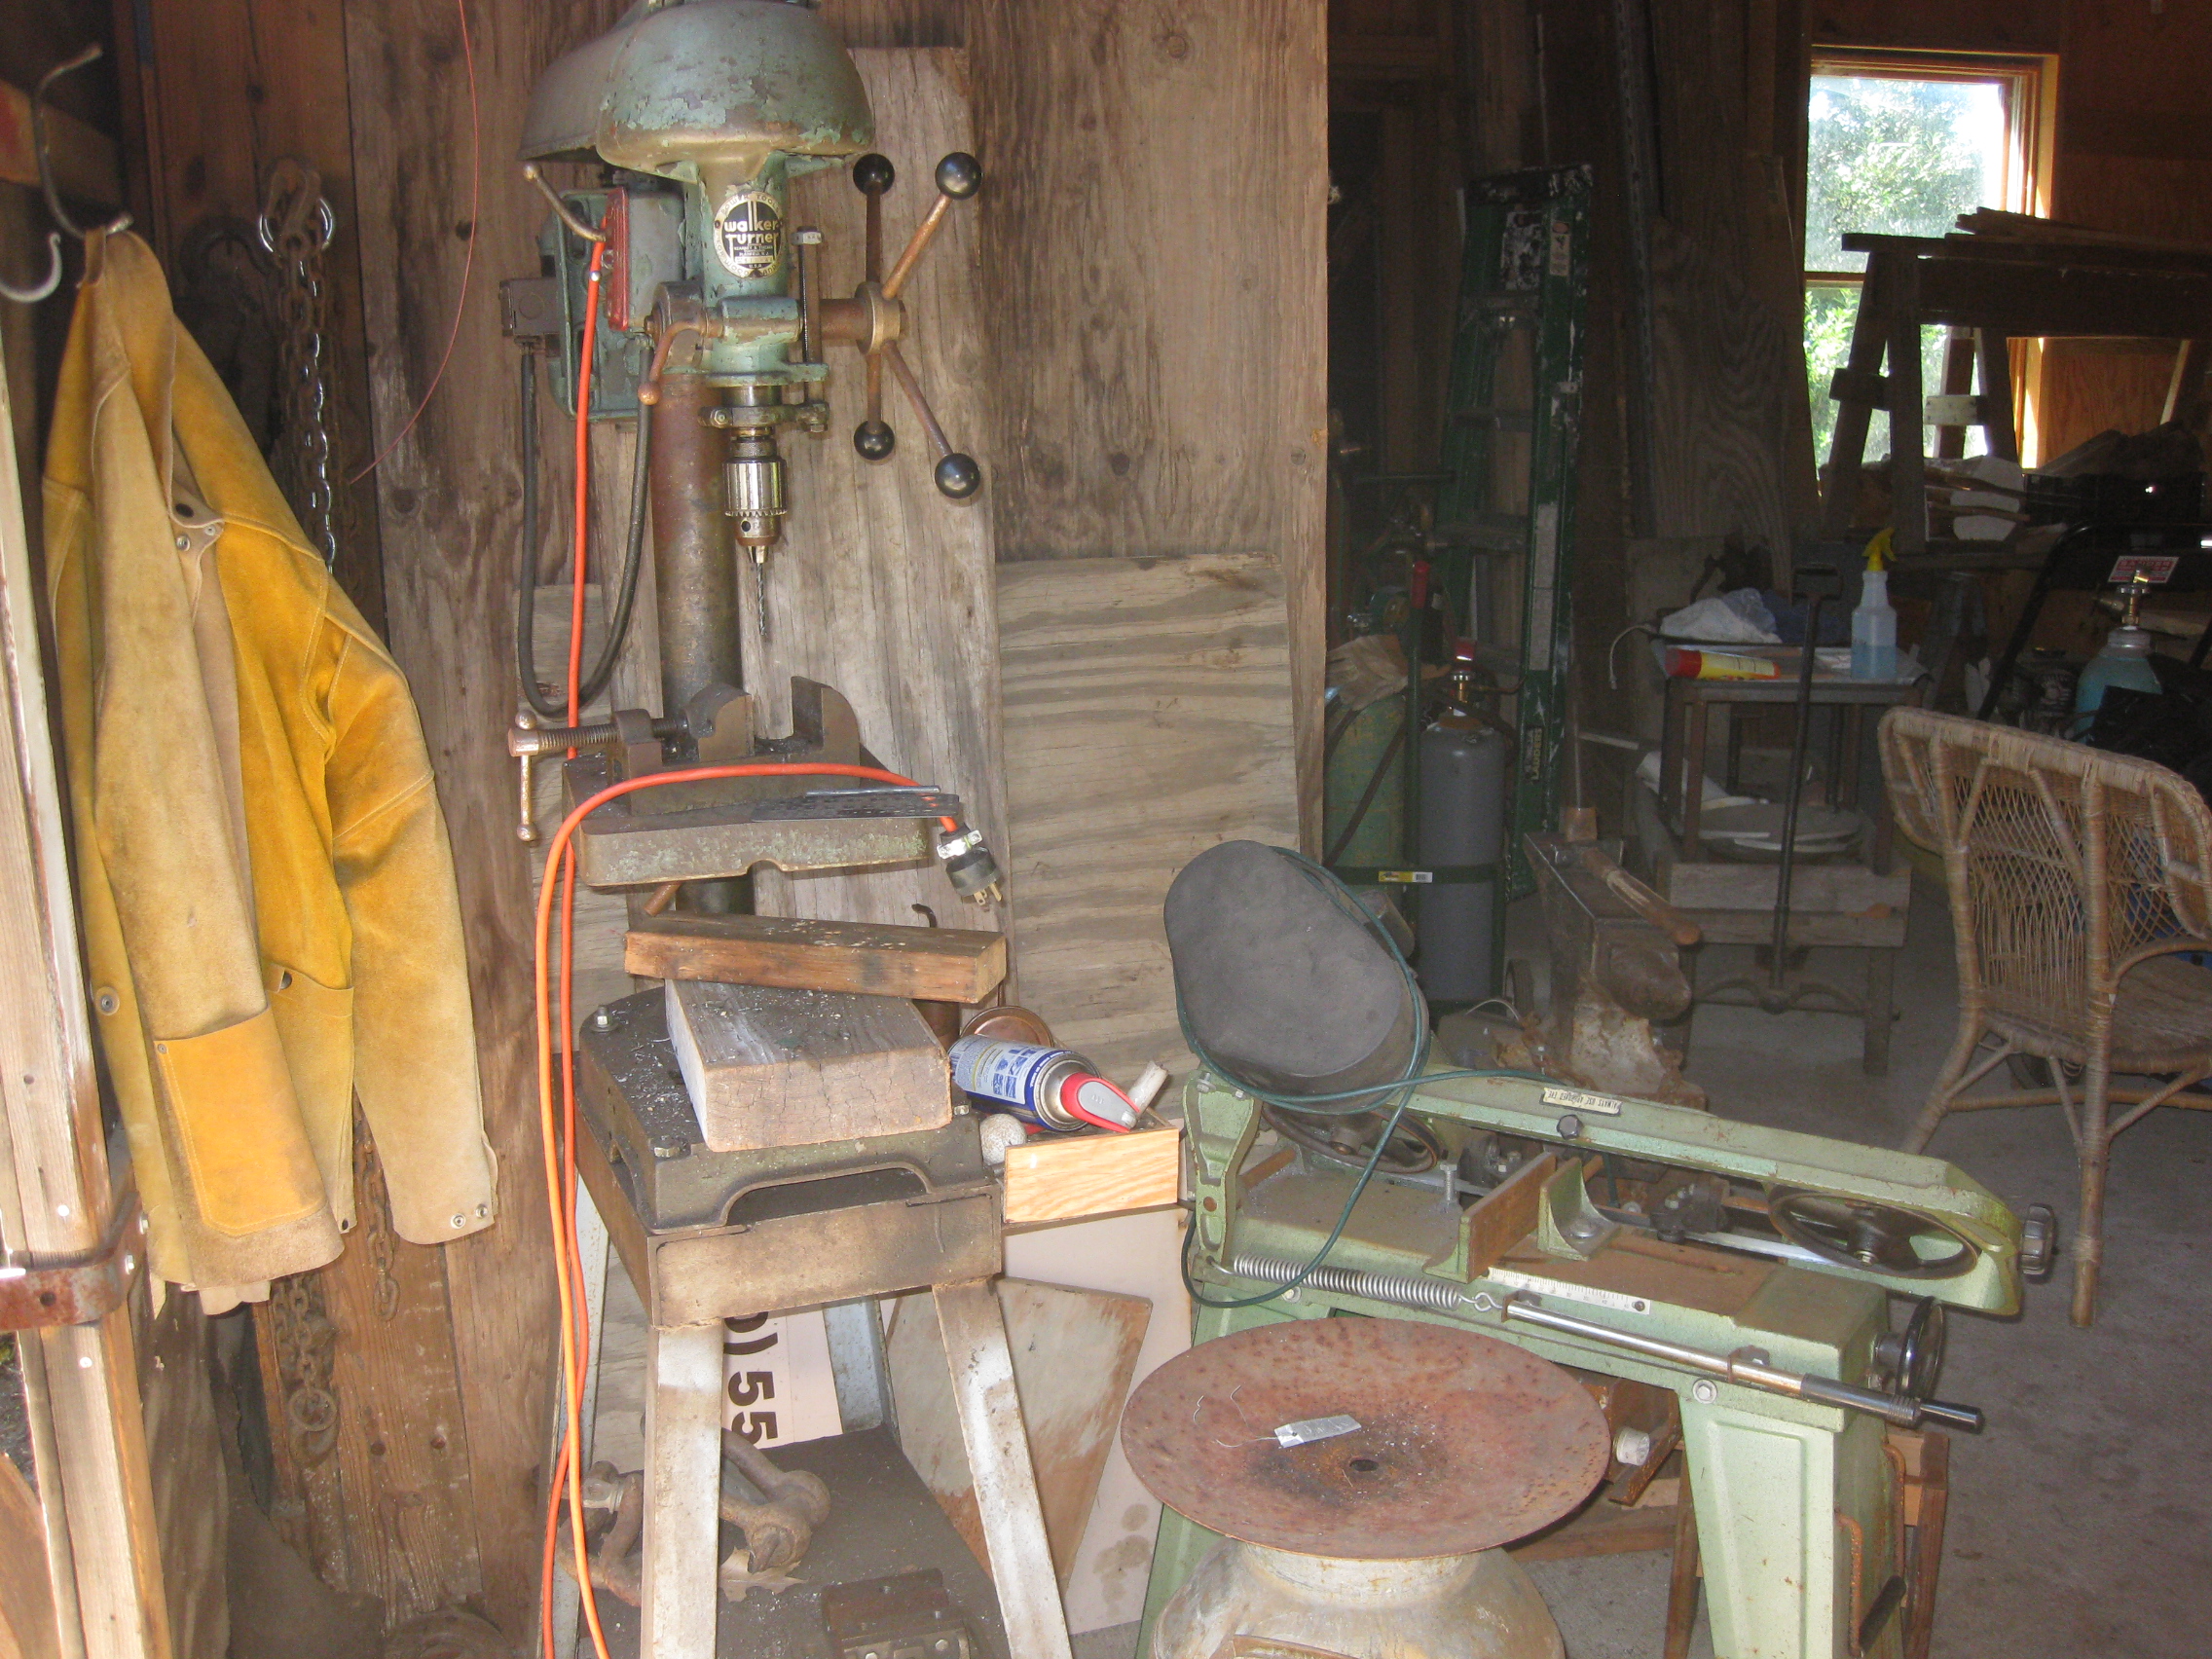
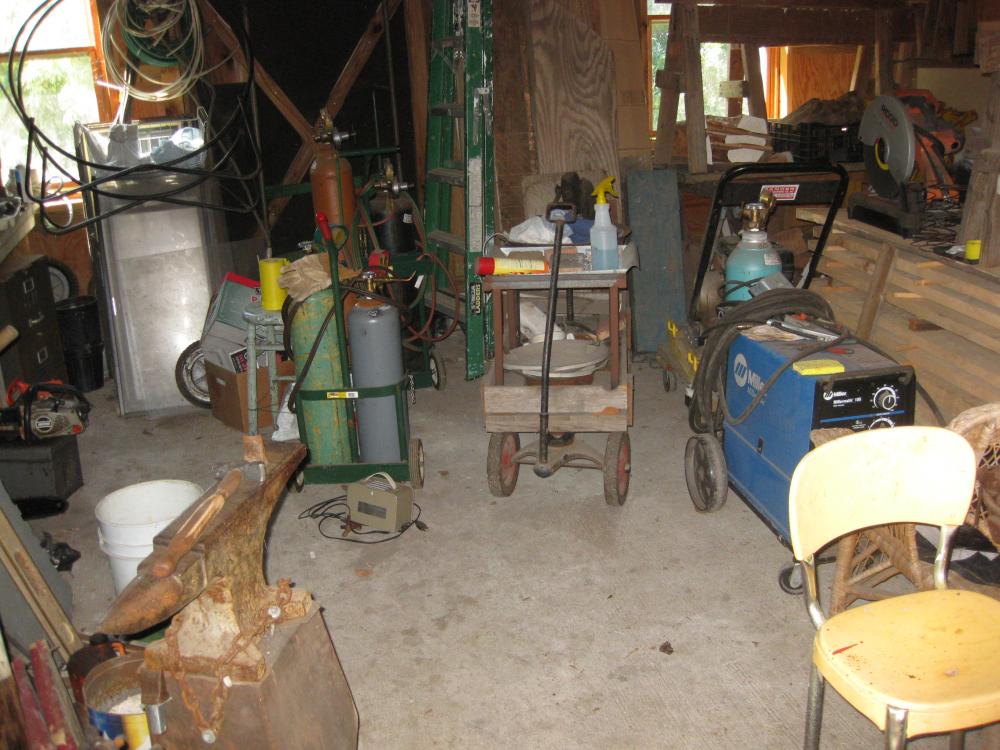
So, let's step inside and see wazzup. Just inside the door is my drill press and bandsaw, with a 103# HB behind it. Going clockwise, we see my welder and a few sets of OA tanks. The wagon holds my little Champion rivet forge. The legs were pretty roached out, so I cut them off and mounted it on a modified kiddie wagon, along with a table, and tong racks. You can also see some wood tucked in there. The next shot is my 270# Fisher, that I have set up for doing cold work- chisel cutting and texturing. The last shot is my 179# PW. I've told the story before, but I was on the road picking up this anvil when I got the text from my wife that I was officially a pop-pop. Shanna is 3 1/2 or so now, and loves to come out and tap on her anvil with some special hammers I keep around for her. More of the tour to come Steve


-
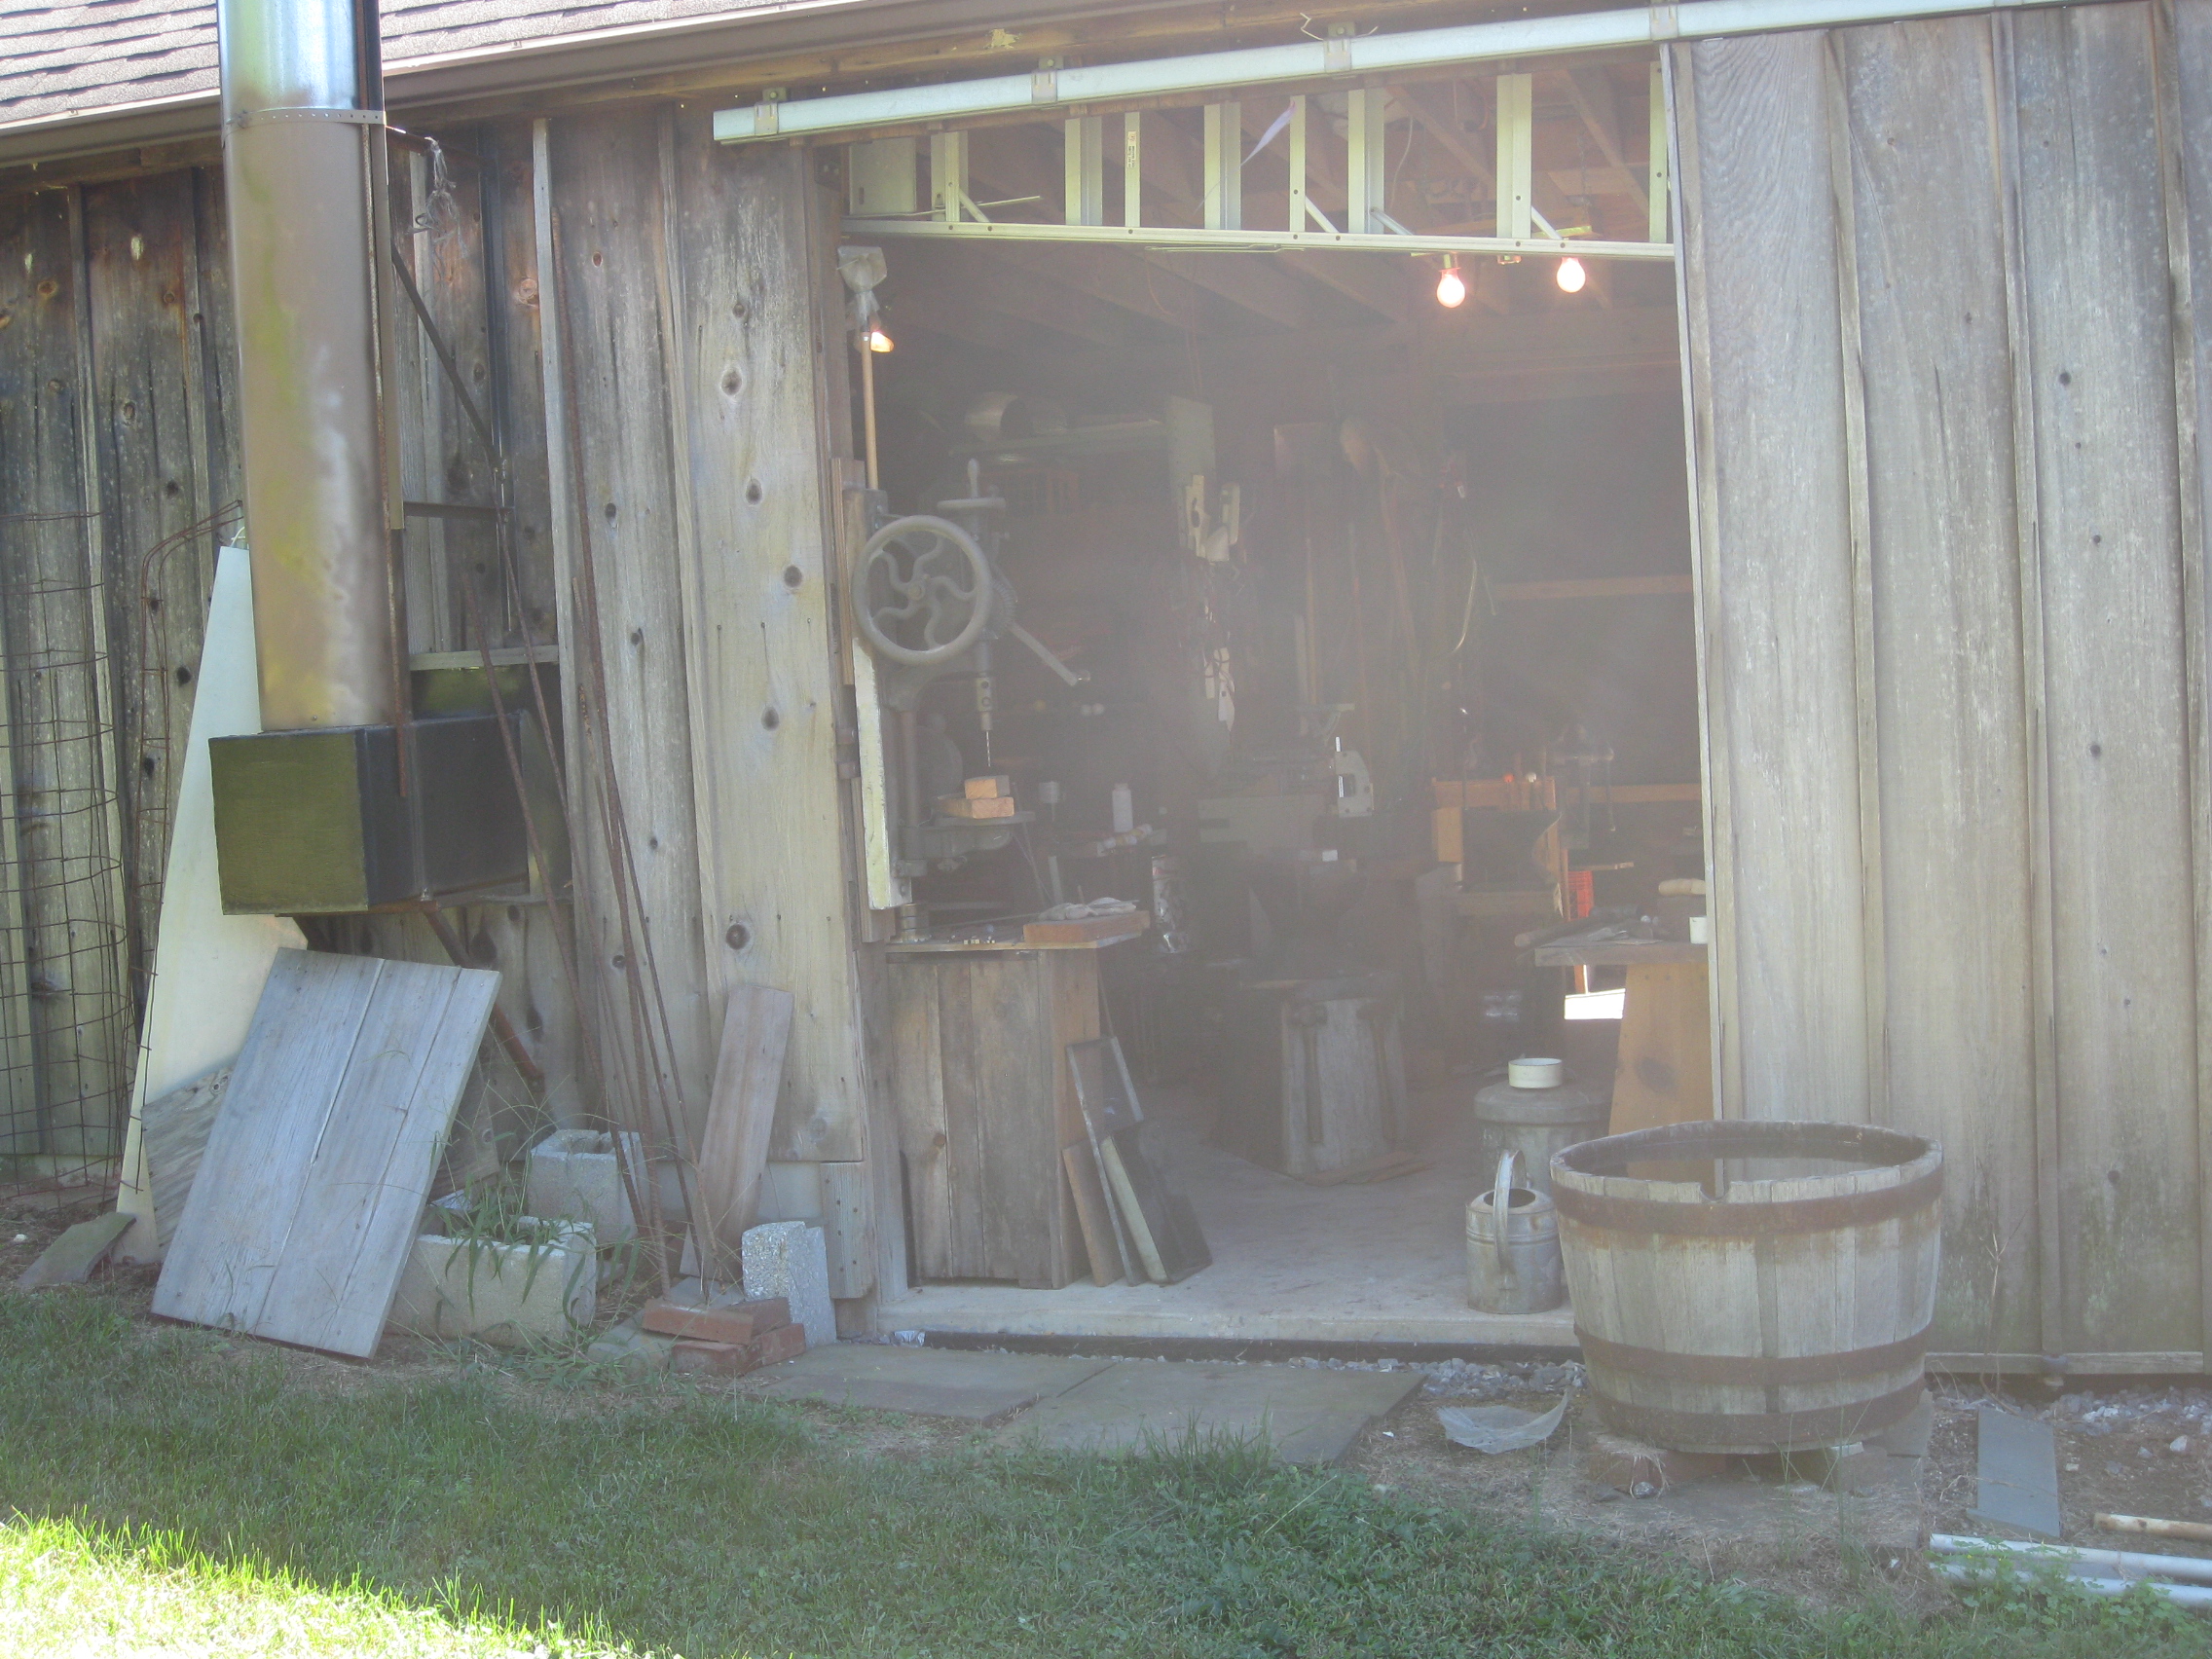
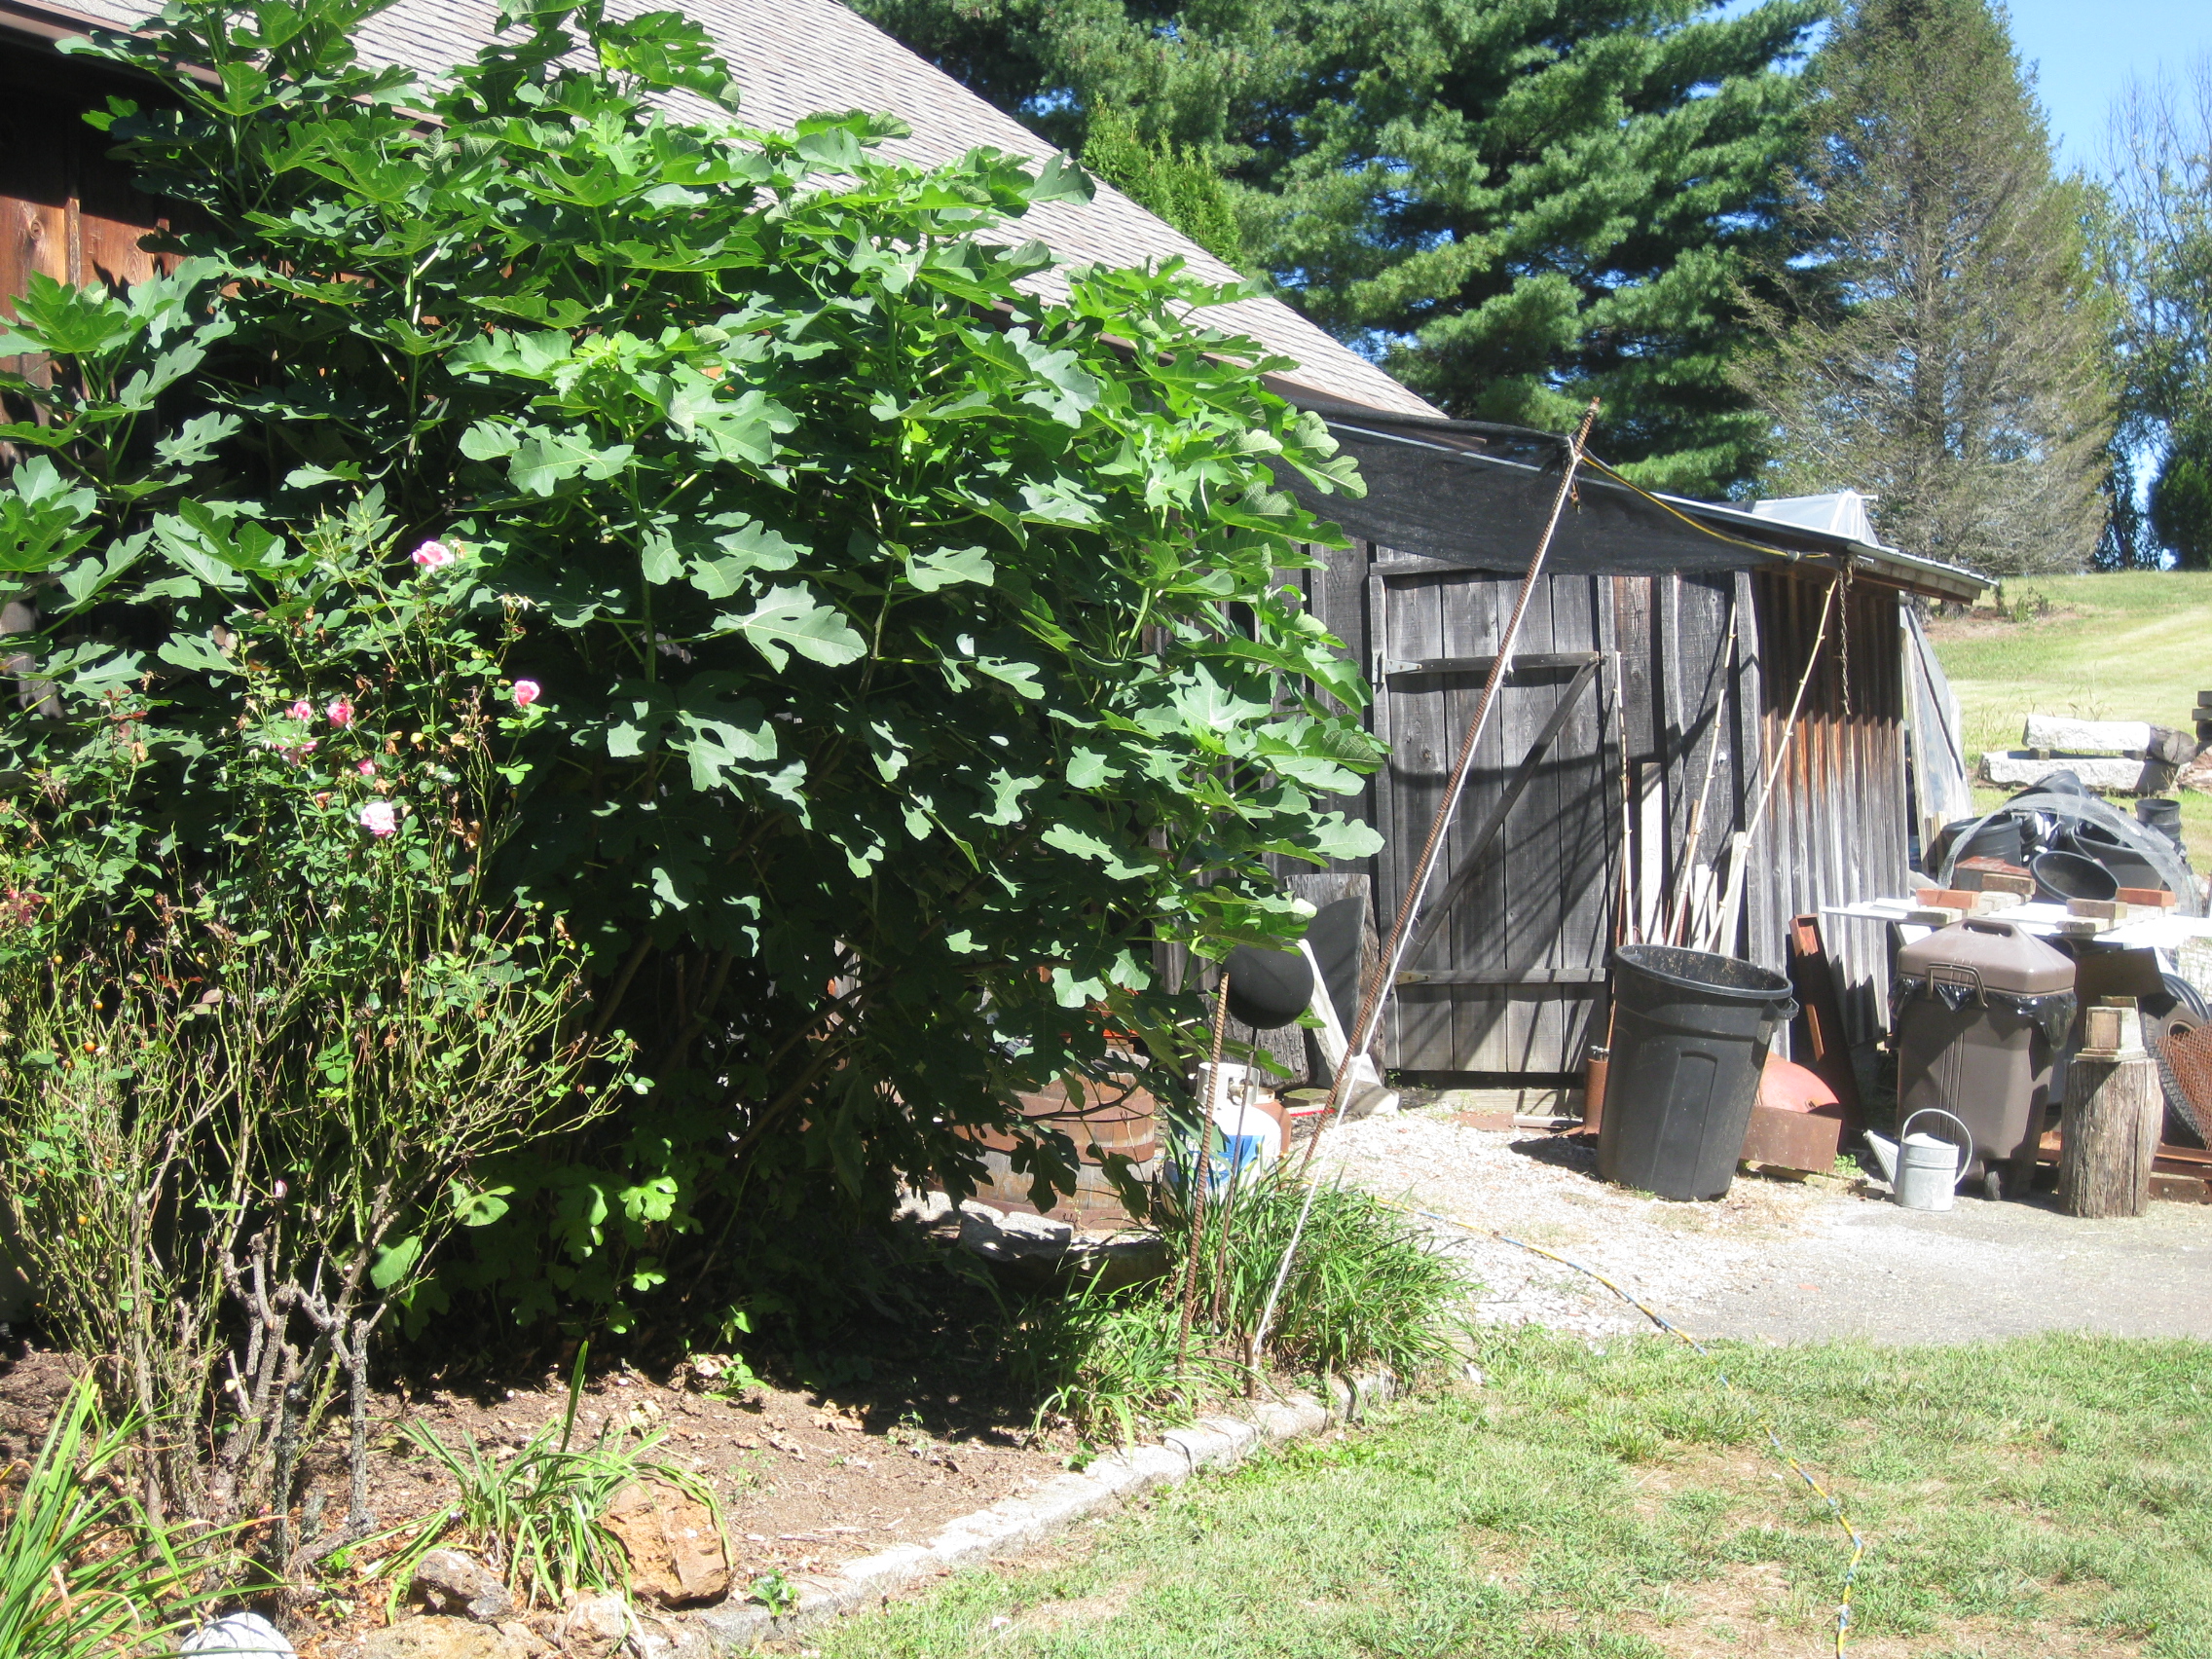
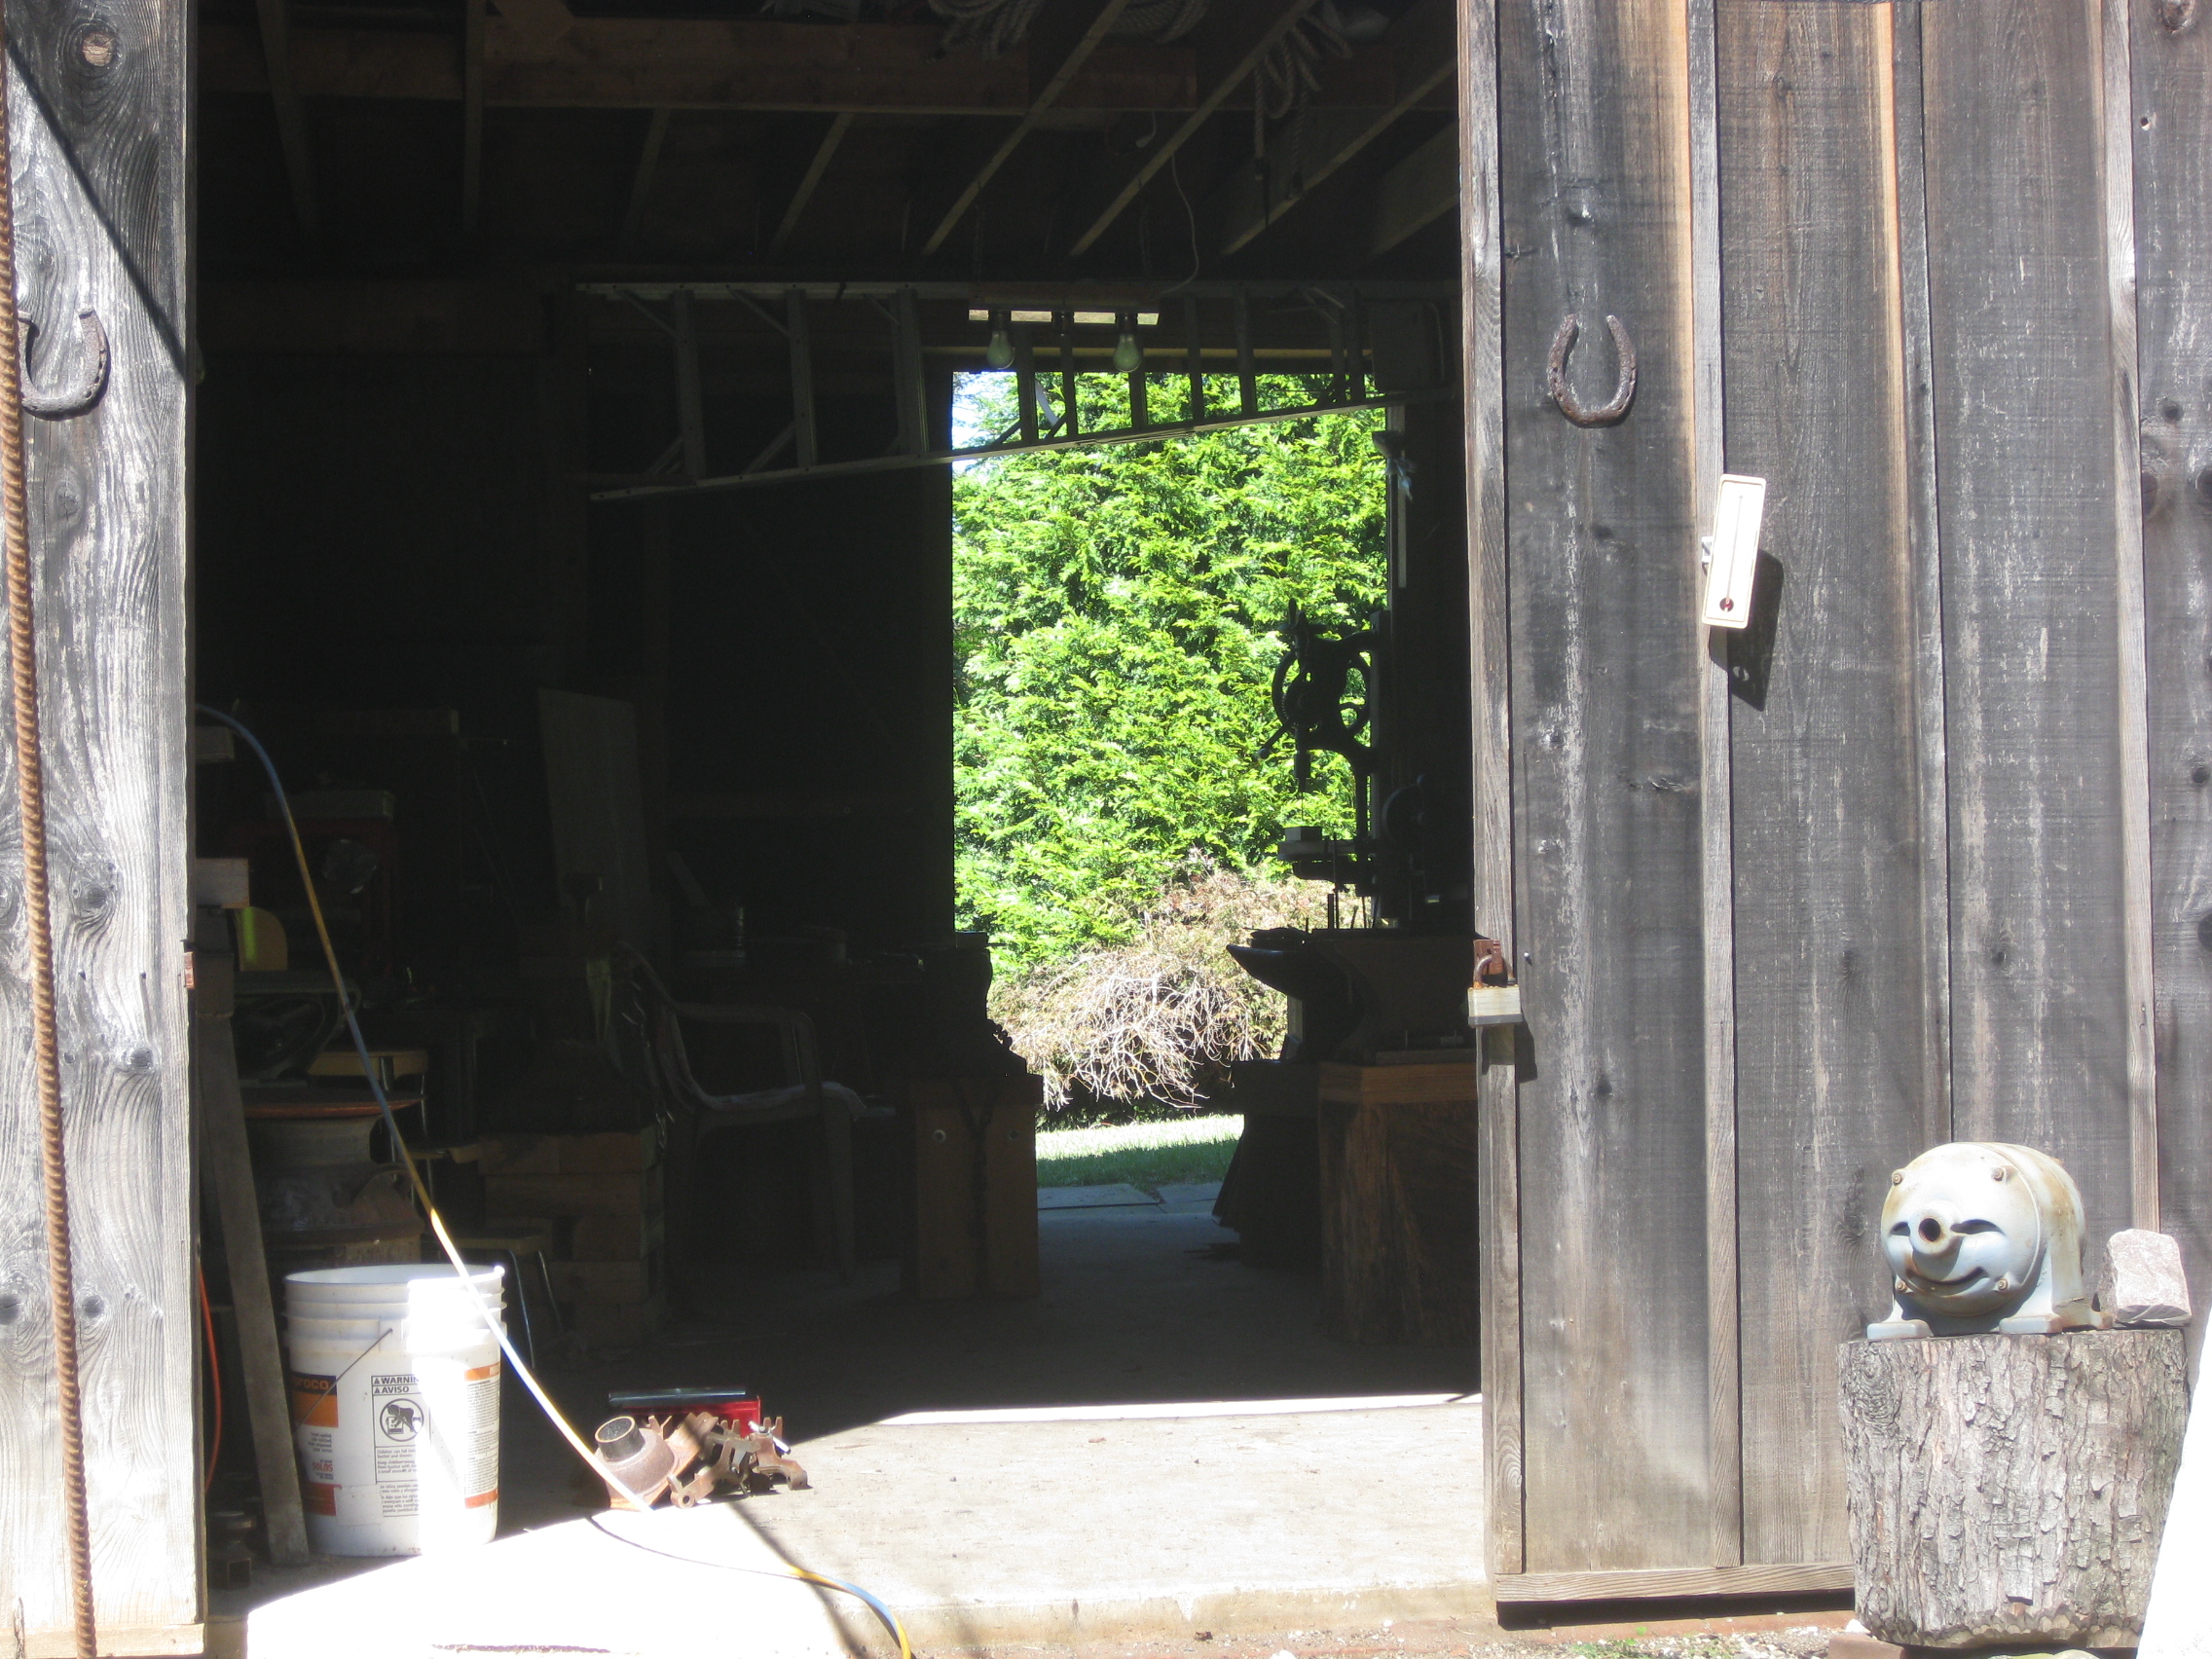
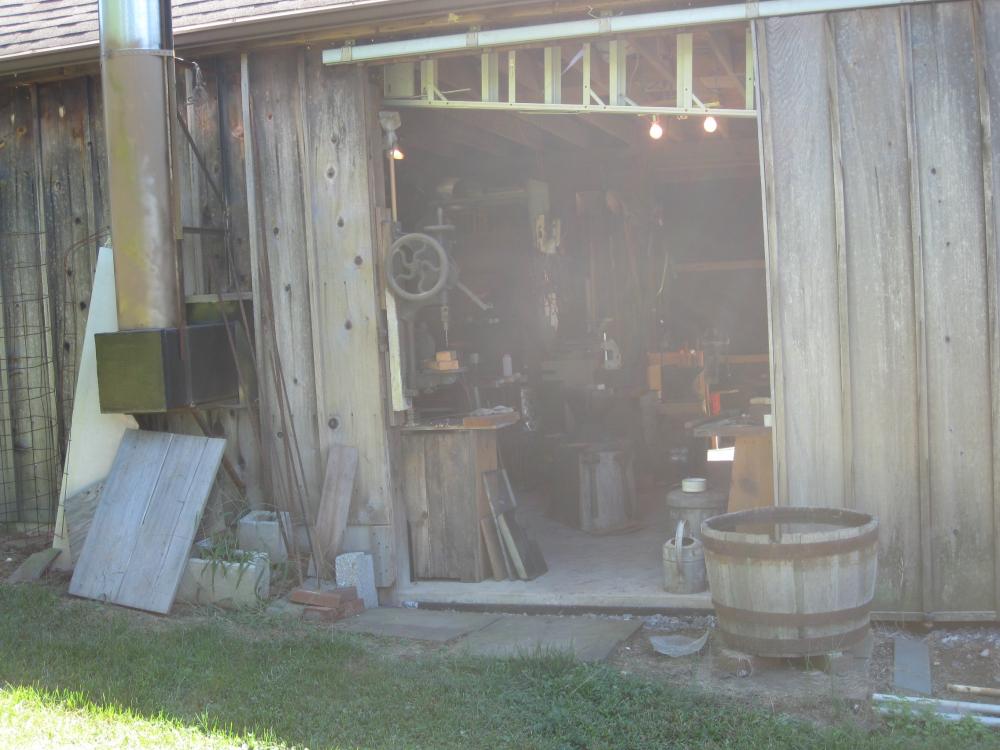
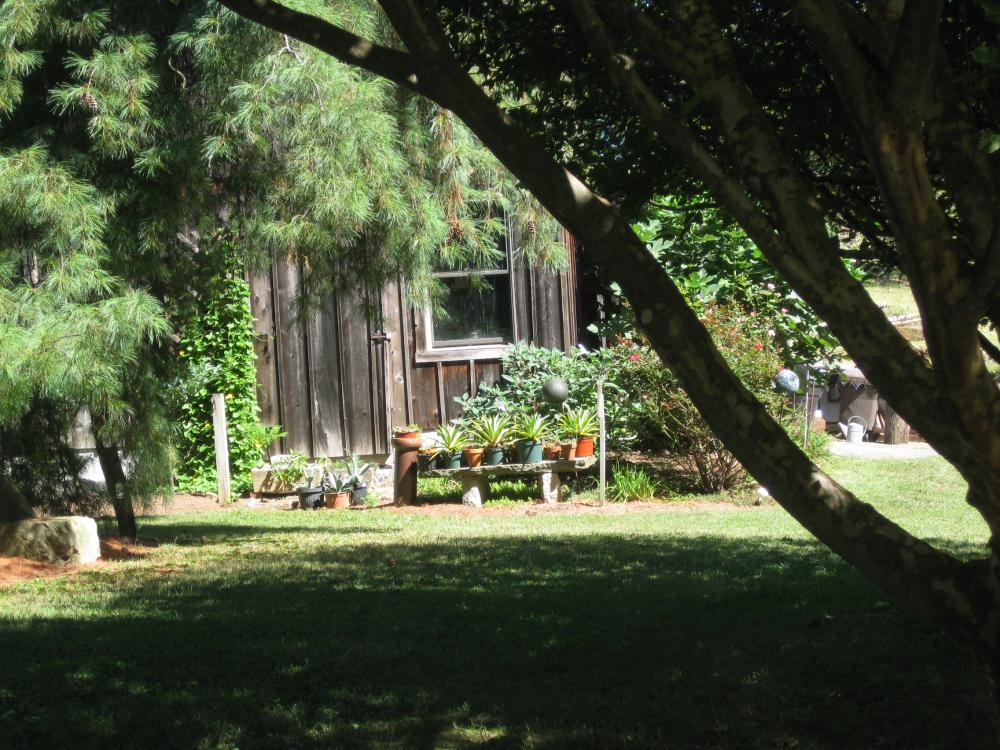
Well, I'm not leaving the forum in a huff, or even a minute and a huff. I'm moving from my home and shop of the last 33 years. Settling on the new place is in ~ 2 weeks, and some final negotiations on the current house. The official moving date is 12/7-8. I've spent a bunch of time packing up my shops- wood and metal. The movers will actually be taking the wood shop, I will do the metal shop. So, why am I boring you with all this stuff? I thought I'd document the move, from existing, to packed and loaded, to setting up my new blacksmith shop. If there is interest, I'll keep it up to the end. If not, I'll let it fade. Lets see how this goes. The current shop is in a 20x32' modified timber building with cedar siding ~ 120' from my back door. The forging part is ~ 12x 16' or so, with a few satellite stations. There is a 12'wide opening in the front, with double sliding doors. The rear is a single 8' slider. The rest of the space has been in support of my landscape biz for the last 23 years, and also holds some of my wood. ( I have ~ 2500 bd ft of mixed hardwood- mostly cherry, walnut and oak all nicely air dried, and awaiting it's destiny). So, that's the nutshell of it. I'll attempt now to post a few pictures, and take off from there. The first attempt is the approach to the shed from the house- yeah, it's there somewhere. Steve Well that seemed to work. Here is the approach around the corner, scooting past the fig tree, and head on to the front doors. You can see the little shed I built on the right to store more of my resources. Finally, the open doors, both front and back. You can see the evergreen hedge I planted so I won't bother the neighbors. Of course, they're about 250' on the other side of the hedge, but I like planting stuff.


-
I tried a sludge hammer head, but it was too soft and mushy to serve my purposes. Steve
-
I made mine from 1/2" mild steel, probably ~ 20" or so. I flattened ~ 5" toward the middle of the bar to 1/4 to 3/16", curved it to a ~270 degree arc, and adjusted so the remaining round parts were ~parallel and spaced 1/2" or so apart. I then welded that to a piece of box tube that fit the hardie hole. The flattened part acts as the spring and the round parts are the fuller. Hope that made sense. It was a quick and easy beginner project, and it's still in use. Steve
-
A drop is the waste that is cut off when cutting something to size. If the track people cut 12" from a 20' length of track , that 12" piece is a drop. A circle drop= when a fabricator cuts a 24" dia circle from a plate (a larger slab of steel) the remaining drop has some of the curves that can be used to make an anvil-type horn. What this all comes down to, is to expand your vision when it comes to making your own anvil. A piece of scrap steel 2' or more wide , with enough size in the other dimensions to provide some mass, will make a dandy anvil. The working surface of doesnt need to be much larger than the face of the hammer you're using. RR track is fine, but there are plenty of other options that might be easier to find. There is a thread in the anvil section where JWS made an anvil from a block of steel, 4 or 5 inches sq, by a foot or so long, dress the edges ad desired, and it's a beauty. Take some time and read thru the anvil section - there are other options out there. Then take some time reading thru the rest of the site. Steve
-
Sir? Sir? (turning around to look behind me) Ain't no 'sir' around here. I'm Steve. Steve (again)
-
That gives me some info- hard to tell too much more w/o details, but if you're into that anvil for $170, my opinion is that you did pretty well. Details will determine if you got a screamin' deal, worthy of admiration and praise. Keep us updated, and welcome to IFI. Add your location to your profile, so we all know where you're from (Yeah, I know it's in this thread). If you haven't already, set a spell and read through the whole site- I'm willing to bet most of your questions have been answered already. Steve
-
So, you buy it? Steve
-
More pix would help- from multiple angles. Give us some details- rebound, ring, etc. Any stamps or markings? I'm seeing the top of a (not badly) used anvil with a chalk number on it. I will commit to no more at this point. Steve
-
I picked up a Rigid on CL for 100, sold the diamond masonry blade on it for 40 and put it to use. There are 3 or 4 constantly listed on the local CL, at real good prices. Stop overthinking things and just grab something. (That's just me, though- YMMV) Steve
-
Wow what a shock! I enjoyed talking with him at he PABA meetings, and we had a great time carpooling down to ABANA '14 in DE. He will be missed. Prayers that his family will find peace and comfort. Steve
-
Many many moons ago, when I was a young buck in my new house, I bought a brandy-new table saw. It was a well known make (rhymes with 'belta') and came to me wired with a 110 plug. I was happy with my new toy, and took every opportunity to make small pieces of wood from larger pieces. I worked with the rhythms of the new saw and all was well with the world. For some reason, at some point, I opened up the connection box and looked at the wiring diagrams. Whaaaaa? It was wired up inside for 220. I looked, looked again, then once more for good luck. Yup, 220. Put a 220 plug on the end of the properly sized cord, plugged it into my 220 outlet, and ---- holy cow, the power the saw now had. I turned into a 2" thick oak- ripping fool. That saw was hungry, and I fed it well. Luckily, no damage to the motor. Steve
-
Oil of Olay puts a nice sheen on metalwork. Just don't let my wife know I told you. Steve
-
I would go with any tooling that has the potential to get real hot. You are right on with the punch idea. You could do slitters and chisels, maybe drifts. That's a start. Steve
-
I tried smokin' a squirrel once, but couldn't keep the end lit. Steve
-
Go ahead- fire it up! We want pics. Watch this- hold my beer, Bubba....... Steve
-
New Fire pot - How should I go about making the pan?
Stash replied to Gazz's topic in Solid Fuel Forges
I set my pot on the lower dip, so the it set higher above the table. I surrounded the raised pot with fire brick and 'pointed the gaps with fire clay. Works well for me. Steve -
Try cutting the sprouts in half, toss with oil, s and p, and mebbee some hot sauce, roast in the oven at 350 till done. Now, there's a good smell. You'll never boil them again. Steve Getting hungry now