

Goods
-
Posts
1,146 -
Joined
-
Last visited
Content Type
Profiles
Forums
Articles
Gallery
Downloads
Events
Everything posted by Goods
-
Now be careful say the word grind and anvil face in the same sentence here. It’s you anvil, do as you please. Keep in mind that most anvils have a hard high carbon face plate with a wrought iron body. Grinding the face can dramatically reduce its useful life. (There are also cast steel anvils, but the hardness doesn’t go that deep. It’s kind of hard to rapidly cool that much mass.) Yes, the sharper the corner you are using to set down or draw material out on the high the change of getting cold shunts. If you have a small sharp step, when you forge the next section down the steel will want to move in all directions, including over top of the step. Having a radius in the step helps reinforce that area, stopping some of the spread back towards to step. (I hope that make sense to everyone else?) If you are going to dress the edges back. Do a little at a time, you can’t really add it back, if you take too much off. (Did I mention that welding on anvil is another general “no no?” The previous owner of my Colombian anvil “repaired” the edges of it. He used Std MiG wire. Some chipped away from HAZ cracks, some just work hardened and started to flake away… it is kind of funny that I can dress some of the flaking issues with a file pretty easily. It can be done right, but that take money, time, knowledge and skill!) (Not trying to be hard on you over the grinding, but others reading this may benefit from knowing.) Keep at it! With this being your first go, I can’t wait to see progress pictures! David
-
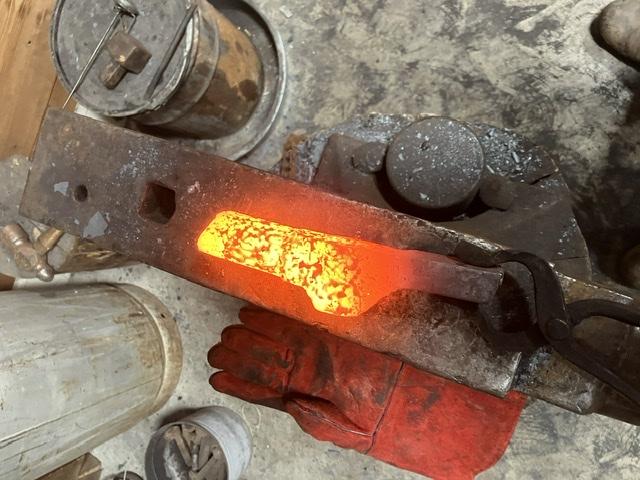
Honestly, pretty amazing for a first forging! Your off to a good start. The location of the crack is a very common location for a cold shunt when doing the set down behind the reigns. If you start to form the step, then offset the the step in the next heat an “over lap” can form. If you see this happen, file it out immediately. Continuing to forge out these “over laps,” or cold shunts, will usually end up in a crack or simply two separate pieces. Keep it fun, David
-
You’ll love having that sitting right by the forge. I have a piece of 3” round I sit on the forge when doing forge welds on small stock and it greatly increased my success rate. Keep it fun, David
-
These are usually made of coils spring, but what diameter? All the coil springs I have are 1/2” diameter or smaller. They always seem too small for most punches, tongs, etc. I’ve been keeping my eye open for large ones though. (Last weekend at our hammer in I made a hack out of the shop owner’s 1-1/2” coils spring. That might be a bit large for most things…) Keep it fun, David edit: I thought I posted this yesterday, something strange much have happened. (On my end that is.)
-
Good eye Daswulf. Gantry, trolley, and chain hoist all rates at 2tons. I have to move, disassemble my power hammer, fill the base with sand and actually anchor it down. (It bounces about quite a bit, and it’s kept from walking by a come-along in the gonitas. Just to make-shift to stay that way) After 800lbs of sand in the base it will be right at 2ton, if I need to move it again. Properly mounted and with the sand, it should be a bit quieter and be more efficient. Keep it fun, David
-
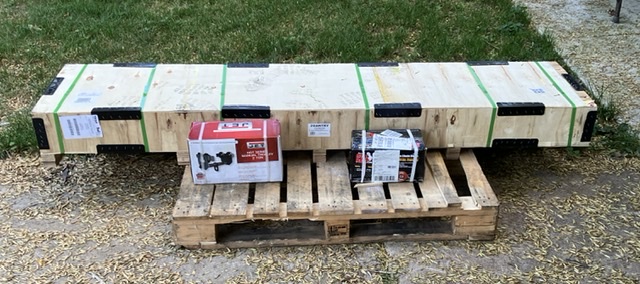
I was very surprised to see this waiting outside my shop when I got home. Ordered Saturday and was supposed to call for delivery… Just got to make some time to get it setup. Then, the real work will start. Keep it fun, David
-
Walmart usually has paraffin wax with the canning supplies, probably in most farm stores as well for the same purpose.
-
I don’t think that an upset corner. It’s a Habberman(sp?) bend, isn’t it?
-
I can’t wait to see the next round of pictures!
-

What did you do in the shop today?
Goods replied to Mark Ling's topic in Blacksmithing, General Discussion
Did you forge the mass down or fold and forge weld the end for the bowl? keep it fun, David -
You may want to check out the Mr volcano forges. There cost is pretty low and have received multiple good reviews. For what you’re wanting to forge, I’d stick with a smaller forge. You can only work so much steel in a single heat by hand anyway. Keep it fun, David Looks like TW and I were posting at the same time… and same advice. What’s the chances?
-
Welcome aboard! Careful, YouTube has some pretty bad and sometimes dangerous blacksmithing videos. There is a page on here with links to well vetted videos. The best course of action is to find a smith local to you that you can learn from. Putting your location in your profile will help us get you setup with someone. A good source is to look for is your local ABANA affiliate. I’m a member of the Indiana Blacksmith Association (IBA) and the local chapter meets monthly. I showed up a few years ago and the smiths there got me going in the right direction pretty quick! Keep it fun, David
-
It’s a horrible useless stake anvil. Just PM me and I’ll send you my address so you can send it to me for properly disposal . Keep it fun, David
-
What did you do in the shop today?
Goods replied to Mark Ling's topic in Blacksmithing, General Discussion
Went to our hammer in yesterday. I was just playing around a bit and tried something new to me: Made from about 24” of 3/8” round. I also spend some time running the host’s 50 little giant. He’s basically done rebuilding it and needed someone to check it out. I made a hack for him out of about 4” of maybe 1-1/2” diameter coil spring. (Sounds like it was an old car coupling spring.) I think he’s got a bit more tuning to do on the hammer… Keep it fun, David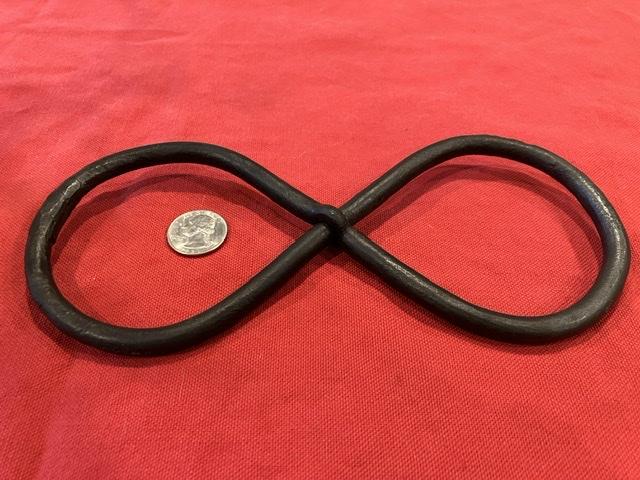
-
Chubby, I like the use of the cam down casters. Where did you find those? (No links, just key search terms will work. I don’t want to make you violate usage terms…) Keep it Fun, David
-
Great, we love pictures. Keep it fun, David
-
What did you do in the shop today?
Goods replied to Mark Ling's topic in Blacksmithing, General Discussion
The first attempt is not scrapped yet. I was thinking it could be made down into a smaller hammer, even though the eye would be strangely large. I never thought about forge welding material on. Not sure how easy forge welding the material is though. It fork lift tine. Crazy tough. Could be 4130, 4140, 4340, or even 8360(?)… Not I’ve got another thing to add to my list, forge welding trails? David -
What did you do in the shop today?
Goods replied to Mark Ling's topic in Blacksmithing, General Discussion
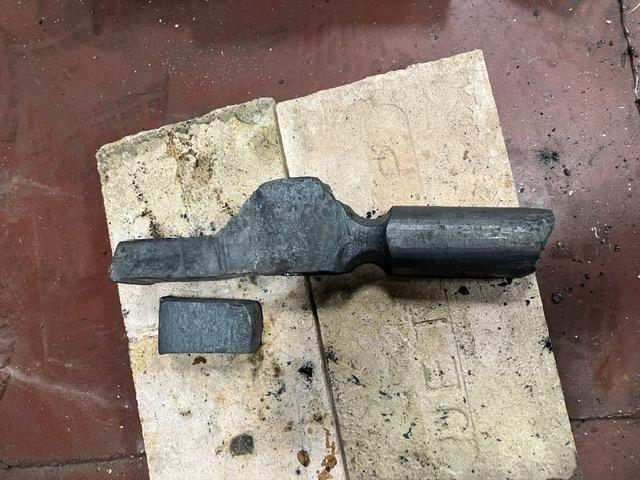
Daswulf, one of these days I’m going to try a throwing knife. I’ve had one on the list for a while now. You might have bumped it up in priority. I got a couple more hours in the forge tonight and got back to work on my carpenters hammer project. Way more material than I needed, but the steel moved more as I expected it to with the extra mass on the ends. A lot of work to do yet, but the major forging is done. Next step will probably be putting it on a cut of wheel diet. Probably a pound of steel to loose. Side question, how much of a radius do you like on a side set? I put about 1/8 radius on mine, but it would have worked out better on this project. Keep it fun, David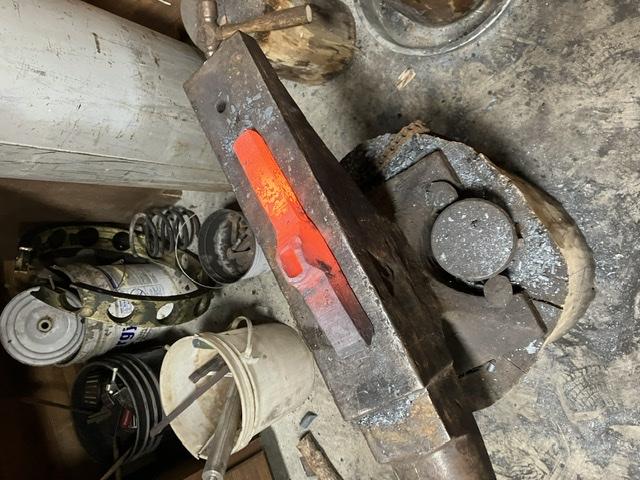
-
If you don’t want to remove the screw, cut the nut in half and set it up as a clamp on nut. Should work just as good as a jam nut when tightened, and would be easy to loosen and spin to the next position. Keep it fun, David
-
Passivating stainless steel exposes more chrome on the surface of the steel. The chrome reacts very quickly with oxygen in the air to form a protective layer preventing the iron from oxidation. You can polish it up after passivation, just don’t use any buffing material that was used on regular steel previously, it will basically negate the passivation process by depositing iron back on the surface. (All, if I’ve missed anything here, please add more information or corrections…) I personally have never neutralized a stainless steel part after passivation, just rinsed really well. I can’t see it hurting anything and could help… Keep it fun, David
-
What did you do in the shop today?
Goods replied to Mark Ling's topic in Blacksmithing, General Discussion
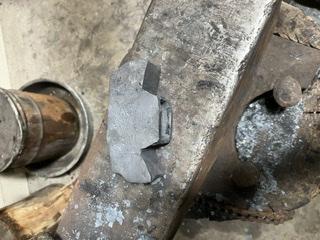
Well, I spent 6hrs in the forge today. I probably shouldn’t have. The heat/humidity is crazy. I guess I calculated my billet size wrong, because this won’t become the carpenter’s hammer I was aiming for: So, I started over and made a few hooks: The new billet is very much oversized (2”x1-1/8”x6”), but I can always cut the ends back if it works out. Hooks aren’t anything special, but I am pretty happy with the one on the bottom of the picture with the forge welded collar in the center. Keep it fun, and stay hydrated! David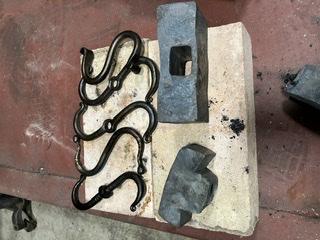
-
What did you do in the shop today?
Goods replied to Mark Ling's topic in Blacksmithing, General Discussion
John, is that going to speed up yarn bowl production? Looks good! David -
I started forging about 4yrs ago at the age of 44. I came home from work one day a found that my son, 15yrs old at the time, had built a forge and hammer head anvil. I supported his efforts and ran into an old friend who pointed us toward the local chapter of the Indiana Blacksmiths Association. After that I was hopelessly hooked and my son found other interests. At this point I can hold my own and I am throughly enjoying the hobby. Could I become a master, maybe if I quit my job and went full time, but I really don’t want to give up the comfortable life my family enjoys. I believe to become master you have to: have some natural talent, put the time in, never be satisfied with you work, and be willing to sacrifice. I’m not in the position to do that myself. I am having one heck of a good time though! Putting your location in your profile and we could be more helpful getting you setup with a local group. (You could be close by and I could help get you setup, right now, I can’t tell…) YouTube can help, but there’s a lot of bad/dangerous info out there. There is a page on here of good channels that will point you in the right direction, but in person in the best way to learn. Don’t try to setup in your basement. Spend some time digging around on here, there are several good examples of mobile setups. Up until my new shop was finished, that’s how I managed. Takes a bit more time setting up and tearing down each session, but it’s still worth it. Keep it fun, David
-
What did you do in the shop today?
Goods replied to Mark Ling's topic in Blacksmithing, General Discussion
So John, did you sell out of the custom forged yarn bowls while the creating artist made a special appearance at the store? Billybones, I’m with you on the social media thing. IFI is my only “habit” and that takes up enough time. (Did I ever mention that I’m very grateful of all who post here and the moderators who keep things straight!) I had a couple hours in the shop tonight. I cut the blank for my next significant project. Started drilling a eye, (unusual approach for me, but I’ve thought about a lot and I think it’s the best way forward on this forging) the drilling wasn’t going well, so threw it in the forge and vermiculite to anneal. During the down time of the multiple cuts with the power hacksaw for the blank, I started building inventory of s-hooks. Thought I’d get six done, only got 4 done: Starting stock was 8” of 3/8” round. (Almost forgot, I made a 7/16” slot punch for the drifted hook.) I haven’t done any hooks in a while and worked without a jig. Took me longer than I wanted, but they were a very good exercise. I’ve got a demo coming up and really need to get some inventory and work on some basics. Keep it fun, David
-
What did you do in the shop today?
Goods replied to Mark Ling's topic in Blacksmithing, General Discussion
I understand where you are coming from. I’m a little different, I kinda loose myself in the persona of the fair, if that makes sense. My wife has been going to renfairs since she was a young child and we’ve been attending since we got married. I hate to add up the cost of all out “gear” even with me making most of the kids outfits. Keep it fun, David