Judson Yaggy
-
Posts
1,804 -
Joined
-
Last visited
Content Type
Profiles
Forums
Articles
Gallery
Downloads
Events
Everything posted by Judson Yaggy
-
Looks like you need to grind a slightly bigger radius onto the corner of your anvil. Either your hammer or the anvil edge is shearing off a little portion of the shoulder of your workpiece and smooshing it down into the neck area. This causes what blacksmiths call a cold shut or engineers call a stress riser. Thus the crack and breakage. A few hundred more pieces and you should gain the hammer control to avoid this without tool alteration. Either way works, but the key is practice, practice, practice...
-
Help identifying anvil maker
Judson Yaggy replied to Pr3ssure's topic in Anvils, Swage Blocks, and Mandrels
Unless you are only working outside (and perhaps even then) you will need a hood/chimney to work with coal. Coal smoke is bad for you, specifically for your lungs, and bad for your tools as it will make them rust faster than normal. Making a quality tool be it a hood or a hammer is worth the effort in the long run. Do your research, do your best to build it, and be proud. Shortcuts in this trade lead to frustration at best and injuries at worst. -
Anyone near me (South Shore, MA)?
Judson Yaggy replied to Cavpilot2k's topic in New England Blacksmiths Assoc.
Hi everyone, Sounds like there is a get together in Foster, RI tomorrow. This came over the NEB email list Thursday. Hope it's not too late for you southerners to make it! If you are not on the NEB email list and would like to be drop me a line and I'll get you in contact with the manager. Just a friendly reminder, there is a meeting this Sunday in foster, RI. Starts at 11 and goes too about 2. We are going to be forging and getting this antique shop up and running again. Might even have a friendly competition and a door prize, if we get enough people. Call me at 401-484-1749 If you are able to make it. On Sep 20, 2017 9:36 AM, "Russ Jennings" <russ.jennings@gmail.com> wrote: Hello all, We had a good little meetup at the Red Rock Farm in Foster RI, and we're headed out again this Sunday to finish up. We're hoping to have a working forge by lunchtime. Our host is providing burgers and snacks, and we'd love to have a few more people show up. -
Are you forging it or just stock removal? If forging go with a silicone bronze, and don't work it past a dull red heat. Or else. Fair warning, bronze is not cheap. Here in the USA I've always ordered from Atlas Metals. Google them, if we were in the knifemaking section I'd give you a link but everywhere else on IFI commercial links are a no-no.
-
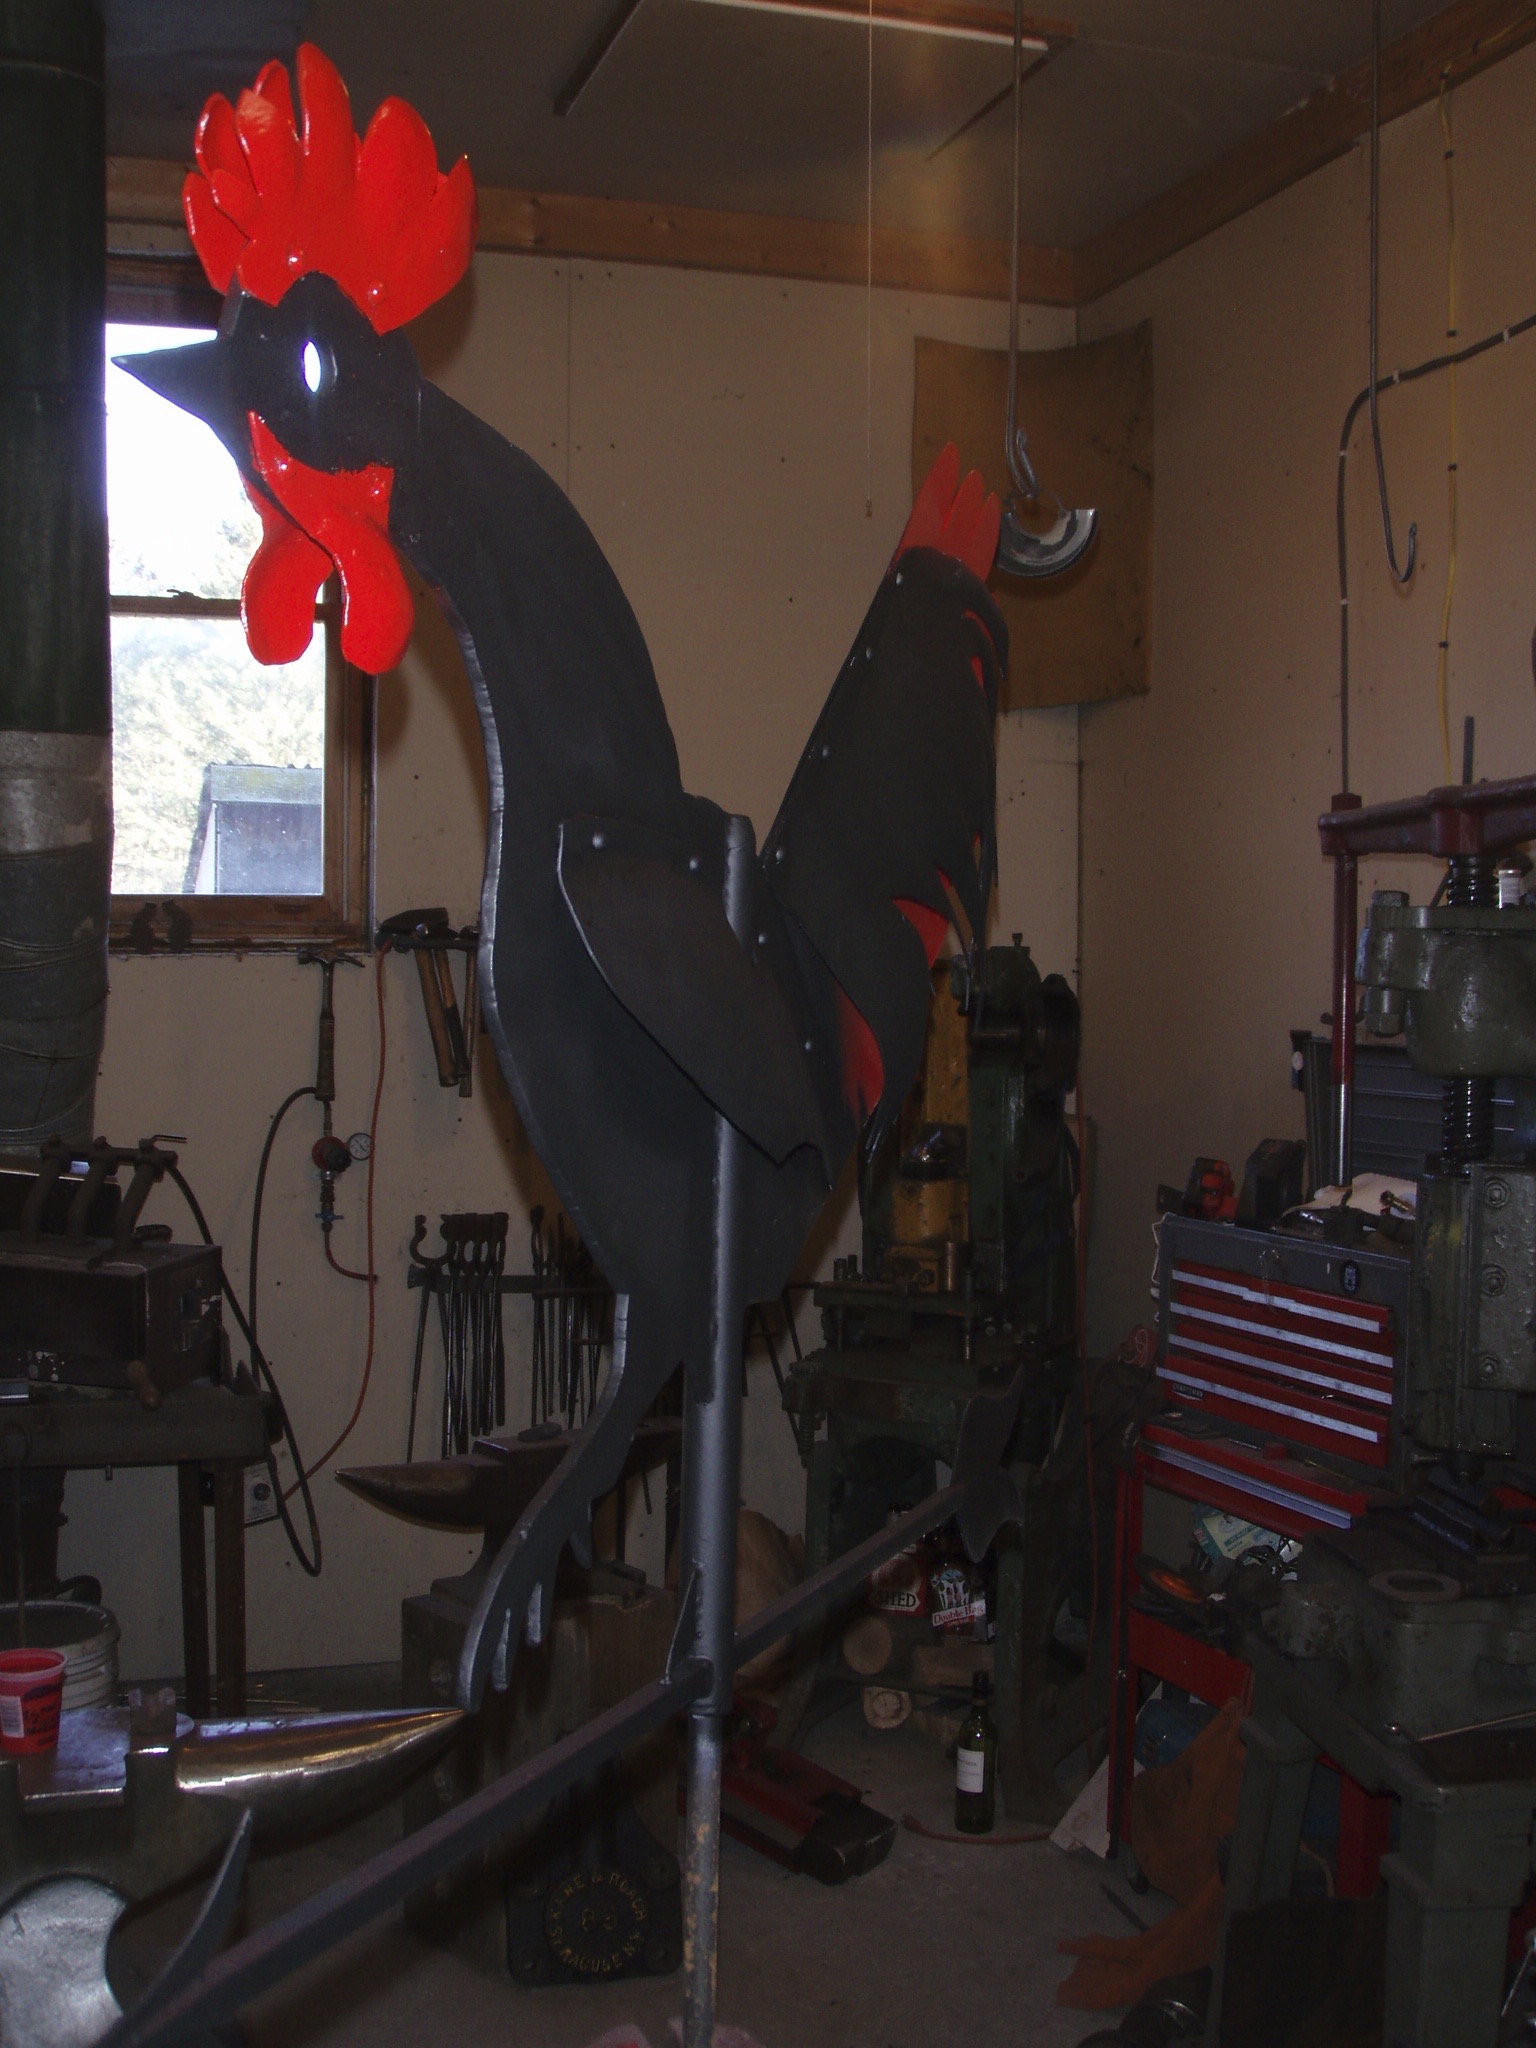
Dimitri Gerakaris, one of the founding members of ABANA, uses (used?) bold paint colors to good effect on some of his pieces. Google as needed. A splash of something other than black can really make something pop. Here is my example. Sandblasted and zinc solids primer before asembly, then etching primer, 2 part epoxy black base, Rustoleum gloss red.

-
I used to use the Francis tong method, but found that unless I was very careful the tongs would leave behind some telltale mark, be it a flat spot or a shiny spot. Better is to oversize the screen beyond the outer frame and stretch it tight with generic vice grip duckbill pliers levering against the outer frame, then rivet tight, then cut the screen flush with the inner frame. You can use a O/A torch with a little brazing tip set to an oxidizing flame to trim the screen, it either burns the little wire back under the inner frame or balls up leaving no sharp burr. Move fast with the torch.
-
Bob Valentine often brings this set to meets, the little board the latches are atatched to comes out of the box so you can see the functioning hardware on the back side. Whole thing fits in the palm of your hand, forged and file work.
-
Finding medium carbon steels in larger bar form?
Judson Yaggy replied to KYBOY's topic in Blacksmithing, General Discussion
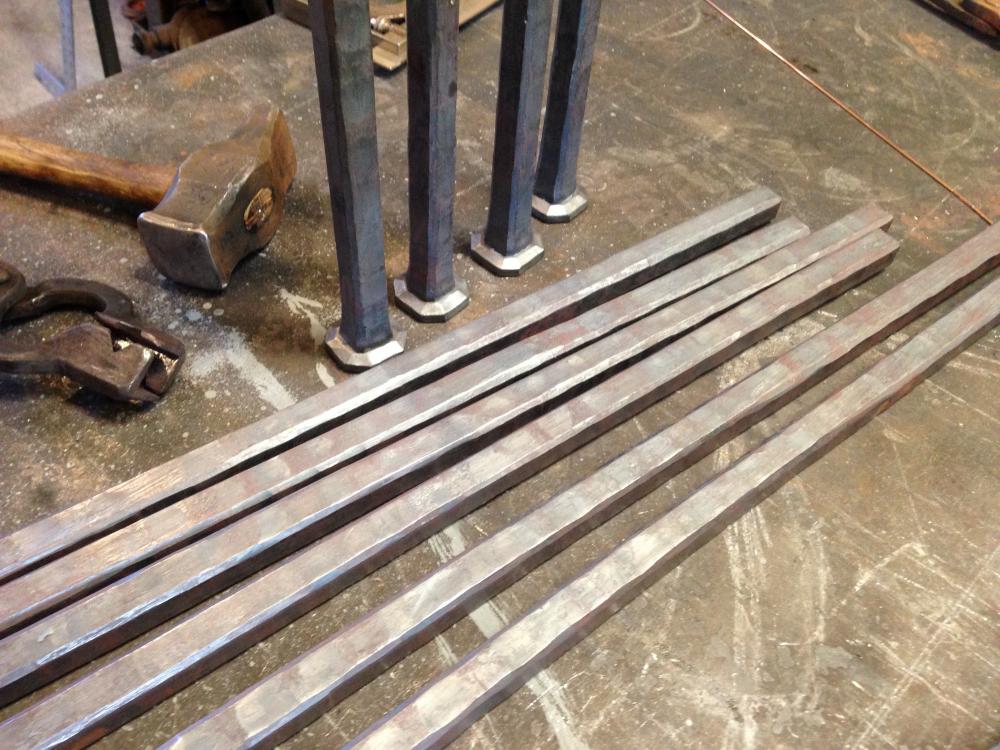
If you are doing this for fun and have the cash to buy known (not junkyard) steel just buy a hunk of your preferred alloy off ebay. Small odds and ends, drops, various sizes, sometimes lots of a particular alloy, sometimes a dearth. But usually everything you would want, and if you are patient you can find good prices. As an architectural smith who forays into tool making occasionaly for job specific tooling or custom orders I will first go to my known alloy junk pile (Sorry, I mean onsite tool steel inventory) then look quickly at ebay for today's offerings, then call one of the reputable steel dealers. The price goes up for each step. I get most of my crazy cheap tool steel from local blacksmithing meets. After labeling it goes into the alloy junk pile (Sorry, I mean onsite tool steel inventory). -
Looking for information
Judson Yaggy replied to Morris's topic in Anvils, Swage Blocks, and Mandrels
Please note that there is a BIG difference between a power hammer DIE and a power hammer ANVIL or base as named above. That looks to be a die that dovetails into the anvil (or tup) given the shape and reported ring, indicating a hardened steel item. Steam or self contained air hammer anvils weigh many thousands of pounds or many many tons depending on the size of hammer, and they are almost always made of cast iron. Your 180# hunk of steel is in line with what would be expected for a larger power hammer die. While being a perfectly usable anvil, it's not a classic London pattern shape and will not be sought after by collectors or beginners who are driving the high anvil prices we are currently seeing. The remaining blacksmiths are users who might like a good bit of tool steel like that but probably already have a good anvil or two and need to pay the rent/mortgage this month. Value on the market: double or tripple scrap price. Value if you want to learn blacksmithing: priceless. -
Blacksmiths are like crustaceans, we grow to fit our shell and then stuff starts getting piled on the floor, or in the corner, or higher on that shelf... if only that junk wasn't do darn useful.
-
Blacksmith Museum Section
Judson Yaggy replied to GrumpyBiker's topic in Blacksmithing, General Discussion
Much of Sloan's work was published and copyrighted in the mid to late 20th C. Not expired yet? Many of his works for sale on Amazon show renewall of CR in the 1990's. He was one of my main inspirations to learn both timberframing and blacksmithing. Amazingly detailed and expressive drawings! -
Blacksmith Museum Section
Judson Yaggy replied to GrumpyBiker's topic in Blacksmithing, General Discussion
Probably still under copyright. -
How can I tame my tire hammer?
Judson Yaggy replied to setlab's topic in Power Hammers, Treadle Hammers, Olivers
Mechanical hammers need a brake. That's because in general they run a lot faster than air hammers and have limited means of slowing down the bpm other than slipping the power transmission. All the top quality antique industrial mechanicals came from the factory with a brake. Just saying. You could also try increasing the distance between the drive pulley and the tire. -
building a mechanical forging hammer
Judson Yaggy replied to MG-42's topic in Power Hammers, Treadle Hammers, Olivers
Between 10:1 and 20:1 anvil to tup ratio is best. Higher is better. Homogenious mass prefered. Otherwise looks like a good build. Have fun with it! -
What did you do in the shop today?
Judson Yaggy replied to Mark Ling's topic in Blacksmithing, General Discussion
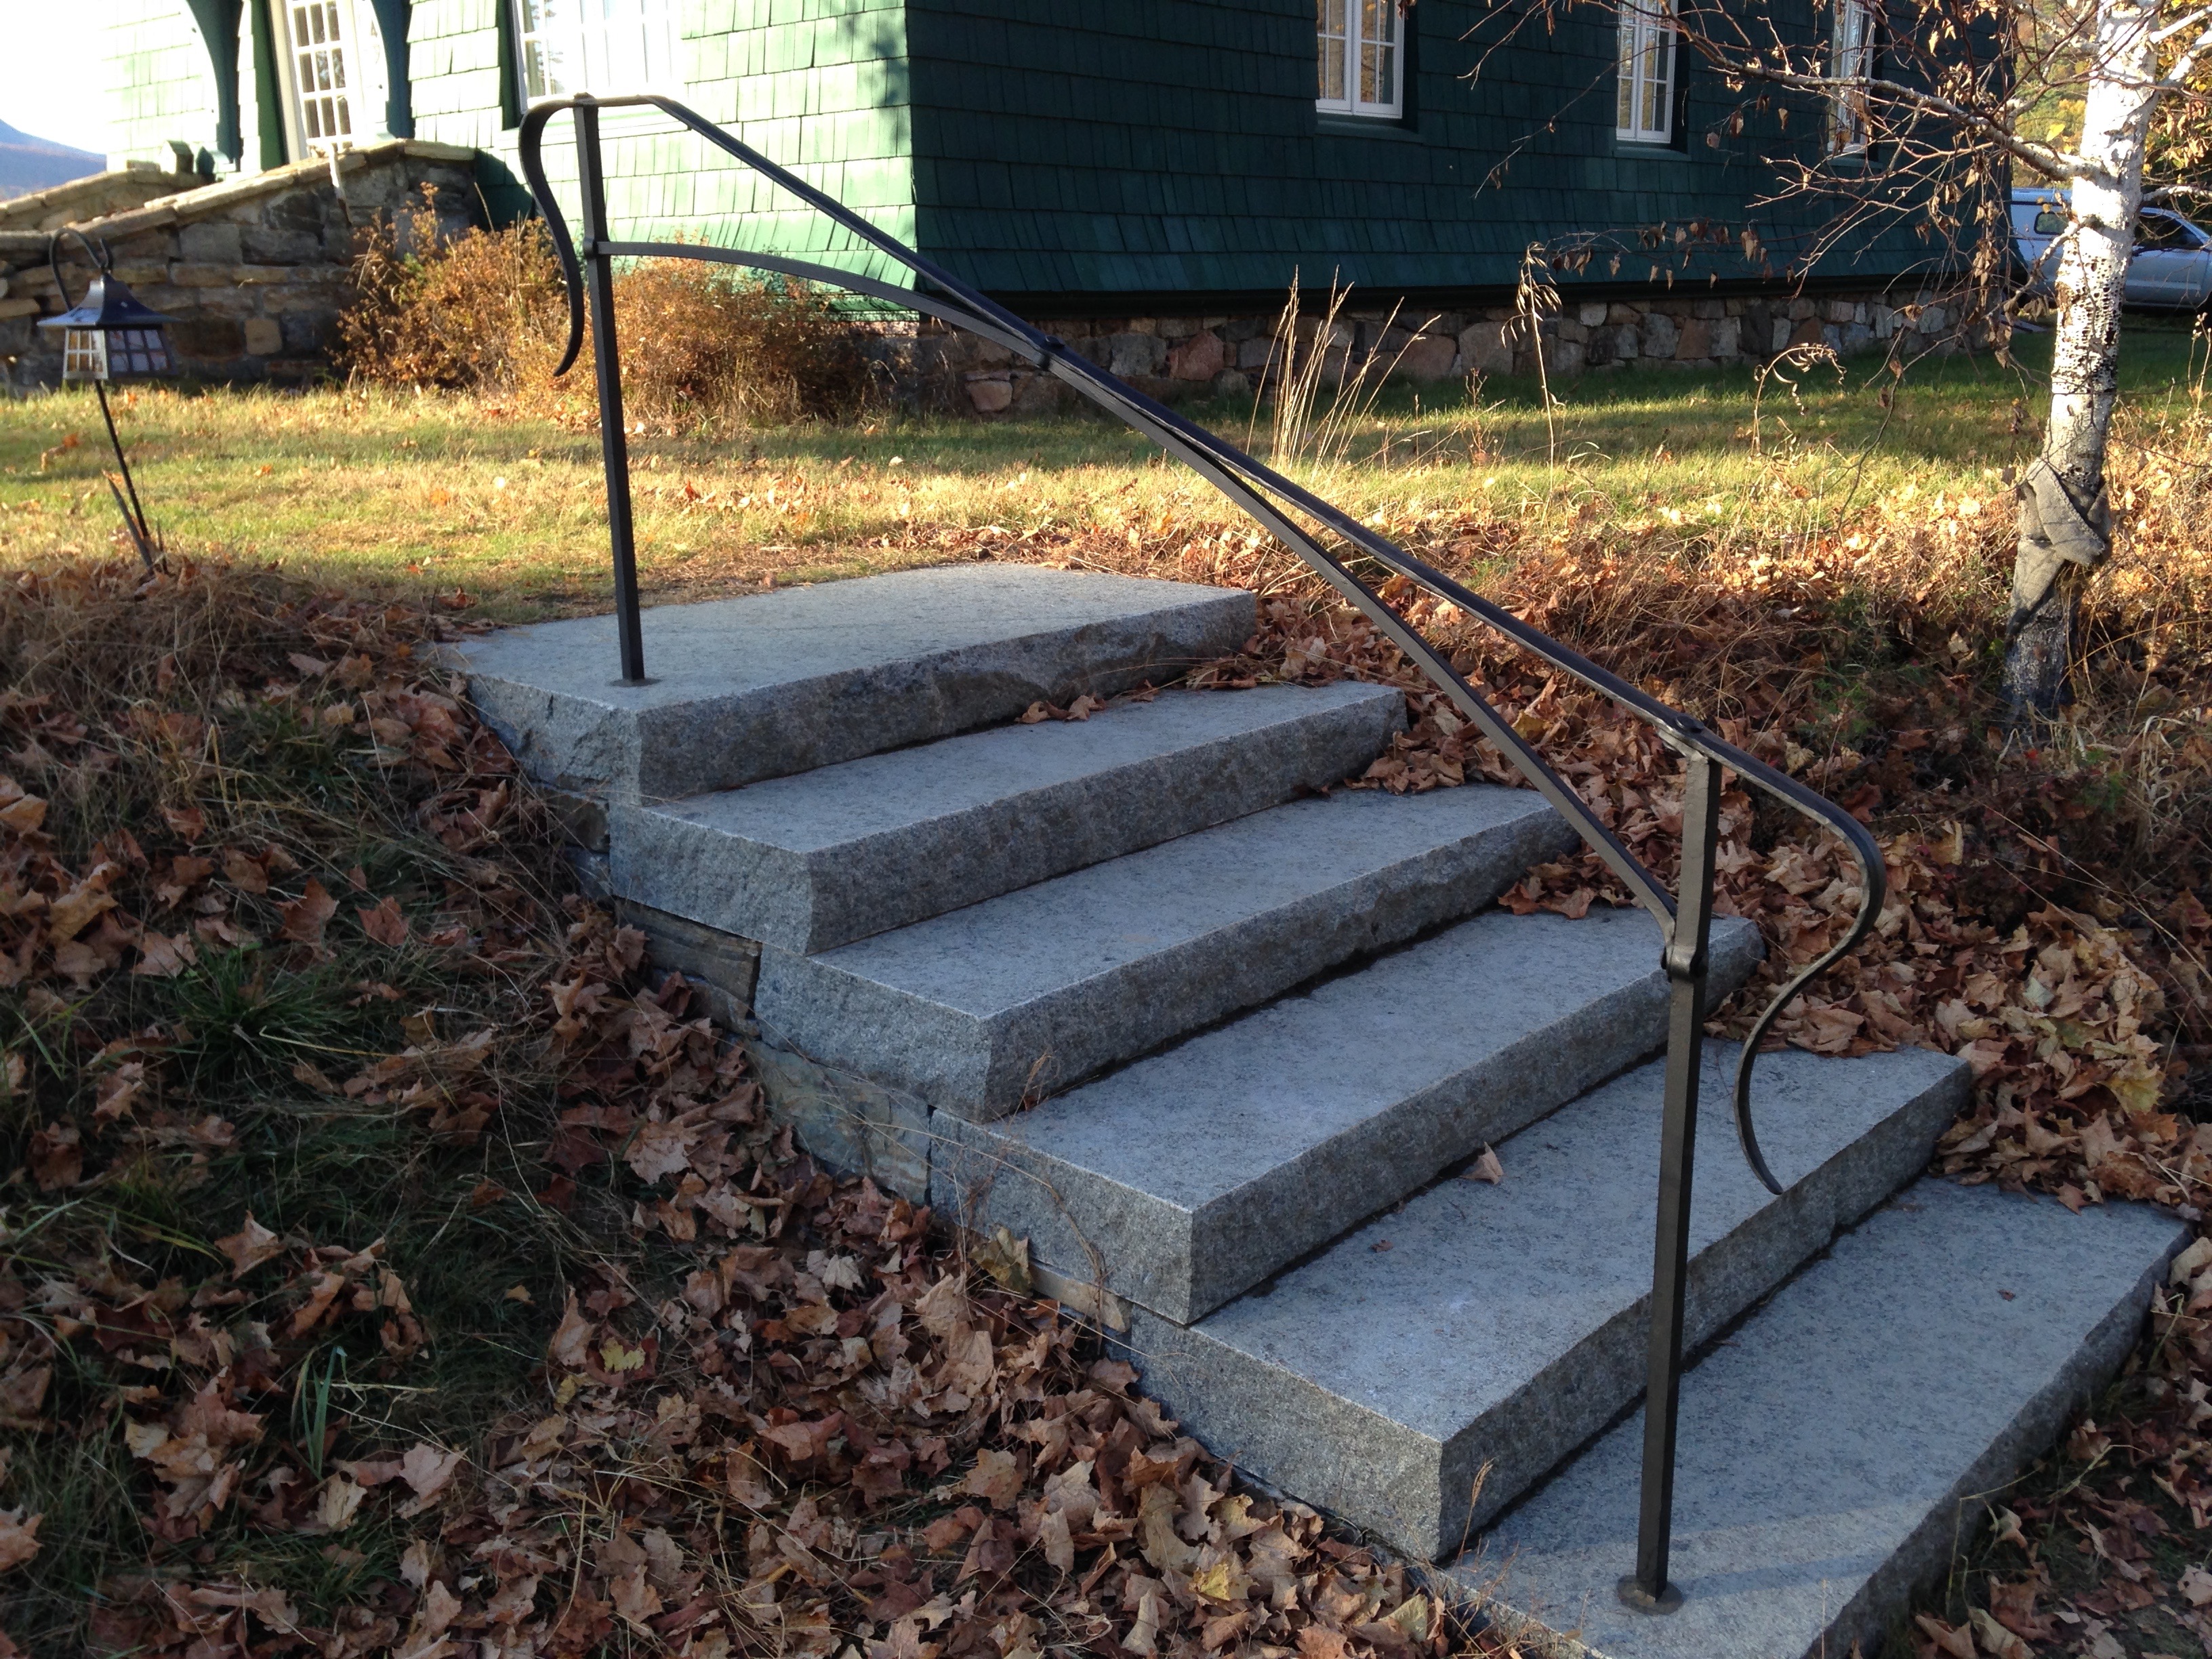
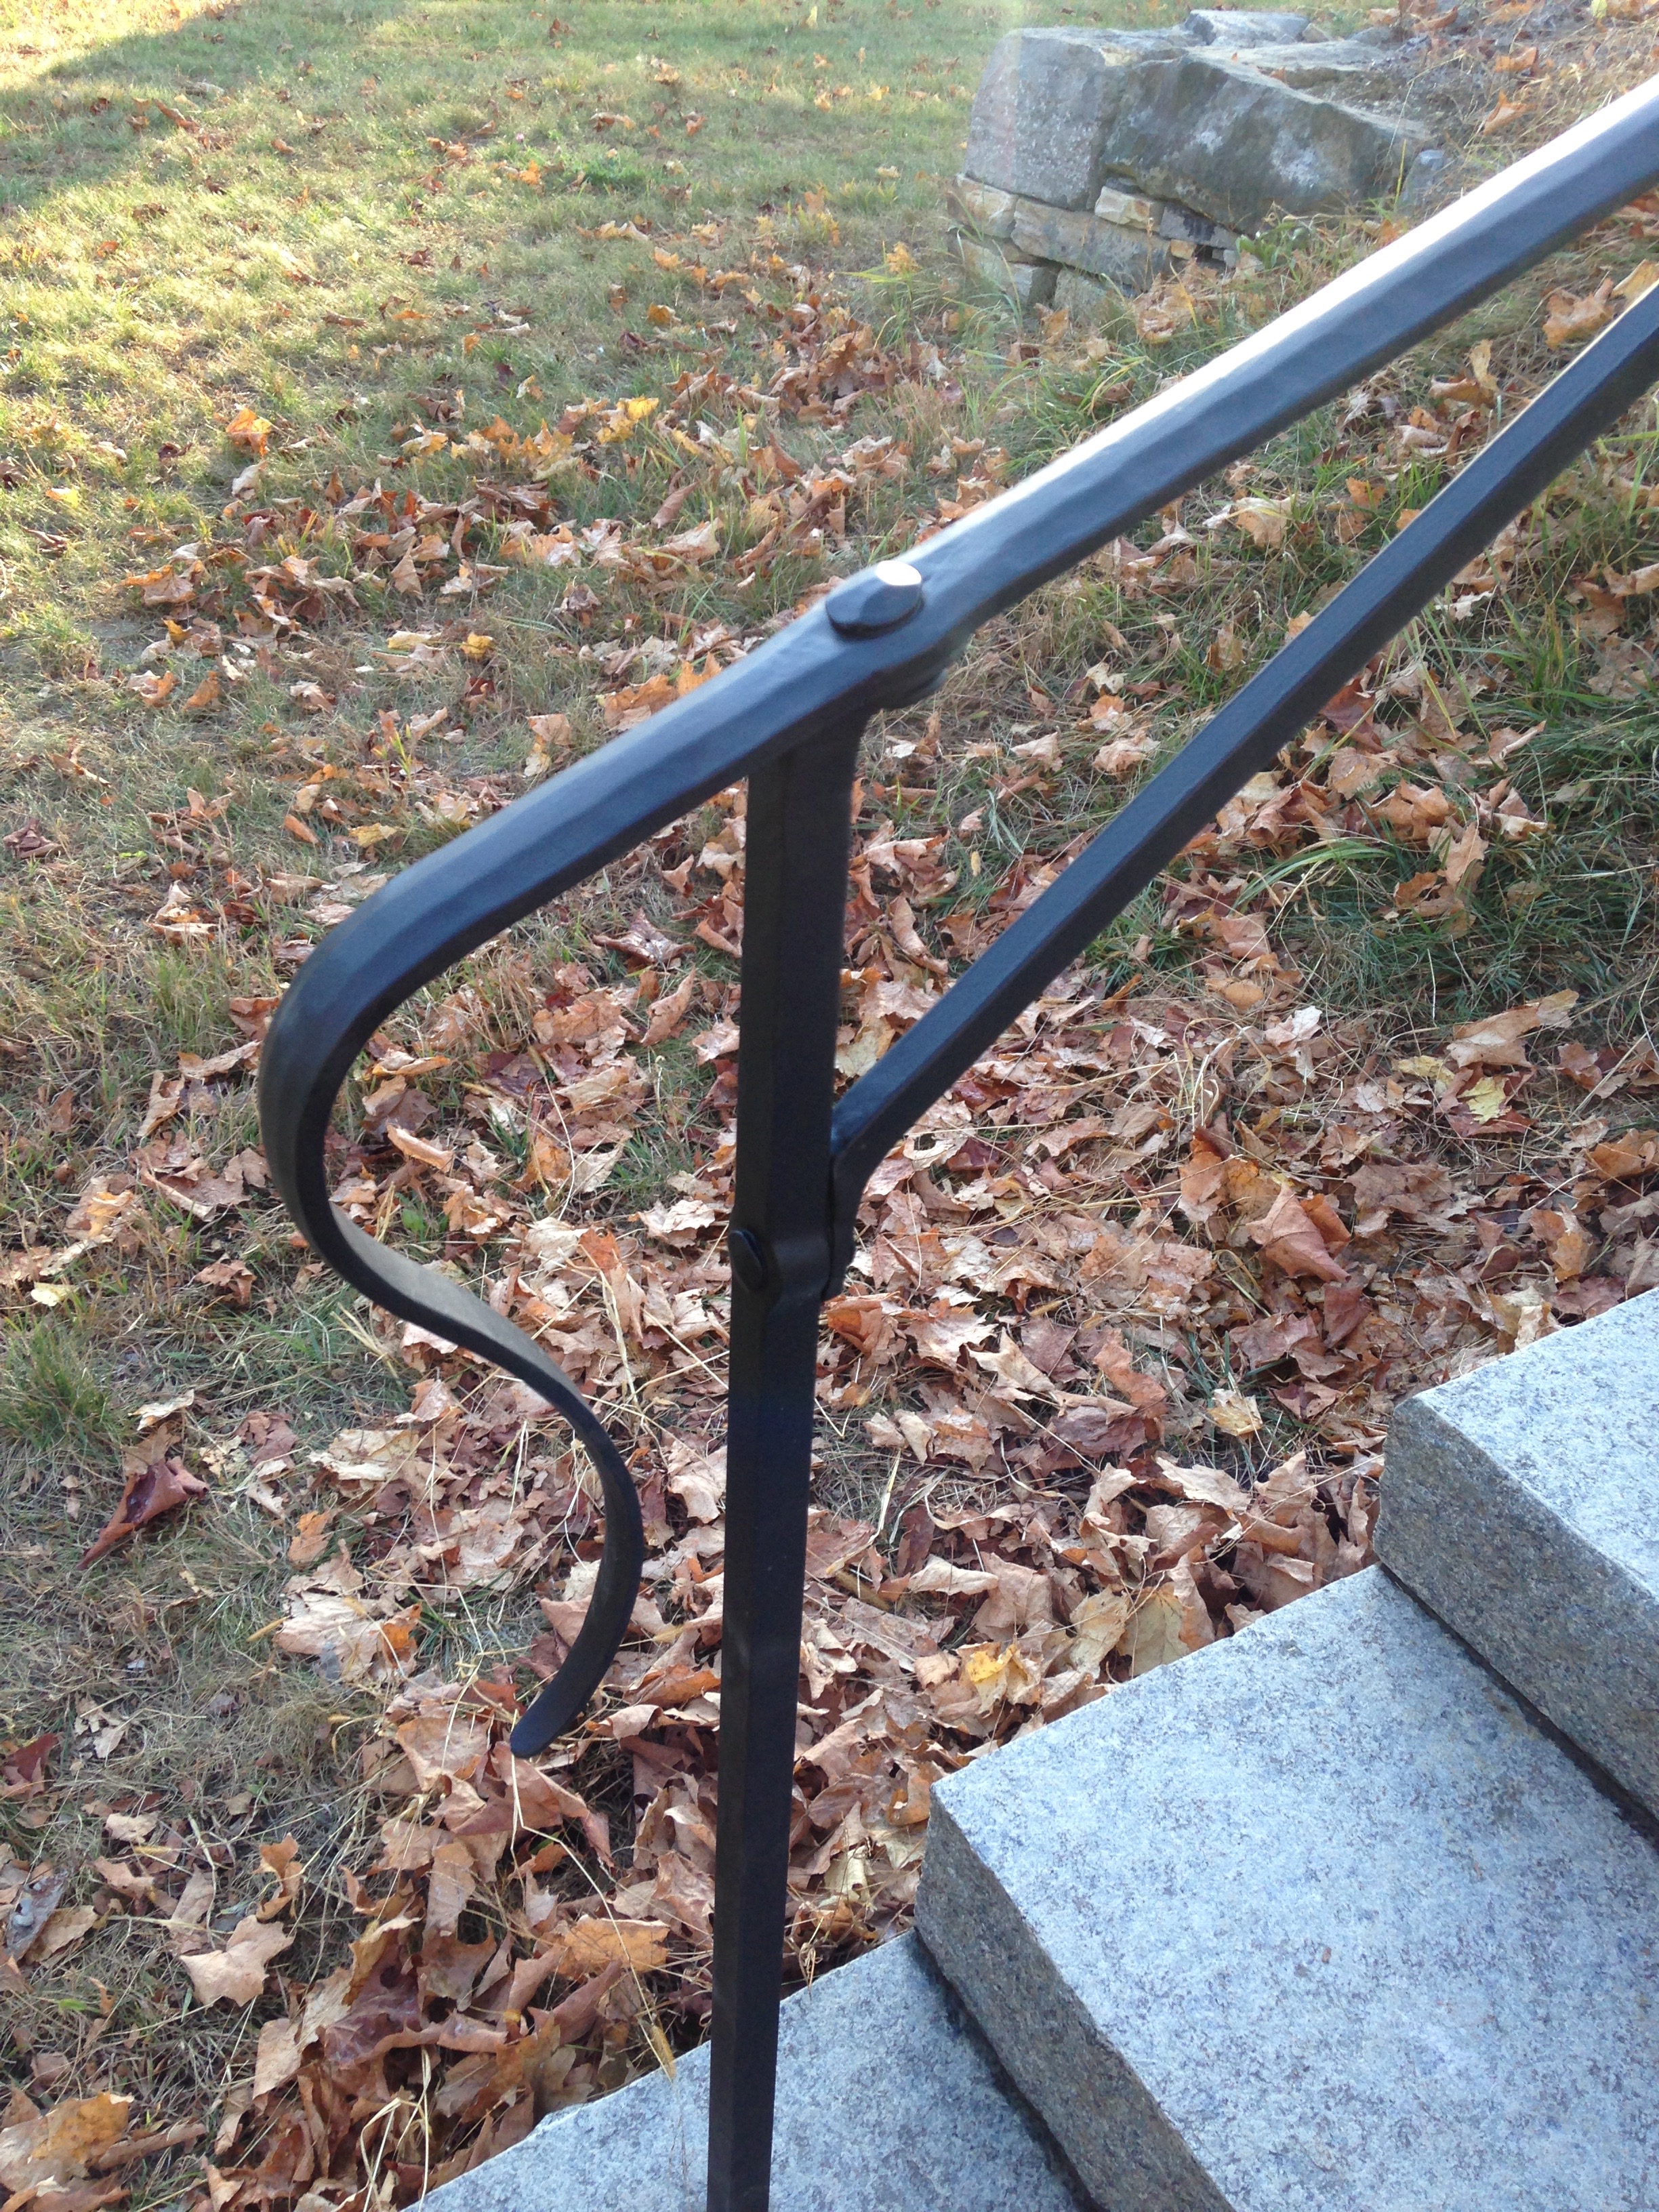
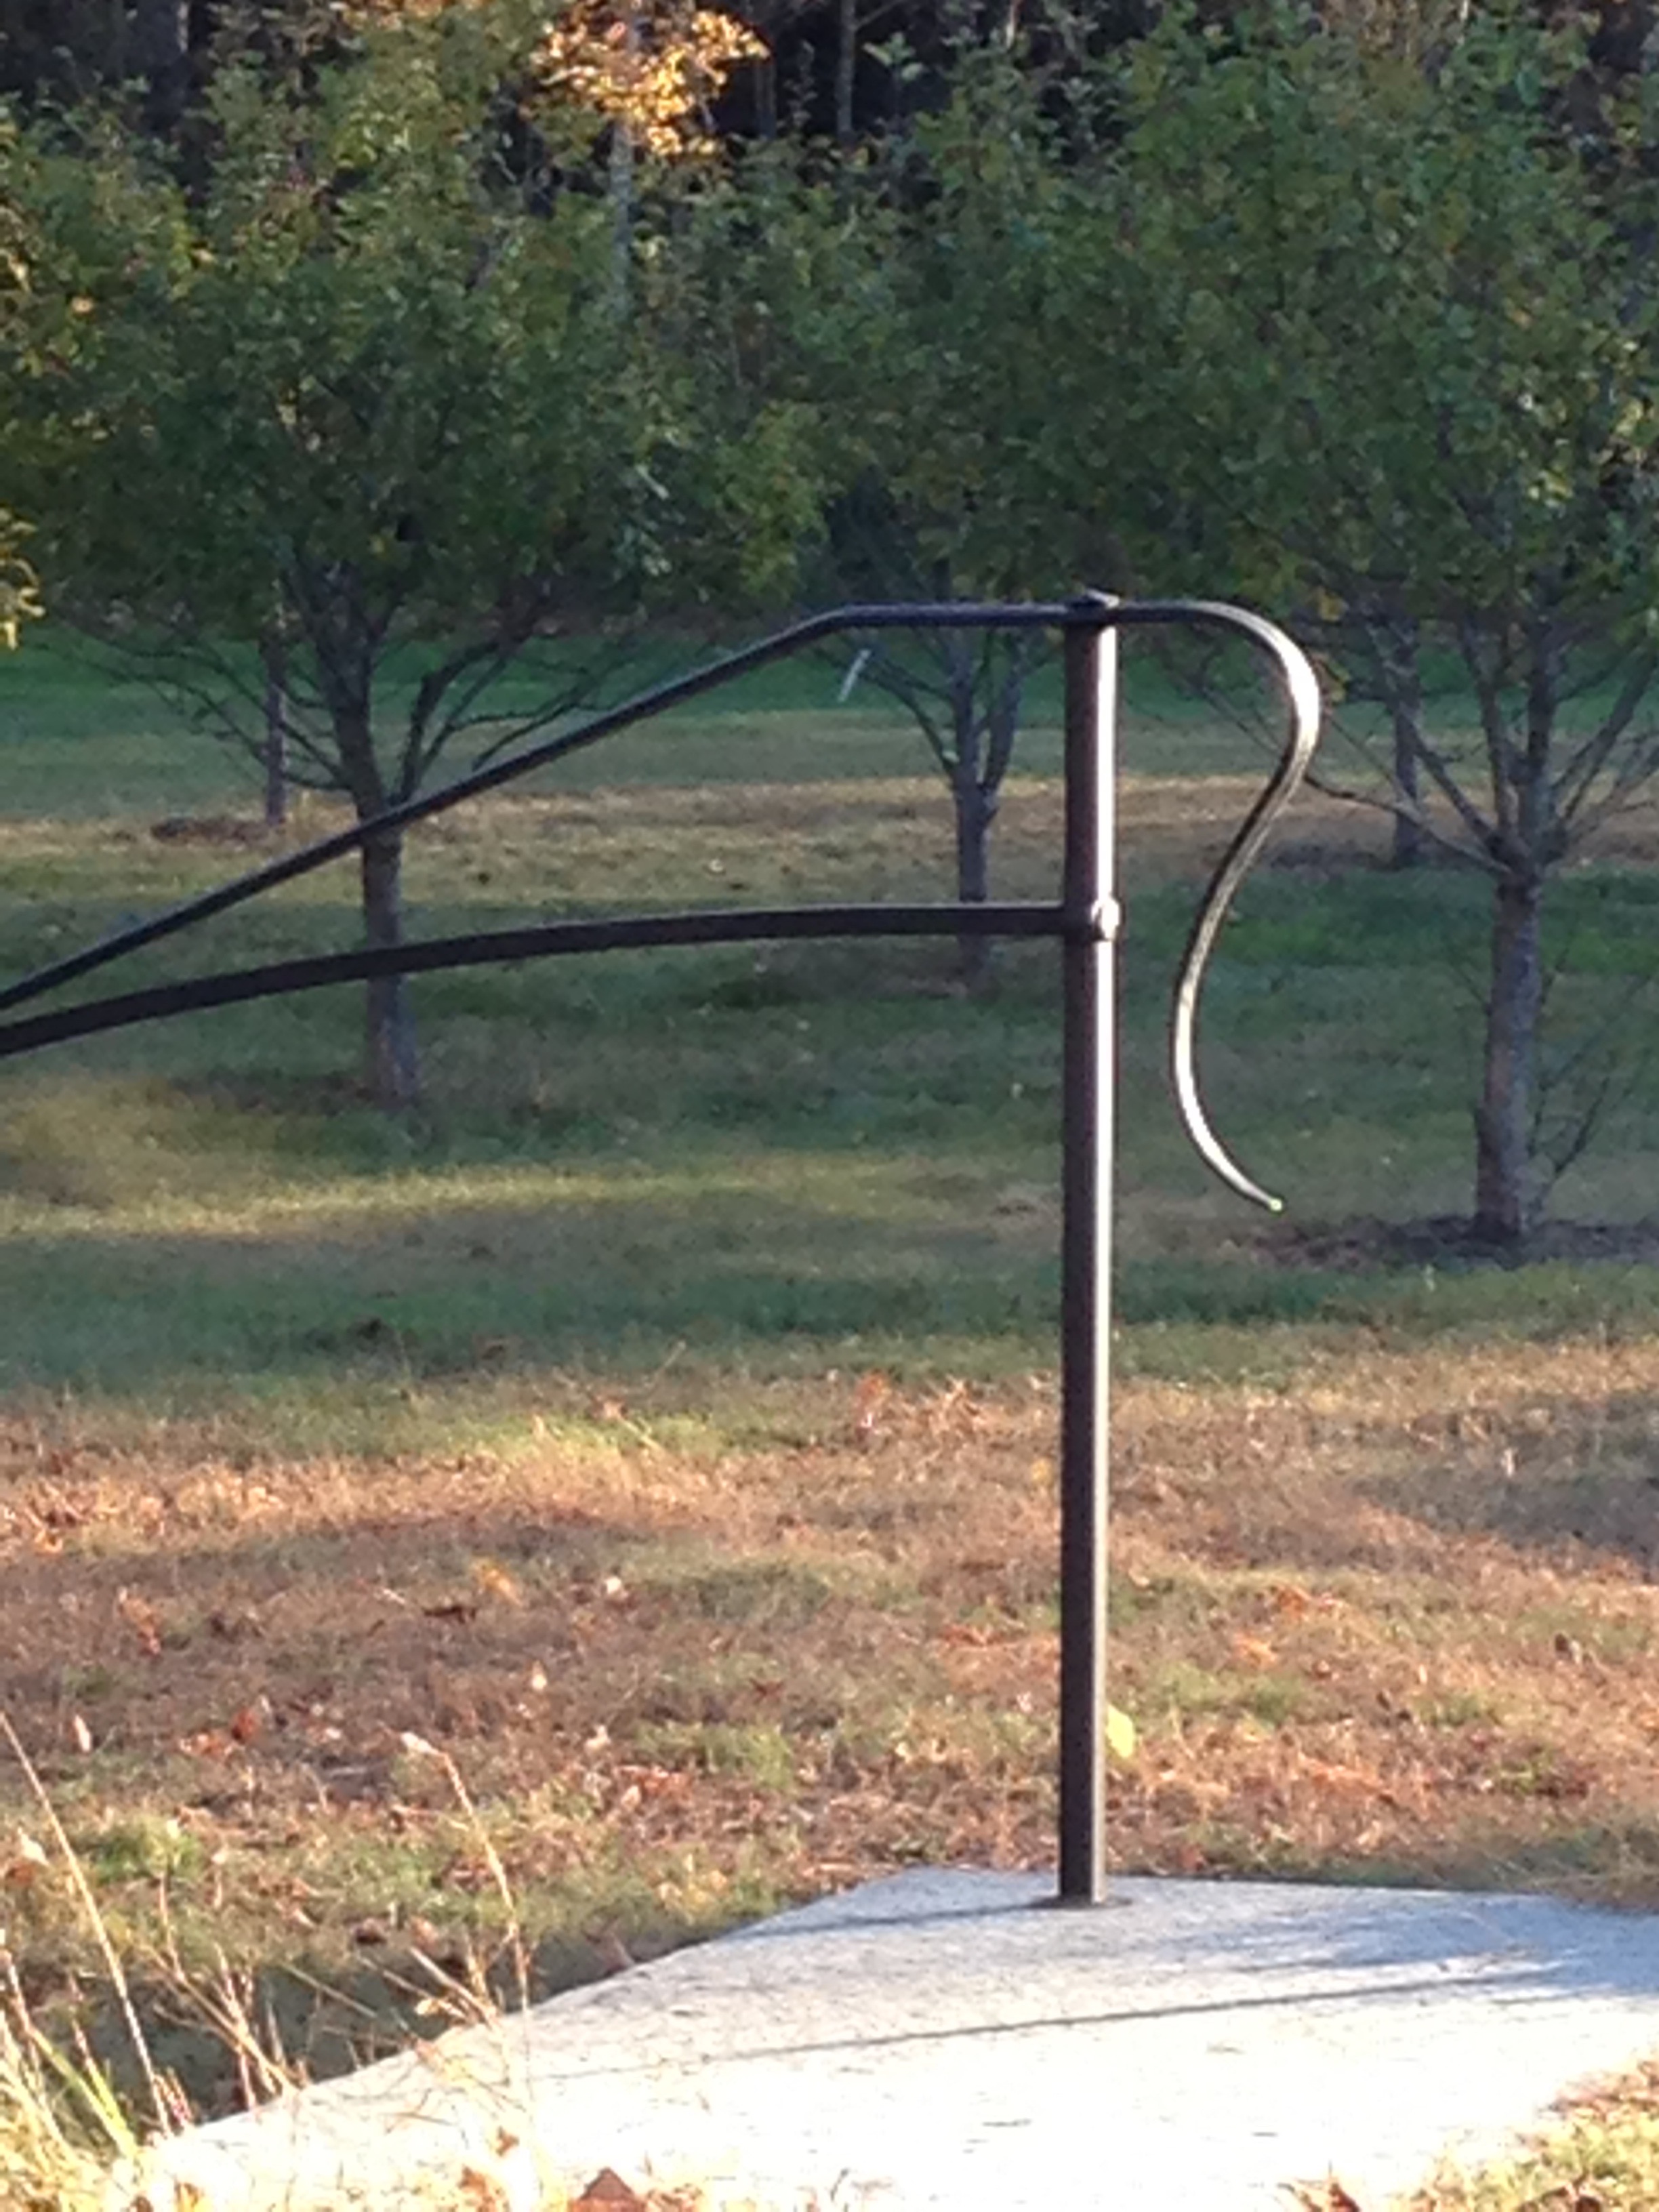
Thanks everyone! This is several hundred miles from seawater, but still in the east coast rainy zone. So paint finish required, but not hot dipping. Sandblasted, then zinc solids primer, then automotive primer, then 2 part epoxy top coat. -
What did you do in the shop today?
Judson Yaggy replied to Mark Ling's topic in Blacksmithing, General Discussion
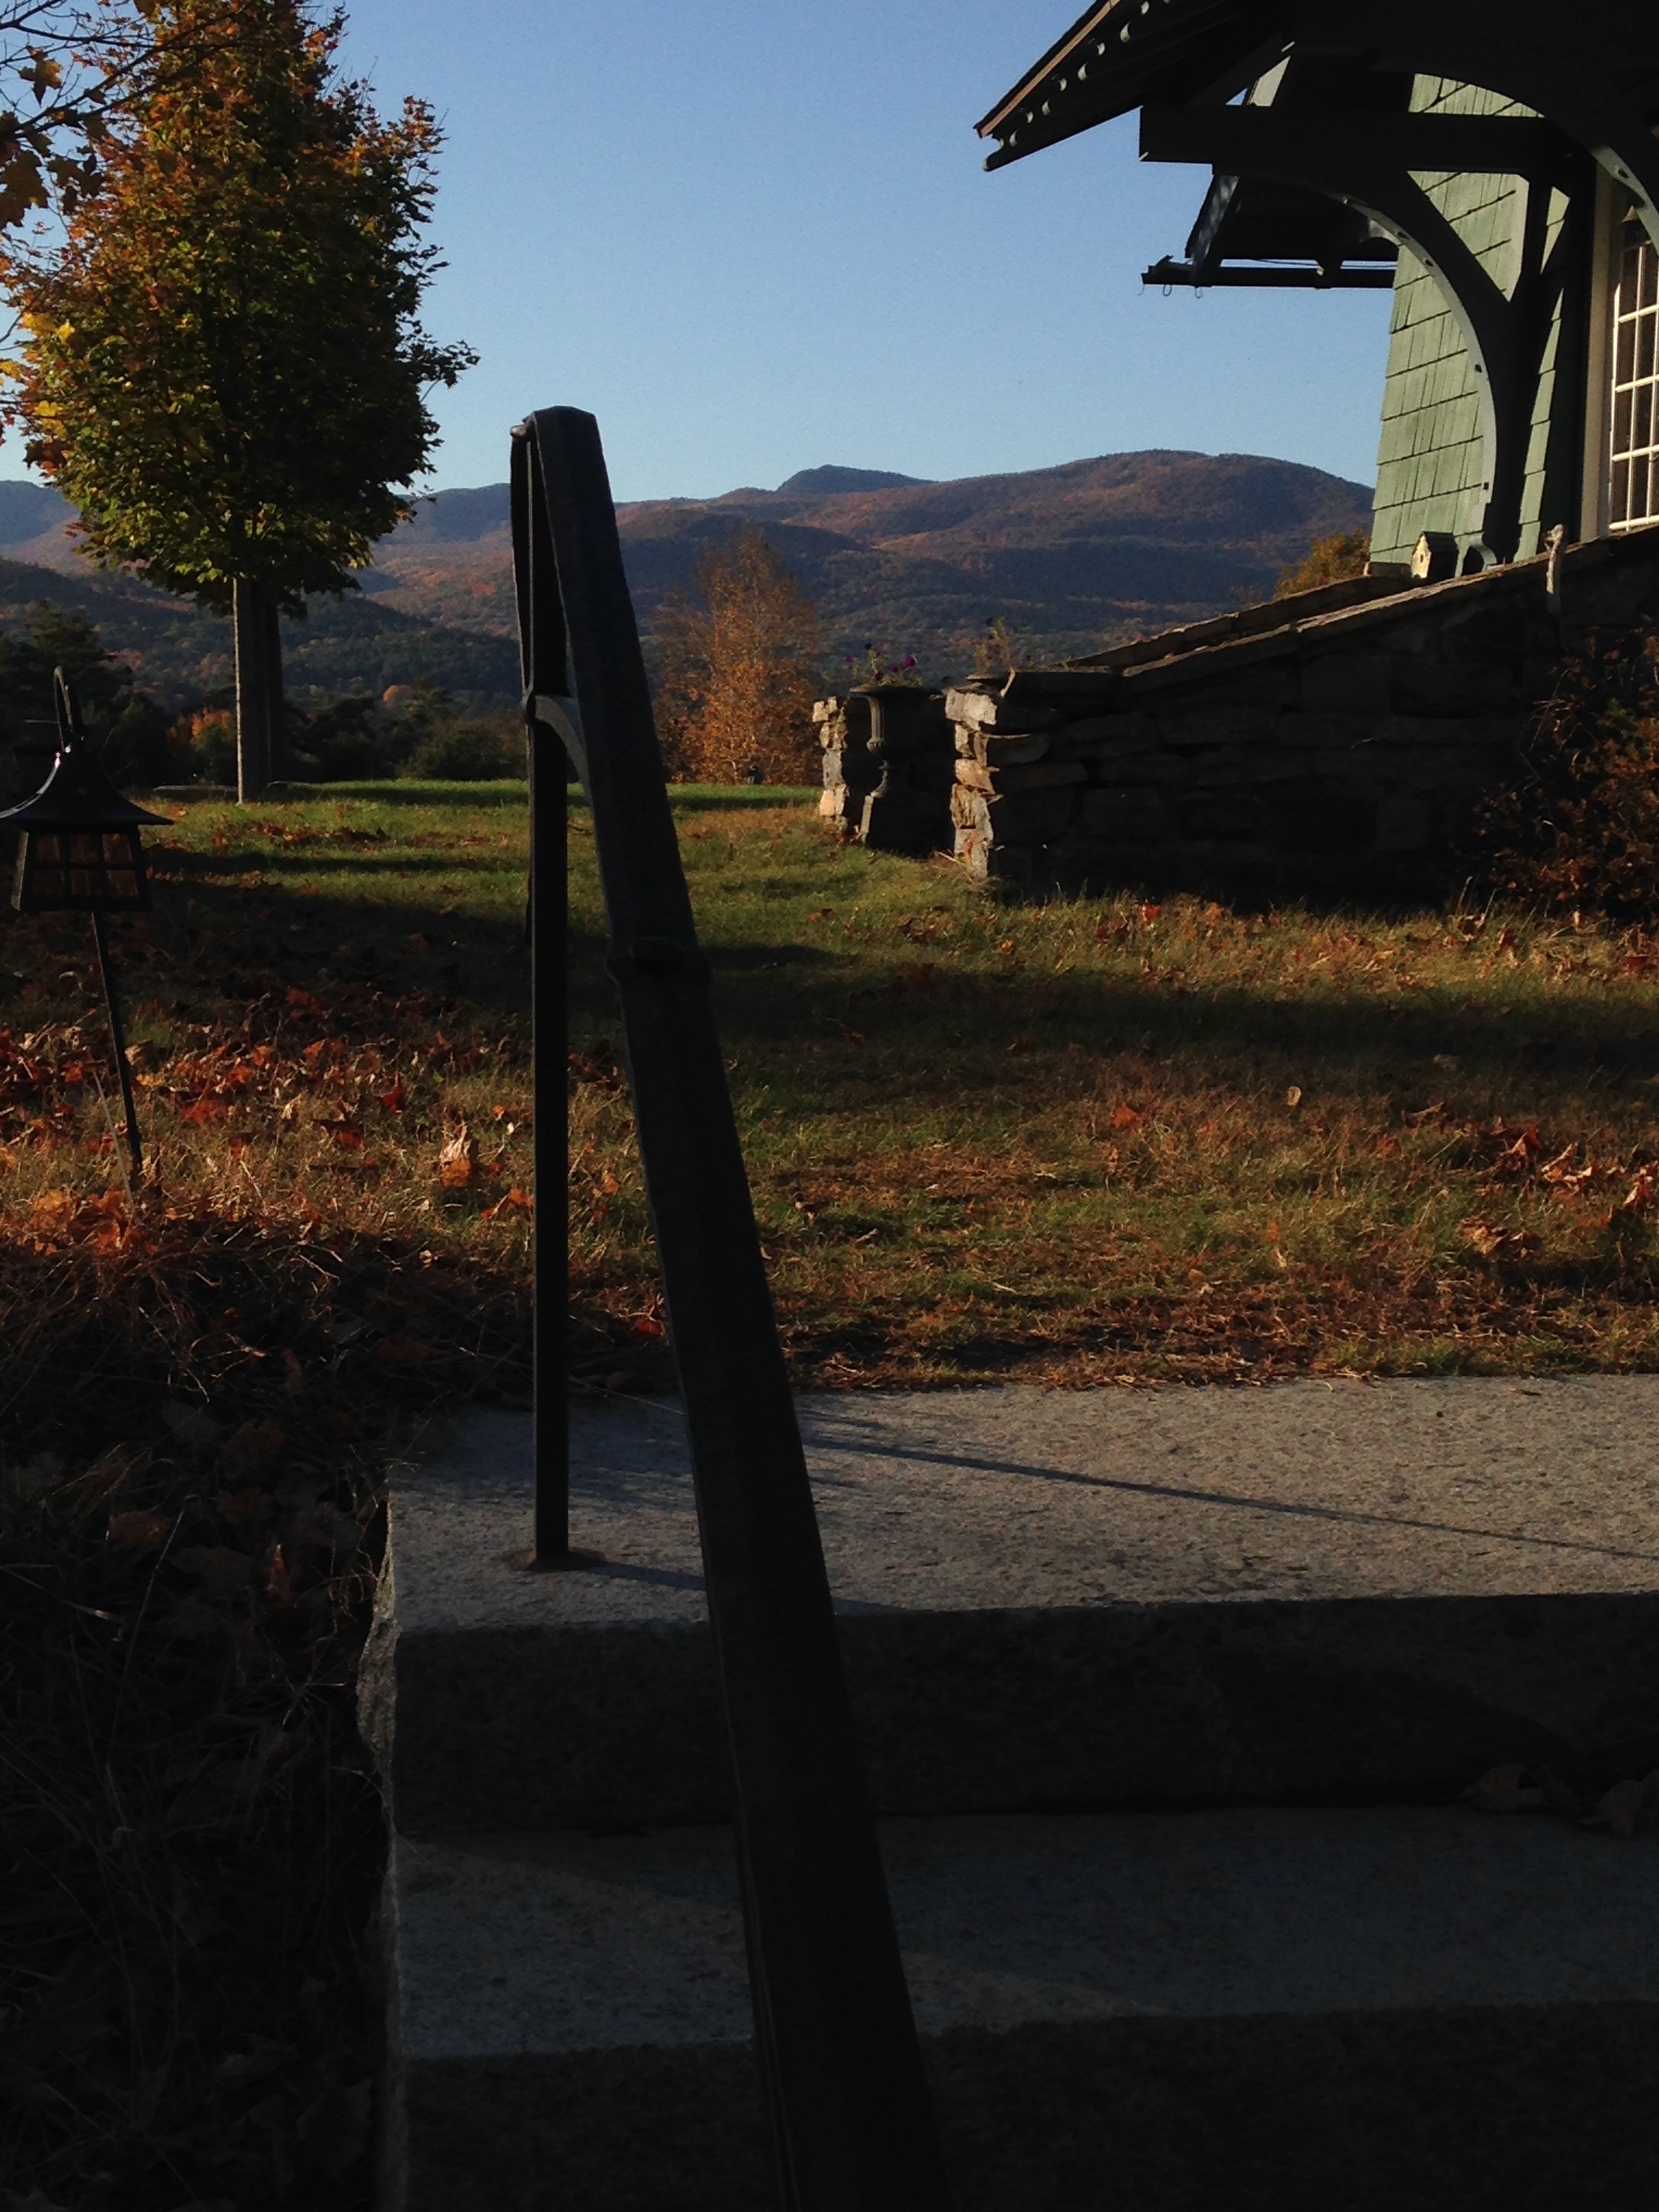
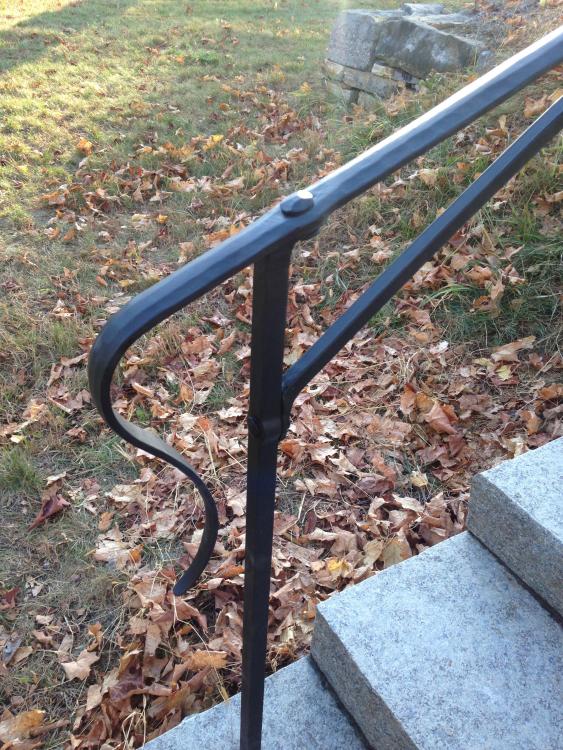
Coffee table parts. And railing install day. Not a bad view.


-
It's the exit for the hardy hole in the face. Common for this style of anvil. Logical if you think about it, it's a pretty easy (short) punch and drift in a big block of steel, and as long as you go into it knowing that your shanks will be curved or angled no problem! The location also puts tooling to the off side for right handers like with German style anvils, so no worry about barking the nuckles on your hammer hand on a hardy.
-
Need some info.
Judson Yaggy replied to seldom (dick renker)'s topic in New England Blacksmiths Assoc.
Welcome aboard! -
It depends on the manufacturer. My Perkins #4 is bigger than what that anvilfire chart or the modern manufacturers call a #6.
-
What did you do in the shop today?
Judson Yaggy replied to Mark Ling's topic in Blacksmithing, General Discussion
Amen. Good advise there. Hope things work out friend Gergely. -
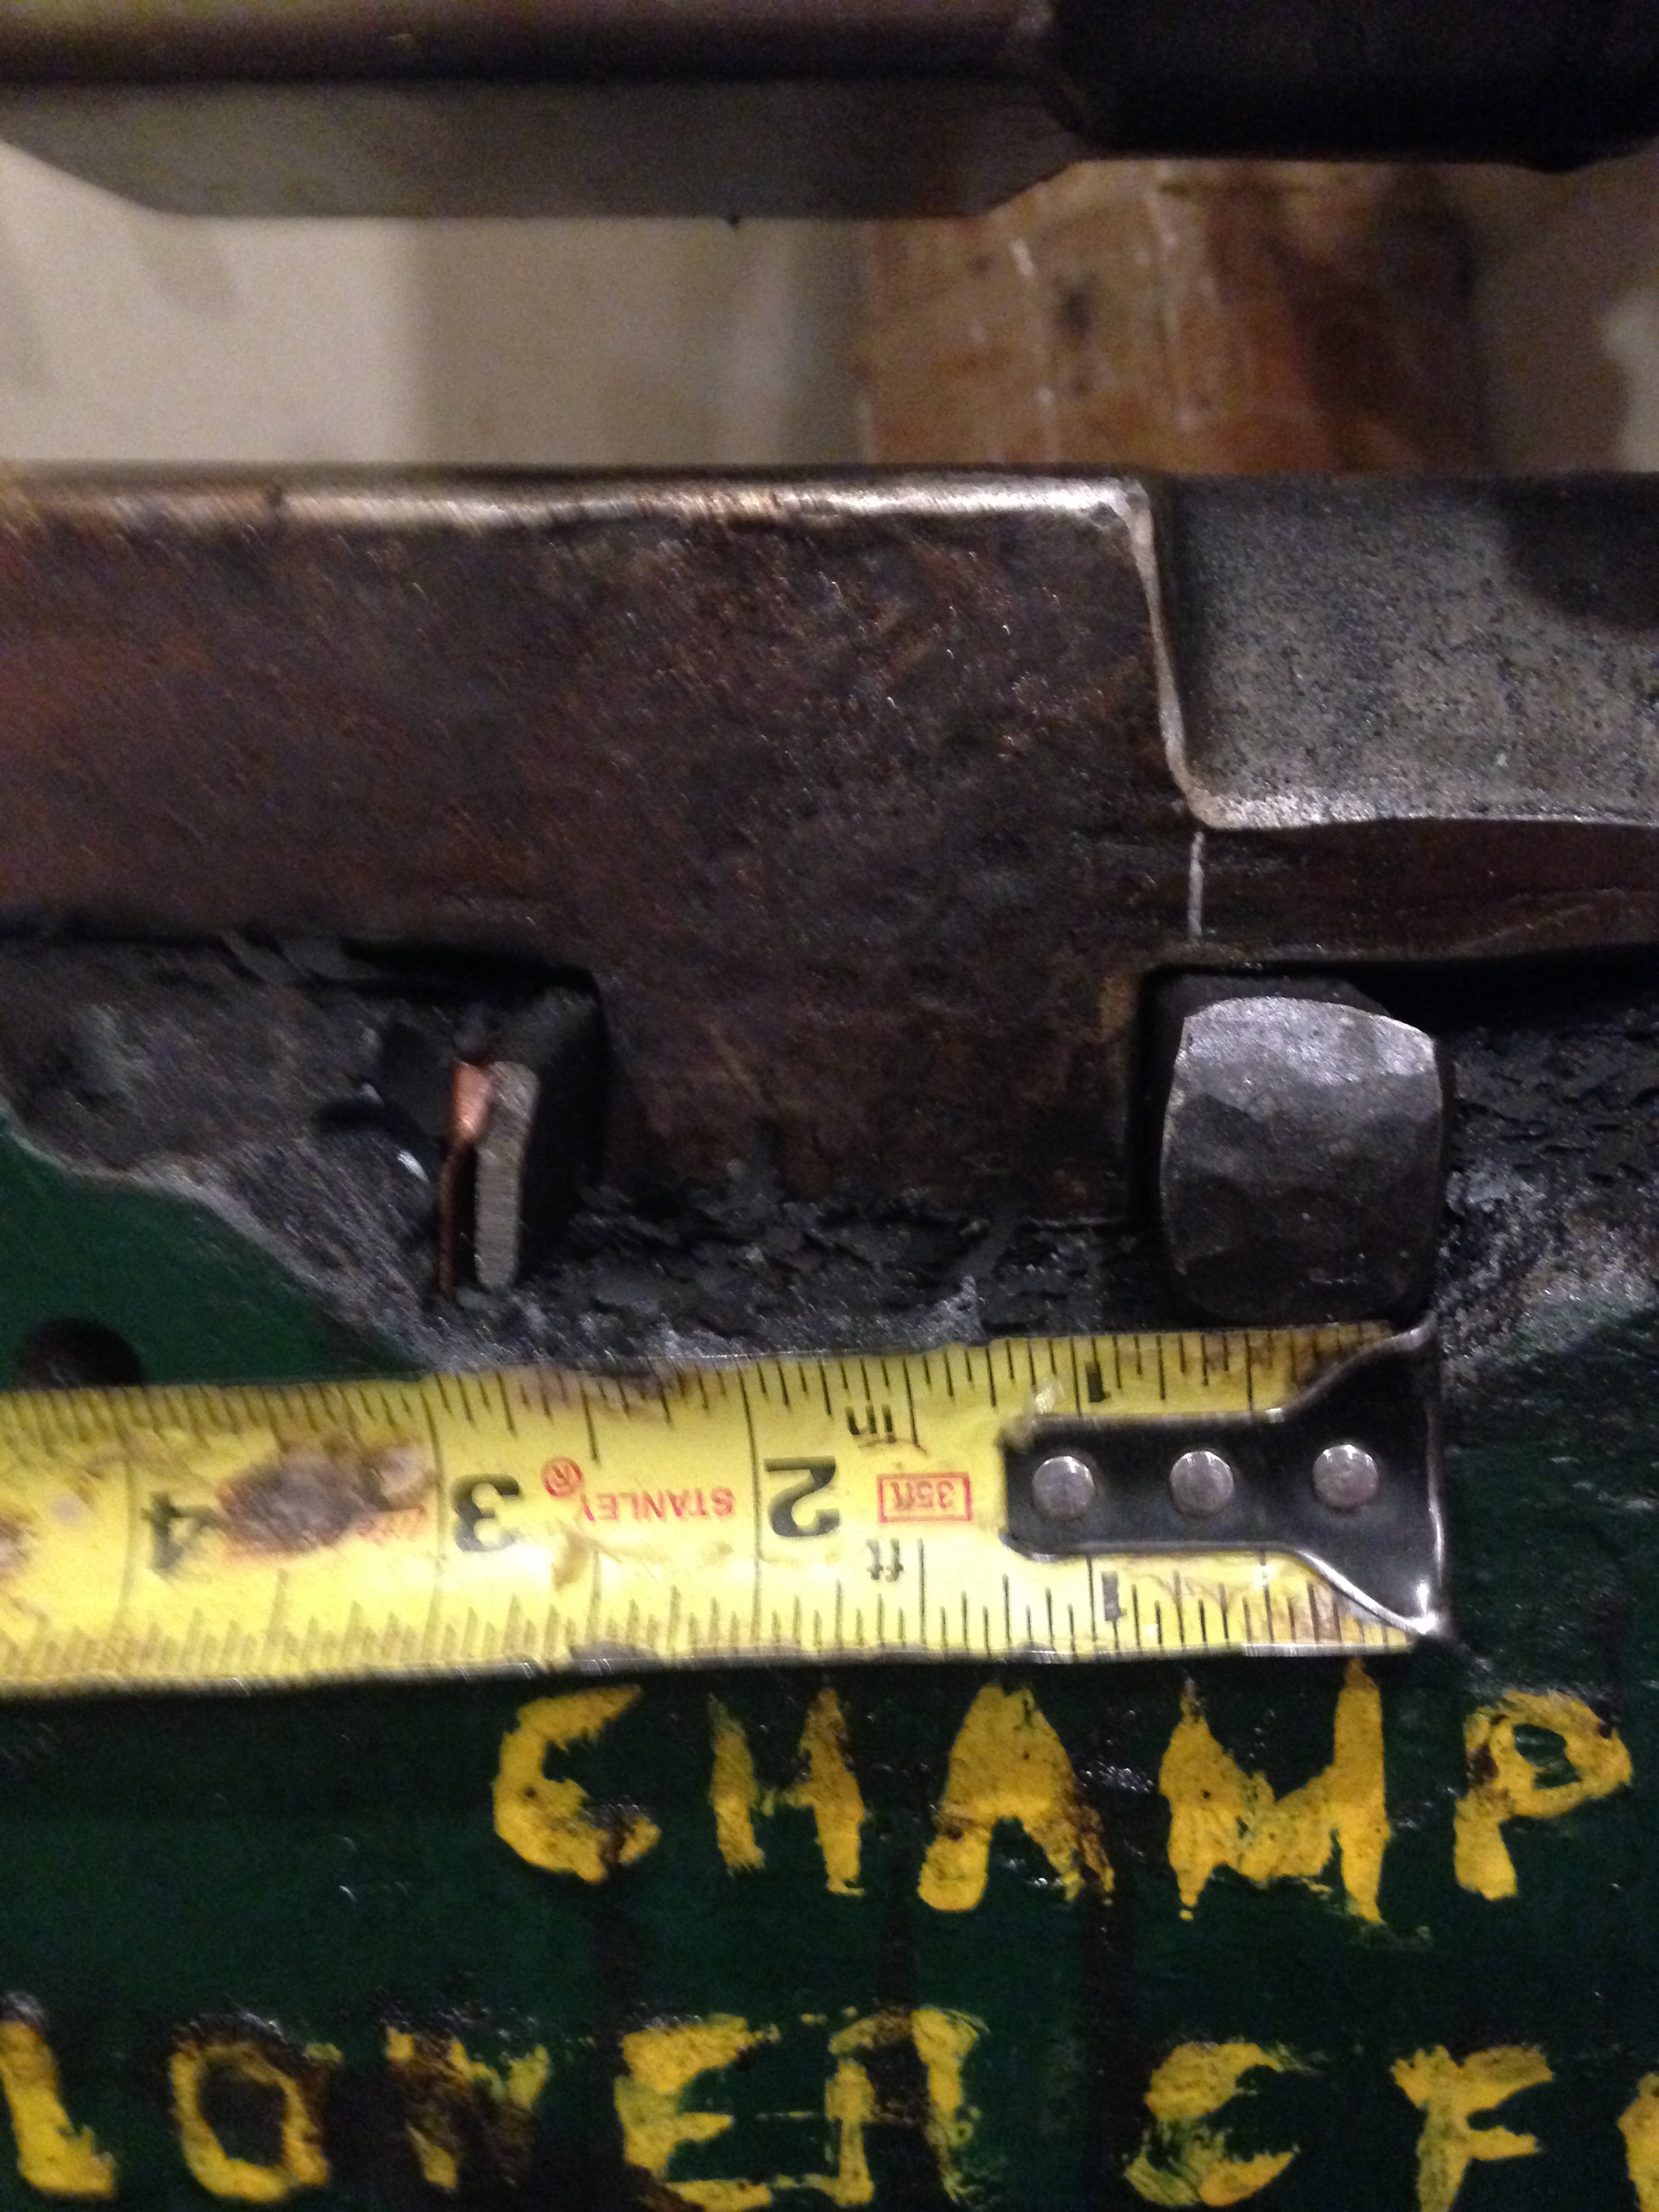
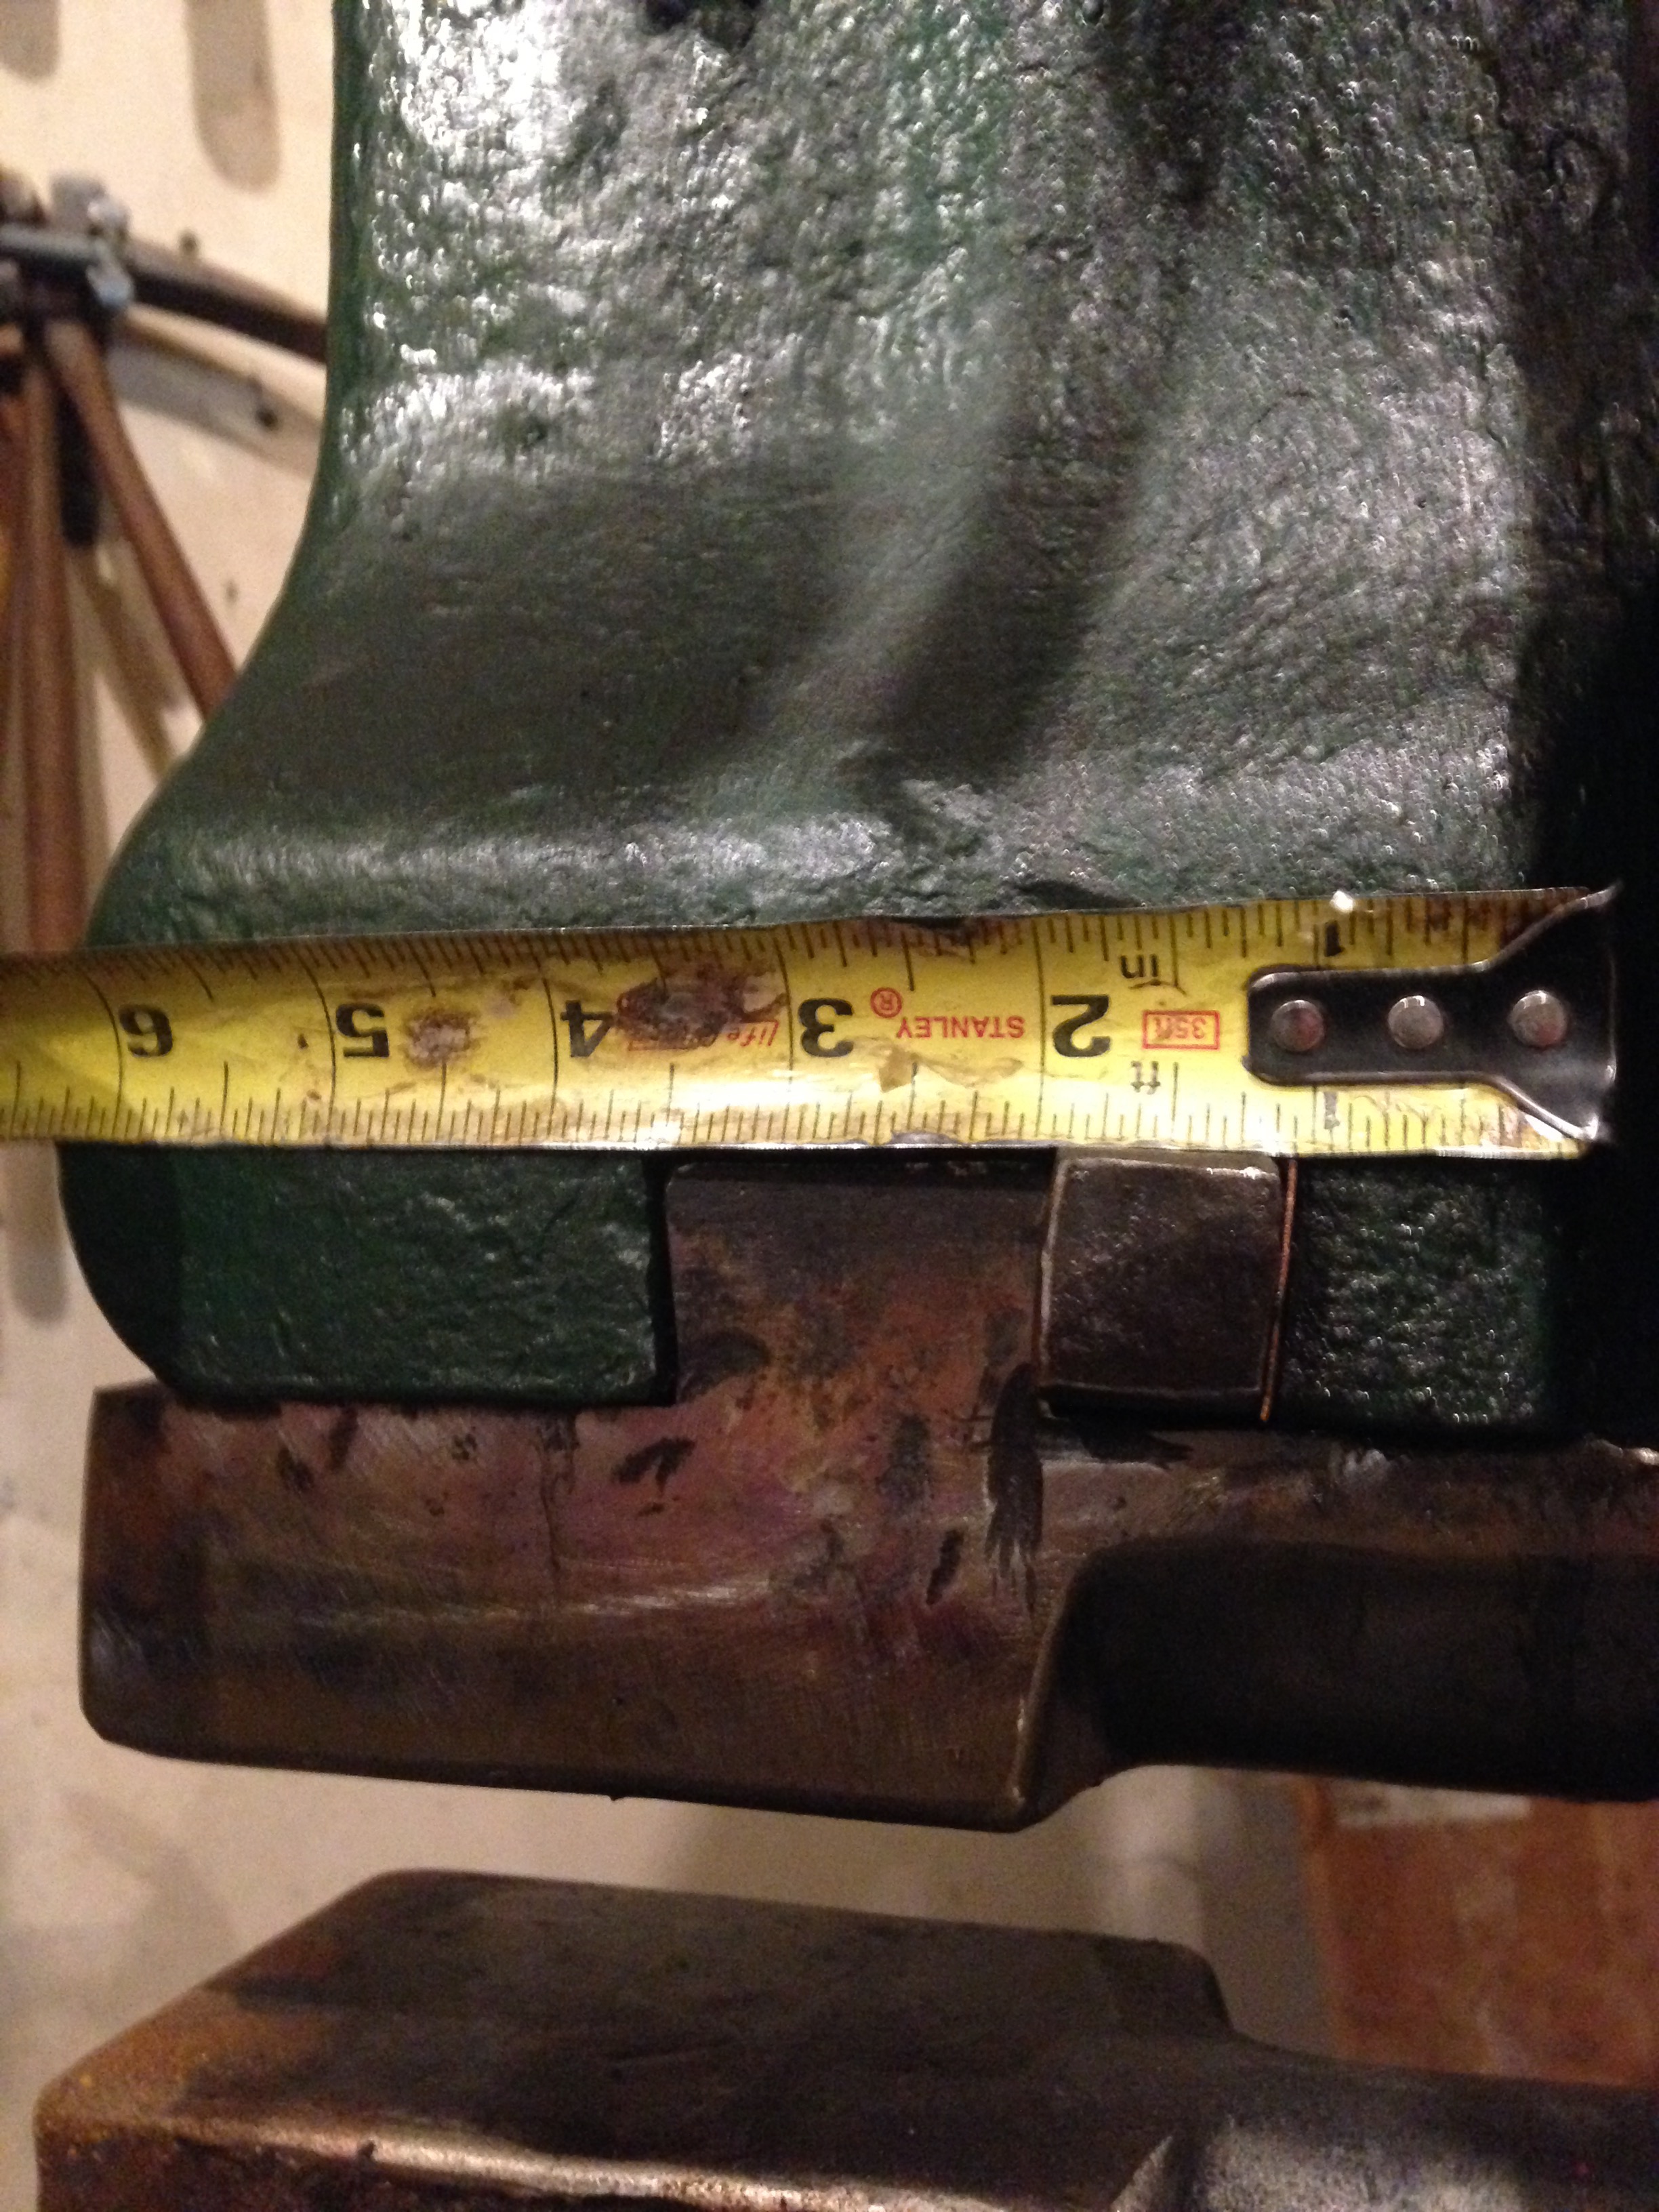
Champion no.1information
Judson Yaggy replied to mitchell's topic in Power Hammers, Treadle Hammers, Olivers
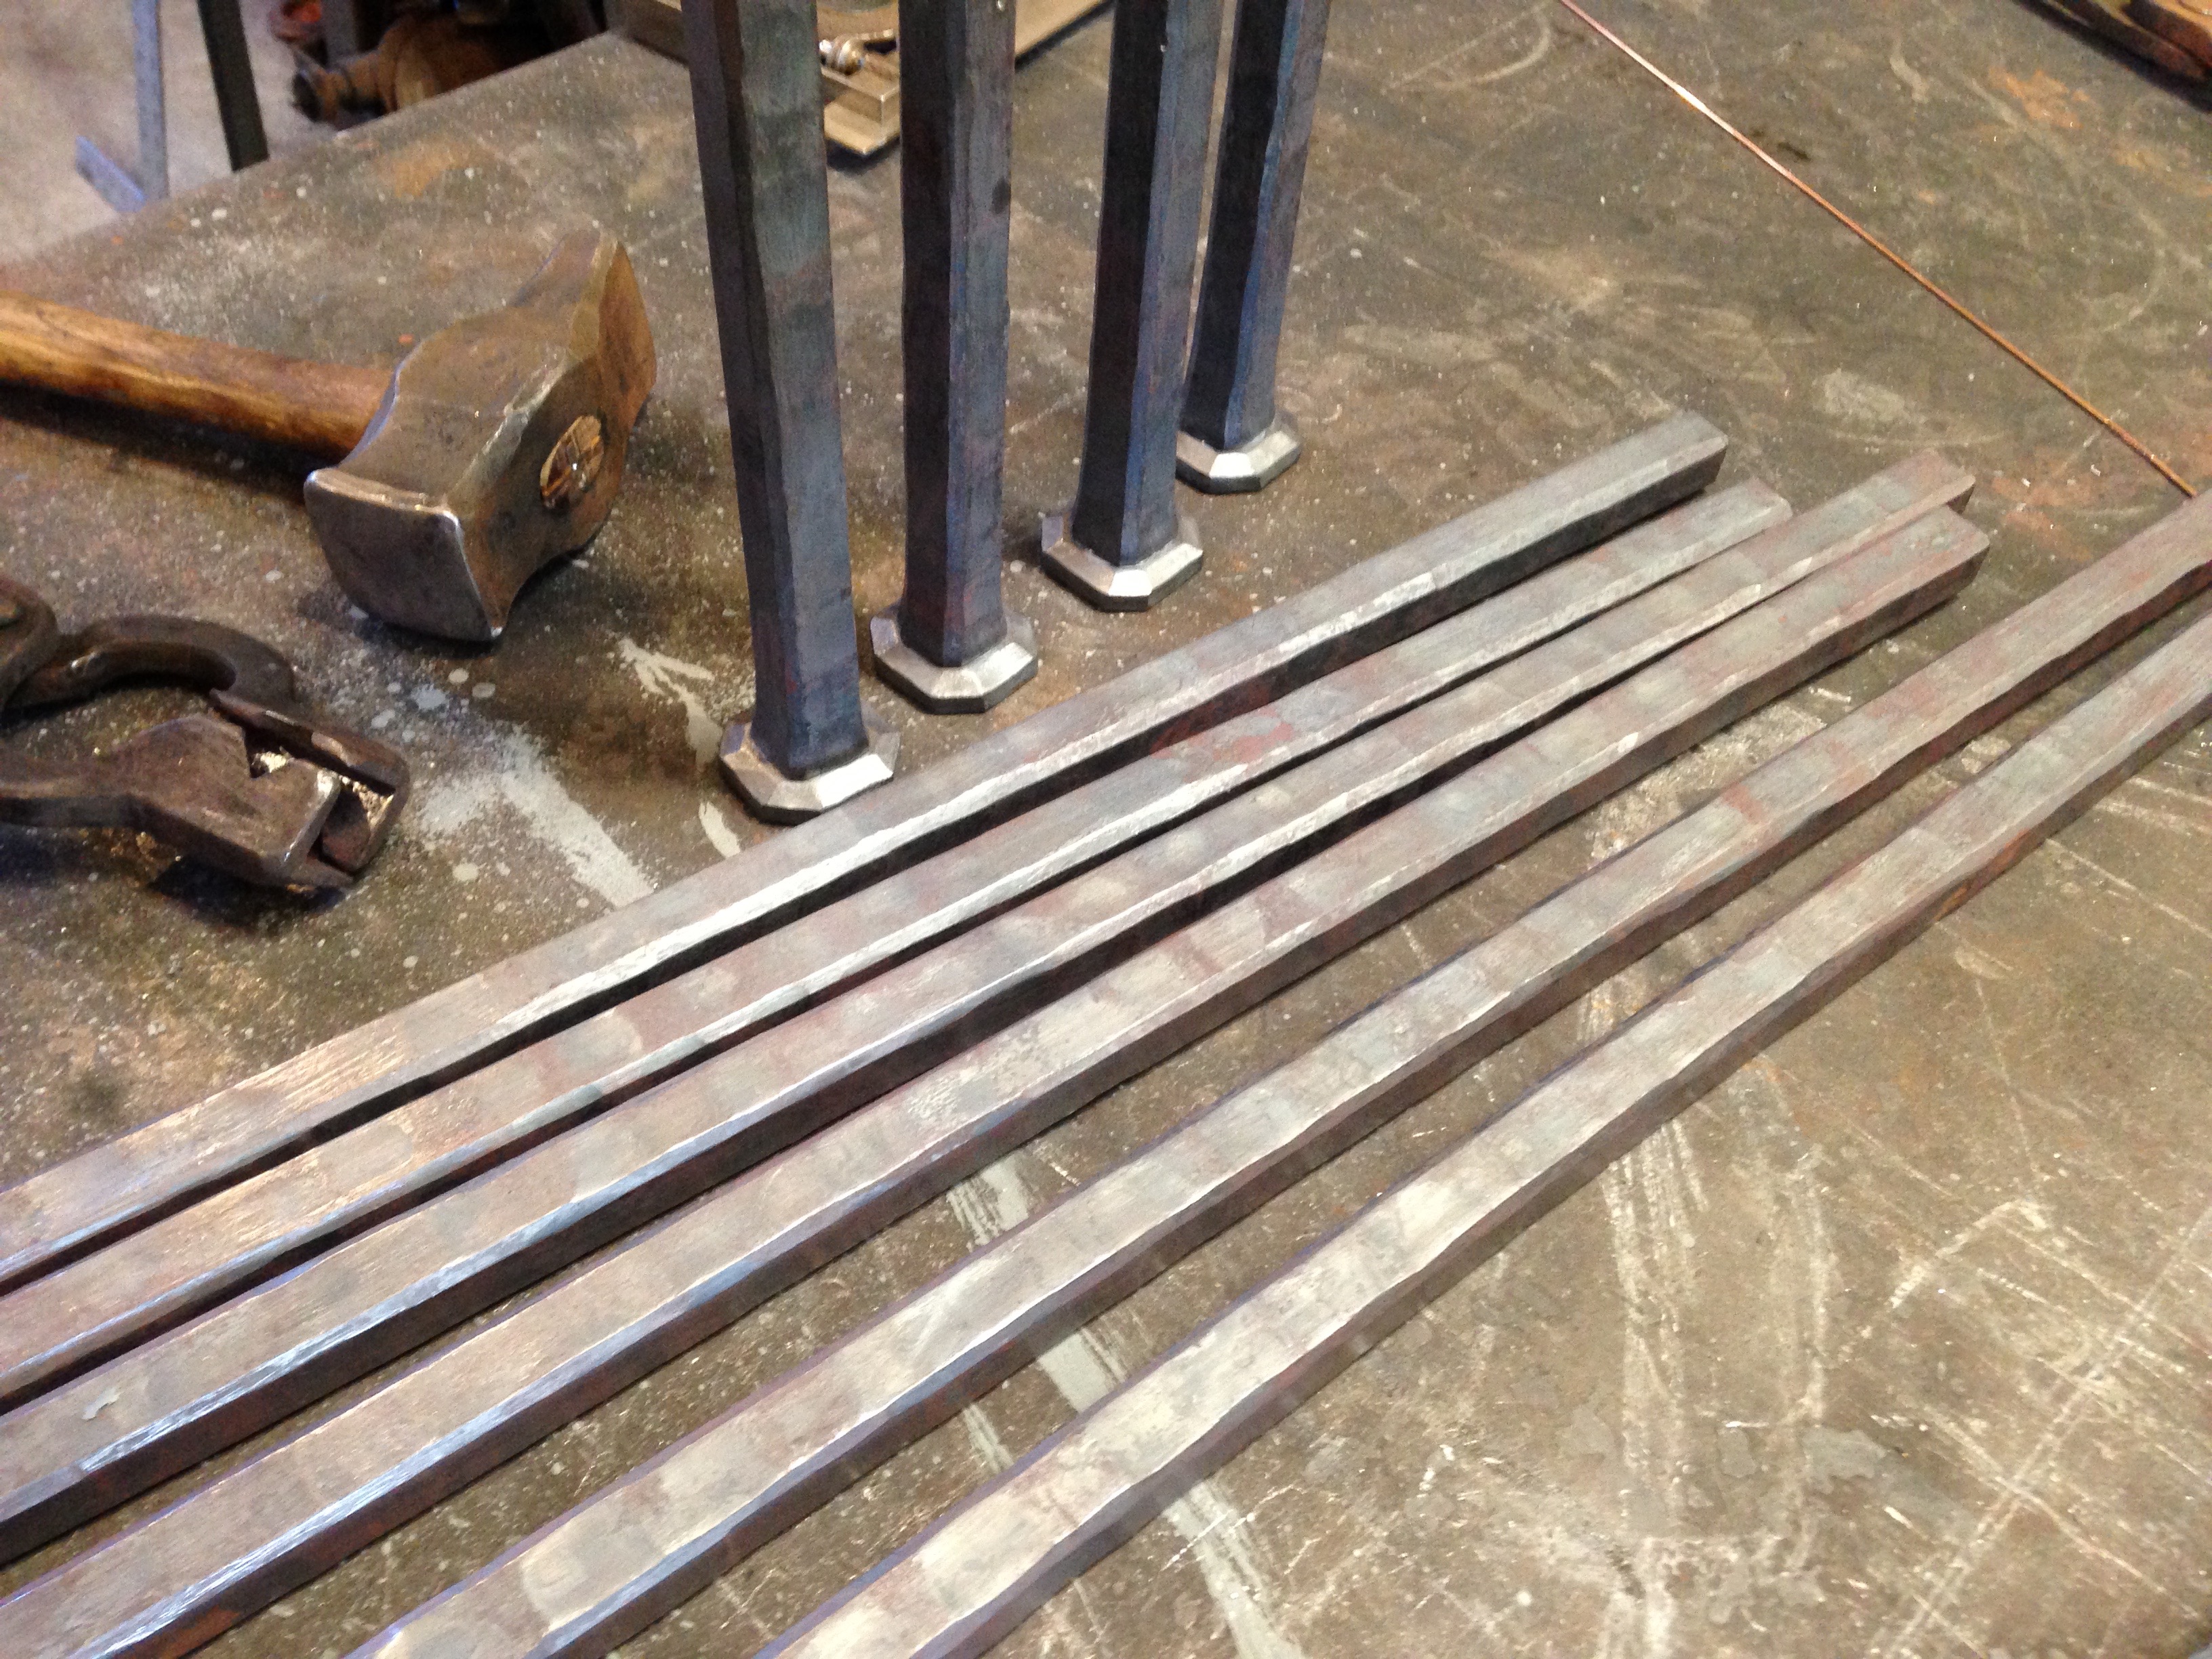
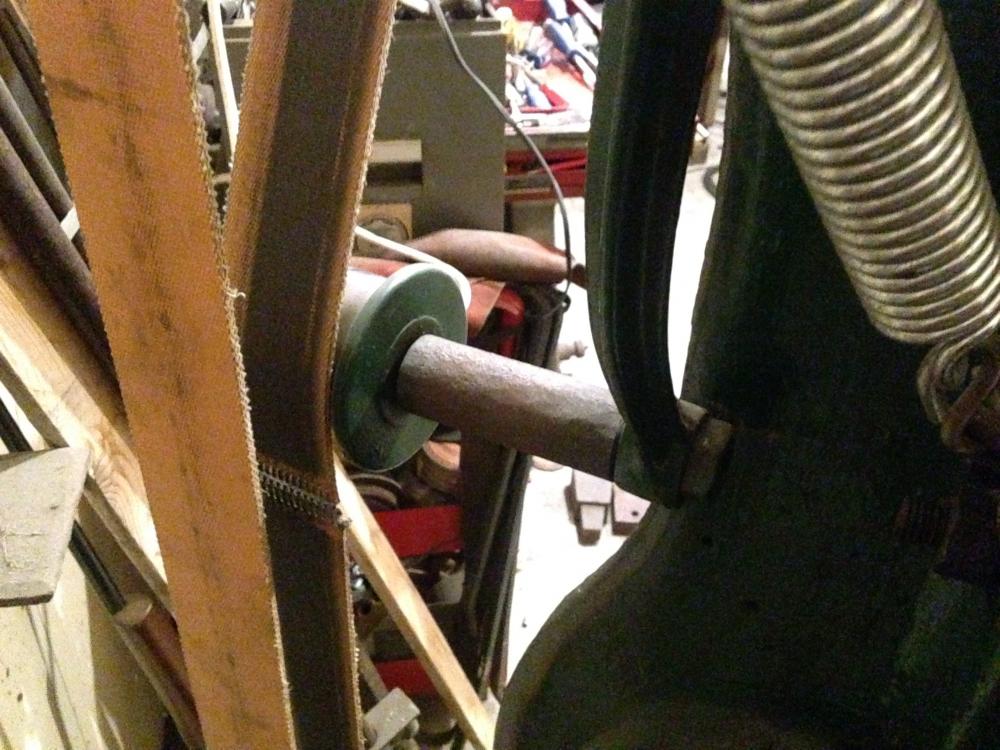
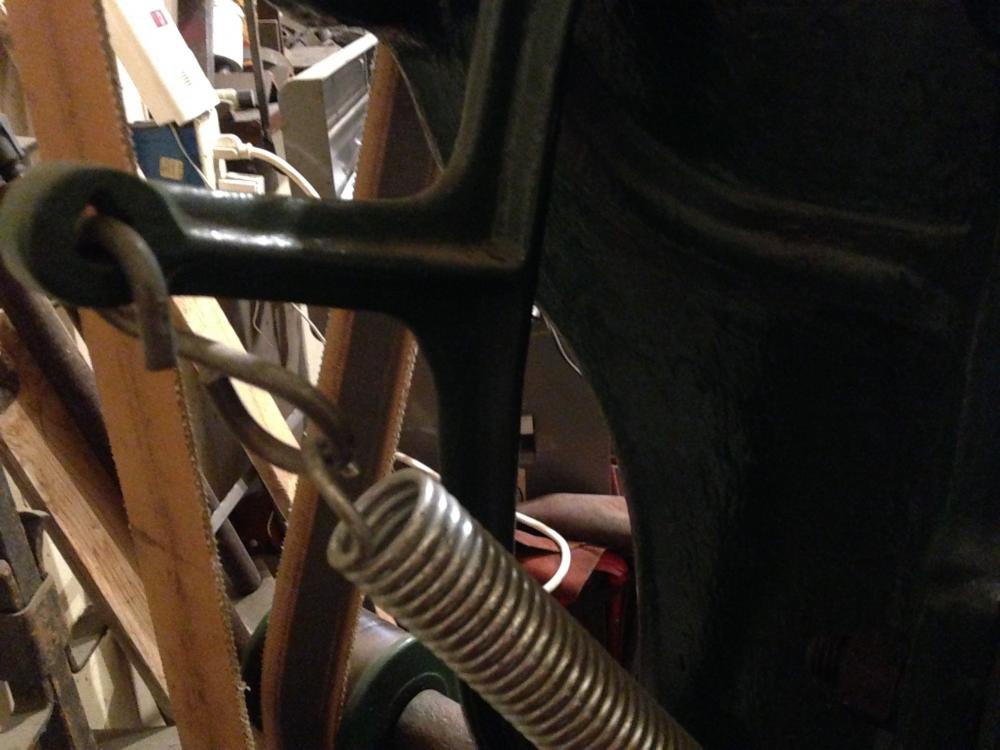
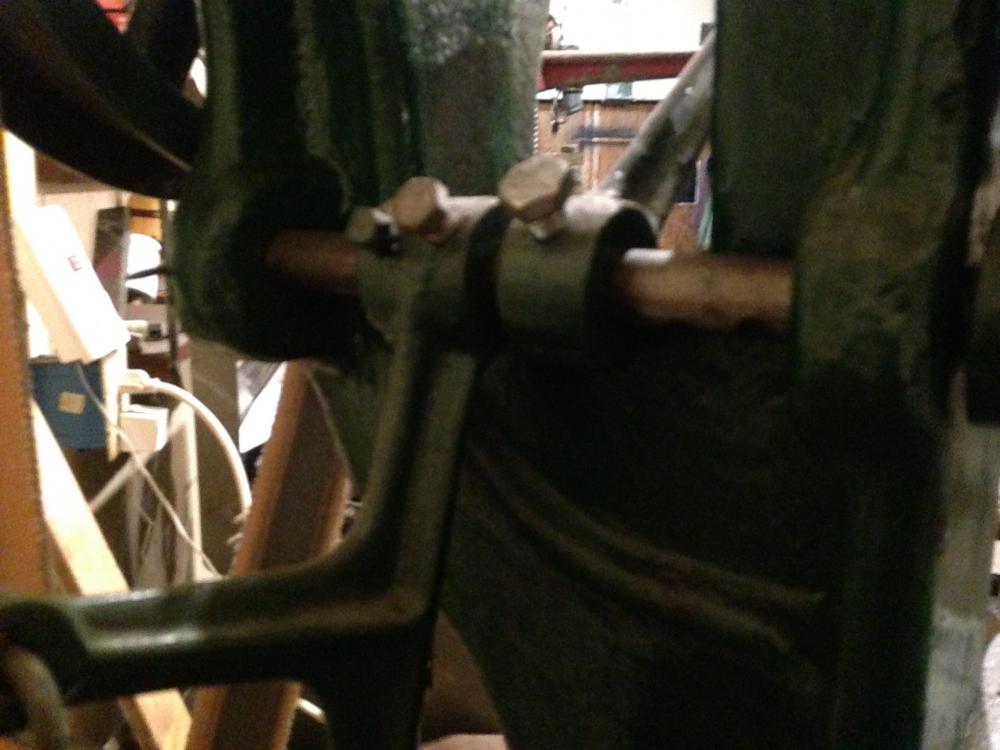
Yes it's a dovetail. And having the lower dt blow out is probably the most comon problem with Champions, it's the #1 design flaw with them. I've seen what I think are original dies with an extended cross shaped lower section to provide more bearing in the dt. Here are some pics of my dies and keys. I ground, filed, and scraped new oversize female dovetails into the anvil (no sow block, grrr) and eventually used a hot fit larger key and the copper shim trick with a reverse taper smaller key to get it to stay put. Also included some awkward angle pics of the idler arm. This hammer is stuffed tight into a corner of the shop and for space reasons I mounted the motor down low and refersed the usual orientation of the arm. Also turned an extension for the pulley axle to get motor, idler, and main pulley to align with an oddball motor location. Thus the tight pictures but I hope you get the idea.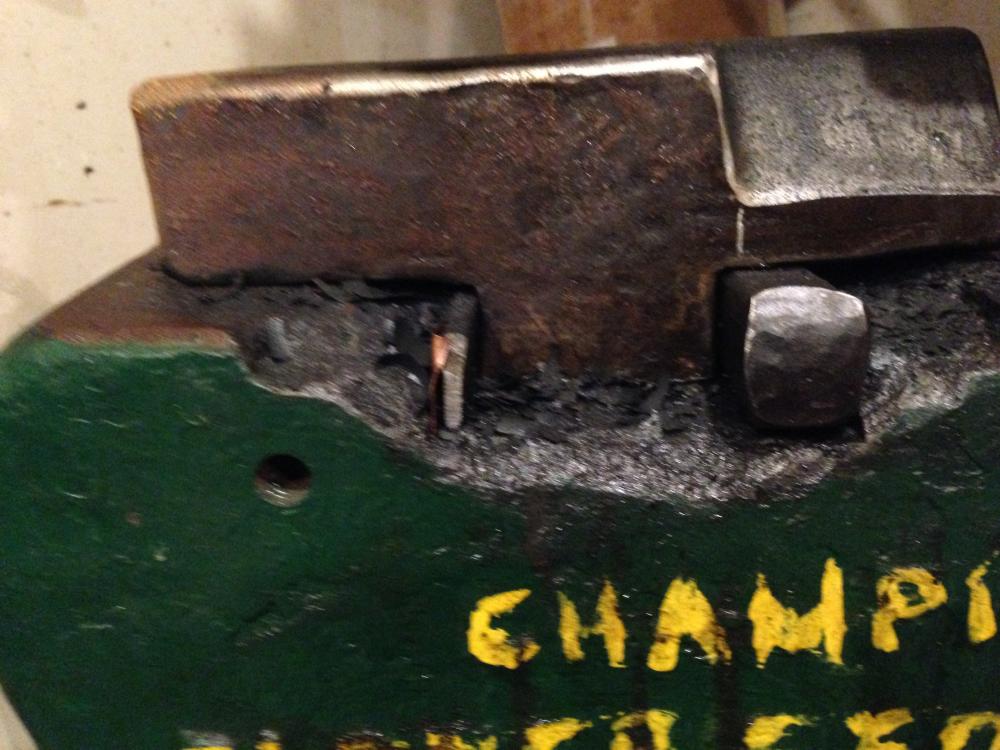


-
What did you do in the shop today?
Judson Yaggy replied to Mark Ling's topic in Blacksmithing, General Discussion
Ha! Told you so! (Grin) -
Rings and clips on the bitter end of reins also create maximum clamping force, and allow the spring in the reins to absorb hammering impact without working loose. They also don't get in the way of rotating the tongs and work on the face of the anvil. Offset tongs allow the same function as your pass thru design while having a more simple and robust design. Only one rivet in the boss. You might be on to something with the hardy hole tong holder thou! Good idea.
-
Ideas for putting a finish on multiple small items?
Judson Yaggy replied to Derek Melton's topic in Finishes for Metal
Build a tumbler. After tumbling to knock off scale or burnishing, you can apply oil based finishes with a tumbler by tossing in an oil soaked rag (beware the fire hazard thou). -
Hold downs work using a combination of length, hight, very modest spring load, and wedge angle (some mystical ratio of hole diameter, shaft diameter, and hole depth.) If you have an oddly shaped hole you will need to play around with the variables to find what works for you.