jlpservicesinc
-
Posts
5,782 -
Joined
-
Last visited
Content Type
Profiles
Forums
Articles
Gallery
Downloads
Events
Everything posted by jlpservicesinc
-

Spanish colonial ironwork collection
jlpservicesinc replied to Frank Turley's topic in Reference Materials
Nice collection.. I love looking at oid hardware and tools that were hand forged.. Makes me want to be better at the mundane.. -
Be handy when out doing demo's.. Can't say I'd want it in the regular shop other than for a conversation piece..
-
shes a bute..
-
Thanks for the reminder.. I'm still figuring stuff out.. In fact I can't seem to find the edit button to remove the picture..
-
Nice anvil. Largest Columbian I have seen.. How big is the hardy hole?
-
Naturally Aspirated Ribbon Burner. Photo heavy.
jlpservicesinc replied to Frosty's topic in Ribbon Burners
LOL.. Thanks for taking the time to get back to me.. Certainly helps with my education in this realm.. I believe the answer will come as one of those.. Ah ha moments and then it will be all clear.. Looking forwards to the results.. -
Naturally Aspirated Ribbon Burner. Photo heavy.
jlpservicesinc replied to Frosty's topic in Ribbon Burners
Yes I have looked at the plans and have seen the ratios... So to just clarify.. A longer tube overall while maintaining the same pressure of LP/NG/Propane would increase velocity but also cooling of the burner orifices.. From what I can remember you tried different hole counts (smaller number/size) which as you stated increases velocity through the holes but increase back pressure.. This is consistent with what I wrote.. Increasing the hole count would decrease pressure inside the block as there is an increase in flow because of more holes.. More holes would mean an increase in pipe length to create the same volume at a higher speed of air flow.. Or you can go up a size in pipe diameter but you would now have a slower air flow but more volume.. It's the balancing effect you have been looking for.. ???????????????? This balance when the burners are getting hot is what you are after.. If there is an increase in air flow this would help to cool the burners better just like an A/O torch so to speak but would also increase velocity at the burners (faster air flow). So, with this being said.. Why would you want a slower flame velocity?????? I understand flame front and heat kernel but if the forge maintains the same volume (area/floor space, etc, etc) so to speak wouldn't you want the flame kernel to be nearly in the same spot to heat the metal???? Instability is because there isn't enough velocity to keep the air from stalling in the tube and the gases are in a reversion process inside the tubes.. If you increase gas pressure this makes the tube induce (venturi effect) more air as it pulls it downward with the fuel increasing both air speed and volume.. lengthening the Tube would give the same effect as turning up gas pressure but without the increase in gas pressure... This would just increase the velocity of the air.. Sorry, just trying to wrap my head around the total package you are trying to achieve.. -
Naturally Aspirated Ribbon Burner. Photo heavy.
jlpservicesinc replied to Frosty's topic in Ribbon Burners
Frosty I know very little about gas forges.. I do know a lot about engine porting and polishing and flow dynamics.. So I'm just spit balling here.. If you were to increase the venturi pipe (pipe going into the forge) would you get more velocity? Or increase the length of lead into the T? A T on a intake system for a NA car would be a no, no since you would have converging airflow which would stiffle and create eddy currents as each side smacked into each other before changing direction into the main tube.. Like I said.. Just spit balling as to gas forges.. -
Tire irons (tire spoons)
jlpservicesinc replied to jlpservicesinc's topic in Blacksmithing, General Discussion
4140 works great in the as forged state for the amount of load that was required even in the thin profile the tips have.. If you run full heat treat you could get some pretty tough tooling but for the small use these will see I didn't even bother.. Only thing i might do is thin back the 1st hook as I found it was a little to tall to slip between the tire and rim as it was getting caught between the 2.. If all goes well the next time i need them will be in another 35 years and at that point the tractor will be somebody elses problem.. -
How did you like the mower blade as a hoof knife material? I usually use coil springs for them..
-
Well, had me a flat on the old Kubota B6000.. I had no tire irons (aka spoons) to change it out with.. So I set about to make a few spoons... I made 3 of them.. One was made from some medium carbon scrap round hanging around and the other 2 were made from some 4140 rectangular bar I had.. Little story here.. I also have some HSS (high speed steel(used for forged lathe bits, band saw guides and hot punches) ) hanging around in nearly the same cross sections as the 4140. I ended up making one whole spoon out of the HSS before I realized it was HSS.. Wasn't till I went to forge the hooked back section and the material refused to move at an light red heat and it dented the face of the hammer that I figured it out.. Sorry for the ramble..
.png.bdd81eb01ac29c1f9ab87d2444b2a3a9.png)
.png.0a0ffd90dfeb4e53039631013778f9e7.png)
.png.a5b50168312f45c8565a7495a7b53036.png)
.png.b78287dc8880acafcf3ba2854e19d423.png)
.png.676d06200a246e1350c38bd0ad8b62ae.png)
.png.a0b9a0ef329e371be23d3afb1562e0da.png)
.png.894fa196fe0891c4d6bbf7ca8e19e104.png)
-
philosophically I'm still a beginner.. Been at it over 40 years.. for me I took 8 years off (full time farrier now) so would consider myself a knowledgeable beginner but no way can I do what I could 8 years ago.( was a professional iron pounder for 12 years). It takes me a good 2 days of forge work before I start to feel like things are clicking in again mentally, and it takes a good 3 days of 8hrs of being at the anvil before I start to get a hammer arm back..
-
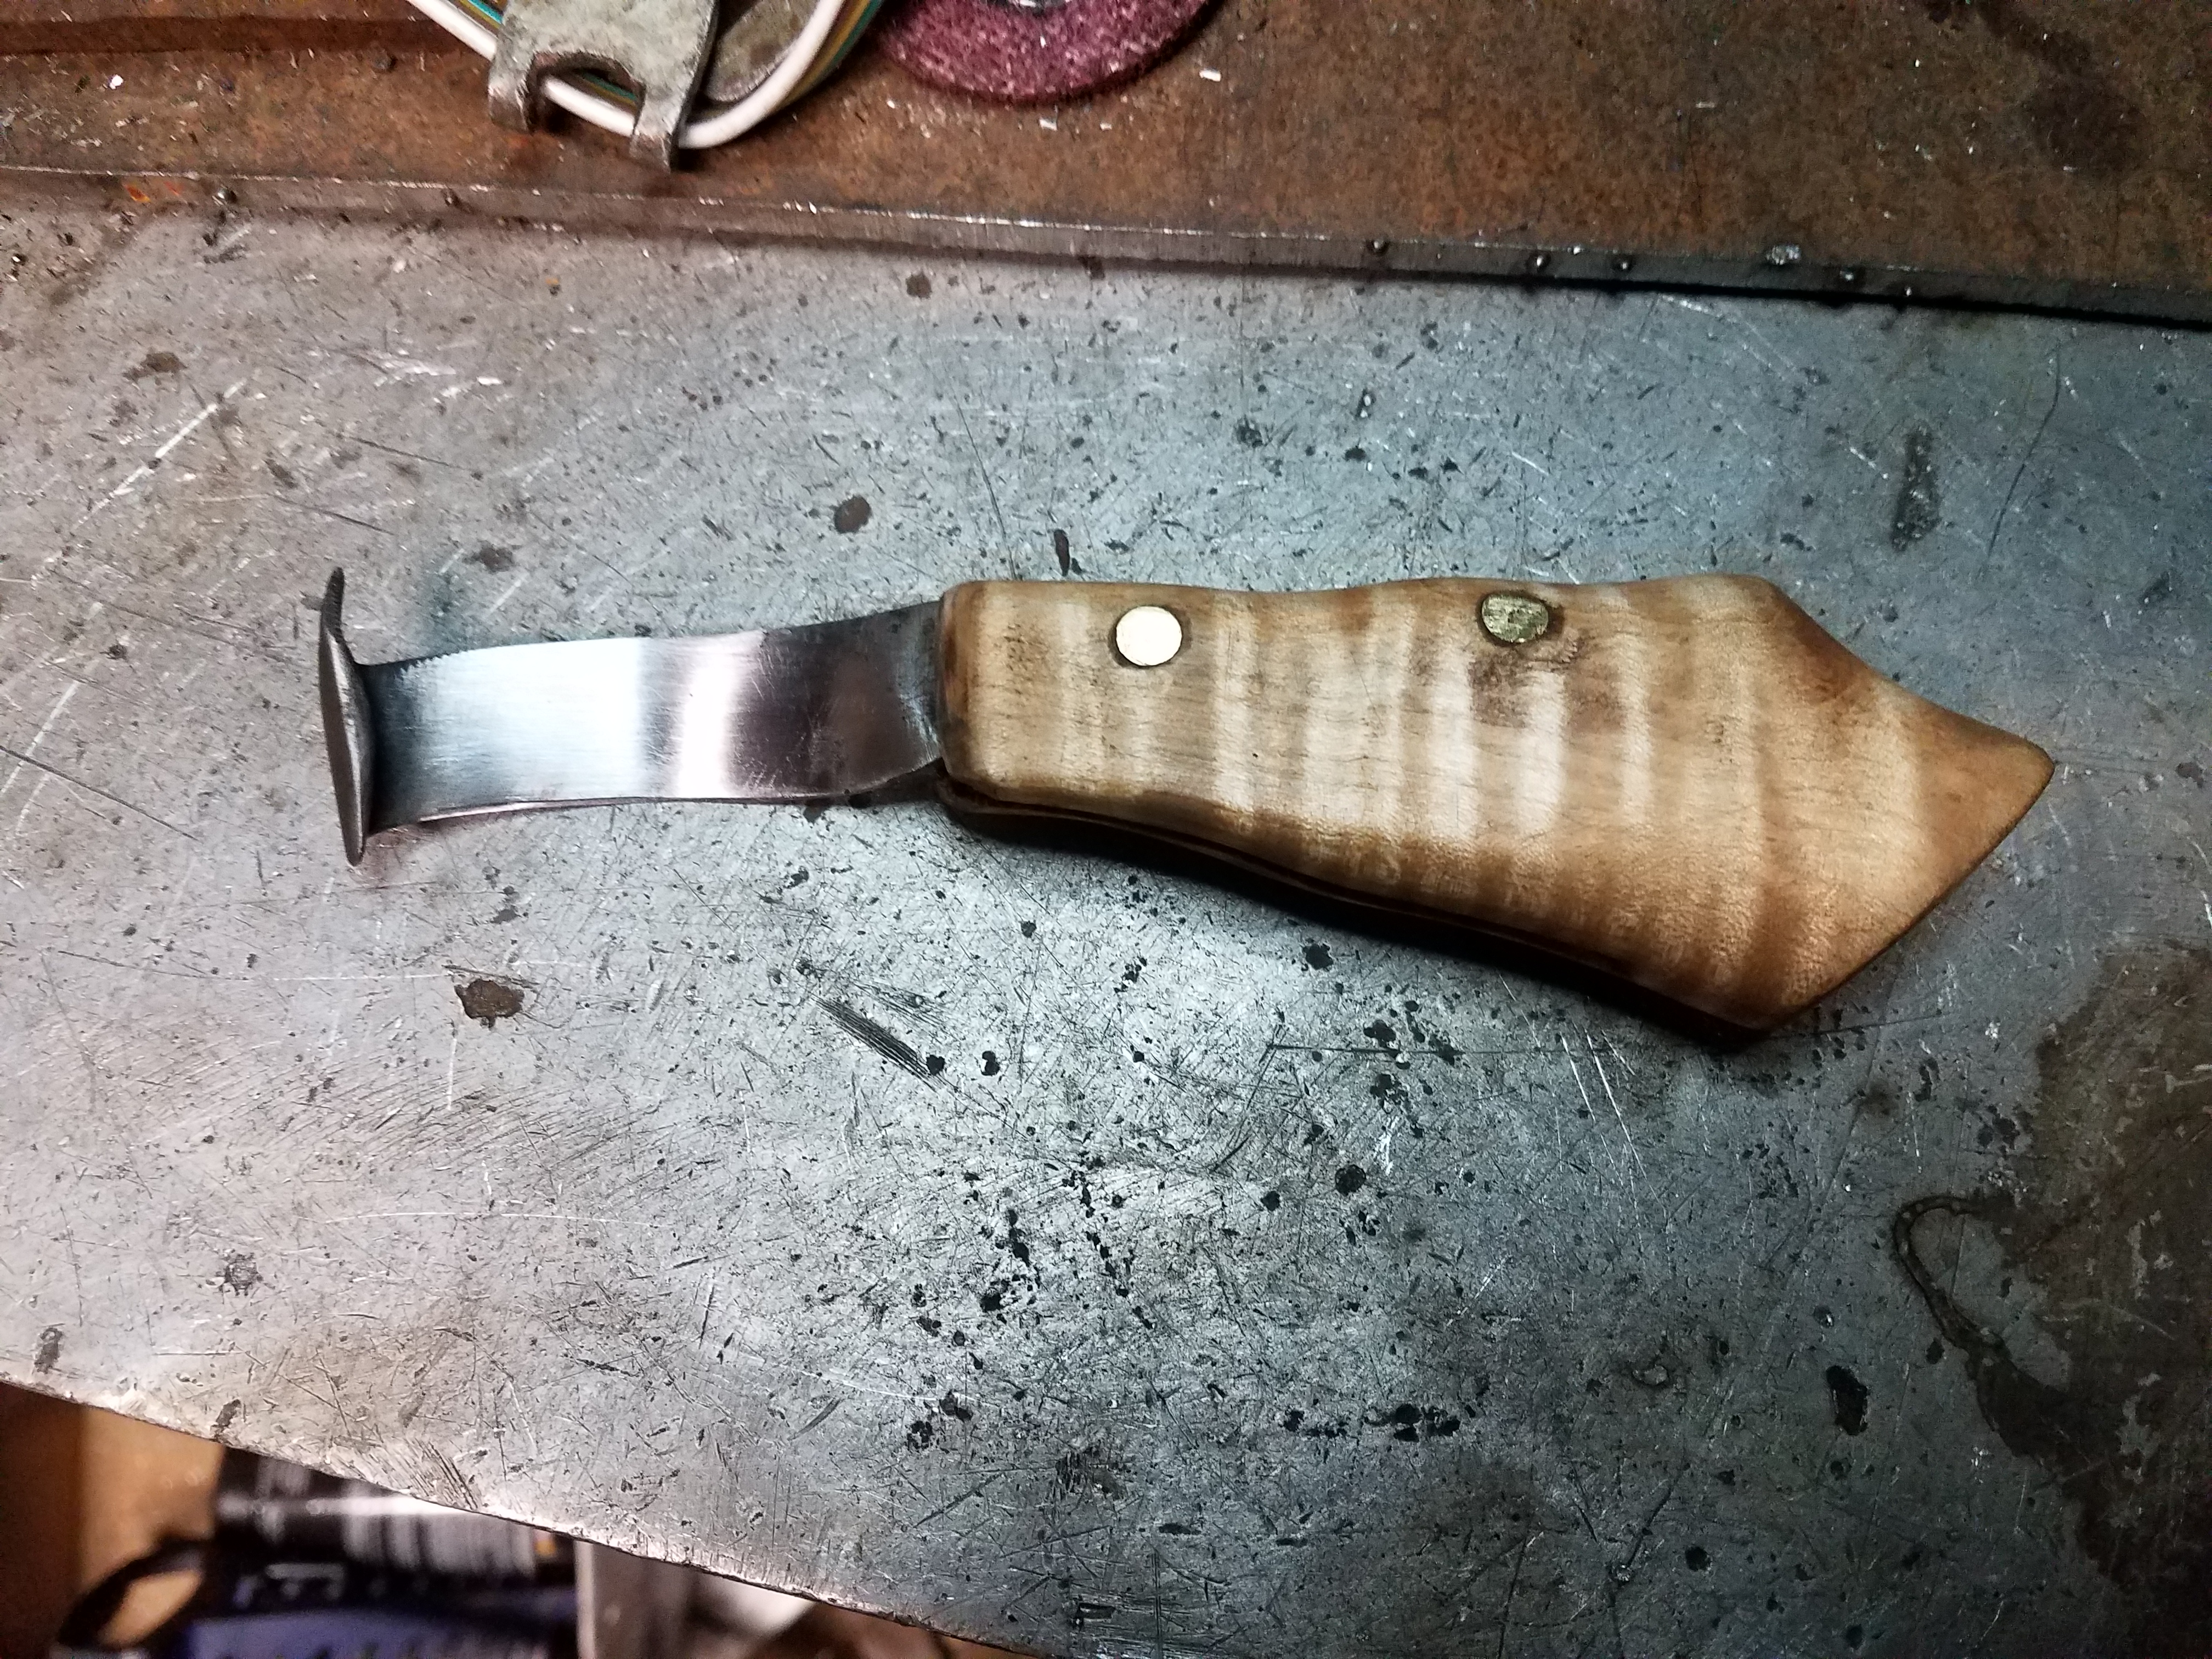
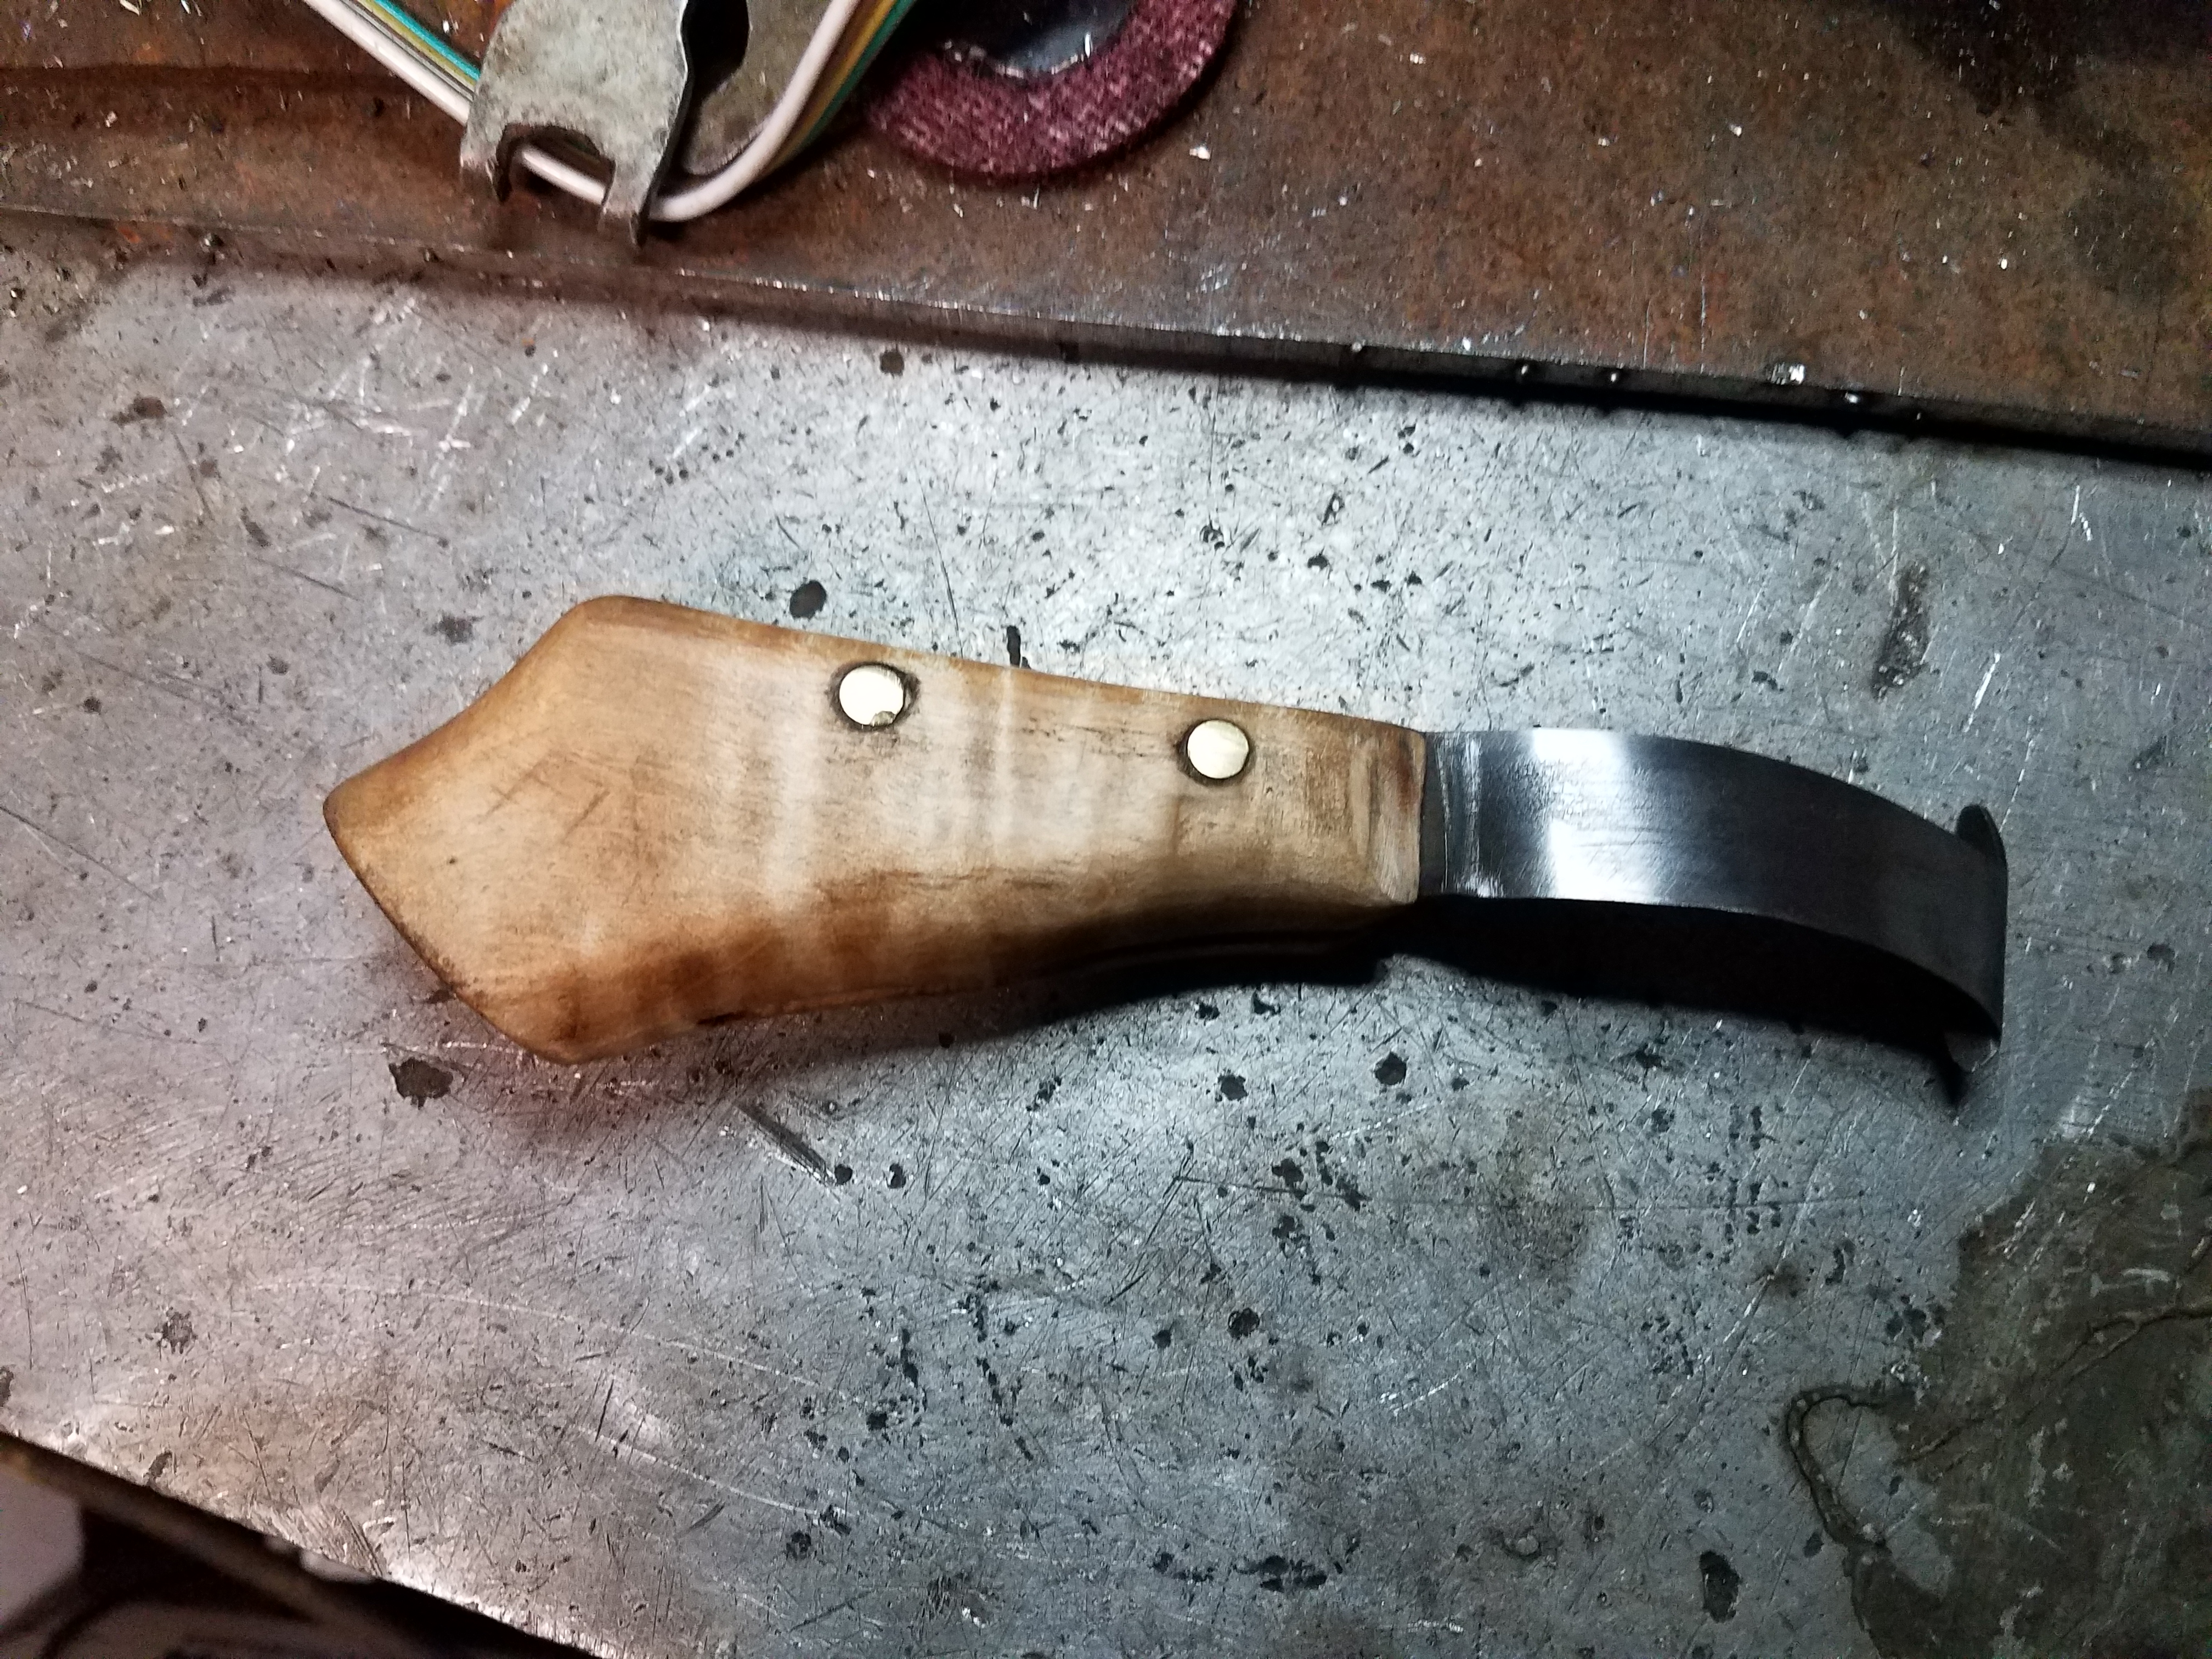
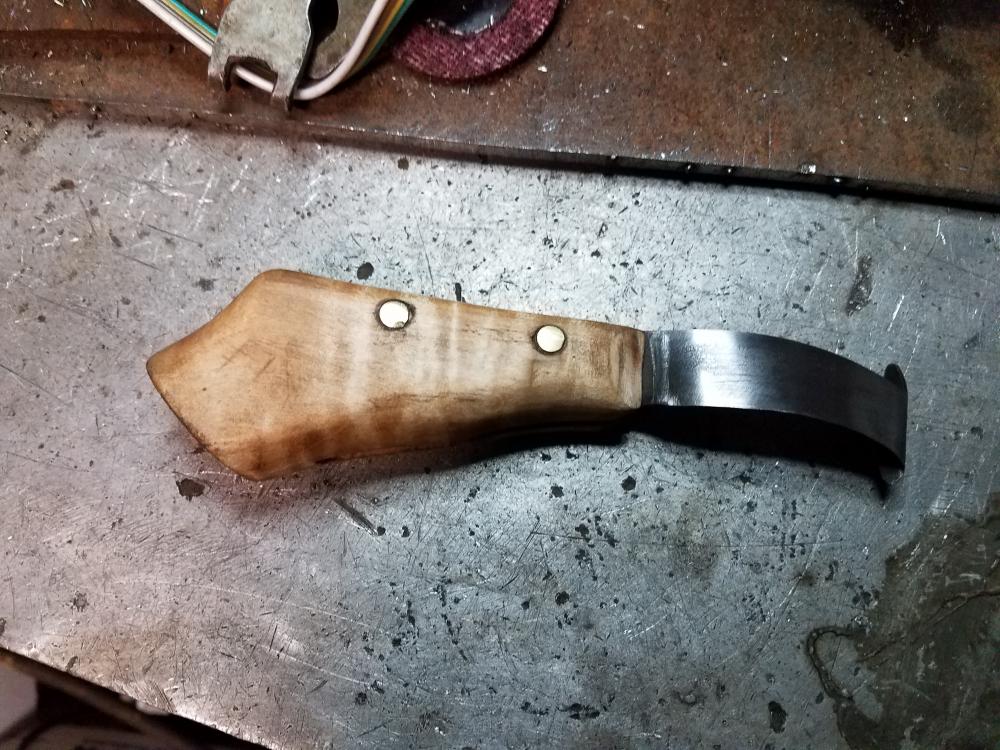
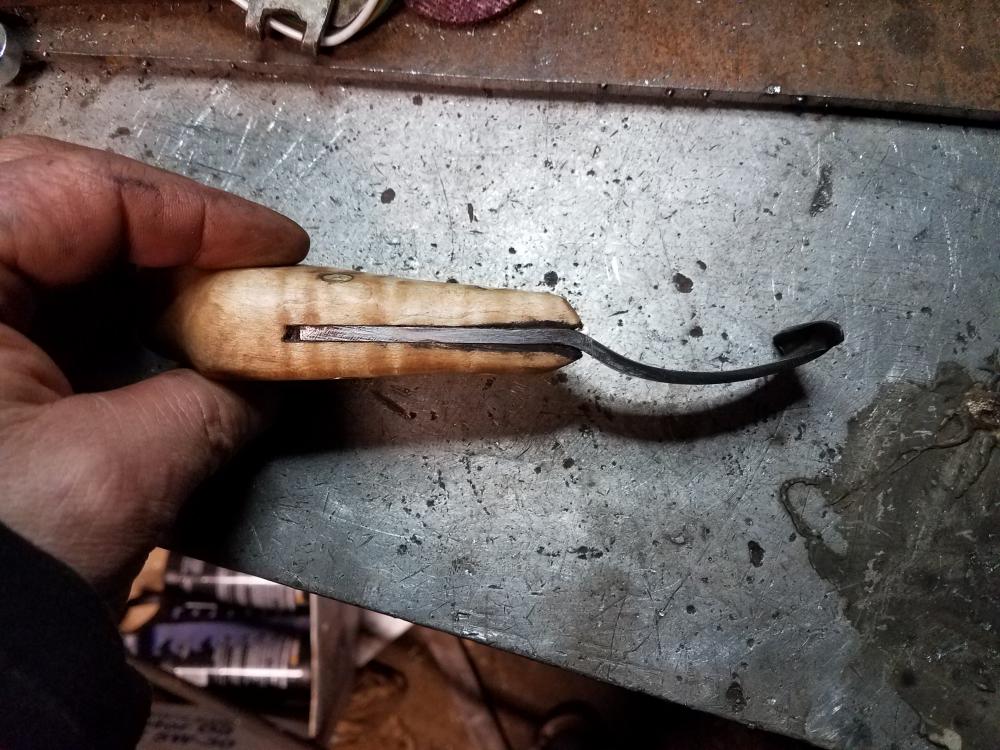
Here is a hoof knife I forged out a few months ago.. It is completely hand made and finished (ie no electric tools or grinders) except for the 2 holes drilled and the slot cut.. Started life as a mower blade.. Was forged out to the right thickness and width vs cut out.. Custom job all the way.. The blade descends instead of being parallel with the handle (IE out of plain).. This should give a little better wrist angle.. Short blade with short club foot handle.. Tiger maple handle linseed oil finish then machine oil.. I usually like to dress them up more but it was just so cold out in the shop and I needed a new knife for tomorrow..

-
Fantastic scoop.. Did you have to talk the guy down? LOL>.
-
Last winter the tub was frozen solid.. On one day I was able to get out there and work.. Was around 32F but was nice and sunny... Took about 4hrs of working and using the ice like water before I had about 2" of water on the top that was usable.. I can work easily with 1 hammer, an ALO and a fire source that will heat the metal.. but without the water I'm just miserable for more than anything than making a nail.. .. In a shop that gets down to freezing at night but warms up to above freezing during the day.. Just sticking a 4X4 wood log in can be enough if you work in there everyday..
-
The NEBA group has been rebuilding anvil faces for years.. I've seen some of the work that has gotten done and it's first rate.. They offer an anvil rebuilding class each winter and for the money it's well worth it.. They do pre and post heat.. If I had an anvil with damage like that I would have no problem taking it to NEB for a one on with the gang..
-
It's funny I just stumbled onto this thread.. I missed an opportunity back in the 90's to get a vintage turn of the century commercially made bolt makers vise.. it was designed a lot like the Arizona plans shown.. It was foot operated and the dies sat in a rectangular slot.. One side held in position with a set screw the other side had a yolk like function for the return and a solid pusher block behind for closing.. The dies were held up by a 2 leg arrangement.. Both sides were solidly mounted in place on a common U arrangement.. In operation you would drop the rod down the throat of the dies and it would hit a height adjustable stop, then you would clamp down on the foot lever, upset the head and when you removed pressure off the foot lever it would return the foot lever to it's upward position via a spring and the newly formed bolt would drop to the floor.. There must have been around 4 or 5" of travel between the dies.. and the dies went to about 1.5" round.. all the dies were there in excellent used condition as was a hand operated threading machine.. Huge hand cranked affair with gear drive and floating die holder.. There was also screw making dies at this same place.. I had gone there once and noticed the machines sitting in an old barn.. before cell phones with cameras and GPS being handy.. Sadly I was there as a new apprentice and when I asked my boss to ask the people if they wanted to sell it, He told me to go jump in a lake.. A few months later I went back to find the place to ask on my own and the barn that had the equipment in it was gone.. Had been destroyed to make room for another barn..
-
Nice work.. Looking forwards to the finished results.. Today it's just about possible to weld anything together,, Gas weld, mig, tig, spray arc, etc etc.. The variety of rods,, Etc etc.. It really just becomes a time frame or knowing someone who knows the right rod or wire to get the objects to stick together.. There are tig rods for cast iron now.. Filler wire/welding rods have come a really long ways..
-
Treadle hammer mechanics?
jlpservicesinc replied to Blister Fingers's topic in Power Hammers, Treadle Hammers, Olivers
Everybody here has lots of insight and information as to what the experiences are/were.. I also wanted to build a foot hammer and in the way back looked at all viable methods for doing that.. My fabrication skills were not as good as they are now nor did I have the machinery to cut, size etc etc to get to a reasonable working prototype.. Today though is a different time frame and while a foot hammer is in no way a power hammer, foot hammers in general were used for a good many years by lots of smiths.. There are a few key things which I have discovered as well.. At some point in the future I might share the project if it turns out to have any merit as I need or want a foot hammer in the demo trailer.. 3 key things.. direct pressure from foot treadle to hammer shaft or cam so there is nearly 0 free play so you get an accurate feed back.. an assist return spring on the full up so there is all ready pressure on the head at the time of the downward stroke again.. (these need to be balanced with ones own natural rhythms).. Ideally with center pivot.. If you do a patent search many foot hammers will come up.. i like one design in particular.. I just got a new to me laptop running so will have to find the files again.. So, one big one: One has to understand the limitations a foot operated hammer has... It's a poor substitute for a striker or a power hammer but it can be very handy if designed and setup correctly.. -
Striking anvil questions
jlpservicesinc replied to Mark BullCreek's topic in Anvils, Swage Blocks, and Mandrels
It really comes down to what it is you want to forge.. the larger the stock the larger the anvil. While cast steel or forged steel anvils do offer a slight advantage theoretically. I have seen a number of steel Hay Budden anvils with the tail knocked off as well as Eagle anvils and a slue of others.. It does seem that in this regards they all fared about the same wrought iron vs steel vs cast steel.. Ideally, as long as you use the center of the mass (anvil body) and forge here you will limit the heavy blows on the tail or horn of the anvil.. I do have a preference for European double horn designs with the hardie hole towards the horn as there is more mass there and will be far less likely to snap the middle of the anvil off.. As for tools and where to start.. forge, anvil, vise, hammer.. with only these 4 items you can pretty much make everything else.. And for anvils.. Any anvil like object will work.. Glenn's suggestion for striking height is good, but also consider who is doing the striking.. A striker who is good and learned can use an anvil or ALO up to about 3 or even 5" from standard height and do an excellent job, where someone with little skill will have a hard time with 1" variance and getting the hammer to land full face contact.. As i have gotten older and started to look at the older forged anvils be it European or american.. I realize now how unique each one is as they are hand made so have a lot more love for them.. I used to routinely make hardie tools in my 1917 Hay budden using 16lbs sledge.. Not anymore.. Number one rule.. Just have fun.. -
Thanks for the reply.. I have an old Mankel forced air gas forge.. Back in the day it was maybe the best forge around and would reach welding temps but that was bck in the 90's.. Might have to dig it out again..
-
The handle sizes were correct for the size vise when new.. A leg vise is a tool like any other and they do wear.. I tighten the vise for what ever the job requires.. But on that same token a 4" vise will not sustain the same force as an 8" vise.. But as for saving wear and tear on the screw threads the more load applied the great the pressure gets distributed to the rest of the threads.. You will usually find on fulled screwed boxes that the first few threads take a beating and then the rest are in better shape.. Lots of the vises have brazed in threads from coiled wire.. While it works very well it's not as accurate as machined and even the machined (tapped) boxes will show similar wear.. A really good vise will have a threaded box that is more than 2" in length.. A cheaper vise sometimes will only have a few threads in the box.. If you ever notice the threads on most vises are worn where they get used the most, yet the vise fully opens and closes.. Anyhow, Because the jaws on smaller vises are usually narrower the amount of pressure per square inch is more focused vs a thicker jaw of a wider vise.. Anyhow, in 38 years I have never found the need for a cheater pipe to hold something being forged. I have seen many a bent handle.. In all the the vises I have if the handle is bent and there is slop in the hole I install the next size rod that will fit in the hole without modification of the screw boss where the handle goes thru.. I'm also no light weight and on a regular basis on my 5" and up vises clamp the vise down with full body weight on the handle.. I will also once tight give the handle a kick with the foot/boot if I need to in a fast time frame.. Proper oiling or greasing will lead to a much longer life span even with heavy use.. When was the last time anybody cleaned and lubed the threads and box on their vise????? Nice job on the handle.. if there was extra room I would have upsized the handle.. Spring steel is a bad idea.. but cold rolled is a good idea.. Lots of the handles were made from mild steel even in the olden days.. Wrought iron bent way to easily..
-
Naturally Aspirated Ribbon Burner. Photo heavy.
jlpservicesinc replied to Frosty's topic in Ribbon Burners
Brilliant work there Frosty.. Just excellent..... -
Both nice builds.. When I fully mature I'll get involved in making a ribbon gas forge.. Frosty, from the looks in the last picture it looks like 2 main streams per burner????? How many ports did you put in? Backhertz: the crayons are brilliant..
-
Blokman, while you are super sexy standing near that anvil.. some more of the anvil would be nice.. Love the historical pictures also. Foundryman,, That's where they made it.. The building sank as they forged it out.. So, glad there are still some of these giant hand forged anvils around.