jlpservicesinc
-
Posts
5,754 -
Joined
-
Last visited
Content Type
Profiles
Forums
Articles
Gallery
Downloads
Events
Everything posted by jlpservicesinc
-

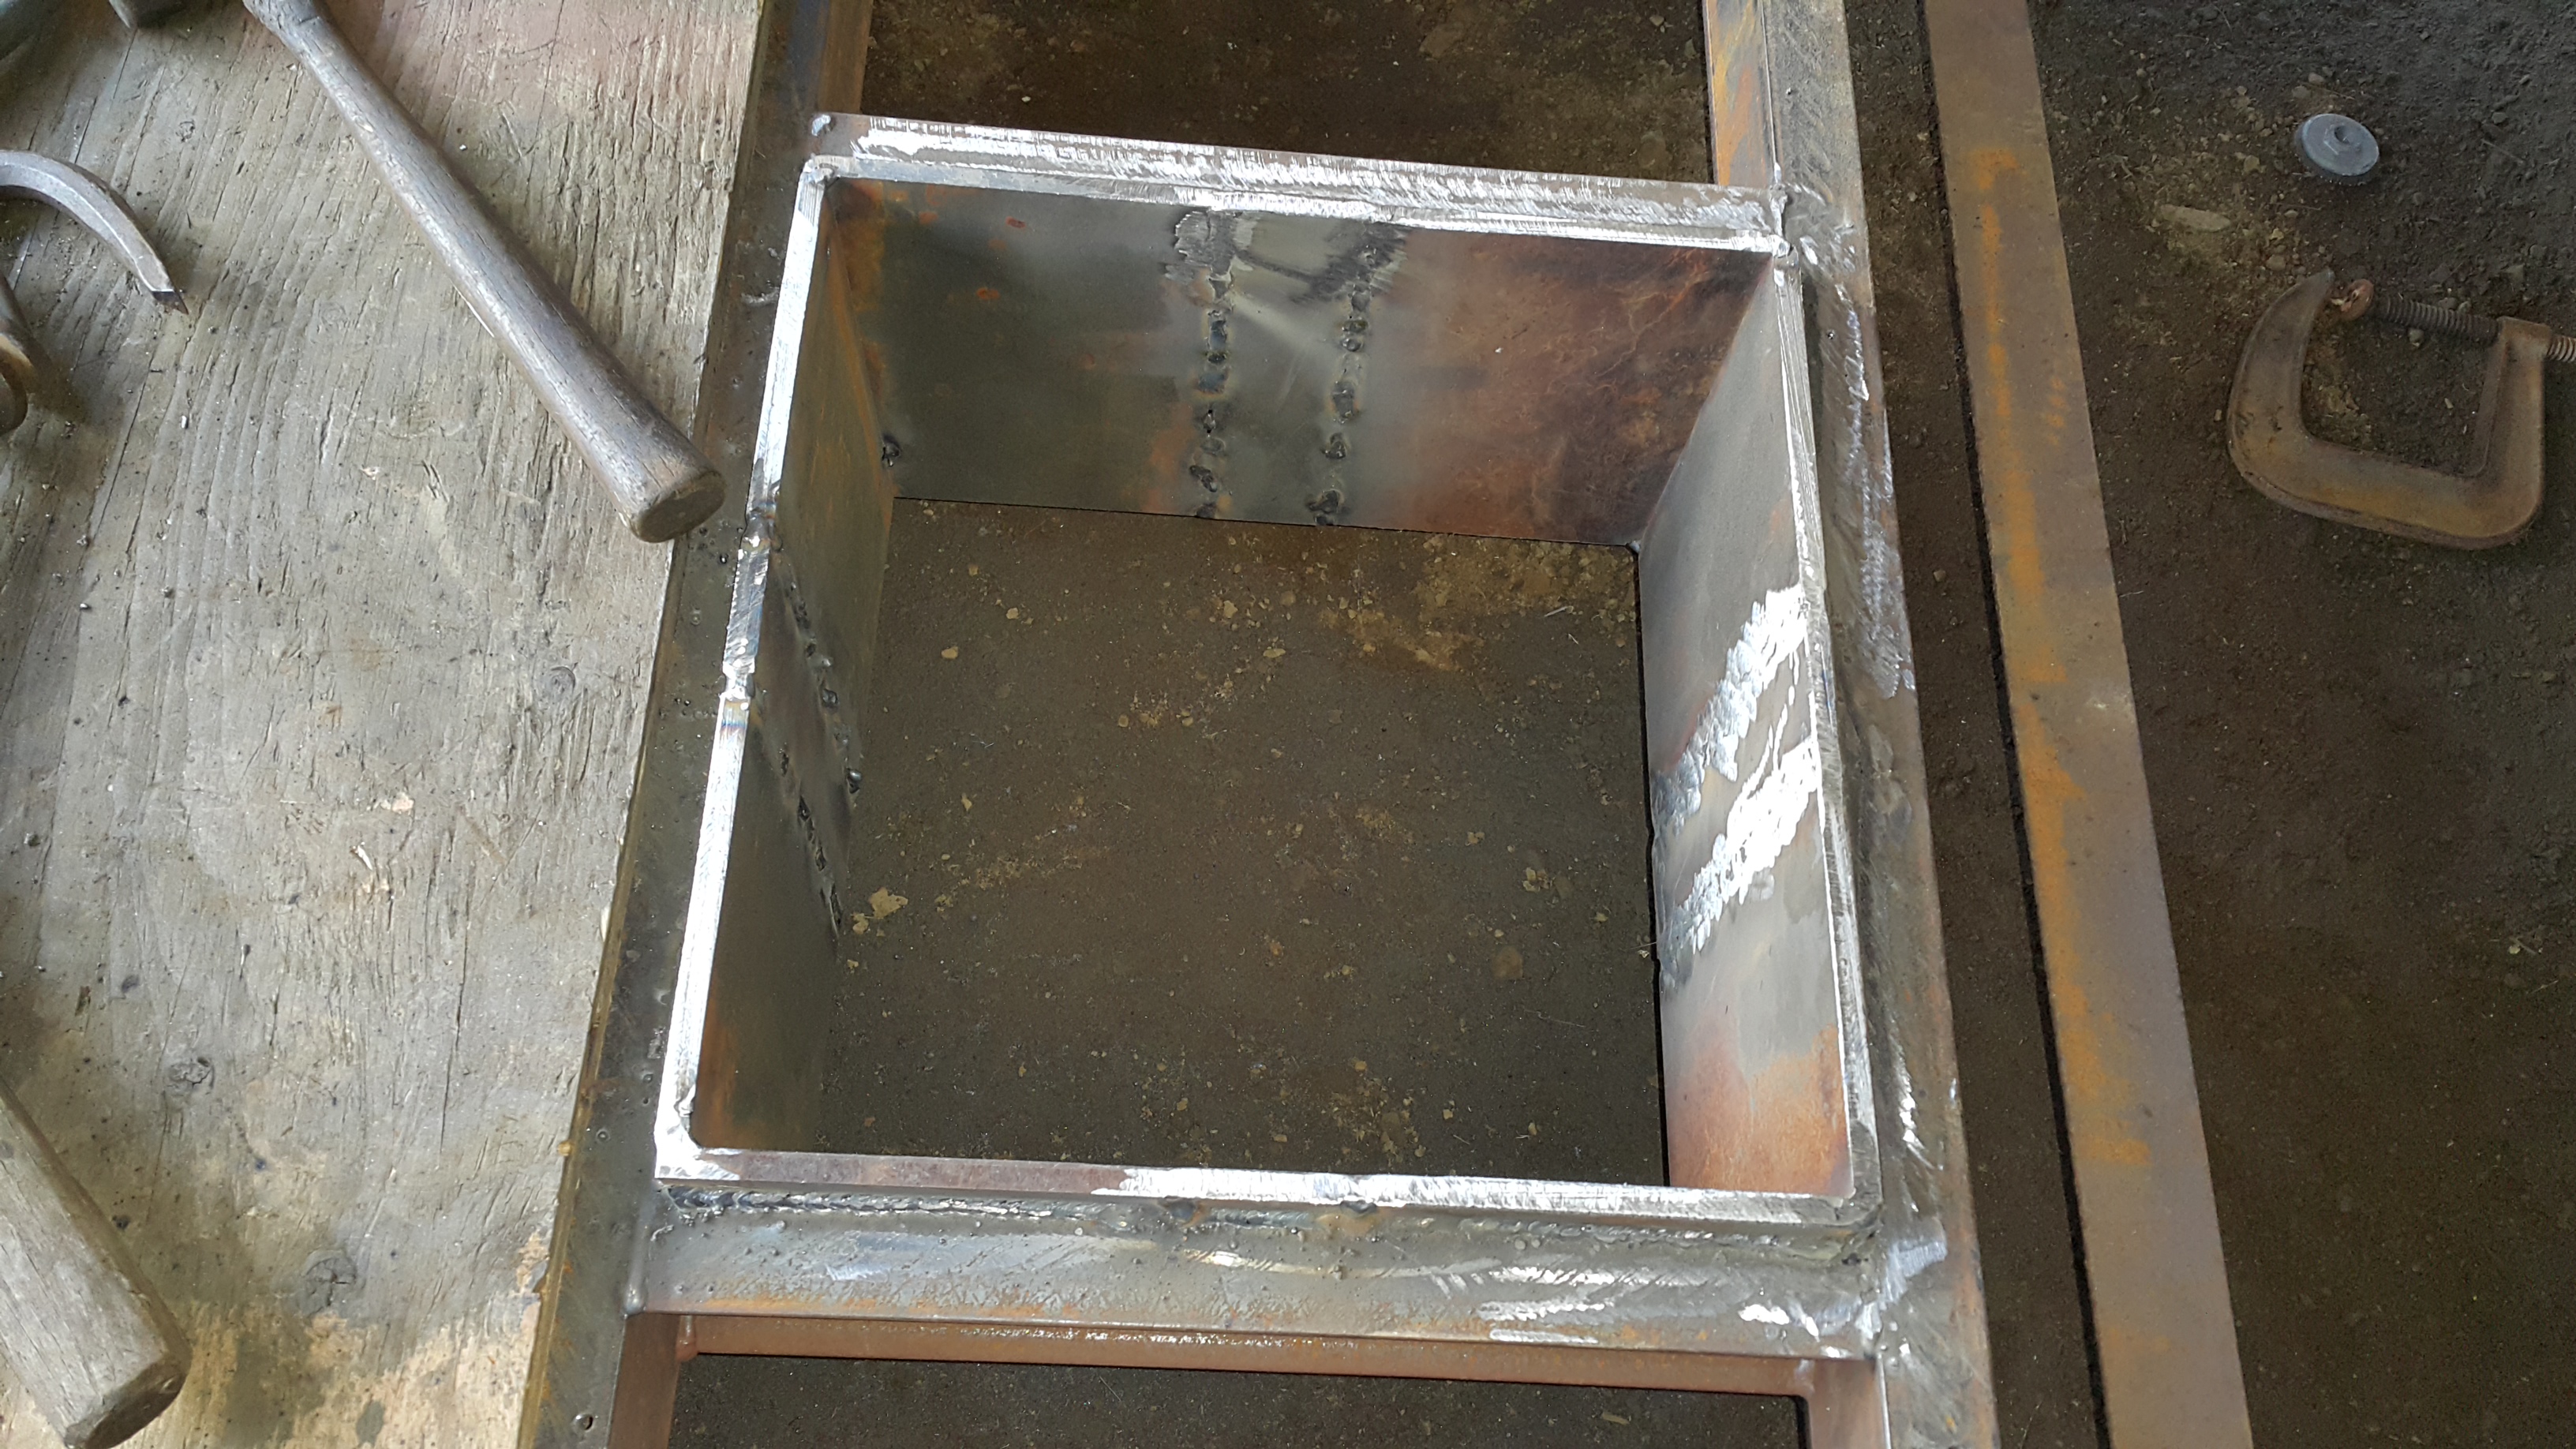
Portable Blacksmith shop
jlpservicesinc replied to jlpservicesinc's topic in Building, Designing a Shop
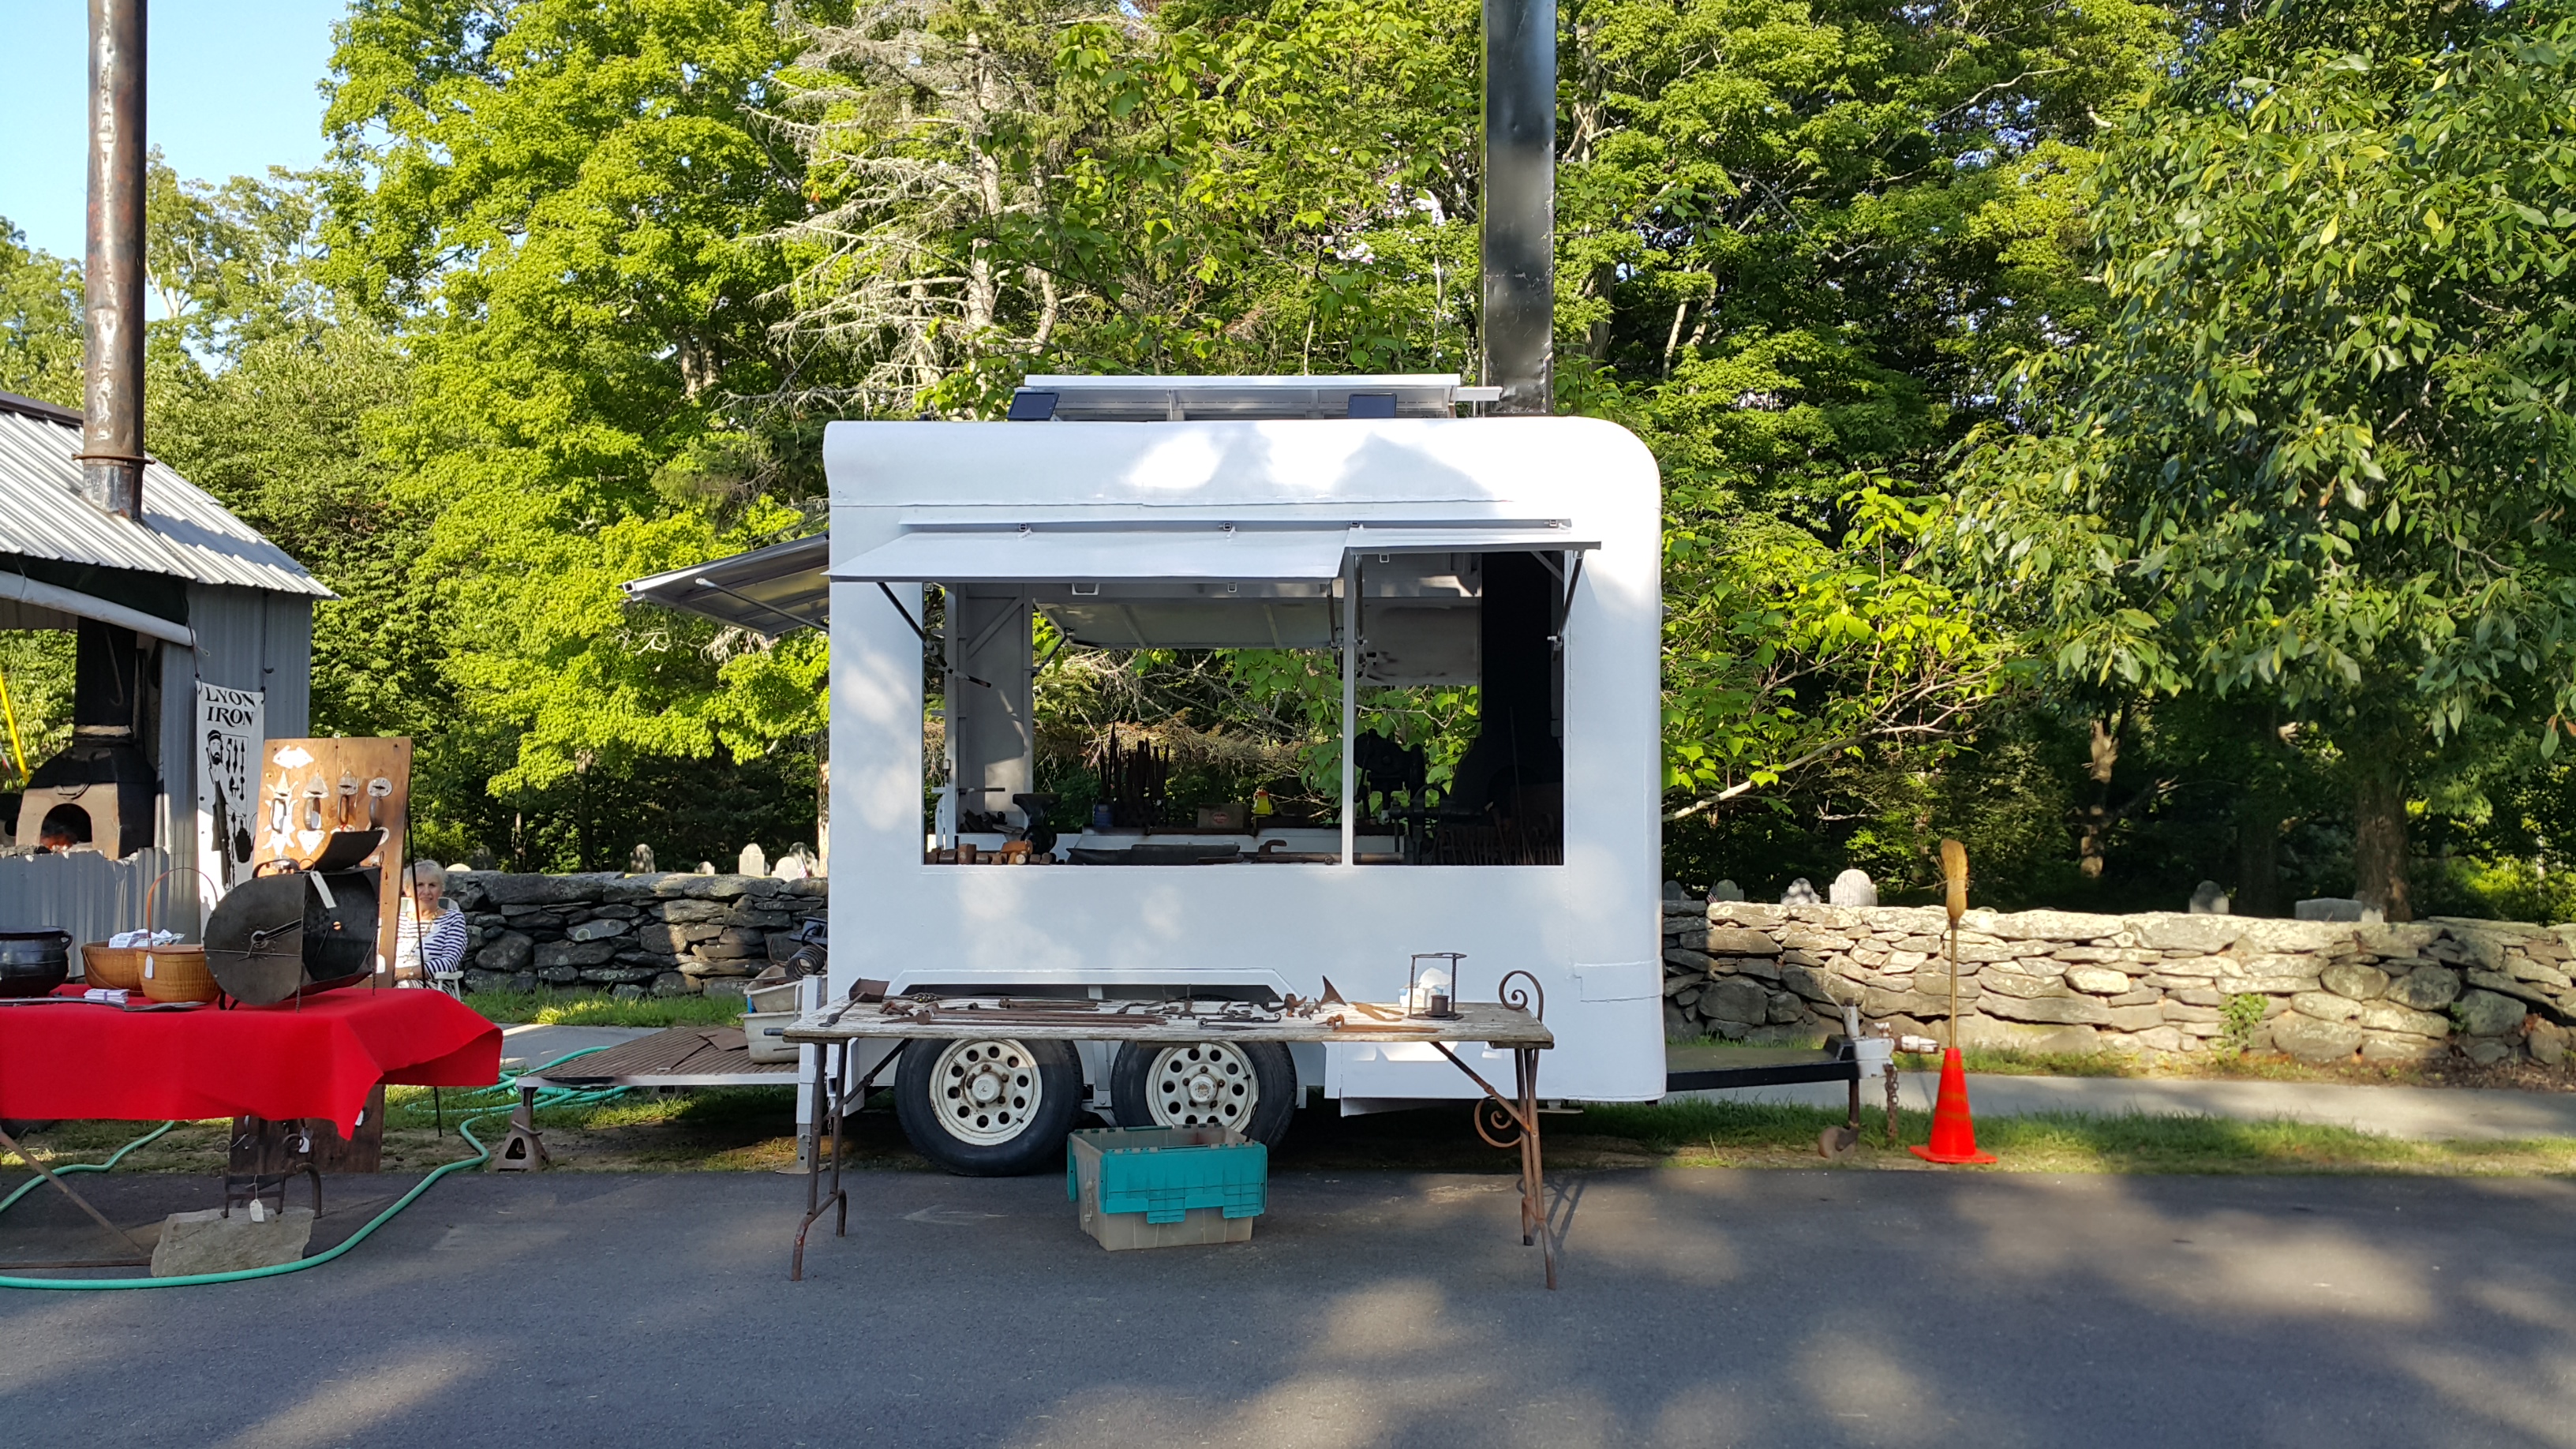
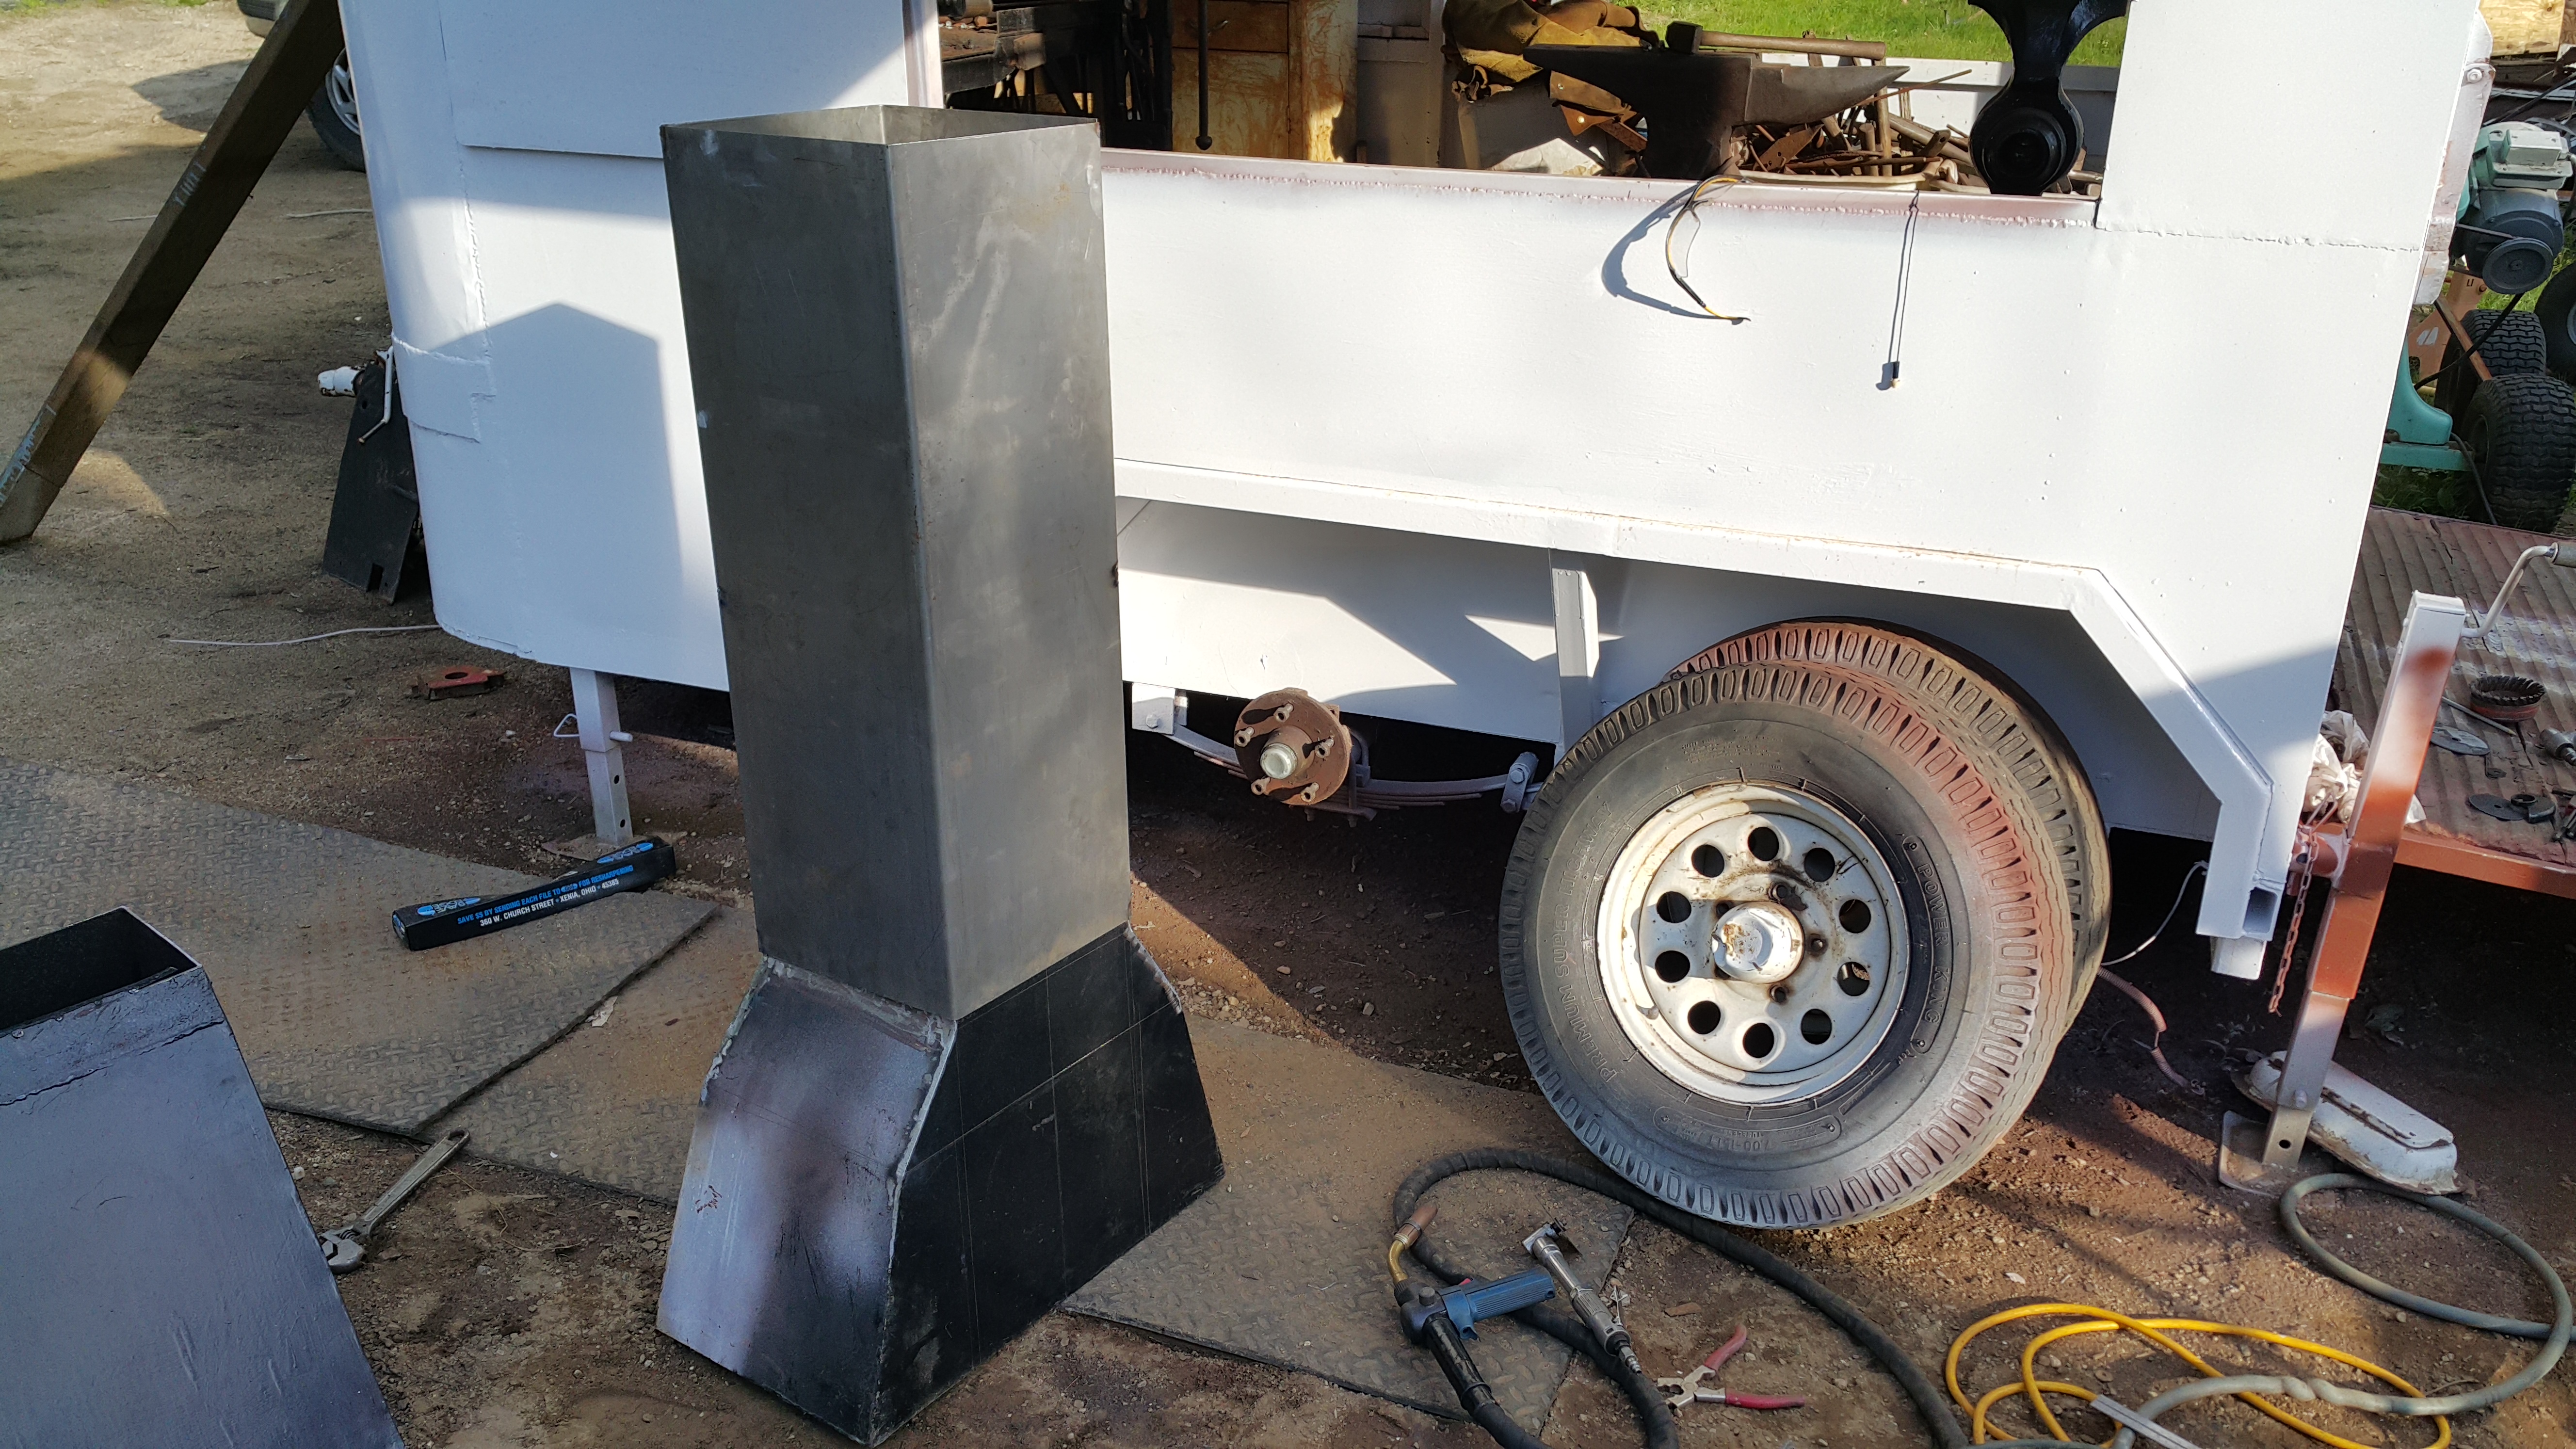
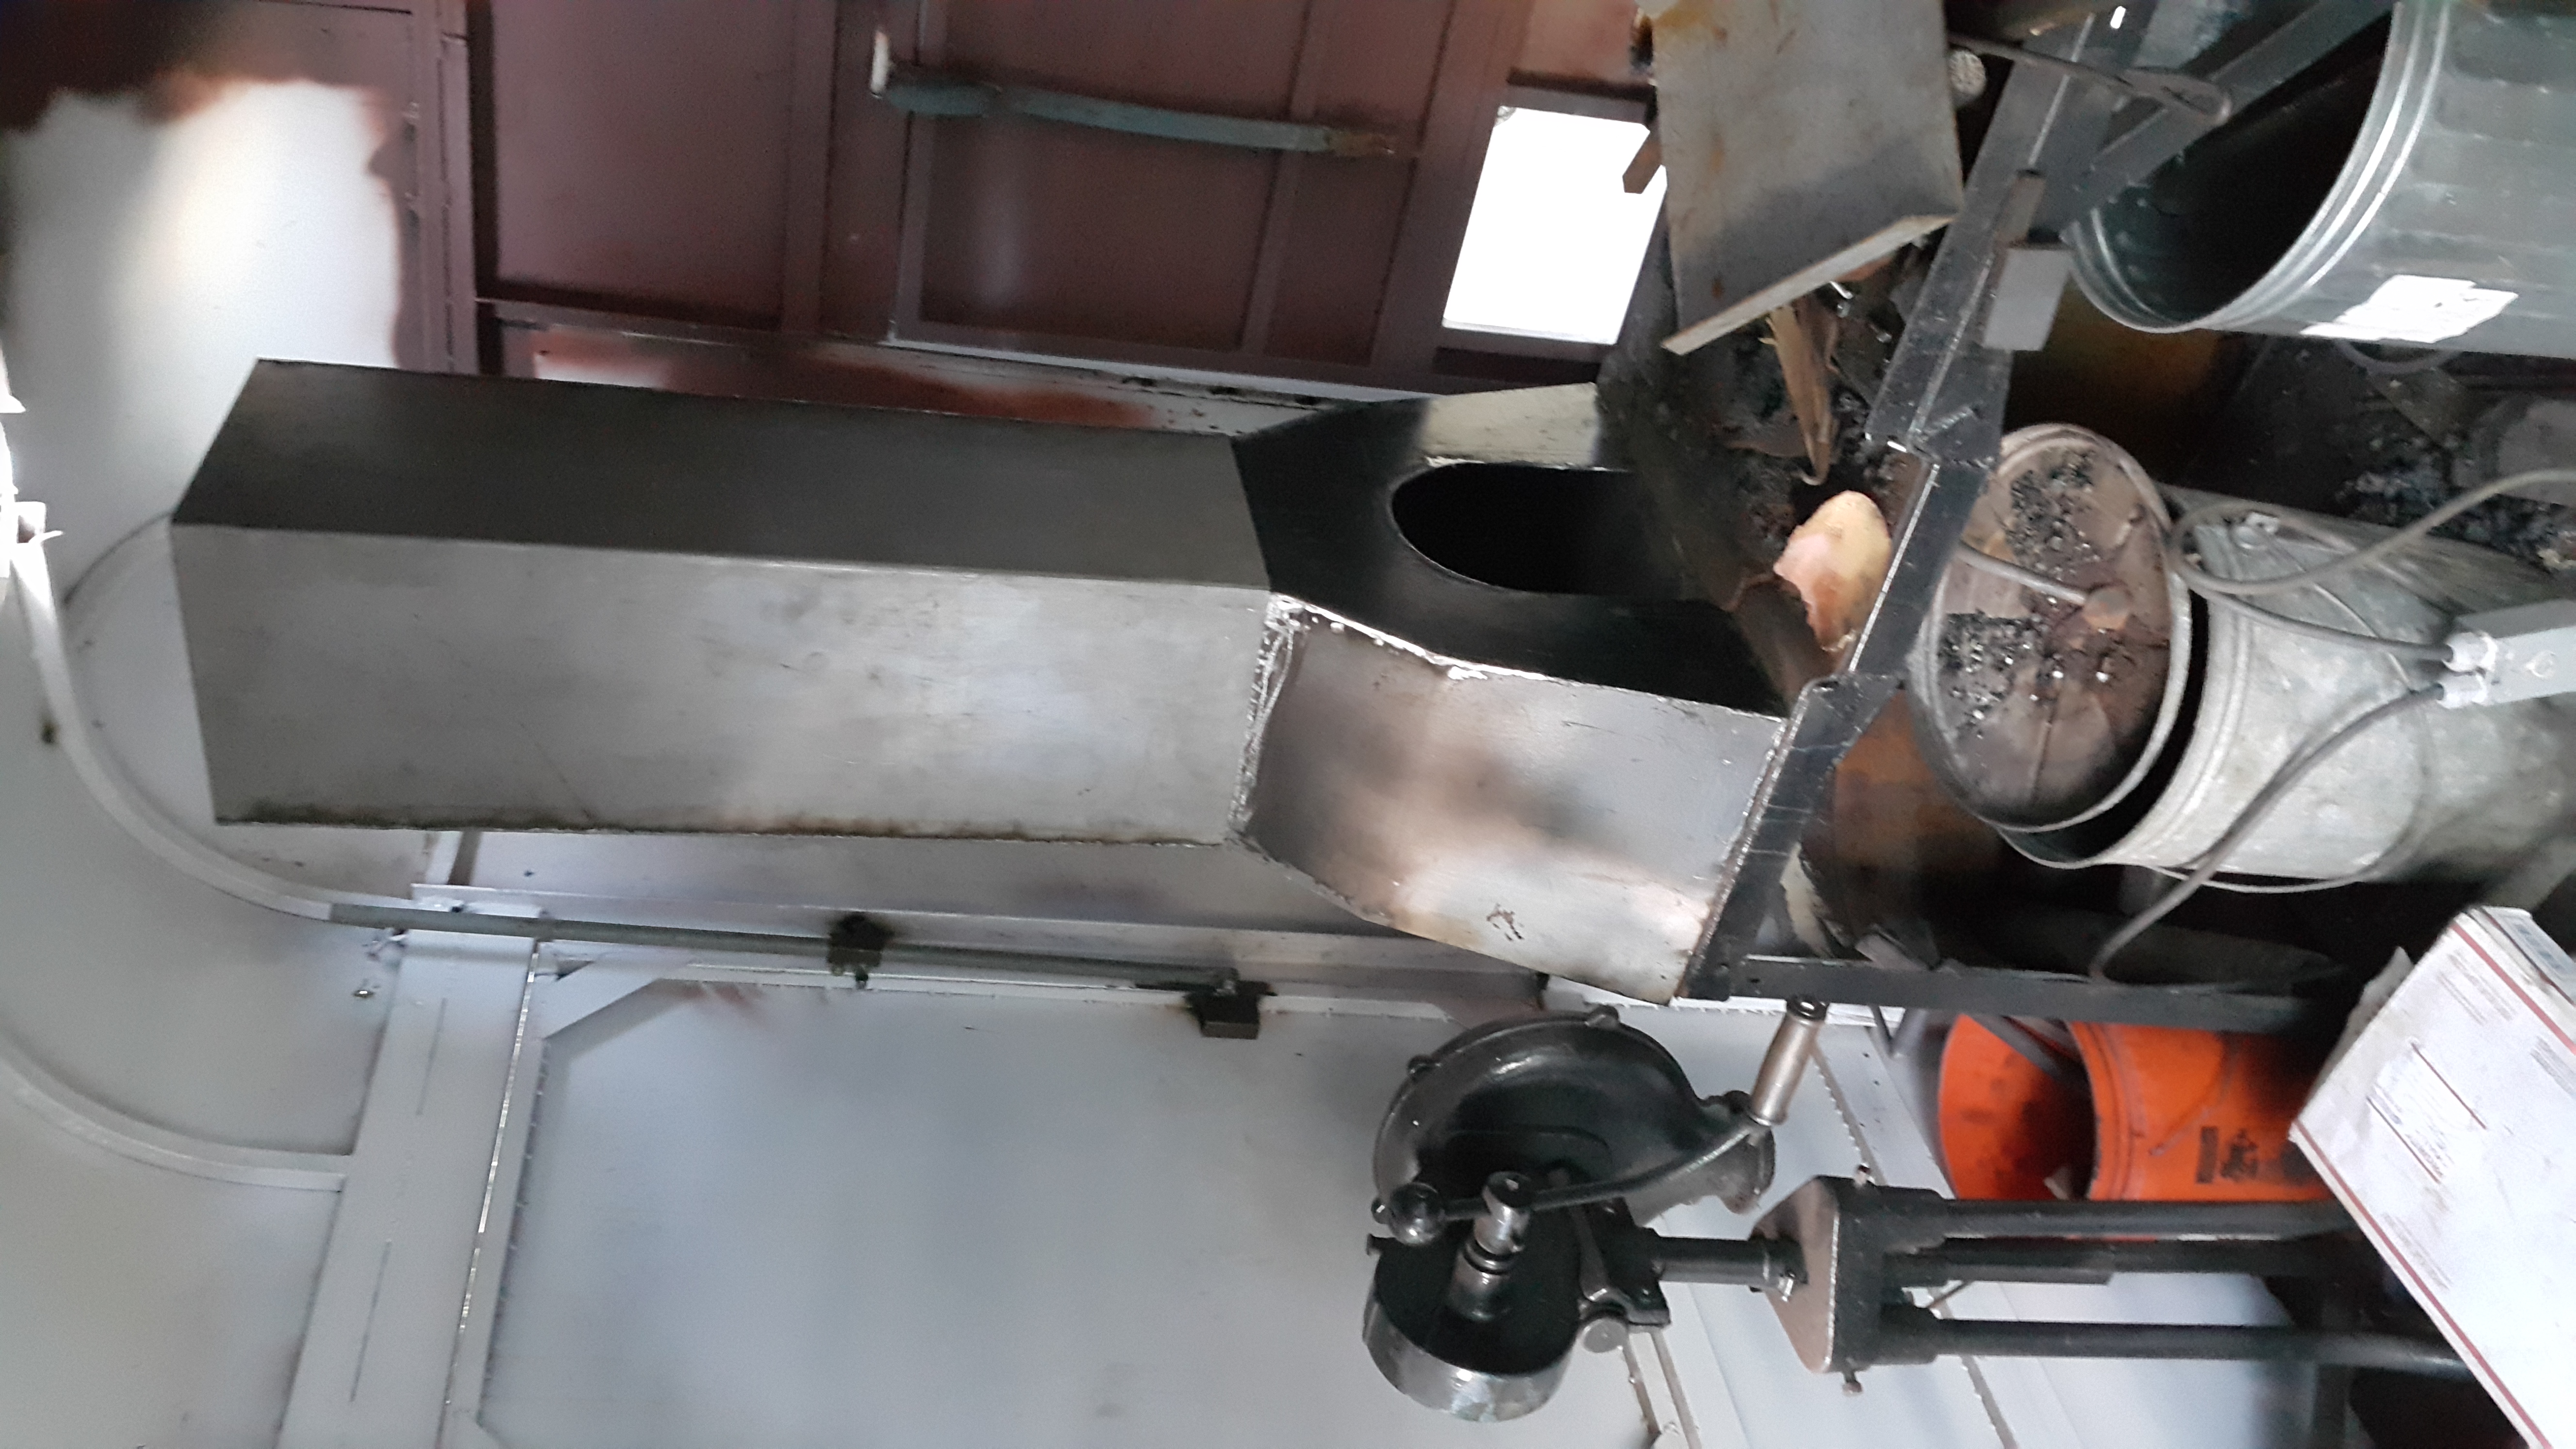
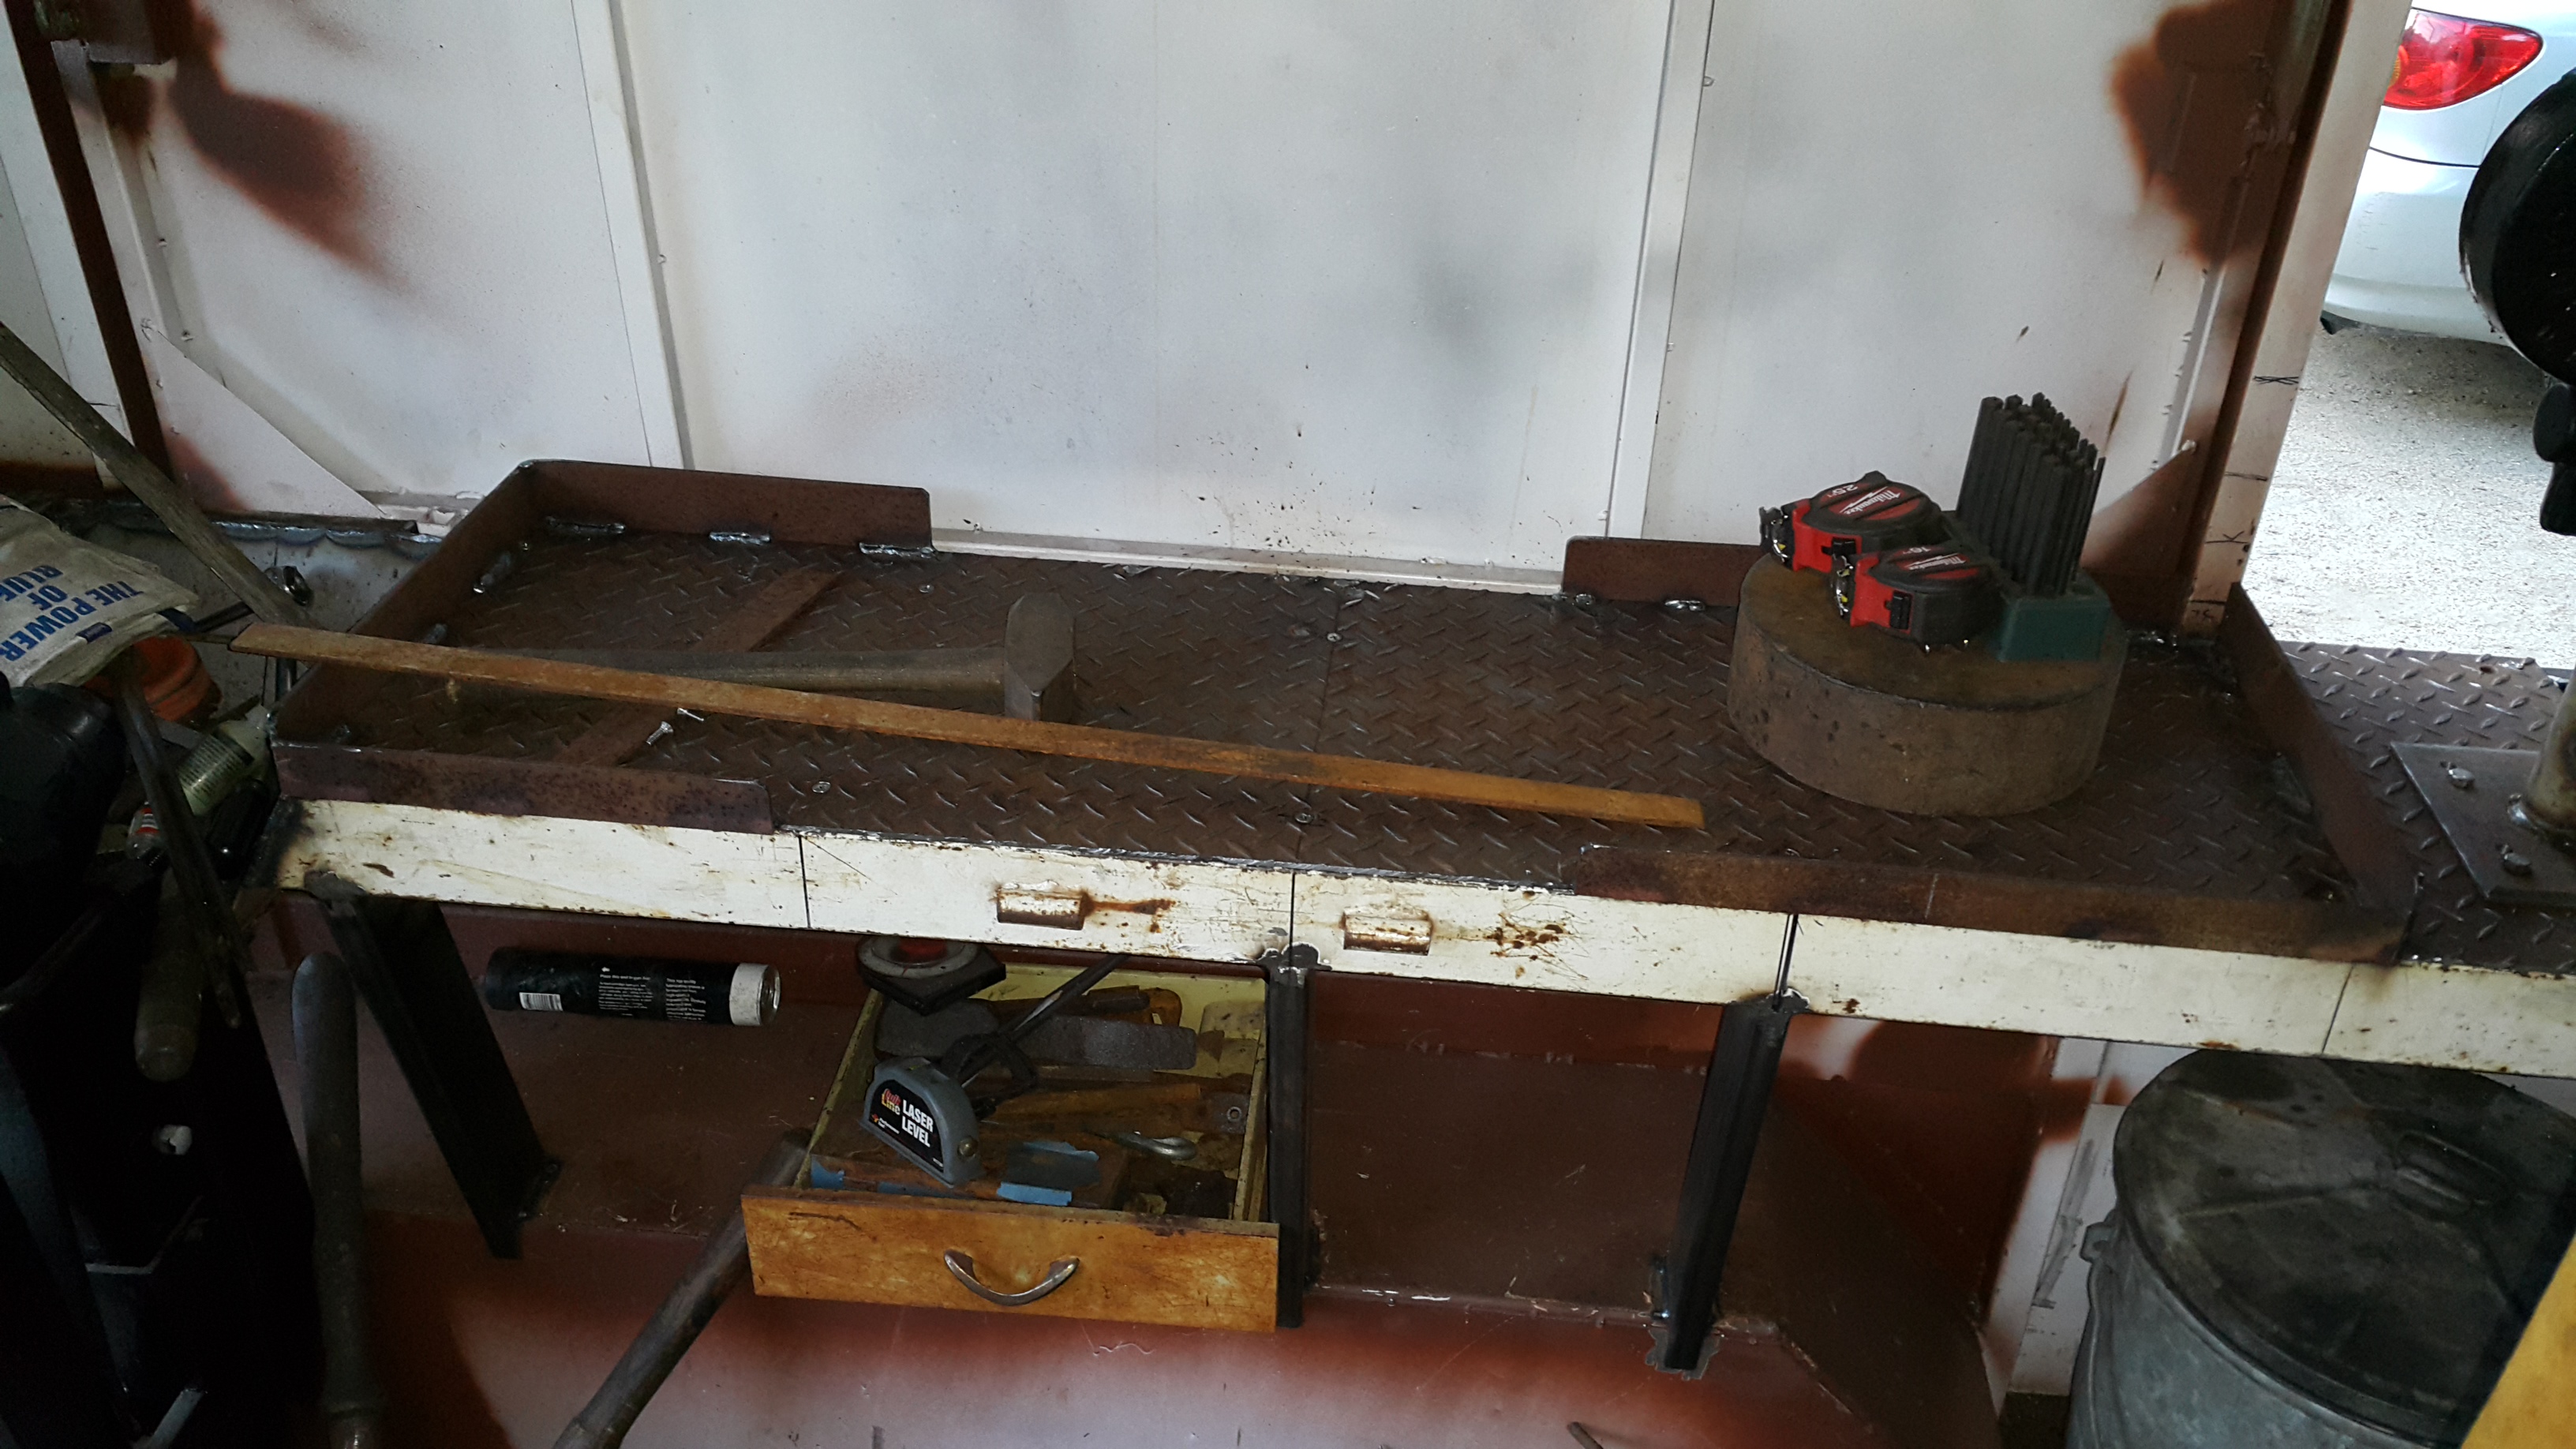
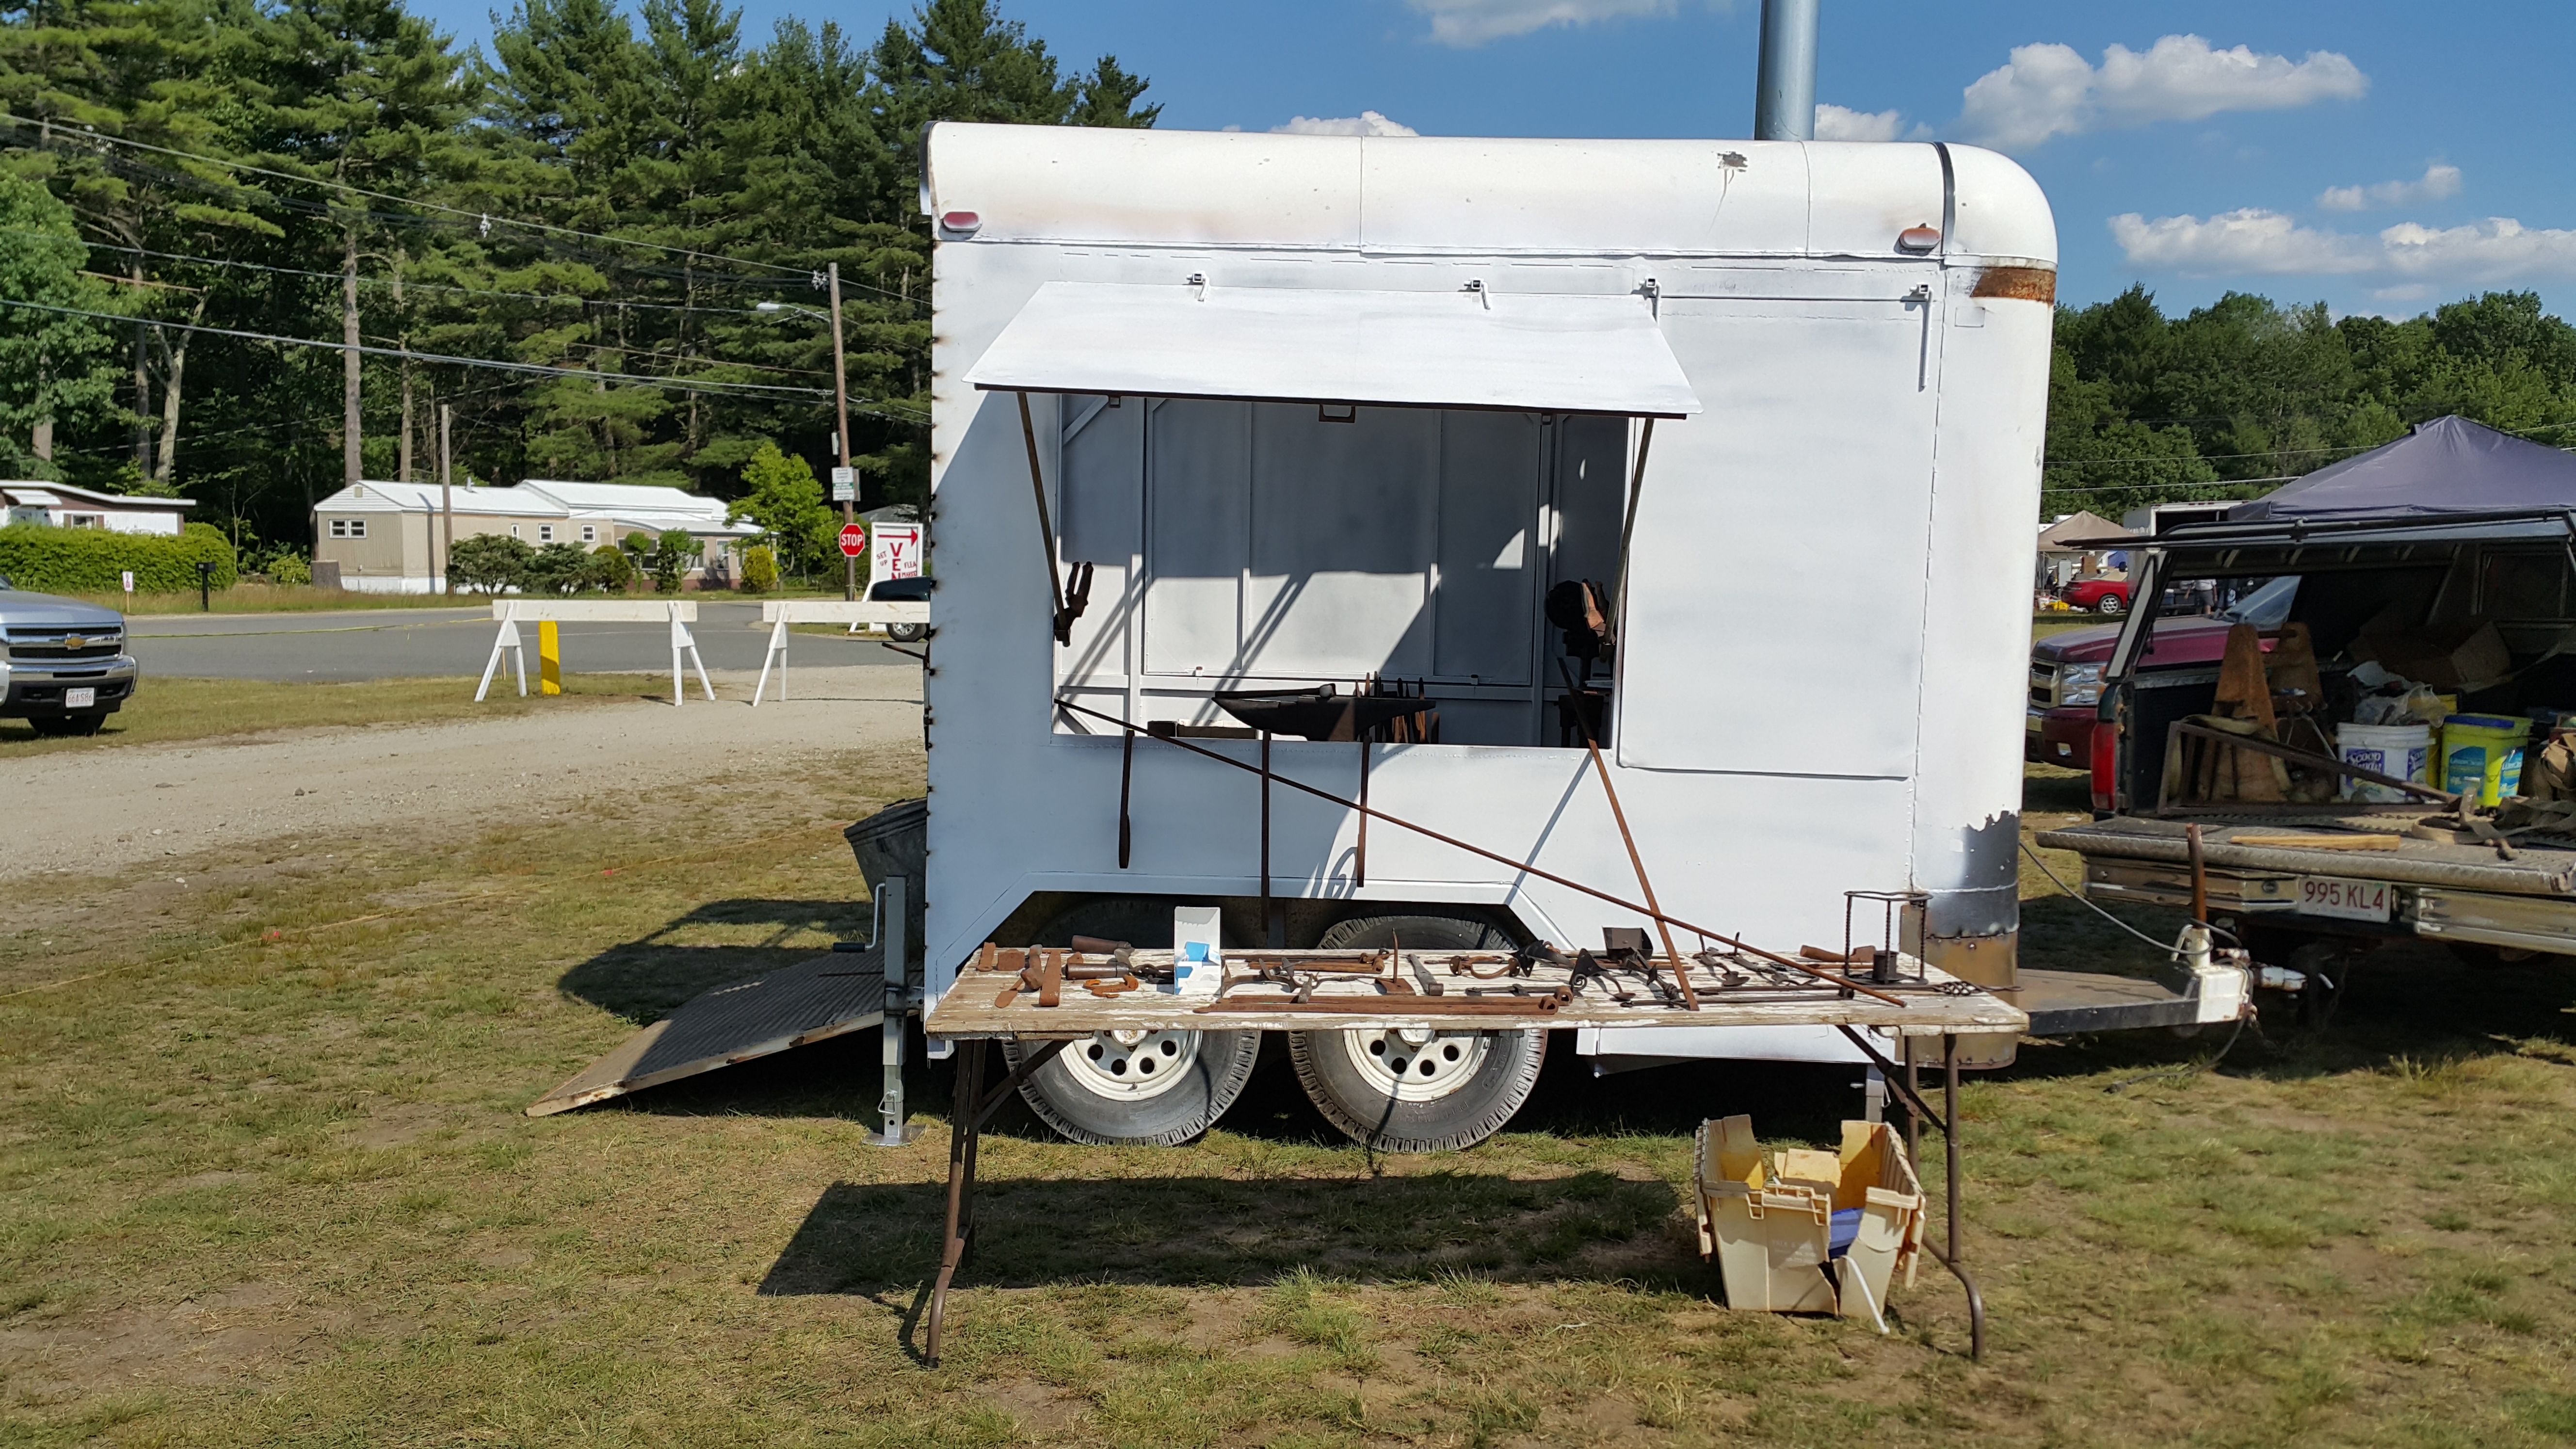
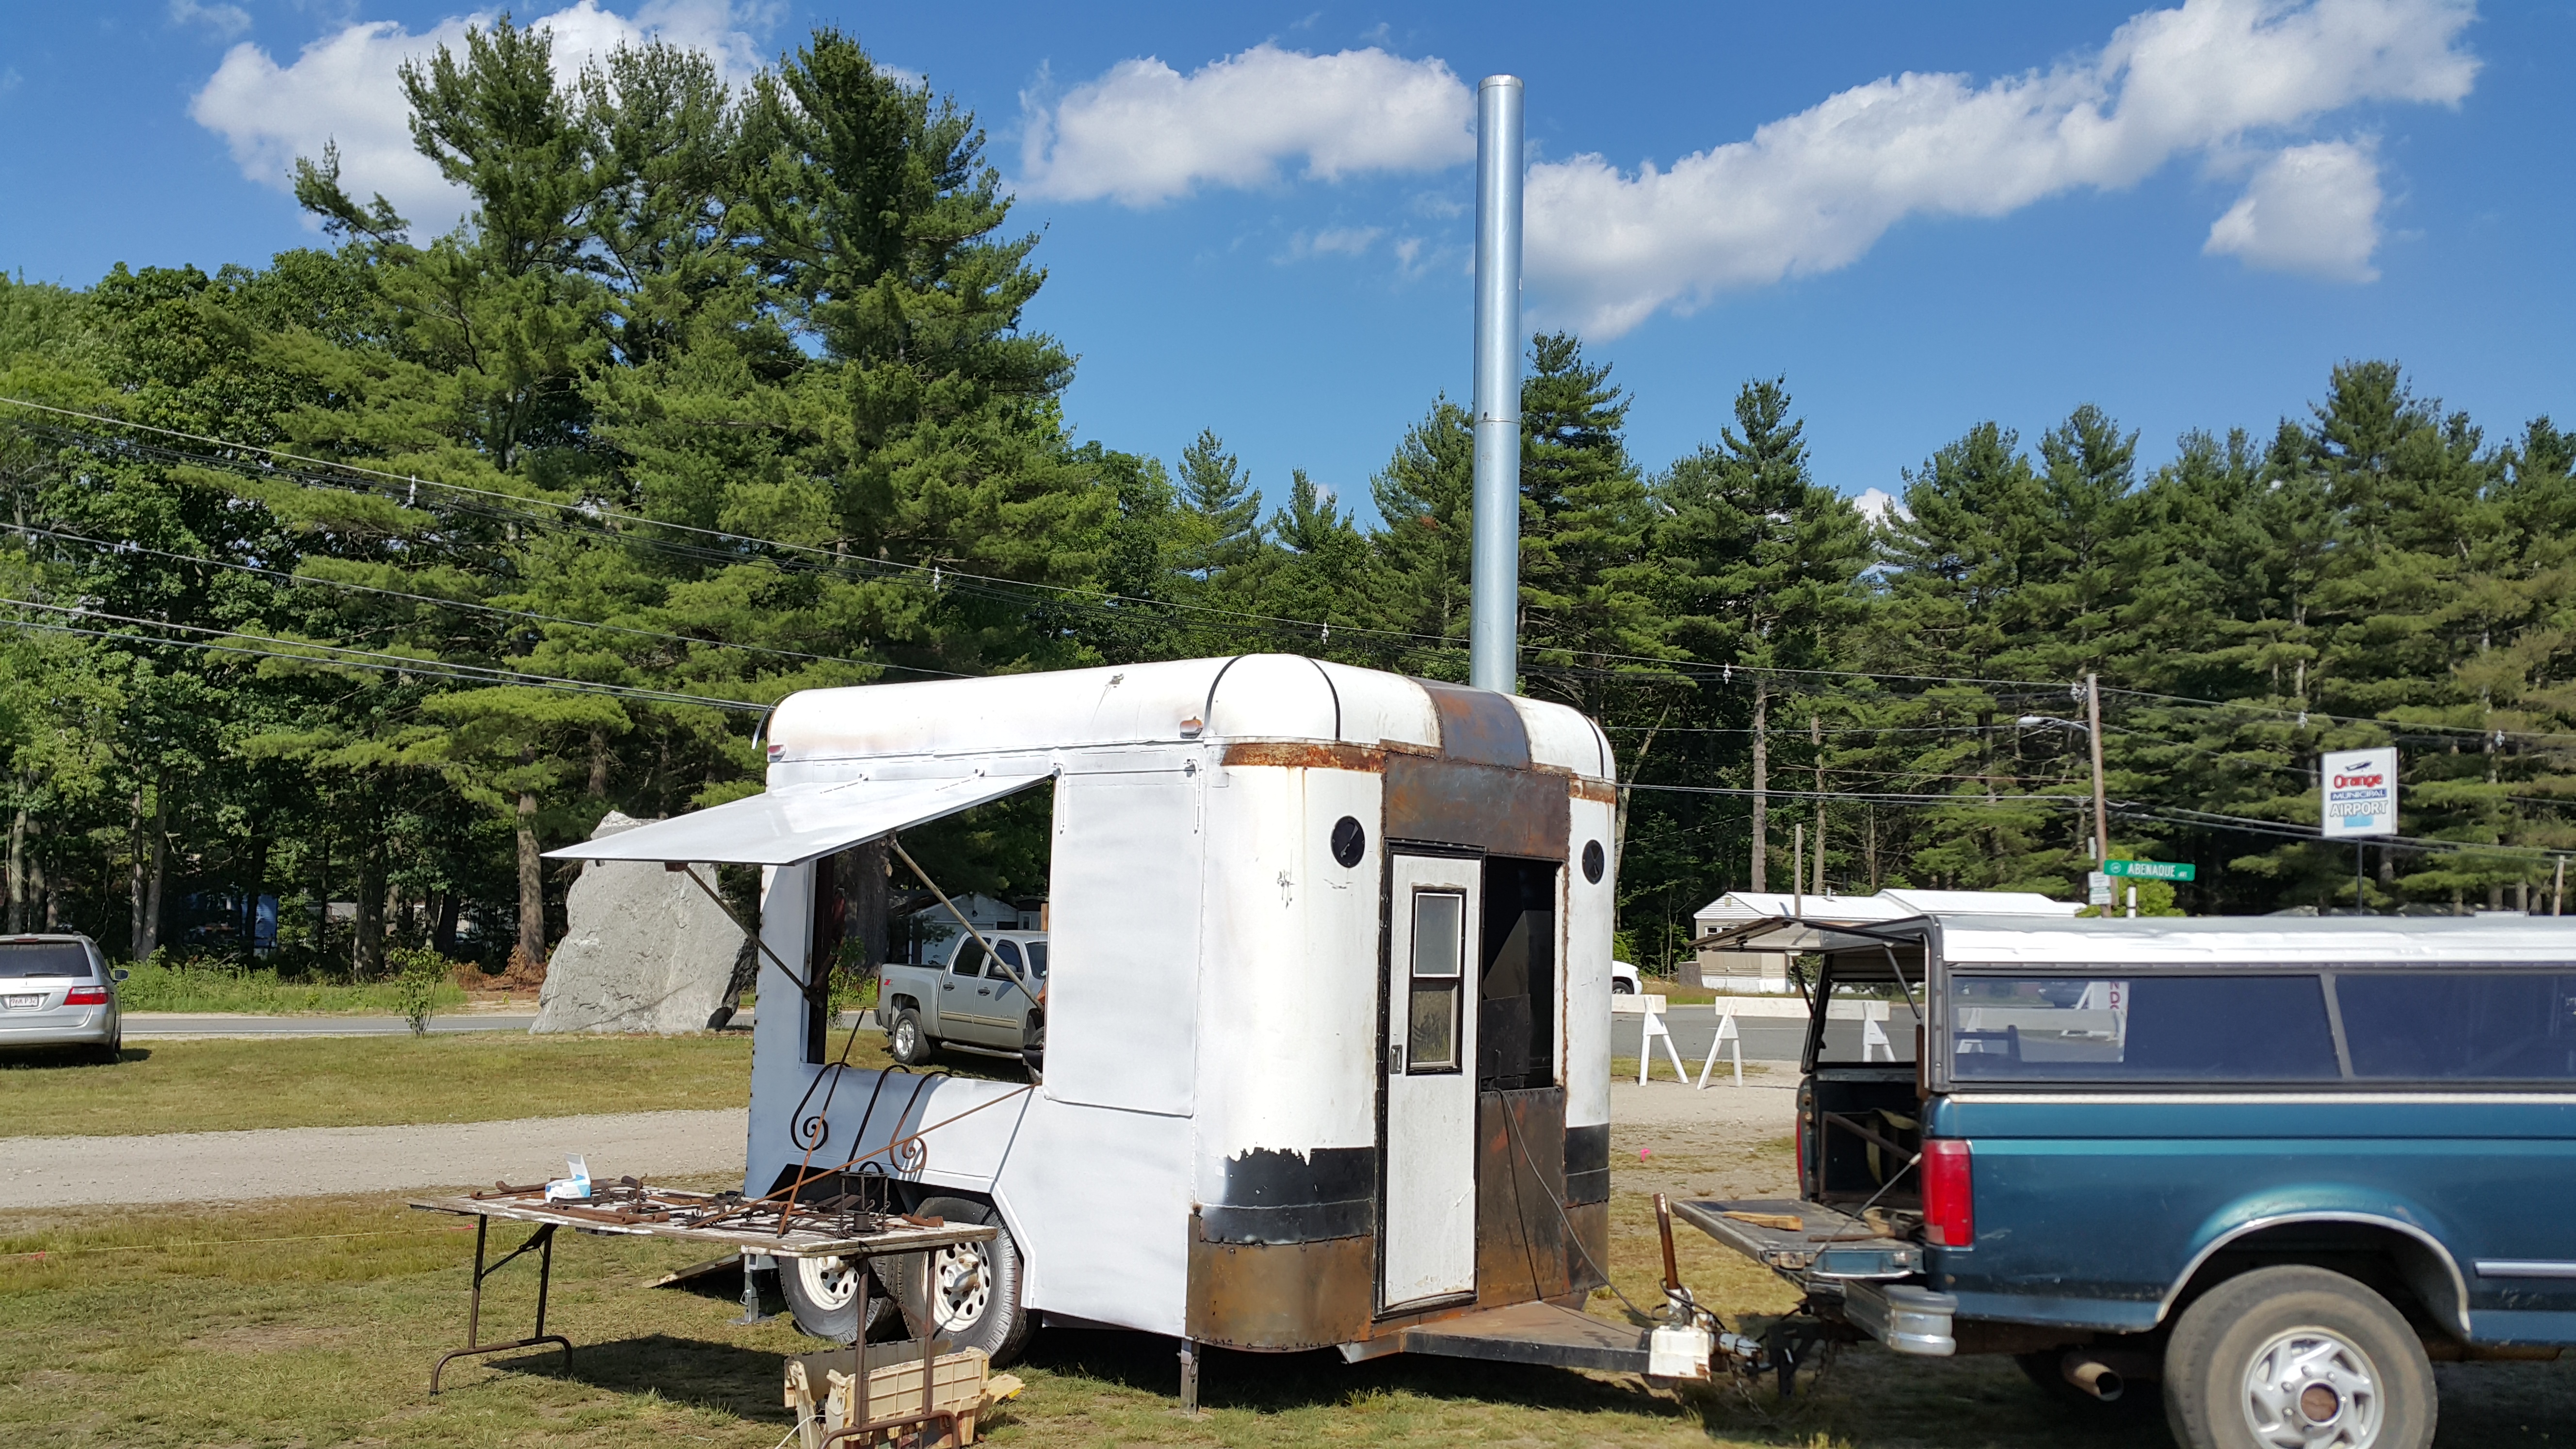
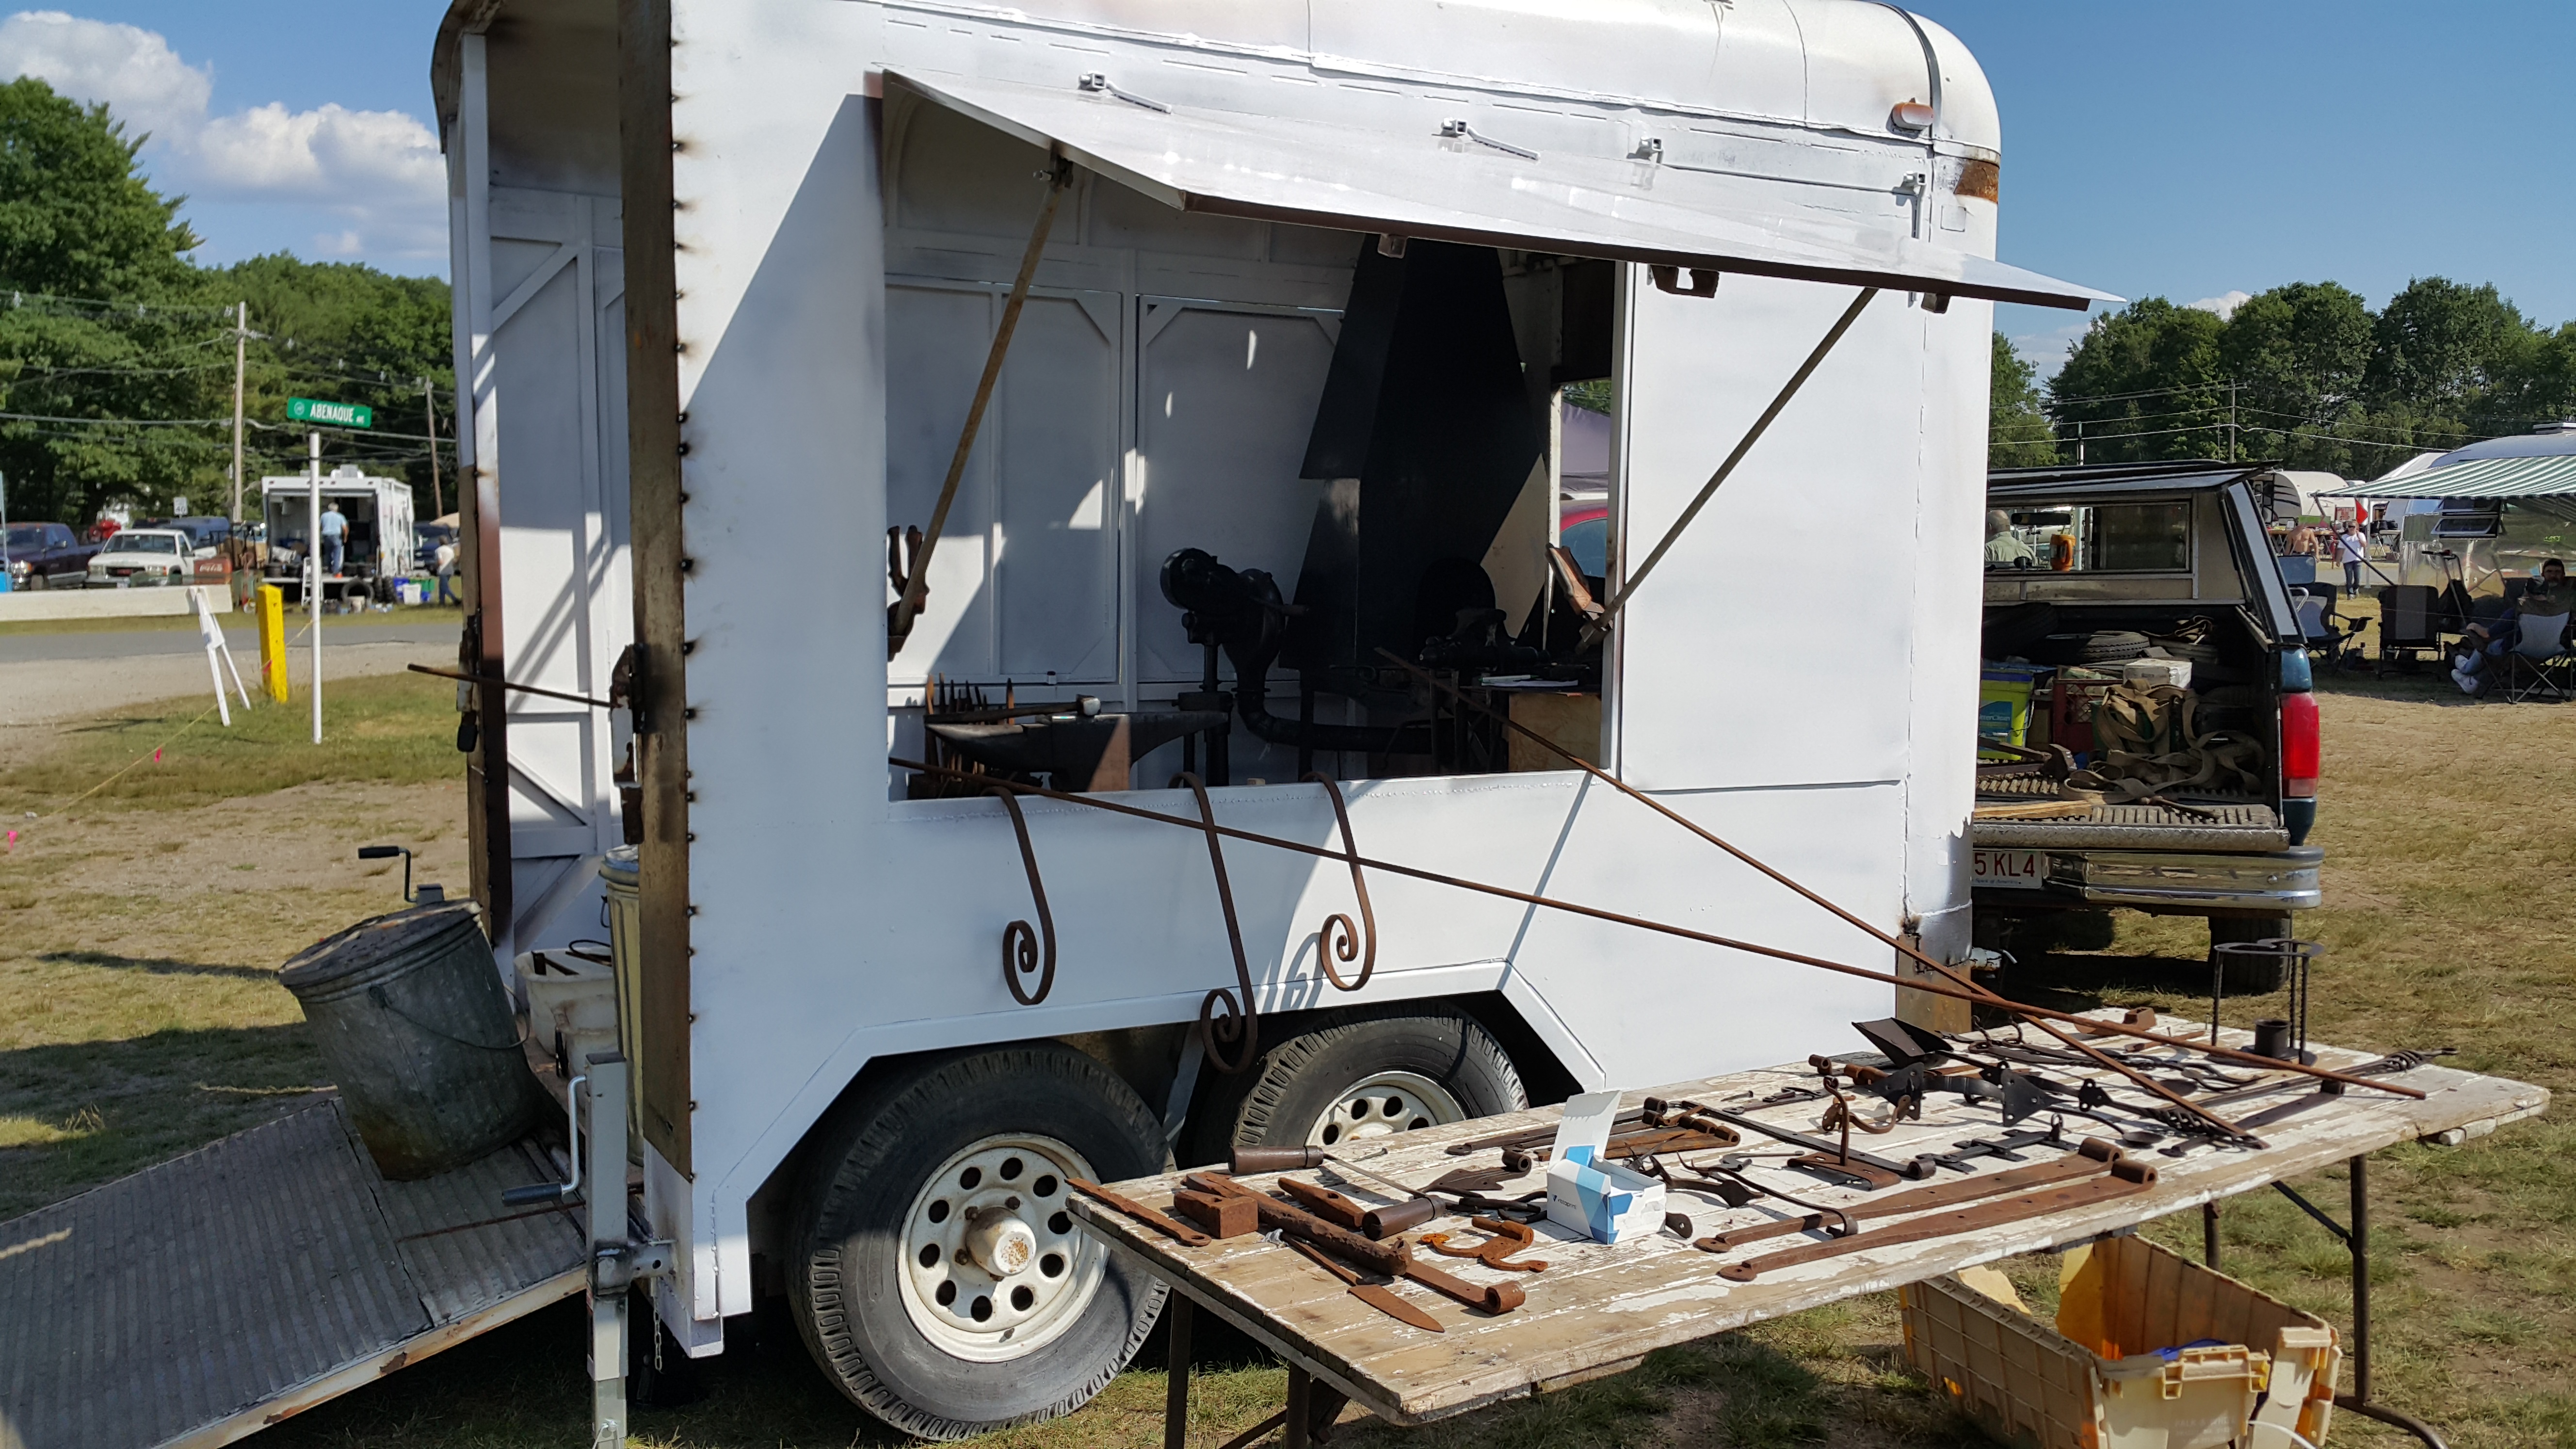
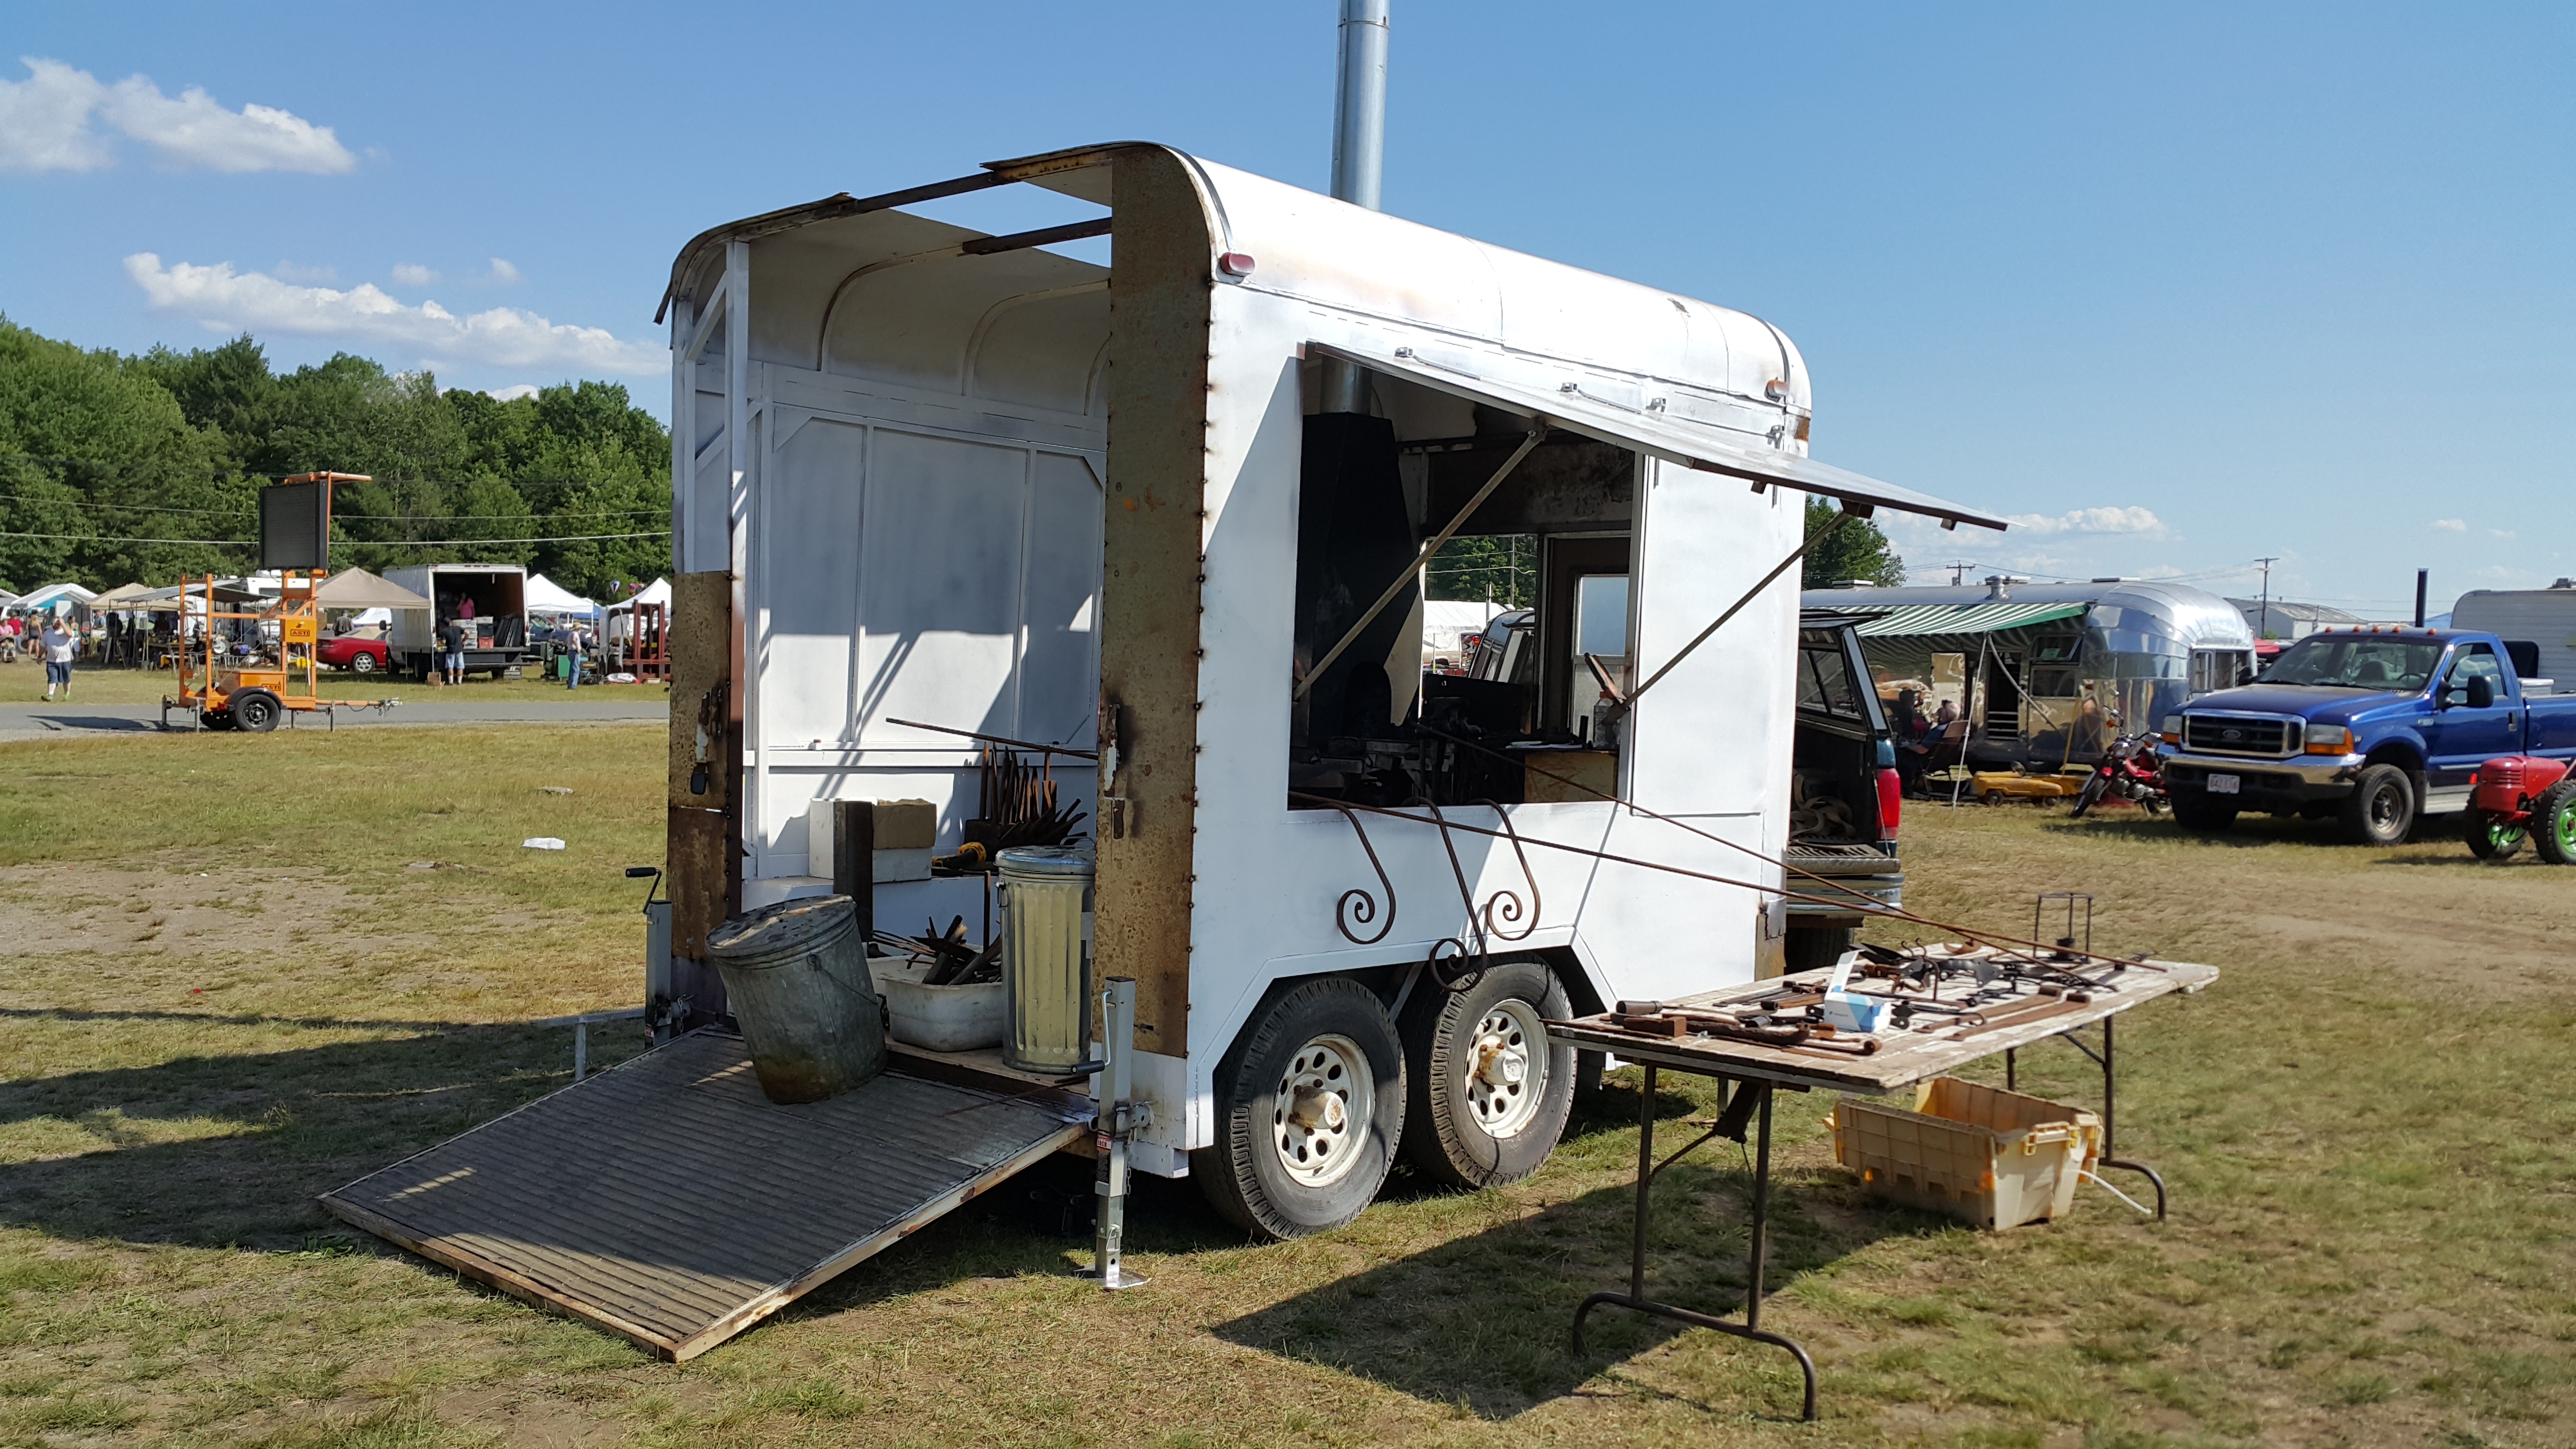
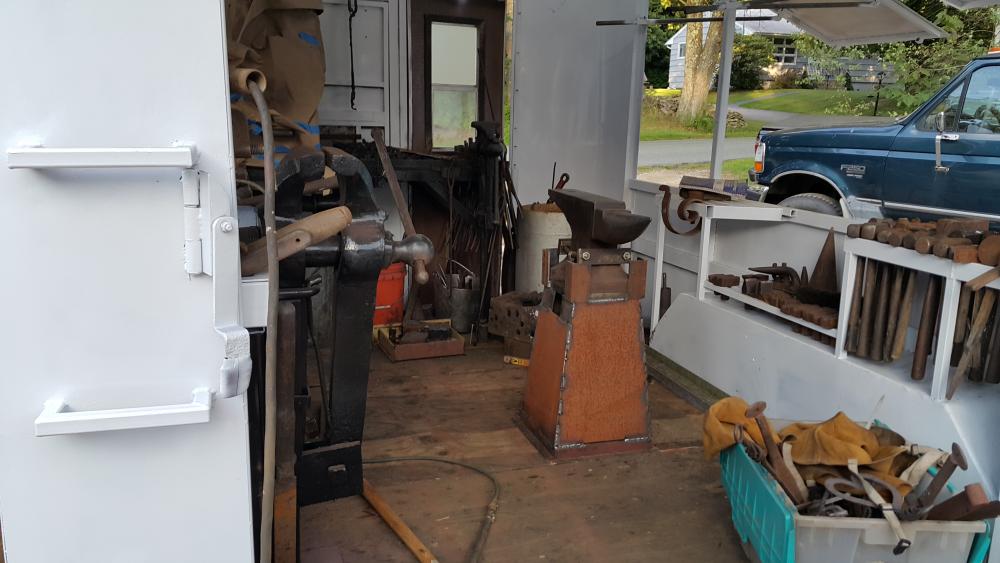
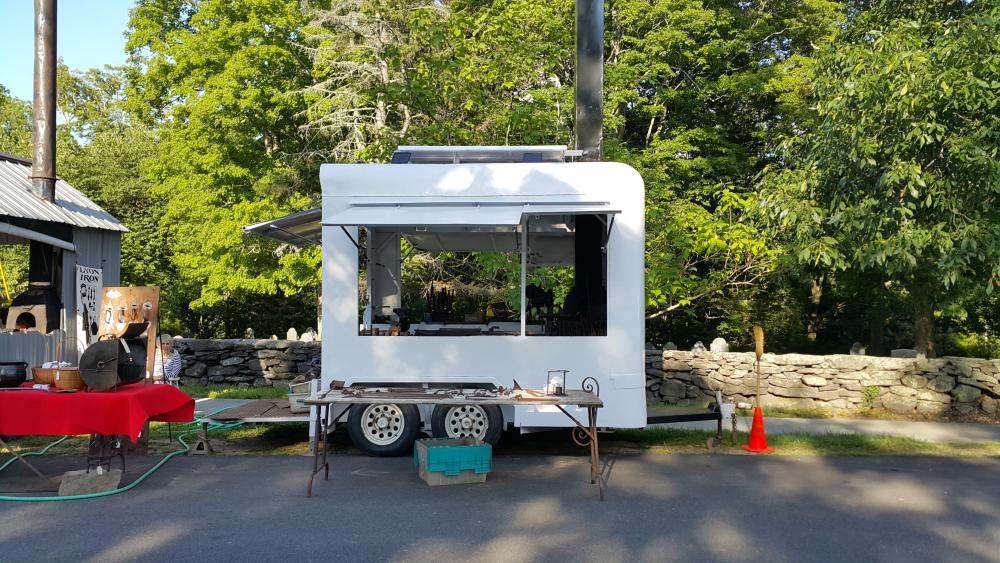
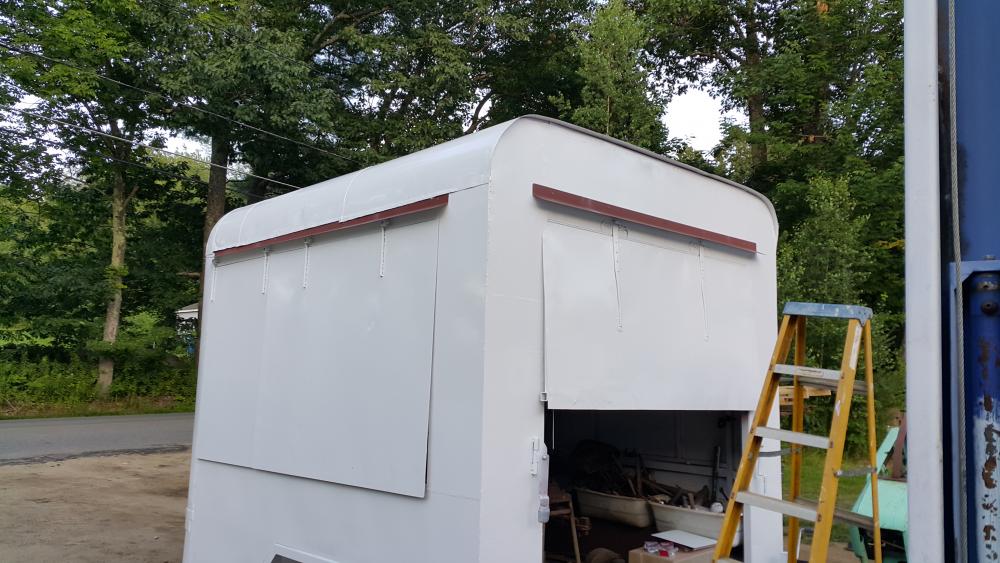
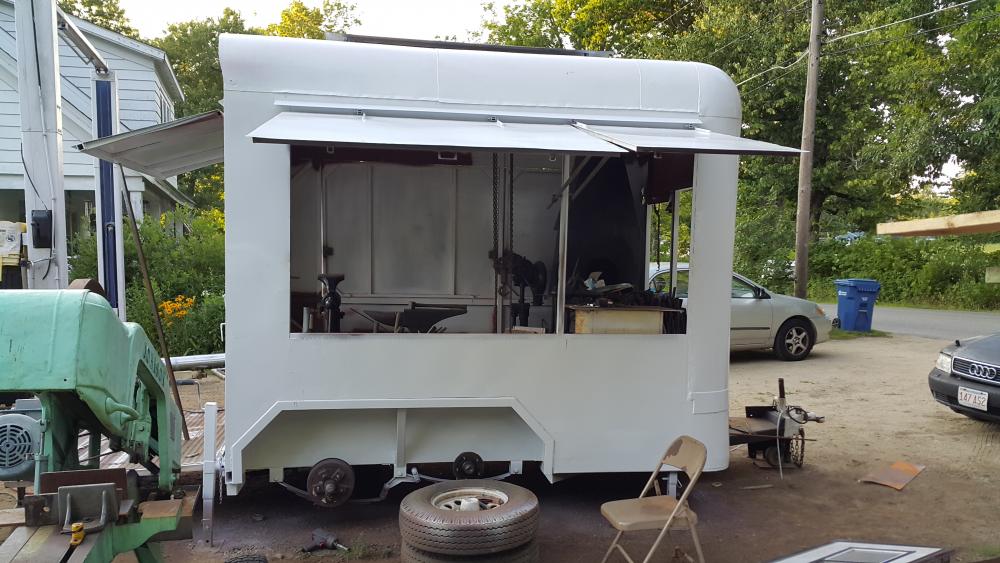
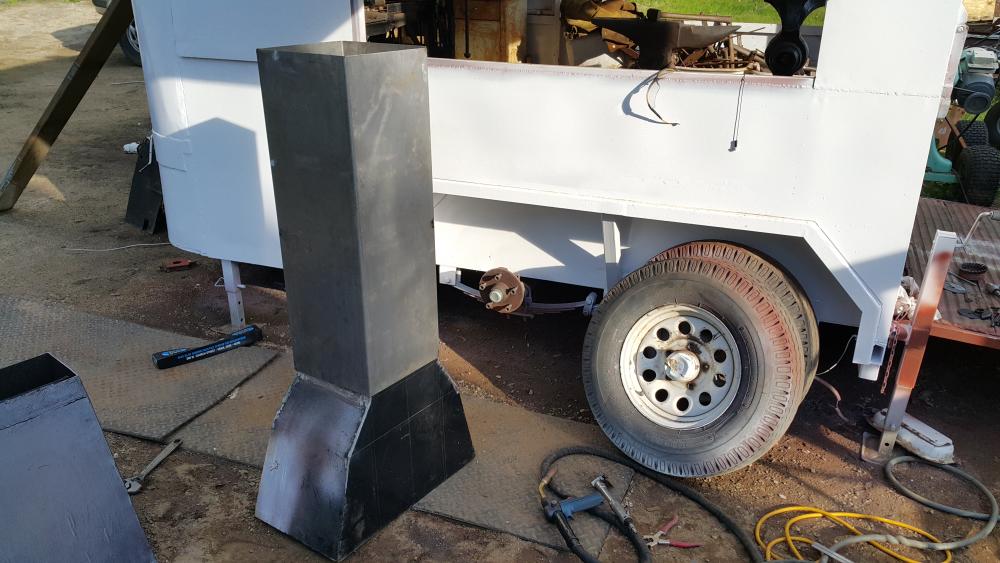
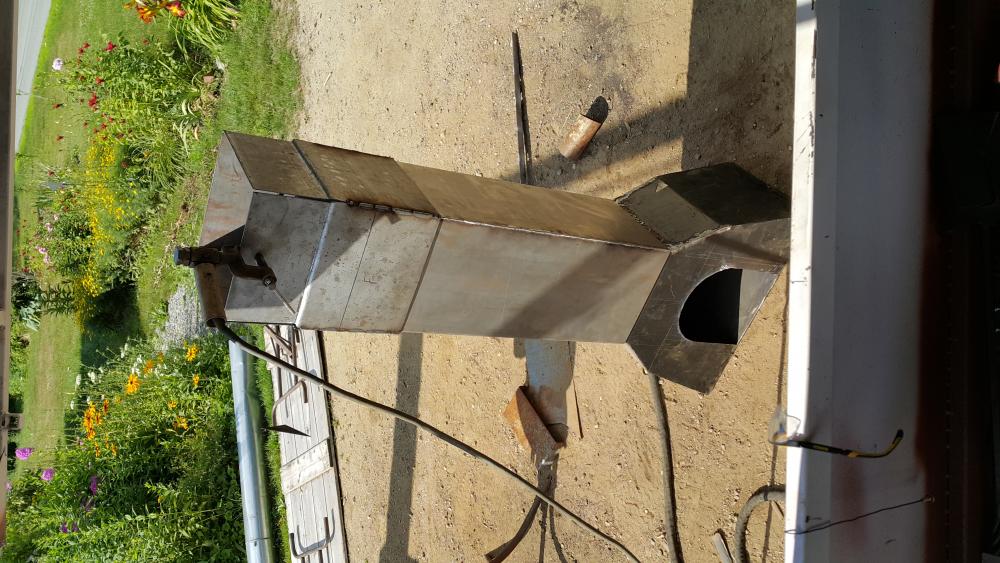
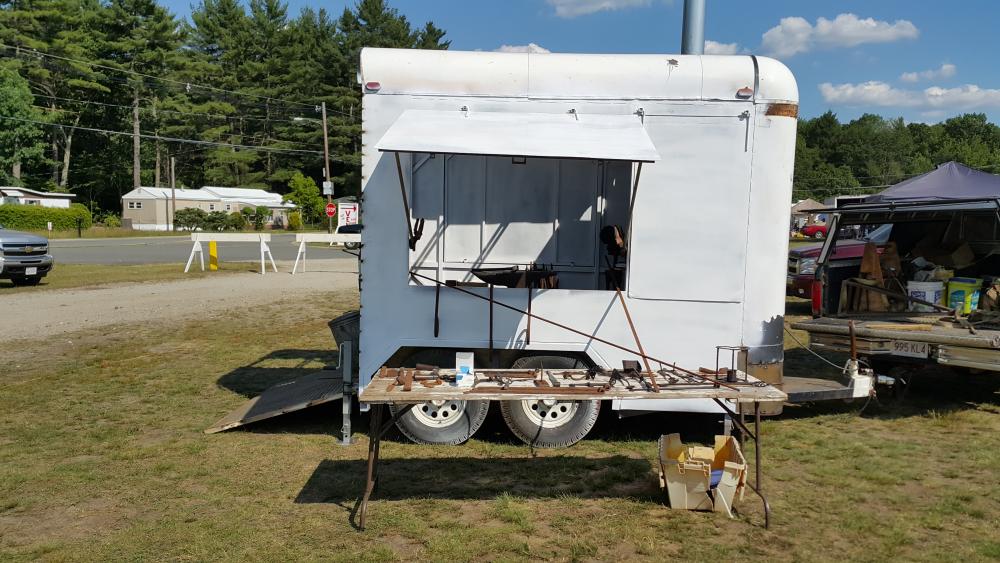
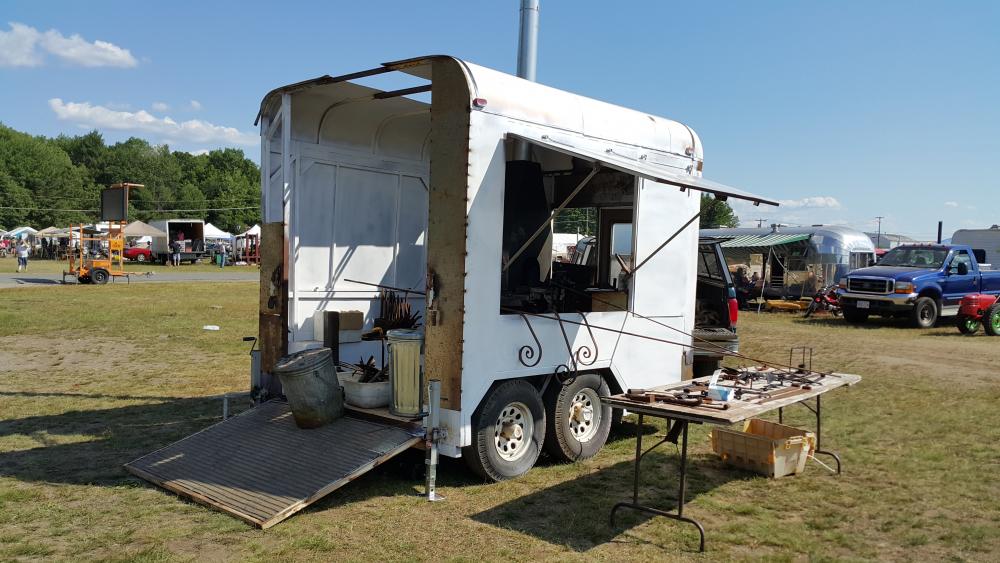
Thanks, Ah, you certainly are in tune with audience flow.. The total idea is to limit people going where they are not supposed to.. When I demo I build or make the same exact stuff I would make in the shop.. If you have ever cut a bar or had a hammer head fly off or any thing at all or a piece of welding flux head into the crowd.. You will see why.. The trailer was actually designed more to be freindly to me as well as the audience.. After doing this for over 30 years you start to understand how and why certain things happen.. One of them is heat exhaustion, another is breathing soot, cinder and dust and smoke when it's 90F+ on the demo days.. The trailer is designed so I can control how the wind approaches the forge and stack and is the reason the stack has a large shape at the bottom.. When I designed it I made the side walls at the spectator side the correct height to catch 90%+ of the weld flux and scale at or around eye ball height for children since the splatter heads out at a descending arc from the anvil face.. As you know the people watching are more likely to be hit with hot slag or flux than the smith is.. Last demo some was watching the smith next door and the smith was doing some welding.. the guy was maybe 10ft from the smith when the smith hit the hot metal the guy jumped back and started rubbing his eye.. YUP..he got slagged.. Could have been very serious.. I don't want people right on top of me.. I actually put the display table about 10ft from the trailer and then put ropes up to keep people back.. So, the design has a lot to do with how to protect the on lookers first and foremost but also how to make me the most comfortable.. As for being able to see.. The only areas I care they see are the immediate work area and this was taken into consideration when designing the doors.. There is a perfect view of the anvil and forge and vise when both doors are open.. If its windy I can close all side doors but the main viewing door and this totally controls the wind and still allows full view of the anvil and big vise if standing in front.. I'll post video of the view into the trailer at some point.. If you look at the first full side picture you can see the top of the anvil, the vises, work bench, blower and forge.. If you are one of those equipment junkies who revels at the equipment than it wouldn't be your gig.. But it makes for conversation as I'm always happy to have someone comer around and inside to look.. Just not while I'm hammering unless they are a striker, helper or in full PPG.. It's pretty amazing.. -
Portable Blacksmith shop
jlpservicesinc replied to jlpservicesinc's topic in Building, Designing a Shop
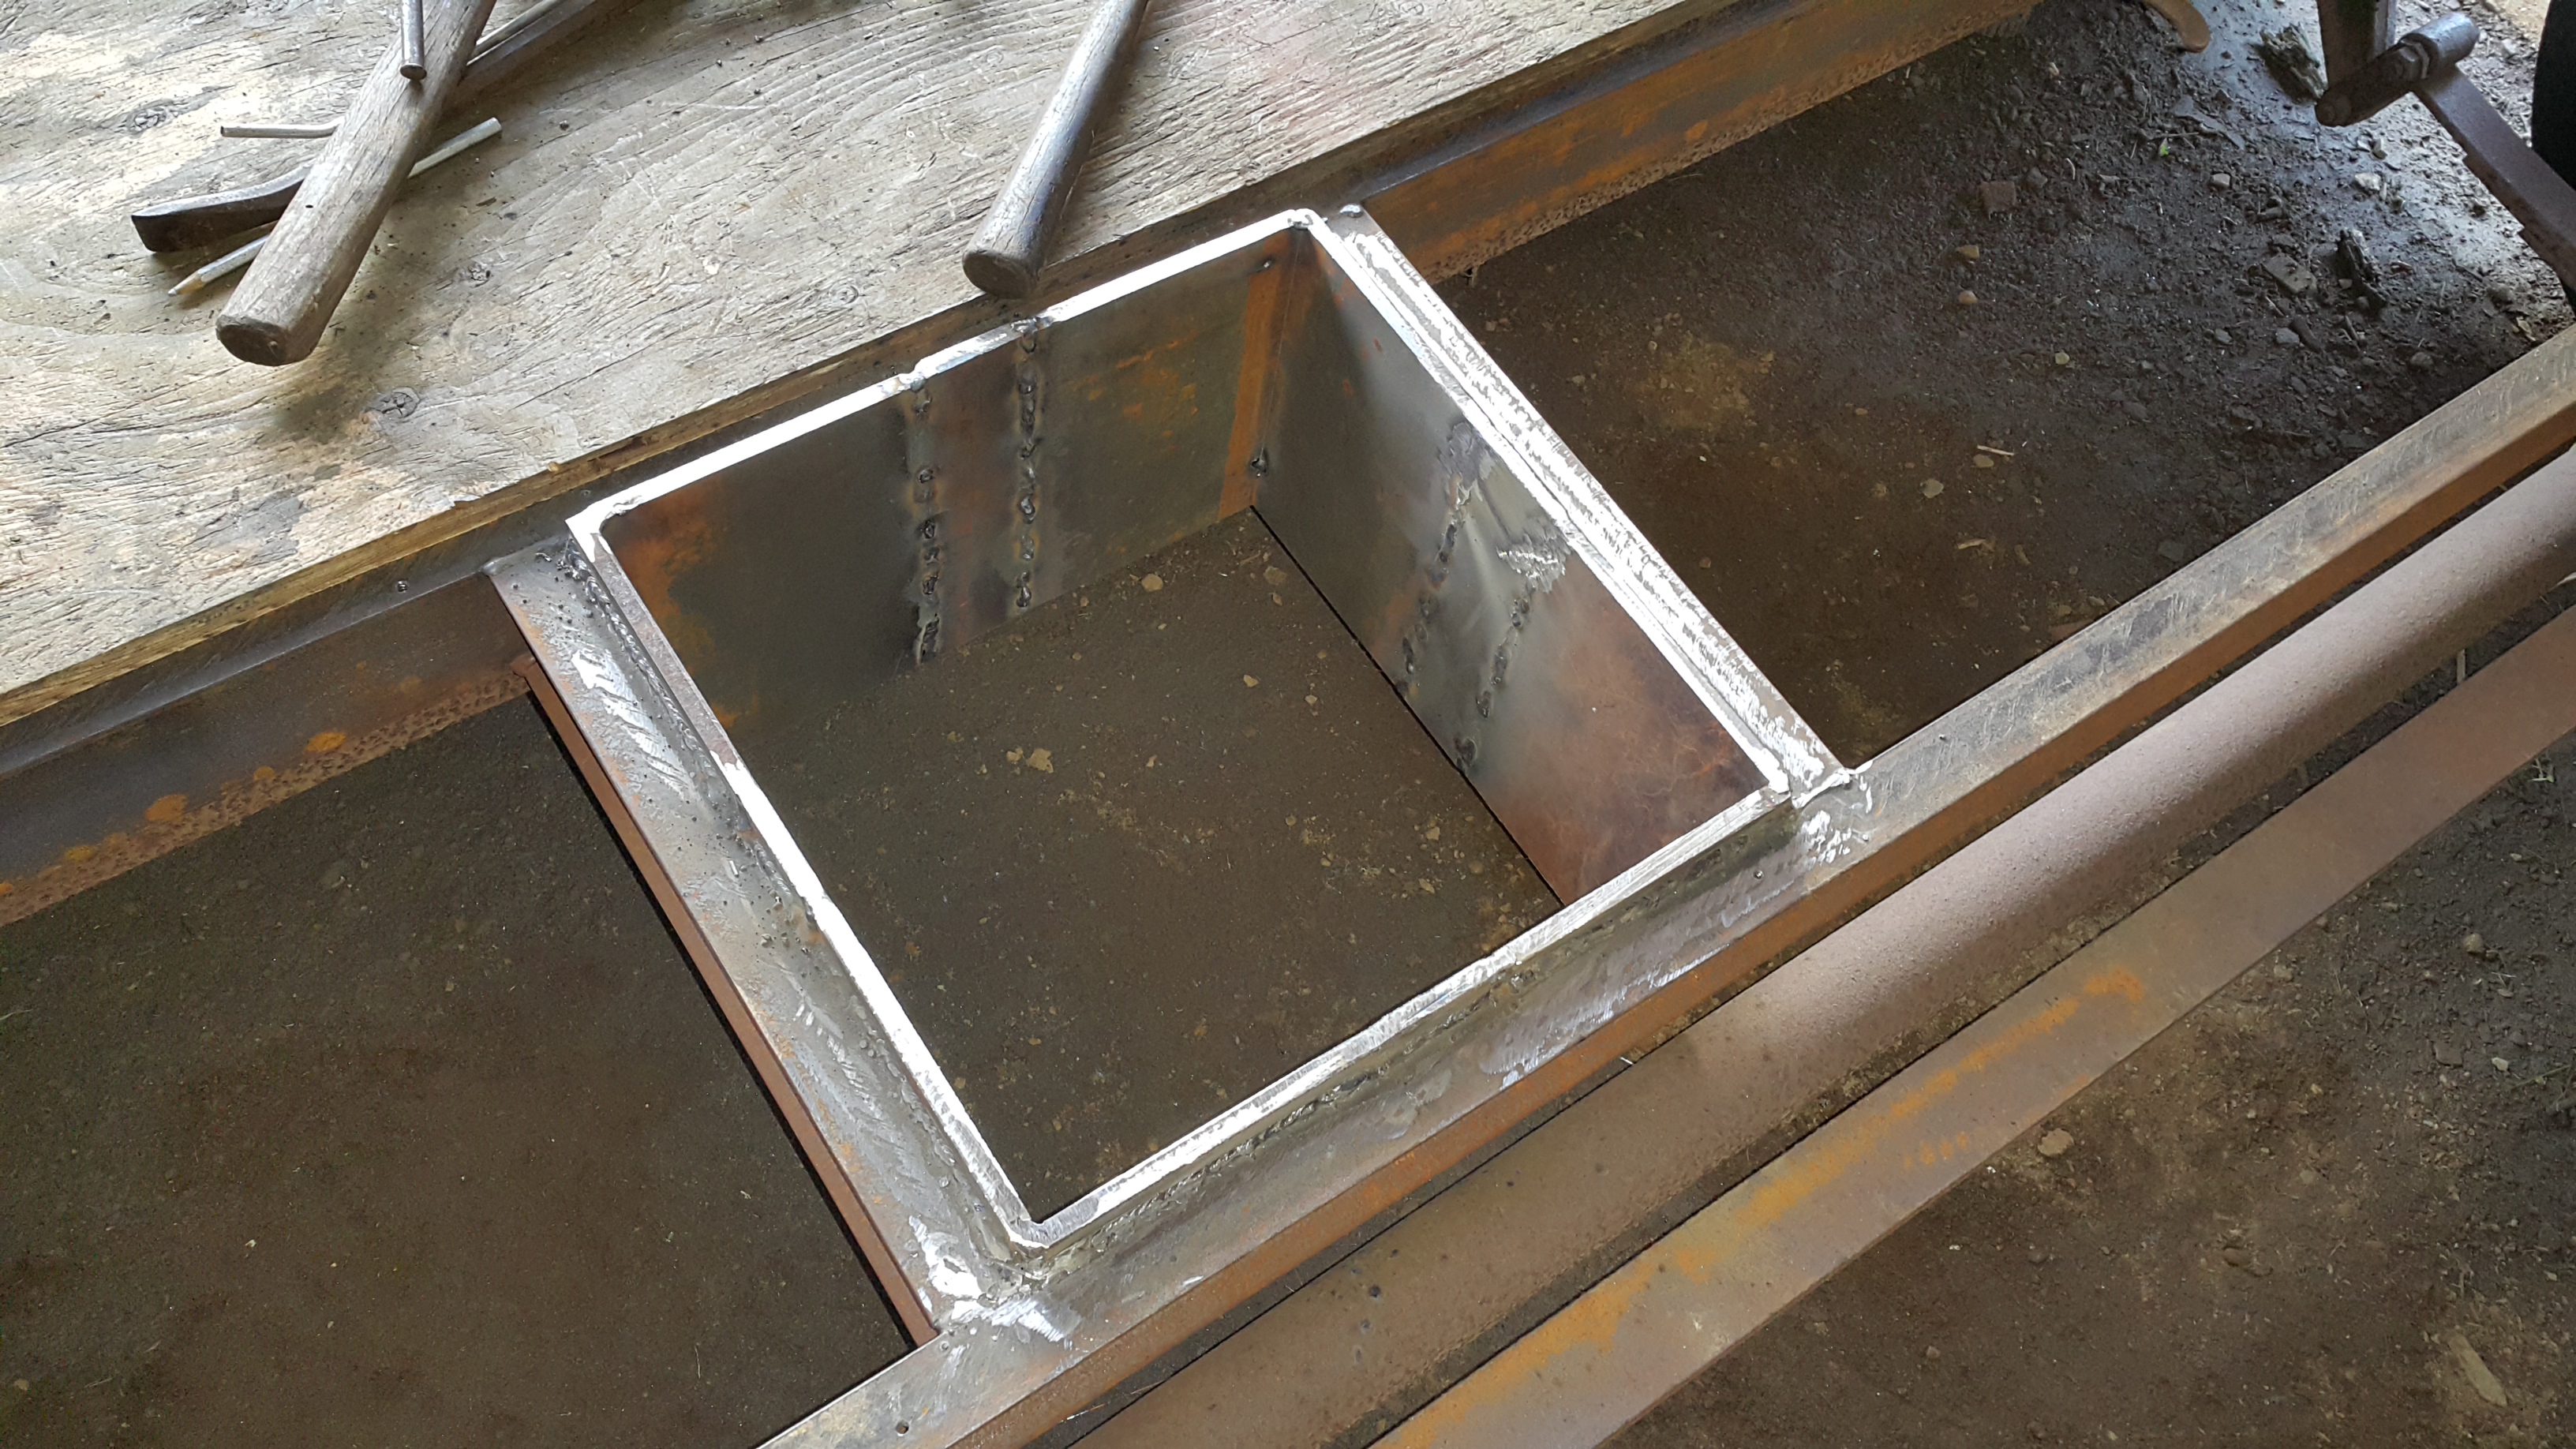
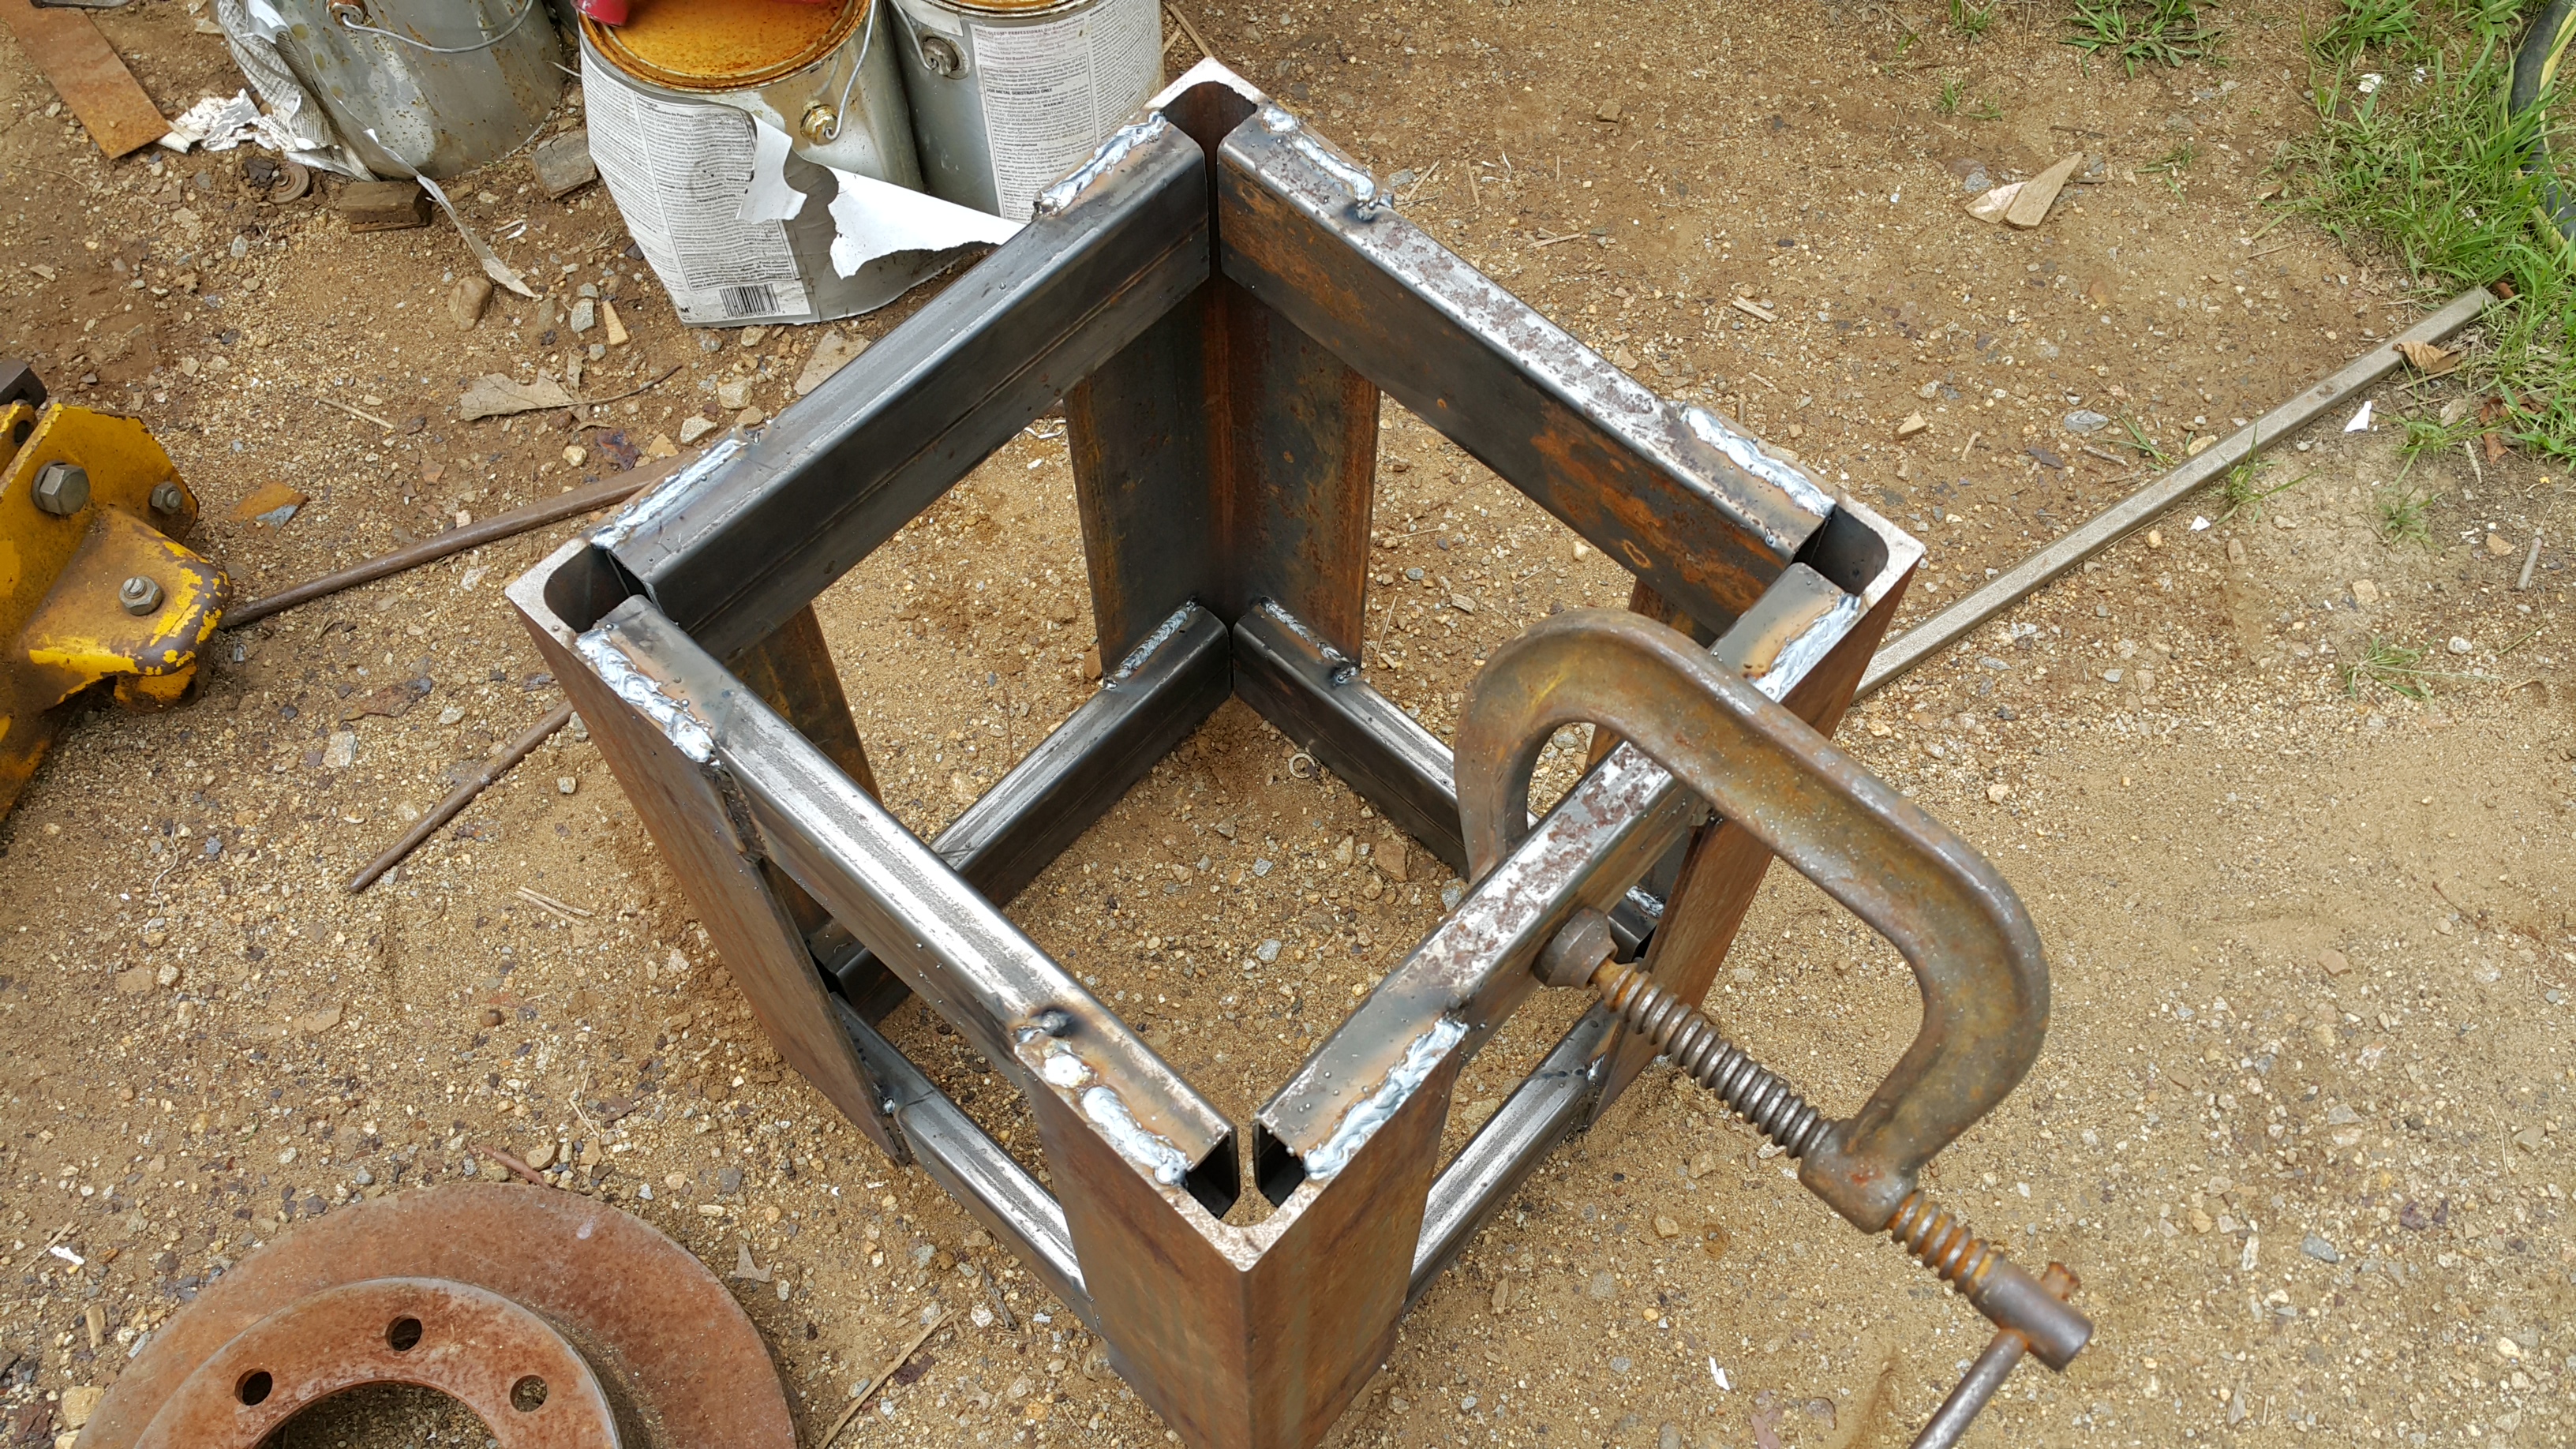
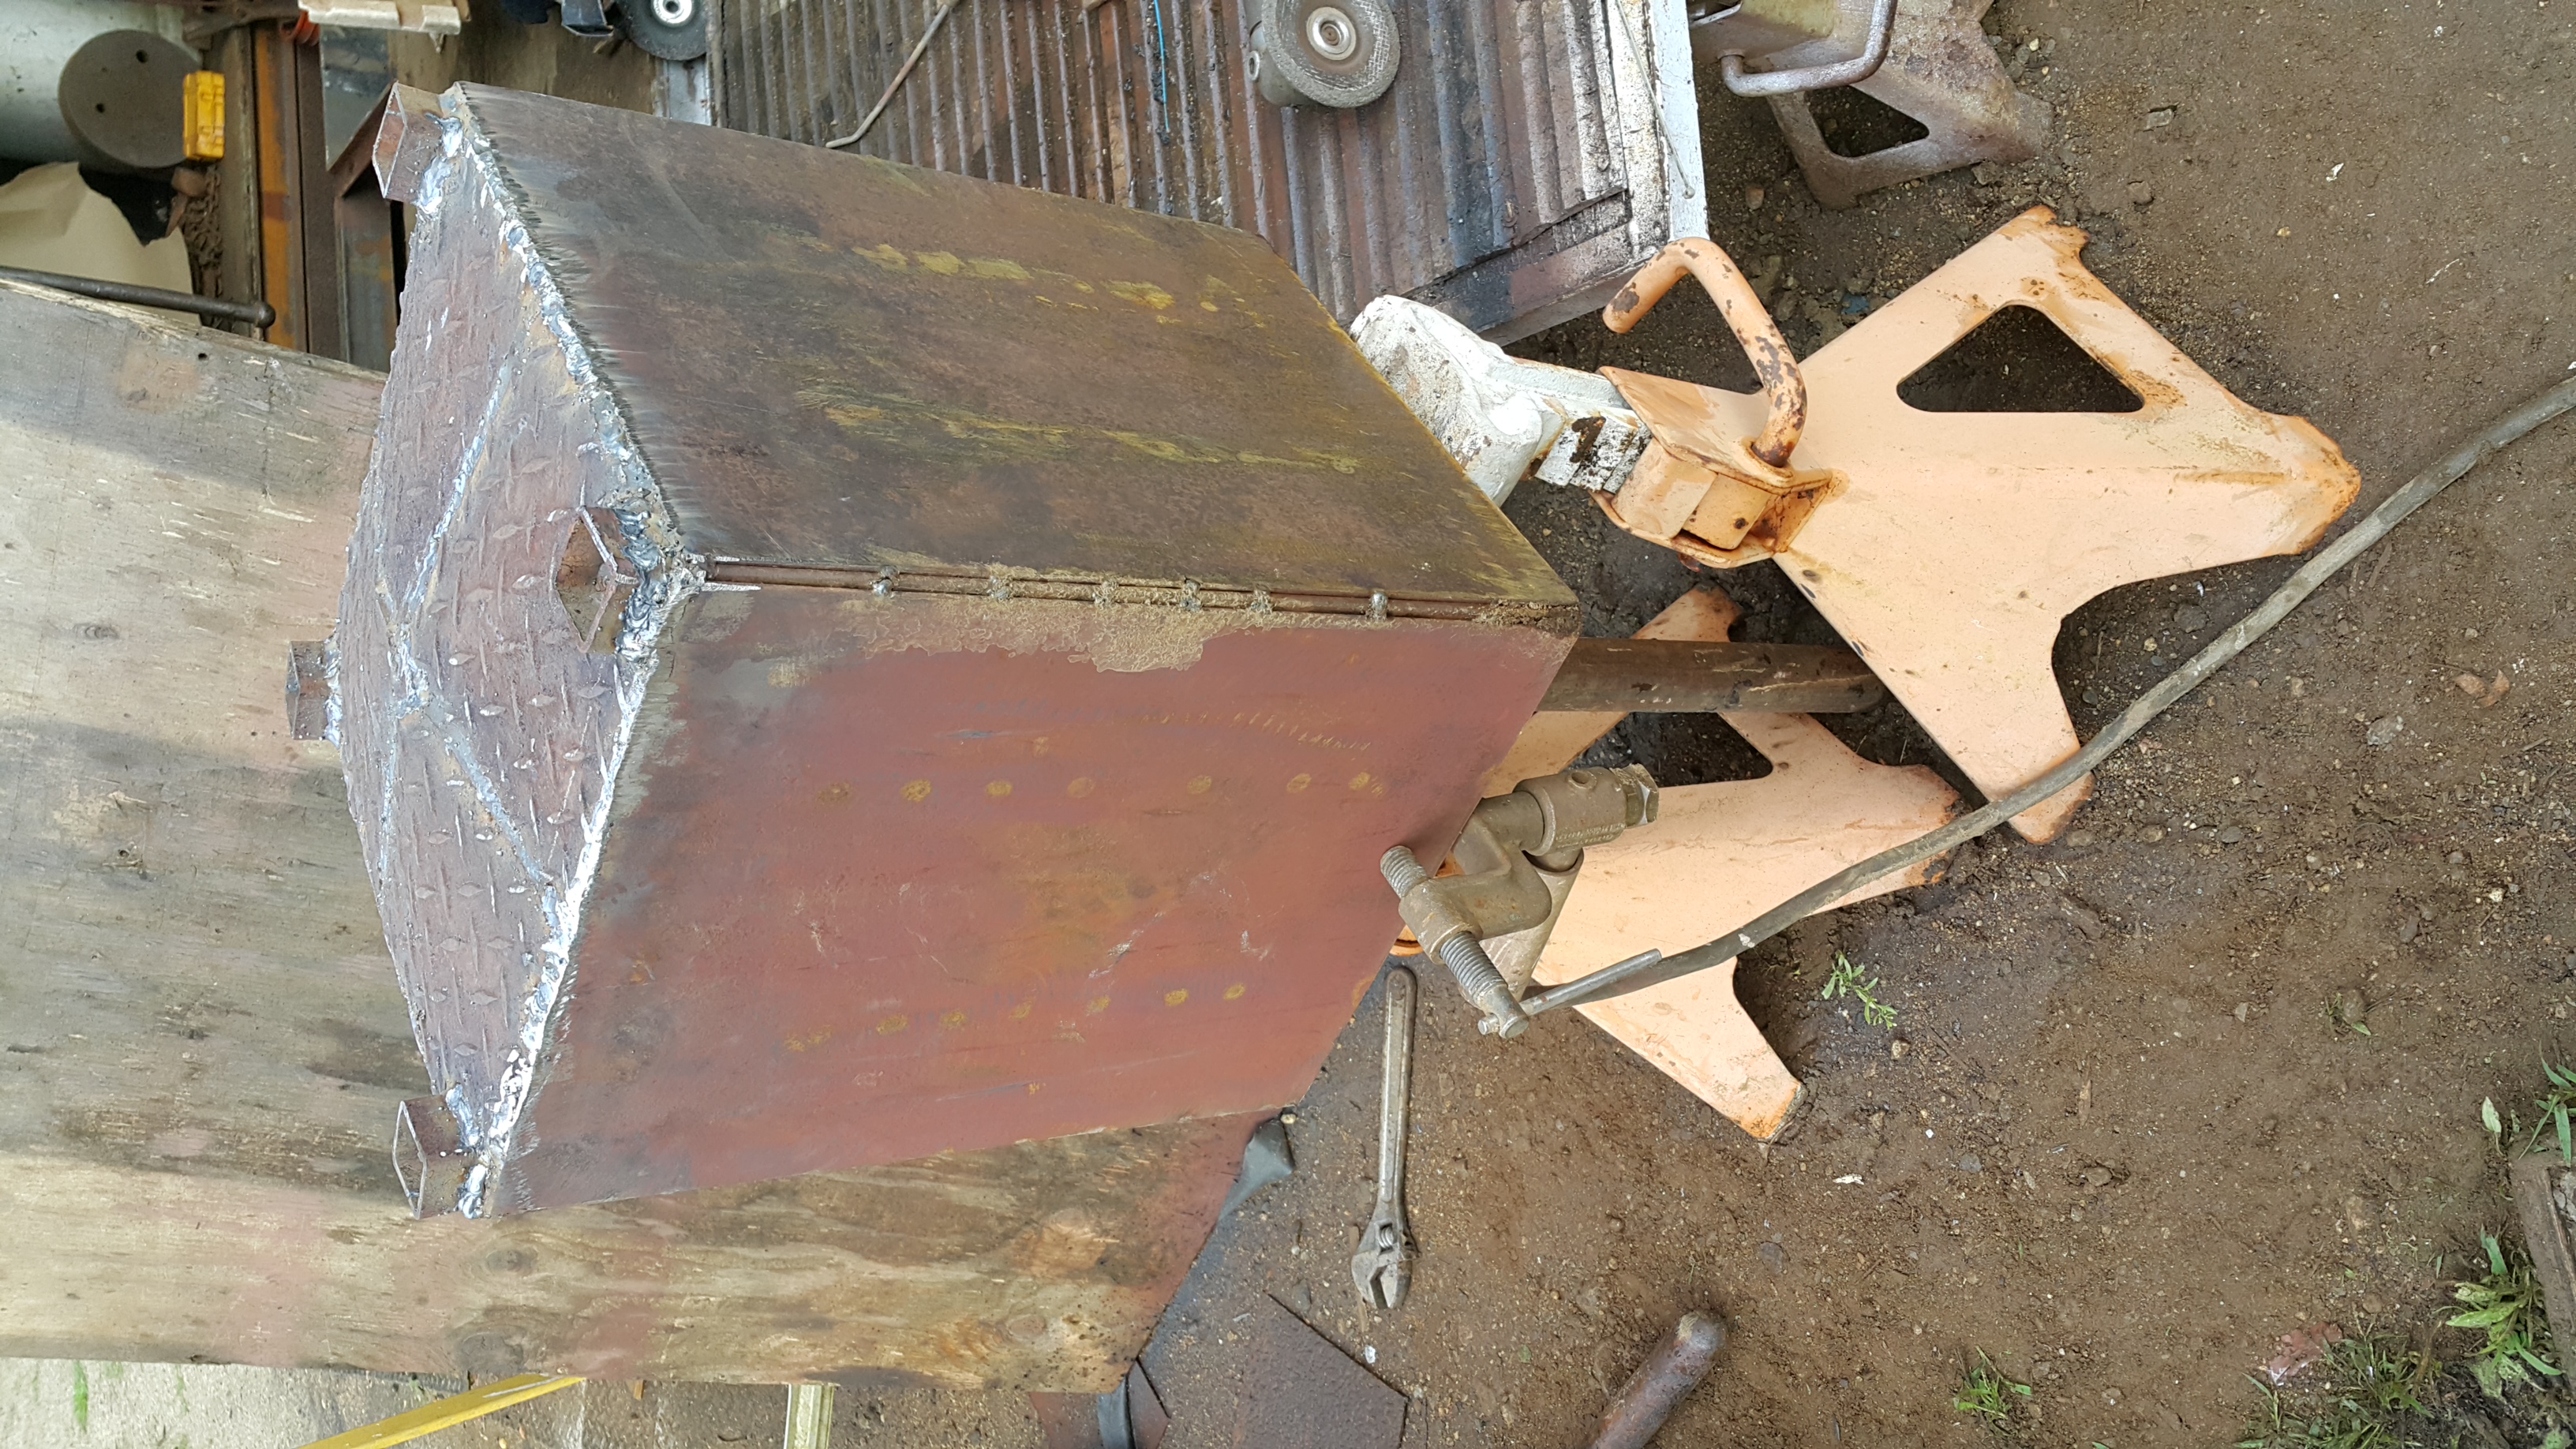
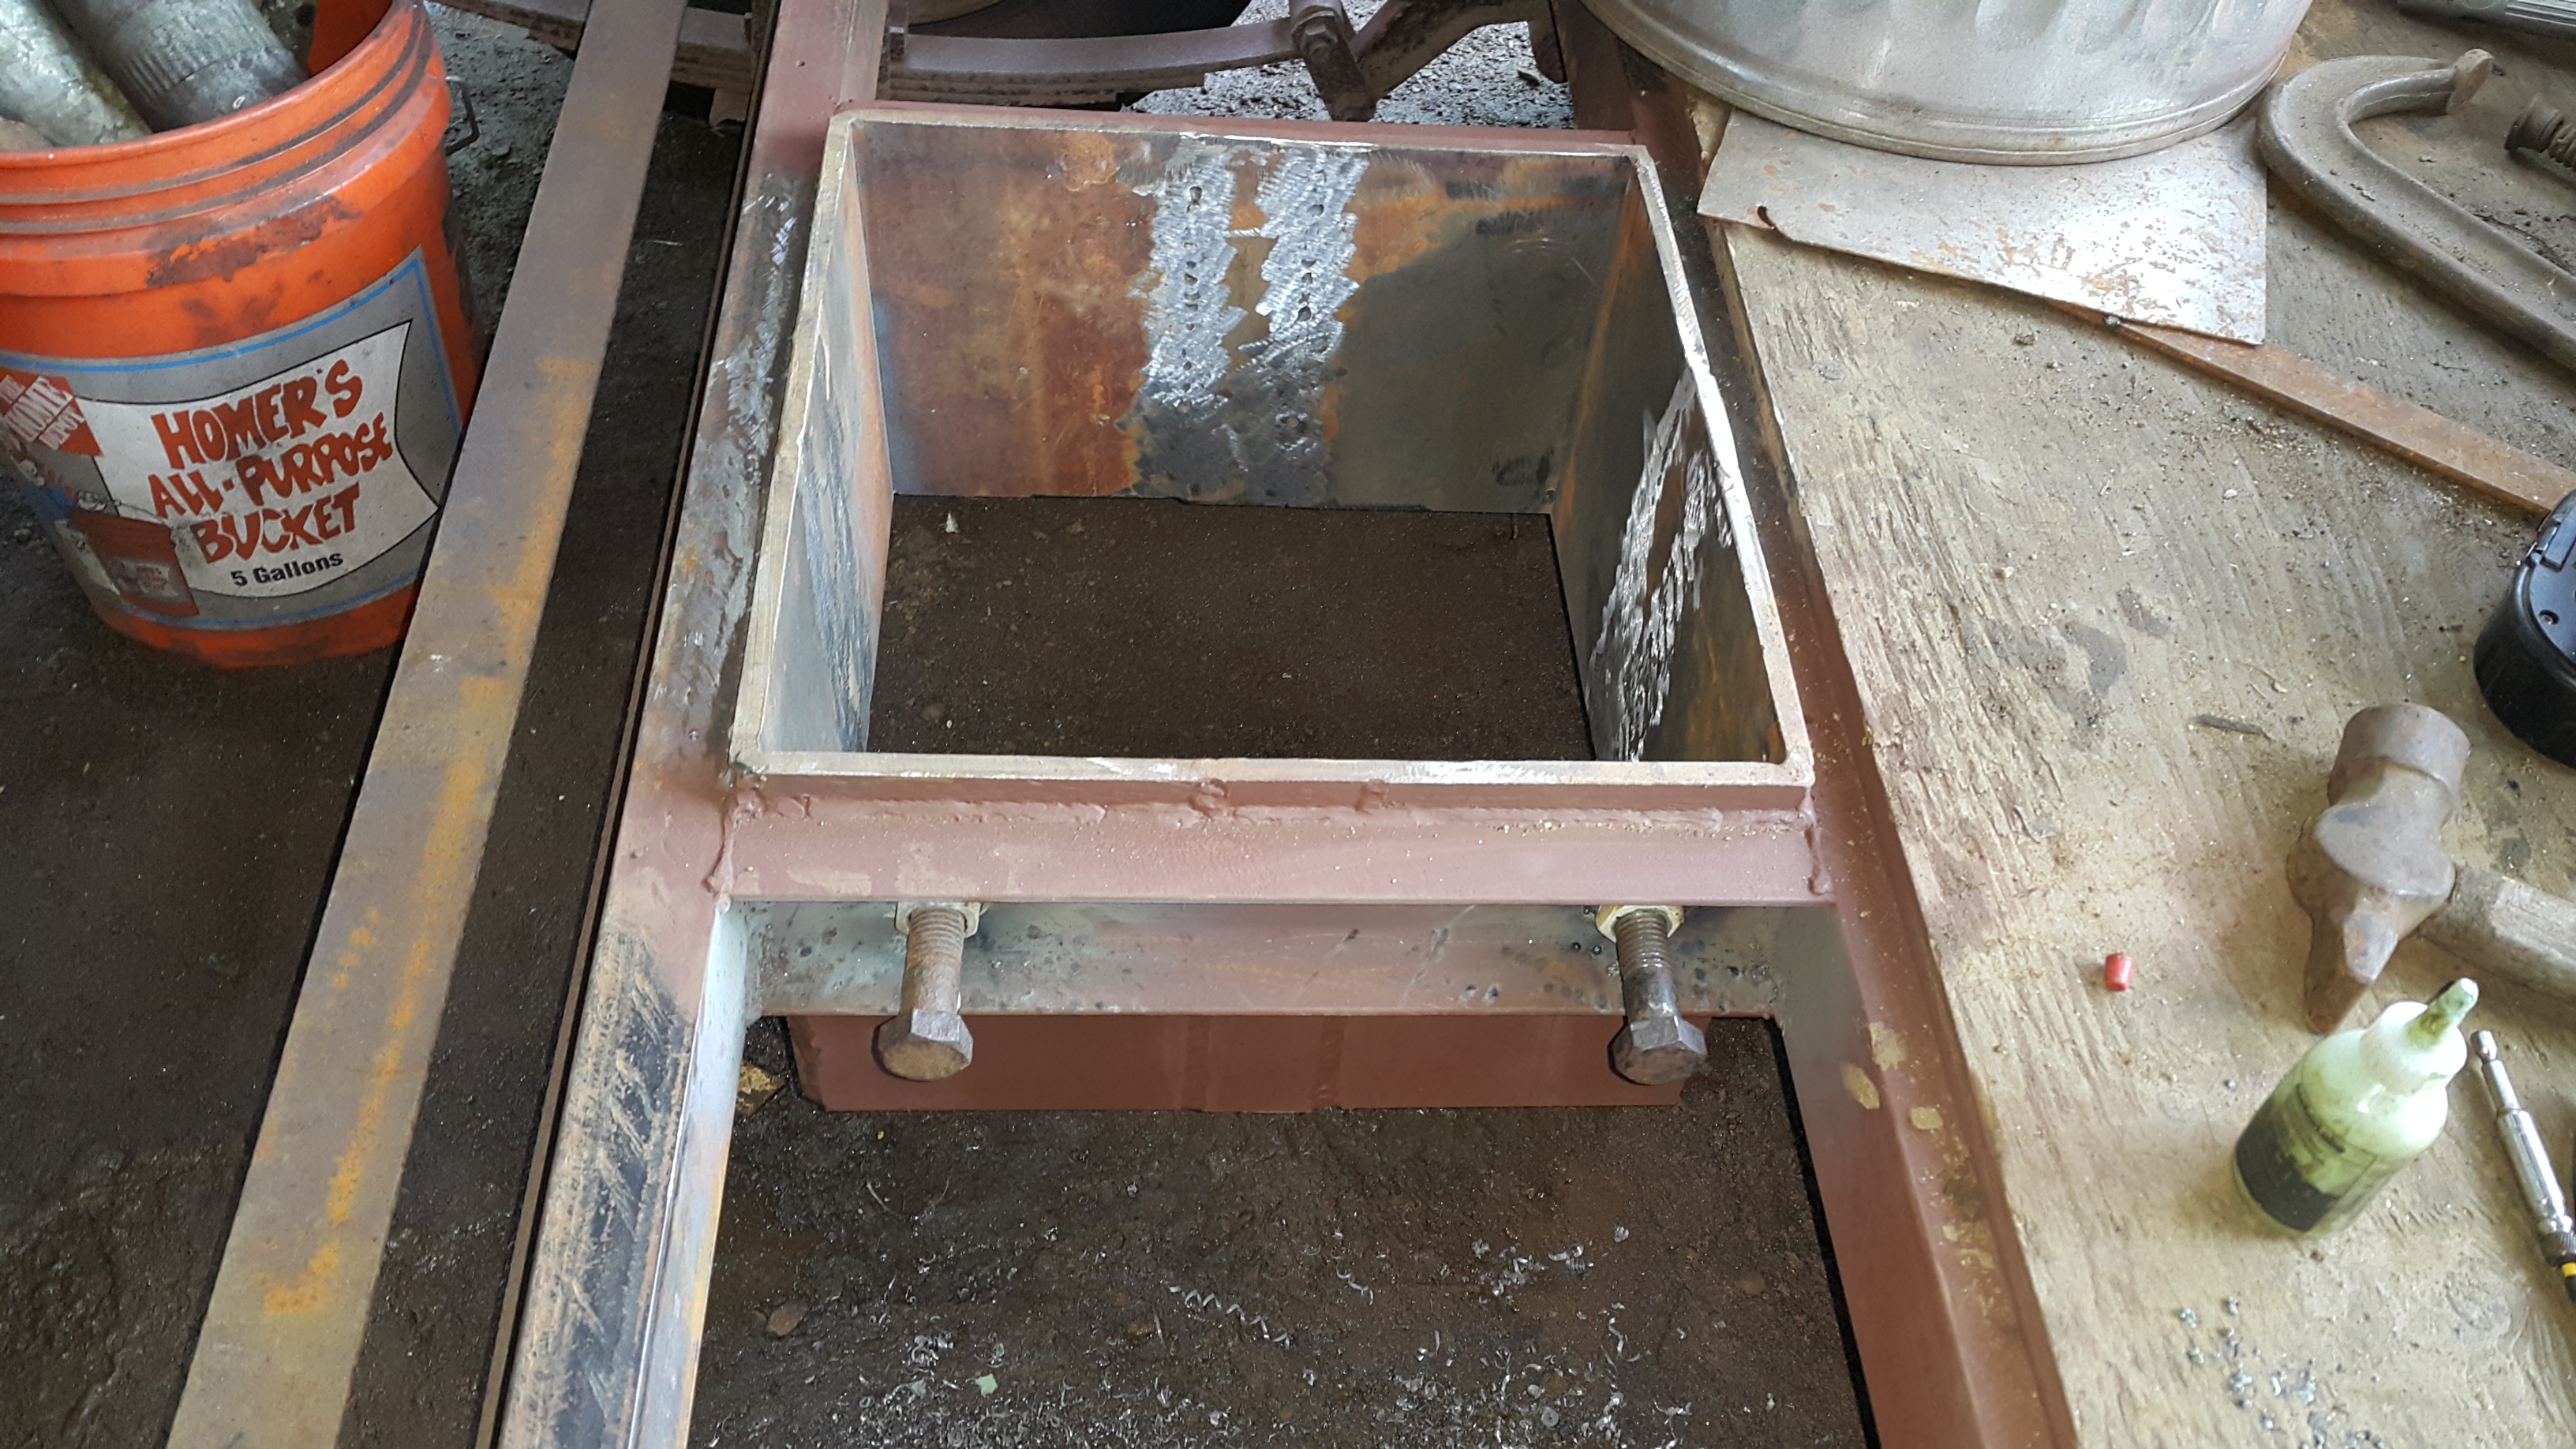
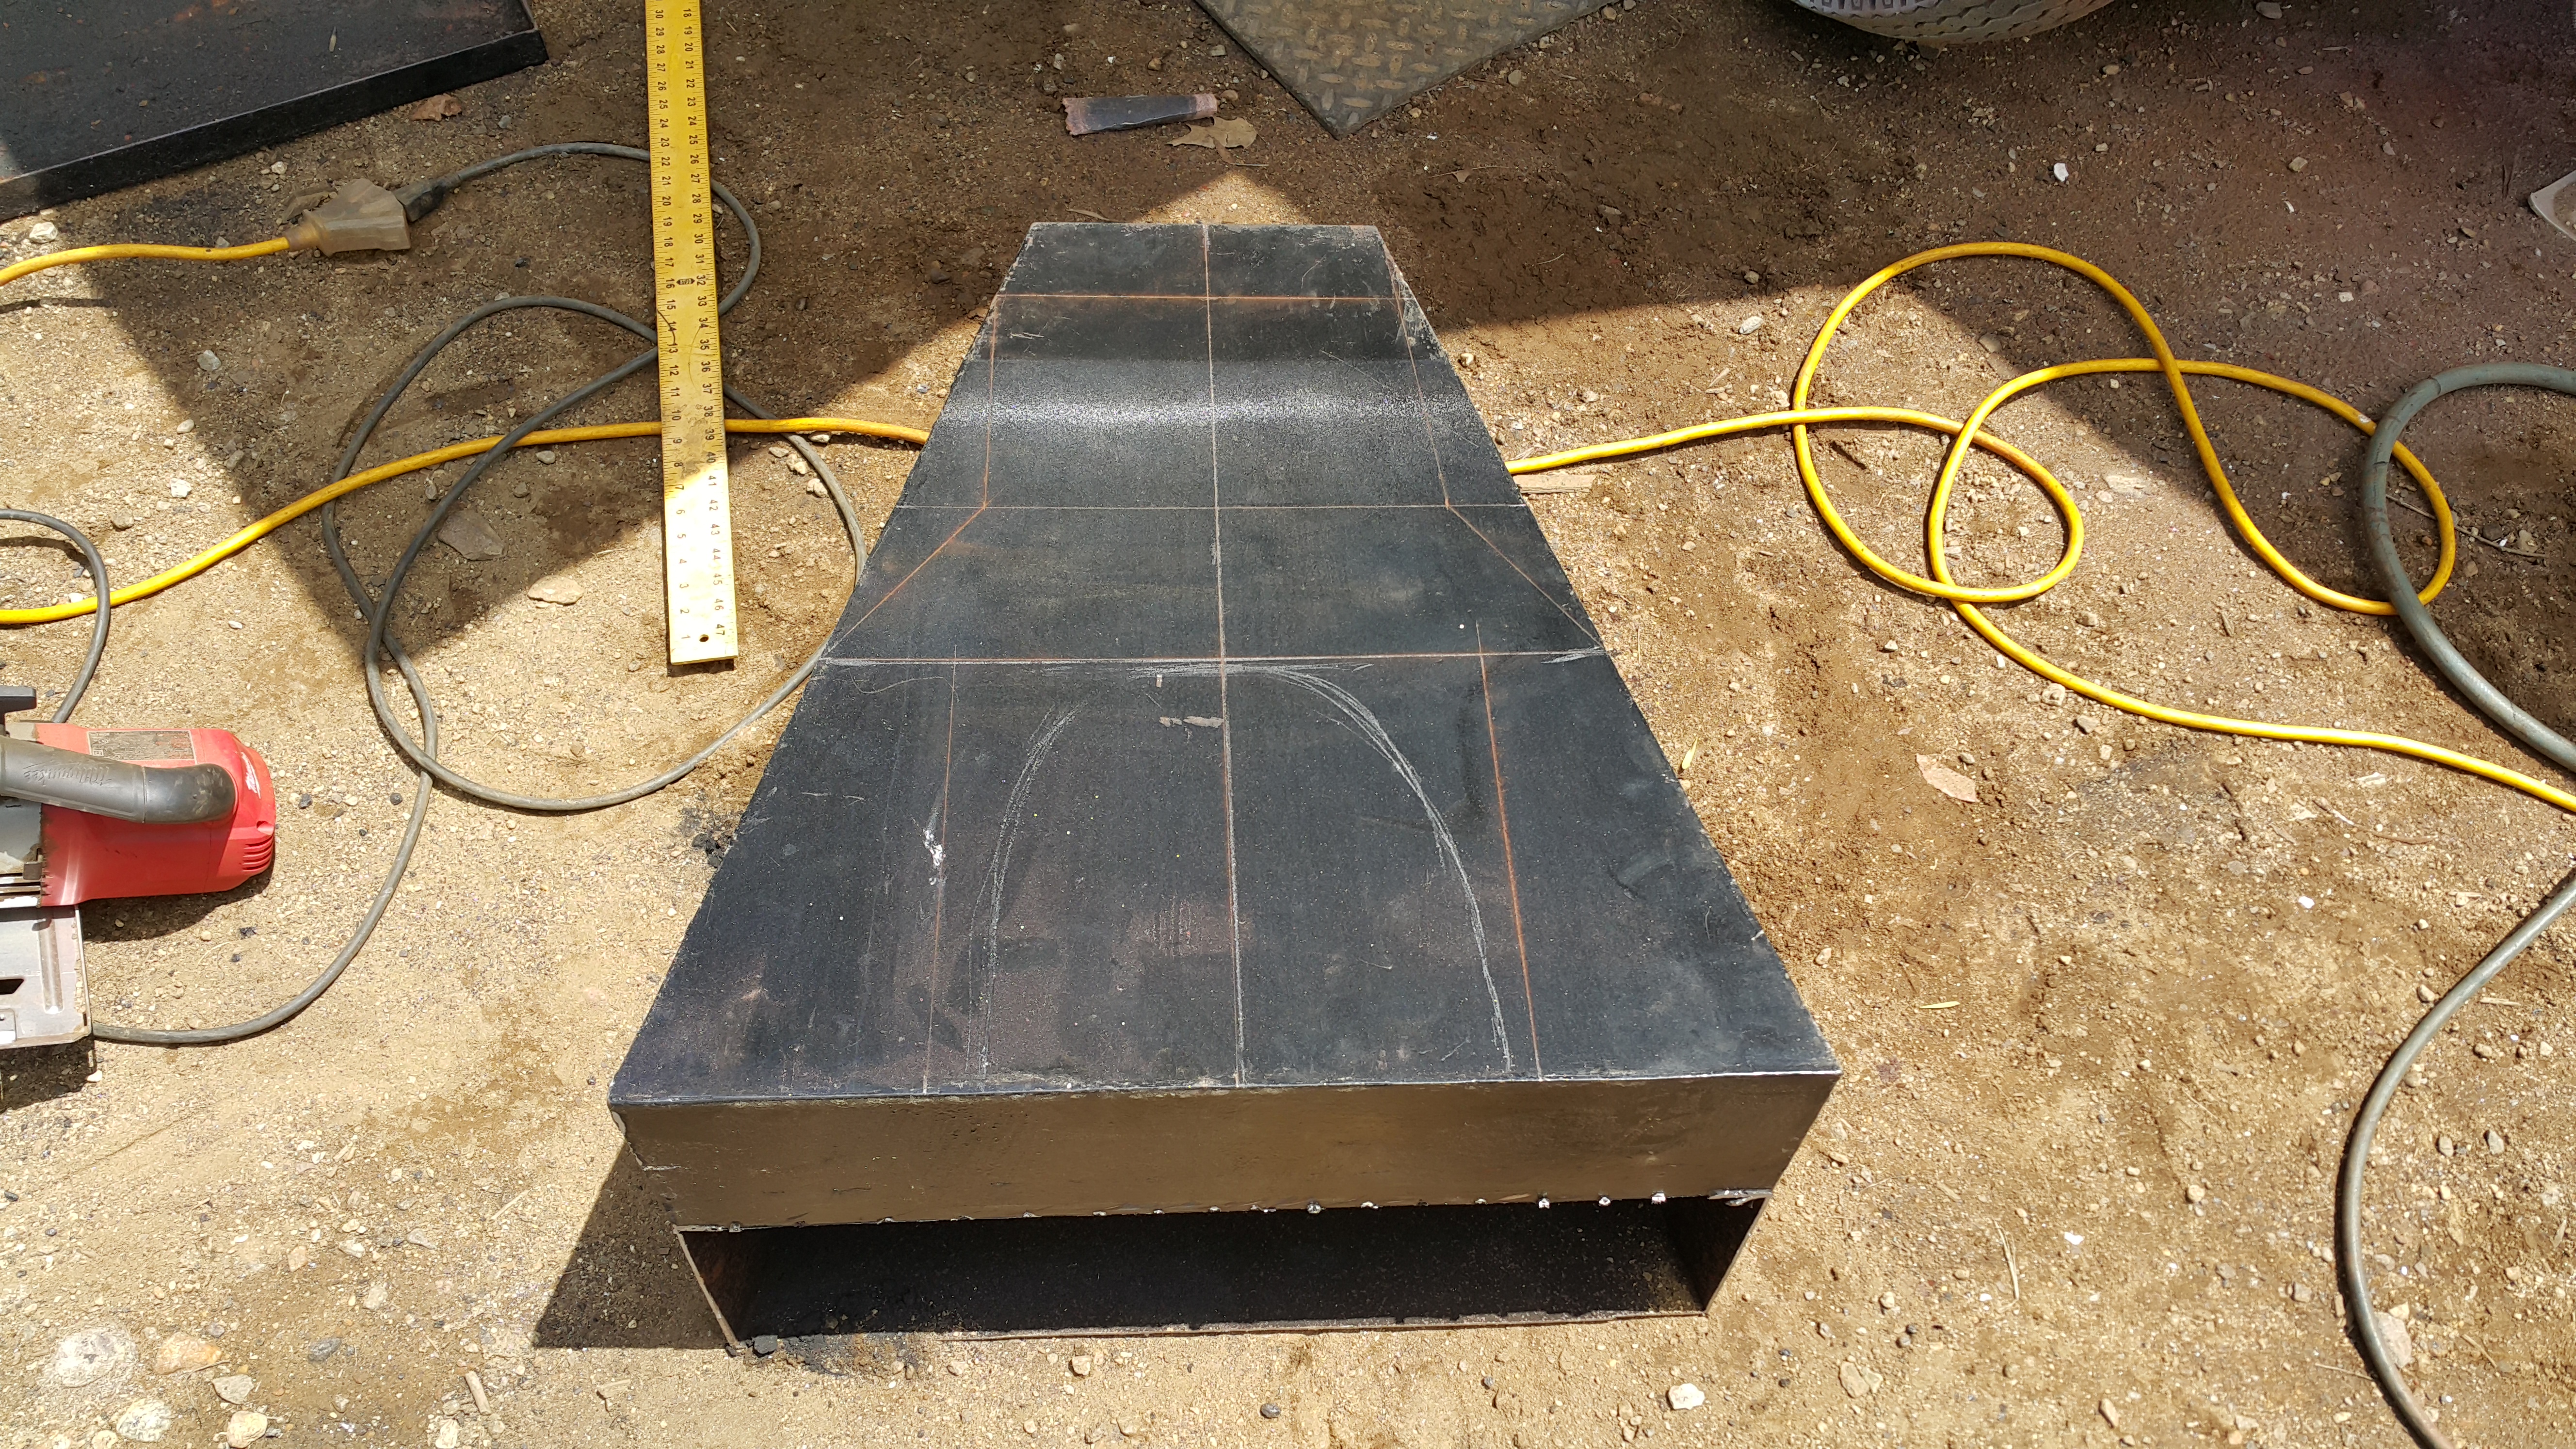
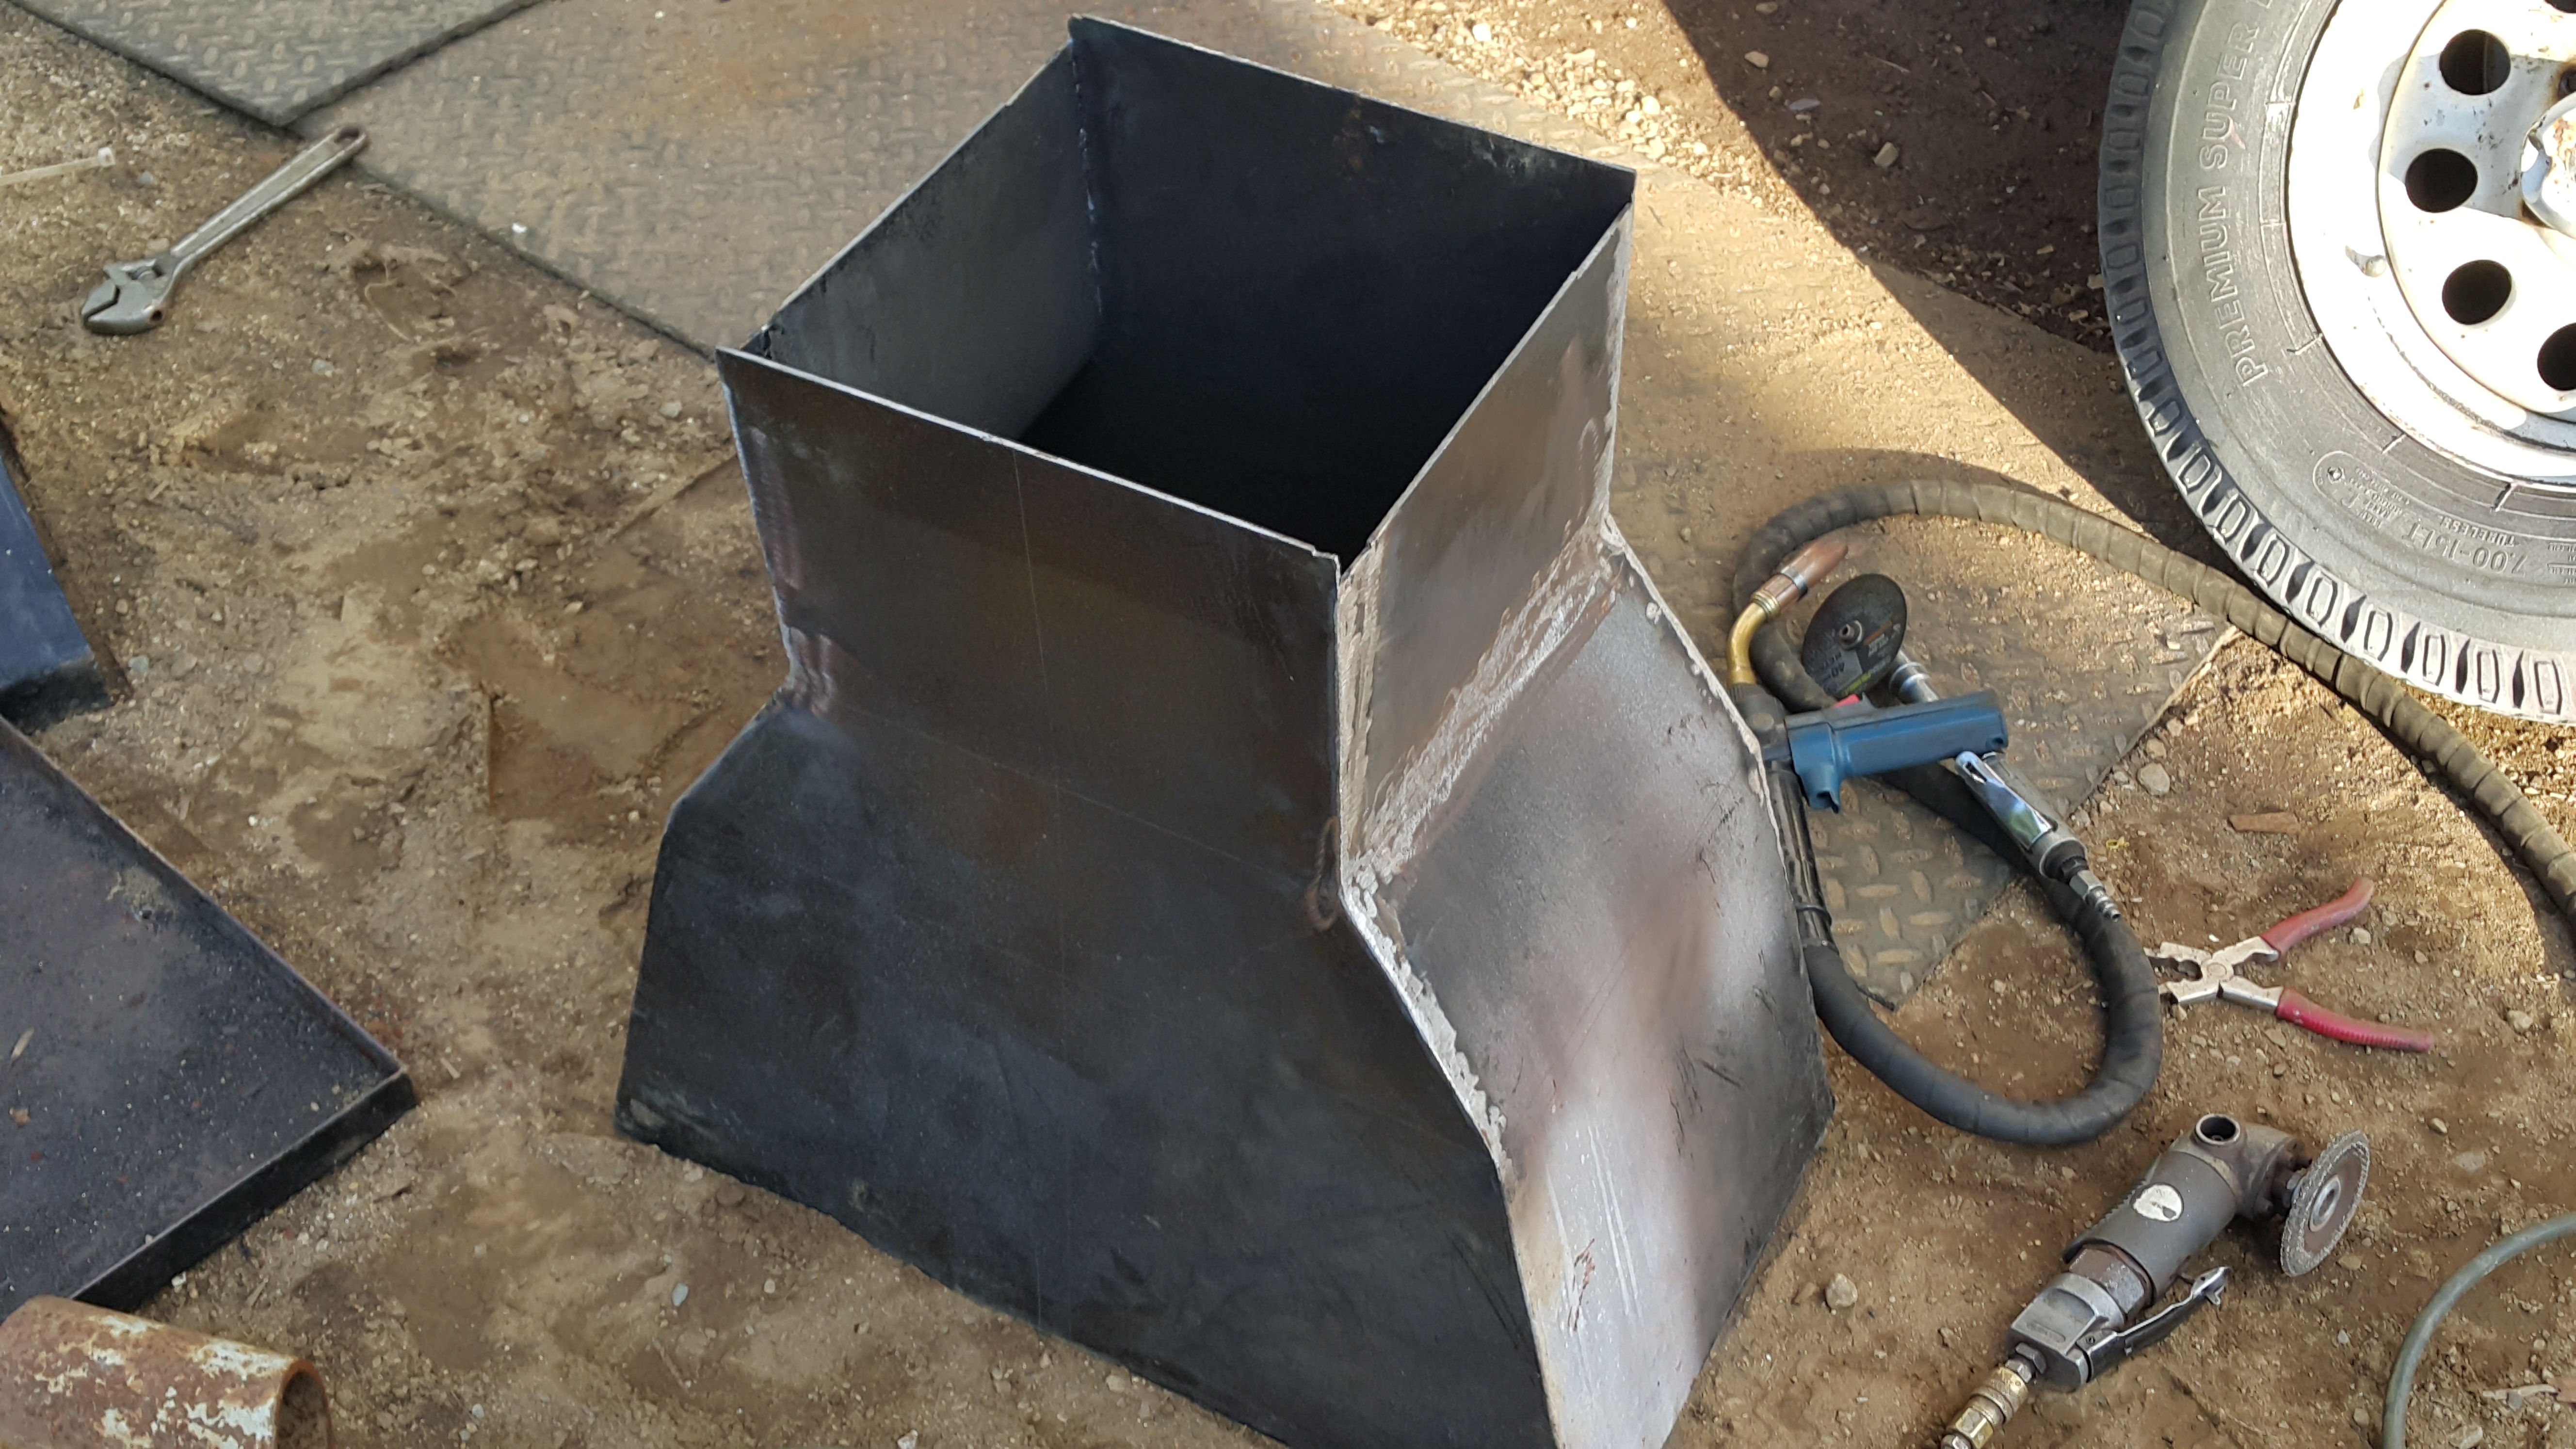
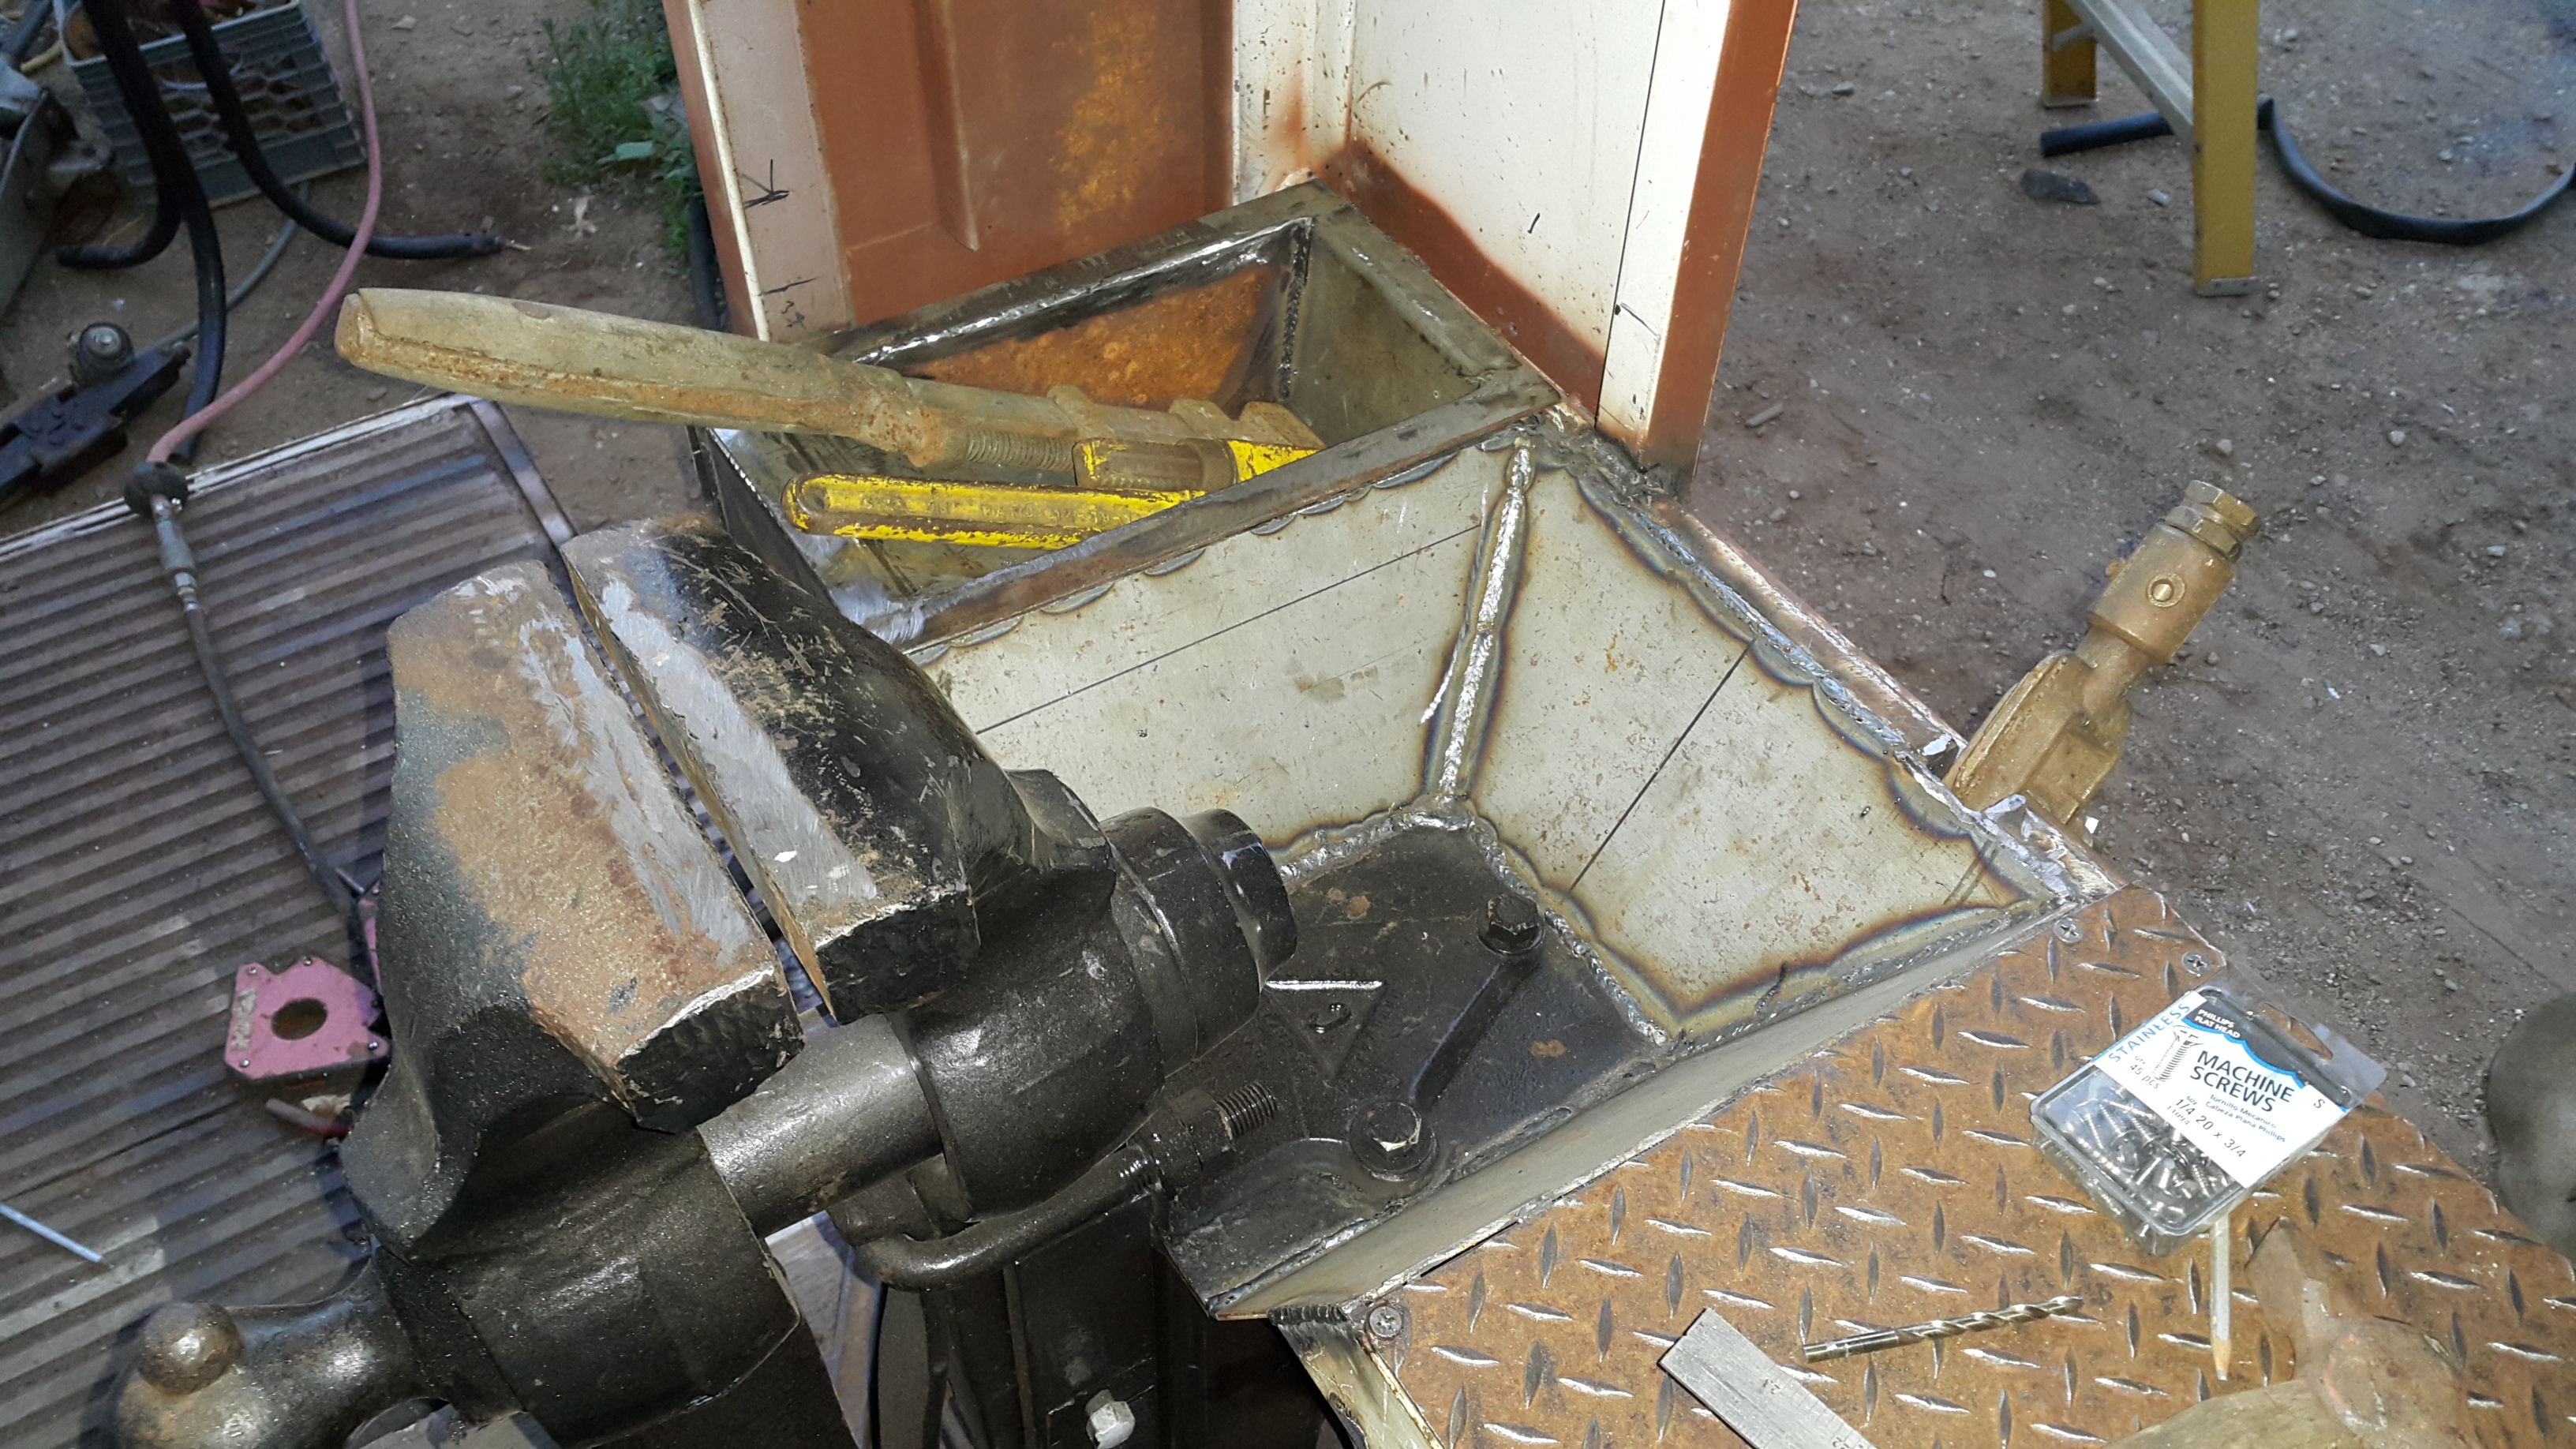
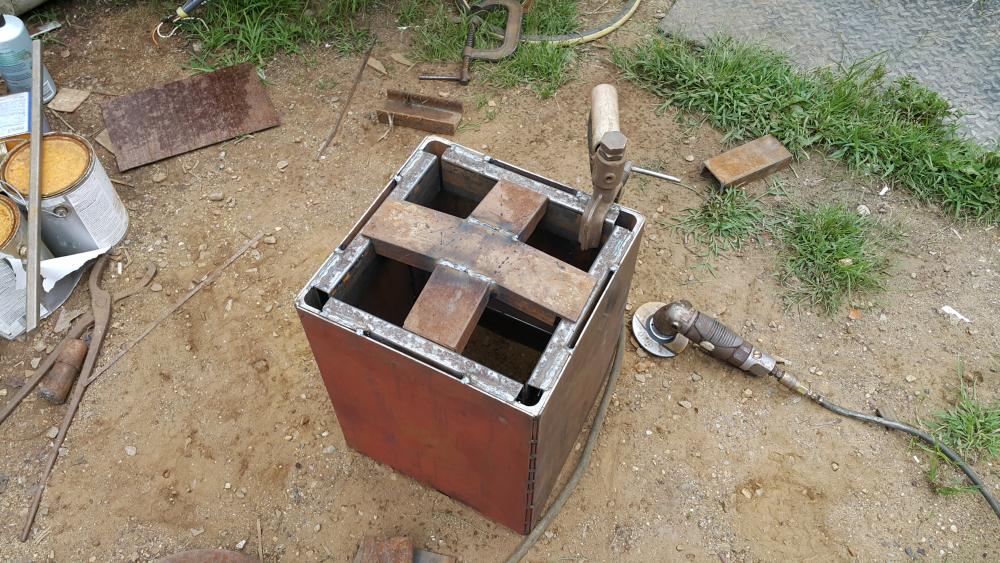
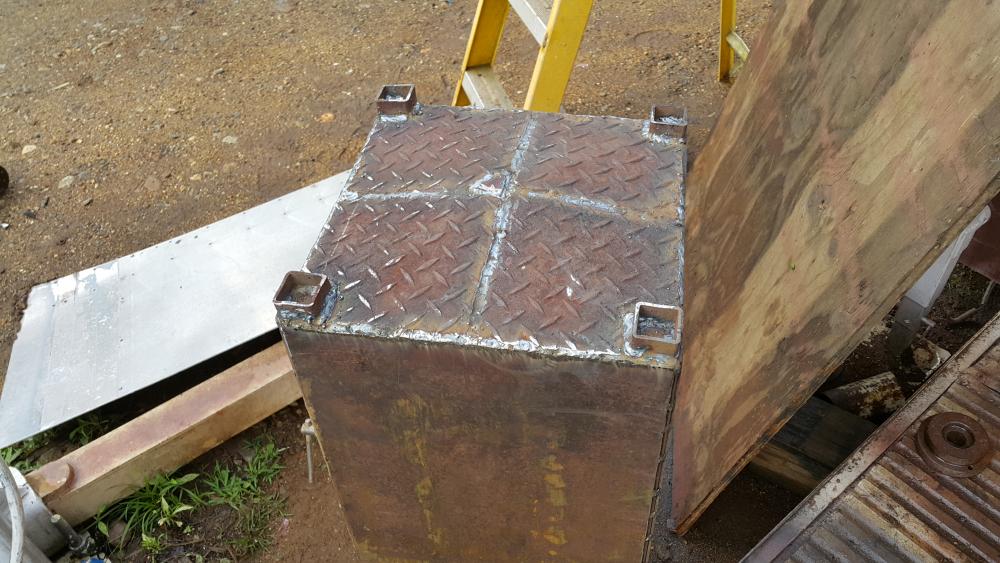
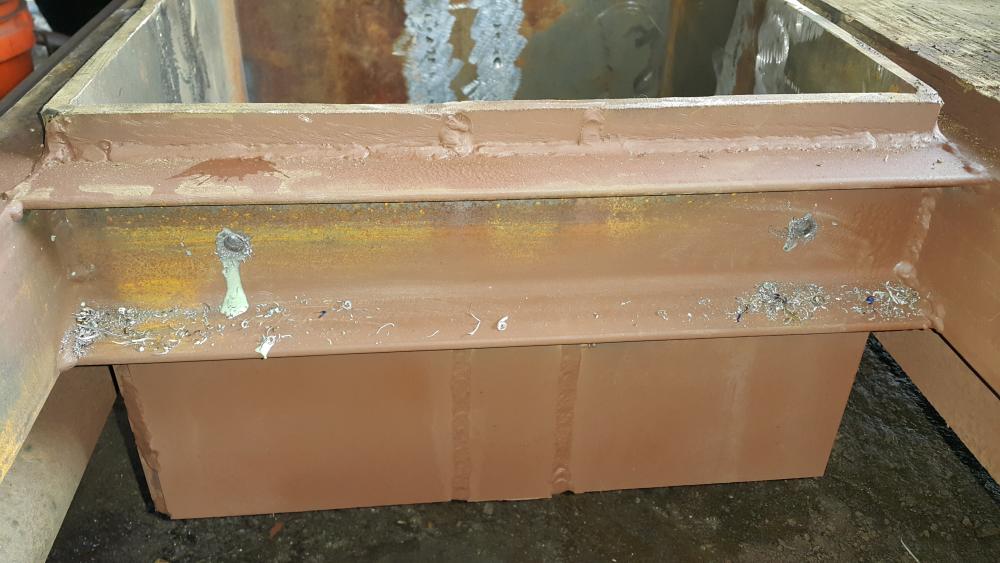
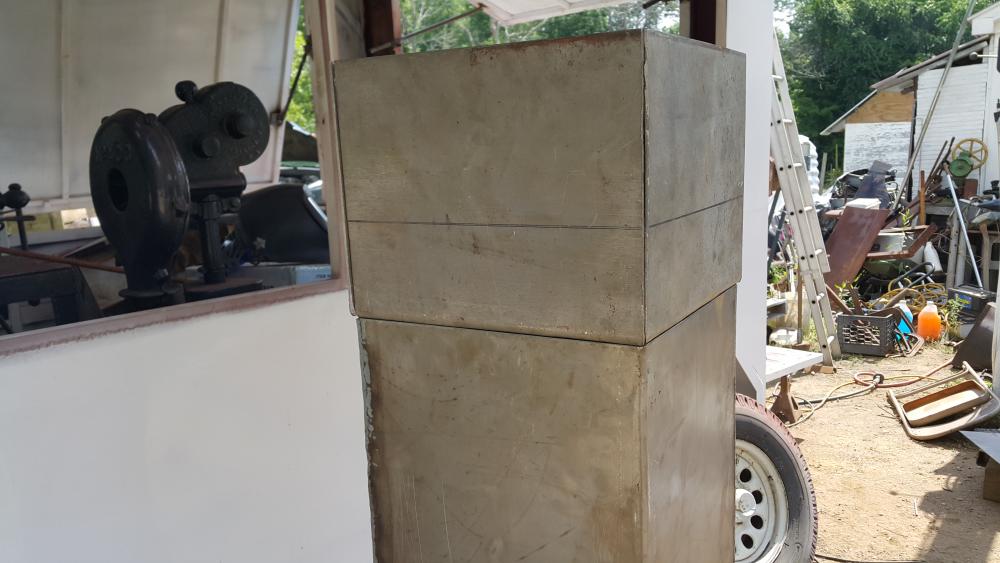
So here we are getting things moved along.. Funny now looking at it but there is 2.5 months of 10+ hrs a day up to Aug 23 which was a half a day, the day of the fair demo.. 20160818_185451.mp4 the pictures moved out of order.. So they are out of sequence.. But you guys will get the picture..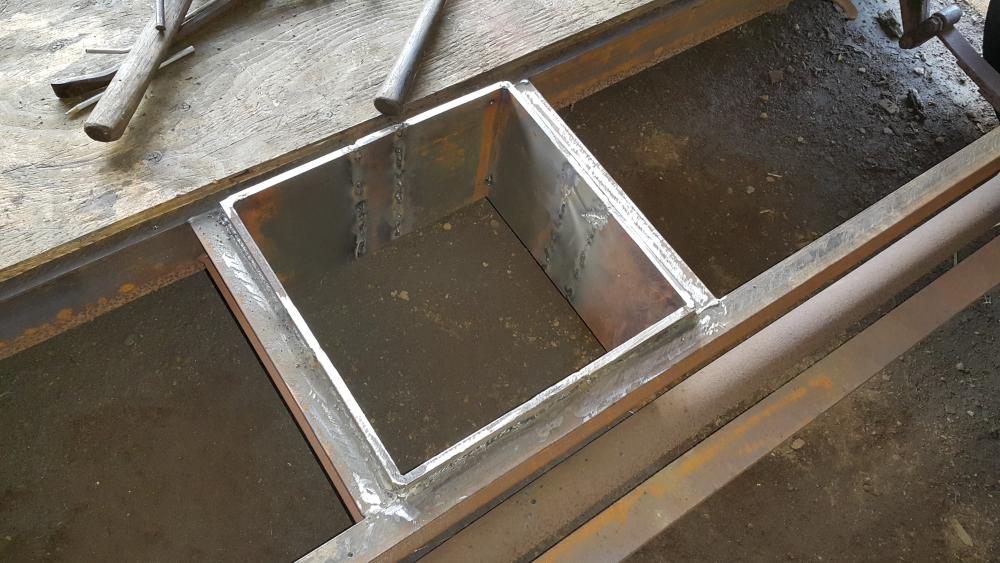


-
Portable Blacksmith shop
jlpservicesinc replied to jlpservicesinc's topic in Building, Designing a Shop
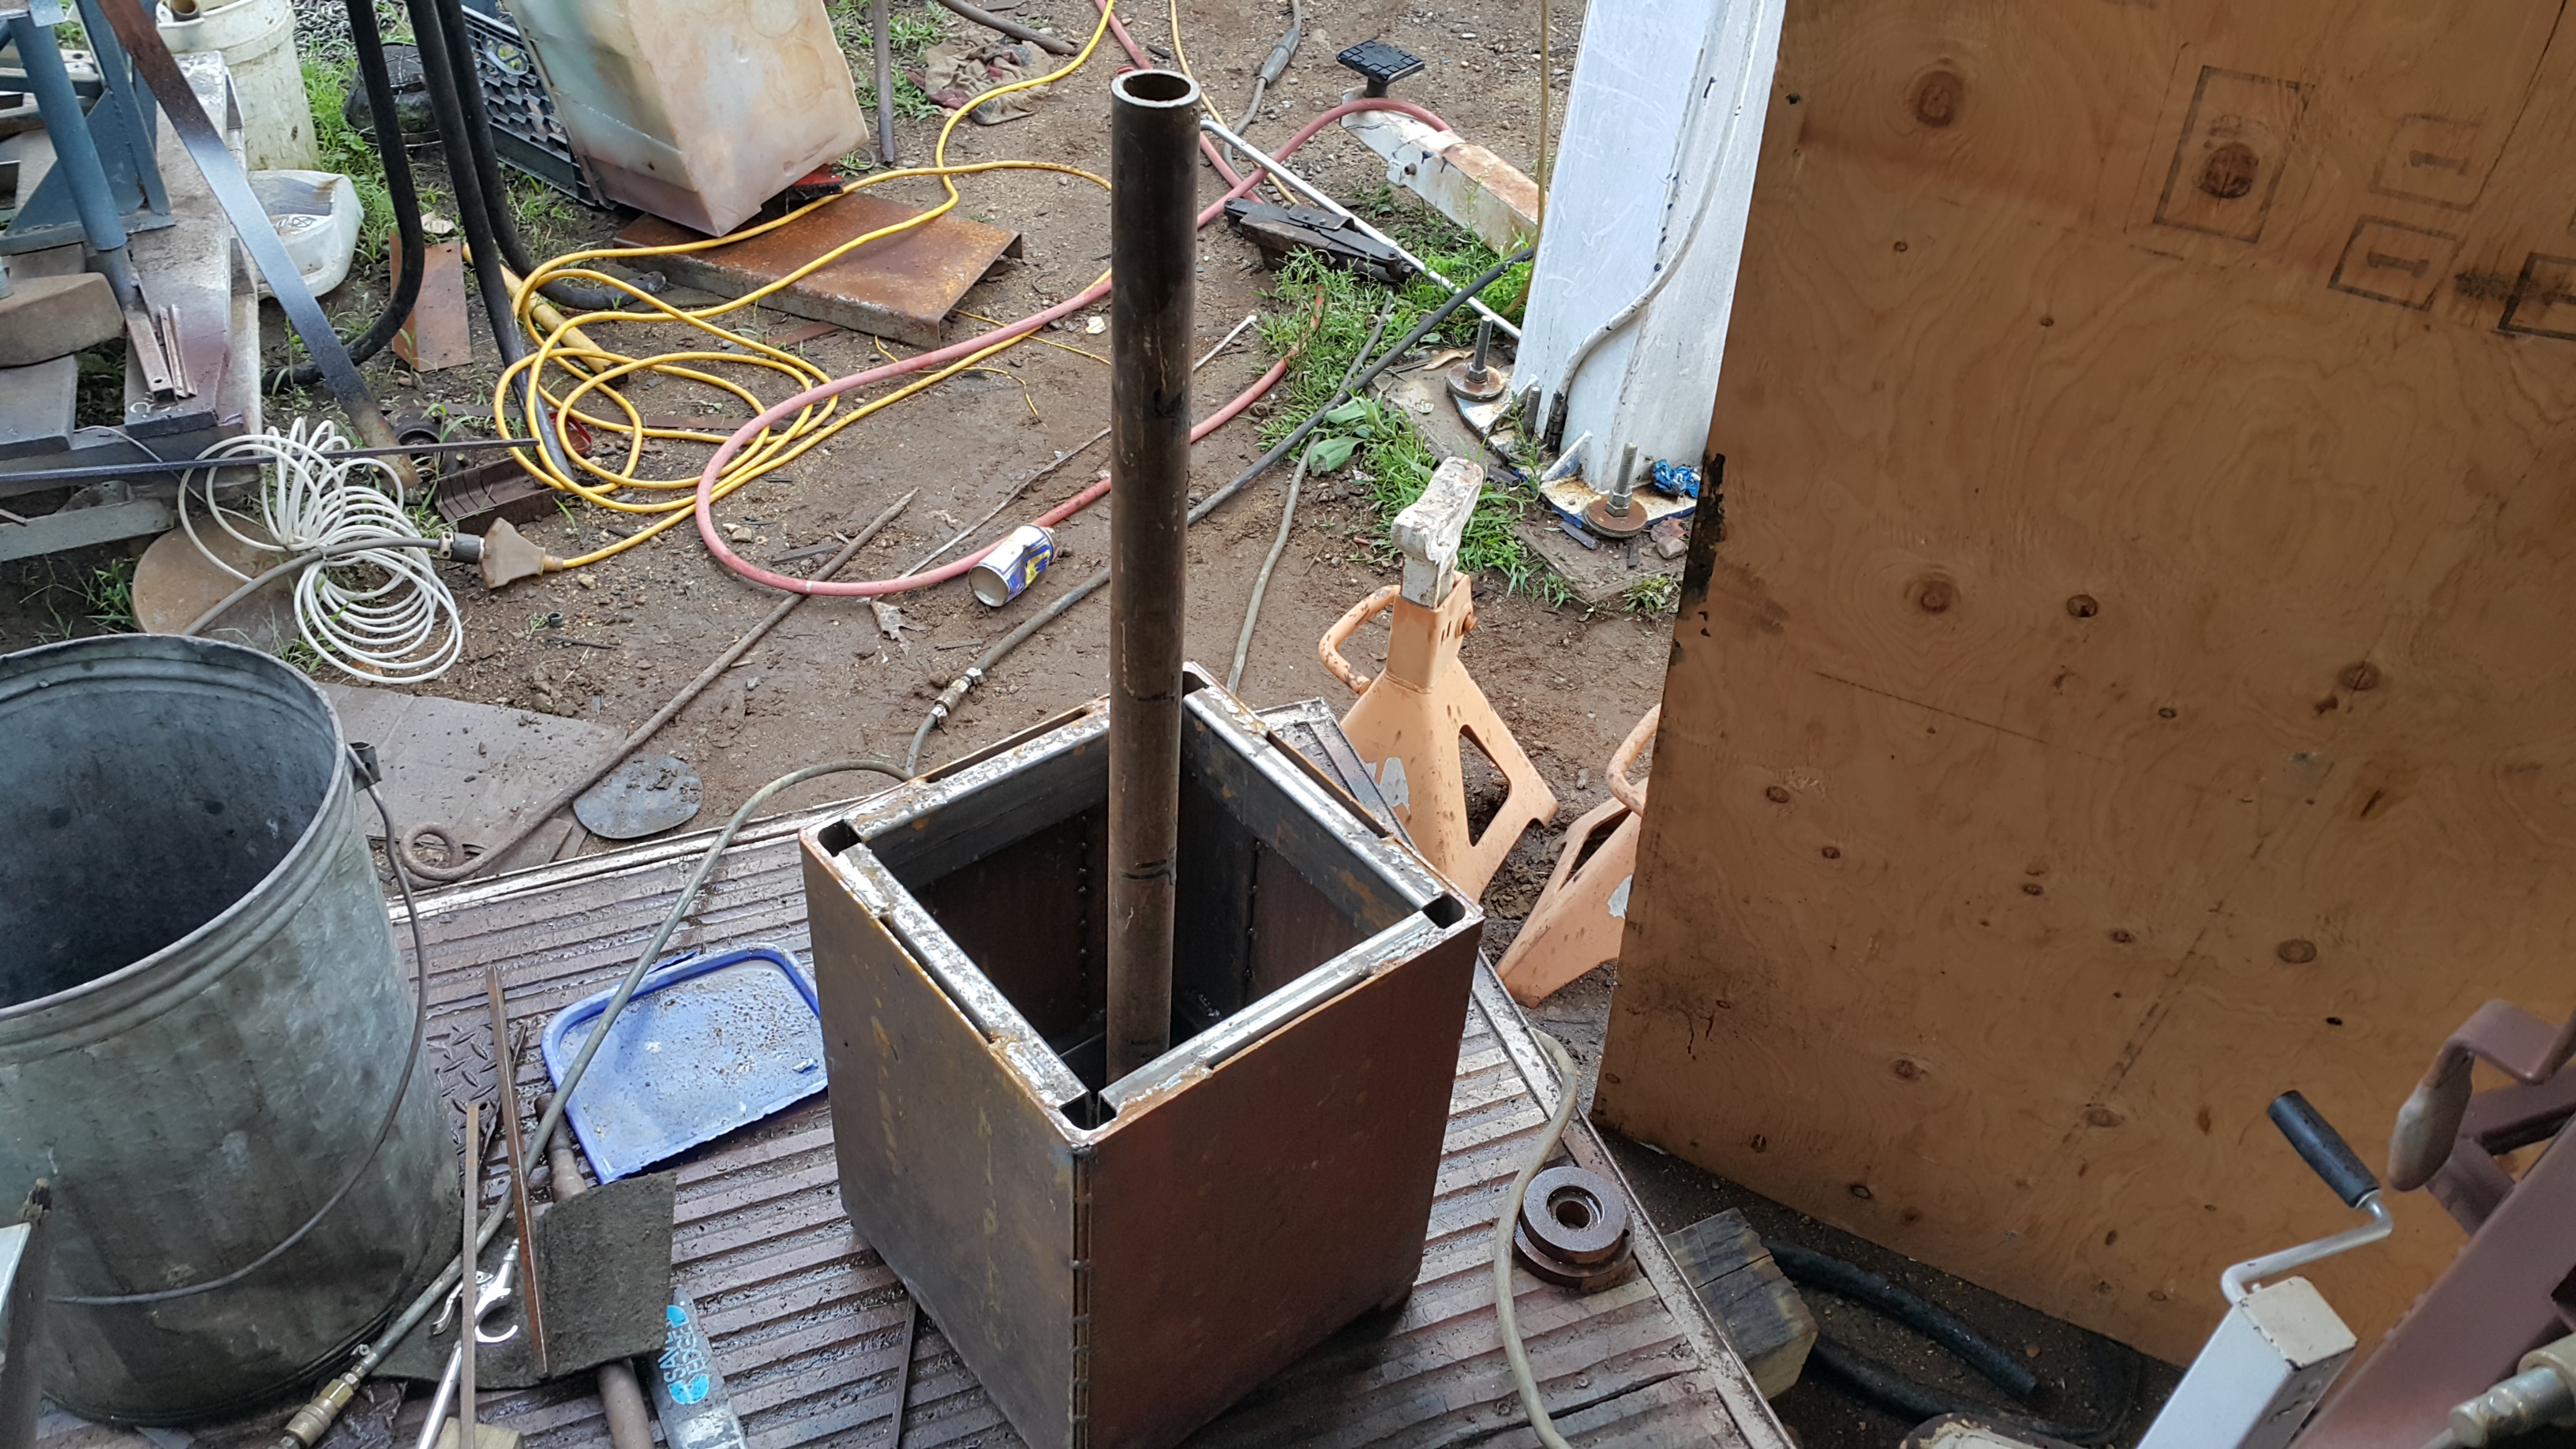
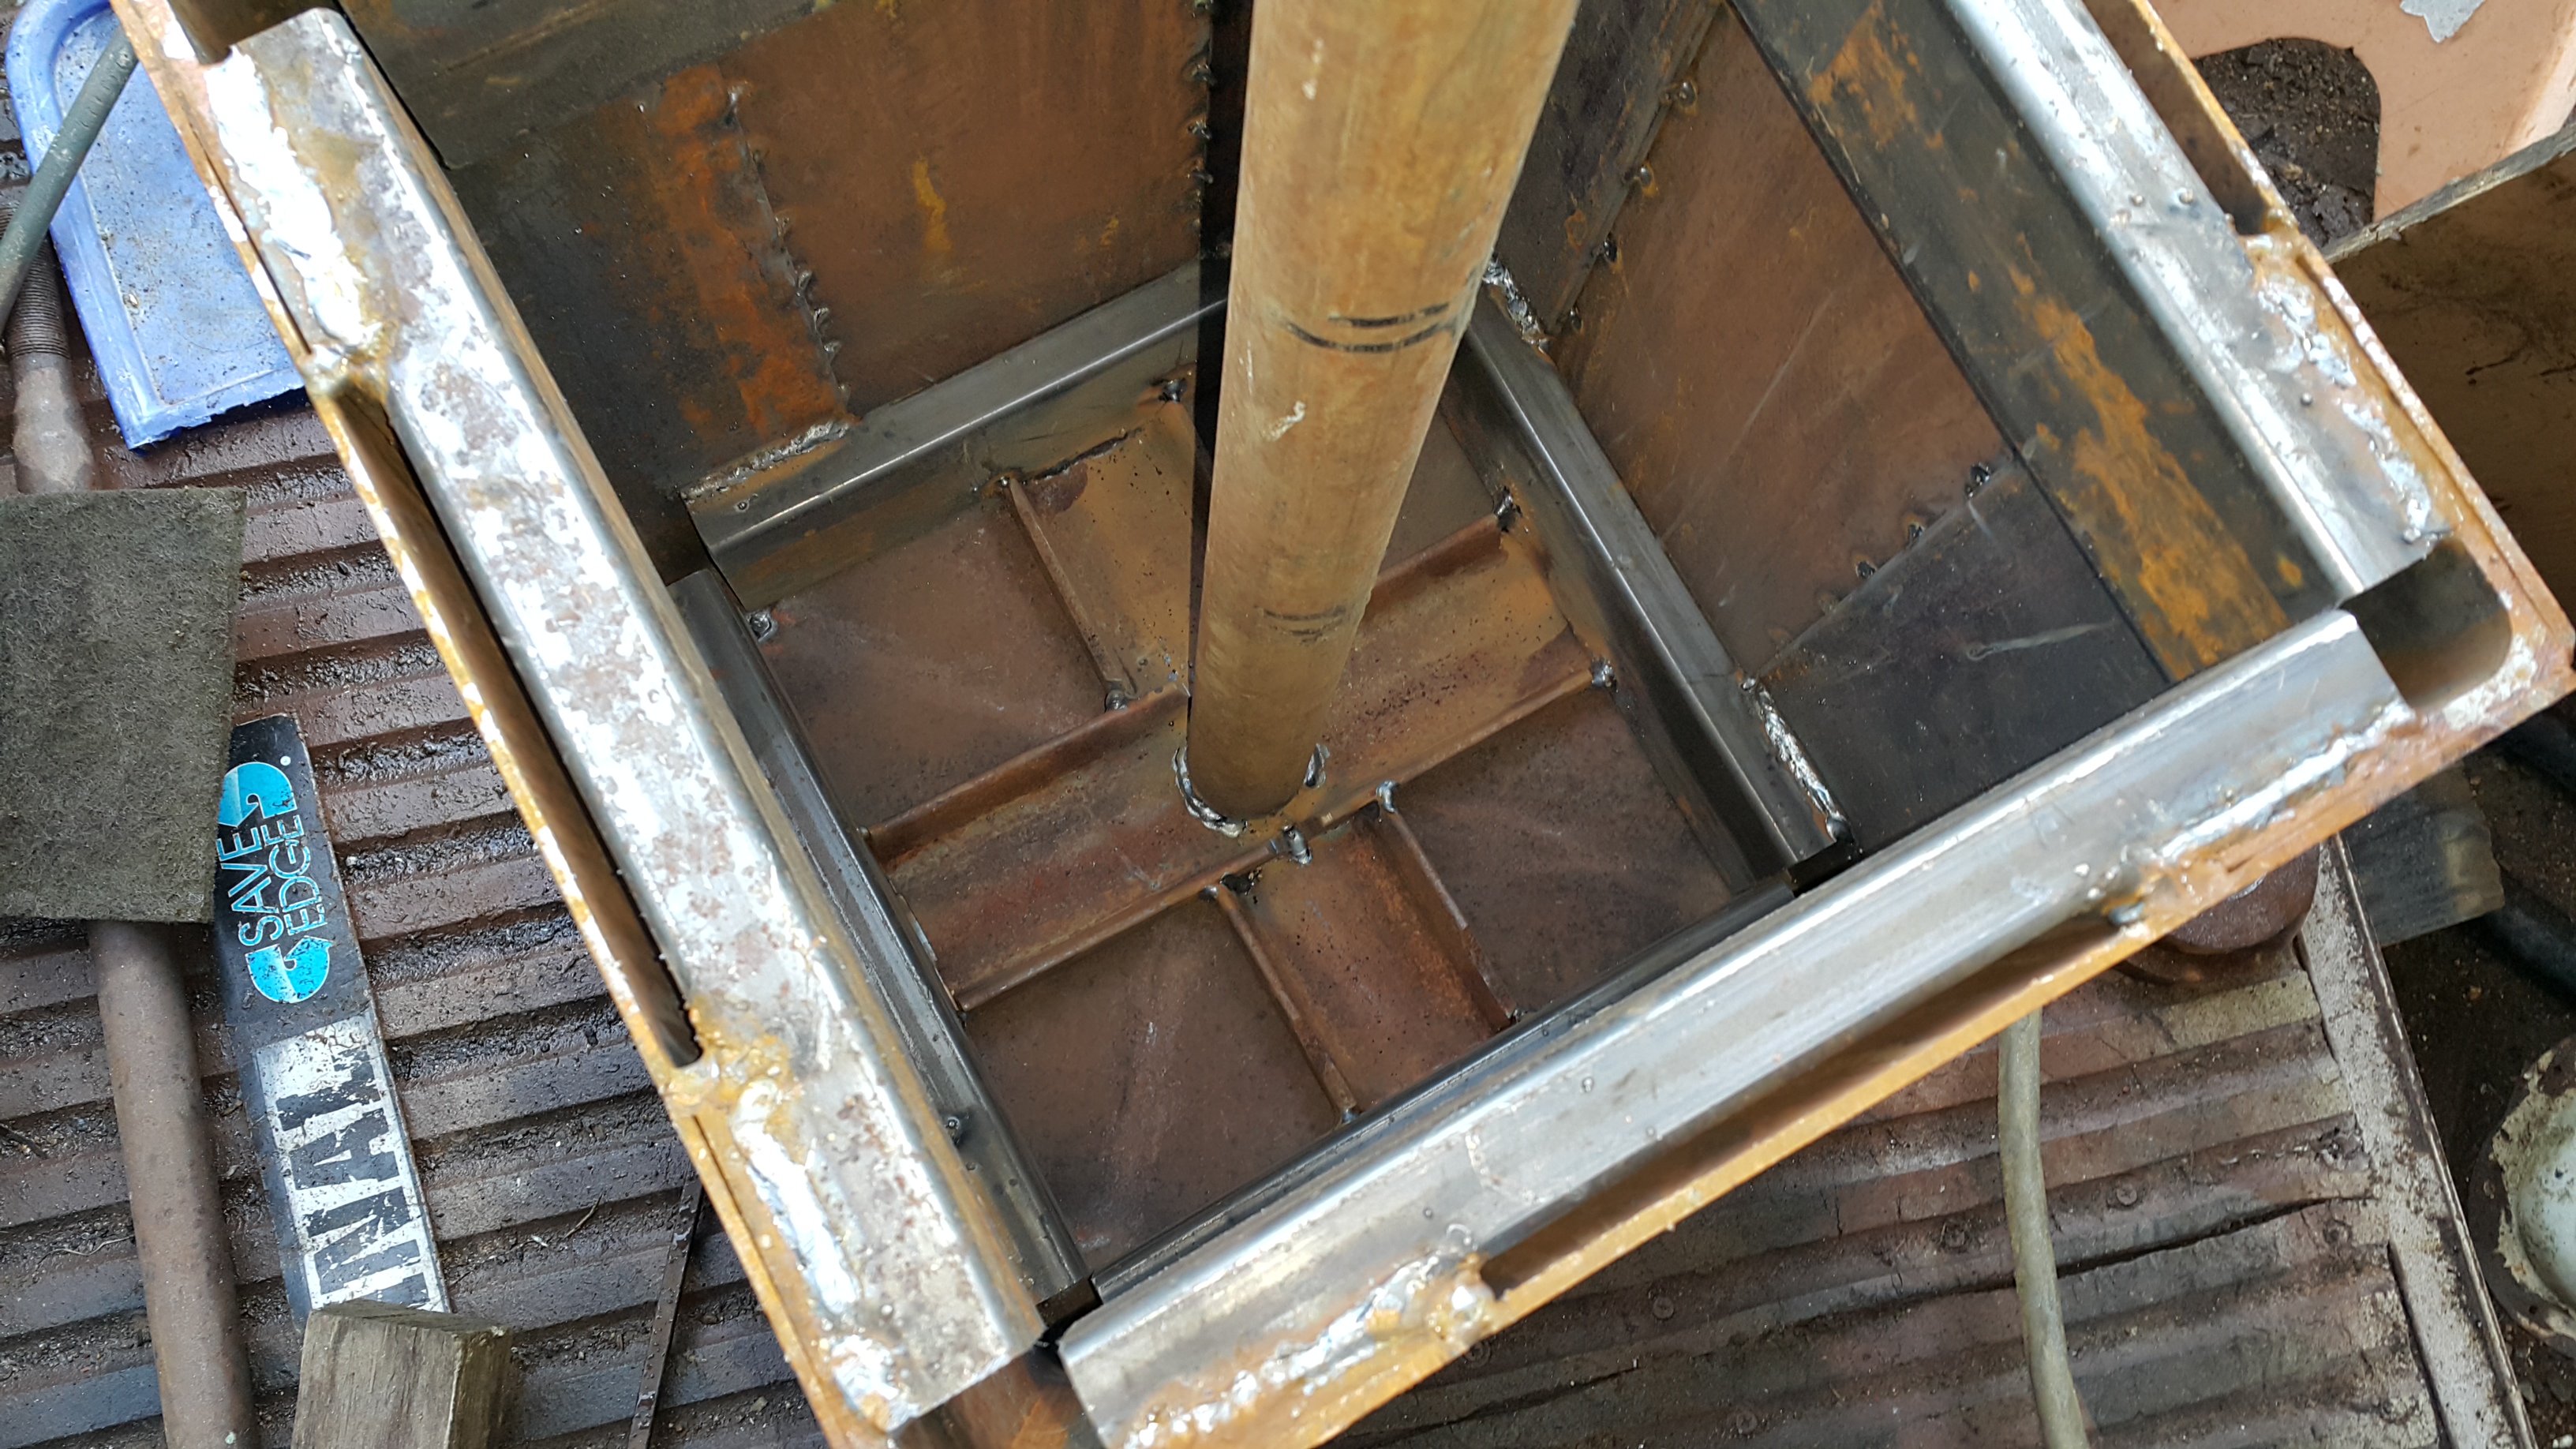
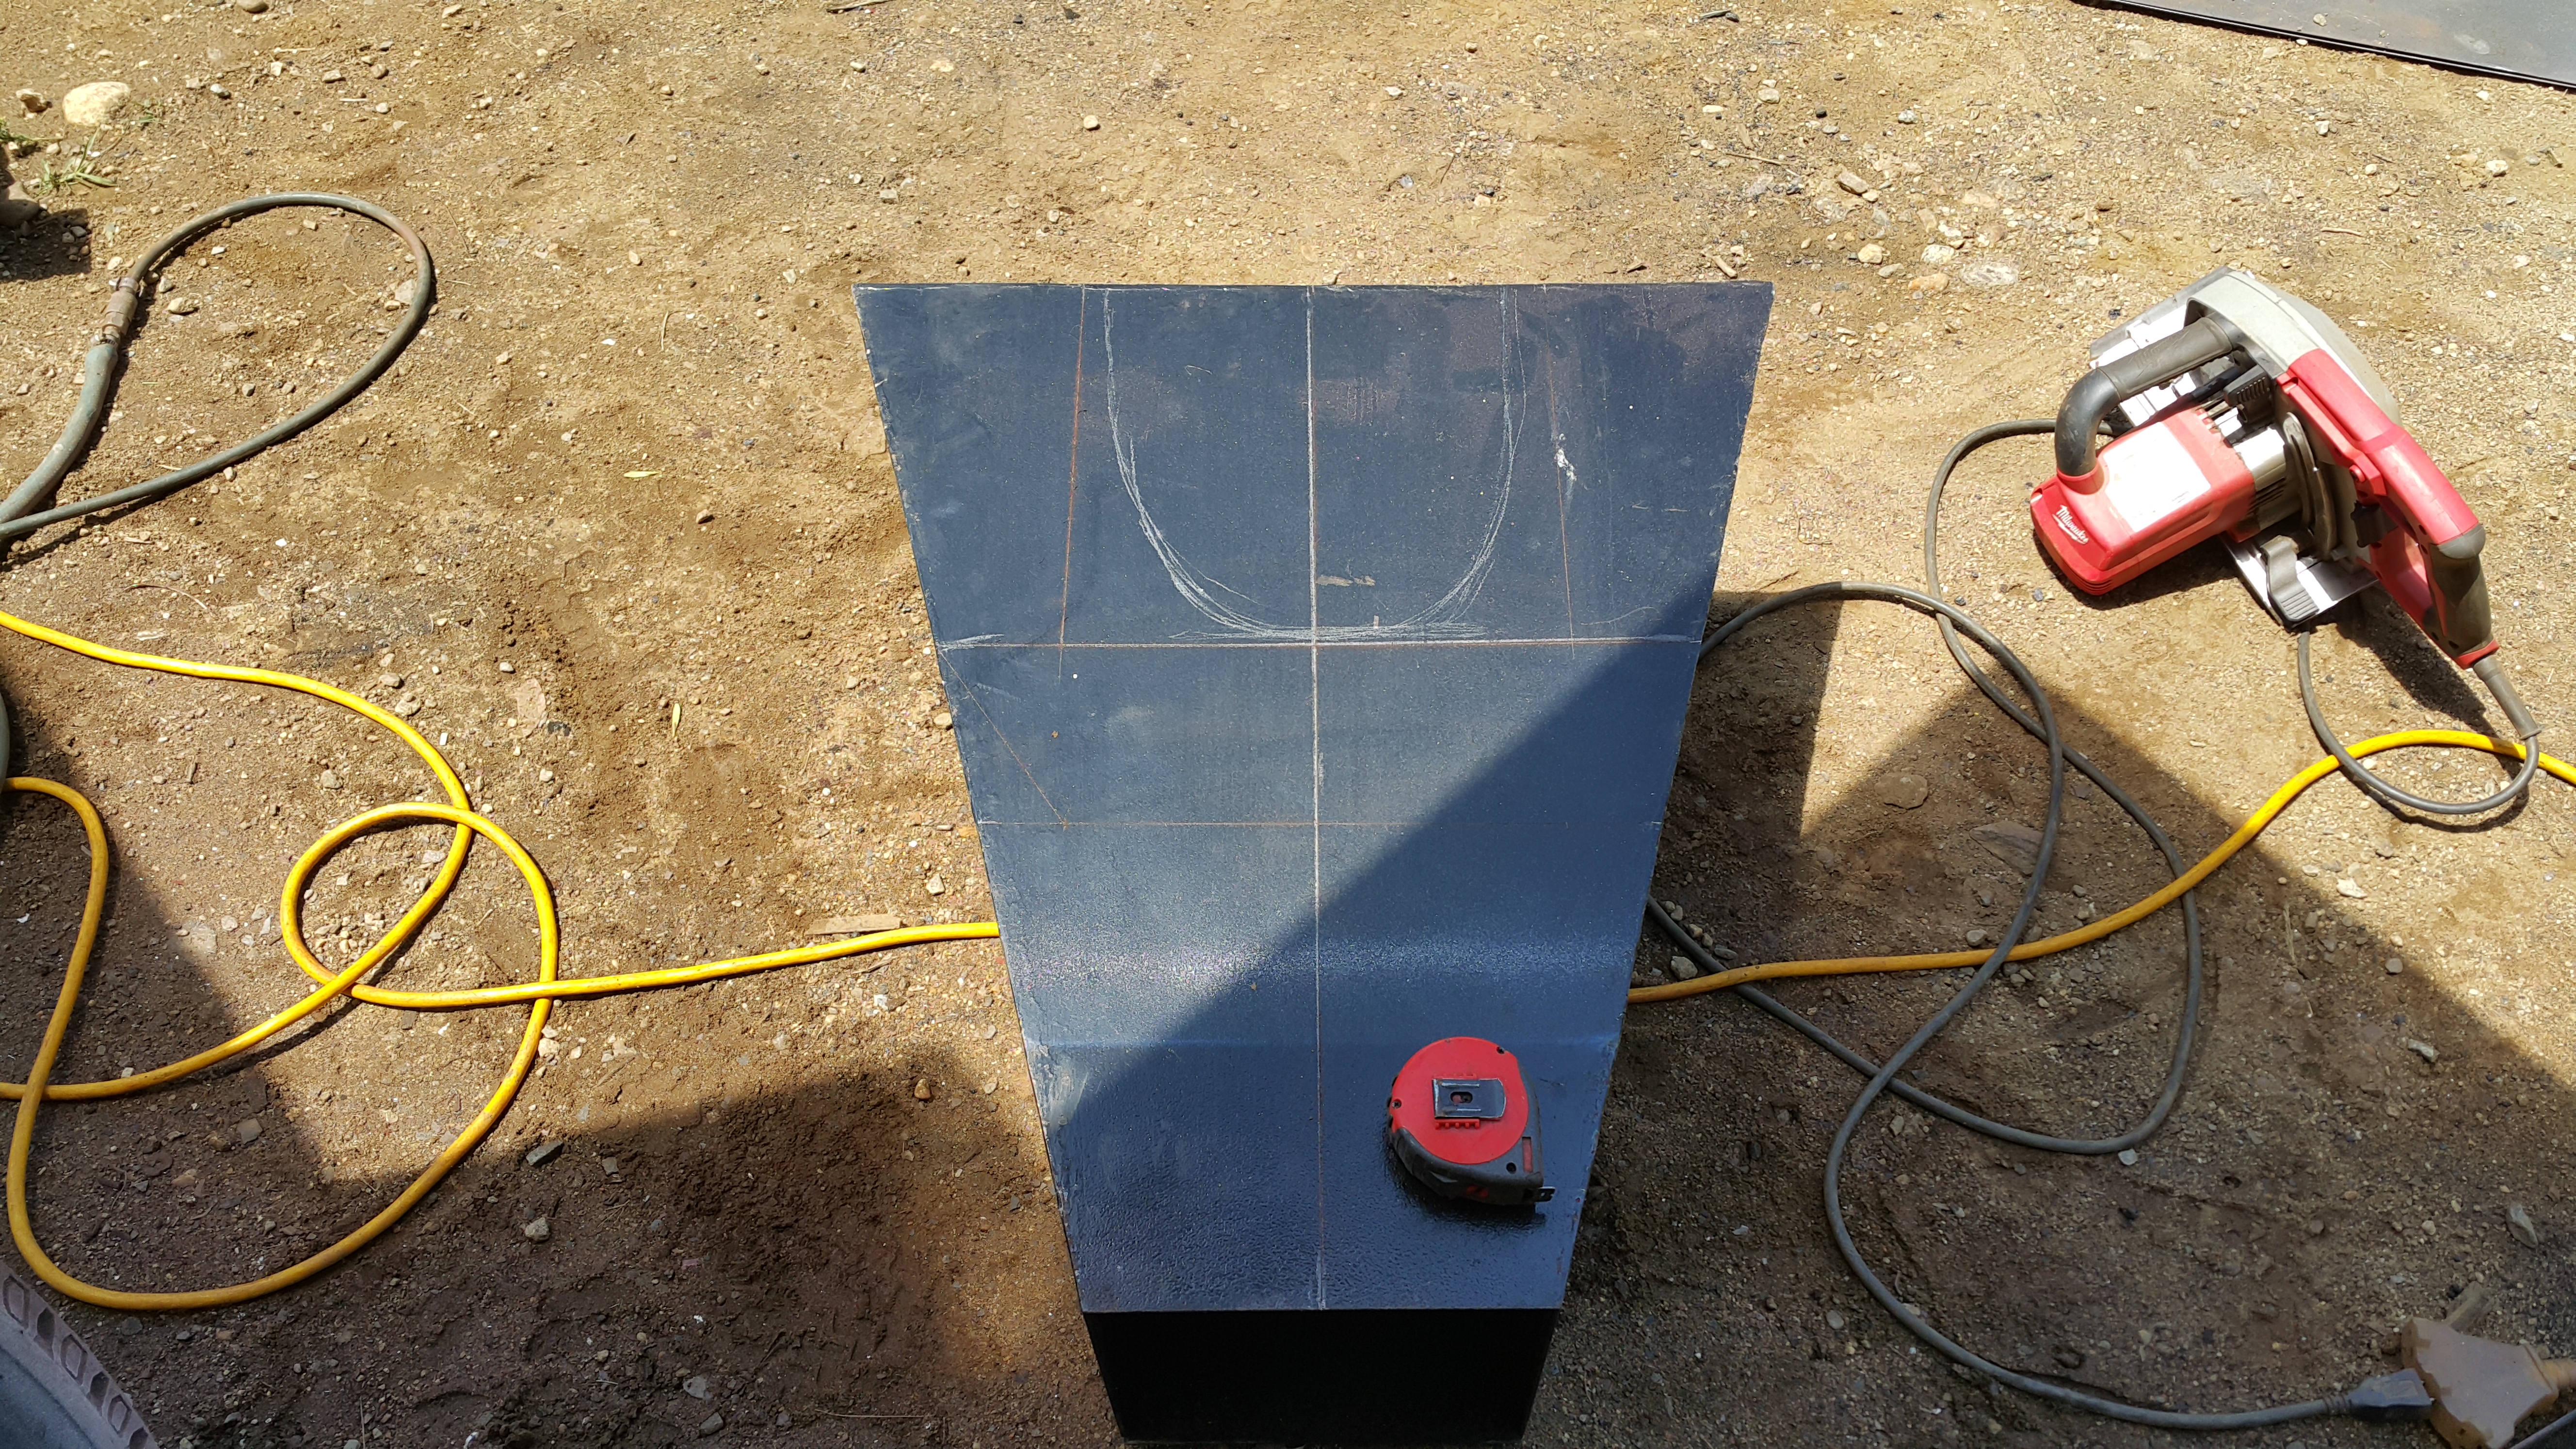
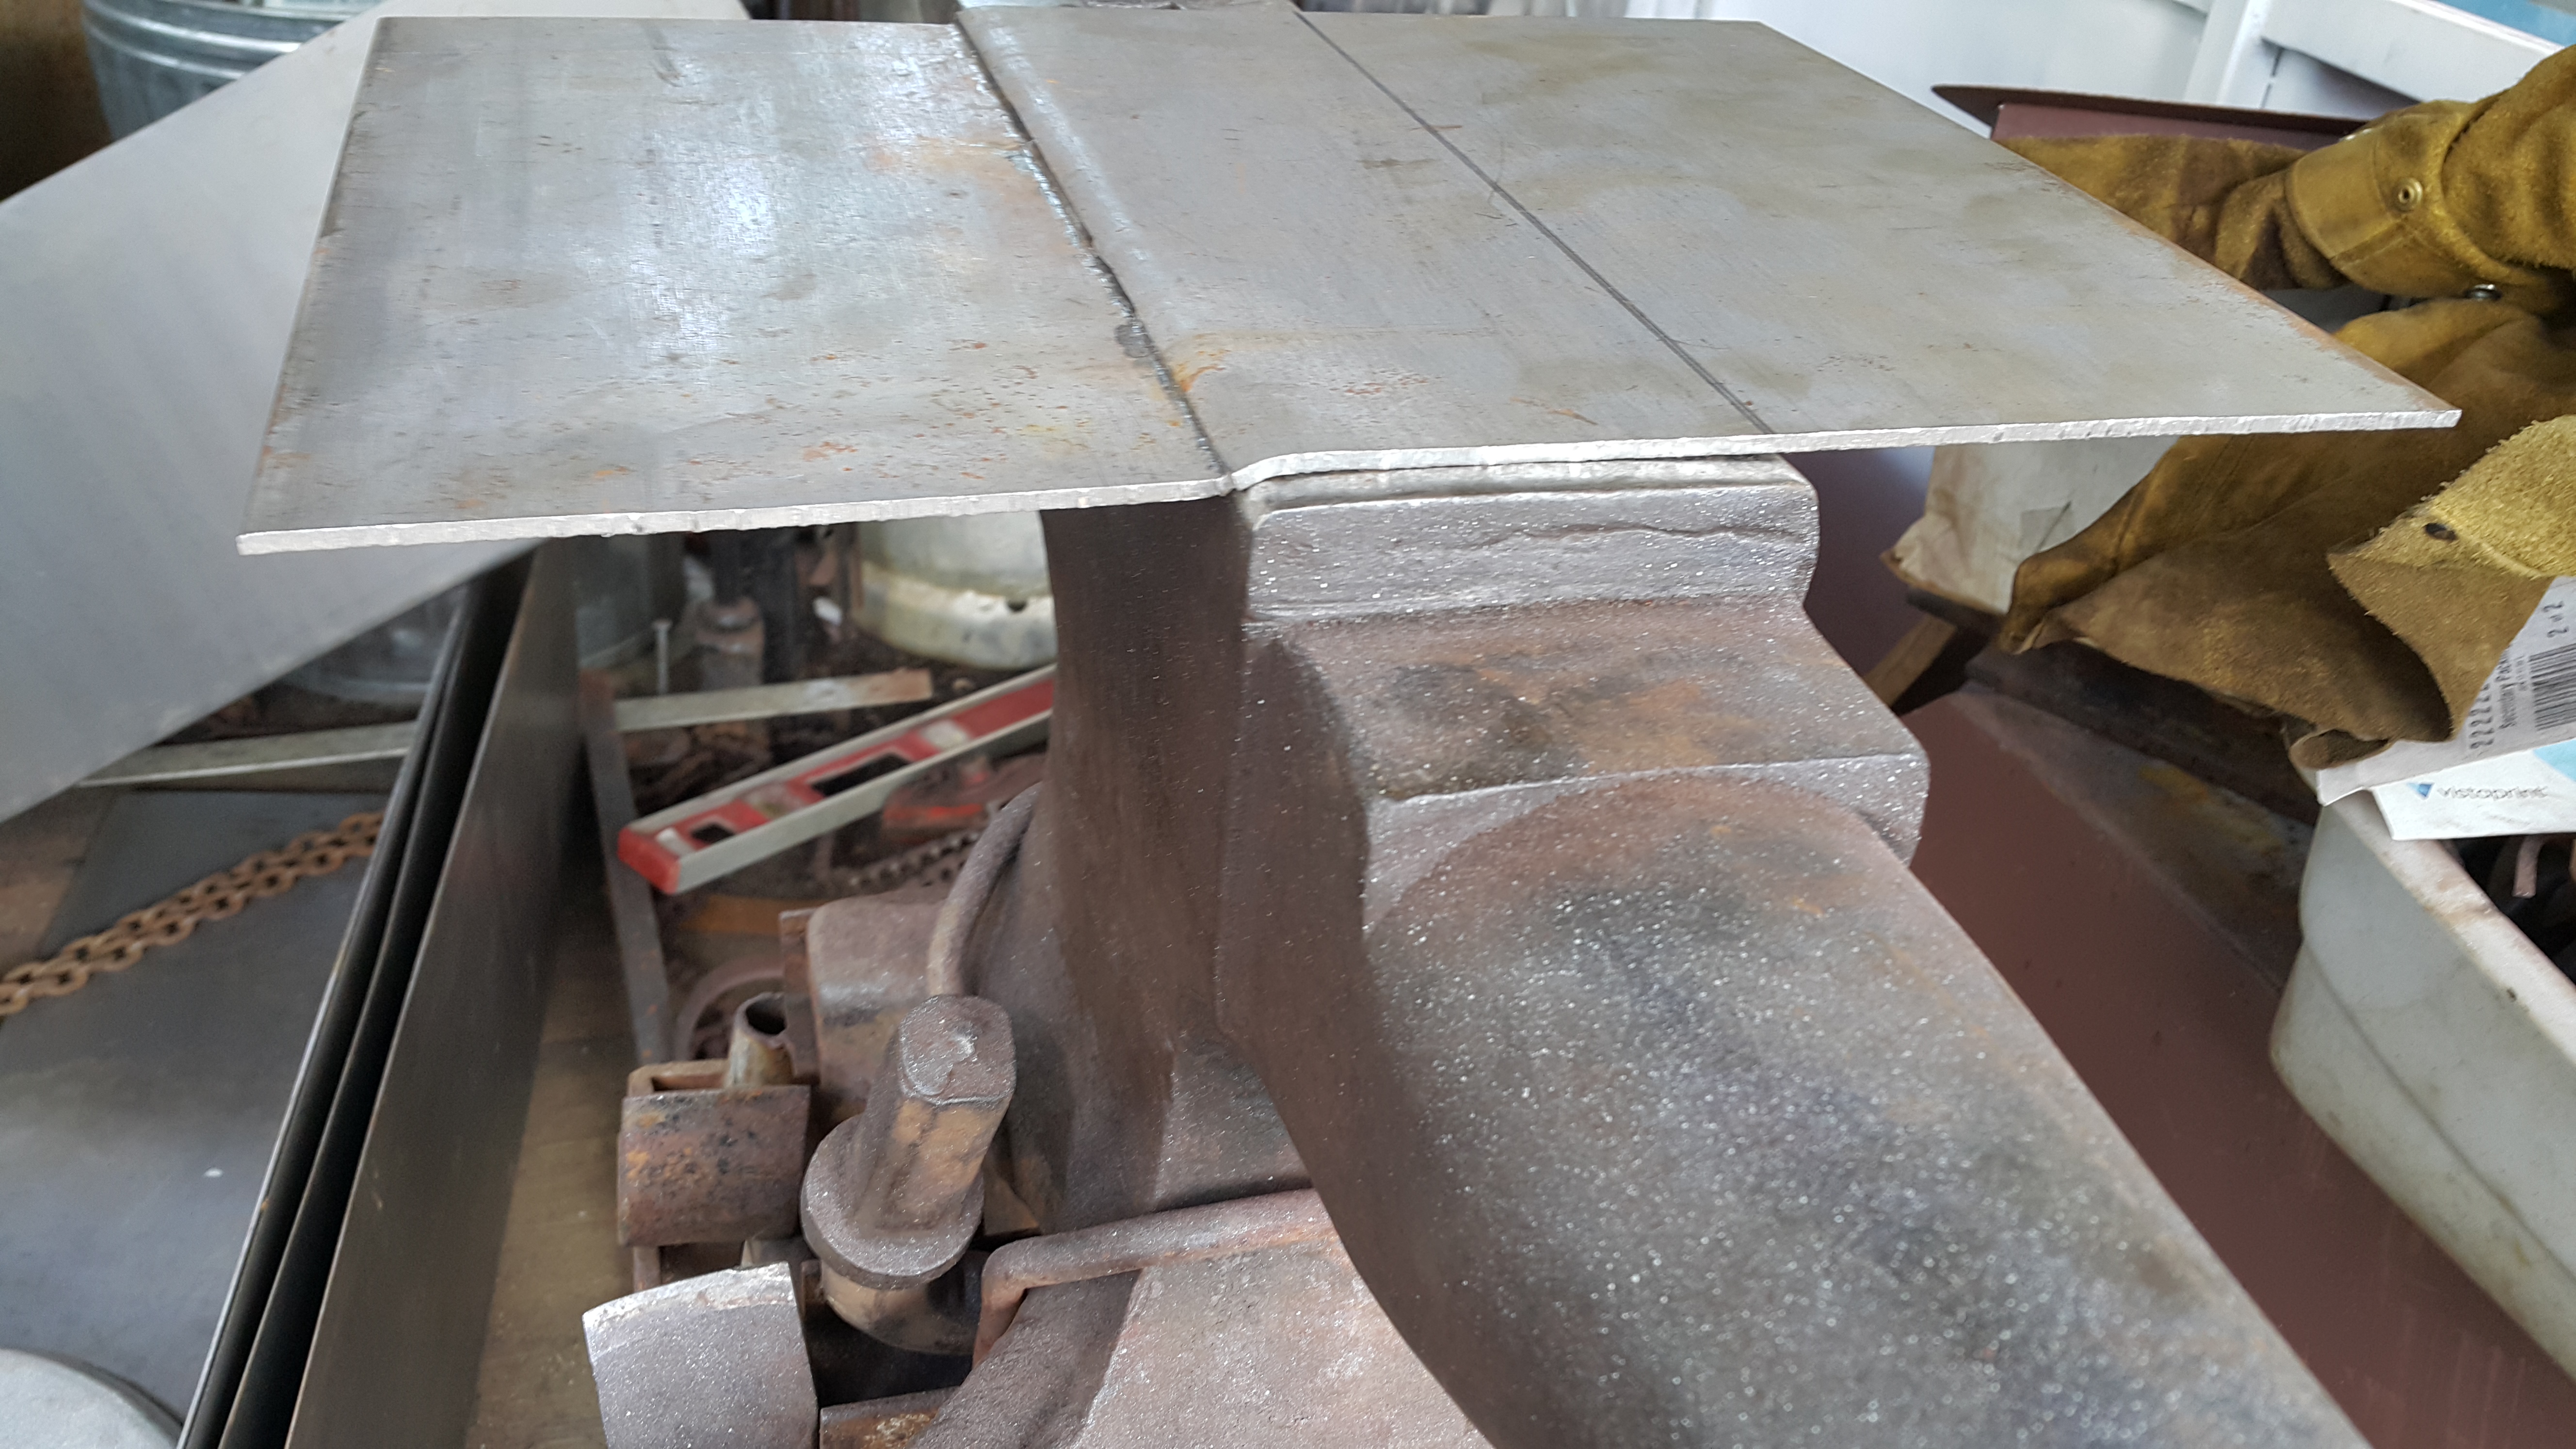
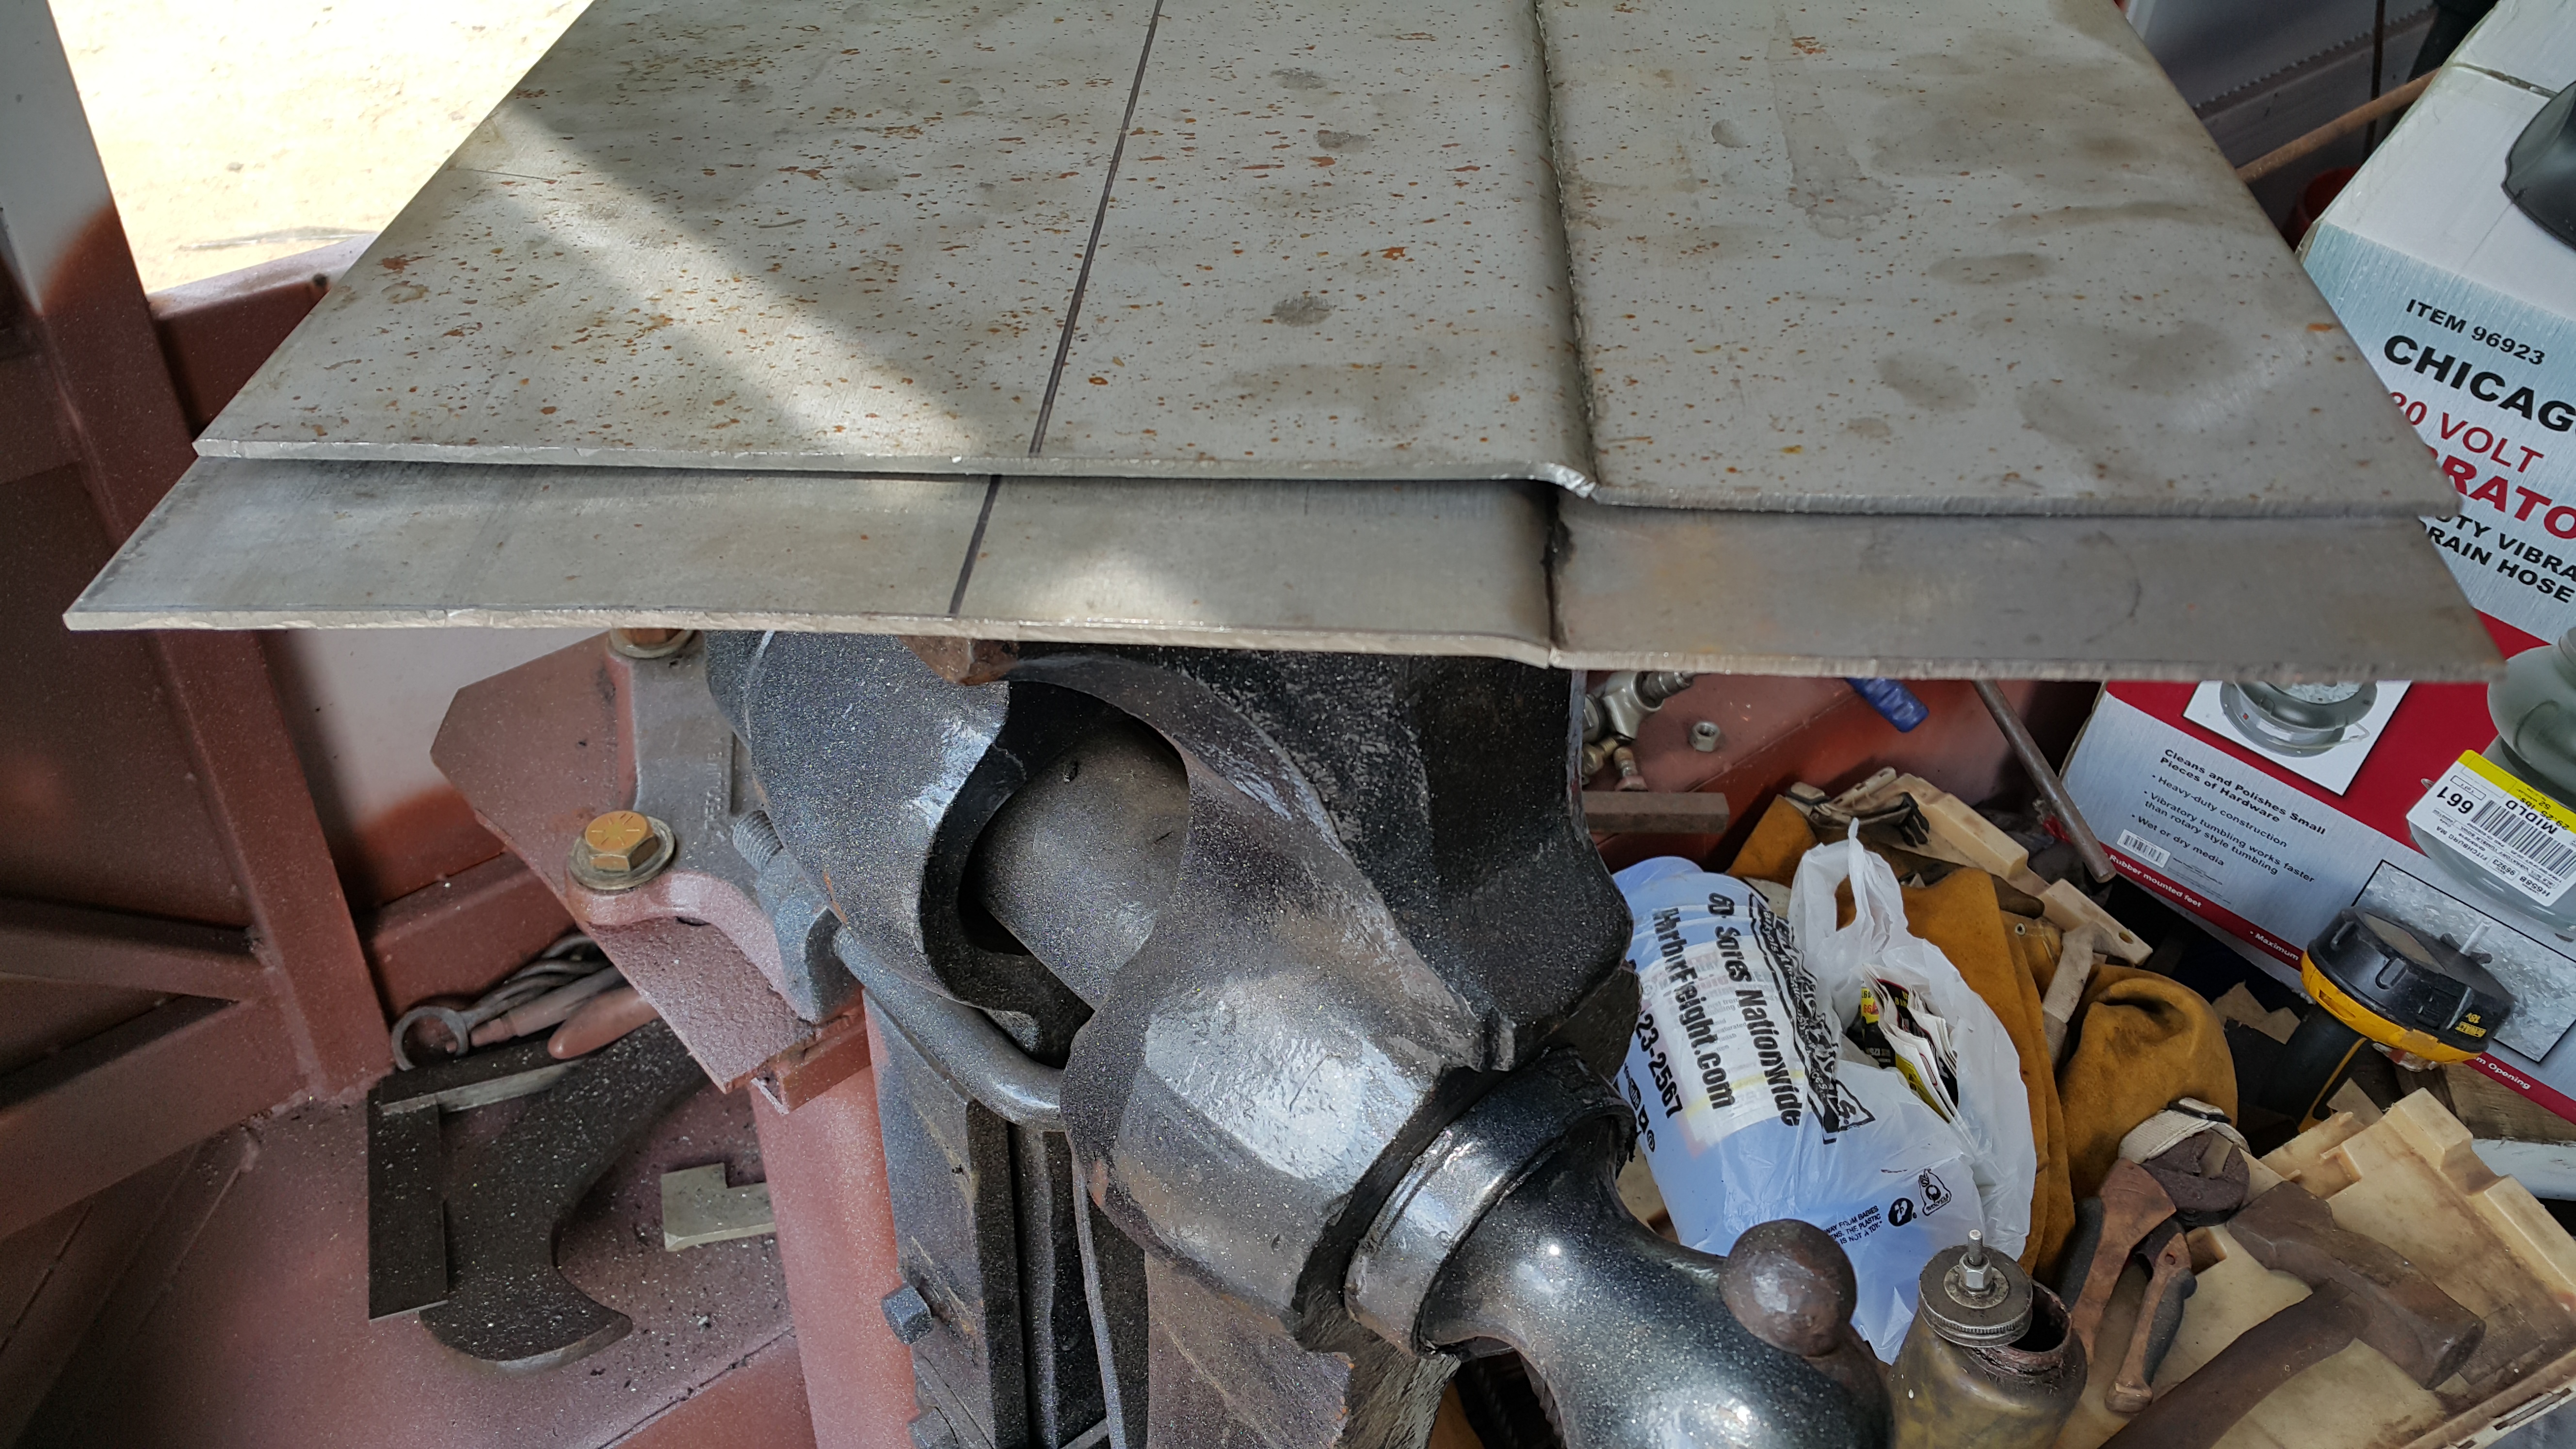
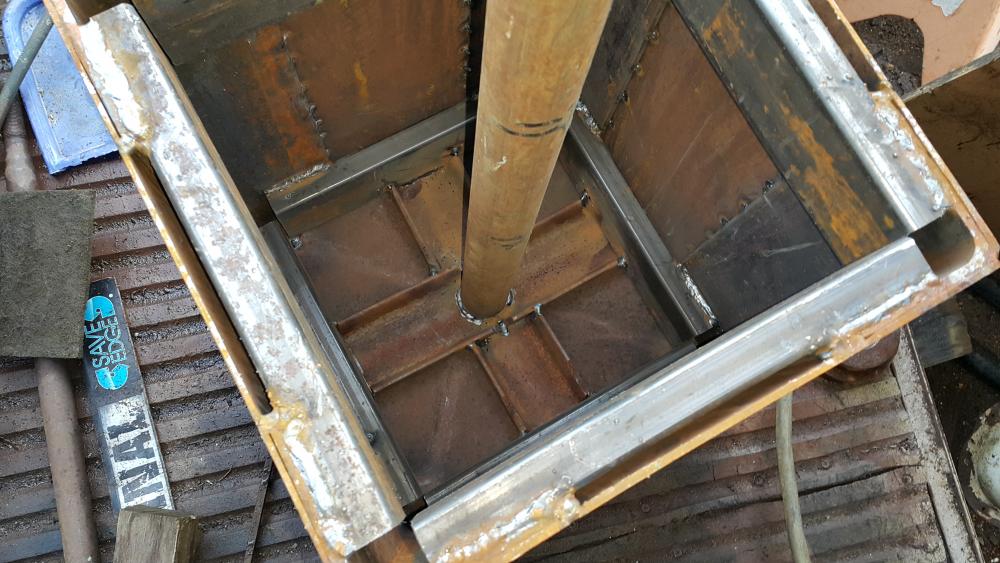
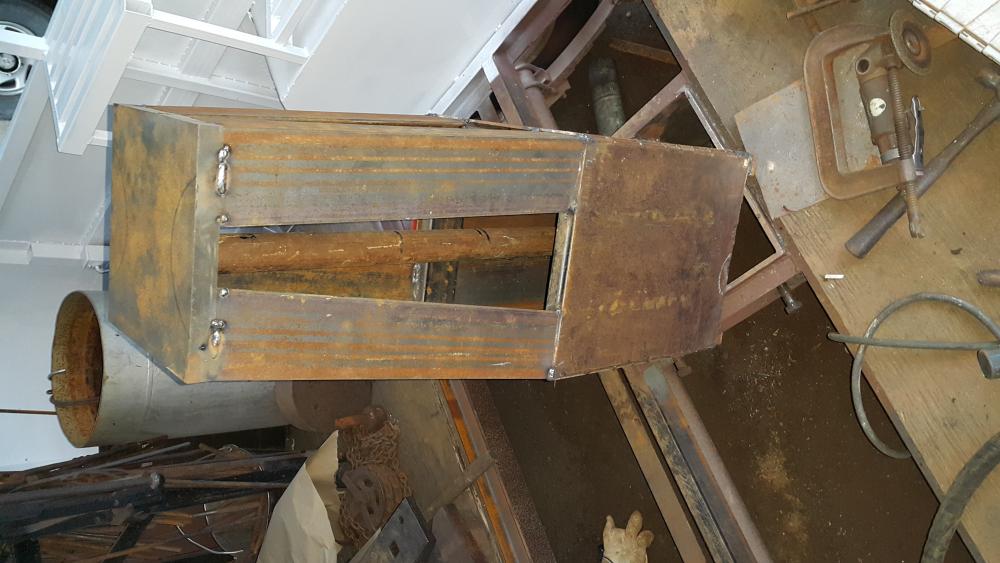
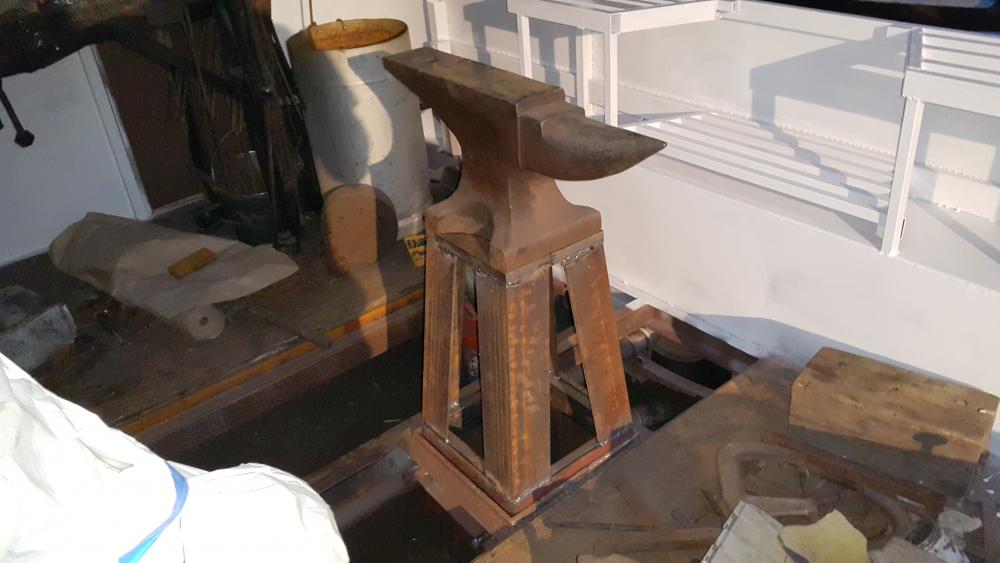
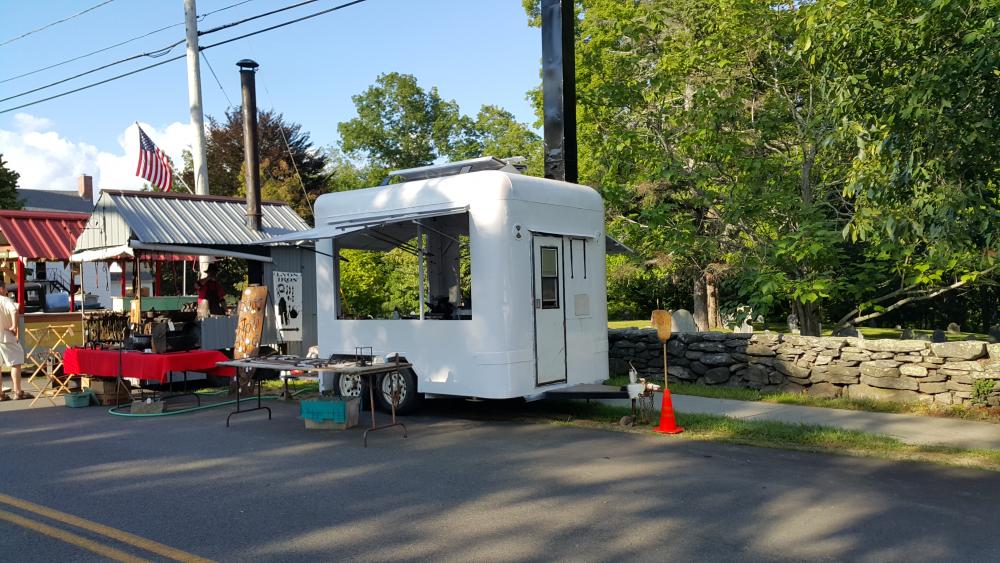
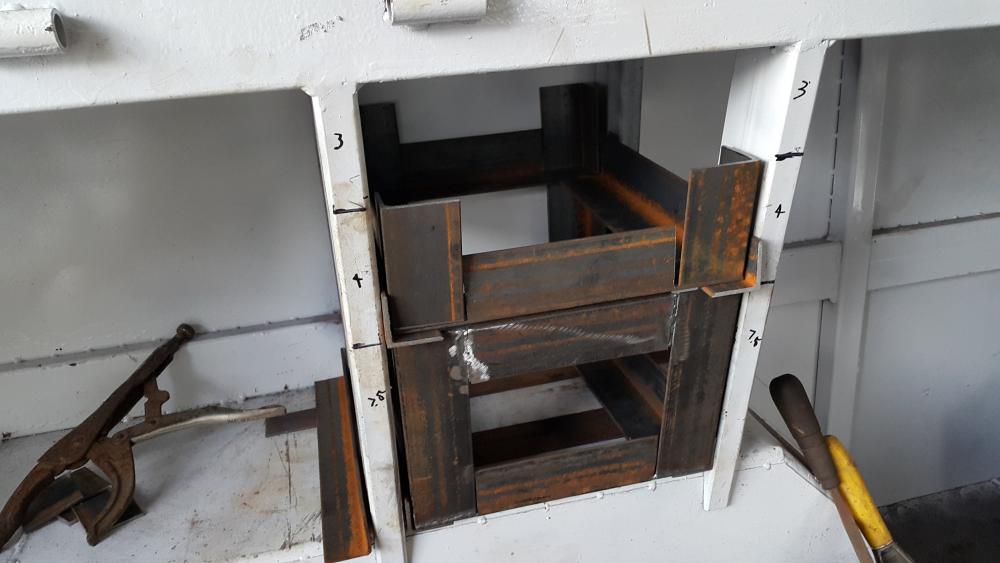
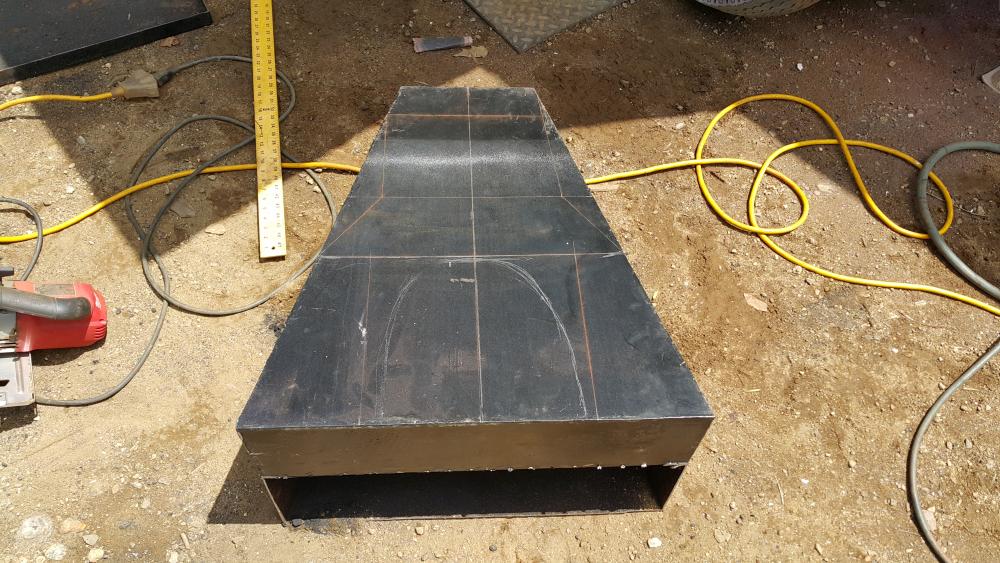
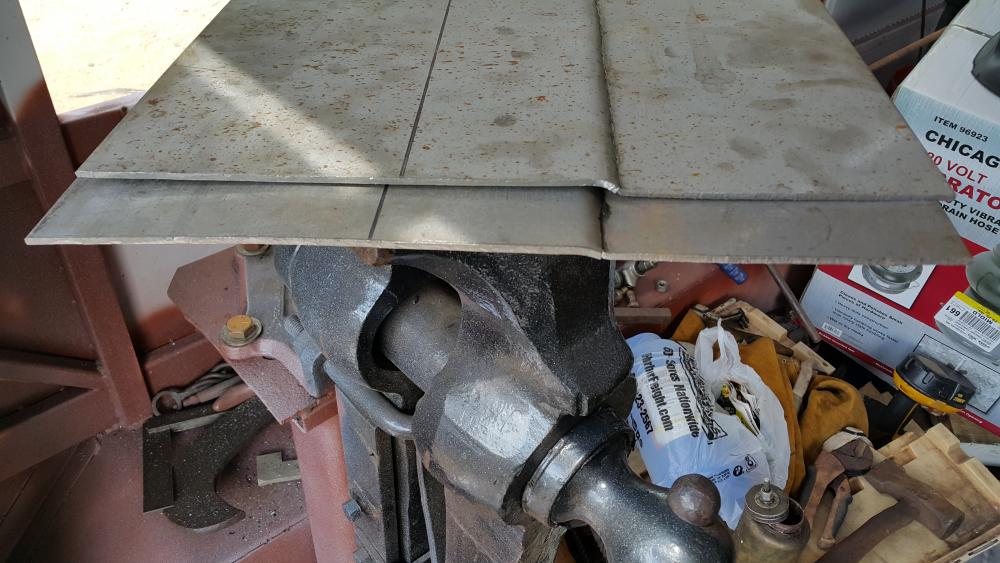
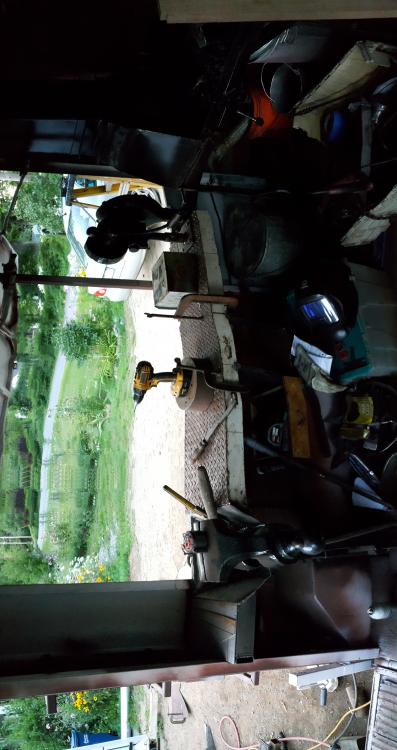
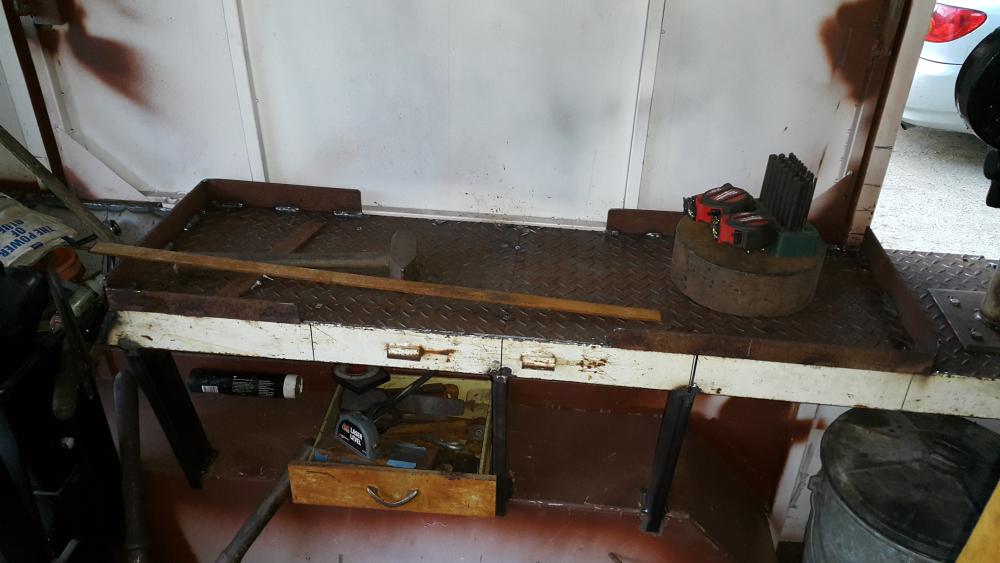
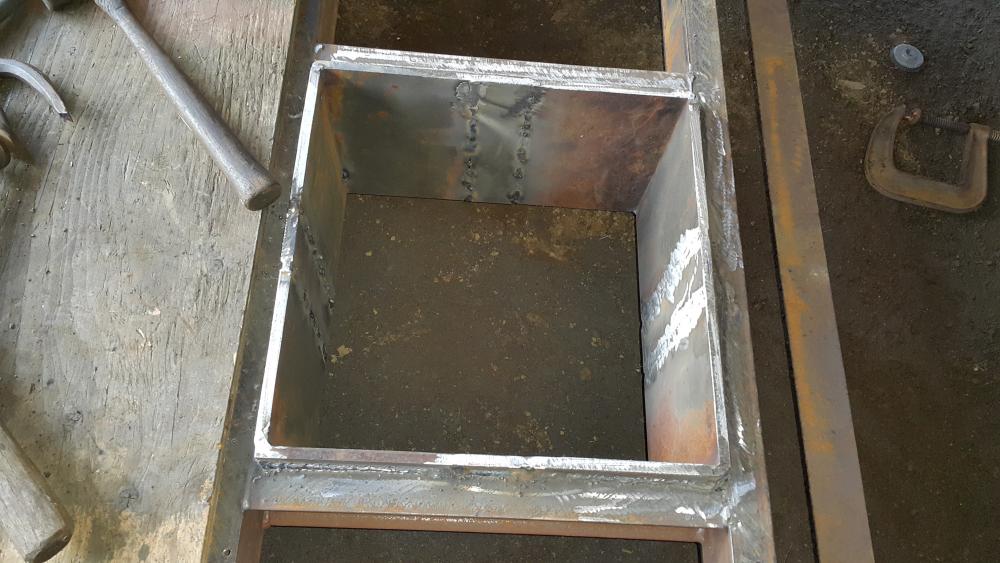
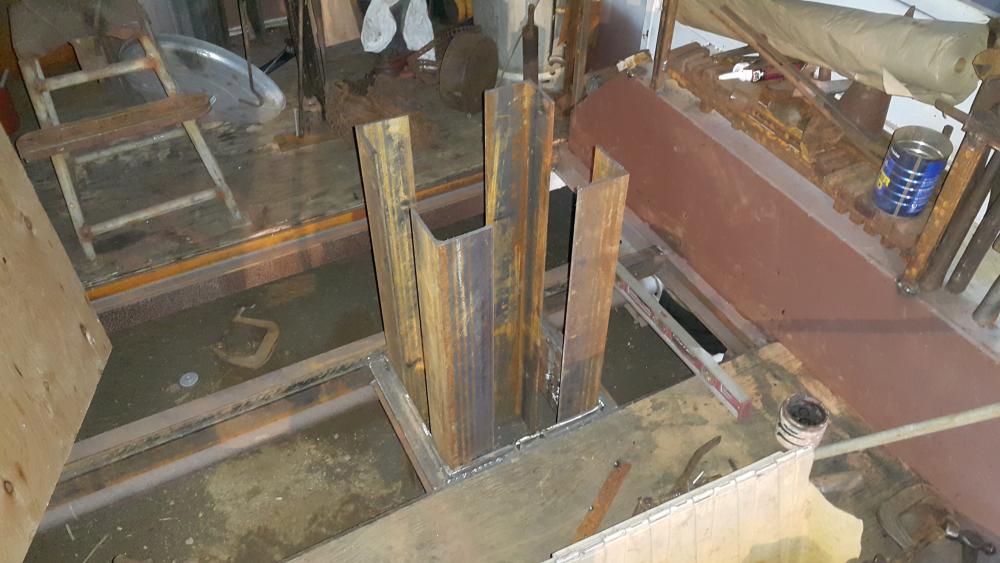
Sorry I have been lax on getting back to here.. I've been struggling with drawer making for the work bench and it takes 16 pieces of metal to make one drawer not including 2 runners.. Anyhow, I got 2 done as of today and have 4 more to make.. Here are a few teasers till it's completed.. I have engineered, designed, cut and fabricated every piece of this thing.. It took on a life of it's own but is the ultimate demo trailer.. Not sure how many I can add at once but here you go.. The roof vents open. the blower is mounted to the work bench and is height adjustable. The edging for the work bench is removable so I can pass steel out the back side of the trailer instead of towards the audience.. The anvil stand passes through the floor and rests solidly on the ground..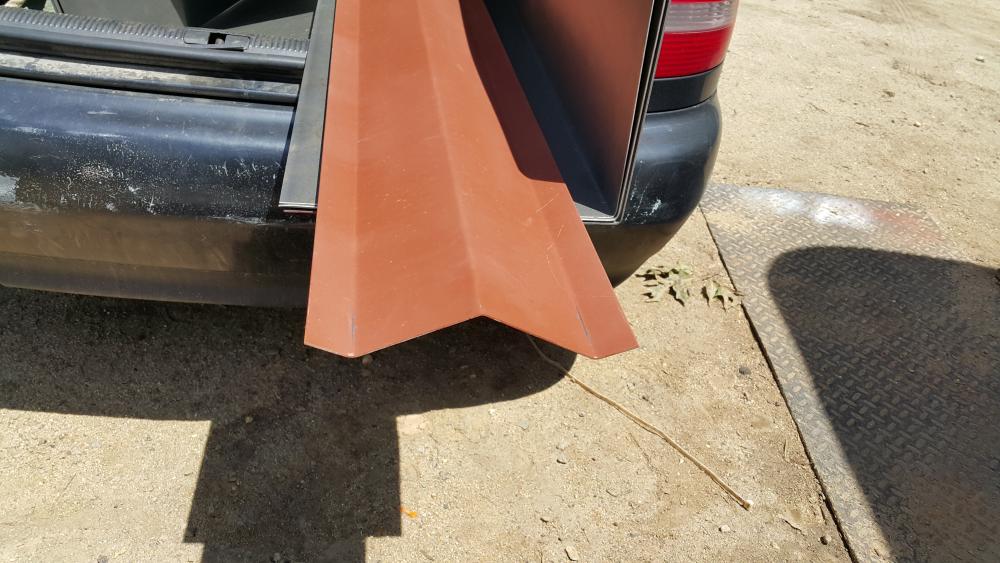


-
Draw knife Pear wood handles all hand made and finshed
jlpservicesinc replied to jlpservicesinc's topic in Knife Making
Thanks, forge welded flat stock.. by the time the ferrules were in process I had all ready been demoing for a few days and it was pretty hot all days.. This was day 3 of the show so instead of making them thinner which is what I would have preferred. I used the stock at standard size.. which is either 3/16" or 1/8" an were shrunk onto the handles.. the thicker ferrules actually works well as that is where the thumbs sit so offers just a little extra purchase when really pulling hard... -
Forging queen works.. Just kidding. Jennifer works or JP. or Ms JP.. .. " Frosty". I like it.. Not sure what people would want to call me.. Never had a nick name.. If anything they would call me stubborn.. LOL>.
-
Draw knife Pear wood handles all hand made and finshed
jlpservicesinc replied to jlpservicesinc's topic in Knife Making
Thanks.. -
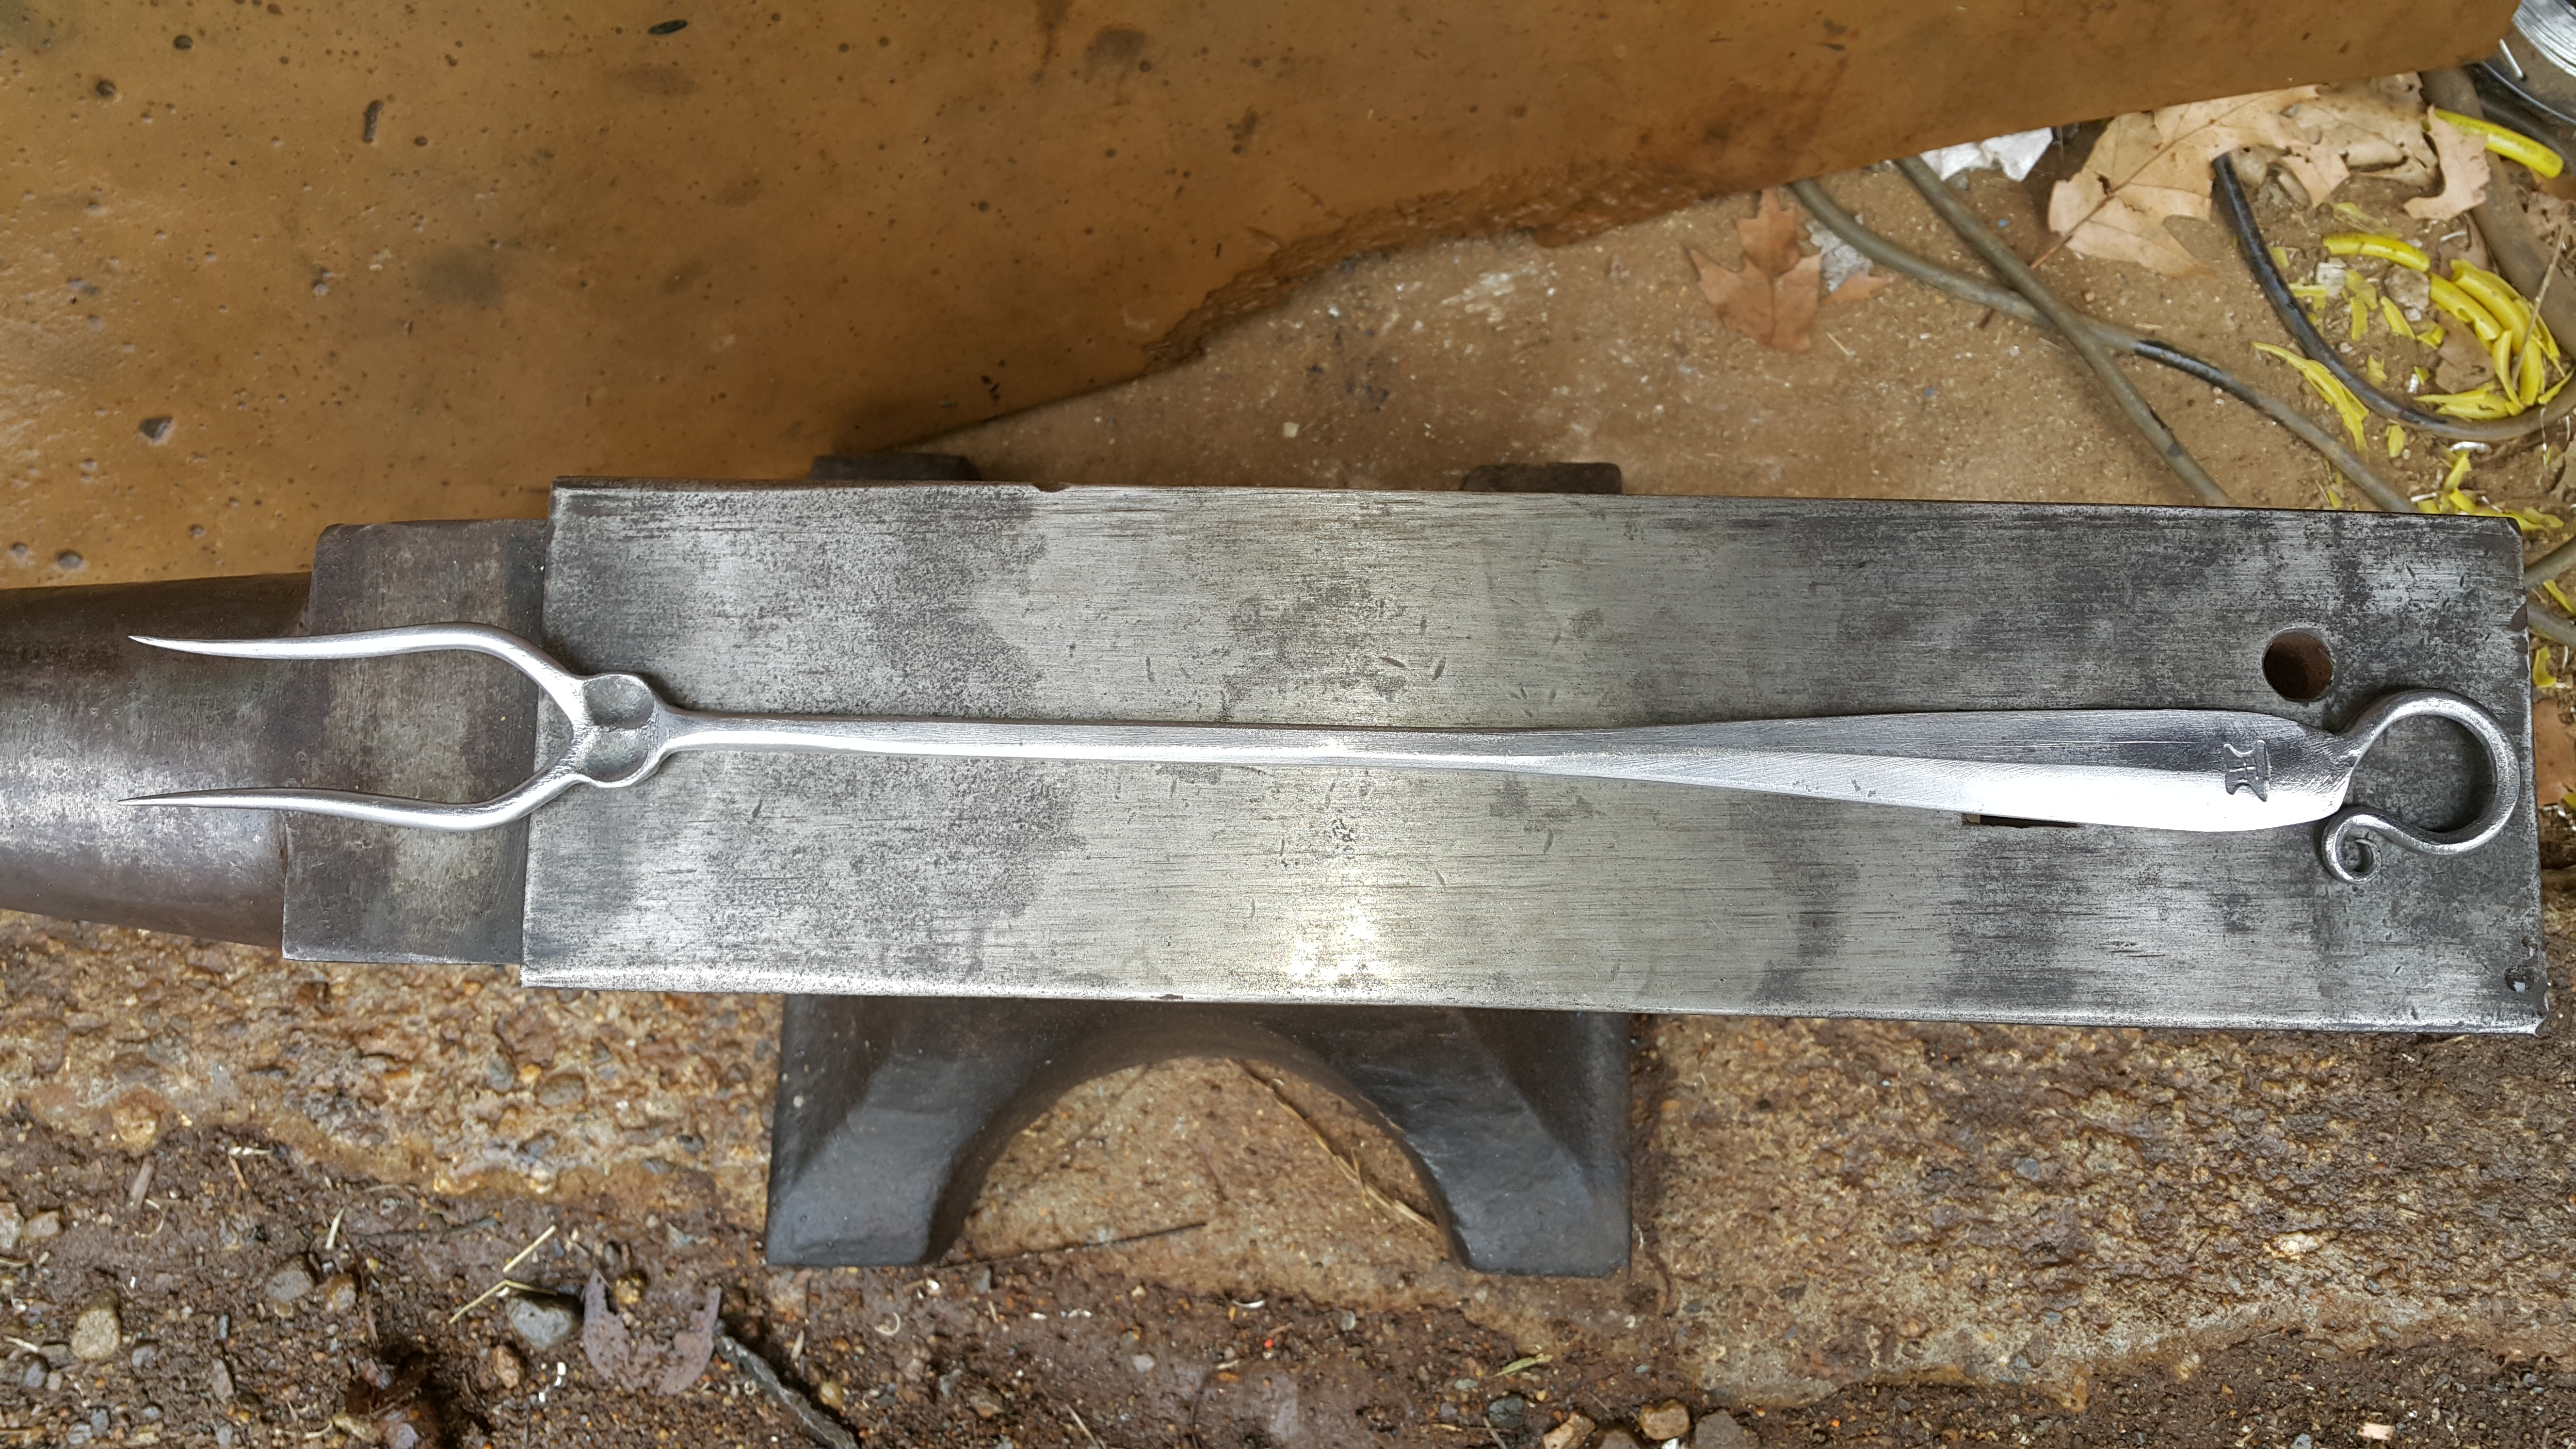
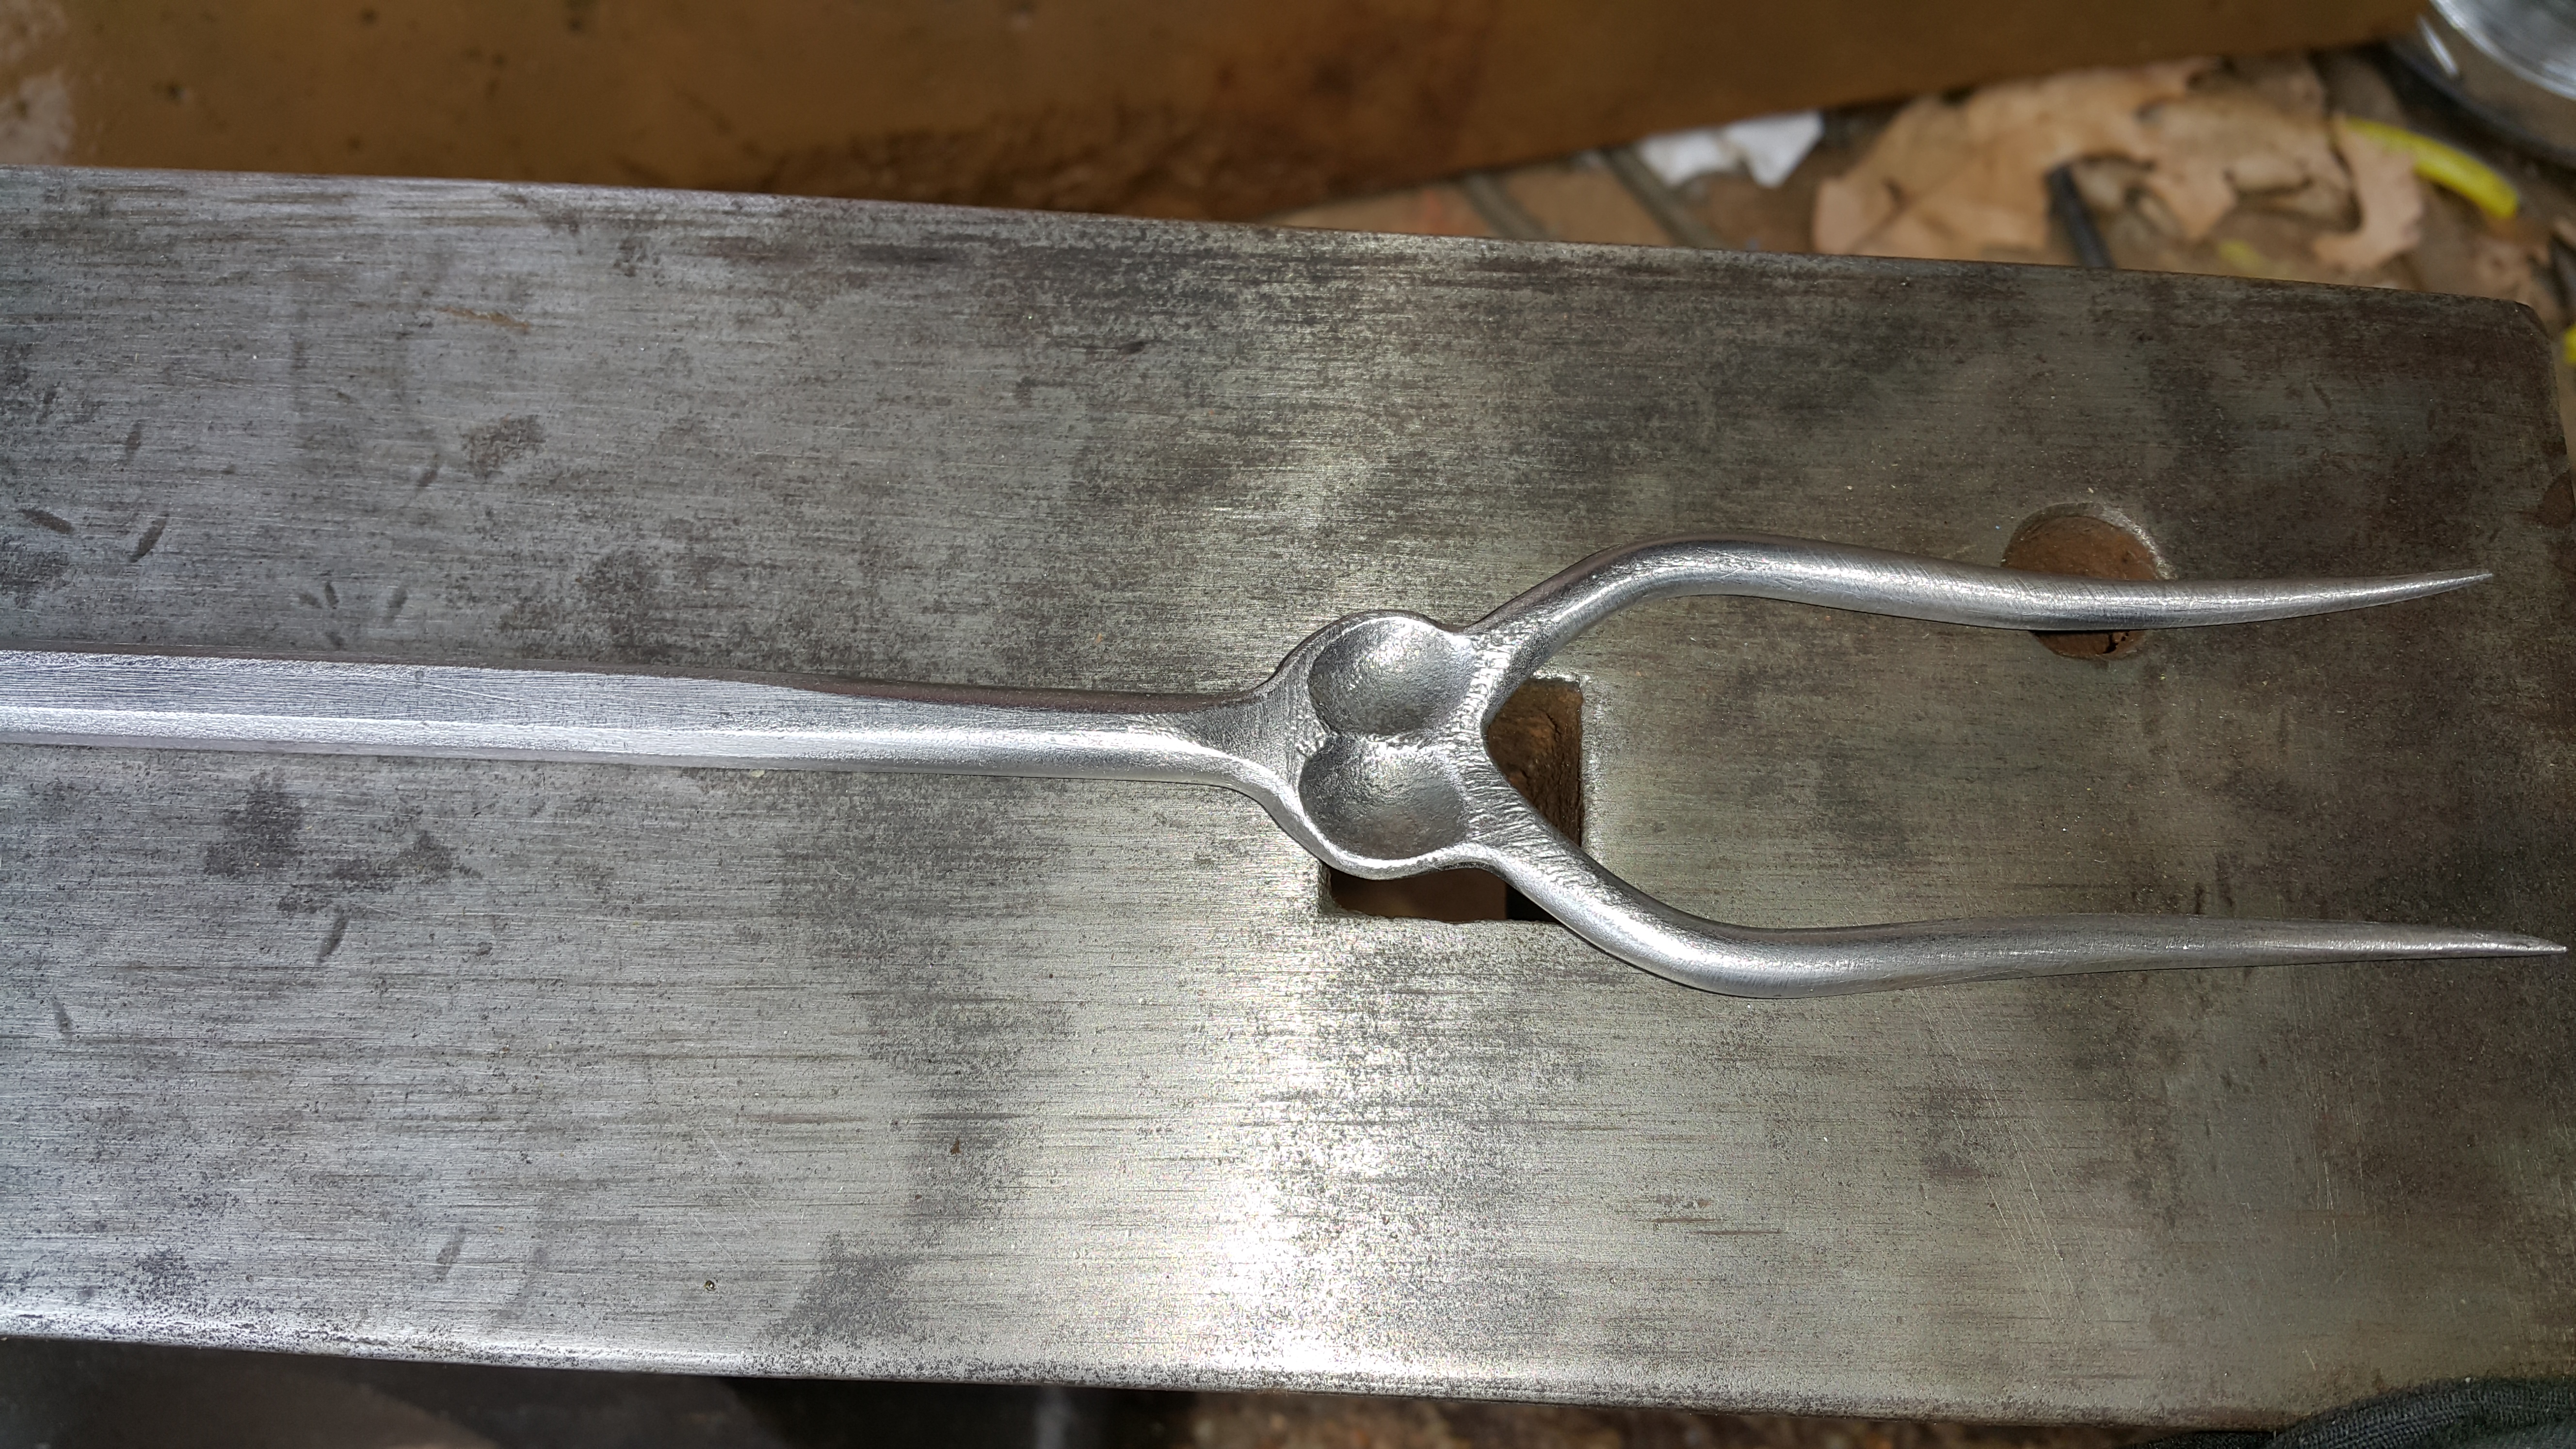
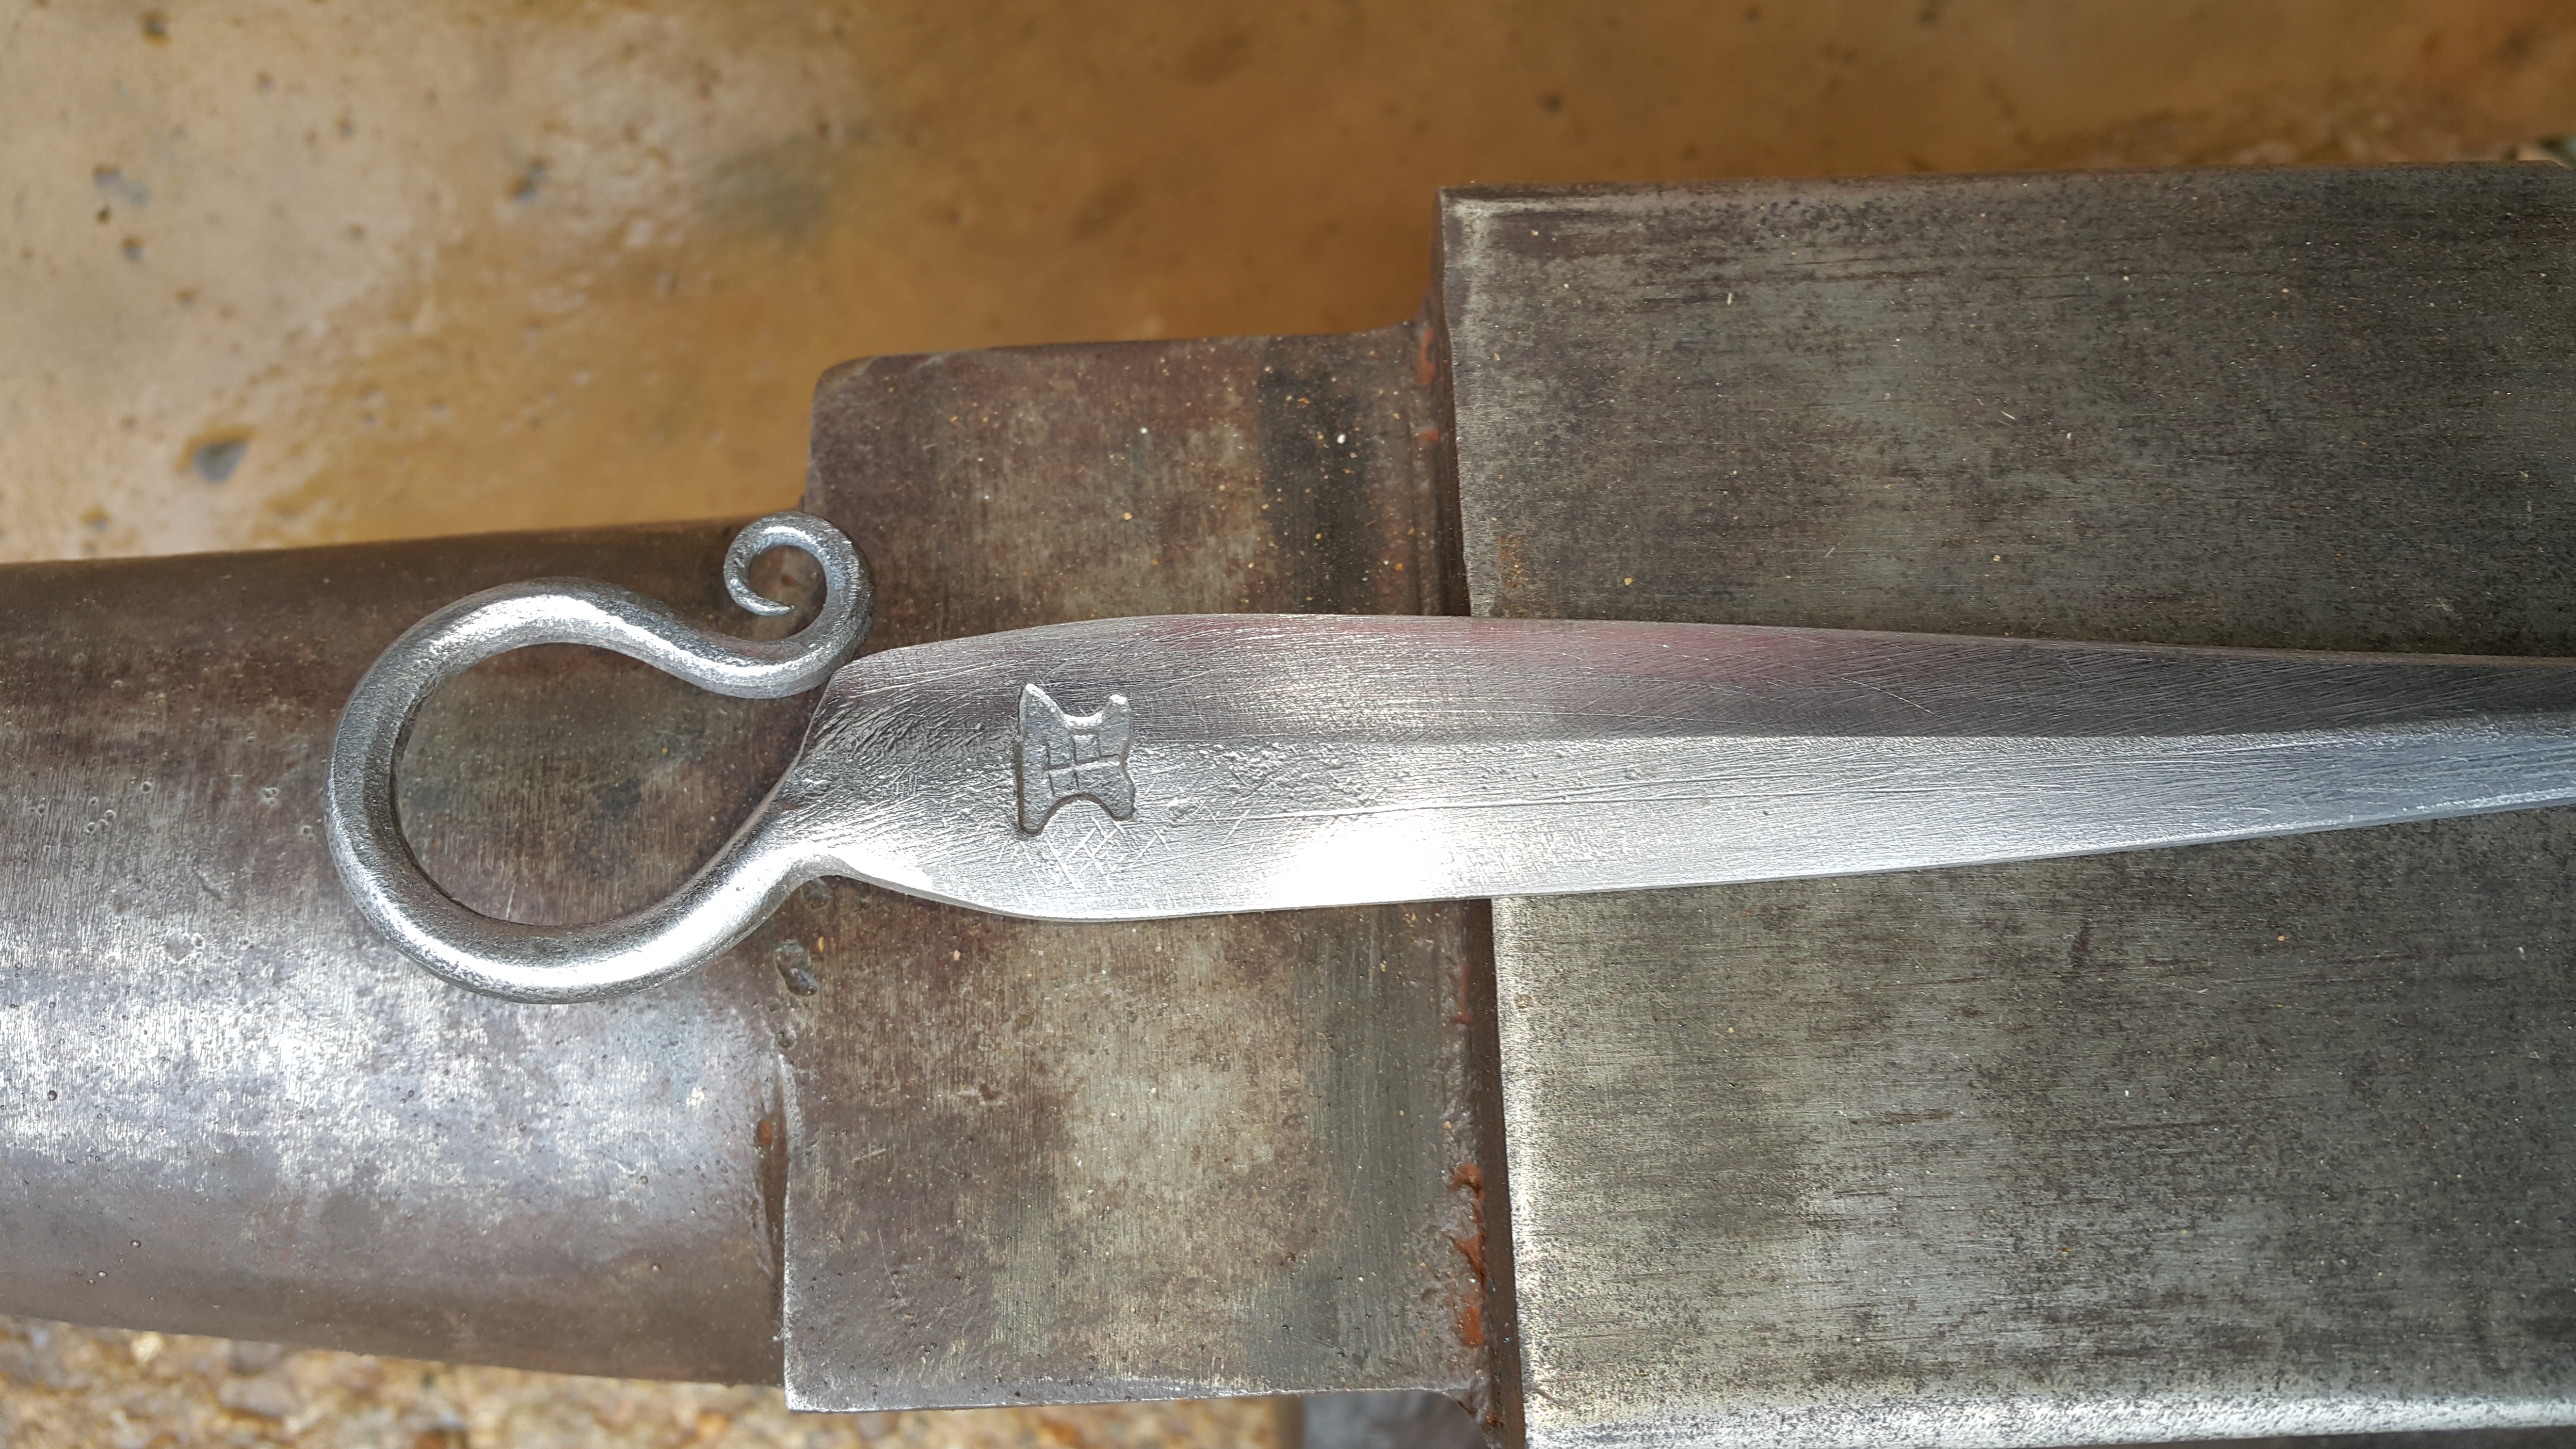
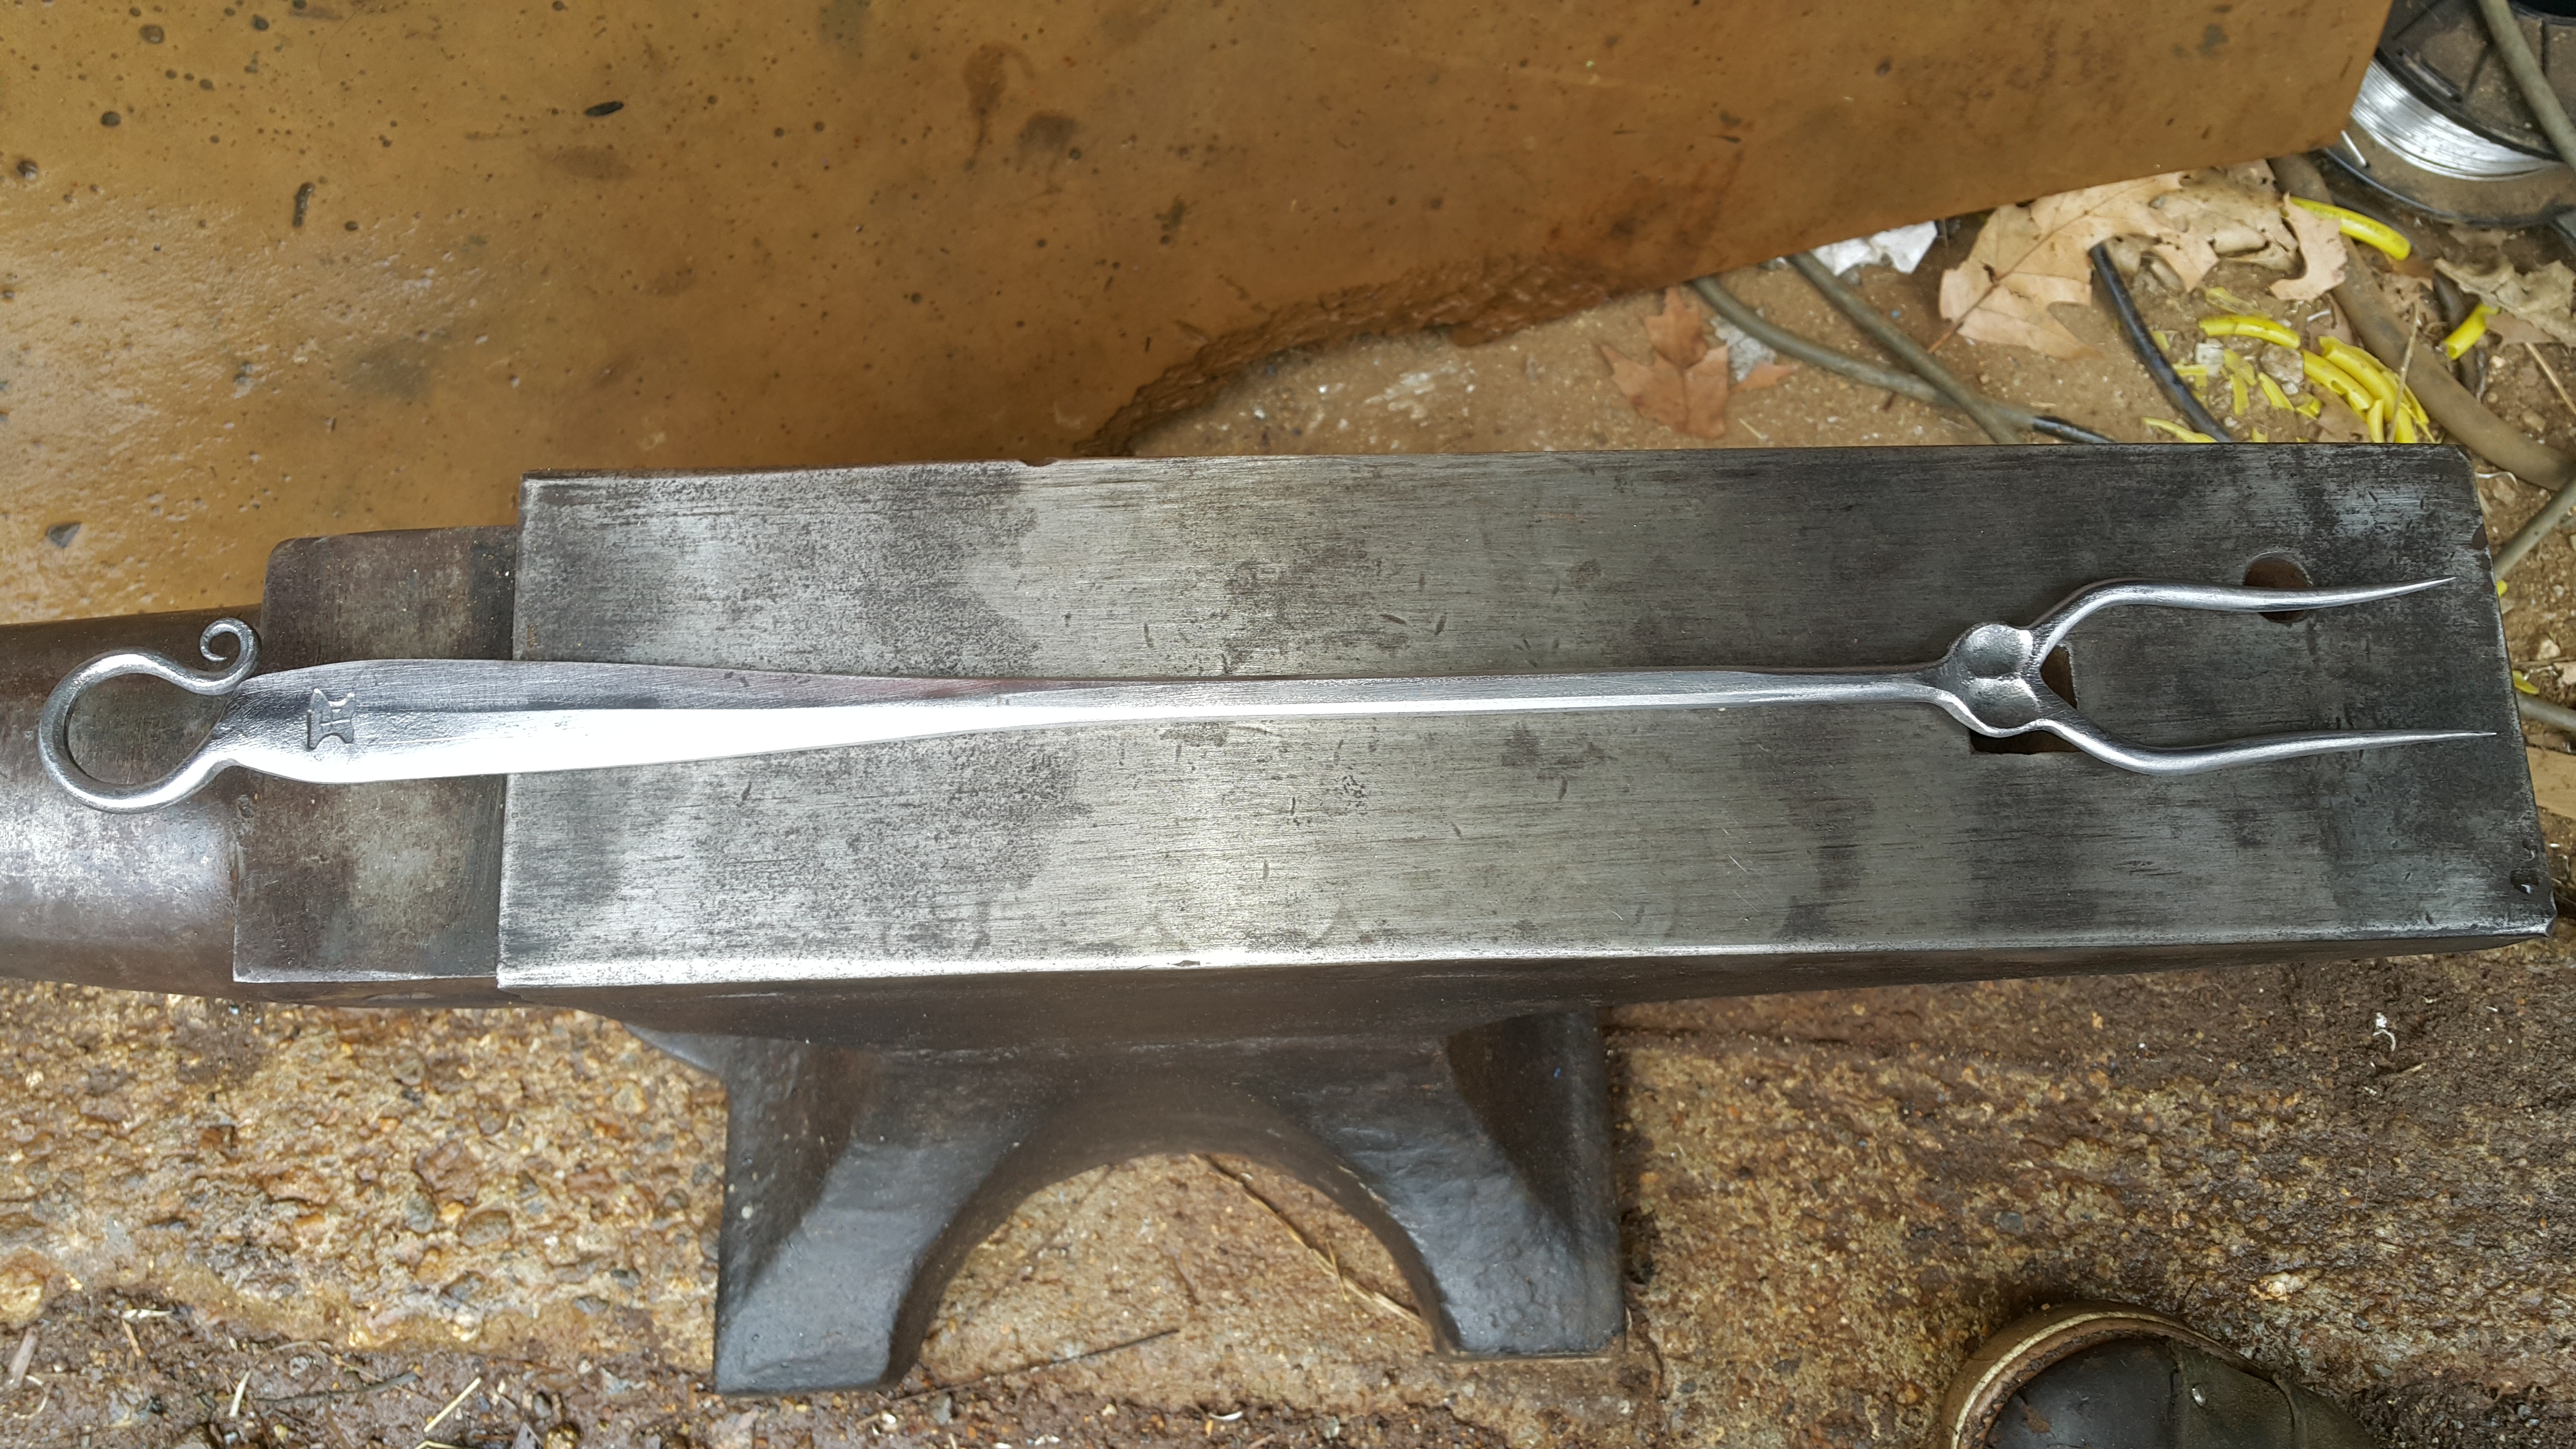
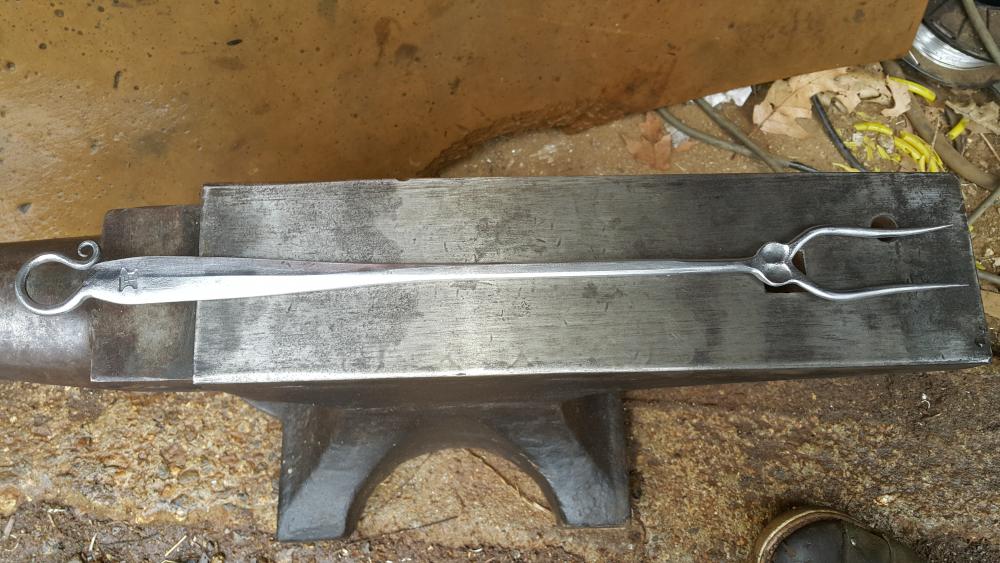
Thank you.. I do make sets.. This was actually a little smaller design in a toasting fork.. The fillets are usually a little larger.. Your welcome and it's Madam, or Ms.. Thank you very much..
-
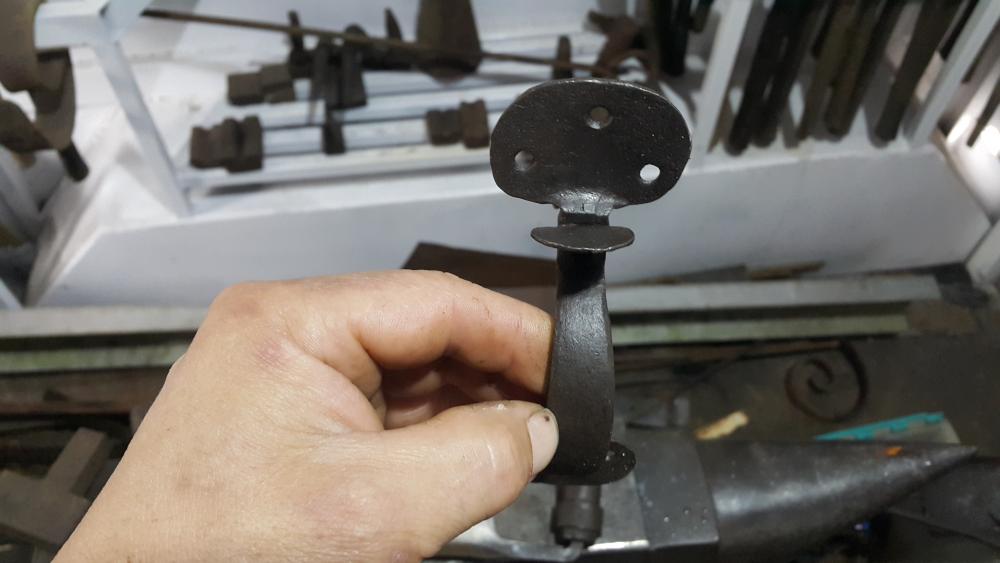
Just a finial/decoration. but it also adds strength to the junction of the shaft to tines.
-
Draw knife Pear wood handles all hand made and finshed
jlpservicesinc posted a topic in Knife Making
I forged this up as a demo at one of the event's I was doing.. No electric power was used in the making of this.. The pear wood handles were cut with another draw knife.. Blade is 5160.. It was forged to this exact shape and hot rasped to remove the scale.. it was draw filed with a bastard file and then finished with sand paper on a flat file.. The handles once joined with the blade were heated in a vat of linseed oil and bees wax and allowed to bubble off for a short time..
-
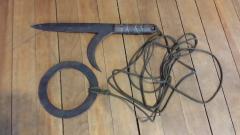 Not sure how to answer your question.. as to Heavy usage.. I'm guessing it is Heavy? Usage? It's not that heavy.. Though it is fairly large.. the knife proper weighs about 1lbs.. the ring and rope adds another 1lbs to the assembly.. handle length including the butt where the cord is tied is 6".. the straight blade to hook blade is 7.250" the hook blade is 5.125" As for usage it's a tool.. it's usages are many.. It's both an offense and defense tool as well as chopping, digging, climbing (jammed in between rocks, rope used for hand holds etc, etc), snaring..ensnaring, used for telling depth or height of both land objects and water or liquids.. disarming others, the list goes on and on.. As with all NIn-gu is is considered a throw away tool to be discarded as need be.. While forged very well and tempered with Hamon it is not finished to the level of a sword.. Made to function, little else so time is not wasted with polishing and such.. I forged this for me so the proportions are a little large compared to traditional ones..
 -
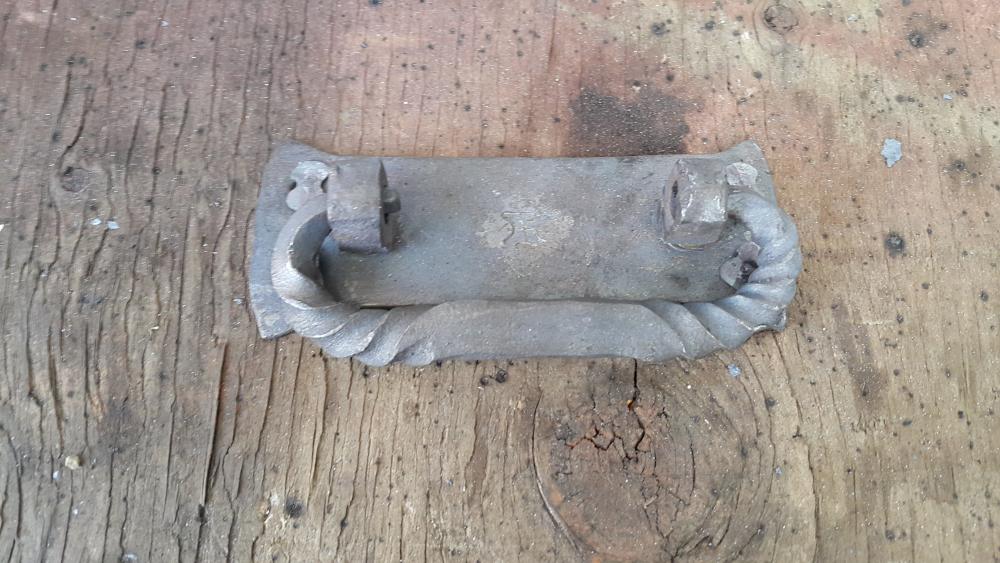
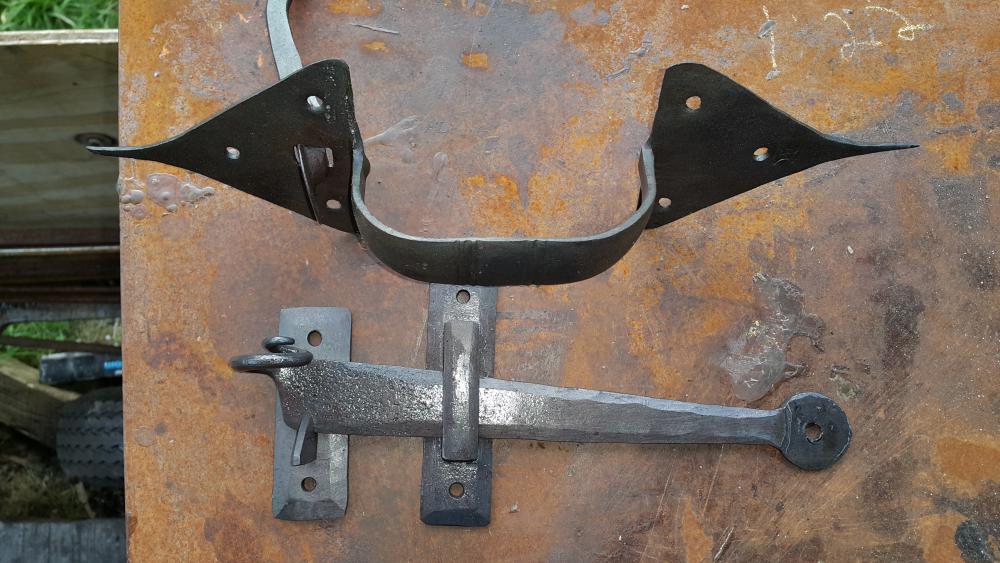
Suffolk latch.. 2 wrought iron bolts welded together..


-
Here is a 2 tine roasting fork.. Made from 1/4 X 1" Just a touch of whitesmithing and then hand wire brushed.. No finish..


-
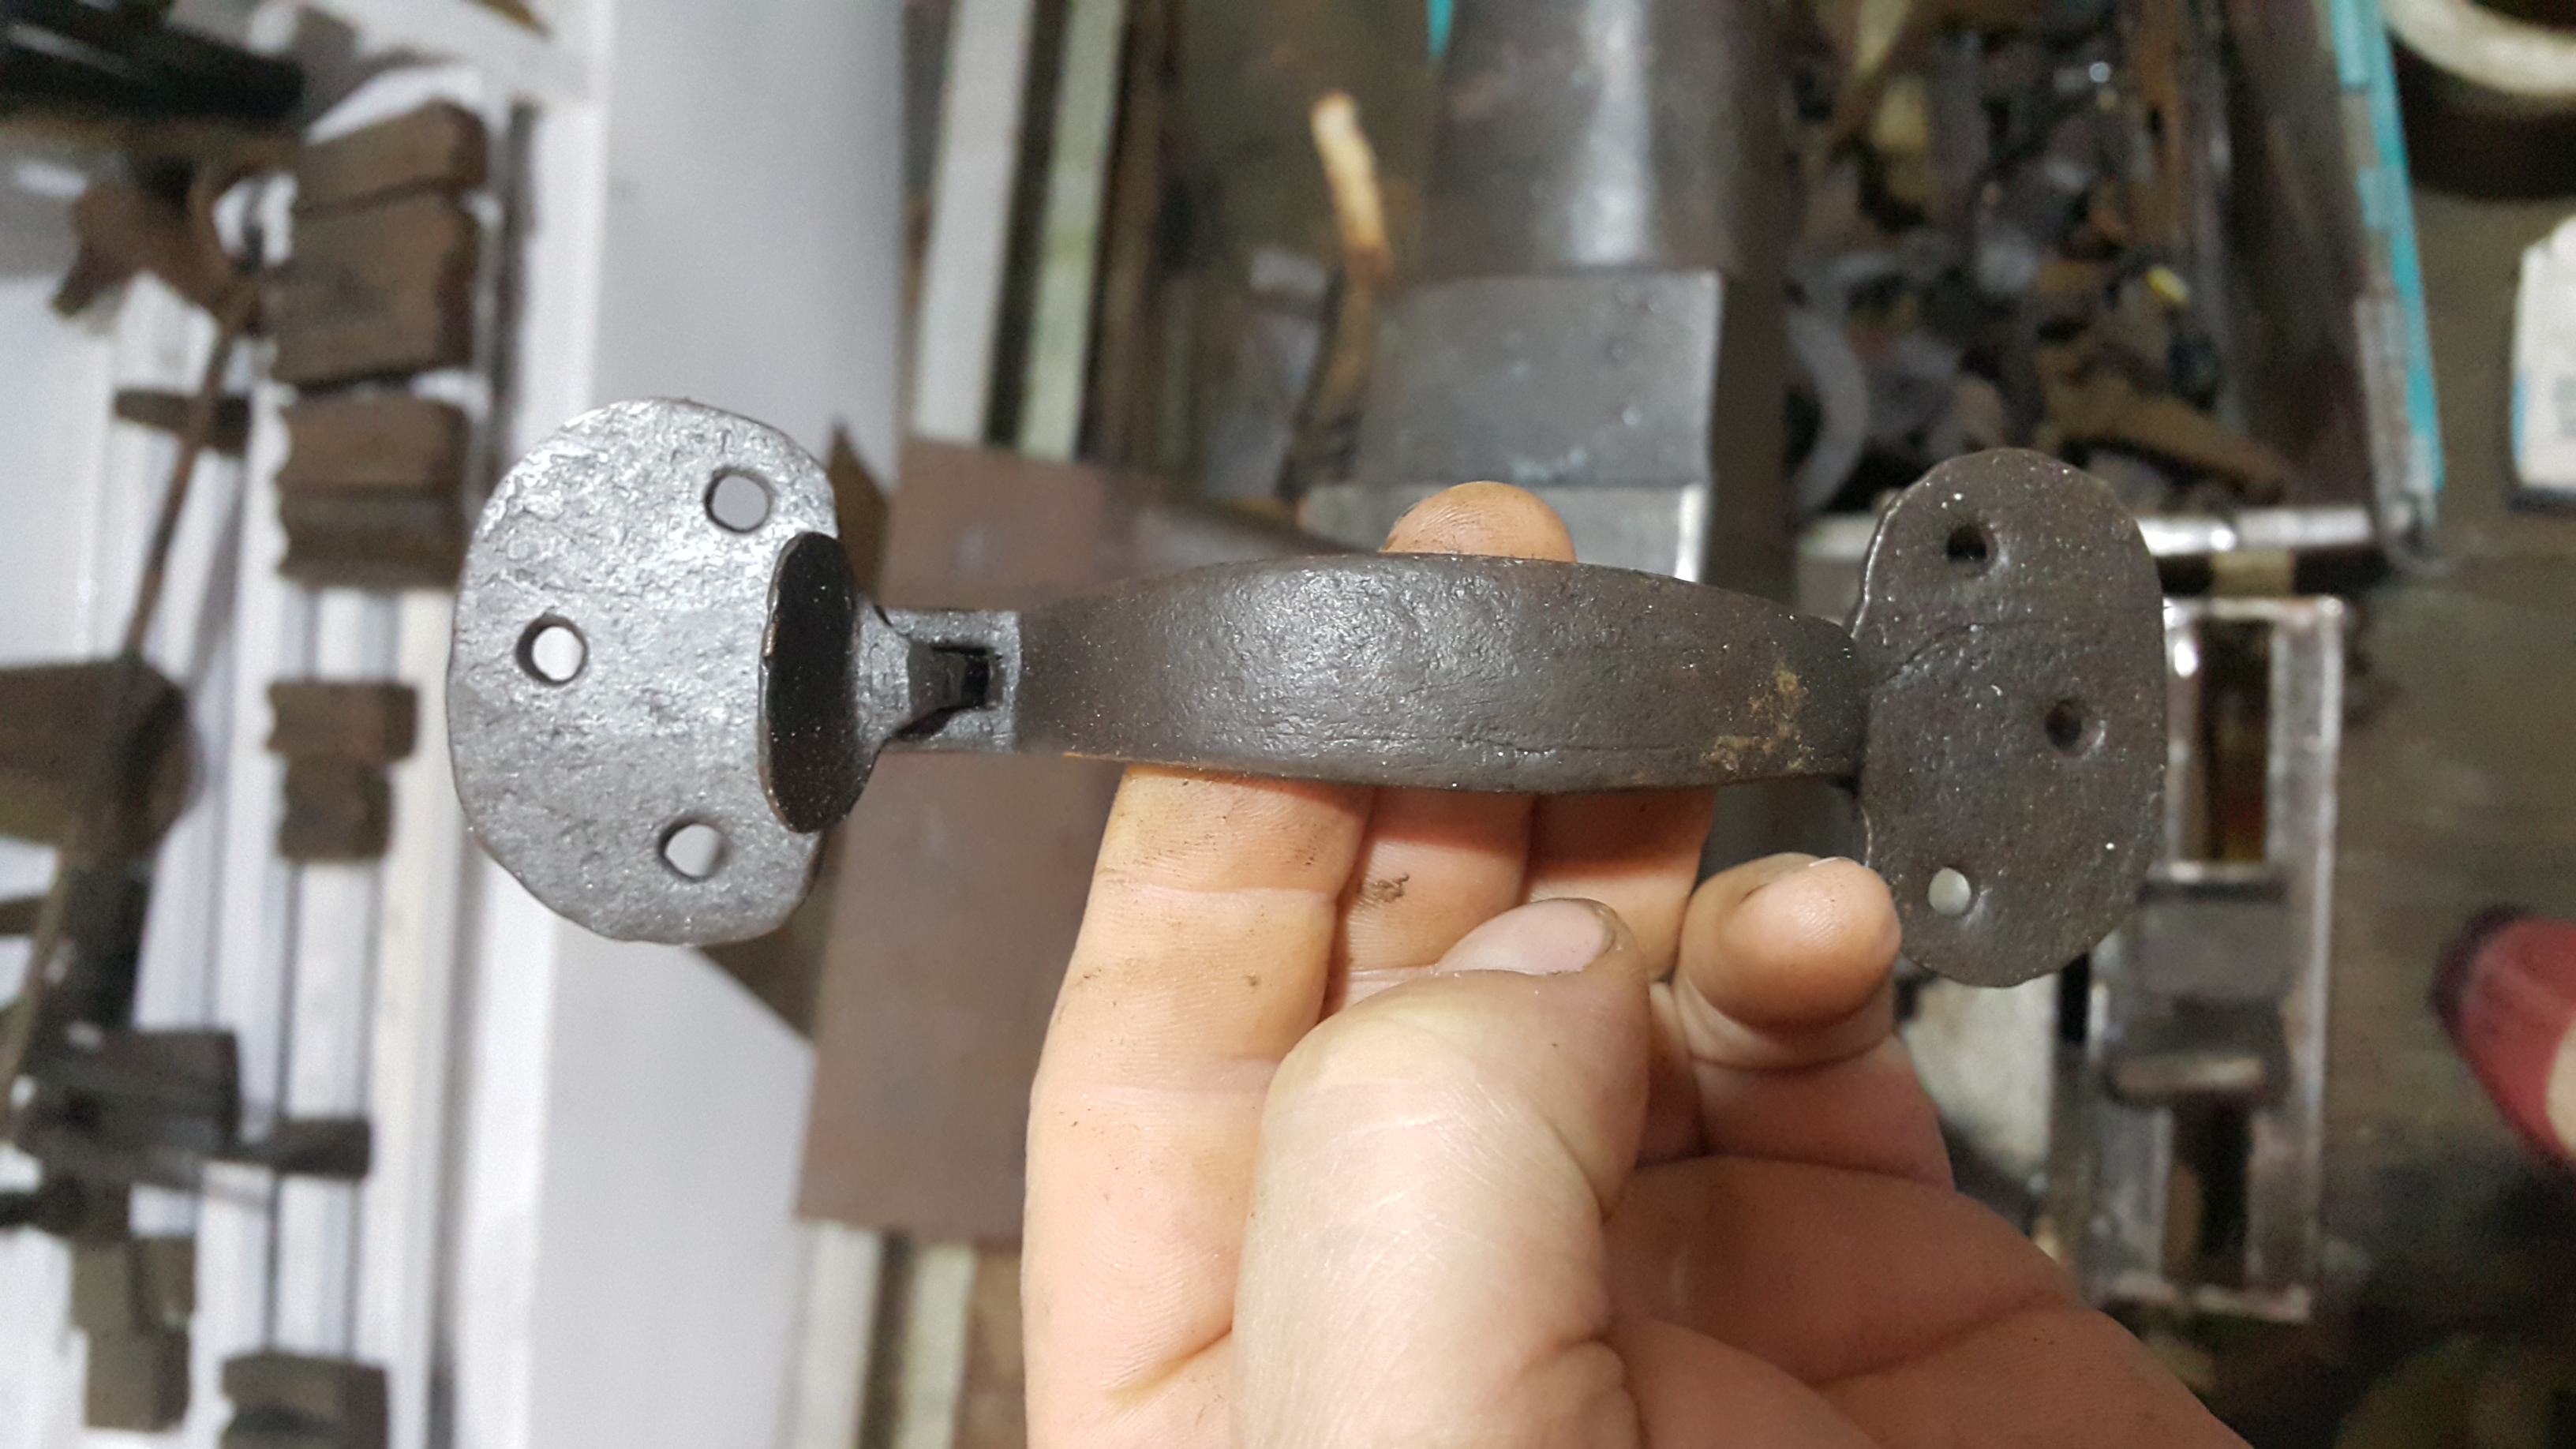
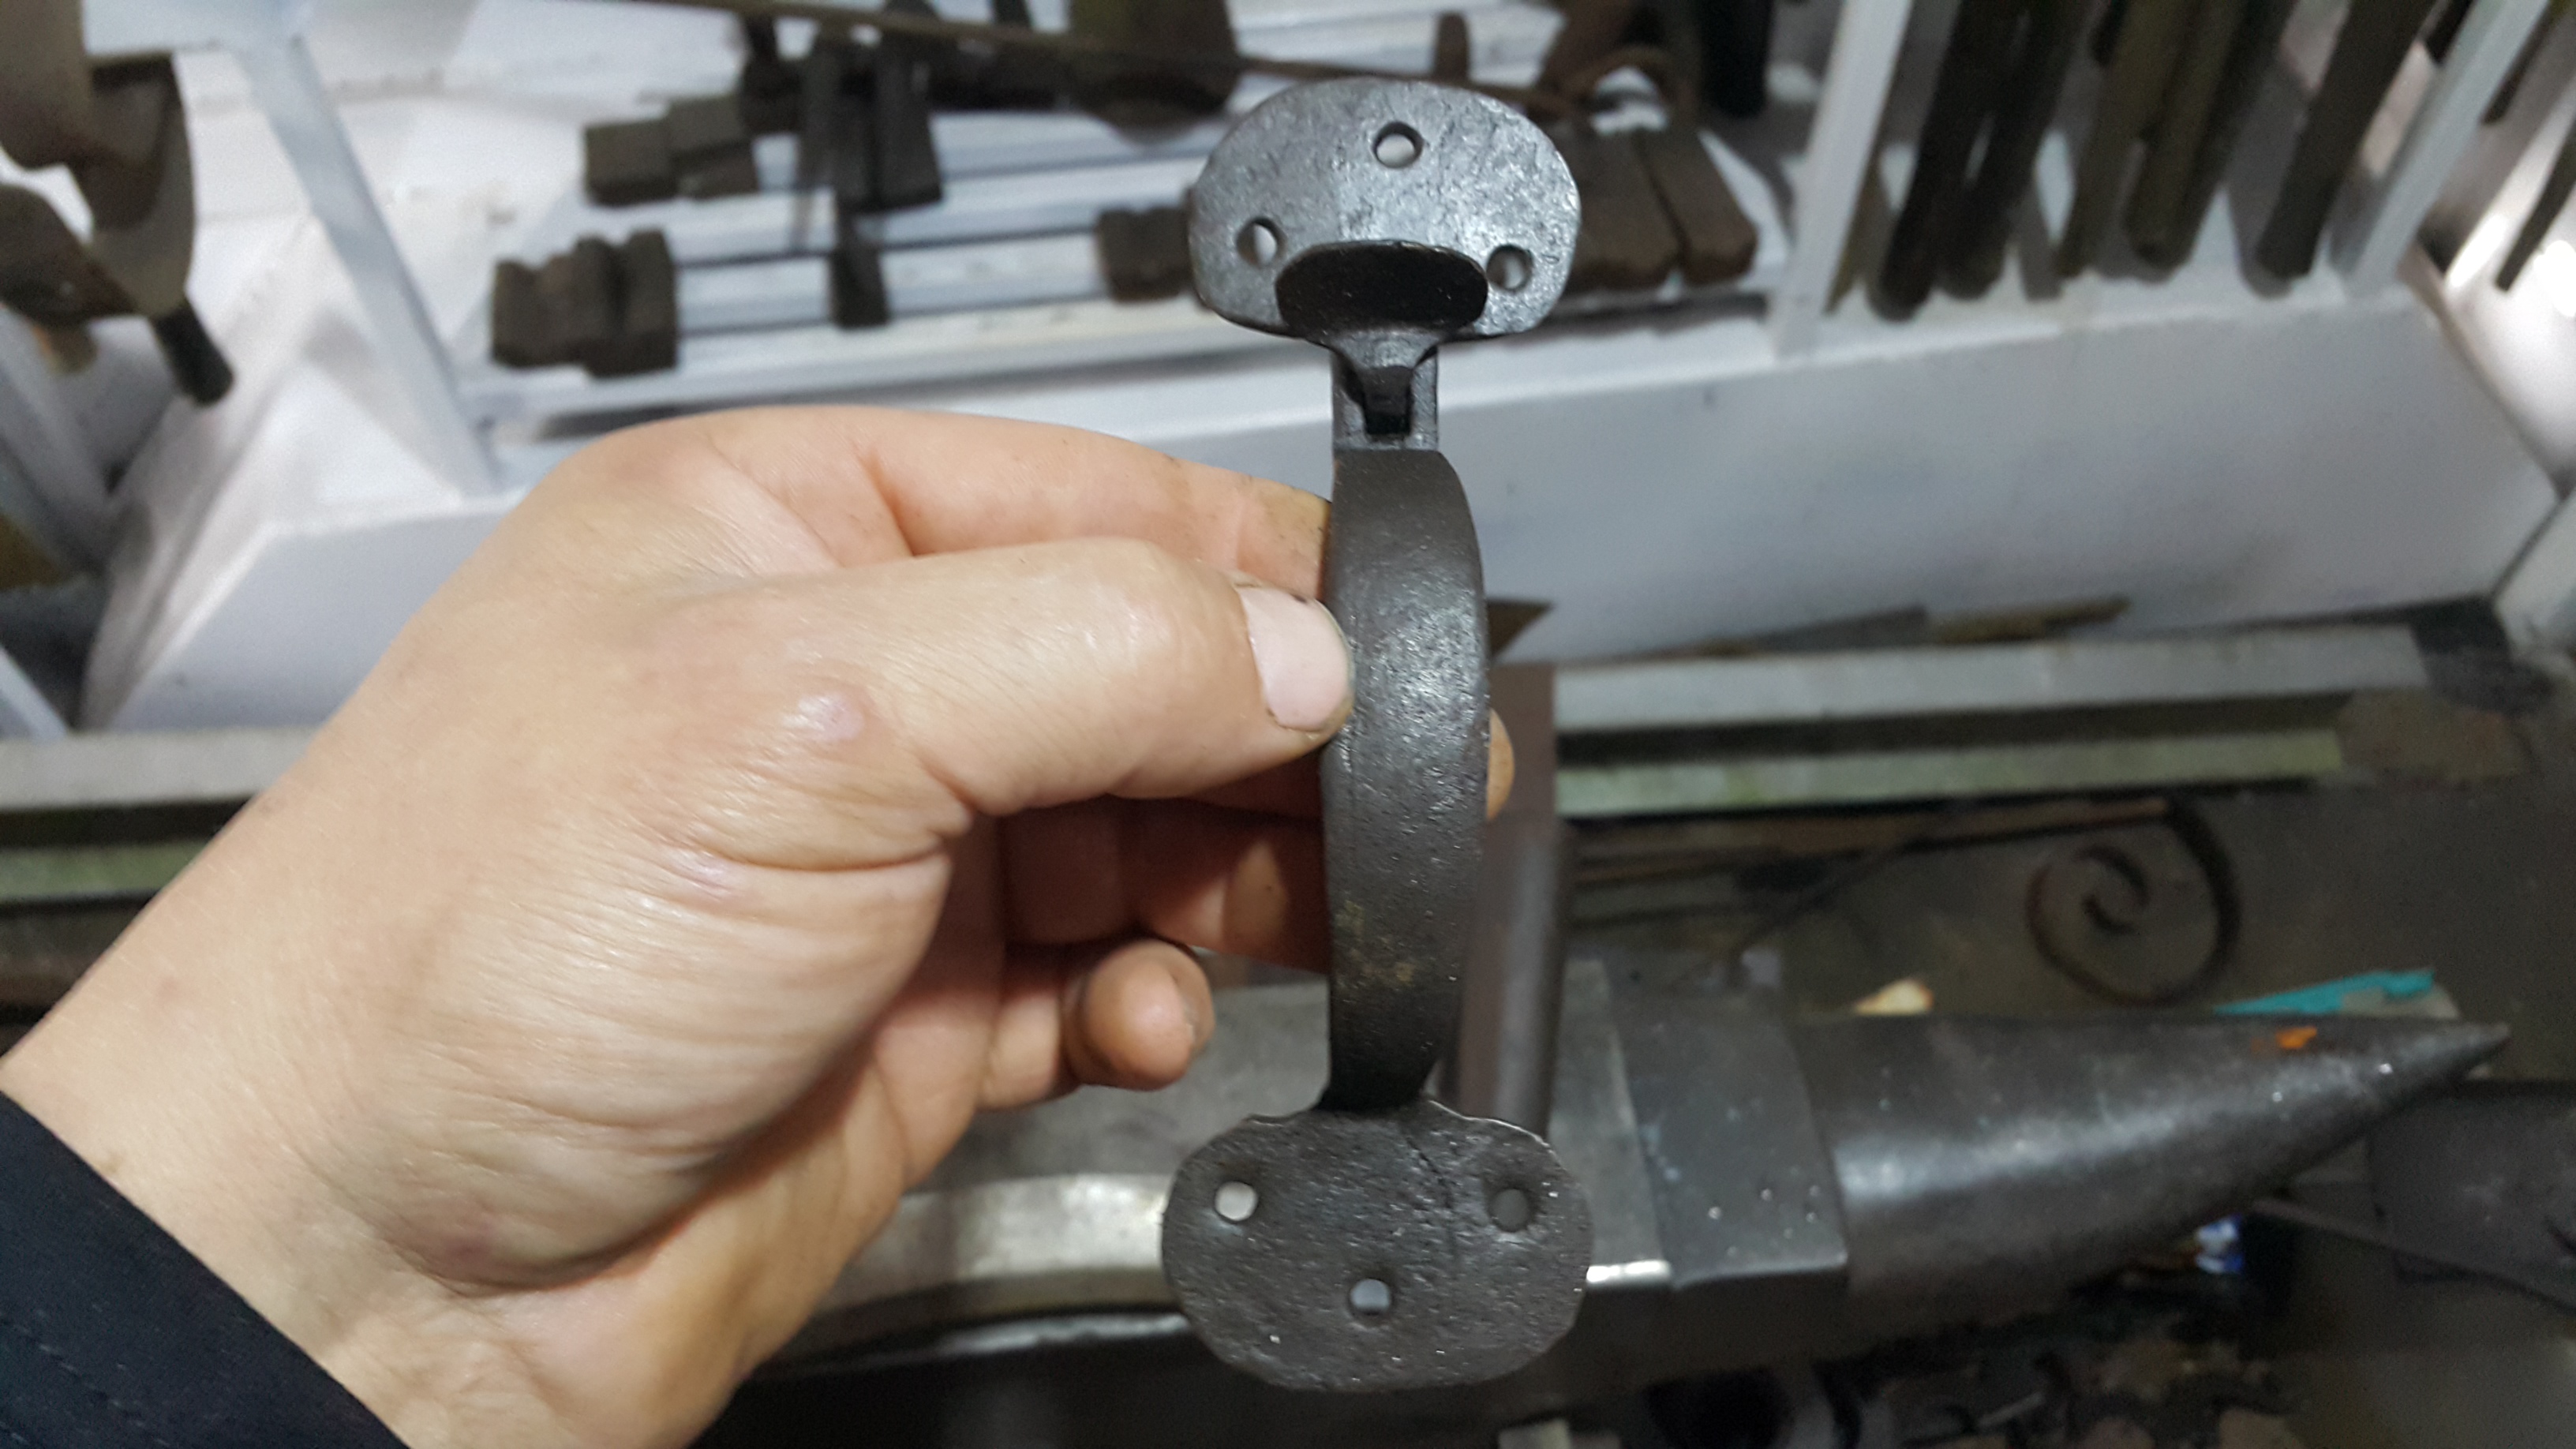
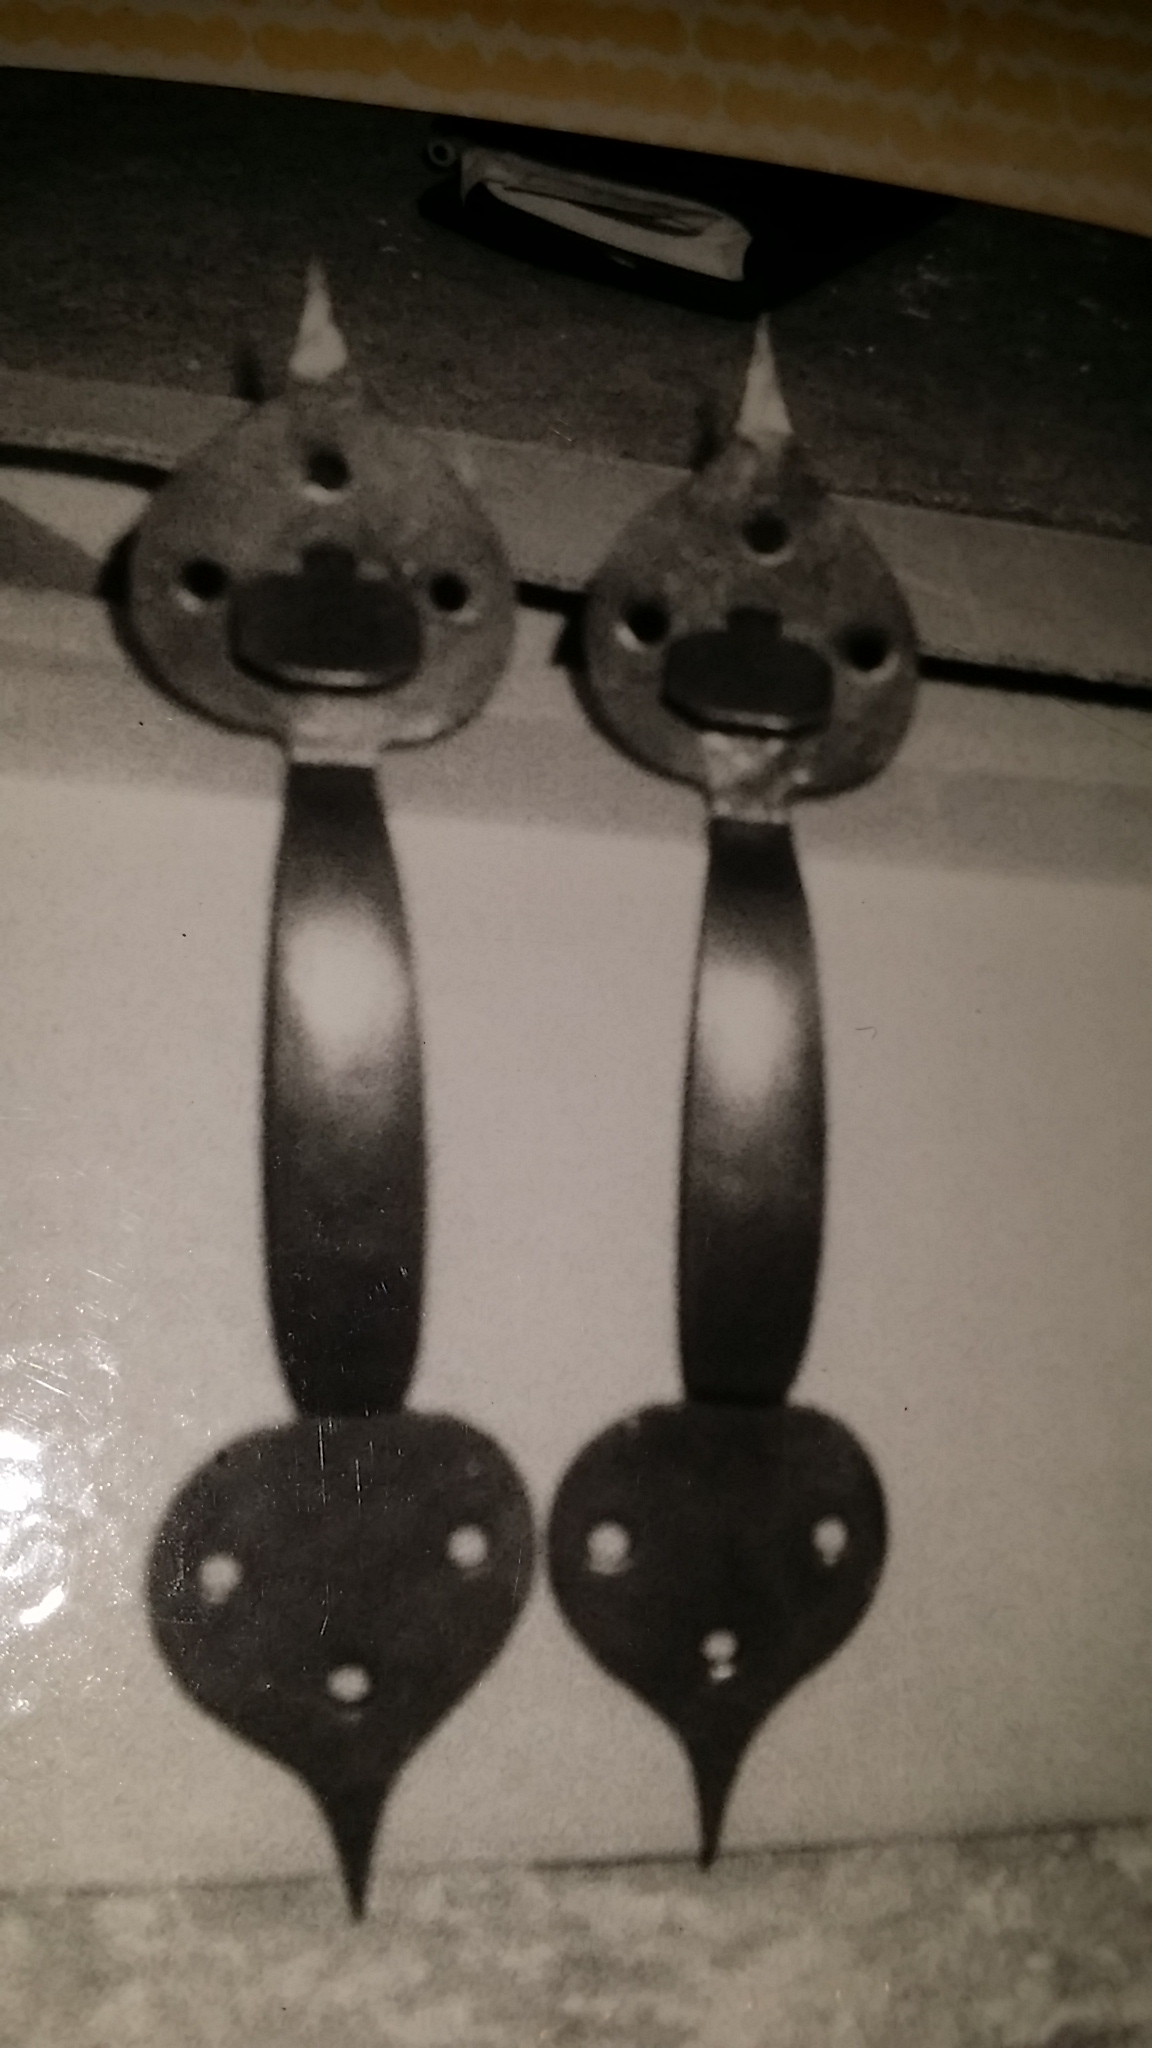
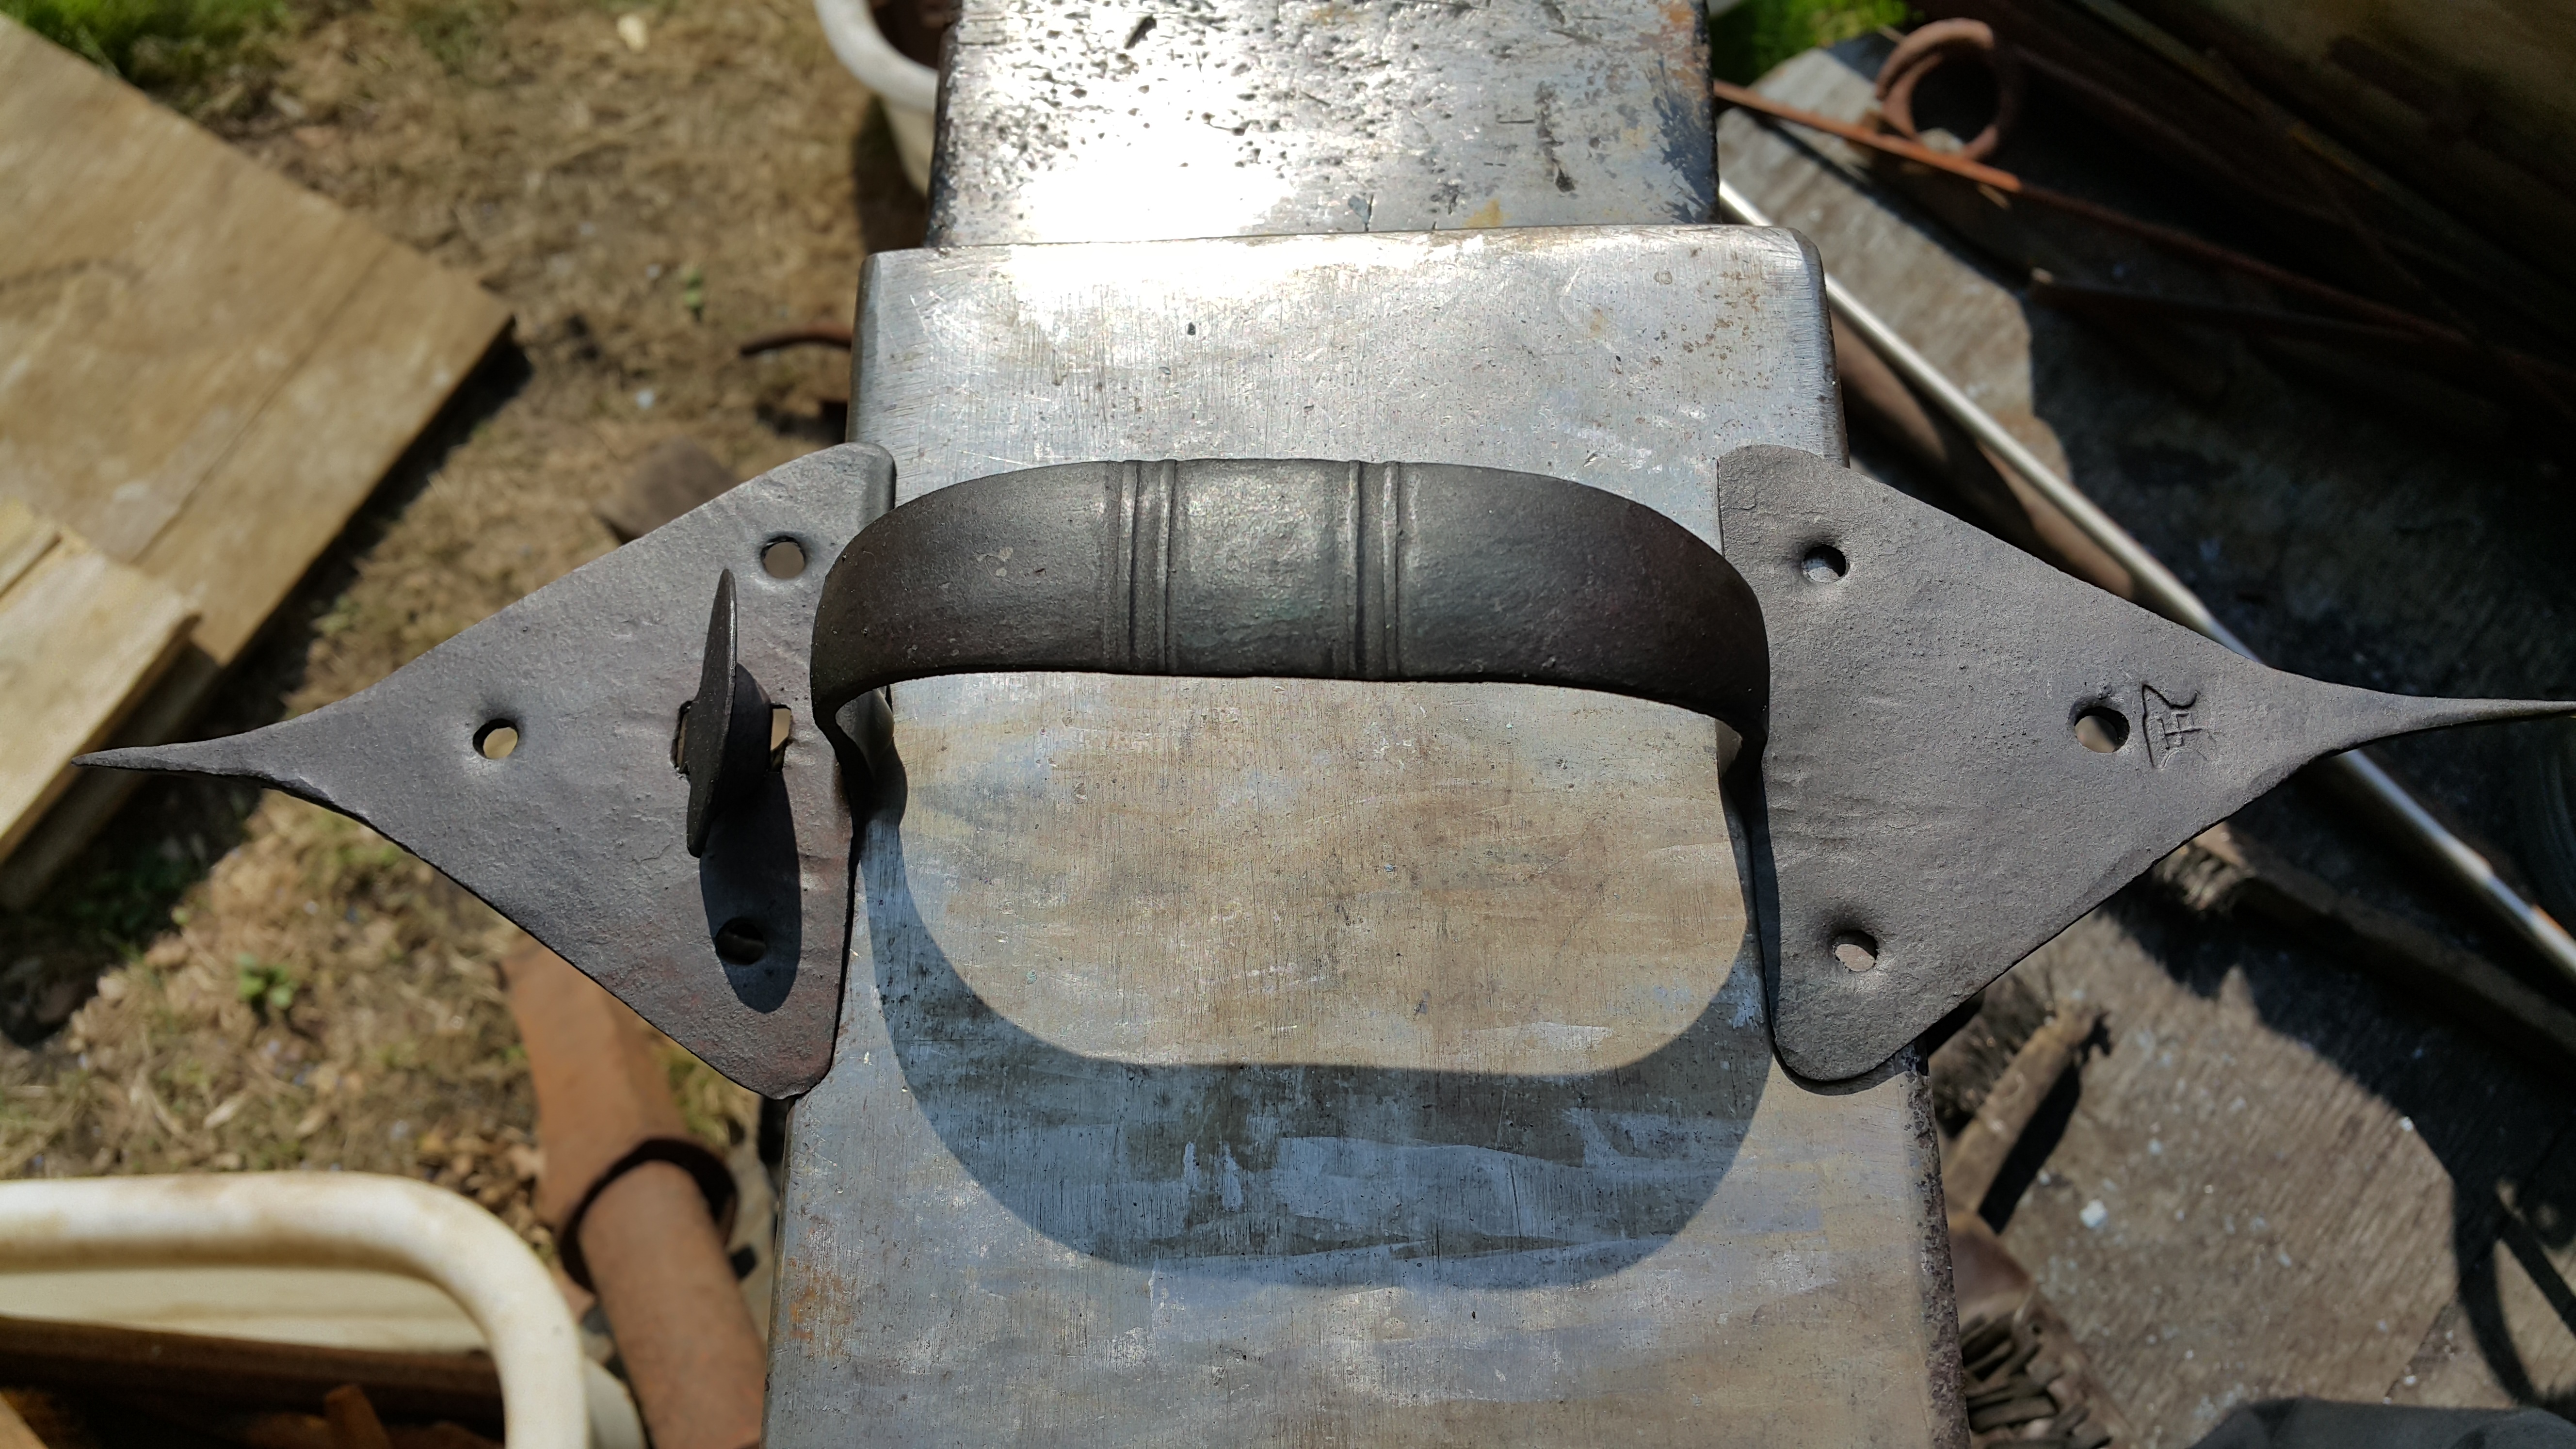
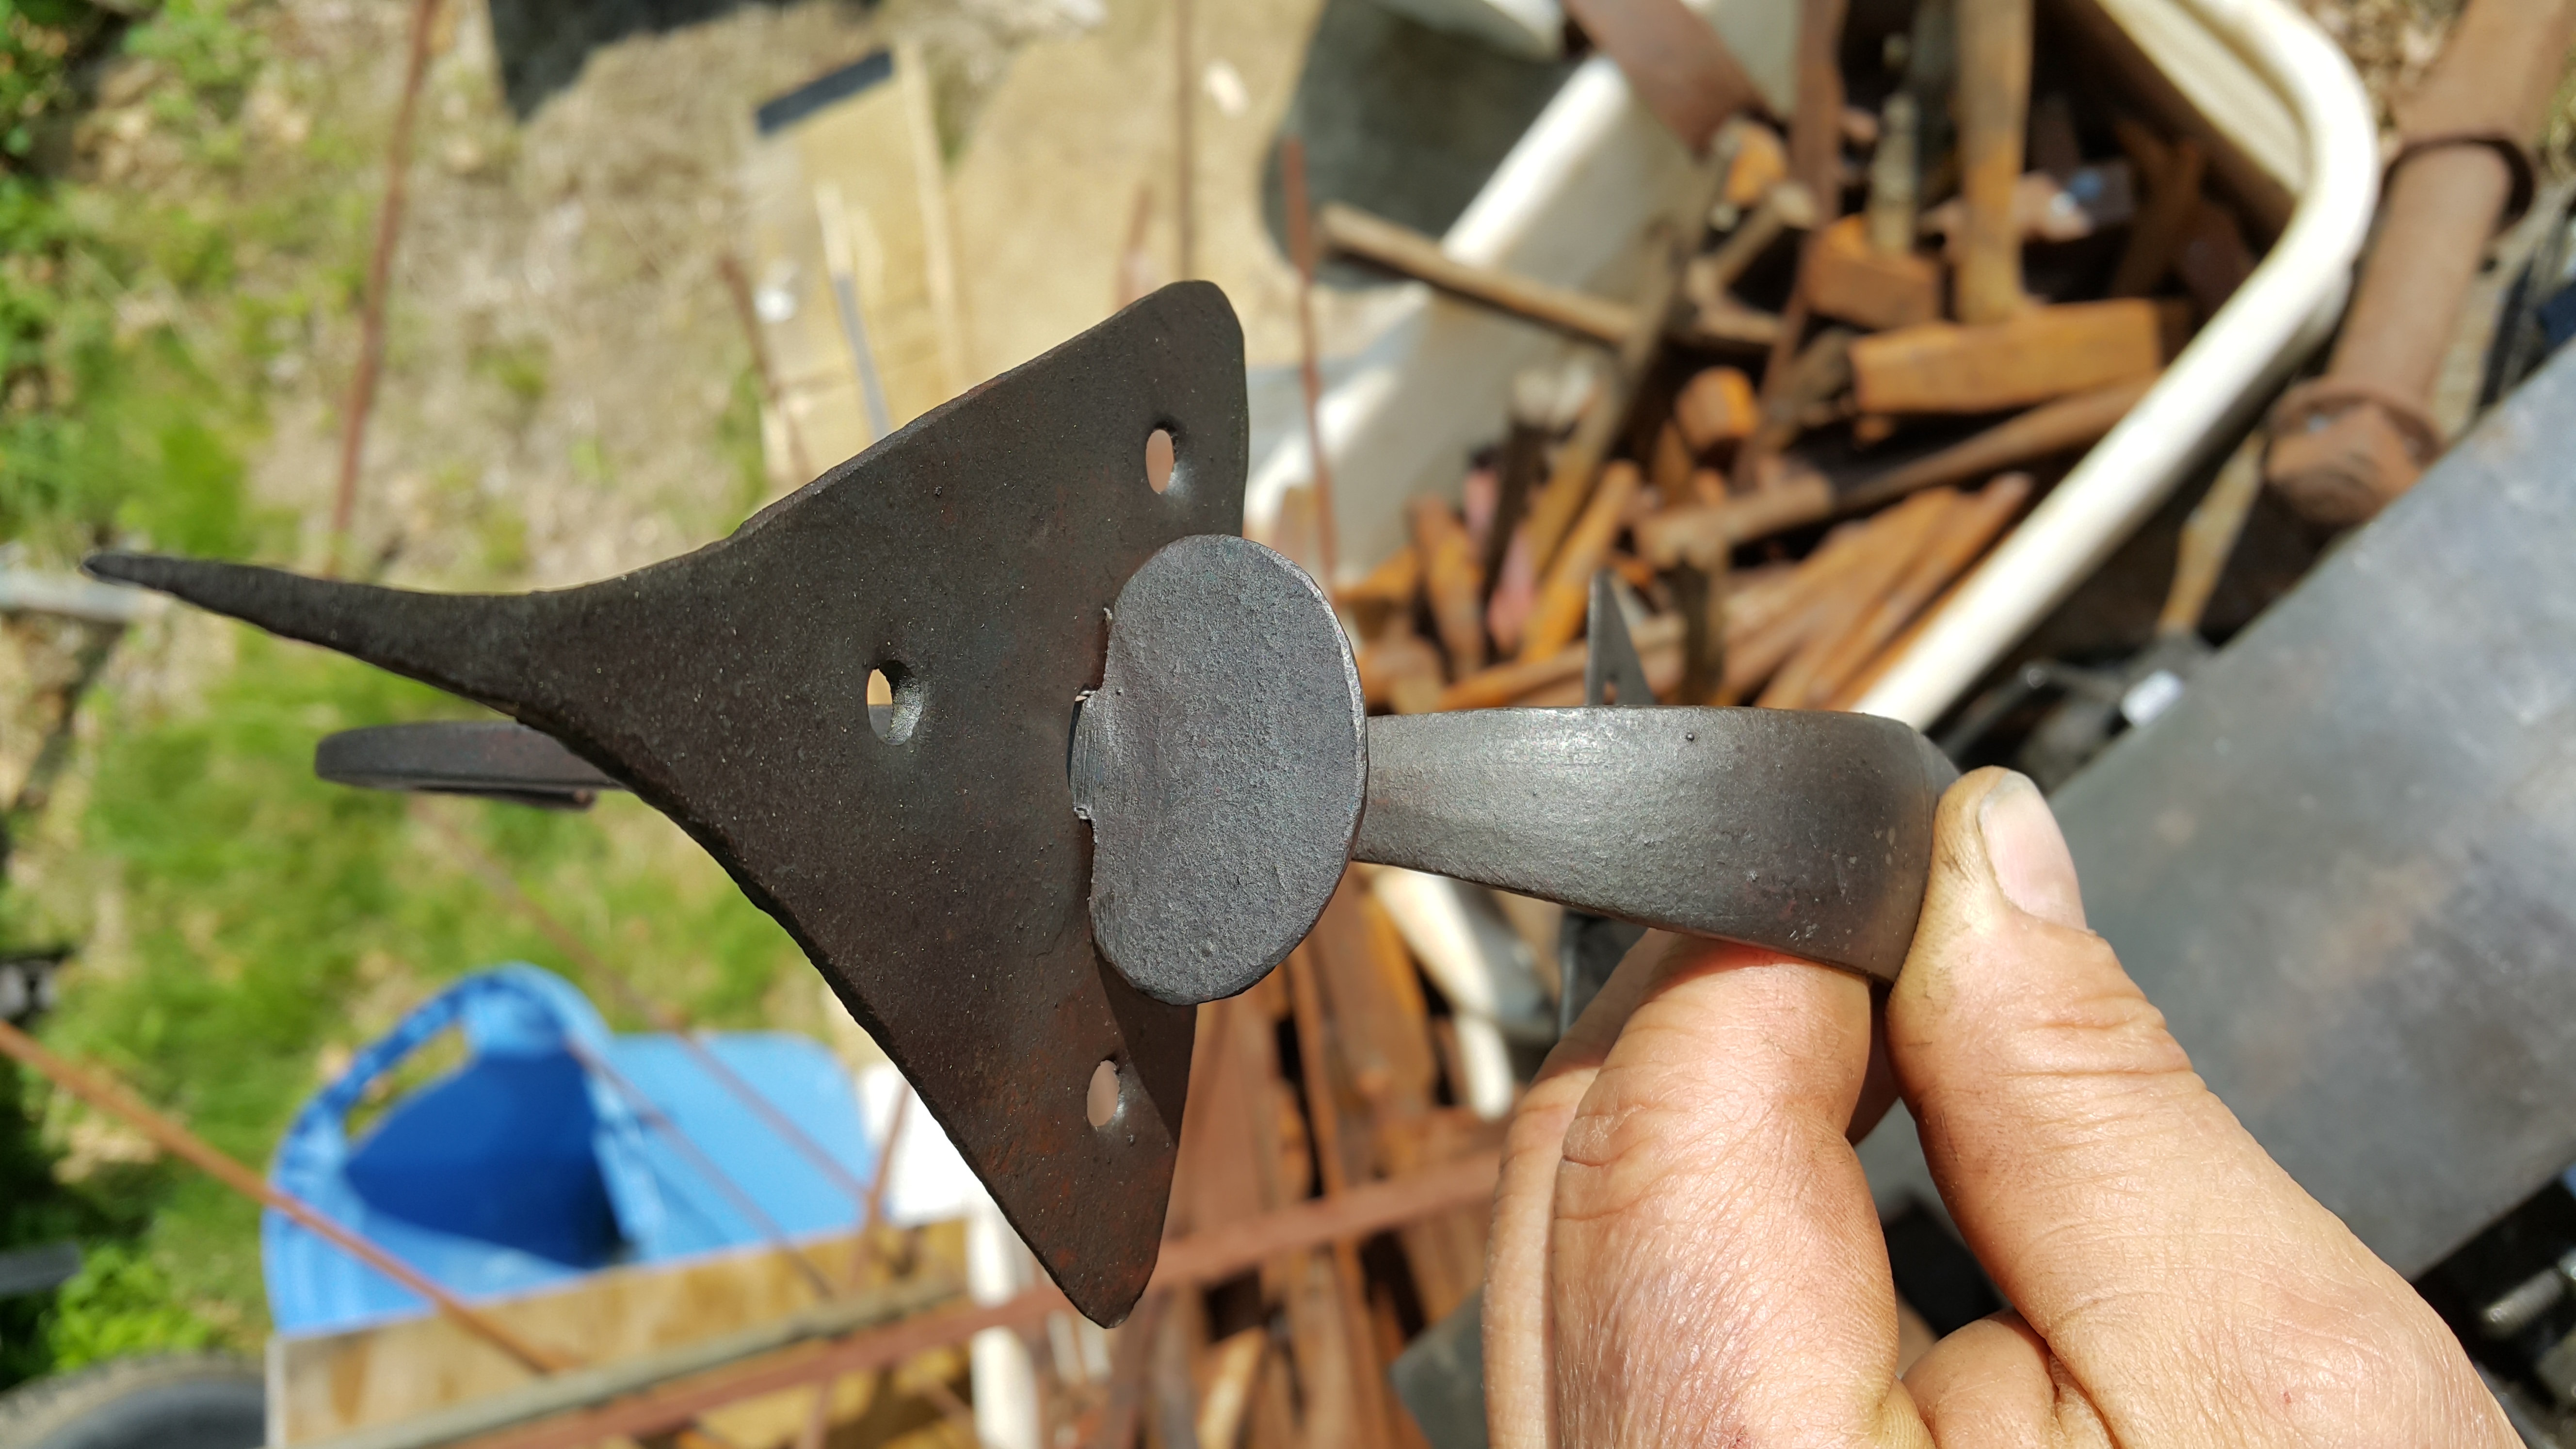
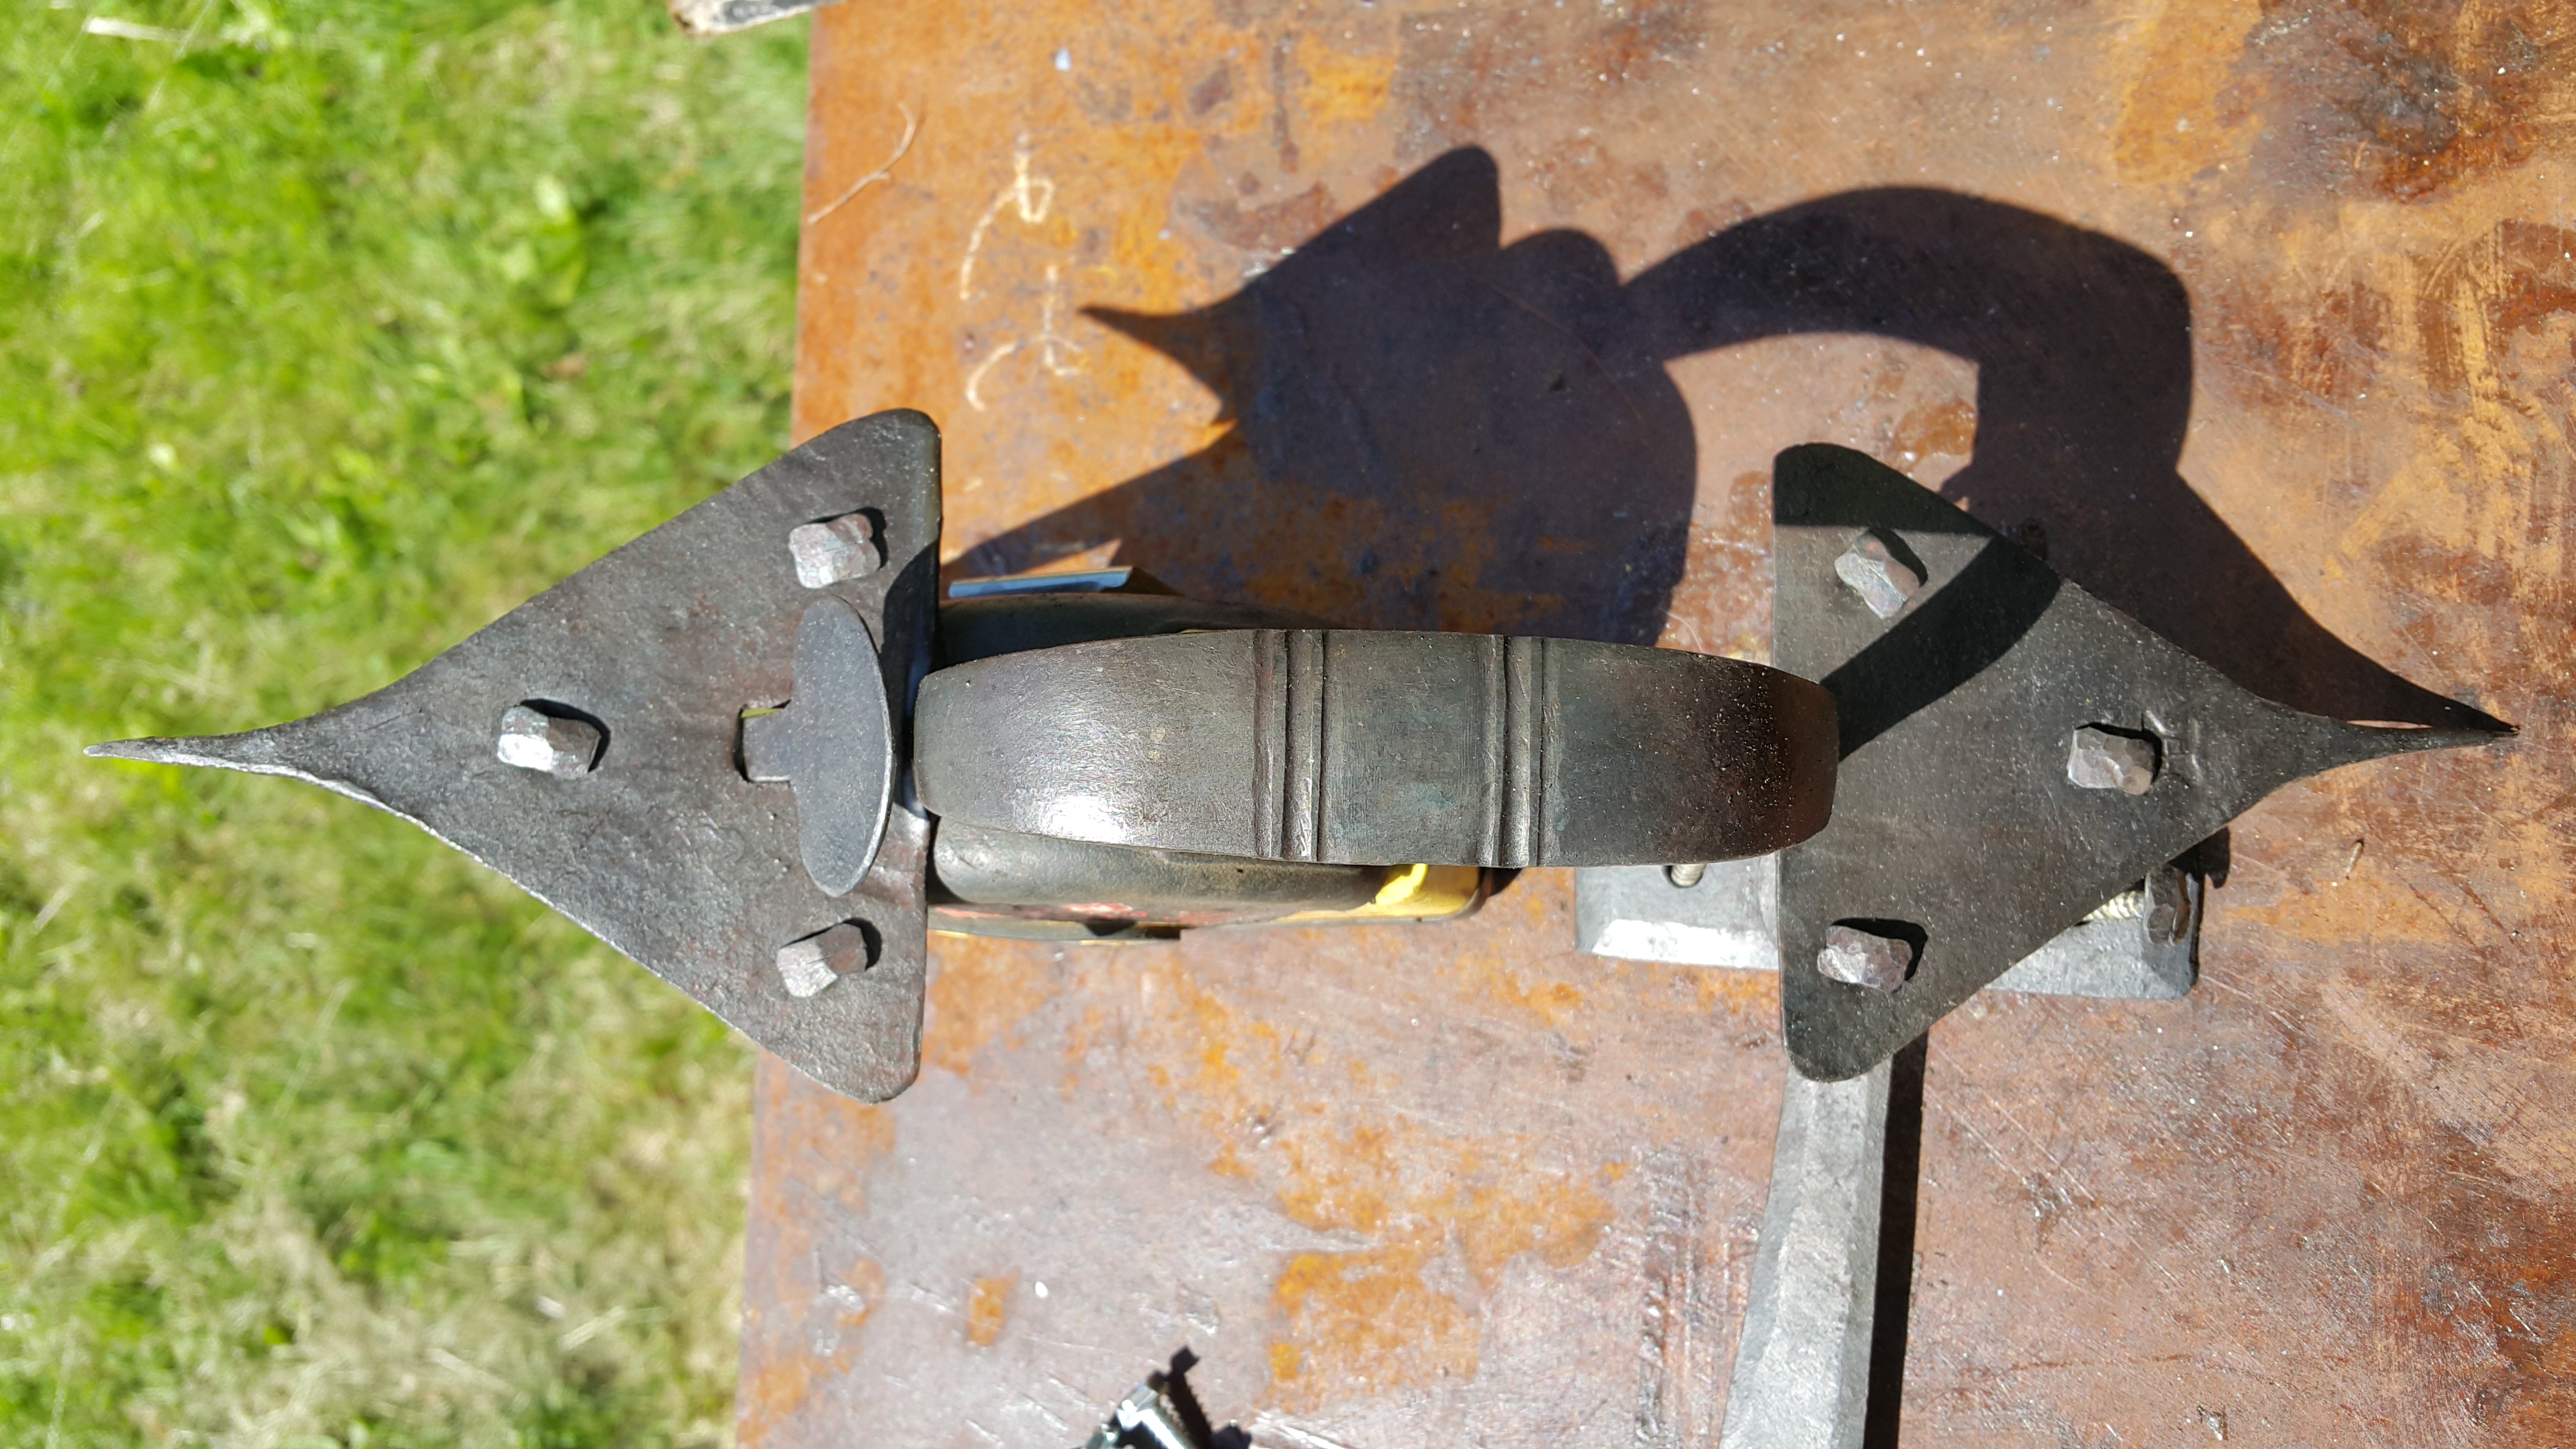
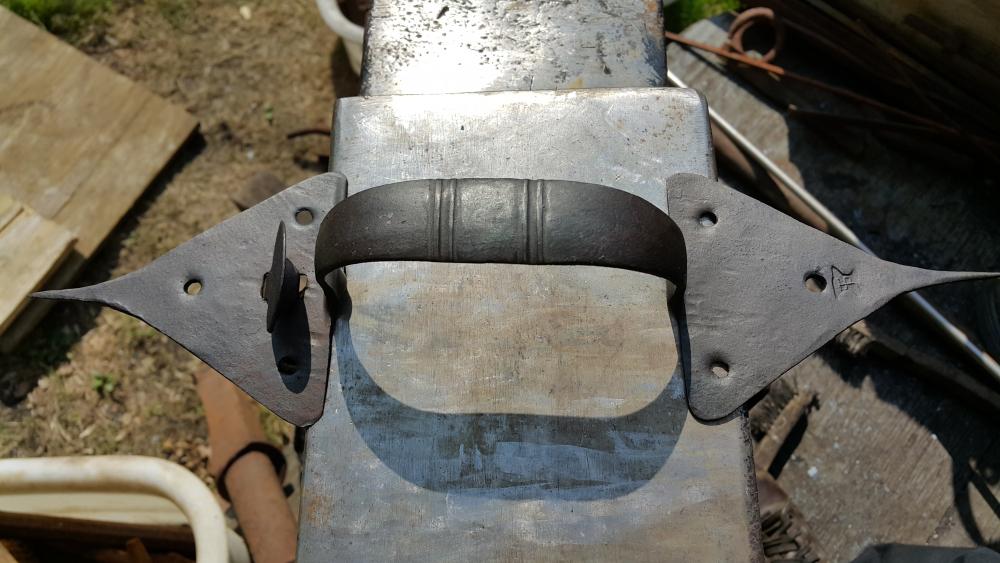
Arrow Pattern Suffolk latch thru cusp
jlpservicesinc replied to jlpservicesinc's topic in Member Projects
That is wonderful.. If I can be of help let me know.. -
Arrow Pattern Suffolk latch thru cusp
jlpservicesinc replied to jlpservicesinc's topic in Member Projects
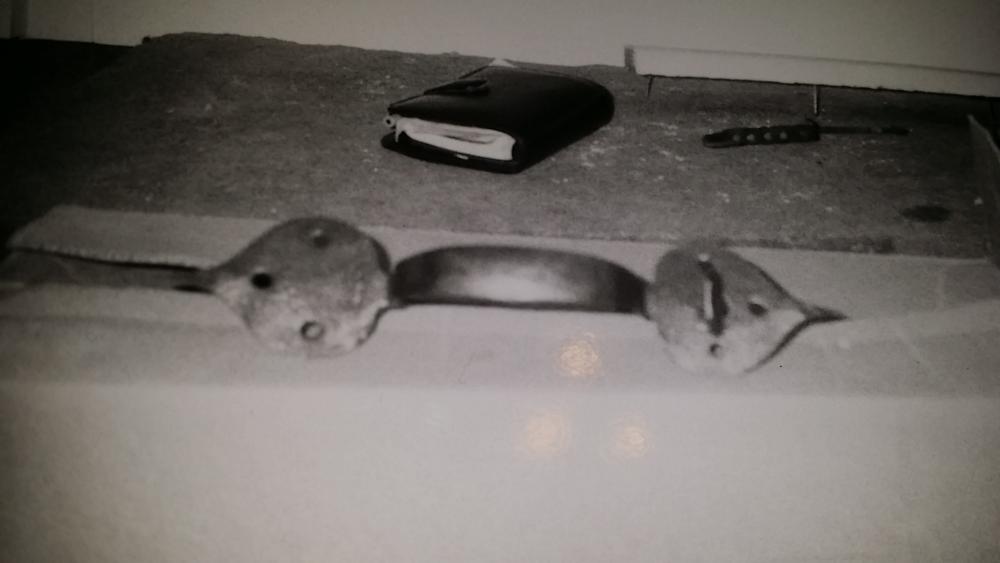
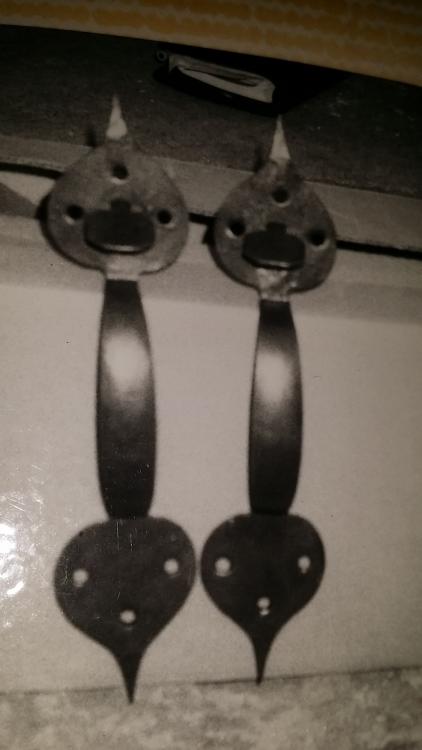
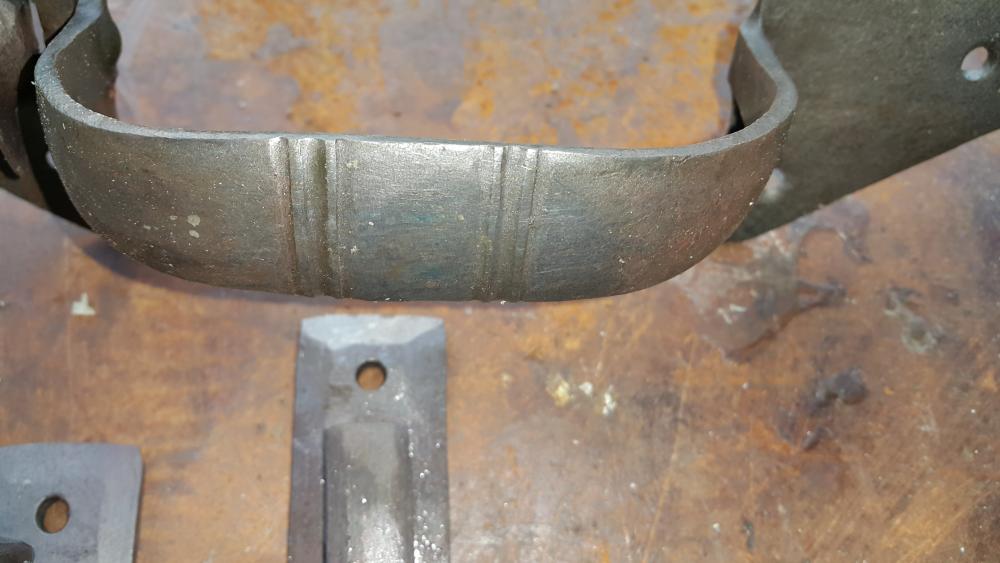
These latches were all cut by hand..Once I made one, I used this to mark out and cut the next one.. If I were making 6 or more I'd spend the time making the dies as it would be a huge time savings.. (Less time more money per hour) I made spring swages for the handle shapes (which were requested by the purchaser)... I turned 2 different center sections on the lathe and let the customer choose.. I still have the 2 handle sections stashed.. also the upset boss where the rivet plate goes.. The screws must have been hand cut.. I love hand cut screws don't get to see many these days.. I almost bought a hand screw threader 30+ years ago but the price went to high at 40.00.. Wish I had bought it and just starved for the next week.. Not sure if you know or even care but the straight ones were earlier and the curved handles later on interior door hardware.. The straight thumbers on latches were so, dresses wouldn't get caught as the women folk walked through the door.. As time went on the handles took on a more curved shape eventually turning into cast iron copies of hand forged items.. anyhow, sounds like you have lots of variety and time frames as they were upgraded/installed.. I'd love to hear if there are old nail holes under the latches there or where these were new doors when they installed the latches.. Colonial hardware was my Niche for years.. So if you run into problems pm me.. Love to see how your work comes out.. The coating was a linseed oil. bee's wax mix applied hot.. -
Arrow Pattern Suffolk latch thru cusp
jlpservicesinc replied to jlpservicesinc's topic in Member Projects
Thanks.. Norfolk latches offer a hole different approach to latch making as the process turned to hand made automation vs hand made.. If you have a lot to make, making the cutting dies will speed up the process as will making a spring swage for the handles.. Okay, A few more...png.1246e0f50ef0cb2a15414ffdf62f3e0d.png)
.png.409758b86deff6bb552e96ac9a319826.png)
.png.658eec7f17de758246f706ec651d196d.png)
.png.40584590a84ab1653f631d71f5eb93bb.png)

.png.42d30646fb938ae12e464ec71558bf48.png)
.png.6d94ebd4c5ff83d66628b9a09dfaba55.png)
-
Thanks... It's held up very well over the last 20+ years..
-
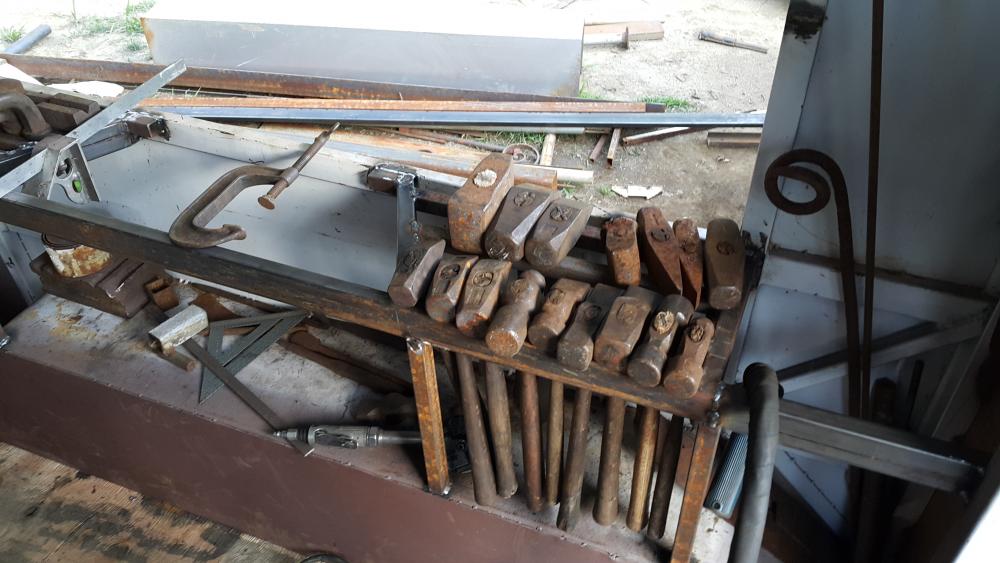
I have hammers weighing from just a few Oz's to 10lbs for one hand use.. As I have gotten older the ability to use a large hammer proficiently and effectively has dwindled some.. Swinging the 6lbs ain't what it used to be.. So for general forging work I use 3 hammers.. 3lbs, 4 lbs and a 6lbs.. I have learned that effectively transmitting hammer force through the center of the bar to be the most prudent. part and this dictates which size hammer for the right size stock at the correct temperature.. If you are forging a rod and it hollows at the end. its because of hammer size, temperature and technique.. Also as you forge more you will find you can move larger sections of metal faster with being less tired as you are forging the material vs just beating it.. And you will start to recognize which hammer for which kind of work.. for heavy hammers I like a heavy handle and as the hammer weight goes down so does the neck of the hammer.. I used to be a long handle person and if the hammer is light enough the long handle give it more speed which imparts a more piercing blow which basically does the same as a larger hammer moving slower.. Personally I just can't hammer as fast as I used to as well.. So, just enjoy and as things (muscle memory, what you are seeing, and eye hand coordination) get better so will your hammering.. Oh, one other point.. A solidly mounted anvil is the most important part, as you can lose as much as 70% of the force to floor spring or bounce and this will make you think you need a bigger hammer.. Work smarter not harder..
-
Arrow Pattern Suffolk latch thru cusp
jlpservicesinc replied to jlpservicesinc's topic in Member Projects
Thanks.. Making Hardware can be tons of fun and create excellent skill sets as it can really show just how far you can push metal around with just hammer and anvil.. Can't wait to see your project... -
Forged from 5160. Forged double edge, integral handle.. Stainless wire wrap. forge welded ring.
-
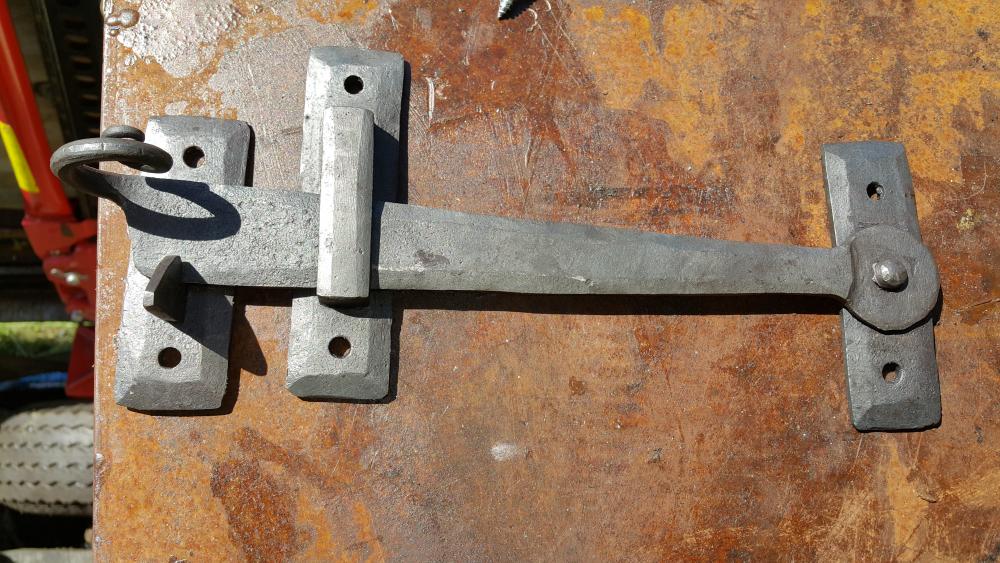
Just a latch I threw together for a customer. Arrow pattern with spear accent.. on back group with pigtail finial on bar. Screws reshaped to look like rose head nails.. Sorry about the turned pictures.. Not that savvy with how to edit or rotate pictures here..


-
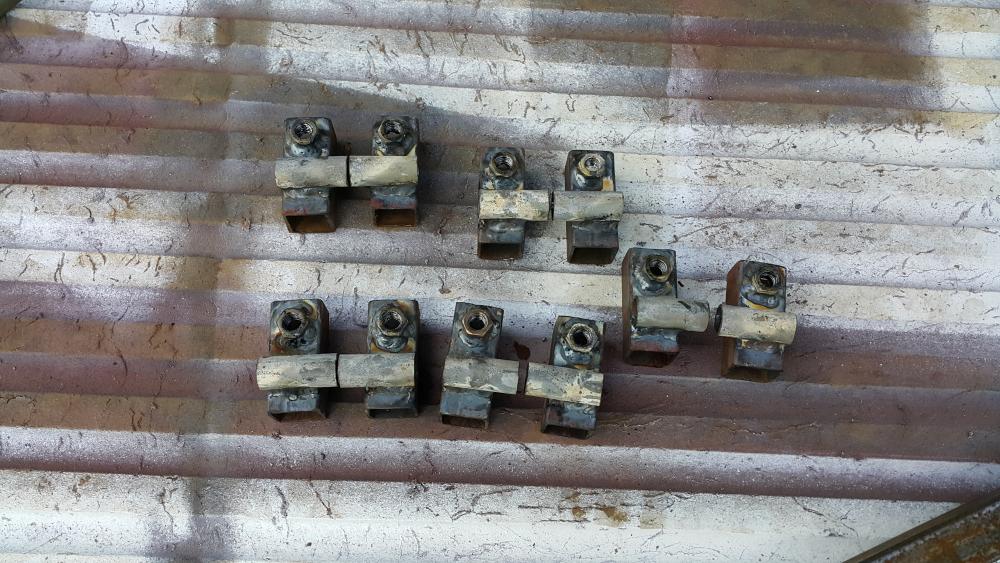
That is a sweet looking HB. What size is the hardy hole? I love the mounting system also.. Nicely thought out..
-
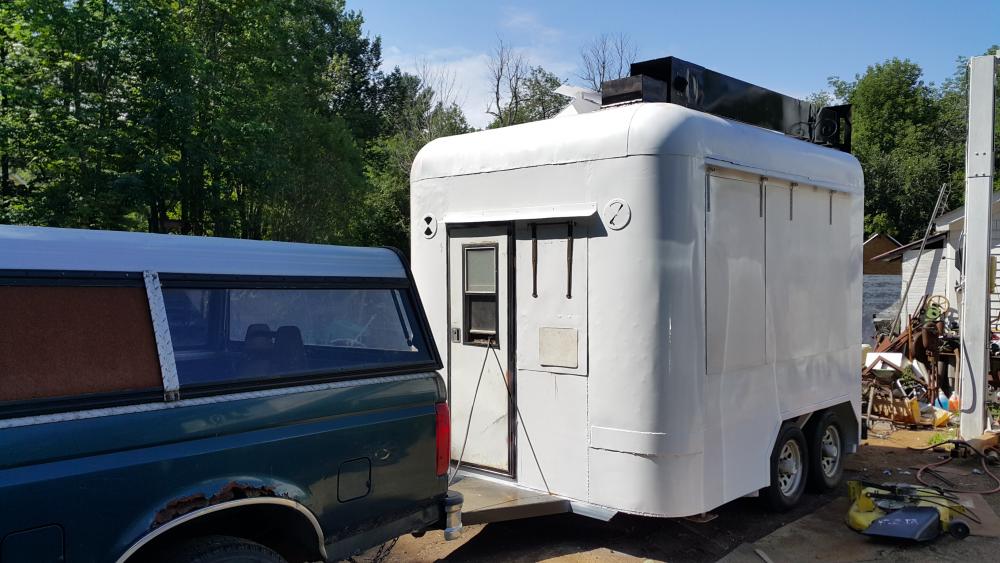
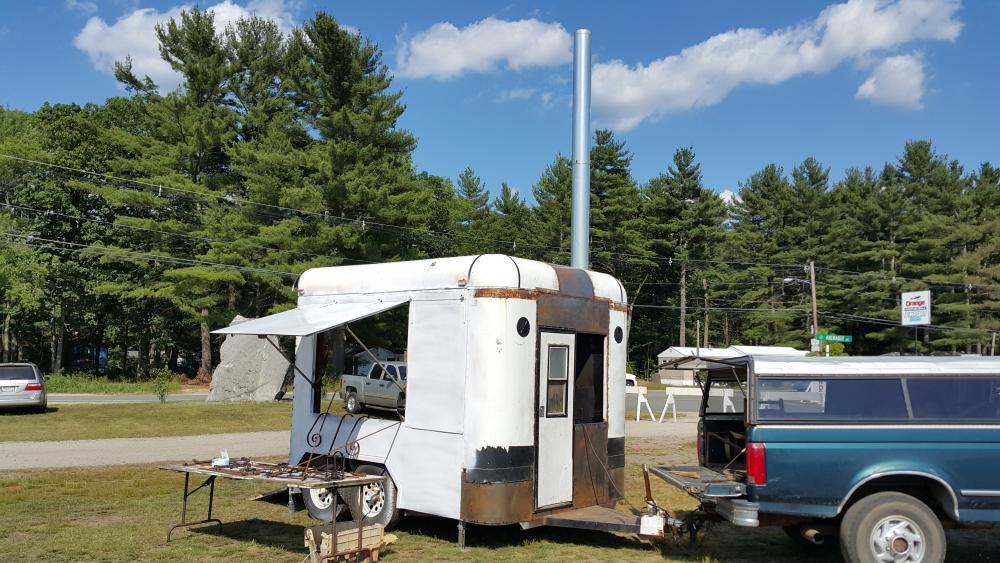
Been at this a long time.. This is my 4th trailer setup in 30 years.. I hope it will be the last I will build.. Took and old horse trailer and made it a full 8ft wide and 8ft tall inside and 10ft long inside. it is still a work in progress as I had to have it done for a demo day so was only able to get it done enough to use.. Will finish it this week or the next.. The anvil will be on a stand that rests solidly on the ground and will winch up for transport.. Currently using the stand from my other trailer which is light pipe bolted to the underframe.. STill to much bounce.. It has awnings on all 4 sides with 2 on each side, 1 in the front to let bar stock to pass through and the back will have 1 large one on the top. All these to control cross flowing winds, will have a roof much like a sugar shack with windows so they can be opened for ventilation.. Undecided if I should put clear glass or not as the sun shining in when it's 90F out is a big problem.. Yesterday was it's first voyage and it passed with flying colors.. Out in the middle of a field 85F and it was or felt like it was 10F cooler inside.. White color to reflect as much sun as possible but also to brighten the inside with reflected light.. Has jacks' at all four corners..

-
.png.e439b7285027f5fe12b4f94281fe9a95.png)
-
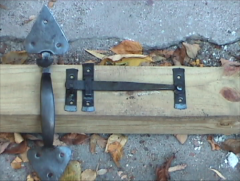 Hand forged Arrow pattern latch..
 -

© JLPServicesinc