Dustin Quade
-
Posts
271 -
Joined
-
Last visited
Content Type
Profiles
Forums
Articles
Gallery
Downloads
Events
Everything posted by Dustin Quade
-
Makes sense to me, thanks for the response!
-
What did you make your chisels out of if you dont mind my asking. I know the post is about the figurine but i do love any info i can get on making some tools for myself.
-
Wow those really are beautiful and i find the guards especially impressive. Did you forge the pommels as well?
-
Both of those knives are leagues above my first attempts i can tell you that. the Ferriers rasp knife is especially impressive looking. Keep up the great work.
-
I really like the look of these tools and while i have seen them before this one looks different. Did you draw out the spike into a thinner stock which you used to make the handle or did you just have an odd sized spike to start with?
-
This is a pretty cool idea! Could totally see this as something my mom would keep around the house somewhere as a decoration. I love the small details you got on the face as well that must be one tiny chisel you have.
-
Those blades are incredible! I have never seen ones quite like them where you can still clearly see the cable it came from. Very cool and the handles are amazing as well!
-
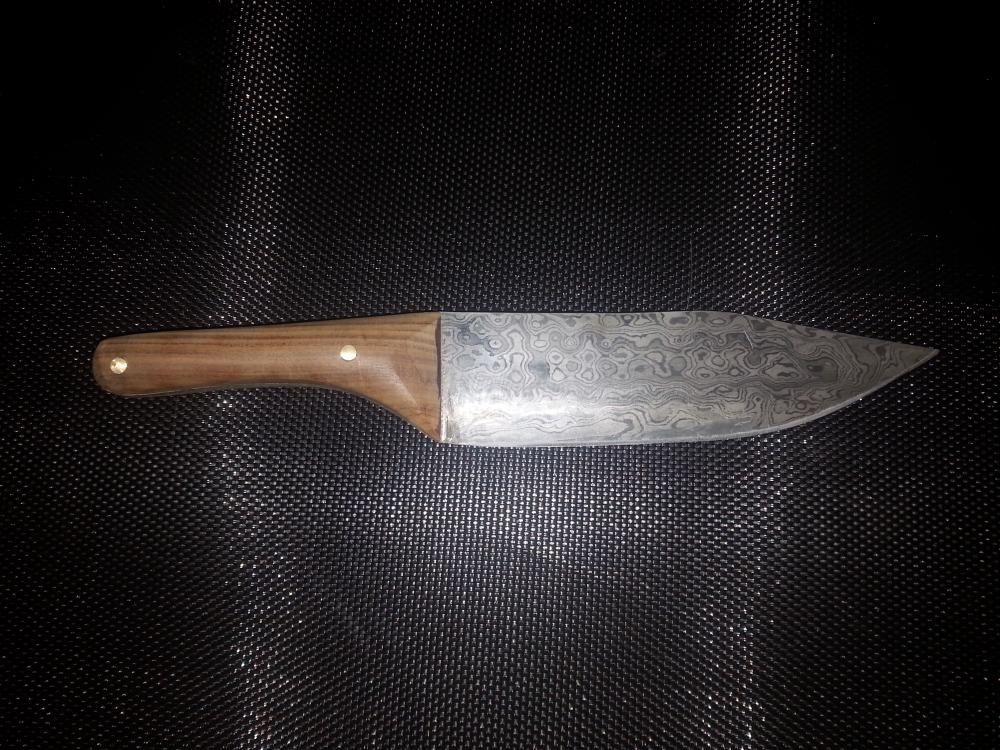
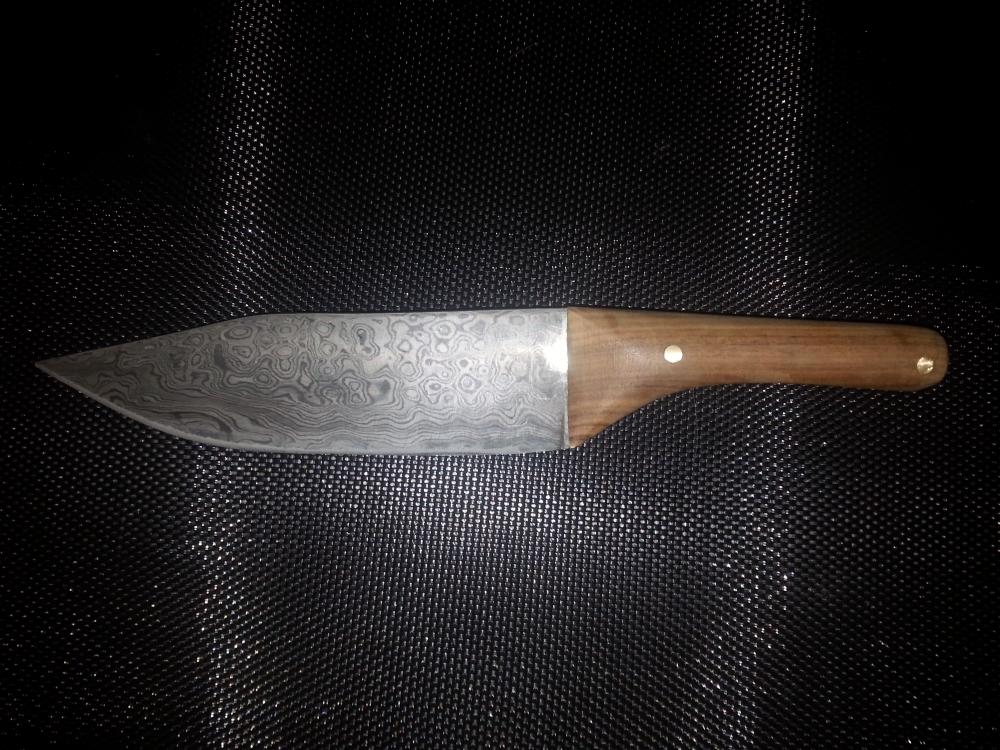
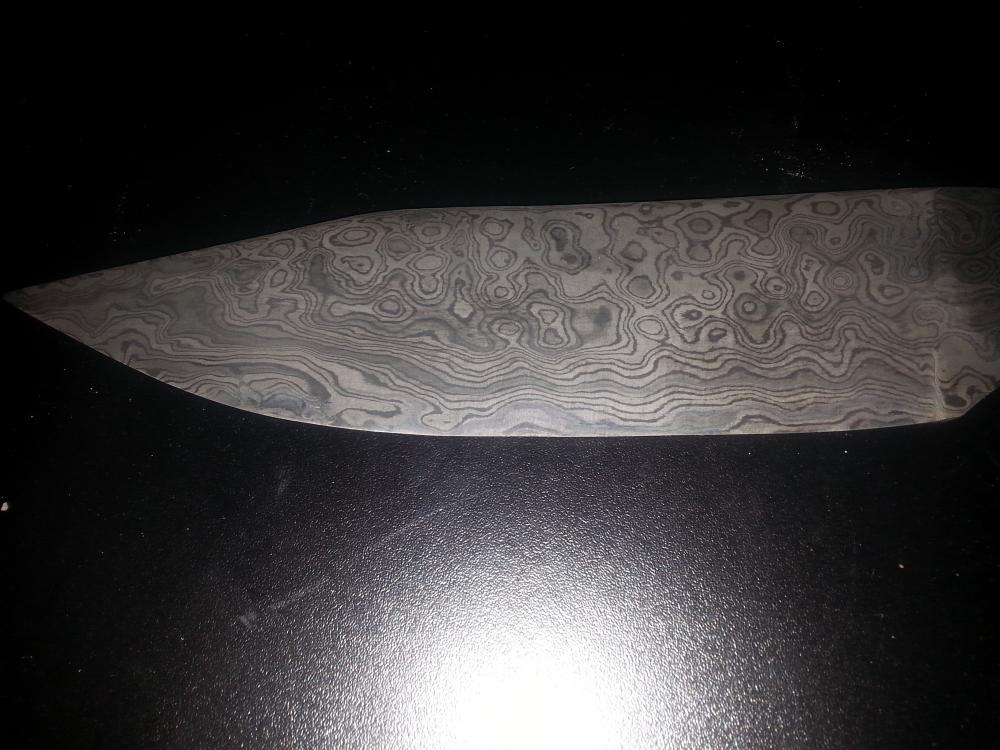
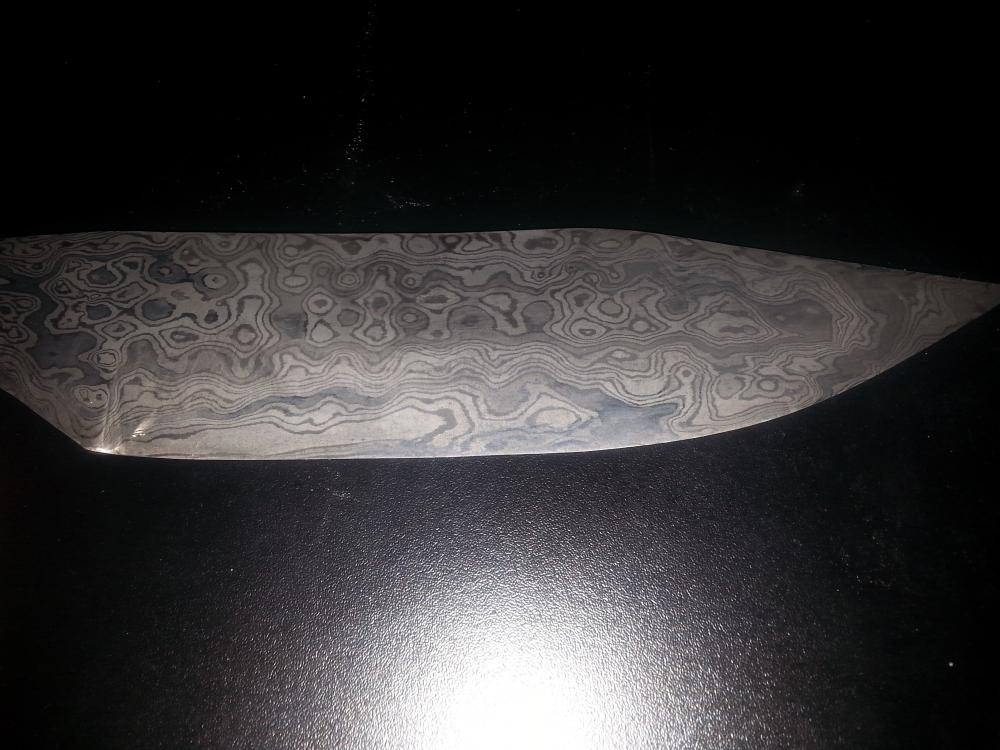
Finished up the knife. Santos rosewood handle, brass pins and sharpened.
-
Yea i agree about the liking the imperfections. I have always liked seeing that stuff isnt machine perfect although i respect the added time that takes for people to achieve. Nice job again and hand made rivets is an awesome choice. It looks amazing man you should be proud as heck.
-
It definately looks fantastic especially for your first project. I mean obviously some of the rivets are off center from one anonther but stuff like that really never bothered me to much. What is the thickness of steel you used for it? How much does it weigh? Is it armor quality steel or mild? Would love to know if you made that pattern yourself or if you based it off something you found?
-
pretty cool i especially like the idea of using temper colours for the wing pattern
-
Oh man i never even thought of that! They make perfect sense now.
-

my frist try at wall hooks and leaf veining
Dustin Quade replied to Goblin79's topic in Blacksmithing, General Discussion
A fair point to be sure, thats why i was asking if that shape was what he was actually intending or if it was basically just the shape he eneded up with. Even if he was going for a willow leaf as you have suggested the shape is still off and i would have suggested a much more narrow taper to the point of the leaf and a slight curve at that end of it. -
I really like your blade shape and il tell you something for sure, it looks a heck of alot better than my first completed knife. I actually also use gorilla glue but only because i have it. I hate the long set up time on it and having to monitor it the entire time to make sure and clean up any that oozes out as it sets. 2 part epoxy seems to be pretty standard. Also the handle just looks a little boxy towards the end which i dont like styalistically. I usually try to taper the end near the blade down a bit for a smoother transition. Great work over all though. I look forward to seeing more of your work in the future.
-
I think that is very impressive. I see alot of different techniques at work throughout the piece but the one that really caught my eye is the basket twist. I have never found a good source for how those are done. Was it 4 piece ot smaller stock welded into th larger main body or was it cut in somehow? Only thing im not a fan of is the feet. It has pointy feet but my house has hardwood floors so those would mark up the floor and then my landlord would kill me lol
-
Those dont seem like practice ones they seem like the real deal!
-
So would Fold Forge Welding be fine for a start?
Dustin Quade replied to jacbow2's topic in Blacksmithing, General Discussion
Super glad you posted the link for the free book downloads. I have some new lunch time reading material! -
my frist try at wall hooks and leaf veining
Dustin Quade replied to Goblin79's topic in Blacksmithing, General Discussion
No worries on the advice. Im sorry if it offended you about the knife thing. Its just nice to see people making other things especially as their first projects. I have done alot of knives myself recently because they sell pretty well but i got started making simple forged objects and they are still my favorite things to make. My first projects were simple J hooks from 1/4 inch round stock. Then an S hook, a J hook with a leaf end, tongs, hot punch, fire poker, dinner triangle and ringer and finally a rr spike knife, although to call what i made a knife would be crazy generous Its just really good to work on simpler projects first, gets people used to working the material, not afraid of the fire or the steel, used to tongs and hammer strokes. Keep up the good work though, hopefully you will post pics of you next leaf so we can see the progress! -
my frist try at wall hooks and leaf veining
Dustin Quade replied to Goblin79's topic in Blacksmithing, General Discussion
Did you intend for them to be so long? My main issue is that they dont look like real leaves. I reccomend that you cut off the tapered point of the spike so you have the square end to work with then you go back about 3/4 of an inch and using the edge of the anvil you make a step in the material so you have about a 3/4 x 3/4 ball you work that into a point then you flatten it and that becomes your leaf. You stretch it out using a small hammers cross pein or a small ball pein to the desired size before adding in the veigns. the veigns should all be connected into straight lines like on a real leaf. Form there you can draw out the stem of the leaf from the material behind the step you made. wont take much maybe 2 inches of that thickness of material to give you a good length of thin stem which you can bend around to a nice design. All in all a good try for your first thing and nice to see your first thing wasnt a knife. I hope to see more from you in the future. -
First post anvil pics 400 pounds
Dustin Quade replied to GPaulSJR's topic in Anvils, Swage Blocks, and Mandrels
If you look at the face does it look at all like there was a pritchel hole and it maybe just has been filled in. I have seen an anvil where somone jammed a tool into the pritchel so bad they had to cut it off and when they ground it smooth you could hardly tell there was a pritchel at all. Maybe check the underside? -
Another useful tip i will have to try. I have just been using WD40
-
I really like the blade but i absolutely love the guard you have done. Awesome job!
-
Thanks alot. I was actually really upset with the etch at first. When i first took it out of the vinegar and put it into the baking soda water it had this black film all over it but once i used a wet cloth to clean it up and it looked great. Wow i really have never heard of that trick at all. I will be sure to give it a try next time. Thanks alot for the tip. As for the ricaso is it that it need to be deeper (like in relation from blade edge to handle) or wider (in relation from handle to the start of the blades cutting edge)
-
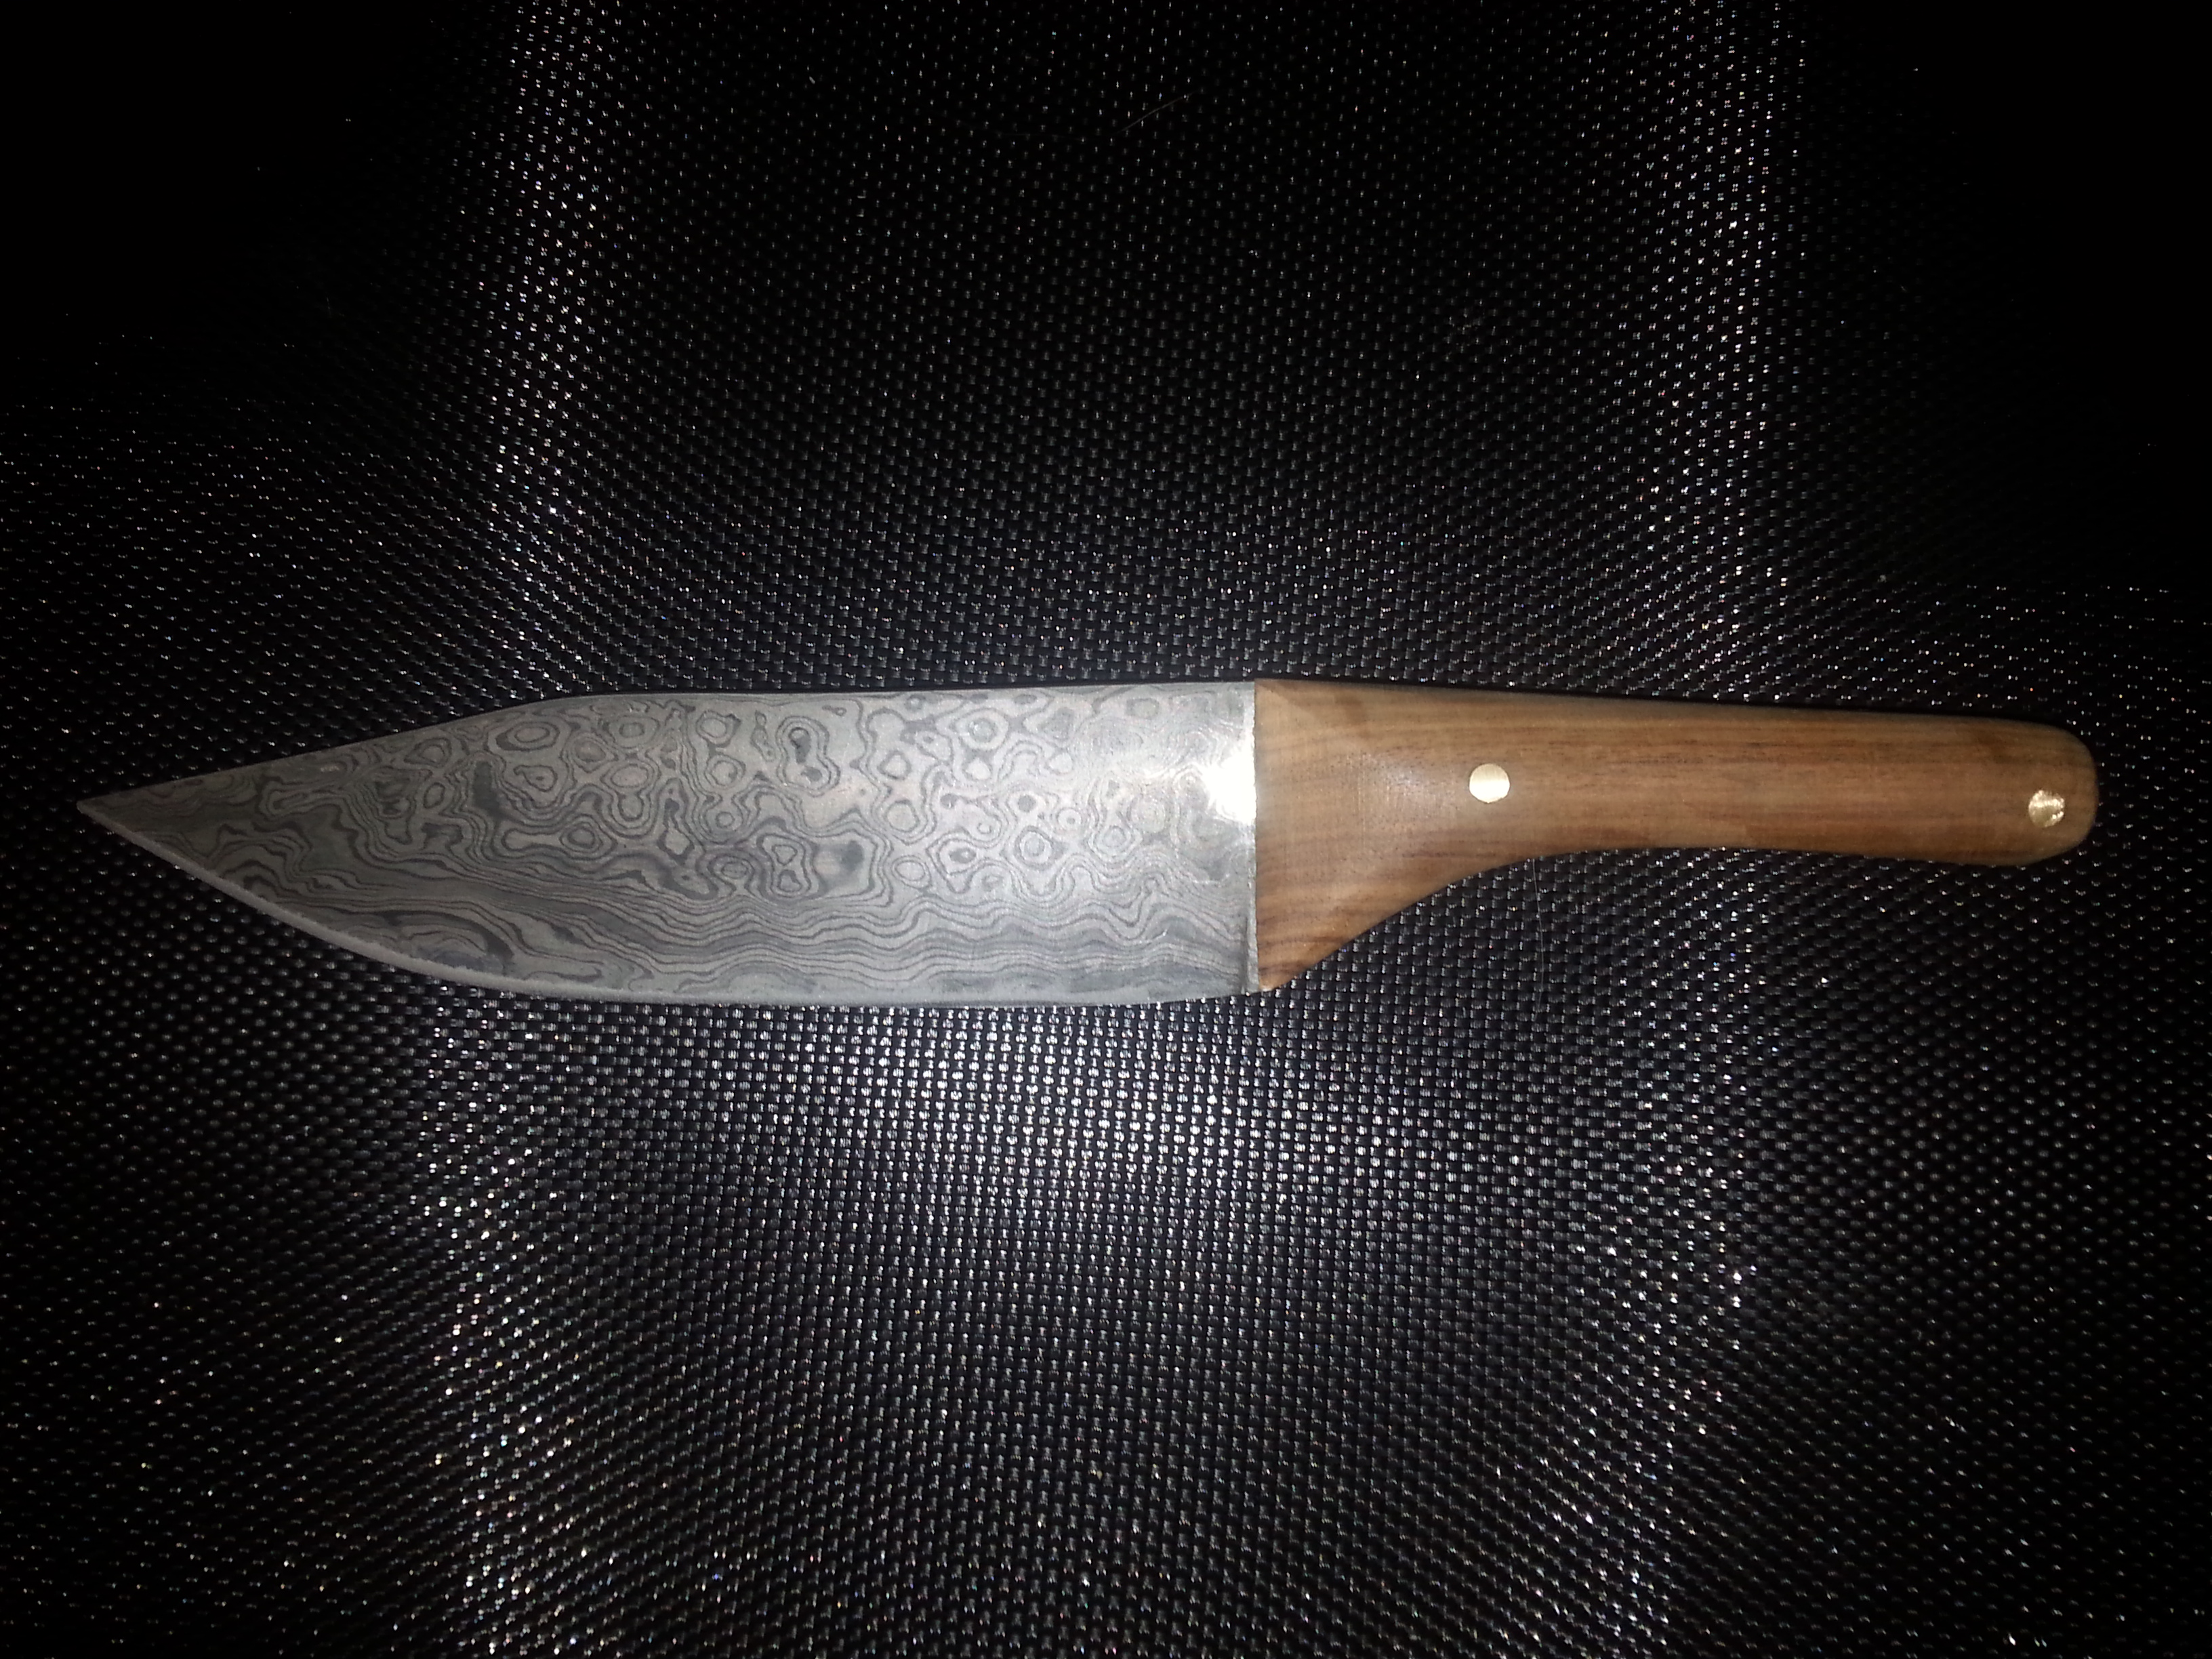
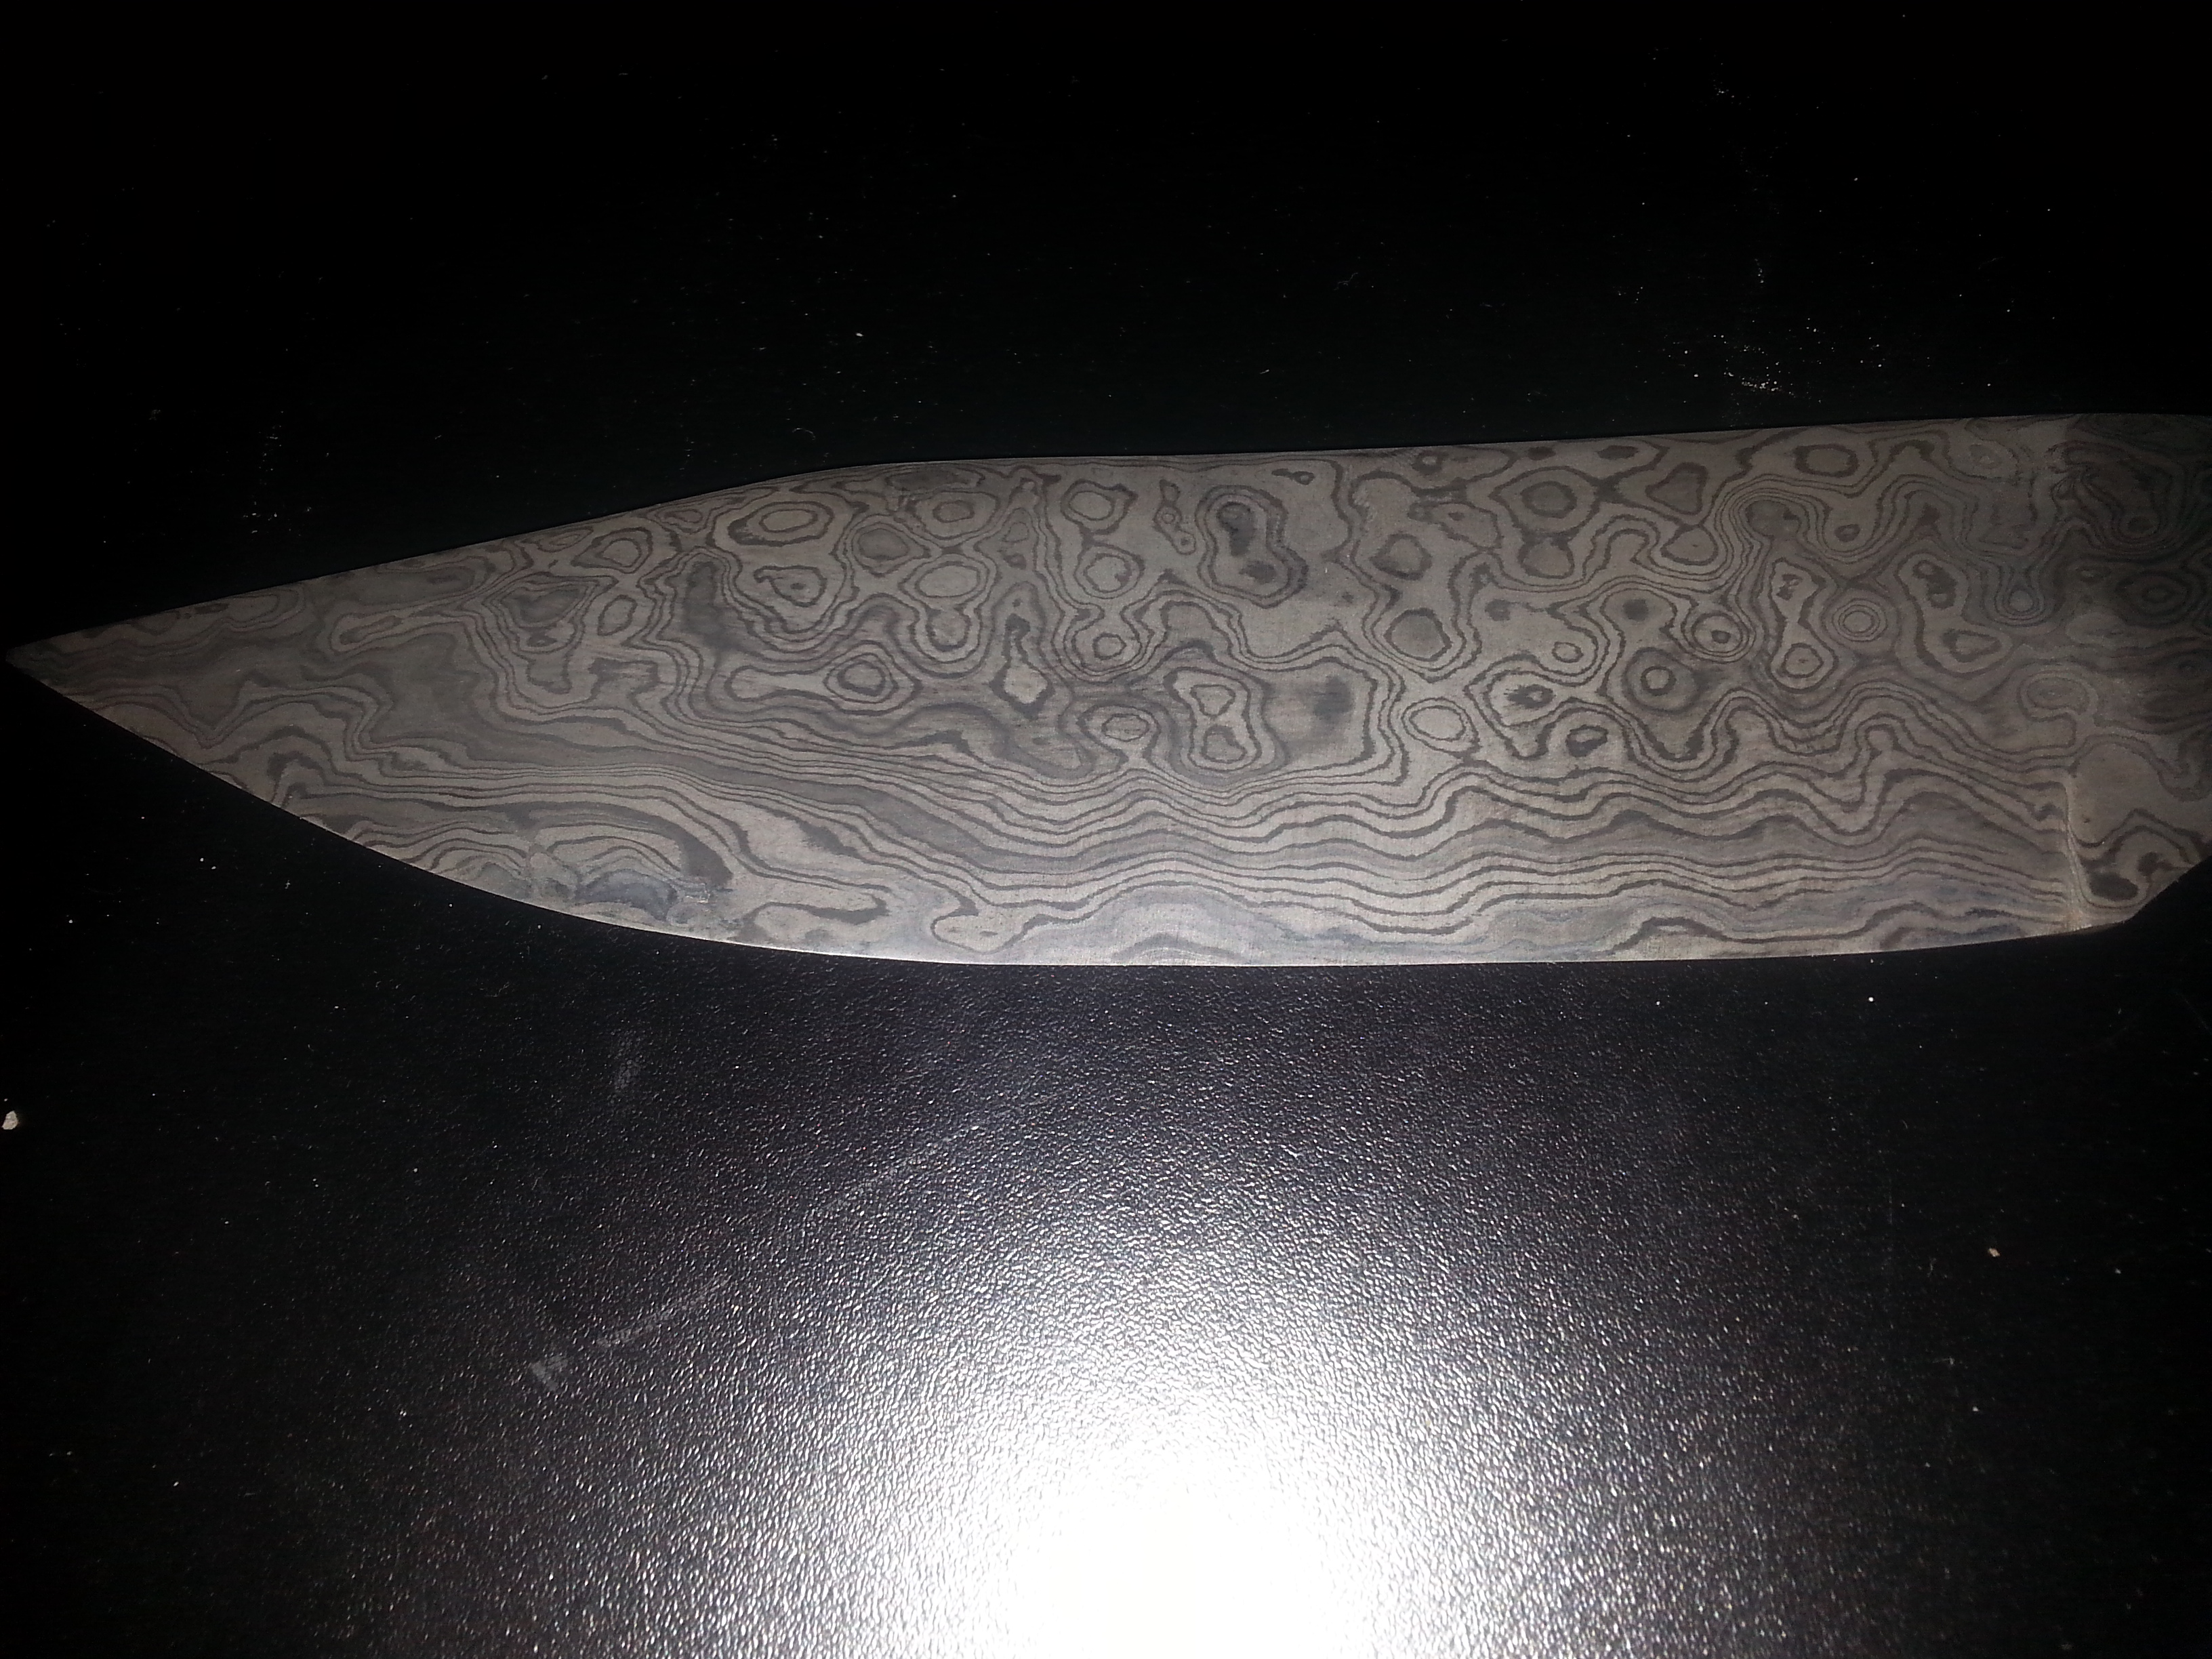
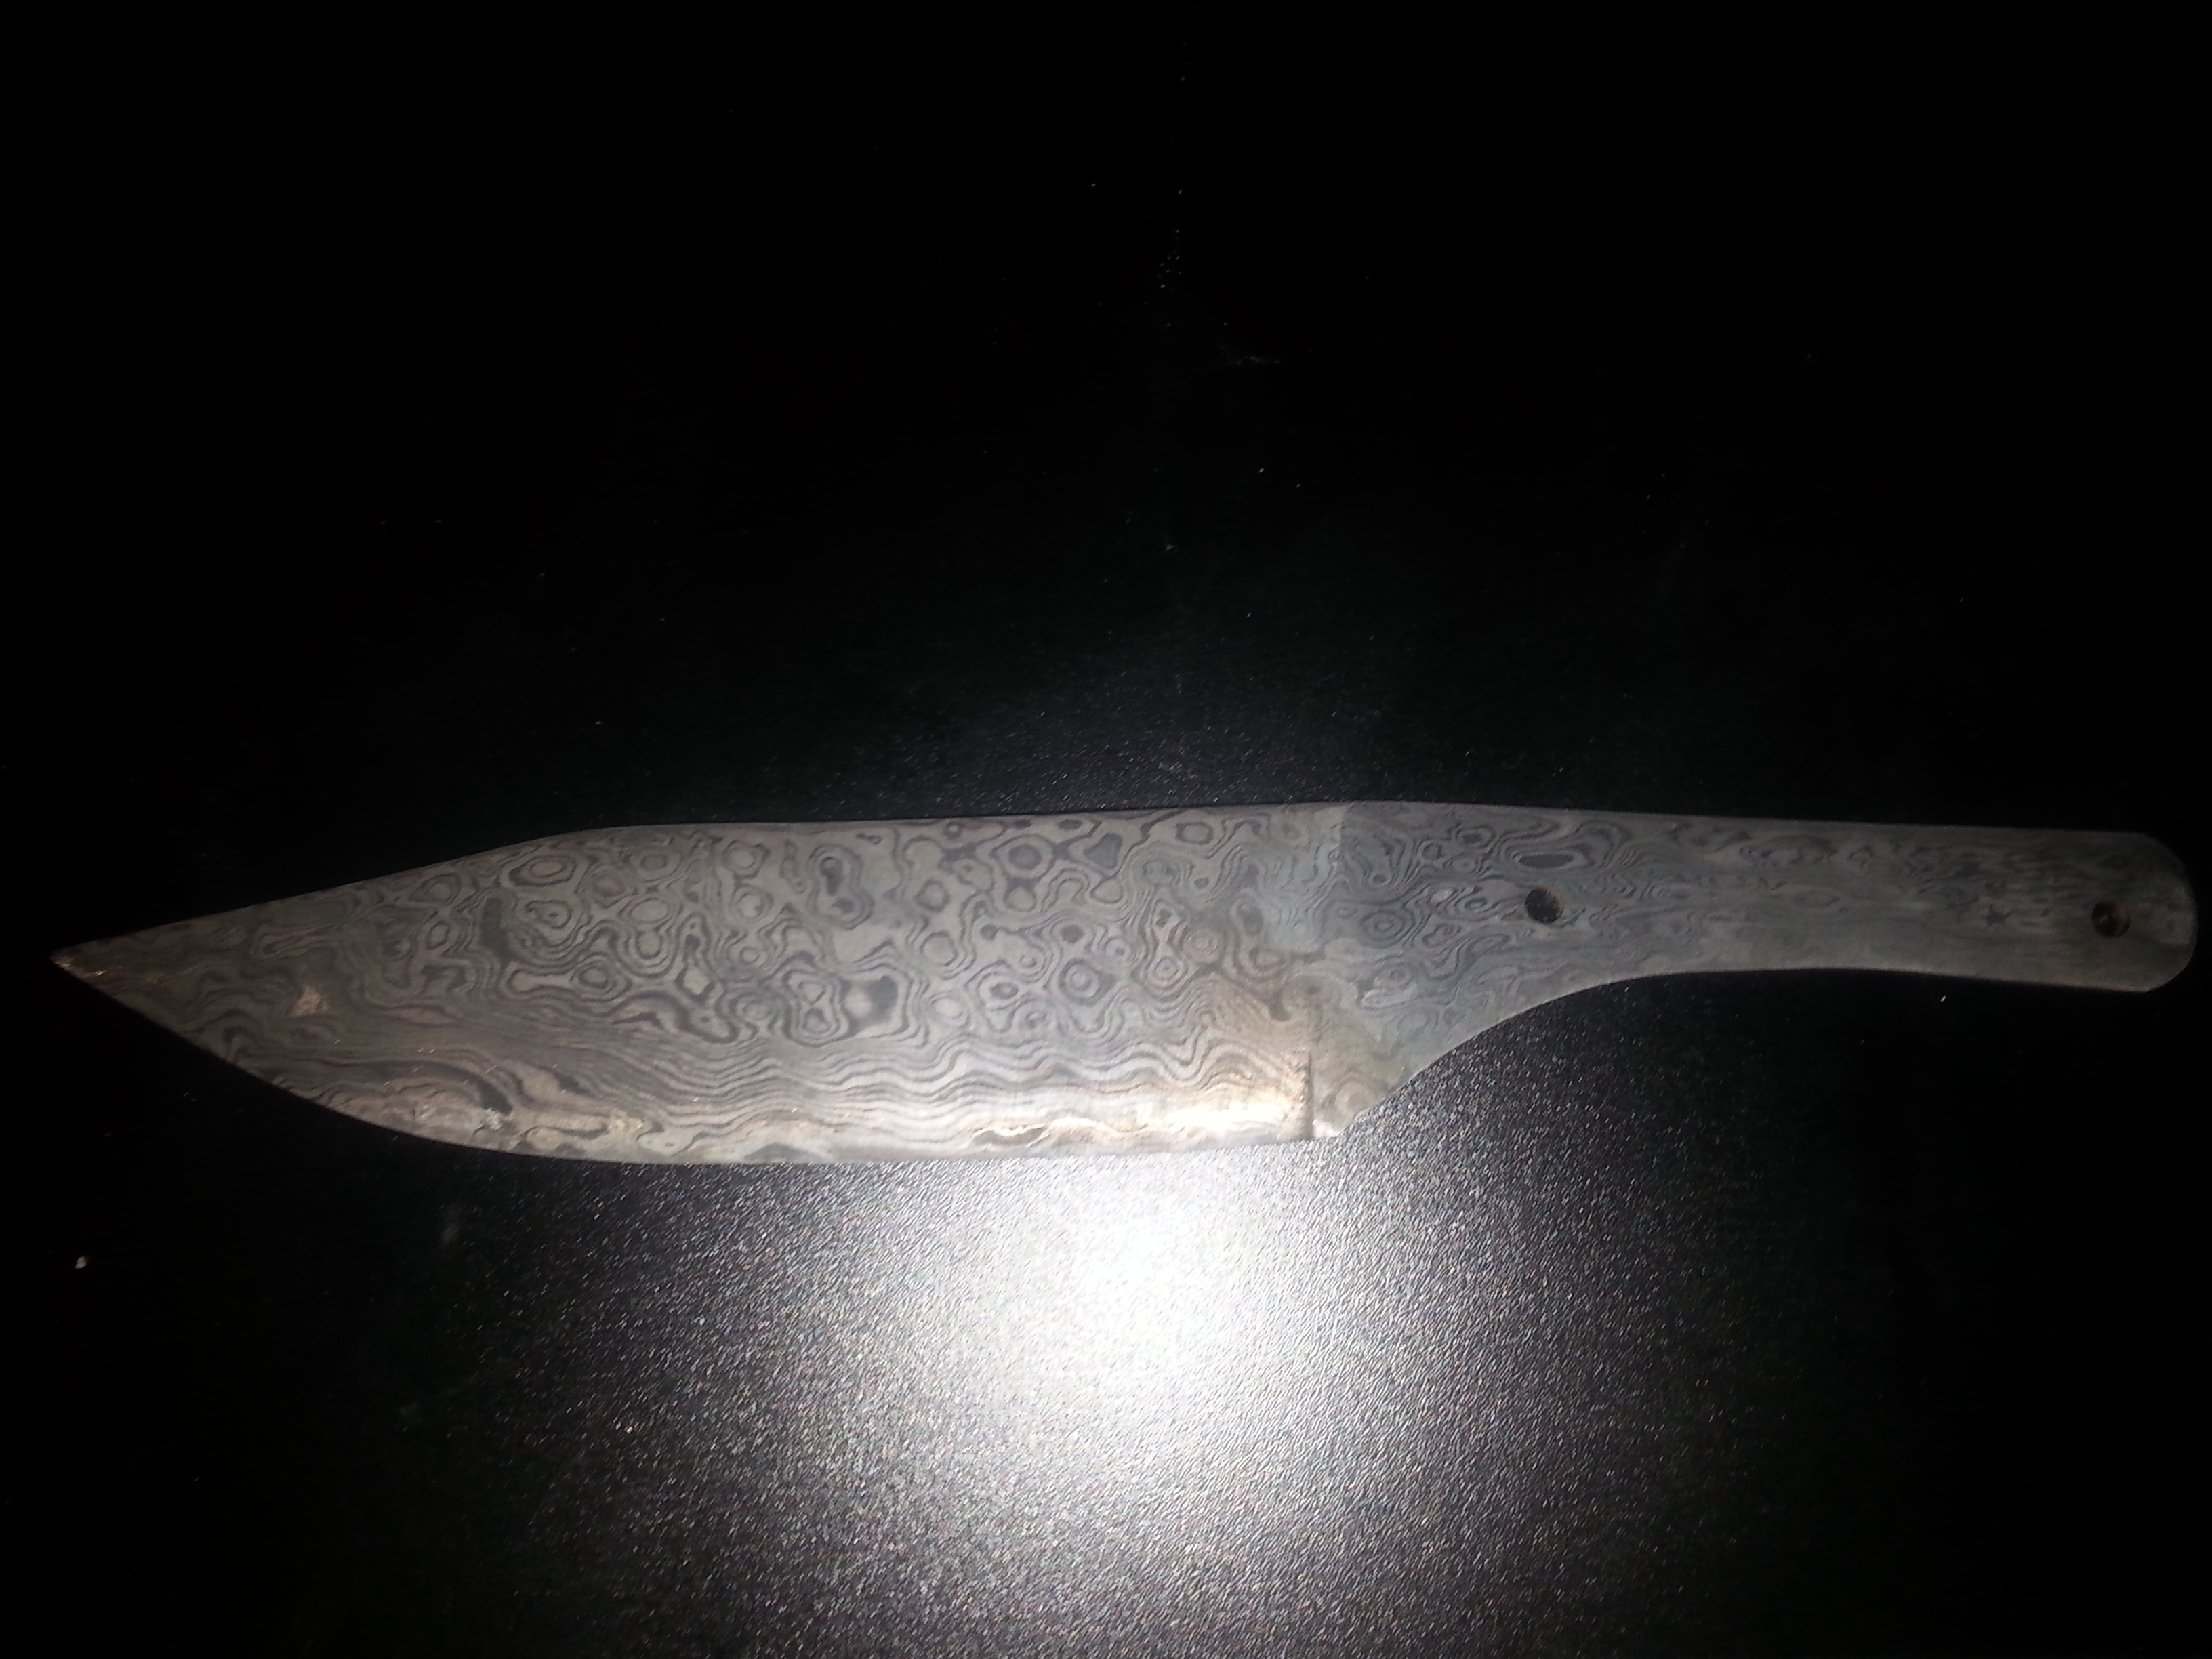
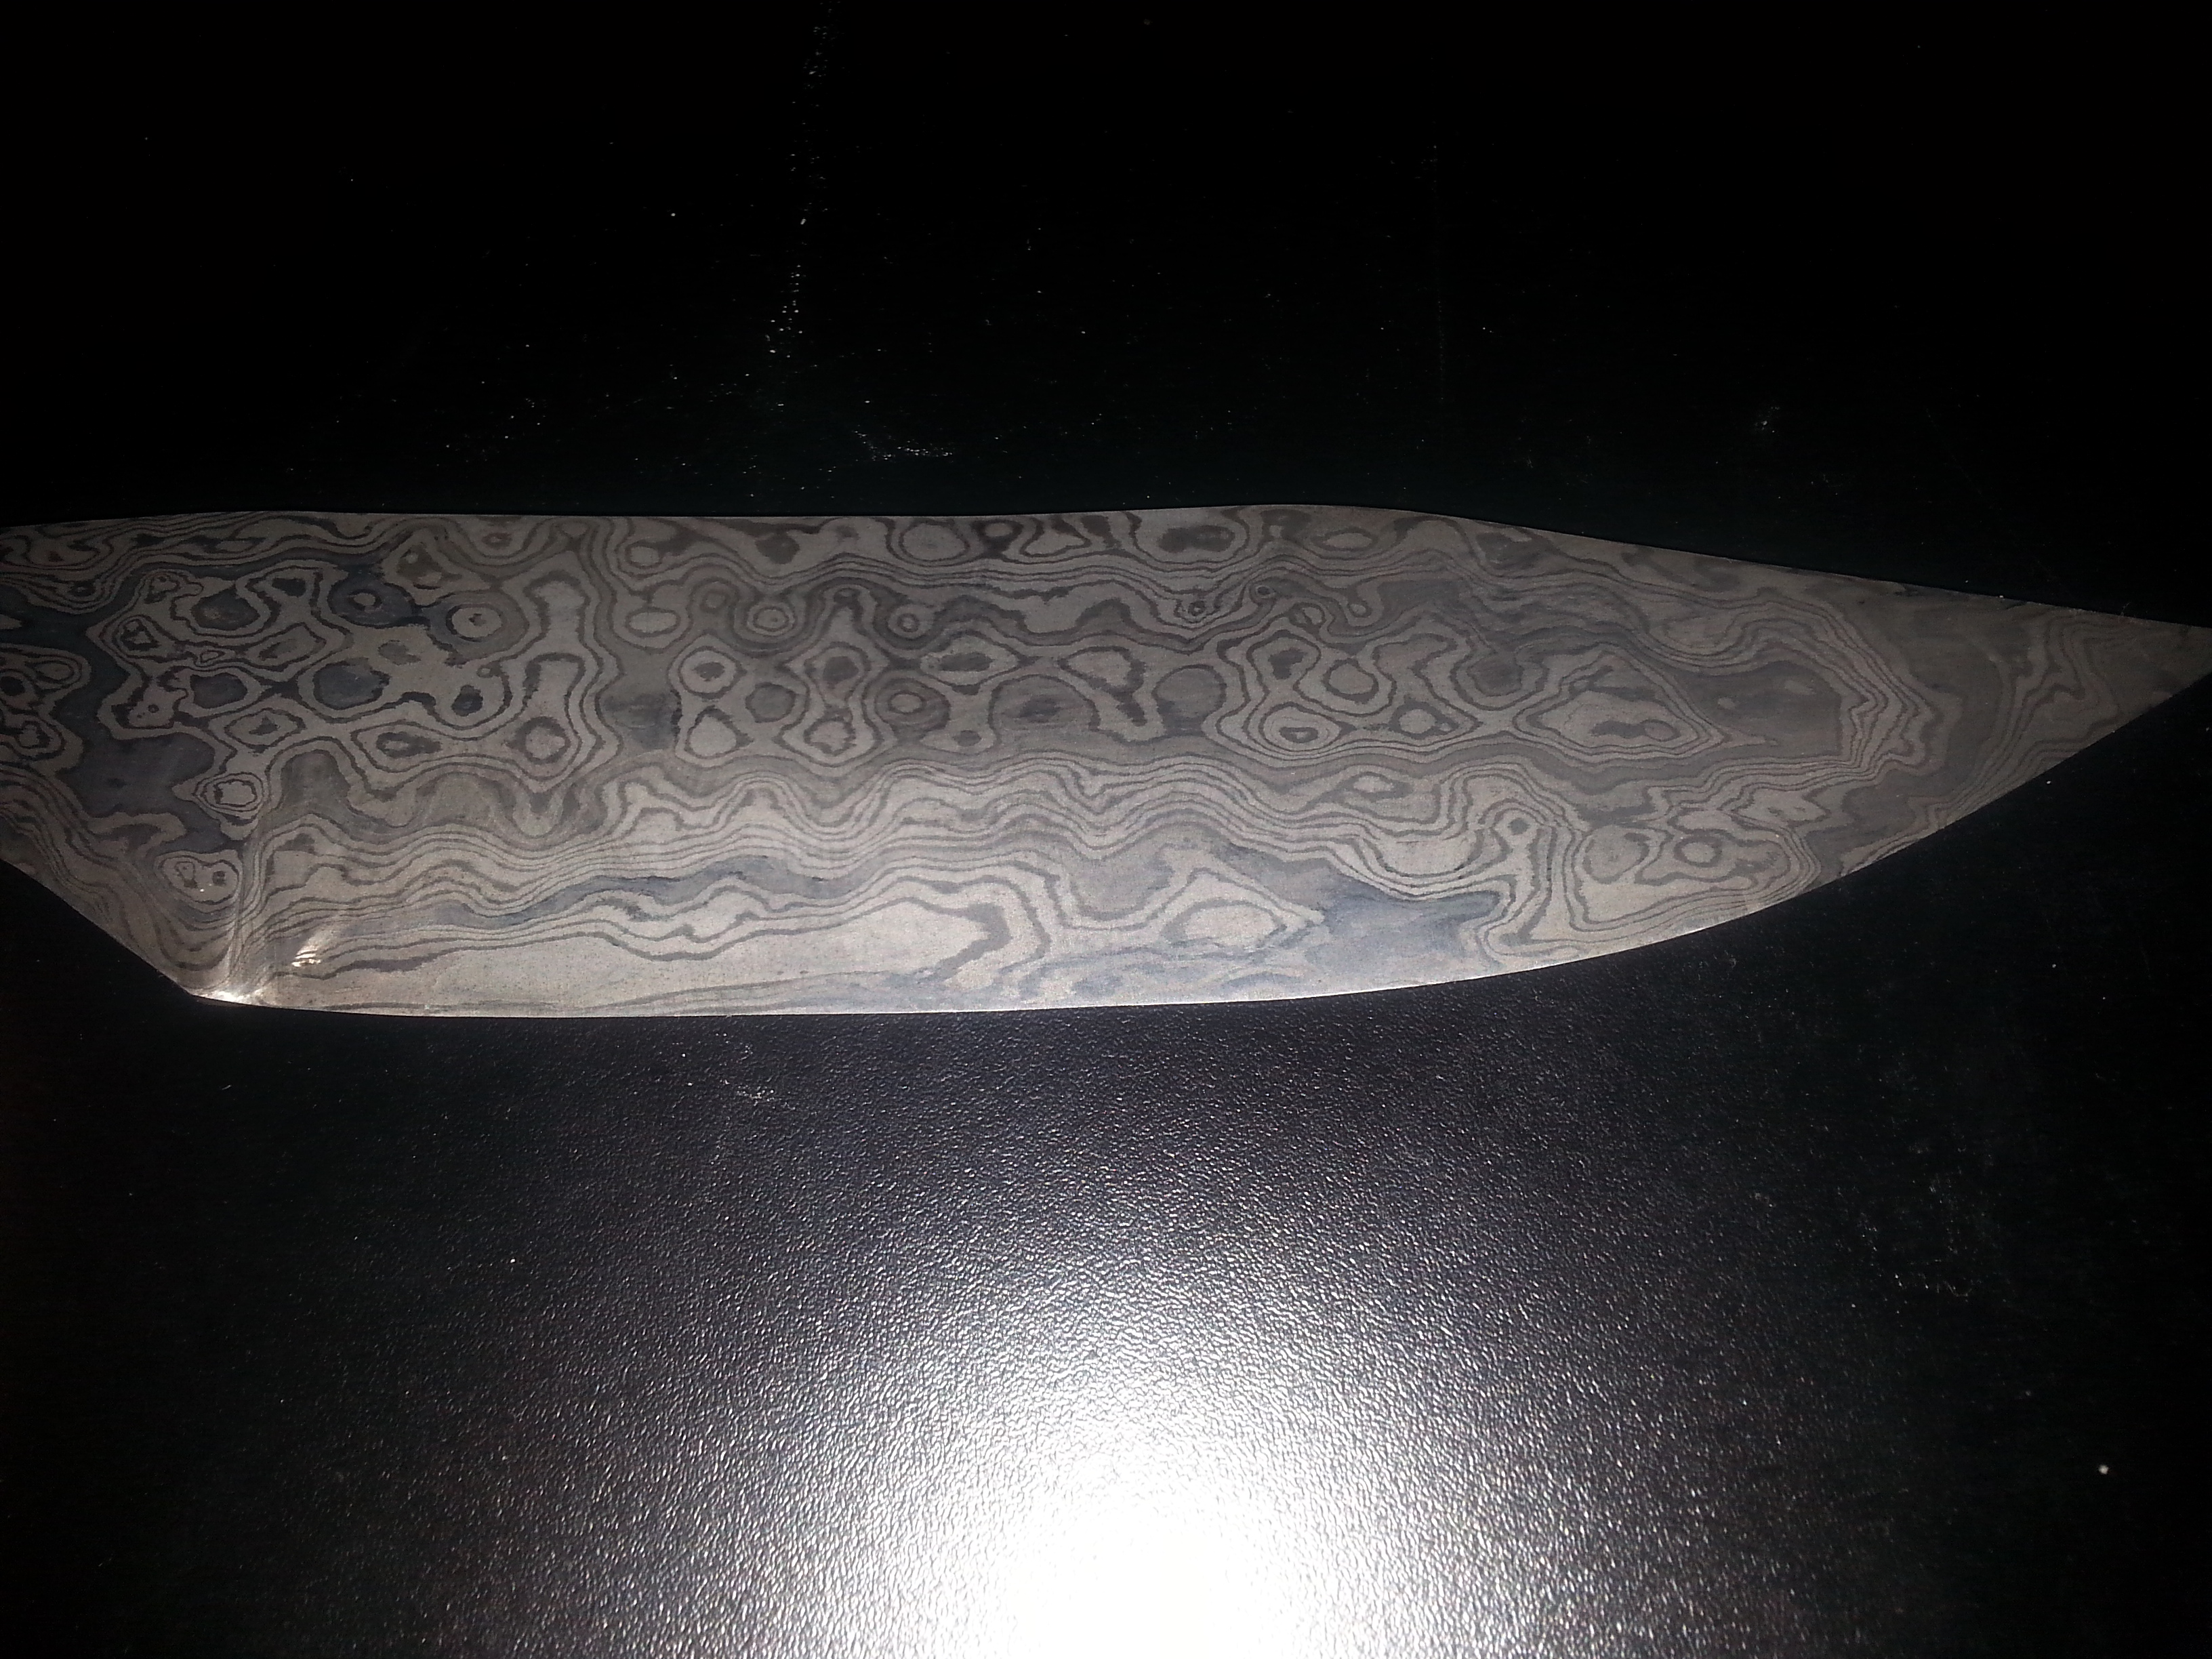
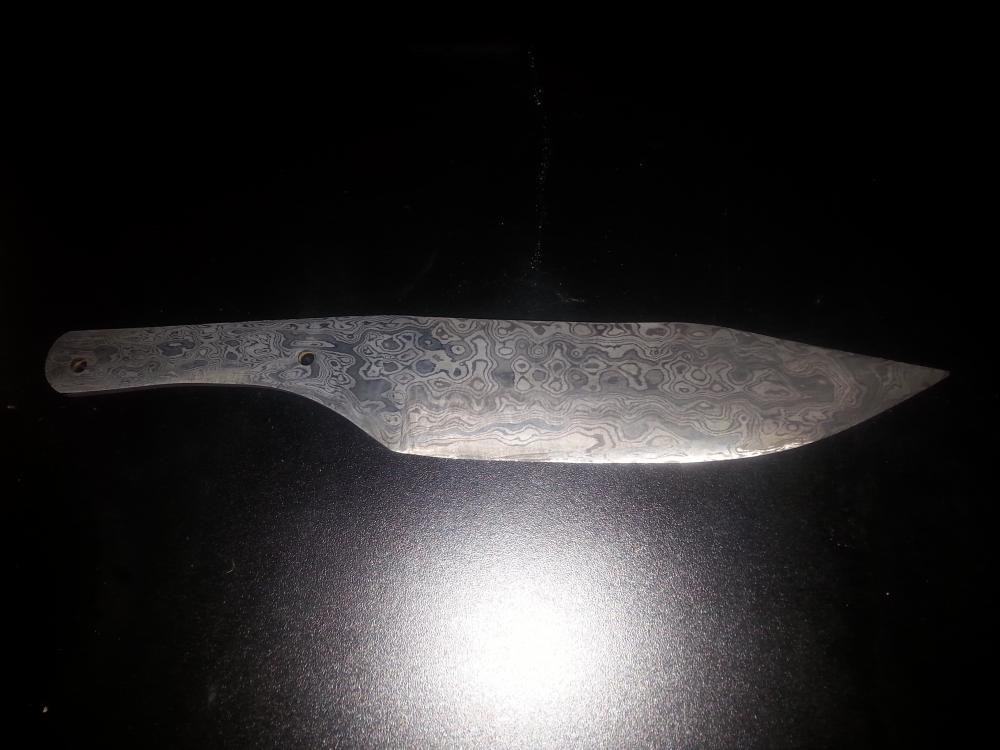
This is my newest knife. I forged it out on one of the days here that wasn’t 35 degrees. I listened to the advice here on my last knife. I took this one through the grits, 60 120 220 400. This one is raindrop pattern 1080 and 15n20. I etched in vinegar again for 3 hours. I was also super happy with the pin holes this time. The last knife I did I had to hot punch the holes in because my drill couldn’t make a dent in the steel. So I invested in a high roc tungsten carbide bit and it went through the handle like it was nothing. Still need to put an edge on it and the handle. I will post more pics when that step is done. The only thing I'm not happy with is the point. I was going for another chef’s knife with this one but the more I worked on it the more I realised it was looking more like a camp knife or hunting knife. So yea not too happy about that.

-
 Wow that is super impressive. I would love to learn to make one of those. Off to youtube to see if somone has posted a video about it