Dustin Quade
-
Posts
271 -
Joined
-
Last visited
Content Type
Profiles
Forums
Articles
Gallery
Downloads
Events
Everything posted by Dustin Quade
-
 My bad you are indeed correct.
 -
Oh yea? Fair enough I have always called this kind of knife a rat tail on account of it looking kinda like a rats tail. I still think it’s still a good option for him given the amount of stock remaining for him to work with. I'll just make sure that when I post the pics of mine I'll use the right name
-
You could do a rat tail handle on that. It looks like you have enough length. You basically draw out that remaining material to a point. Bend the end of it towards the spine of the knife using the nose of the anvil, which make the figner guard and you then bend it towards the blade edge at about the half way mark using the nose again, this gives a small bulge which is nice to hold in the hand. Here is an image of one online. I did not make this knife but i actually have one in my living room right now waiting for heat treat lol. Description might not be the best but you can probably get an idea from the picture.

-
Honestly the value is crazy right now depending on where you are located. I went to an auction last year where a brake drum forge sold for 500 bucks and a broken anvil that weighed 85lbs went for 600 bucks. Every hammer sold for 100 bucks plus. I mean if your going by those numbers this is probably like a 5 thousand dollar sale easy. No idea how much the screw press is worth as i have never actually seen one for sale. I mean the nice thing would be that you would have basically a full shop ready to go. The other thing to considder is buying the lot then just taking what you really need and sell the rest to recoup the costs. Alot of those hammers have somewhat specific uses that may not be something you want to get into so you could sell them to somone who is. Good luck with the purchase though. It would be great if you get a decent deal on it. I am curious to know what it all goes for in the end.
-
That knife looks very cool. It also looks super hefty. You could certainly batton that one no problem. What did you use for a handle material?
-
That looks pretty great. Turned out alot better than my first attempt at such a thing. What did you do for heat treat on it?
-
Wow that is some really incredible stuff right there! And the fact that your mainly self taught makes them even more impressive.
-
Do you what what materials were actually used to make the damascus? That dark gray to perfect silver is beautiful contrast.
-
Damascus steel chefs knife wip (problem with etching)
Dustin Quade replied to Dustin Quade's topic in Knife Making
Thanks, im waiting on some 150 grit and 220 grit belts in the mail when they come il re grid the knife a bit and try it again. Its also a fair point about the etch time. Patience is still something im trying to learn a bit. I get so excited that i just want to see it finished. Hopefully this next time will be better. Yea after the aluminum foil incident my brain actually woke up and informed me that maybe pouring it down my pipes would be bad so i poured it into the container it came in and il be disposing it on my next run to the dump. -
Damascus steel chefs knife wip (problem with etching)
Dustin Quade replied to Dustin Quade's topic in Knife Making
Yea it’s definitely aluminum I did eventually neutralize the whole thing after I looked up some more information on it. I defiantly got lucky it has made me very leery of using such a thing again before I really look up information about it. I will try your suggestion of cutting the etchant with 3 parts water and see what kind of etch I can get out of it. First though I guess I'll need to find some large glass jars. If I don’t heat the vinegar how long do I need to leave a blade in it to etch properly? Like overnight? -
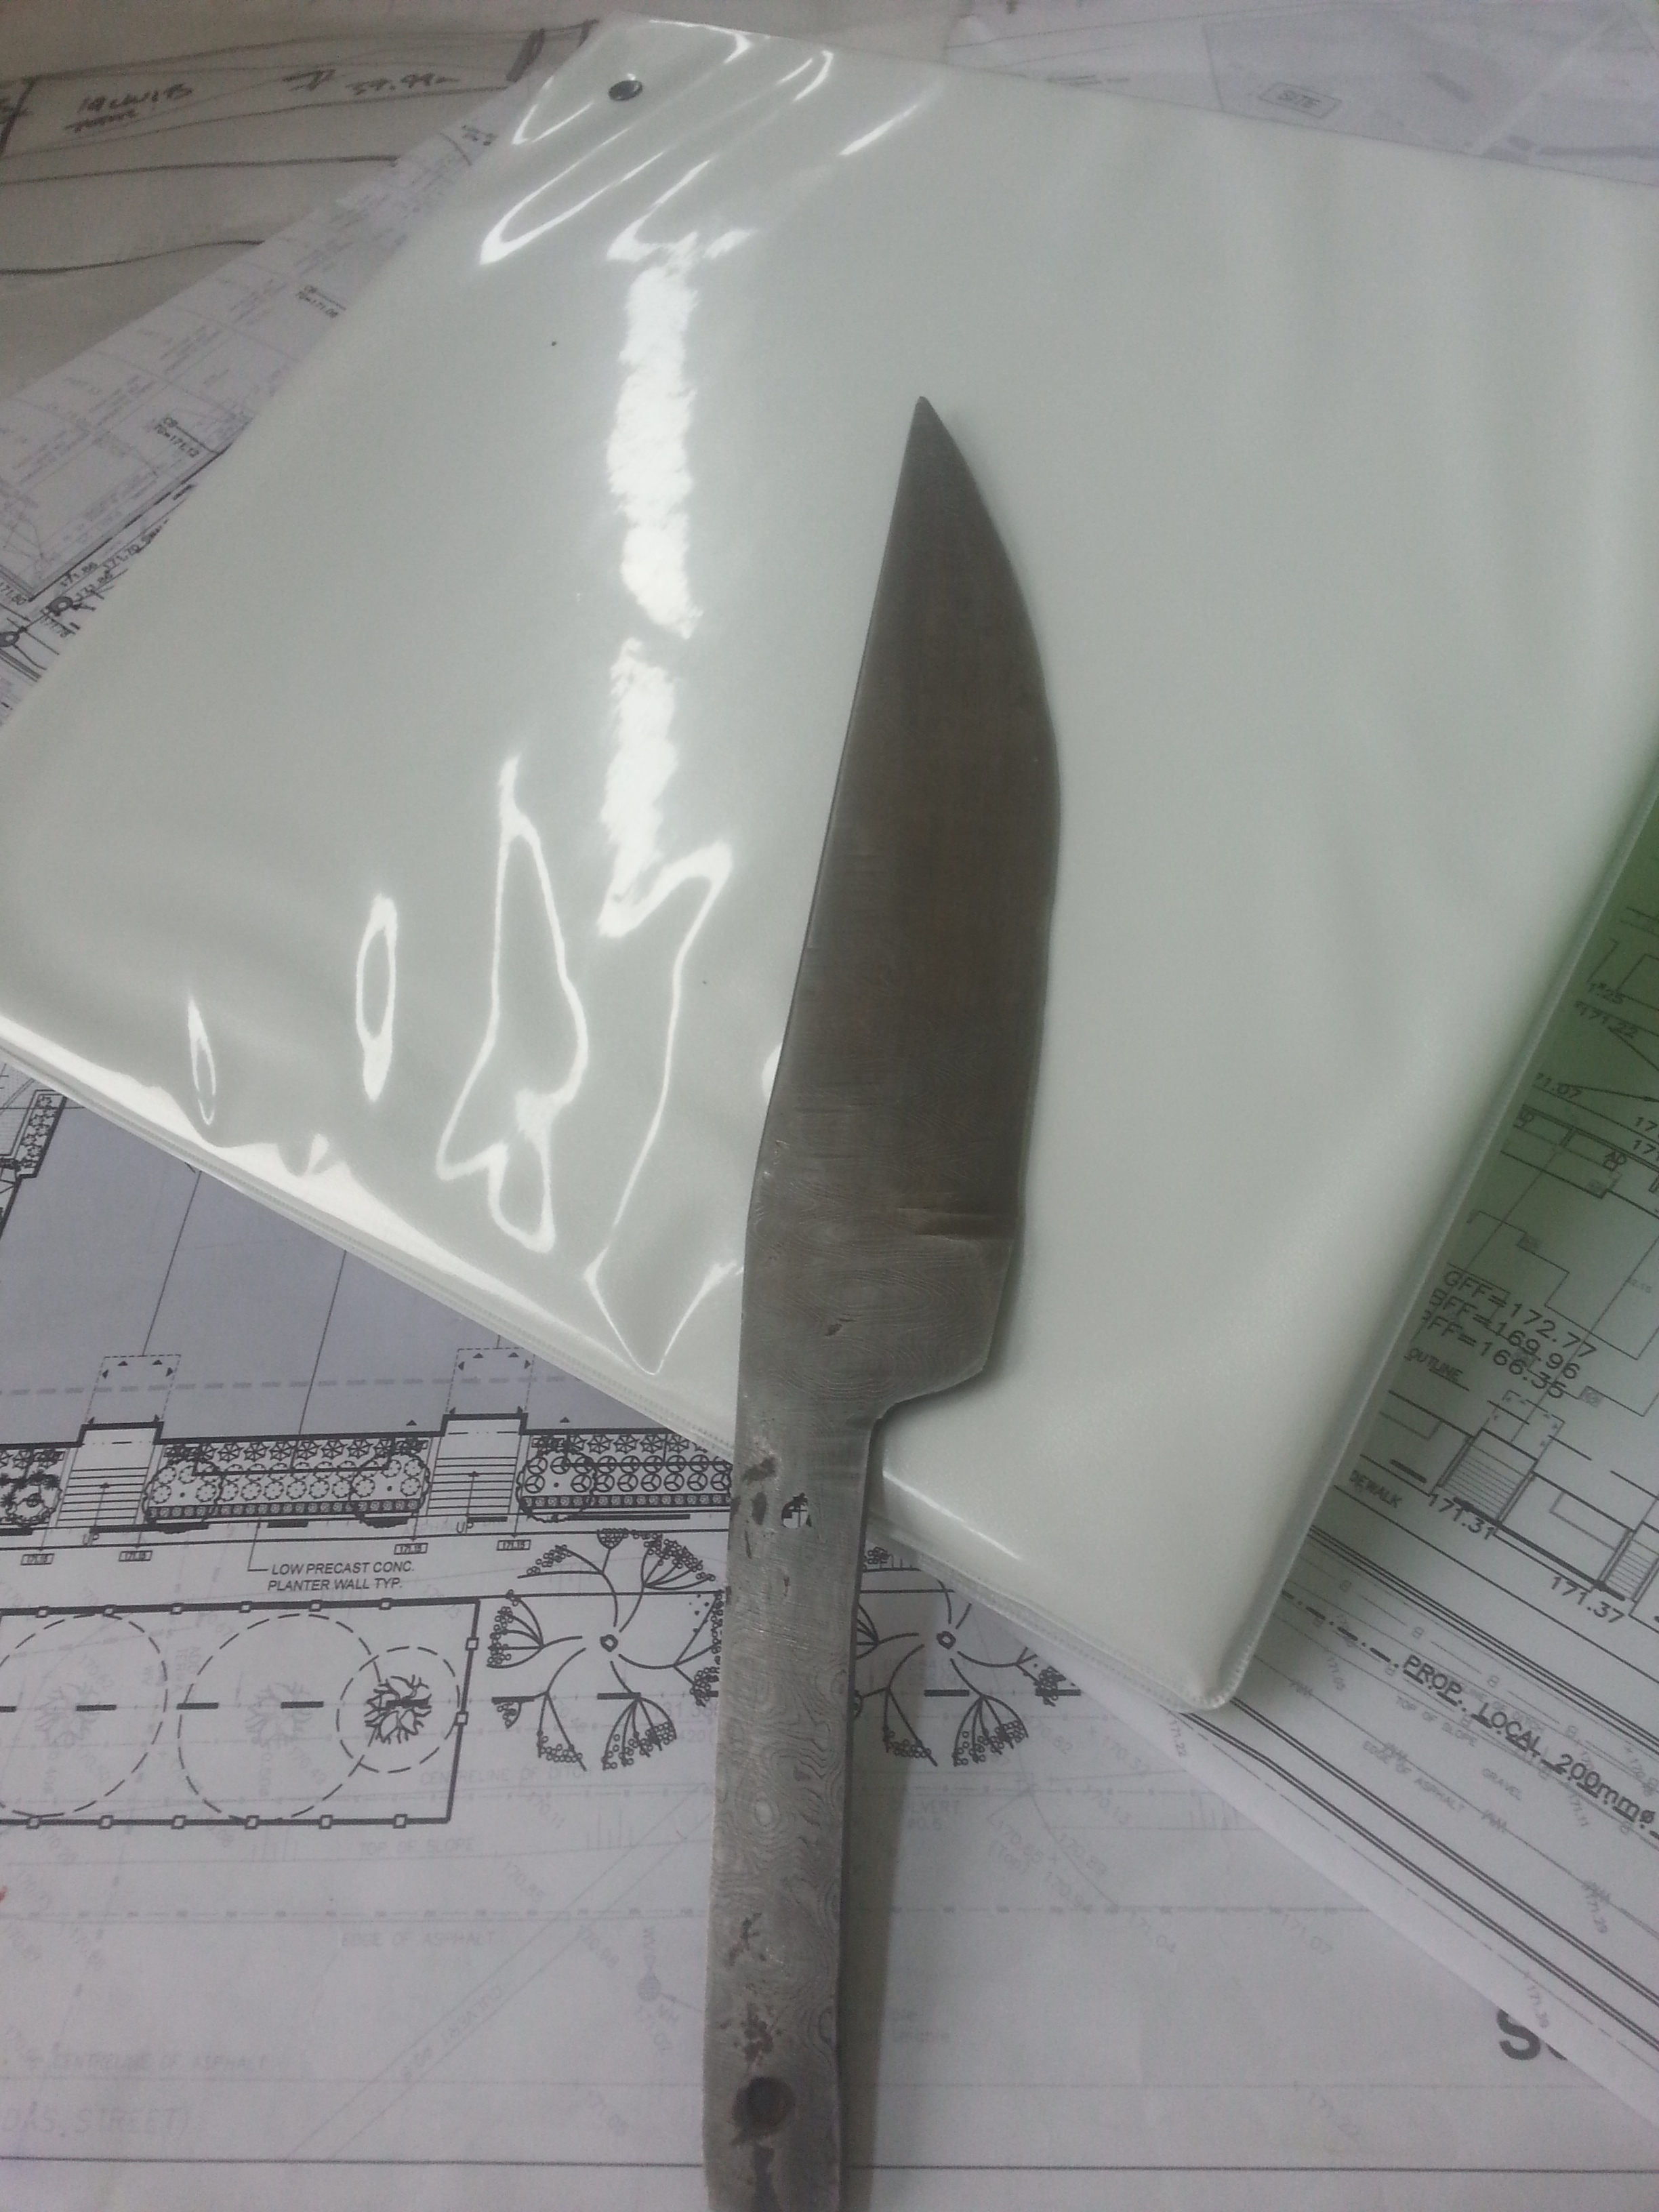
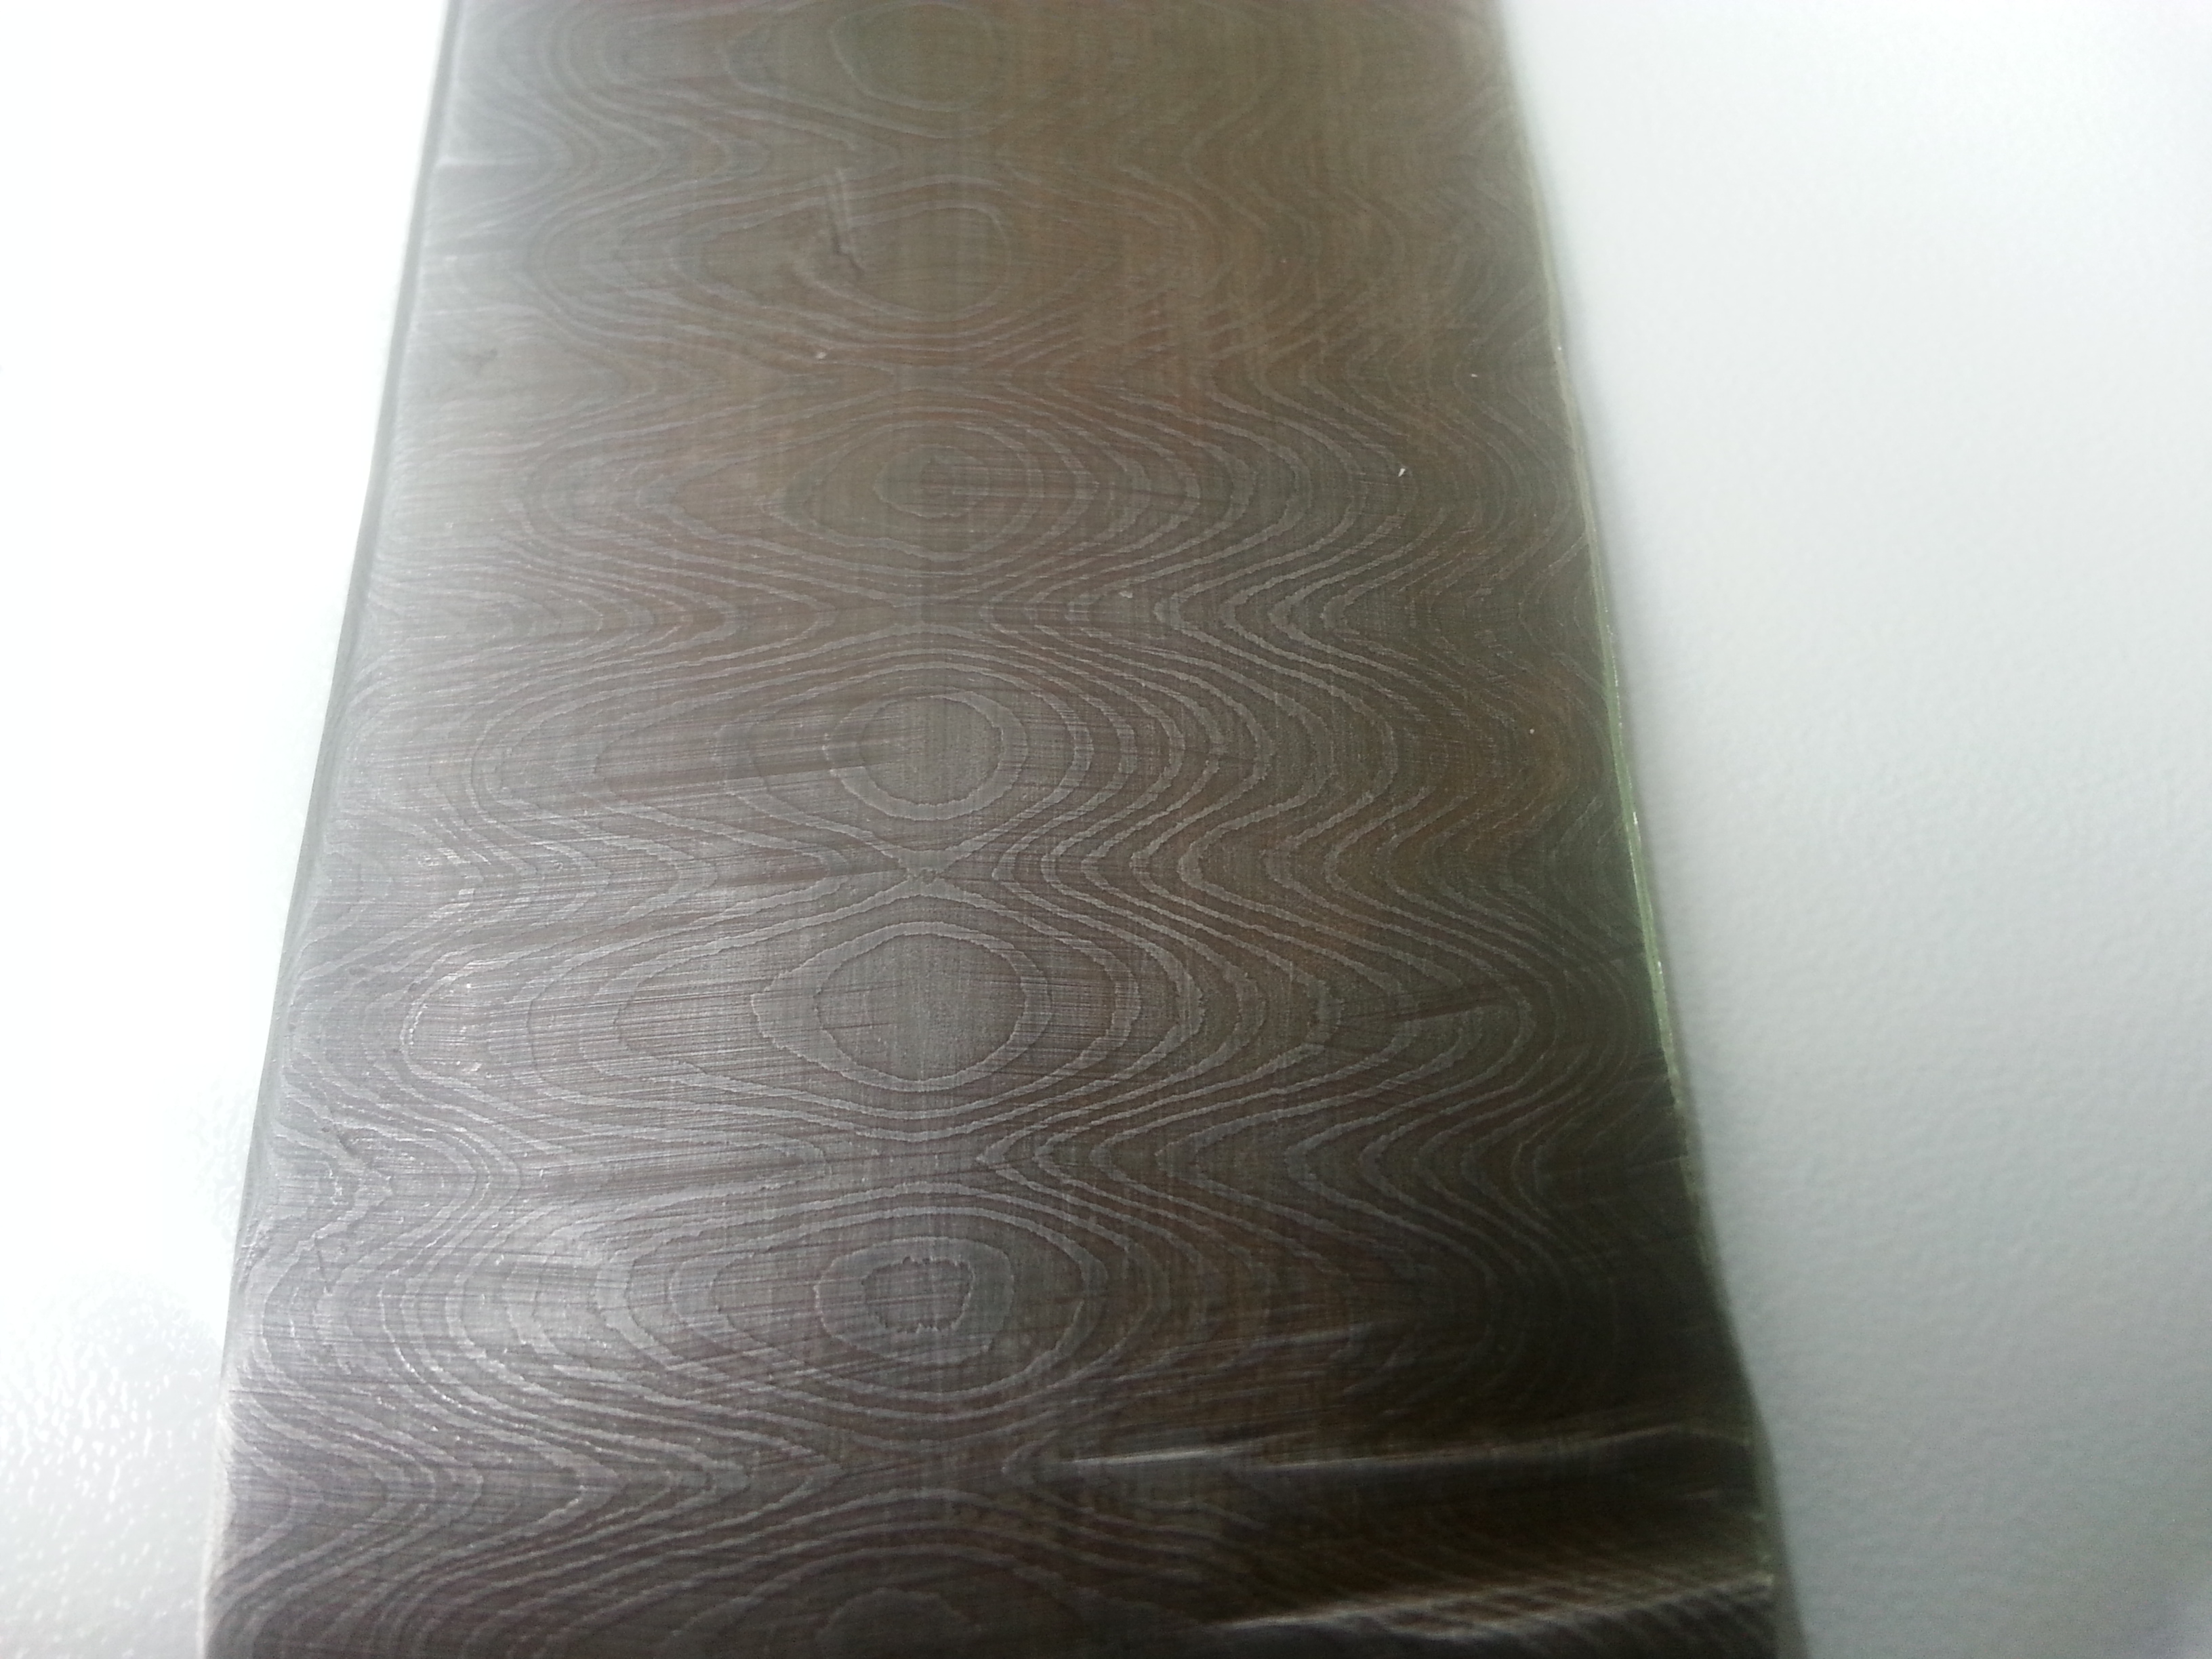
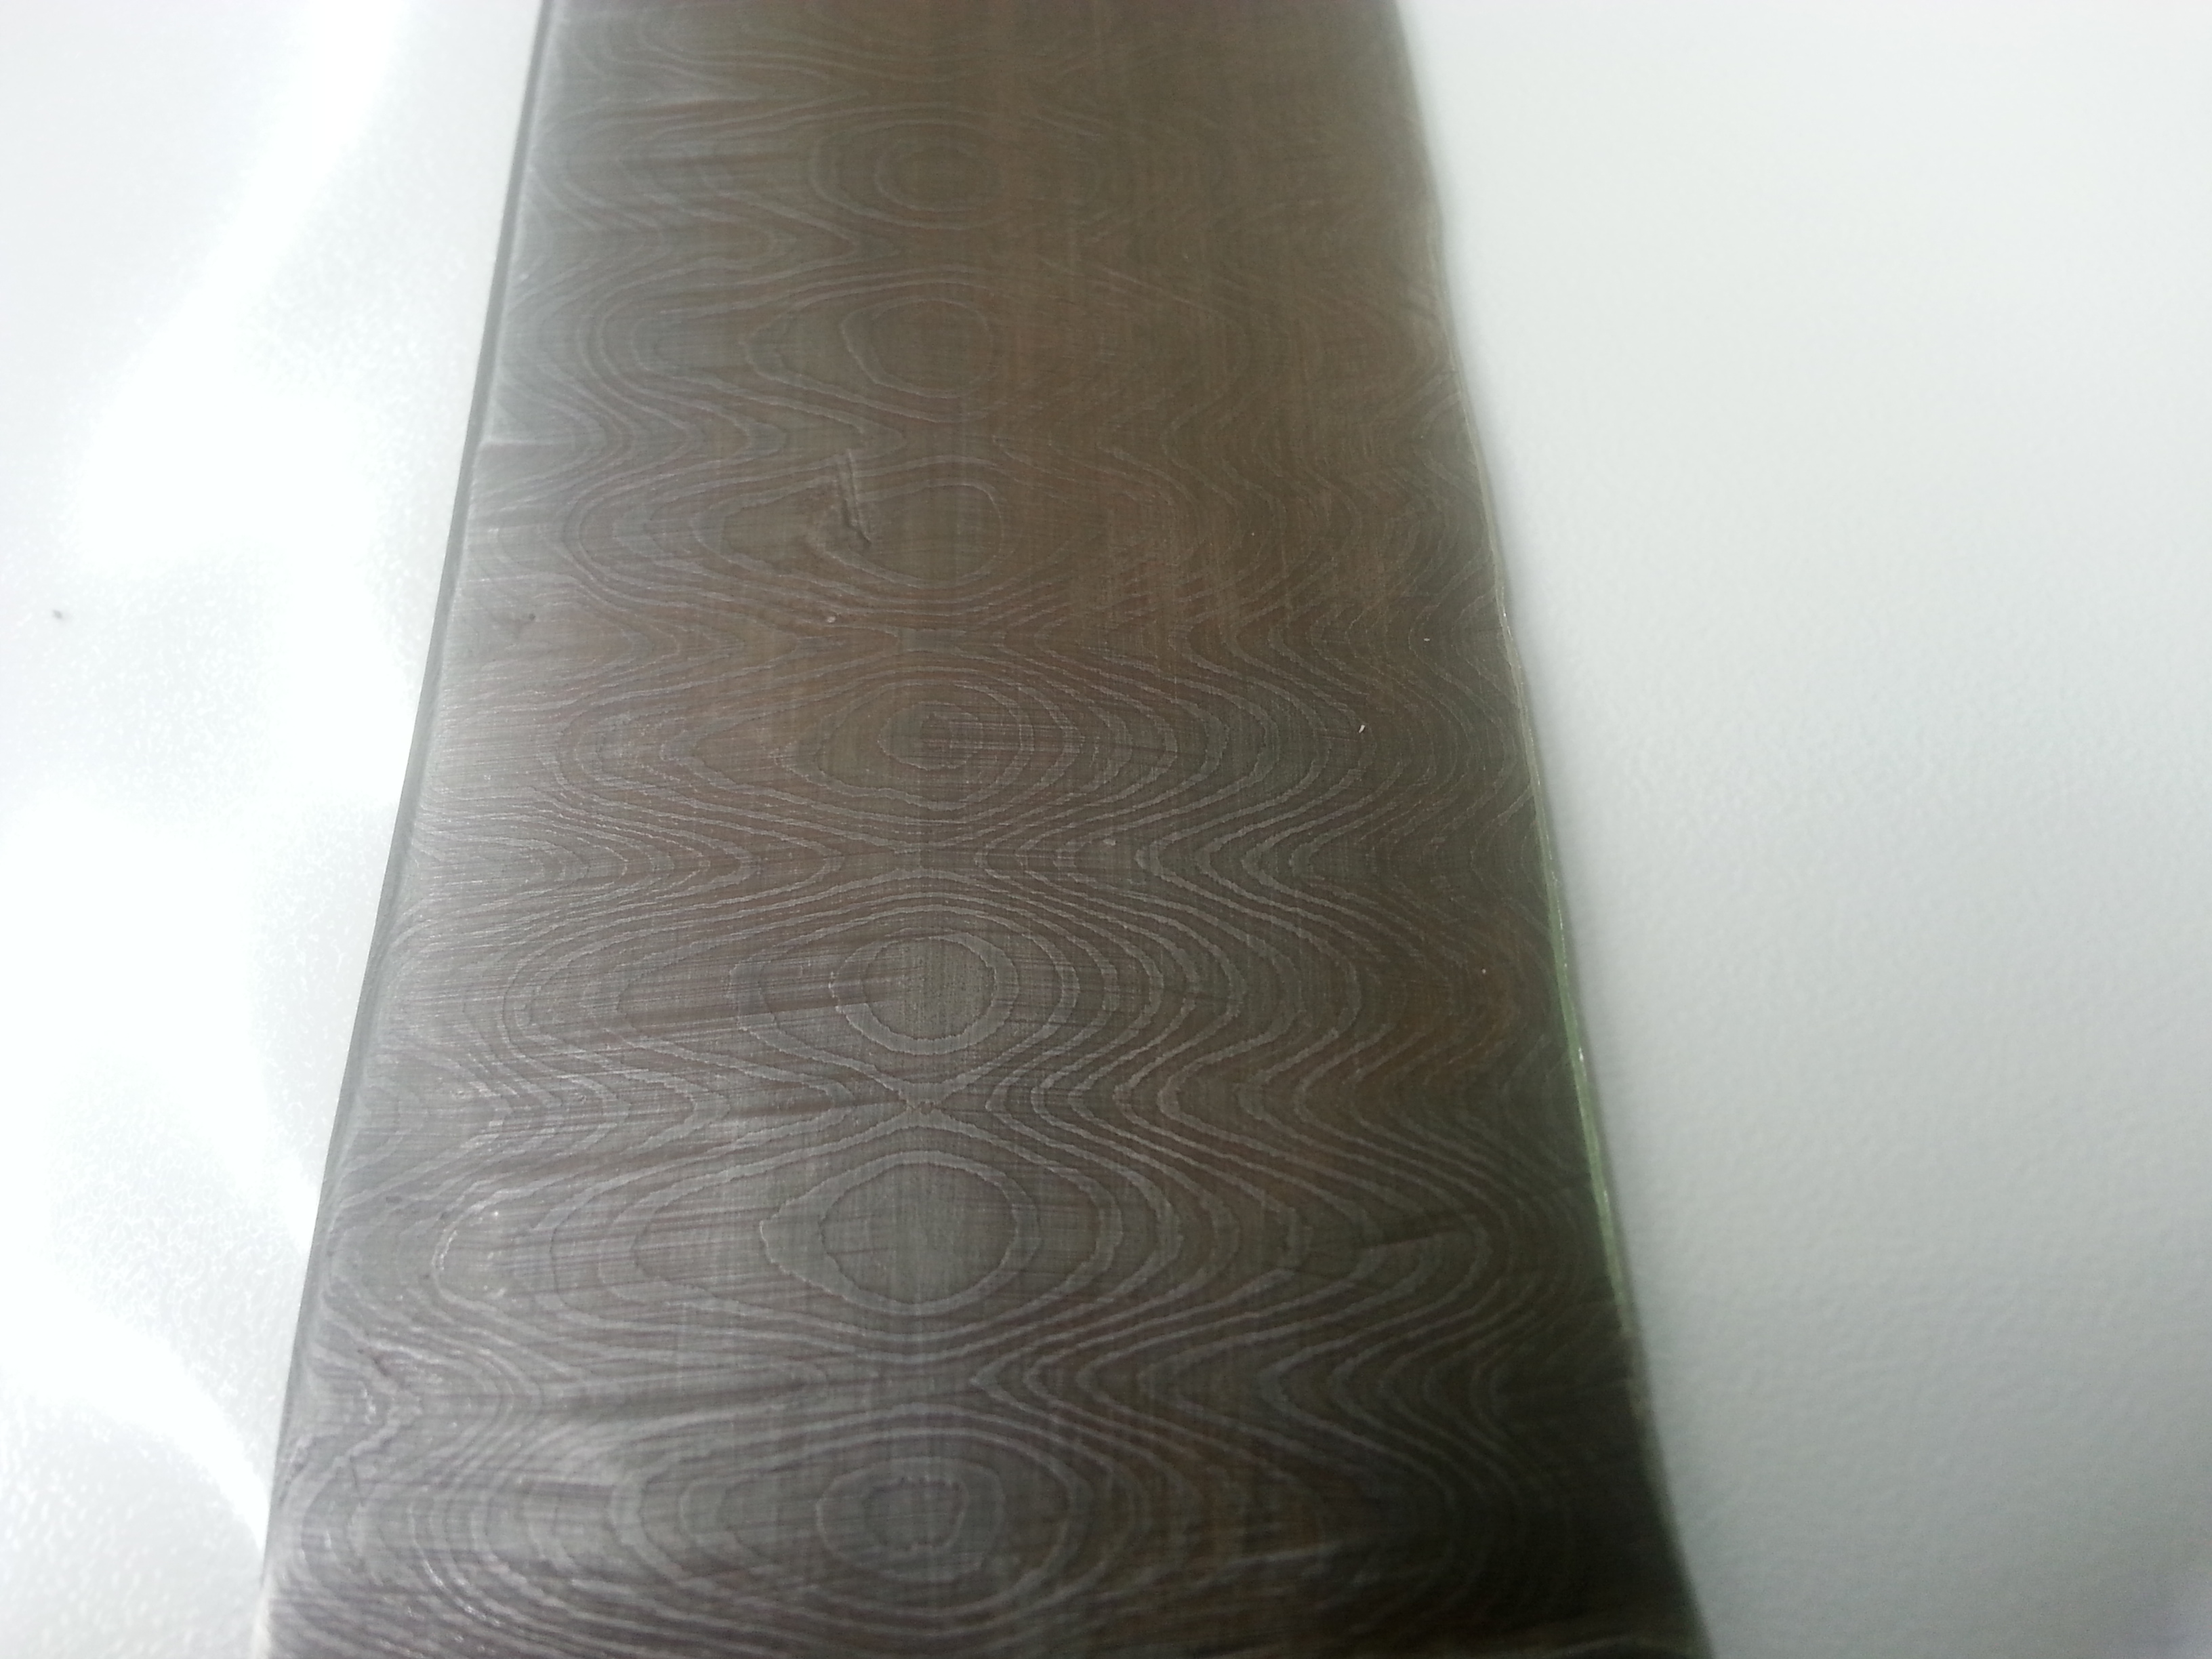
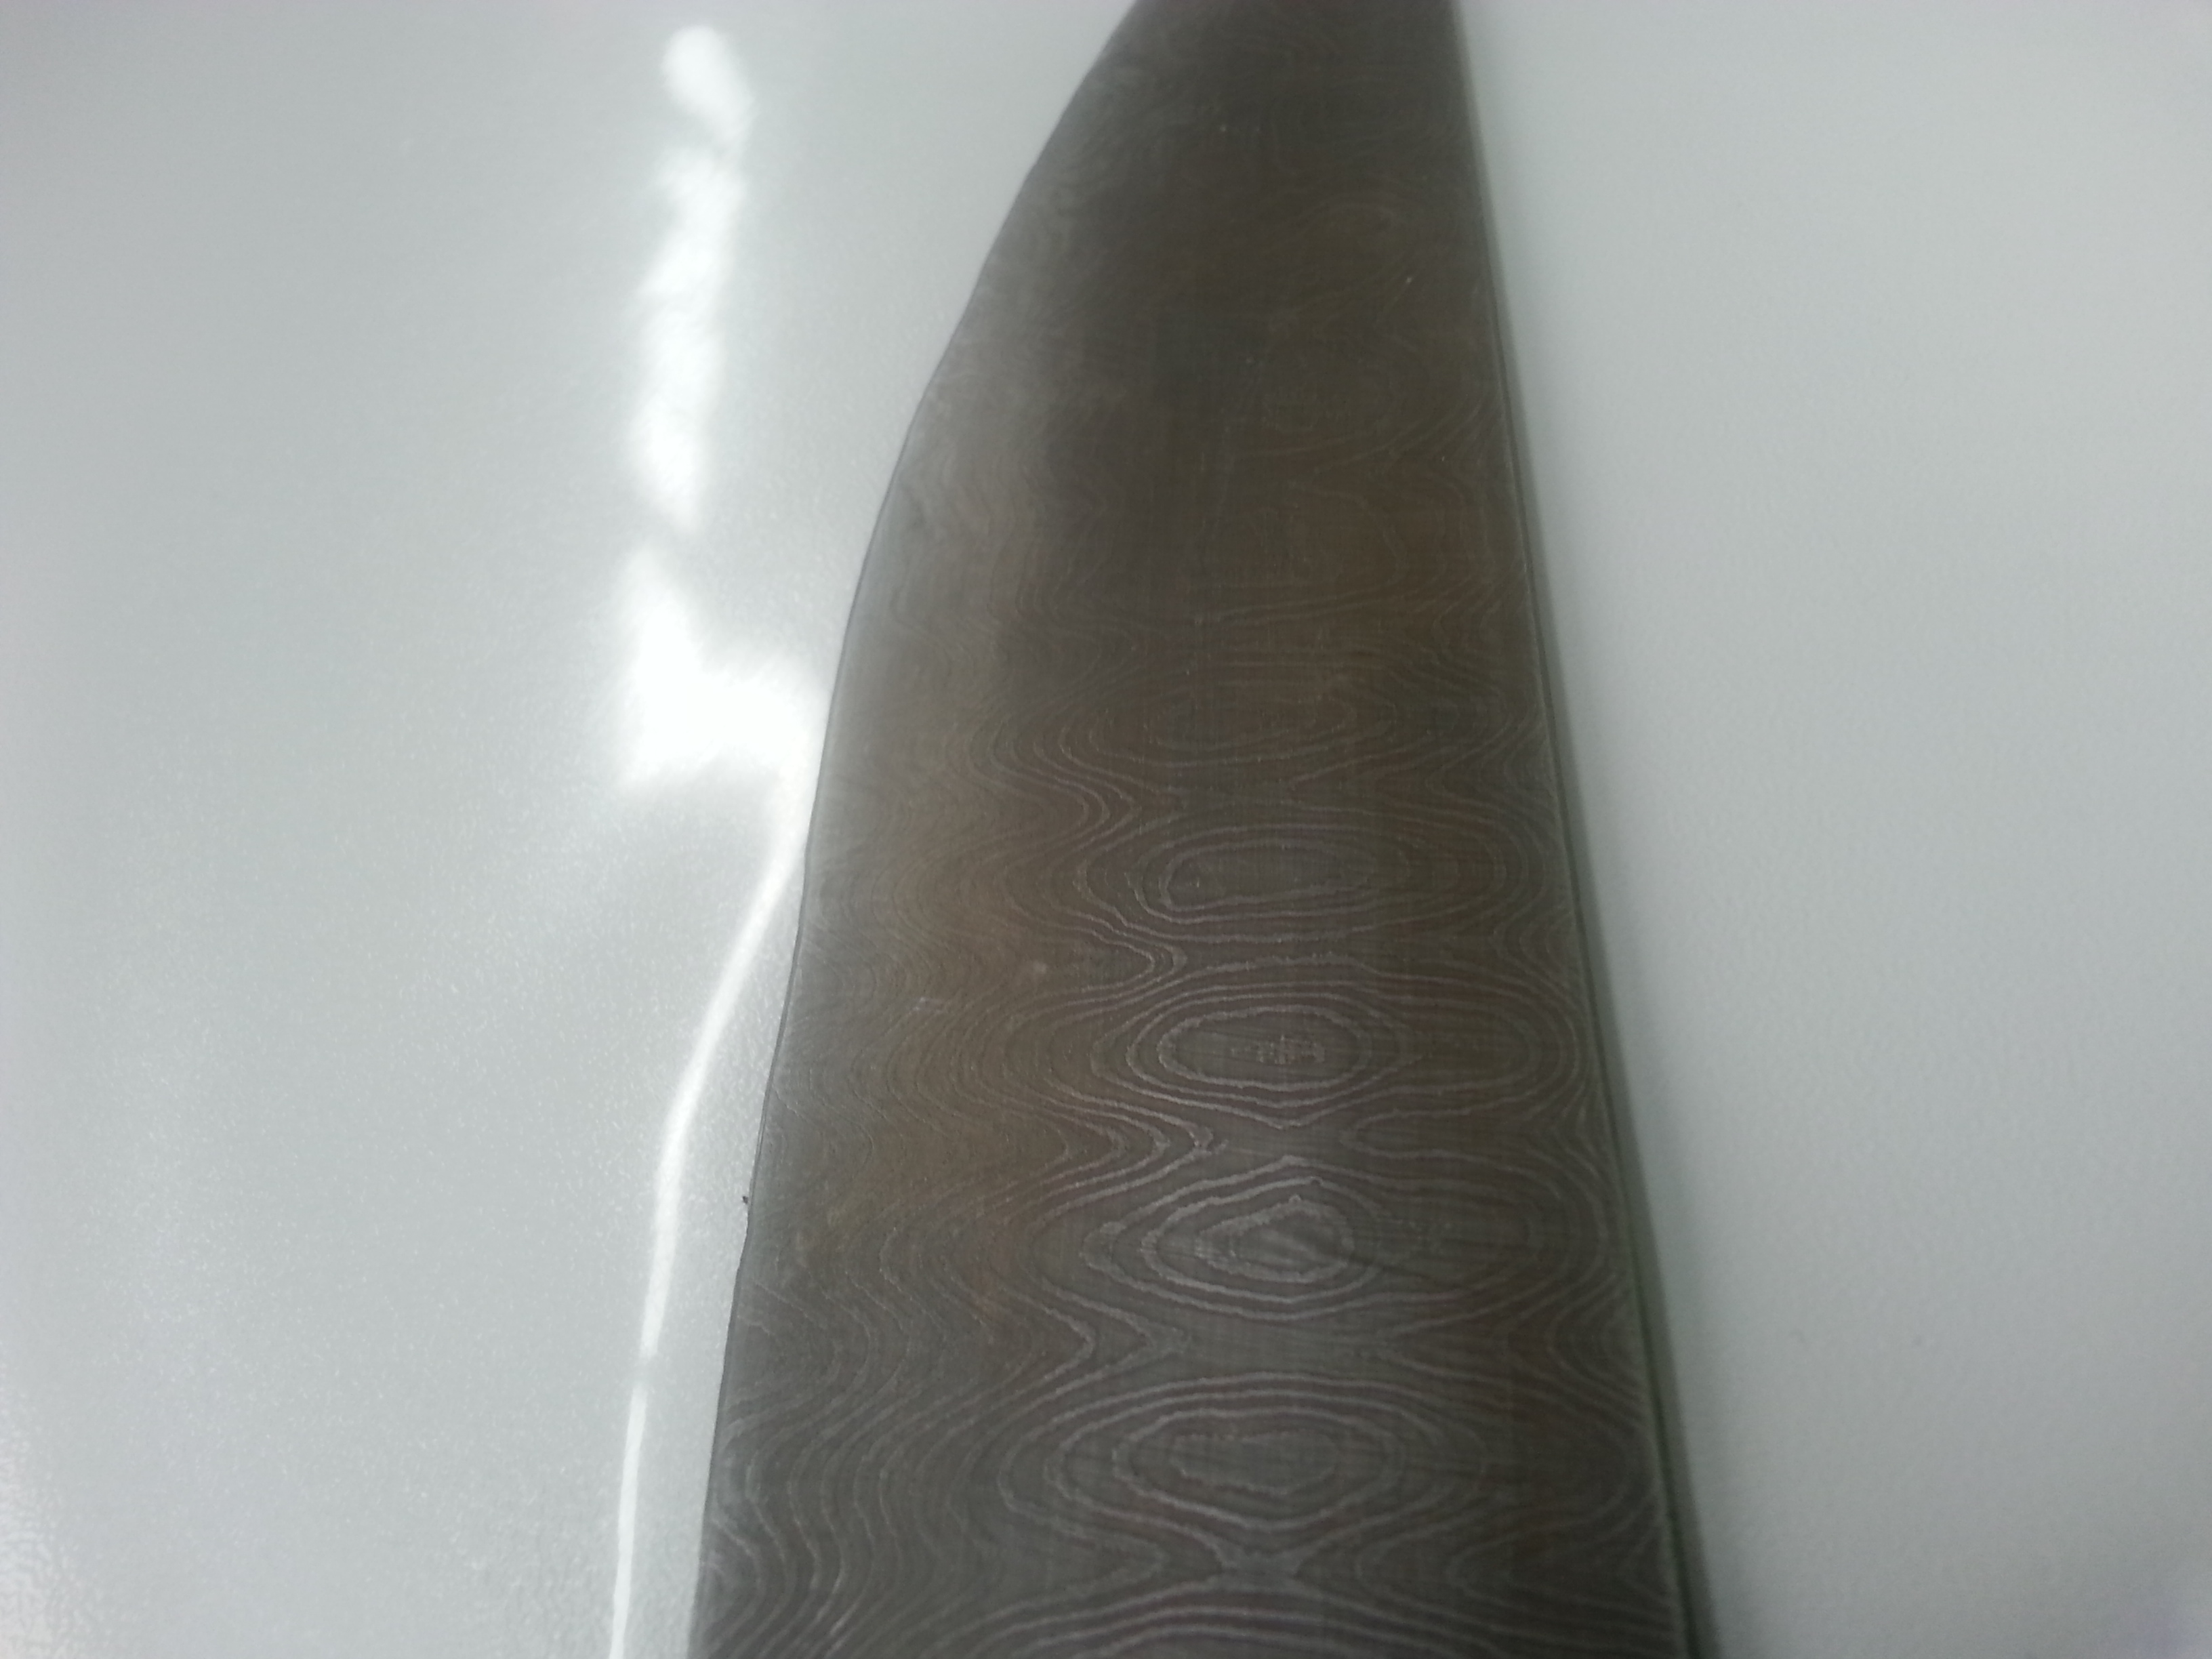
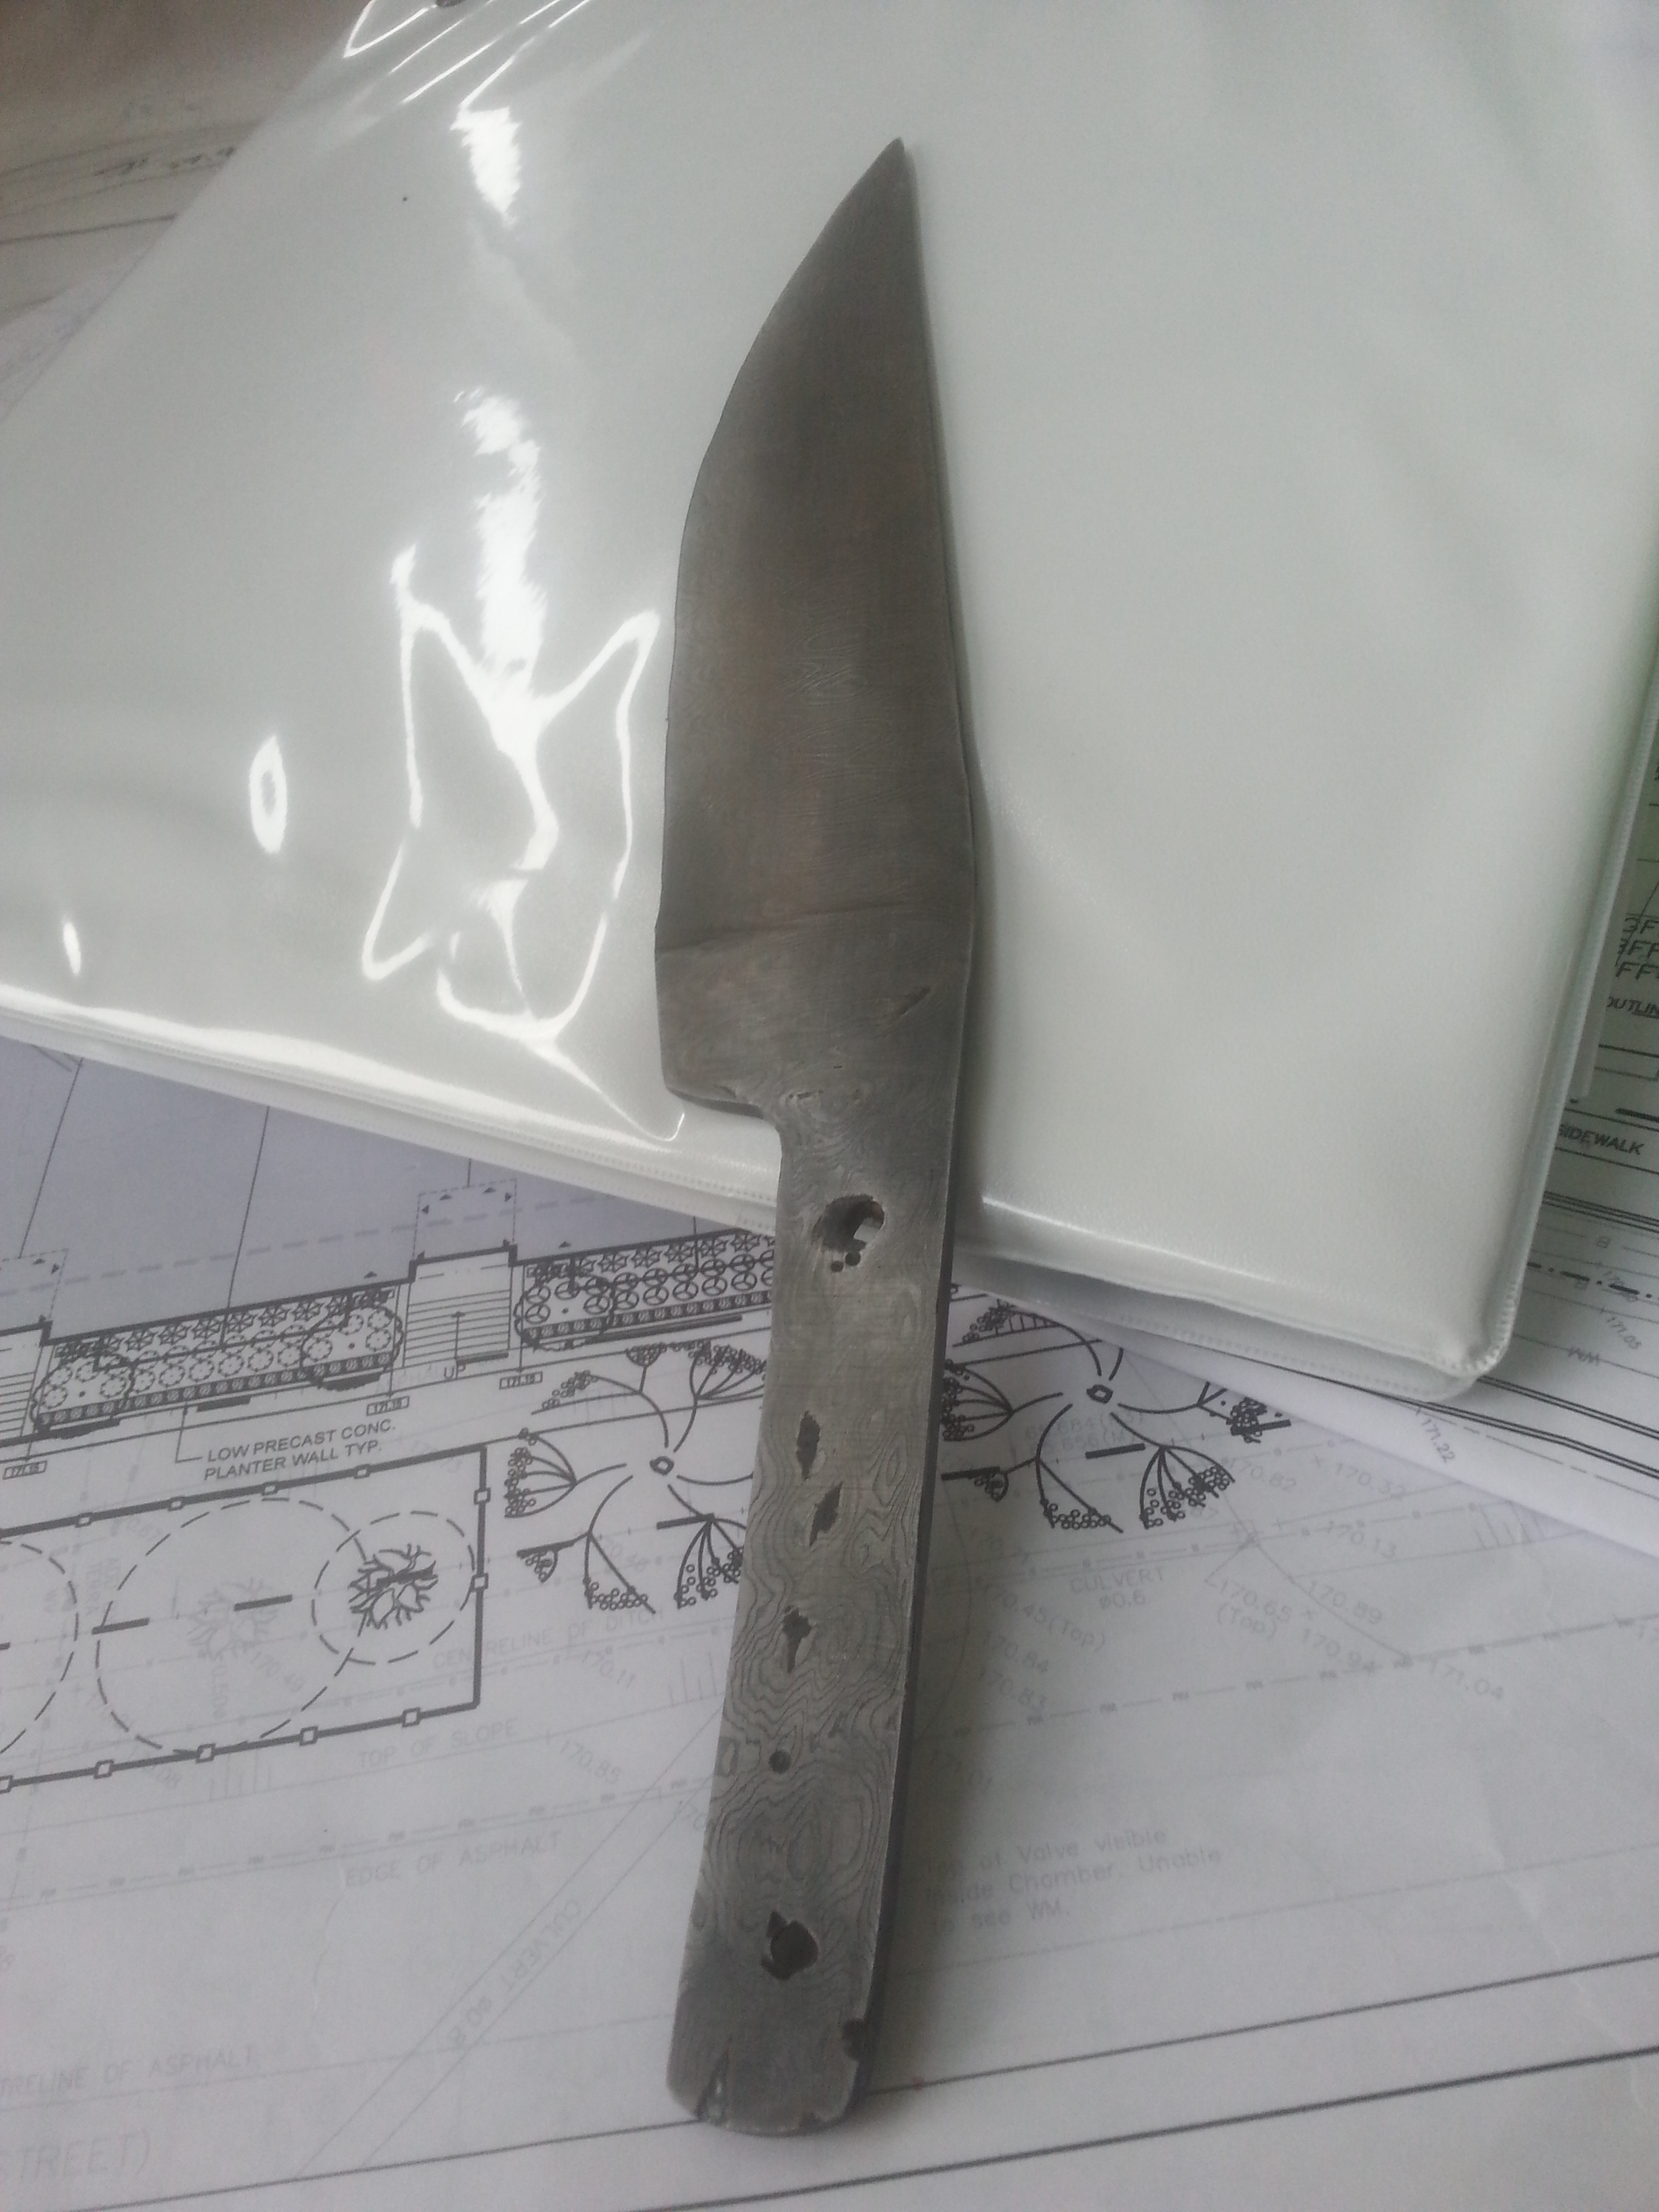
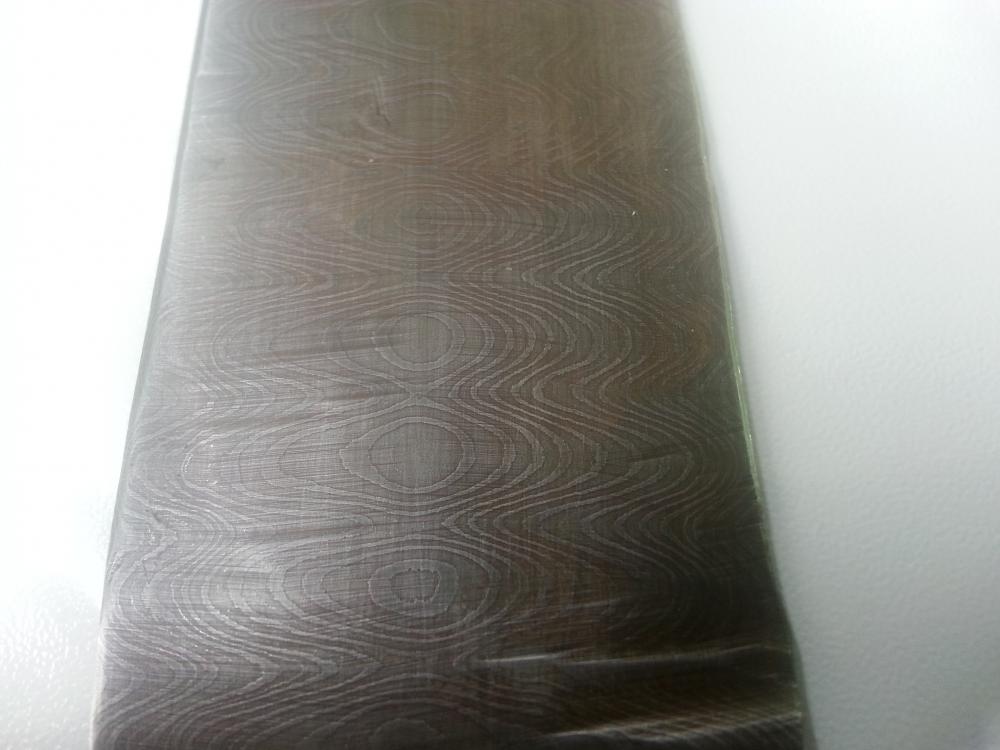
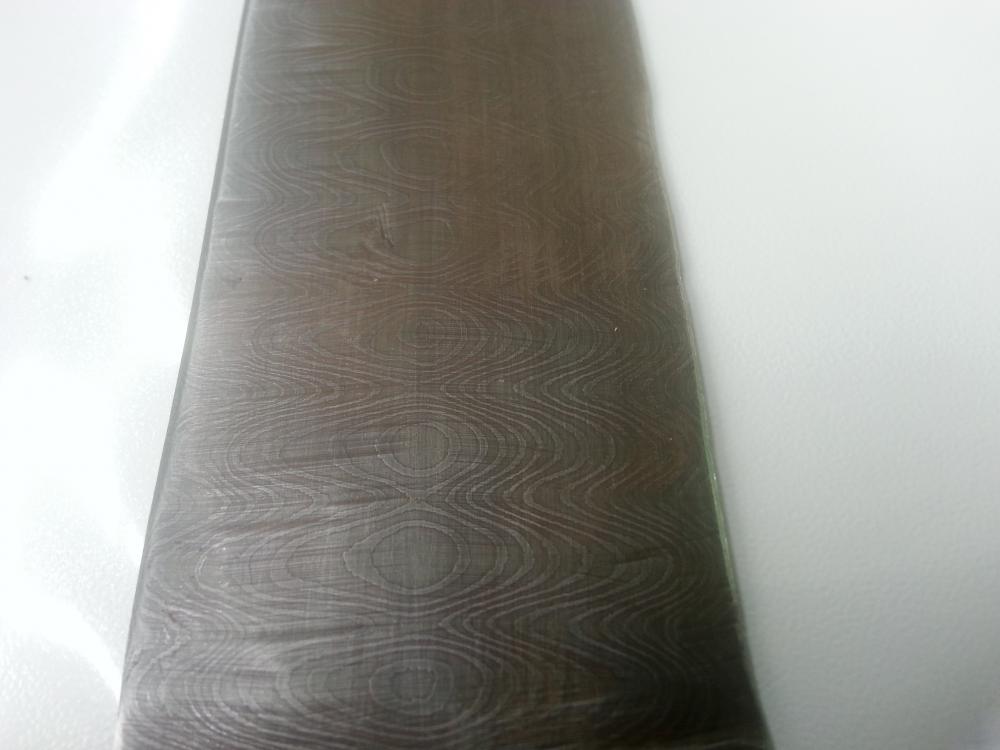
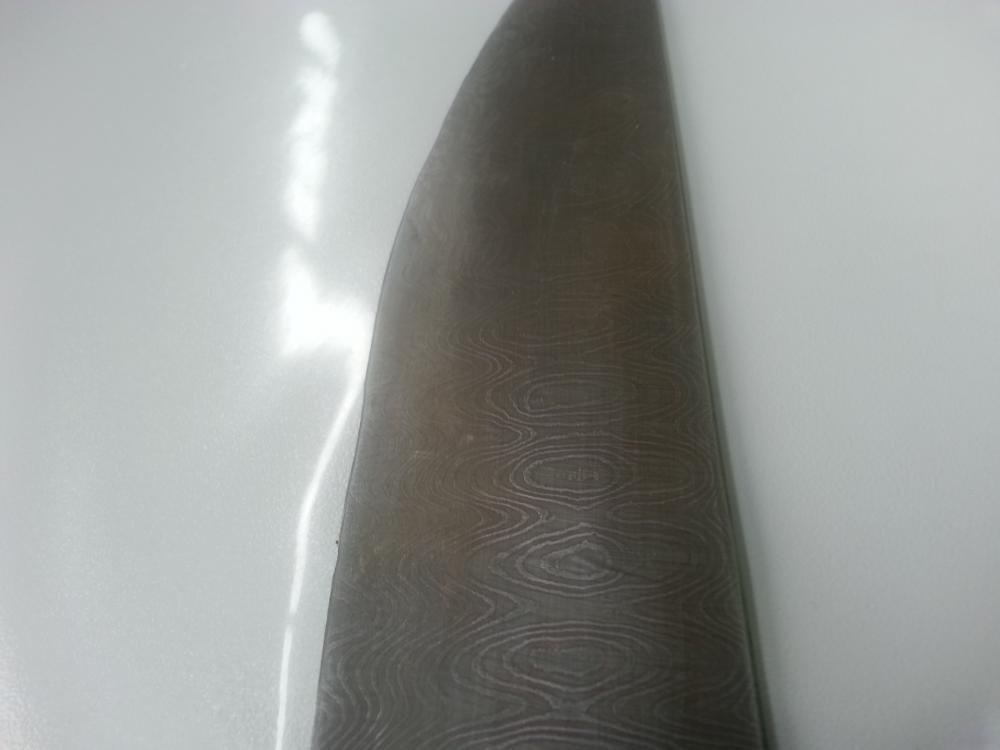
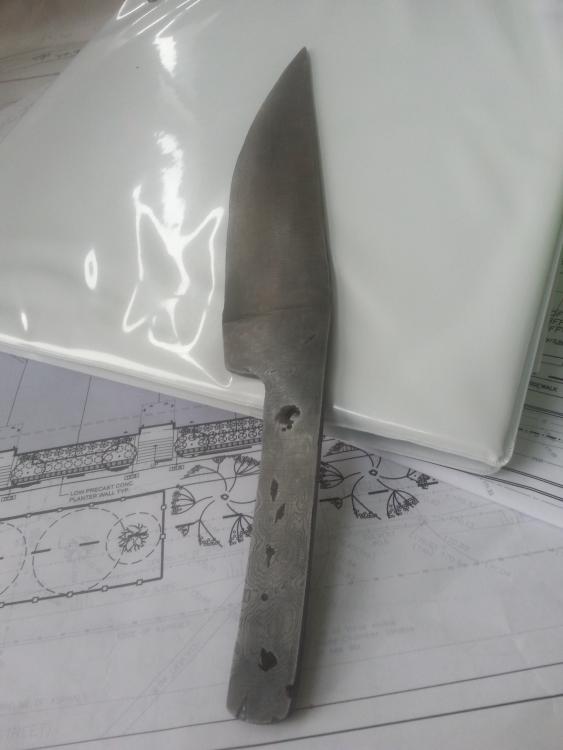
Ok so I have been working on making this chefs knife for my cousin. I fored it to shape and was pretty satisfied with the blade profile. I held it up to one of my store bought ones and its pretty close to the same dimensions. I went with a flat grind for the blade and that was fine. One side is much cleaner than the other but im not completely unhappy with it. One of my final steps was to etch the blade. Now in the past i have used boiled vinegar to etch this same material and was happy with the results but was unhappy with the way it completely stunk the house up. So i decided to try some ferric chloride. First thin i can tell you is this pro tip. DO NOT PUT FERRIC CHLORIDE INTO A TIN FOIL BAKING TRAY!!! Yea turns out that that causes a chemical reaction. Extreme heat, smoke, boiling chemical. Lucky i had some gloves so i could pick it up and dump the whole thing into a plastic bucket which stopped the reaction. So yea after that i got a plastic container and poured the ferric into that and submerged the blade for 20 minutes to get the etch. I used one of those green dish sponge things to rub the etchant once i took the blade out and cleaned it all up. So the etch took and the pattern came out fine. But here is the thing. The etchant left this weird rusty looking residue on the blade which i think some of this pictures show. Now i thought it was actually rust so i put the blade into hot water and scrubbed the heck out of it with an SOS pad but it didnt do anything so now i need to re sand the whole thing and etch the sucker again. What did i do wrong?

-
Your blade shape is pretty close to your sketch so good for you on that one. I look forward to seeing the final product. What size did you make the hole for the pin?
-
Honestly i dont really have a clue. I have a giant angle that i used to make sure the wheels were lined up when i assembled it. It just seems to be an issue with the arm alignment. See the arm is one giant pipe and comes fully assembled. It slots into a shaft on the main body. The two are held together with two bolts, but see when you put the bolts in place they kinda force the arm pipe into alignment which is good but near as i can tell this is where the fault lies. Somone on youtube suggested running a couple of bands of electrical tape around middle of the wheels to crate a ridge which is supposed to help track the belts better but i have yet to try this.
-
I currently use the Grizzly myself. It was actually my upgrade from a 1x42 as well. So far I'm very happy with it. Assembly was pretty easy and its nice and solid. It takes stock off pretty good with a 60 grit belt as well. My only real gripe is the tracking. I simply cannot get it to track perfectly. It is either perfect on the platen or perfect on the bottom wheel but no matter what I cannot seem to get the sucker to track perfect on both. It’s a classic case of you get what you pay for and for me the price was easy to swallow for what I got. If I have 2 grand just laying around yea id get a better one but as I see it it’s a great tool for the price. Good luck with whatever you choose.
-
Wow man for your very first knife that is really impressive. Always nice to see a fellow canadian involved in this activity.
-
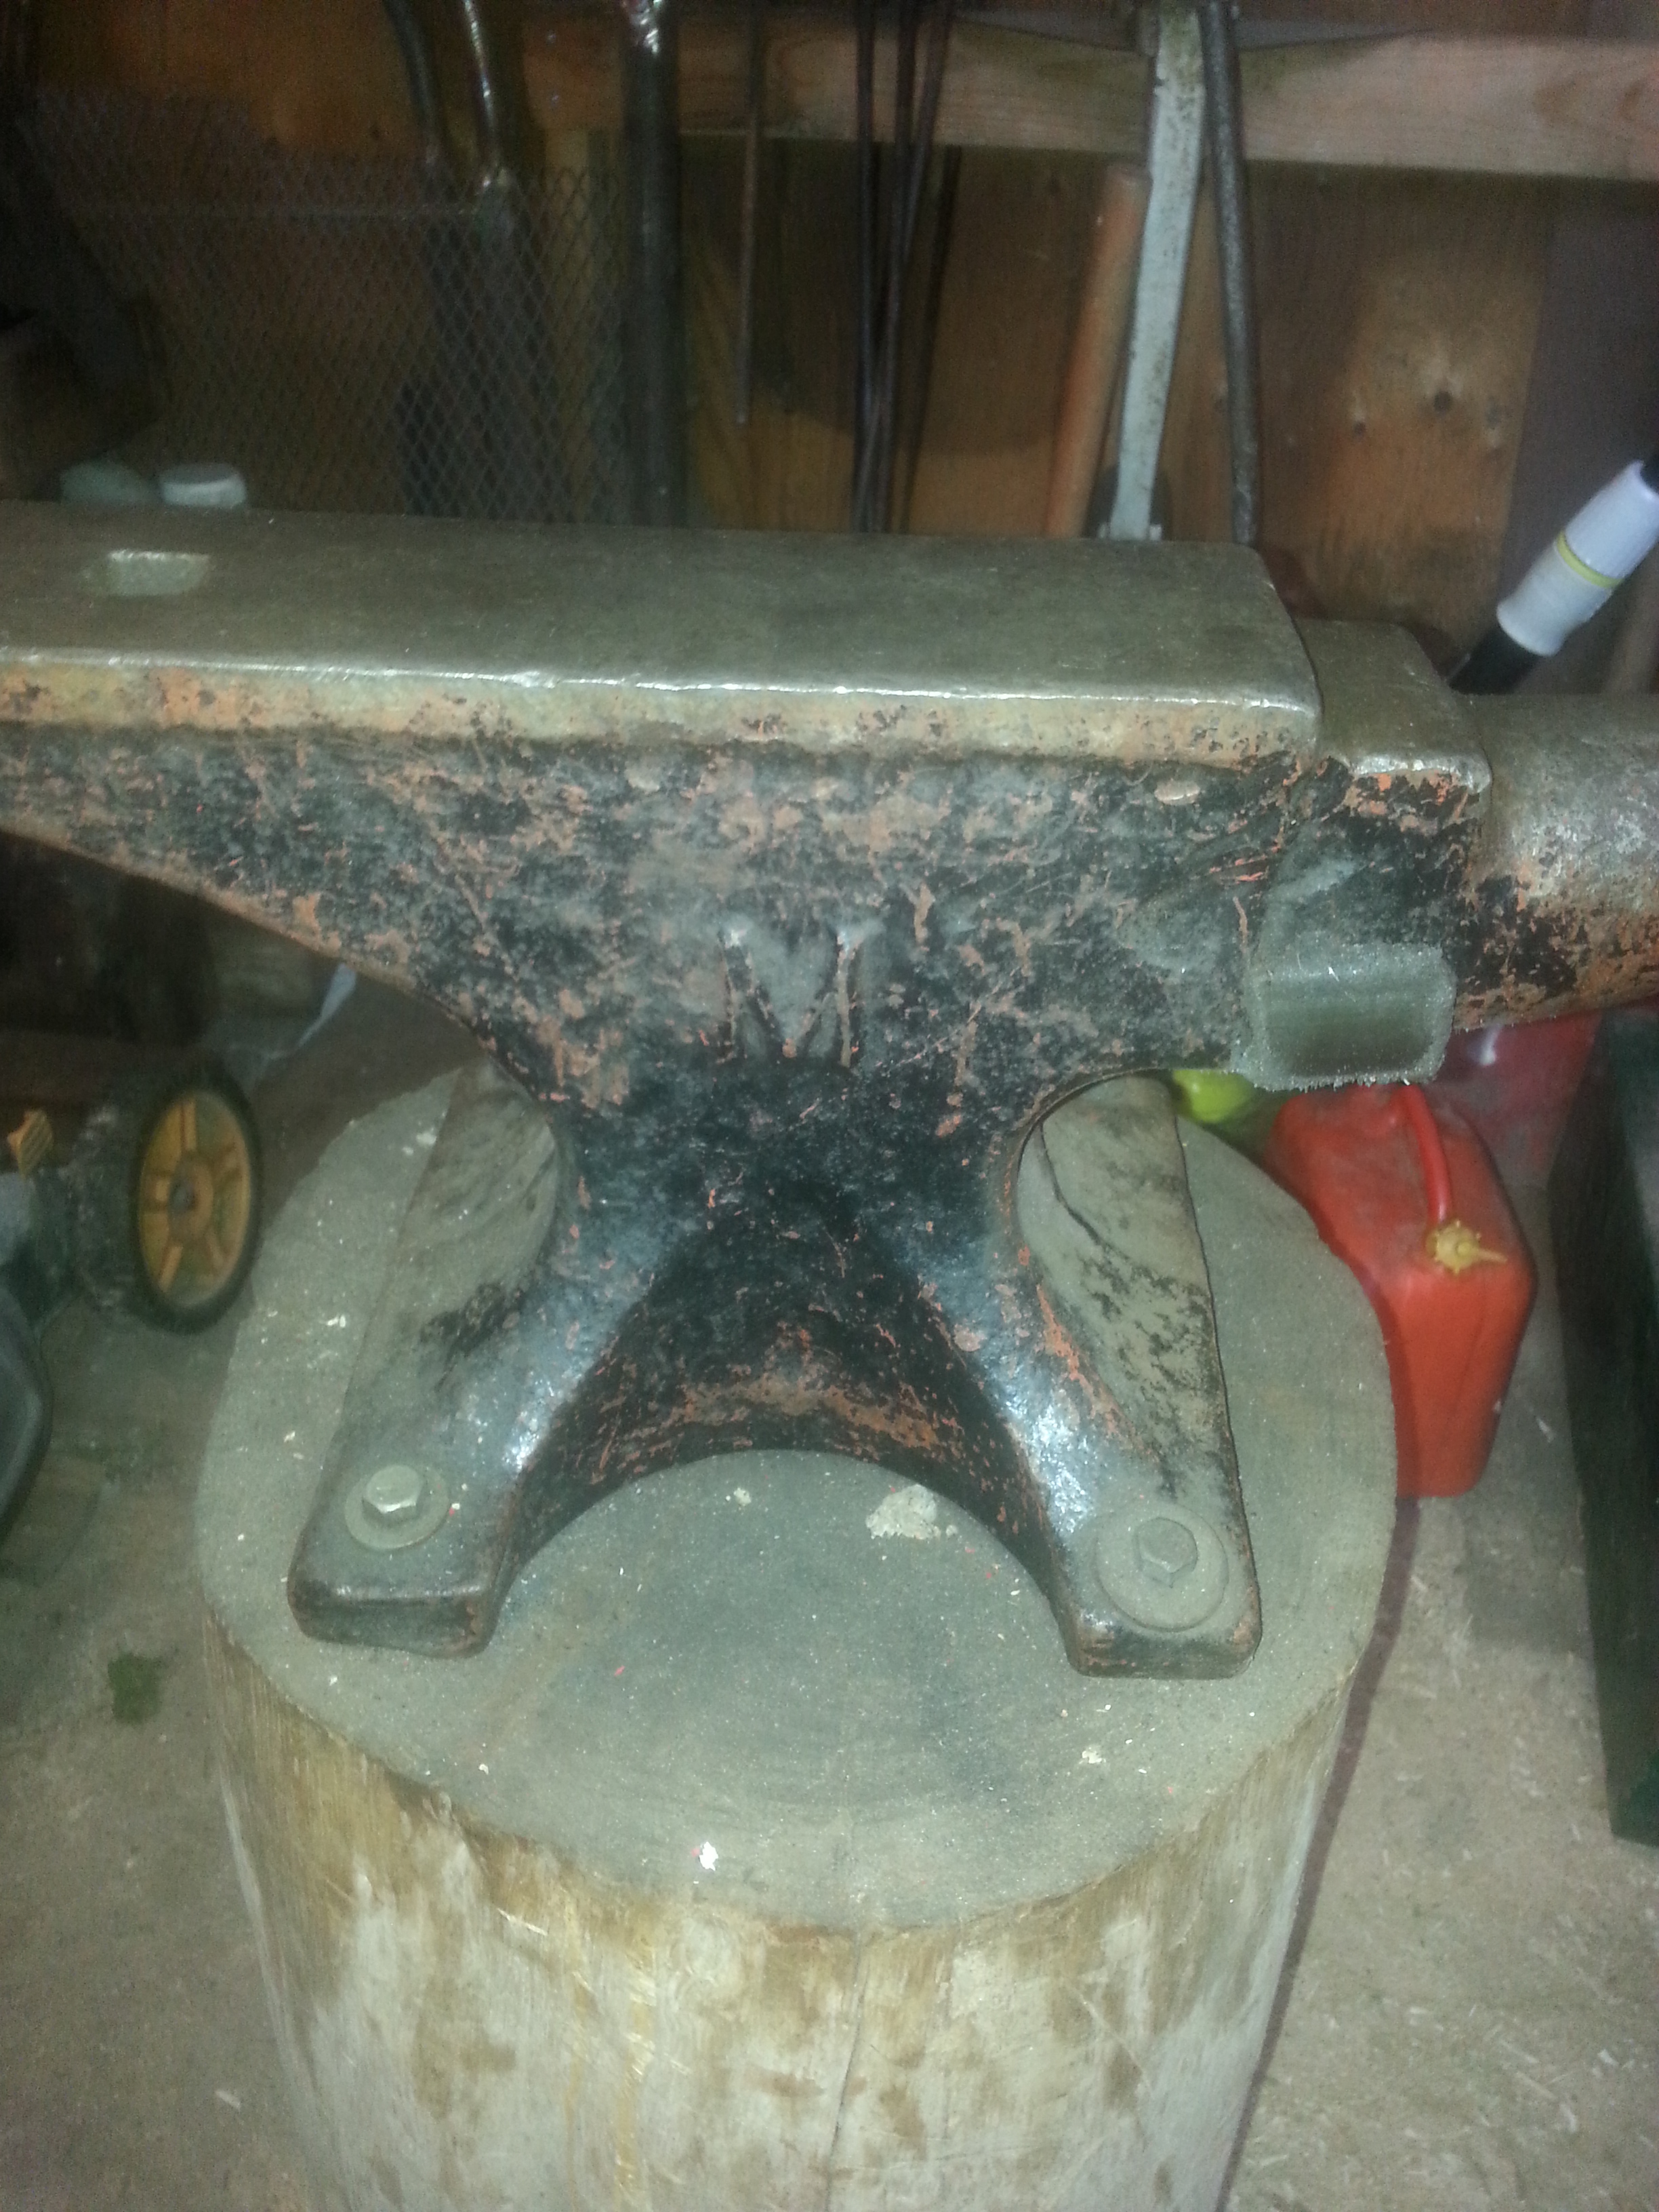
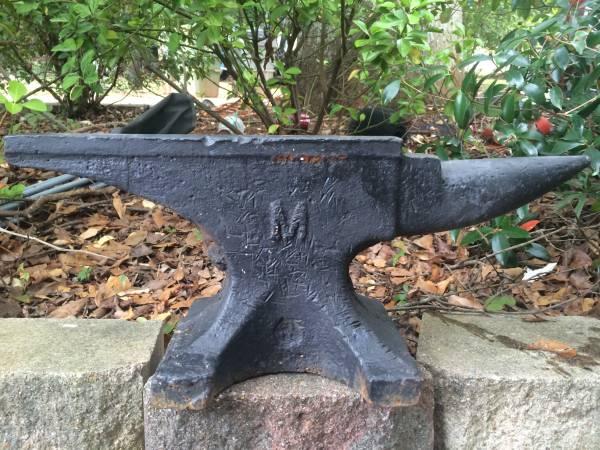
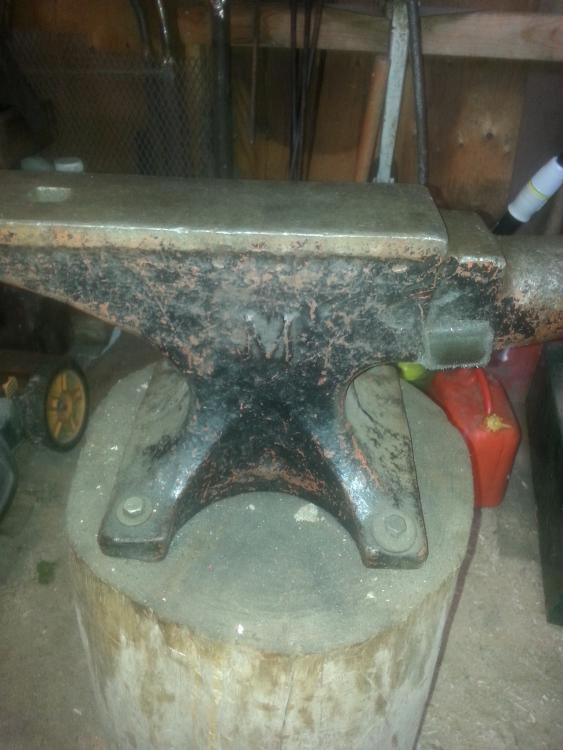
We may have a winner here. Looks like columbian anvils are cast steel and do have a raised letter M on one side. the other should have a depressed triangle with a riased C in the middle. He said there are no other markings on it but he also said when he got it it was super rusty and he had to clean the hell out of it. It may be that side was just really bad so most of the info is gone. Found this image online from some blade forums and the rest of the anvil looks about the same in design.
-
It has a pretty good ring to it. Bounce with a ball bearing is about 7 inches when dropped from 10 he says.
-
It is my neighbors anvil so il try to get more pics the next time i talk to him. I dont think its a Fisher though, none of the pictures i have ever seen of that kind of anvil have that big raised M on the side of them. If you have ever seen one though can you say where? Also what are the pictures of the front under the horn and rear under the heel supposed to show? As for the bottom while i dont have a picture of it i do know that its kinda bowl shaped... or so my neighbor said.
-
Im hoping somone will be able to help identify this anvil. It weighs around 85 pounds and is only marked with a letter M on the side. No other markings on it at all. Any info would be appreciated.
-
New Grizzly Grinder - Dead On Arrival
Dustin Quade replied to sunnydale's topic in Grinders, Sanders, etc
I bought one last week and it is great. The tracking took a while to get locked in but after i got my new belts it tracks pretty well against the platten. Im sorry that yours did not arrive in good shape but i wouldnt hold it against grizzly as much as the shipping company. -
Having trouble with annealing
Dustin Quade replied to Dustin Quade's topic in Heat Treating Knives, Blades etc
Actually when i bought the steel i wasnt given any of the paperwork on it so i have no idea how to ensure proper heat treatment of it. The only advantage i have is that there was a video series by kyle royer on youtube of his journeyman knife test and the blade he made was of a similar material to what i was told this stuff is. So im trying to follow along with how he made his knife but the holes are just being problematic. What is a sub critical temper? -
Ok so last year i got my hands on some damascus, there was some people here that warned me that it might be of inferior quality because of the price i got it for. Warned me to looks for delamination and the like. So i held off on using the stuff but last weekend i finally decided to give it a go, both so i could test the steel and so i could test out my new grinder. I forged it out and no delamination at all which of course makes me happy. I was told that the steel was 1080 and 15n20. So once i forged out the blade and tang to the shape i wanted i decided to anneal the blade. I heated up some kind of metal they use on train tracks, it big and heavy and looks like a question mark. I put that in my bucket of vermiculite then i heated up the blade but tang more than blade to an orange heat and stuck it in my vermiculite with the other piece of steel. I also forged another blade out of some 01 and annealed that as well to make the grinding easier. I left it outside for about 5 hours and when i took it out of the vermiculite it was still warm enough to sting abit when held so i figured that it had annealed. I took the blade to the grinder and got it profiled and flat ground then went to go and drill in the holes. I have used the drill press and bits before to drill holes for knives and it worked out. I have never been able to get it to work on this damascus stuff though so i usually end up just punching the holes in hot. But i feel like im just not annealing the steel right and that must be my issue. So does anyone have any tips for getting damascus steel of that make up soft enough to drill through with titanium coated bits.
-
A favorite of mine has always been "A good anvil does not fear the hammer"
-
Me too but thats just math alone not even price based. Does he really have 520 anvils just kicking around on his property somewhere? How?
-
Lately people have been asking some pretty high prices for old anvils. Im not sure why, i mean 6 bucks a pound why wouldnt you buy new?