Dustin Quade
Members
-
Joined
-
Last visited
Everything posted by Dustin Quade
-
Can you give me a little more info on what you mean about the more elegant look to the upward curve? Like what would you do differently. Im going to try to remake this piece soon and want to try to make sure i get it right this time.
-
Im uploading a PDF I made for the instructions on this project. Hopefully it explains it better than my words could. Heart Base Candle Holder - Instruction.pdf
-
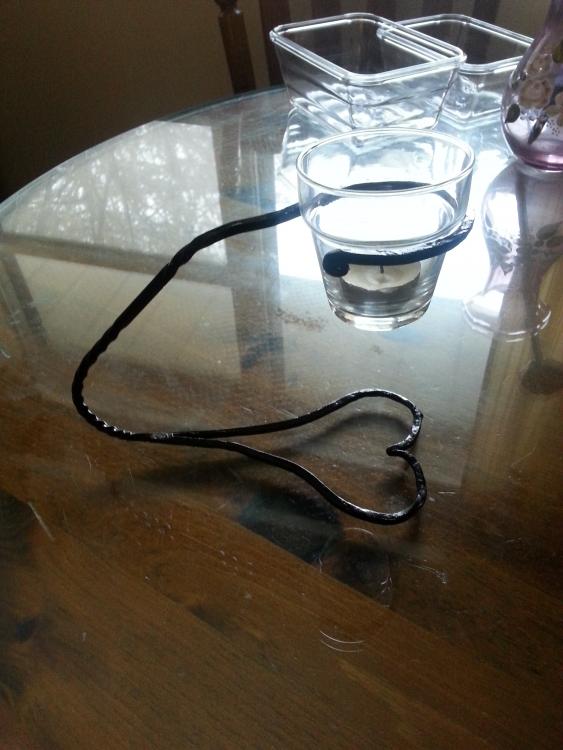
So this was another first attempt for me as a project but all of the techniques i used i had done at least once before. The stock is 3/16 square stock, i chose to go with square so i could get some nice twists going along the stem. I started out forging one end into a rounded point and rolling it into a curl which would be how I finished the part that holds the glass cup. Then I bent that portion around a round piece of metal to get the rough size and worked it the rest of the way around the horn until the cup sat properly. Next I did the heart. To do this I measured out from the base of the cup holder 24 inches, this left 8 inches for the stem and 16 inches for the heart. To so the heart you fold 8 inches of the steel onto itself. You forge weld it closed maybe about an inch or so, then you slightly point the non-forge welded end. You then open up the middle of this piece fairly wide, I usually start it open with a hardy tool then use the horn to open it wider. Once it’s open you fold the pointed end inward so the point is now facing into the middle of the opening. This creates a sharp corner on either side of the point and you just round those out over the horn and the heart is done. Then I just put a nice tight twist on the stem portion, and put the bends in where it seemed appropriate. I also wire brushed it to clean it off then gave it a coat of black paint followed by clearcoat. I was very happy with how this piece came out but there was one thing I had not thought about at the time. See I picked square stock only thinking about the stem, what I forgot was that to make the heart you also created a twist when you do the fold over. This left a lot of ugliness in the heart which I tried to clean up with some cold hammering over the horn to try and smooth out some of the bumps. It worked but not perfectly. I think next time I would use a slightly larger stock to give the piece a bit more weight. The only thing I can think of to fix the twist of the heart is to make the heart out of round stock and then forge weld on the stem portion afterwards. That’s a little beyond my skill right now though.
-
Thats actually a really good idea. I pretty much post a picture of everything i make on my facebook just to make sure i have some record showing my progress but a physical reminder never hurts.
-
So this weekend i learned that proactice really does make perfect. Also that forge welding square stock is easier than round stock for me. I had a 100% success rate with it compared to a nearly 50% success rate with the round stock. It was funny to me, when I had made my first piece i was so proud of what i had done but by the end of the weekend my first one was now something for the scrap bin. It reminds me of how xxxxxxx proud i was of my first knife and now i cant even imagin making something so poor. I hope this trend continues in the years to come getting better and better and more and more dismissive of the quality of my old work. Attached is a pic of my first ornament and my last one.
-
Thanks for all the replies guys. I will try to invest in the croc pot and sparex next year but i dont have time to get it all in this year. I think i will try a pot with vinnegar and salt. Im used to the smell because thats how i used to etch my blades before i got my hands on some ferric chloride. I will be sure to let everyone know how it goes.
-
Last year for christmas i made my girlfriend a copper rose and she loved it. In fact she loved it so much that she wants a new type of copper flower every year for christmas. So yea here i am this year making a copper tulip. My issue / question is this. Last year when making the copper rose i ran into a problem. I was told that when working copper you need to anneal it when its time to bend it all into shape otherwise it will be too difficult and wont work properly. I was told that to do this you heat the copper in the forge and then quench into water. But when i did it the copper became completely covered in a black finish which i had to very very carefully sand off without bending up the copper because it hardens back up as you bend it. I want to try to avoid that this year so does anyone had a way of annealing the copper that wont leave this residue? Quench in oil? Air cool? Use a toaster oven or regular oven? Any tips or tricks would be greatly appreciated. Thanks,
-
You are most welcome, glad that its getting those creative juices flowing!
-
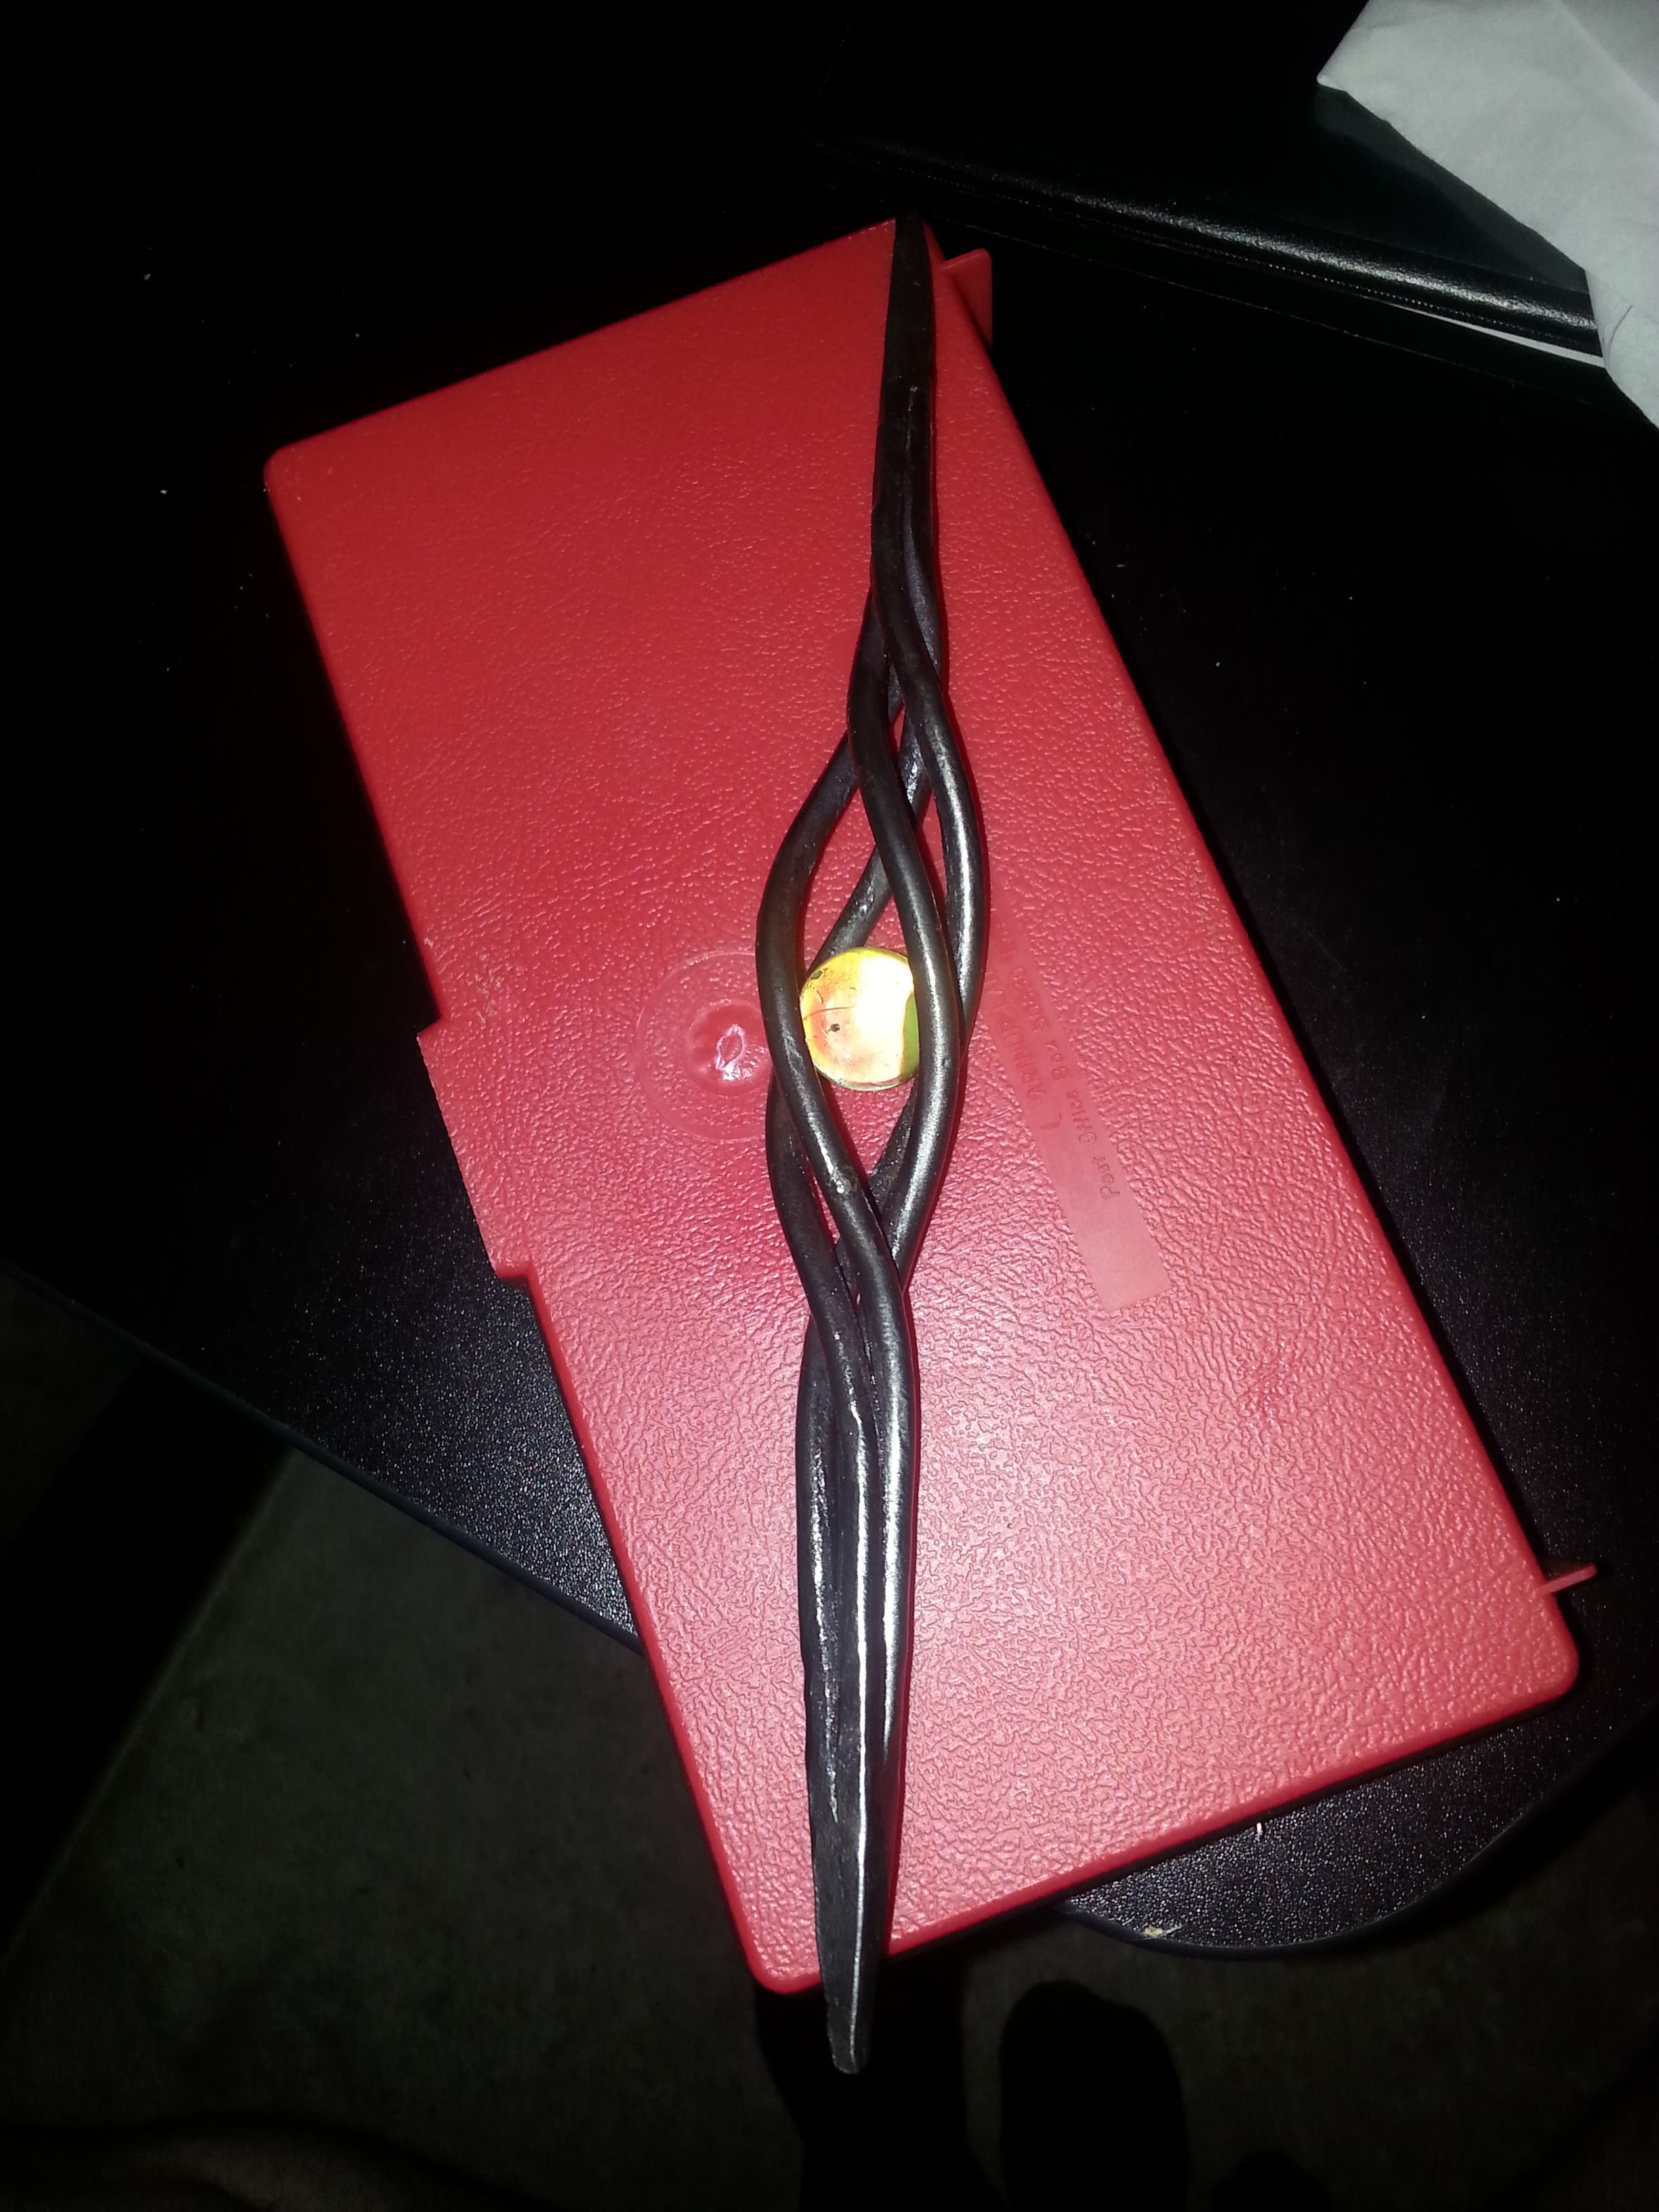
Wow man i must say yours looks alot better than mine. I made another 1 last night and tried to make a third but i messed up the forge weld on the one end and couldnt recover so i scrapped it. So far my success rate on these is about 50 50. I really like the nice long tight twist you have there though i think i will have to give that a try on my next one. How long is yours?
-
Yea i just get this really thin bailing wire from the dollar store. Free is always better of course but dollar store is usually cheap enough for me lol.
-
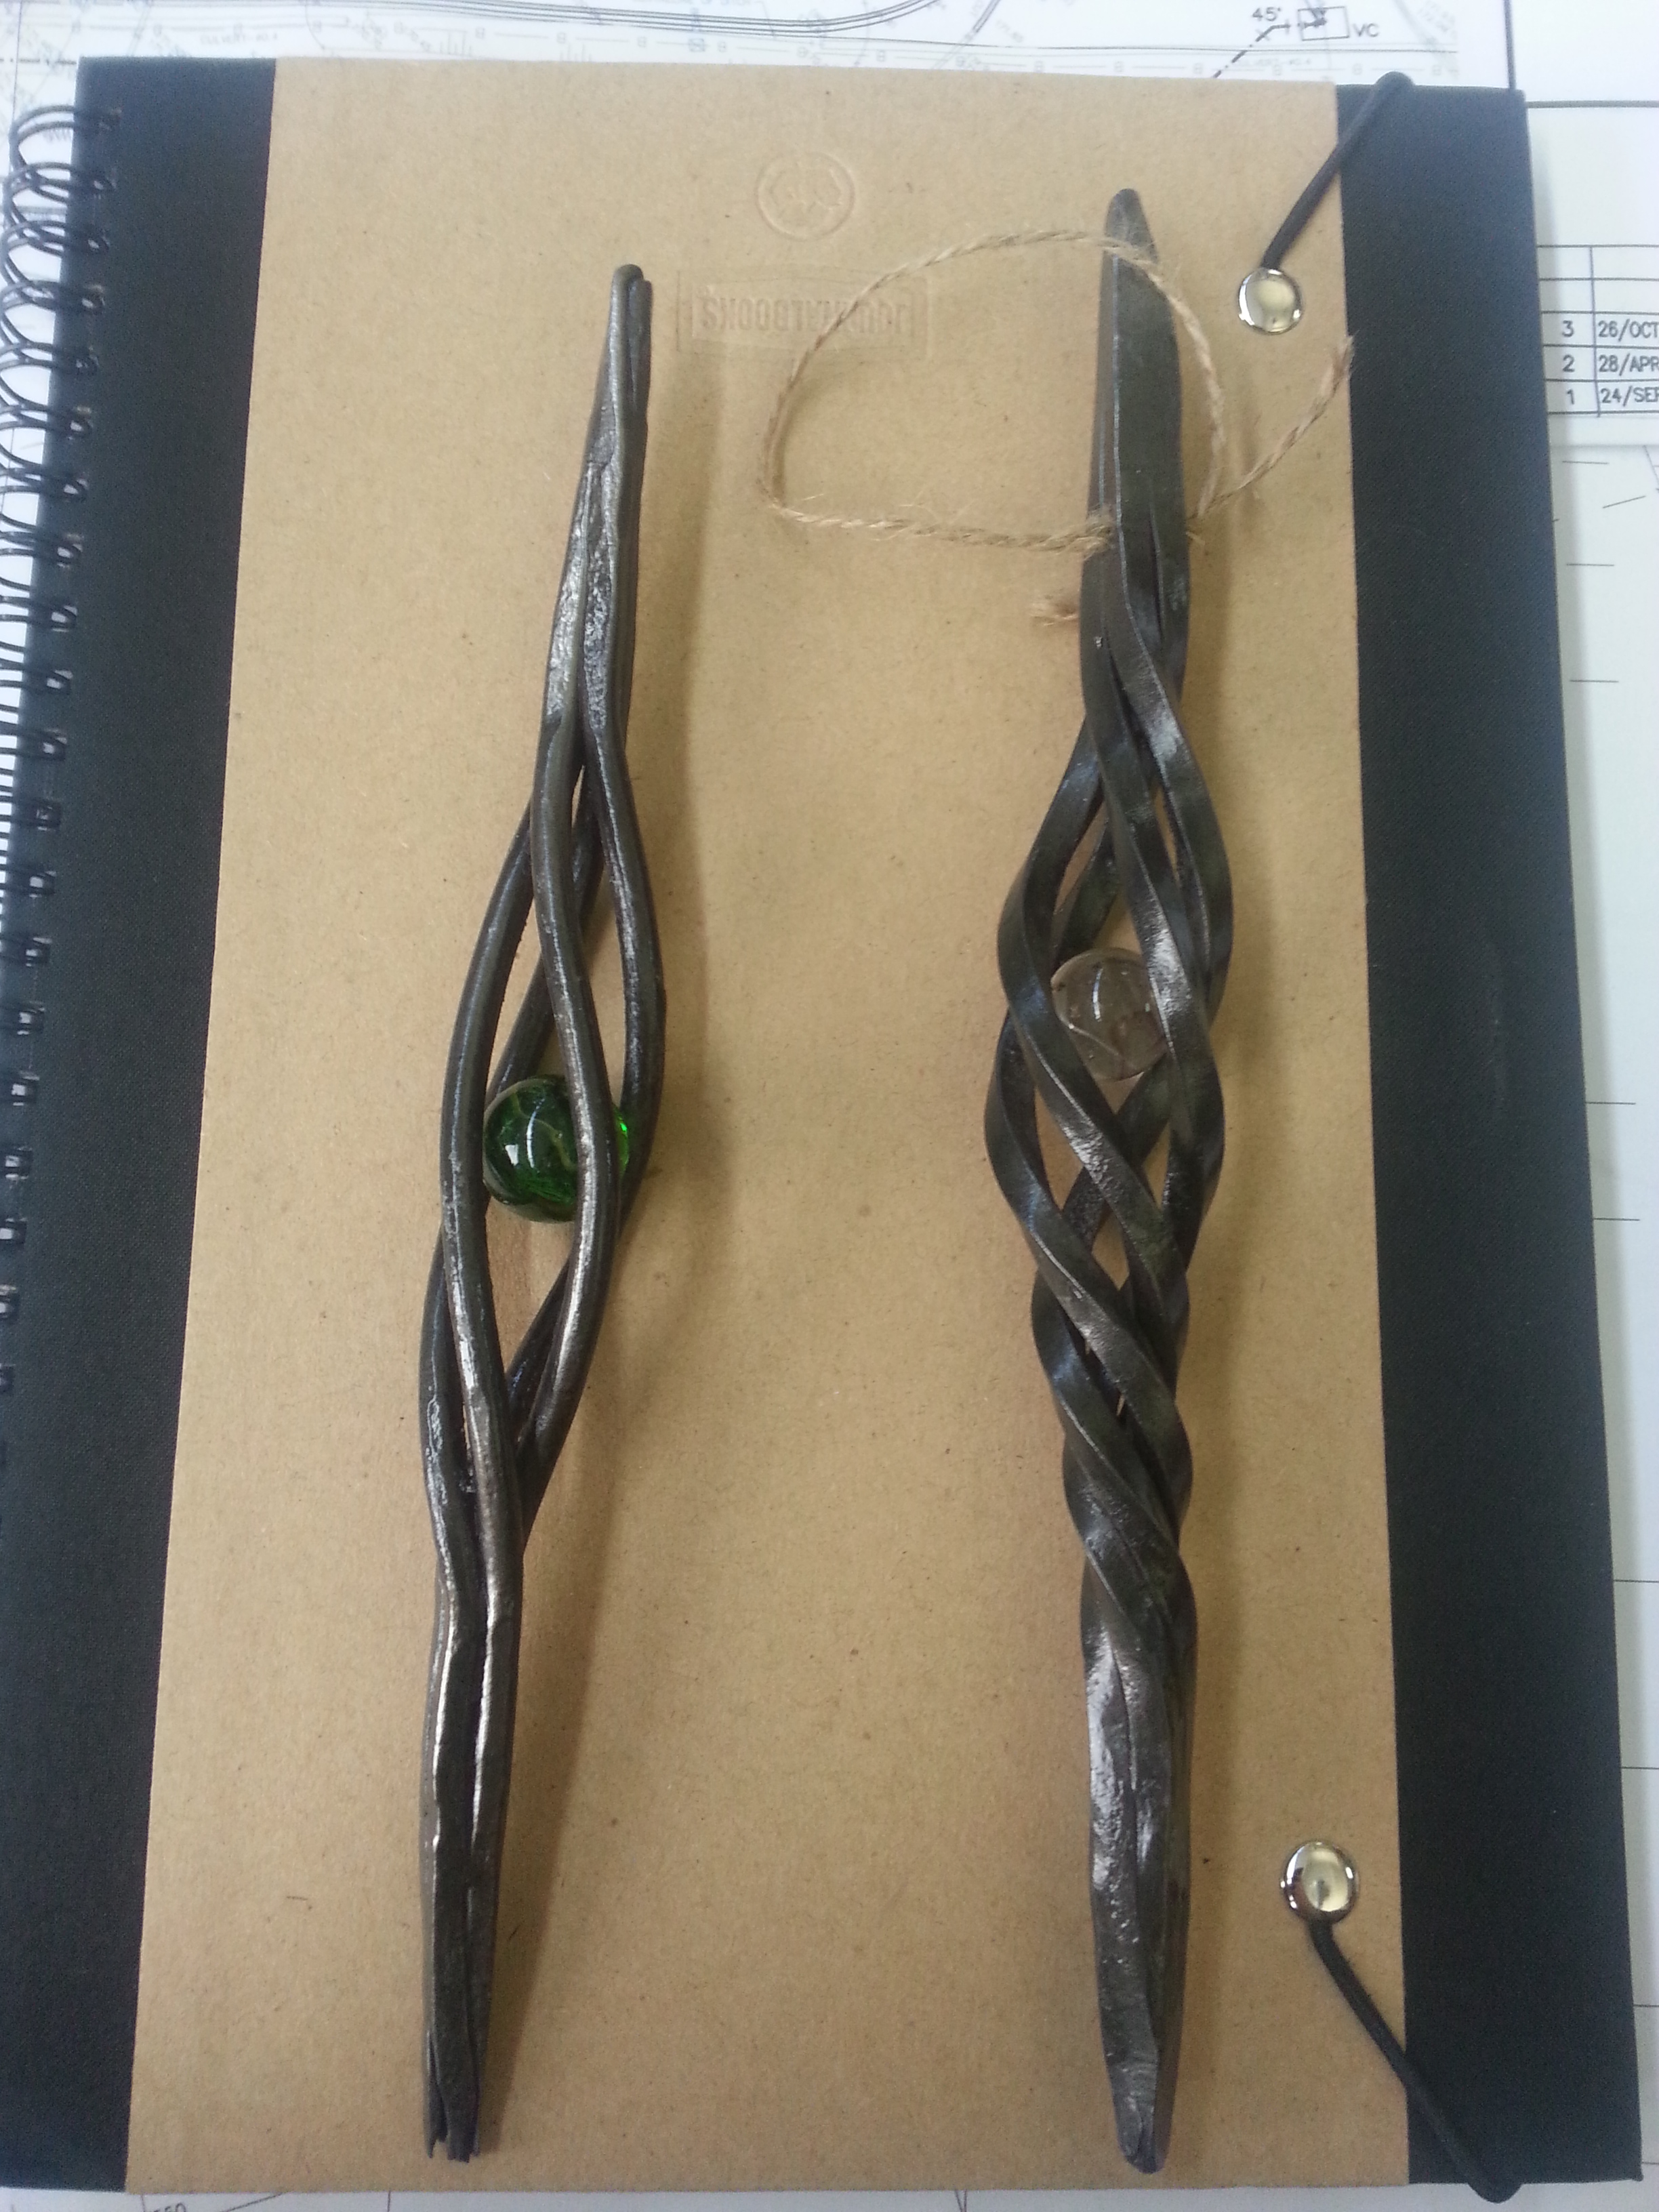
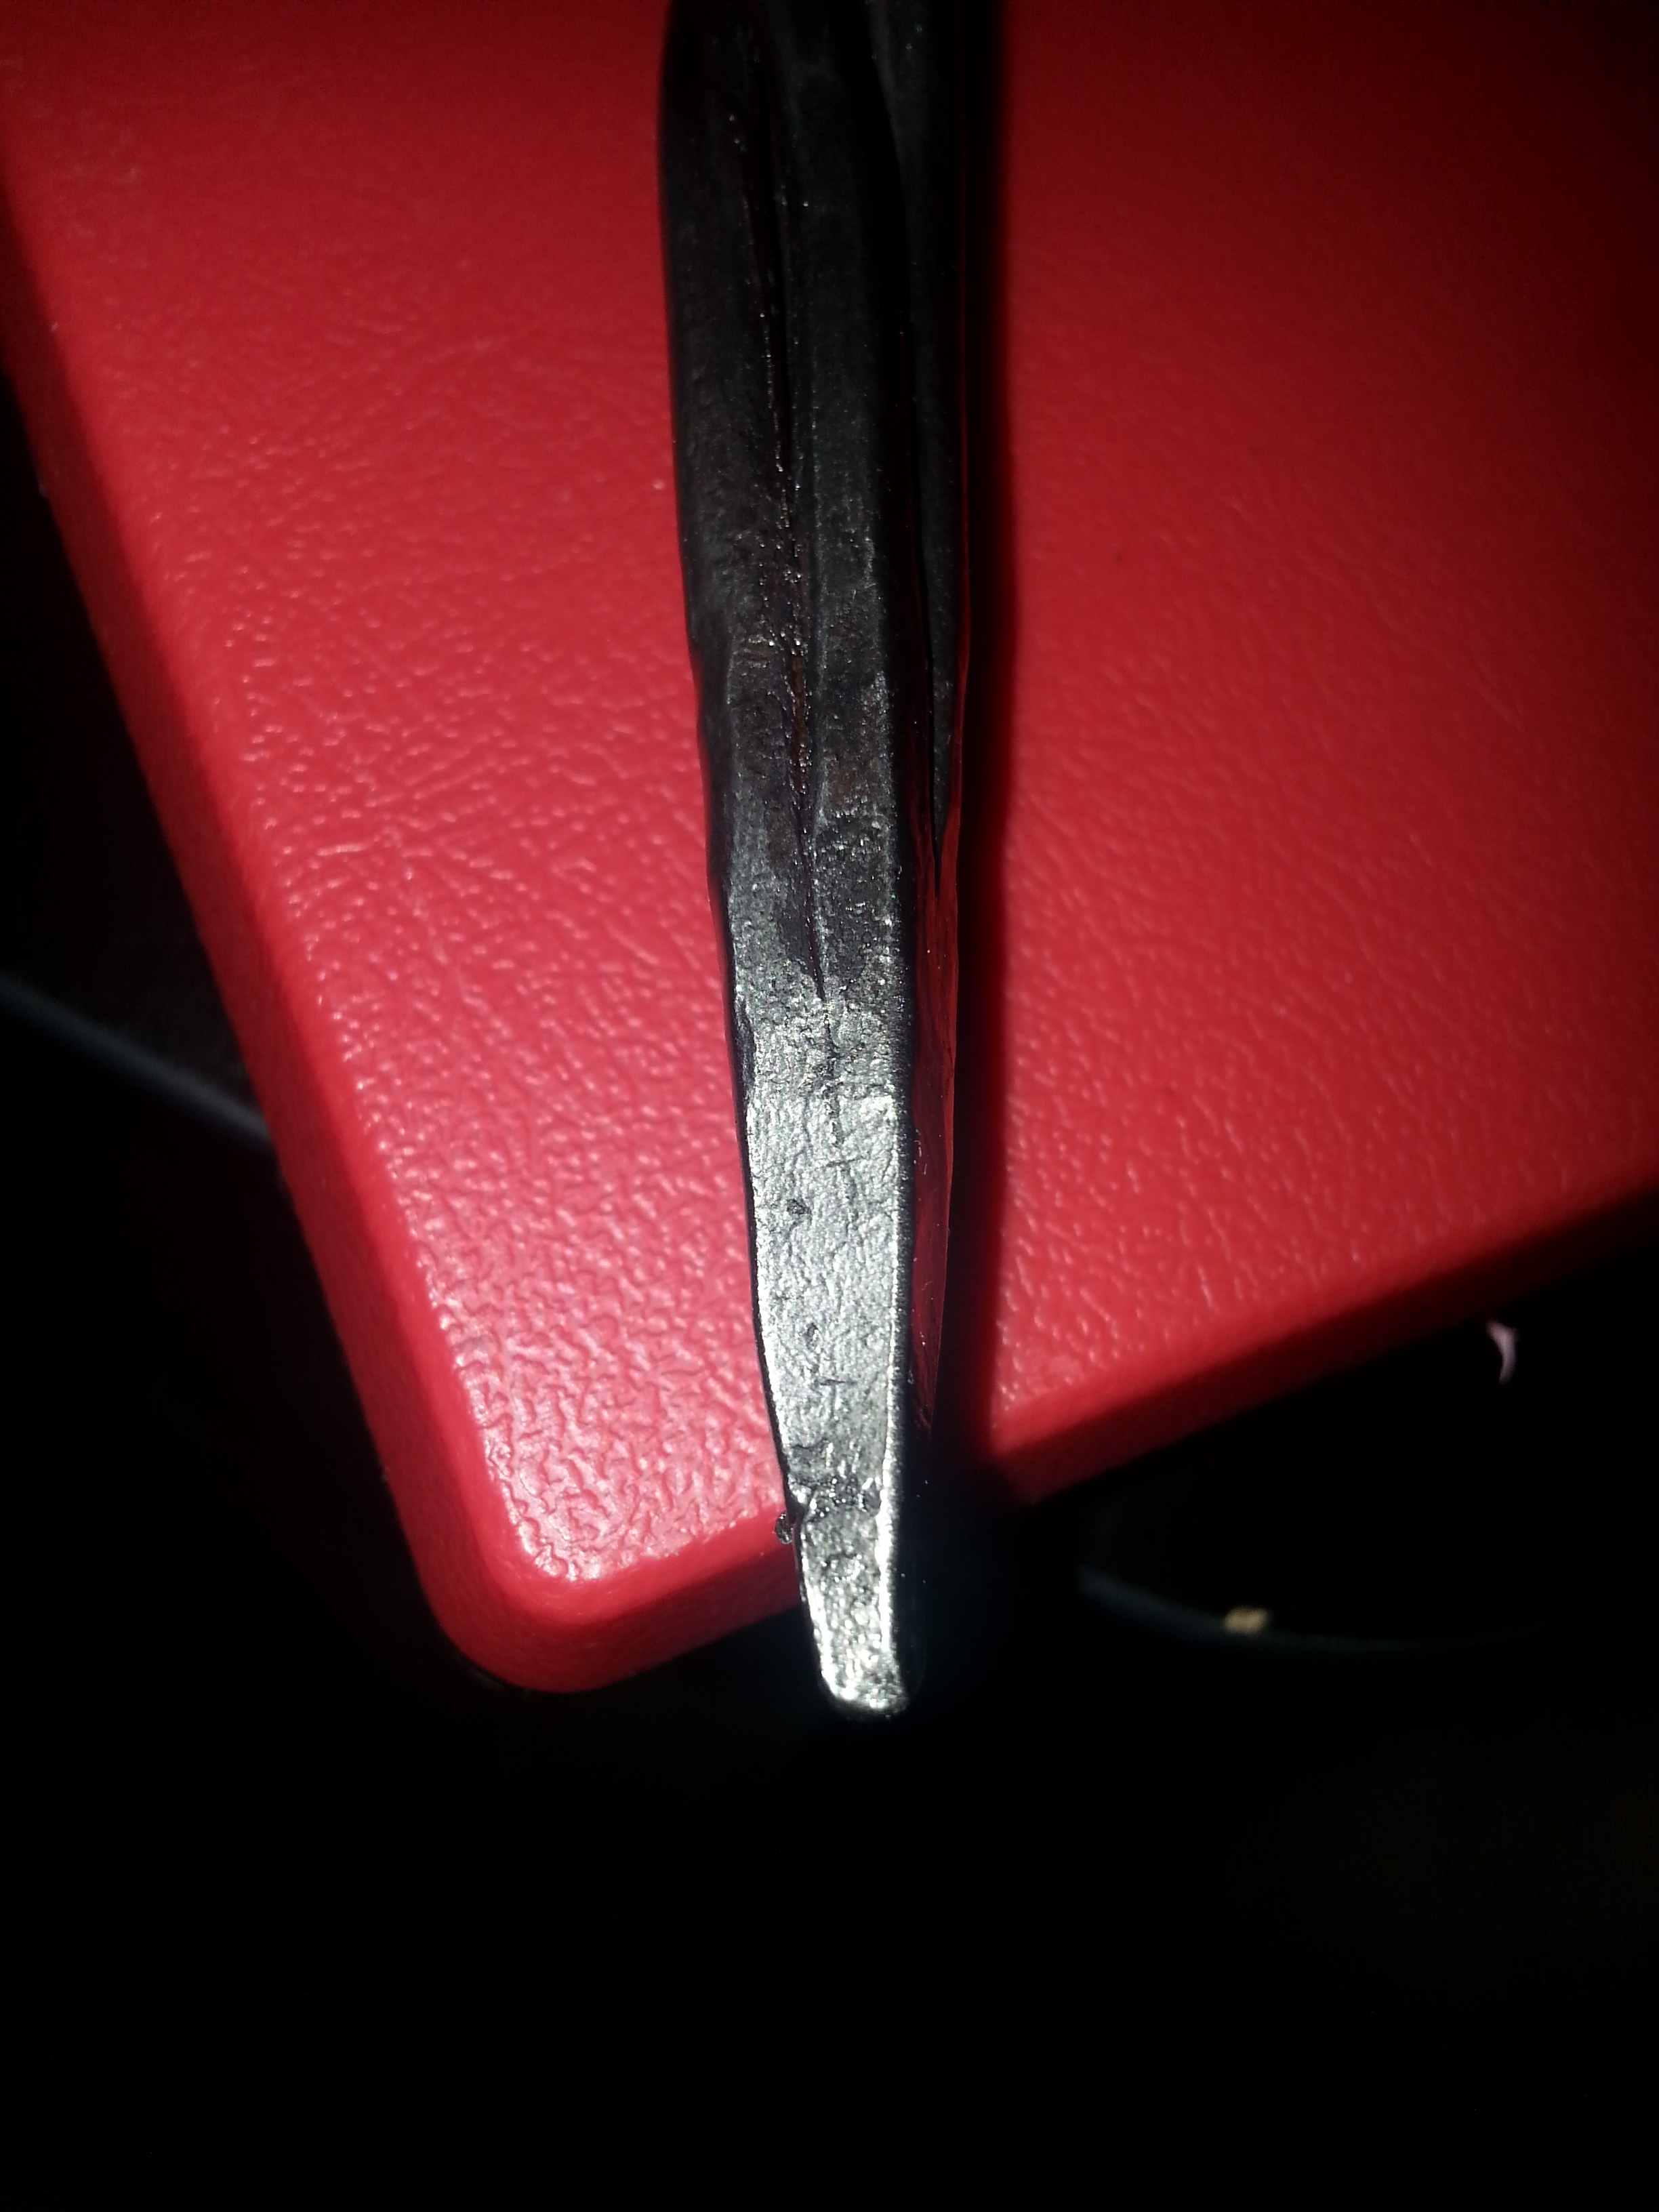
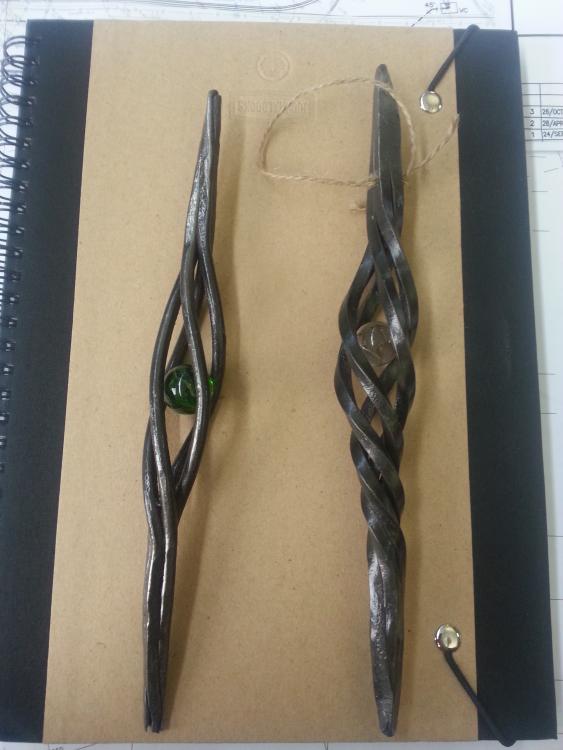
Saw a video for these online and decided i wanted to have a go at making them for people as small gifts this year. I made them using four 8" long pieces of 3/16 round stock. I bundled them together into a square configuration and forge welded them together. Twisted them around 1.5 times then reheated and went back around the other way until i was happy with the look. I opened up two of the bars of the cage with a pair of pliers, reheated it dropped the marble in and closed it back up trapping the marble inside. Wire brushed the whole thing and gave it a shot of clearcoat paint. This was my first ever forgeweld at home and it took me a few missed steps before i got it right. Now that i know how to do it with my forge though im pretty confident i can make my next ones even better. I use a propane forge.


-
Im not sure which product they ended up going with in the end but there were several options available on amazon. Protectaclear, Jewlery Shield and the like. I told them to just read up some reviews.
-
Good Afternoon, I recently forged a pair of wedding rings for a couple out of dmascus steel and they are both very happy with the results. If the steel you are working with is anything like that and basically not stainless it will rust without taking steps to prevent it, but there are a couple of things you can do to fix it. You can do an outer ring of steel and an inner ring of a presious metal like silver or gold. The outside would still look excactly how you want but the inside and sides of the ring which actually touch your finger would be coated in gold and greatly help protect from rust. Another option is a chemical made for costume jewlery. Its bascially like a clearcoat spray paint which protects the piece from wearing off against your skin and in the case of the steel jewlery it helps keep moisture from attacking the steel. There may be other options but those are the 2 i know of. I have also seen a wood insert in place of the silver or gold but the same principal applies. If you do opt to use wood you need to make the wood one first and form the steel around the size of it instead. The gold or silver insert is so small that it wont really effect the fit of the rings much but wood will be moderatly thick and must be taken into account for size. The couple i made the rings for chose the spray. They had me make the rings for them because they could not afford the more typical gold ring and so they also could not afford an inner liner of the presious metal.The steel rings do have great durability however and will do the trick well as long as you maintain them. Good luck with your course.
-
-
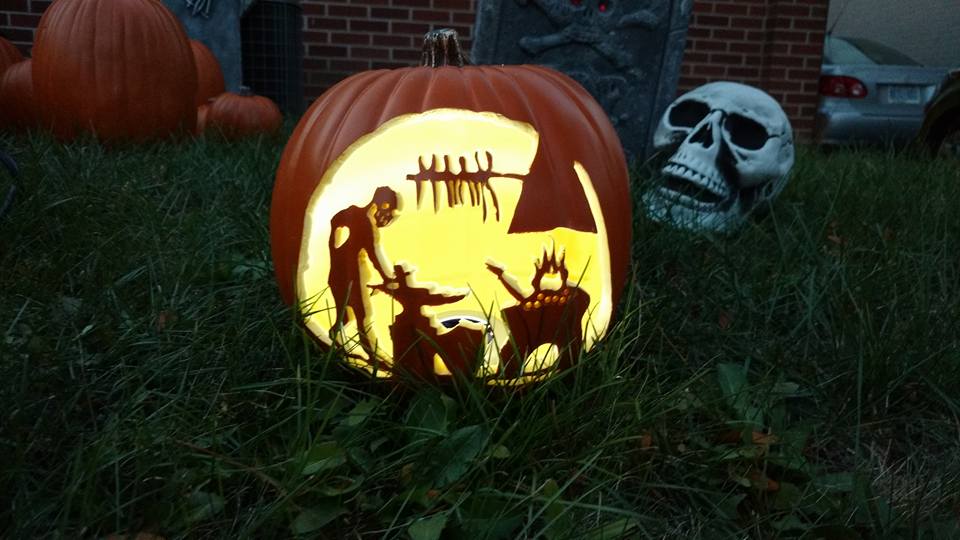
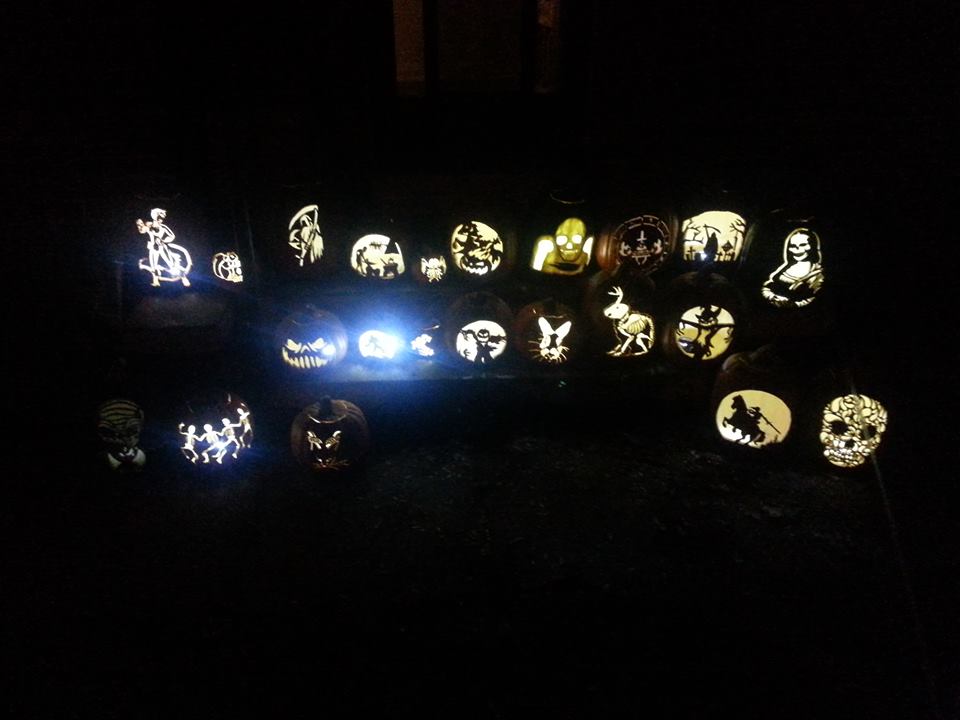
Yea i have a folder just for pumpkin patterns. I go a bit overboard with the carving. This year our collection grew to 23 pumpkins but next year will be 38. No joke though that image right there was what i had thought to try to come up with then i was first thinking of making a smith pumpkin but i couldnt find any good reference images. Saving that for next year.
-
-
-
-
-
-
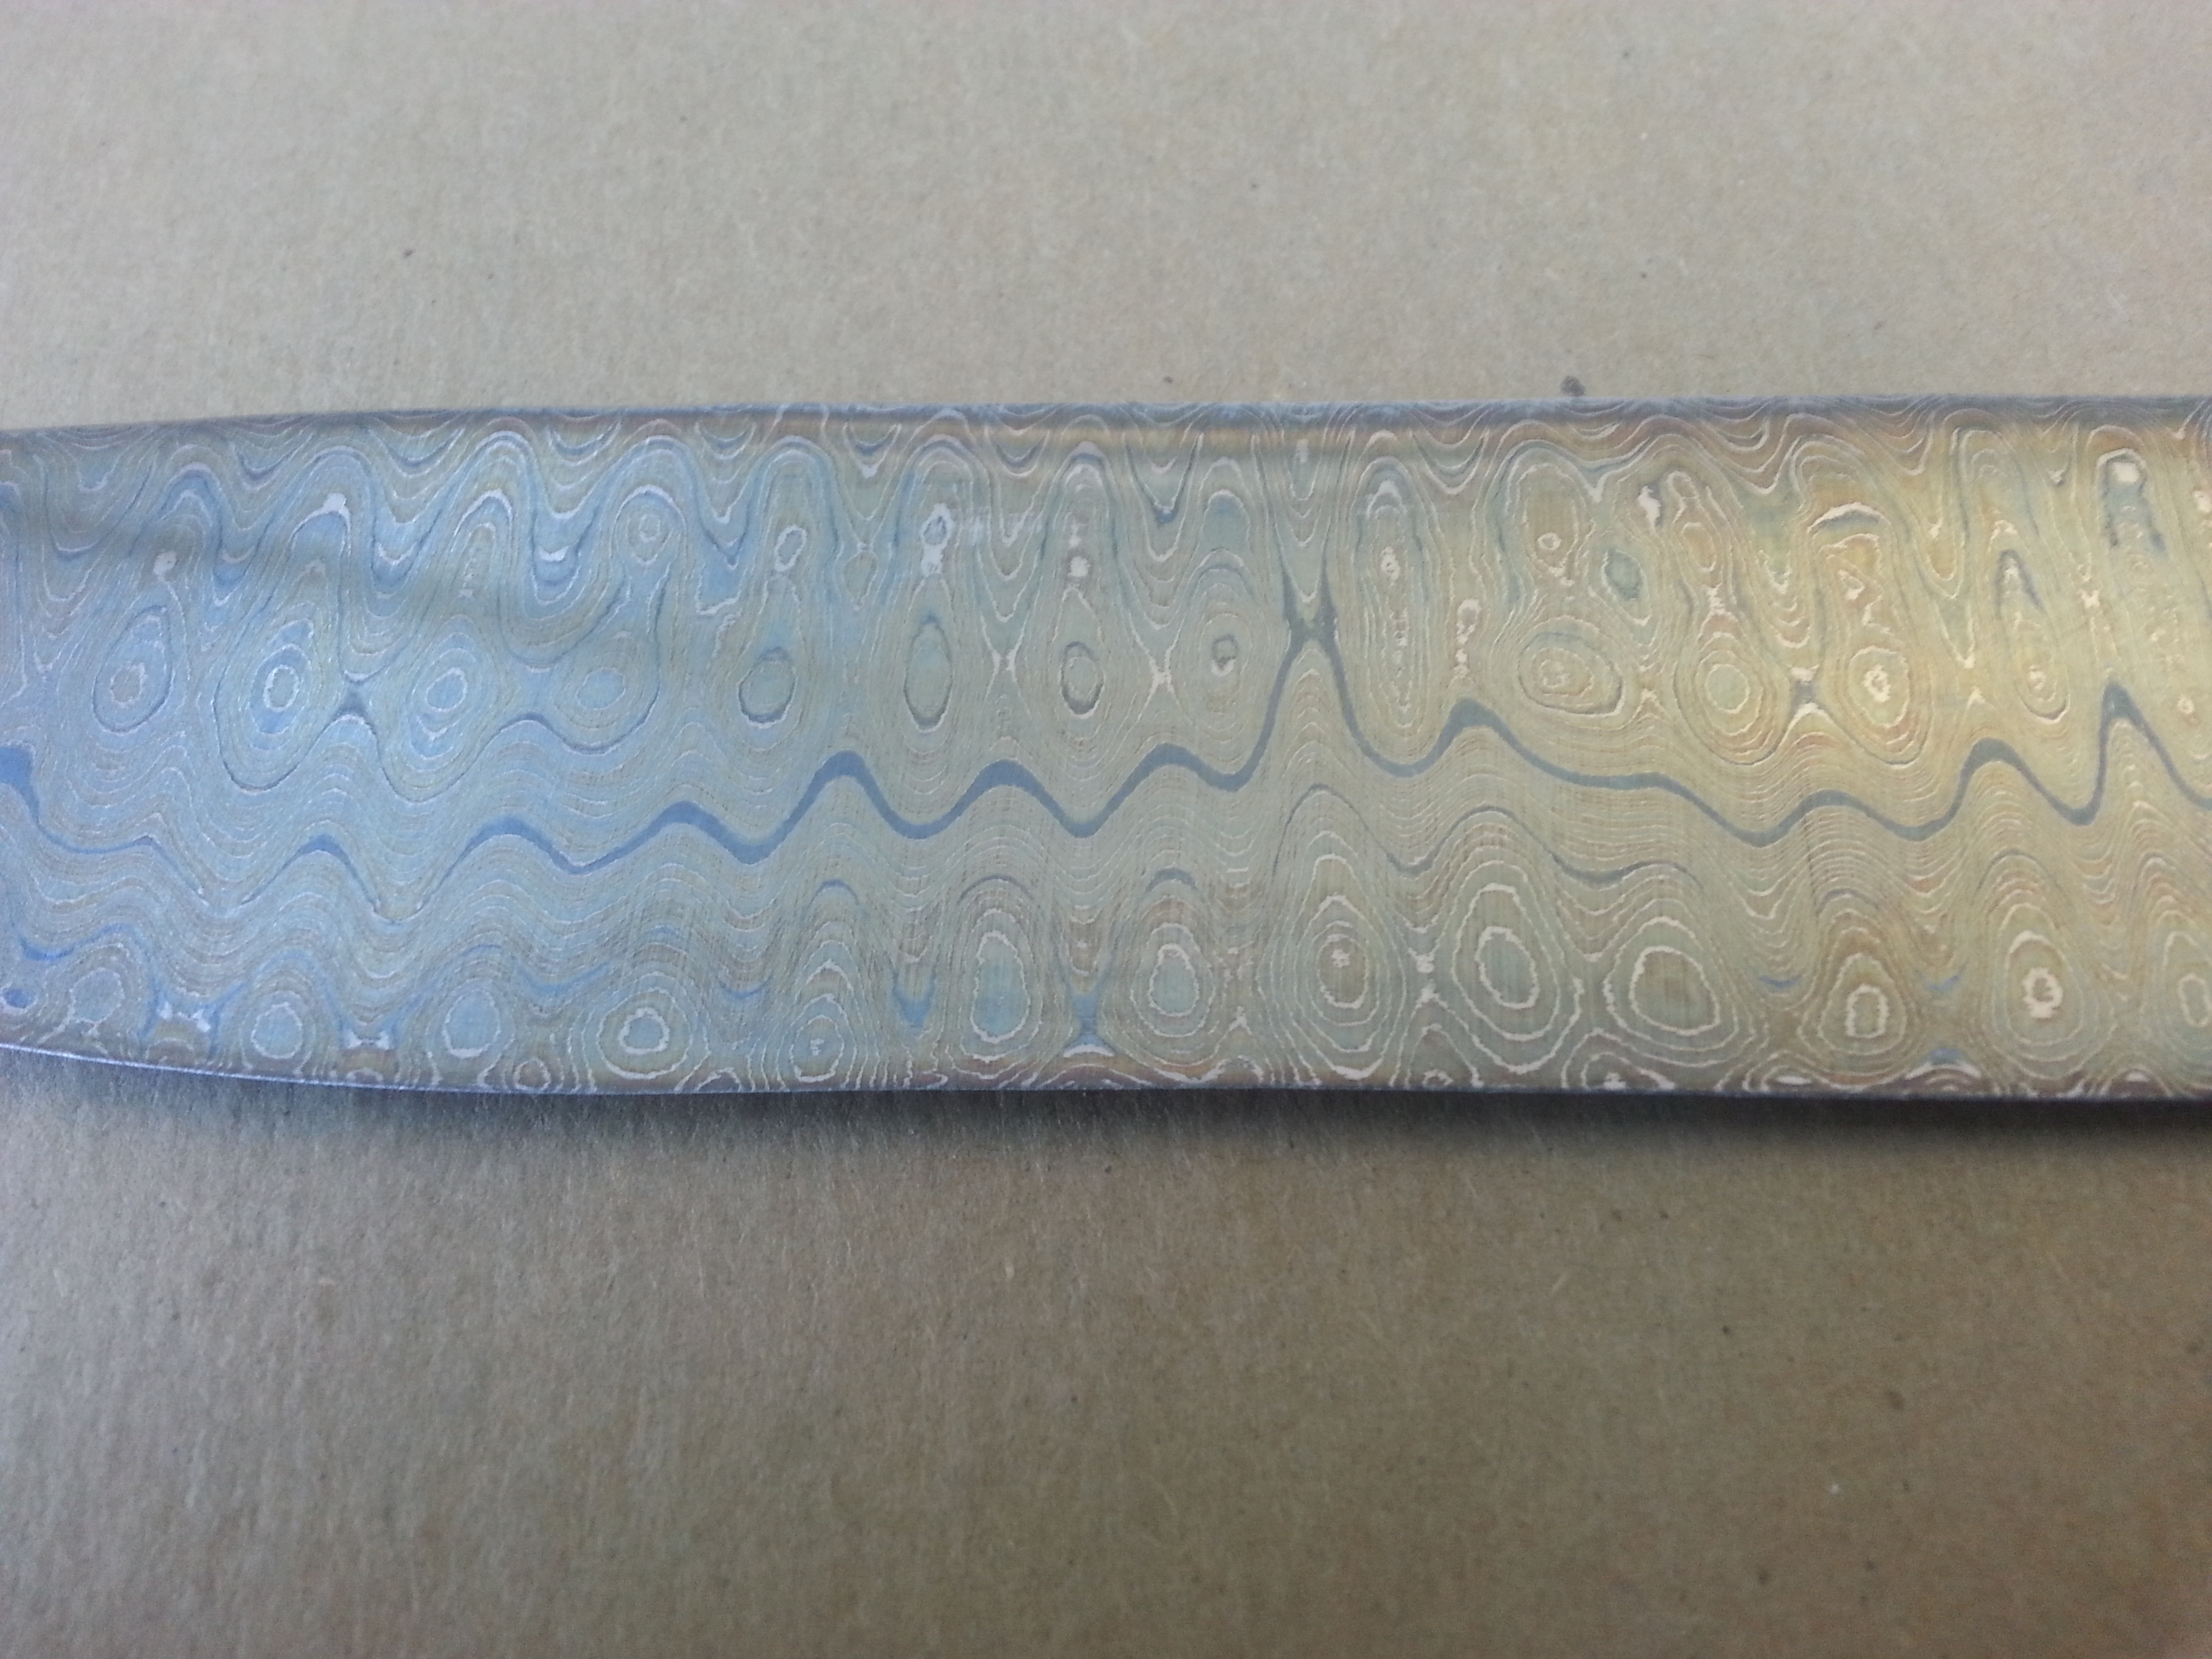
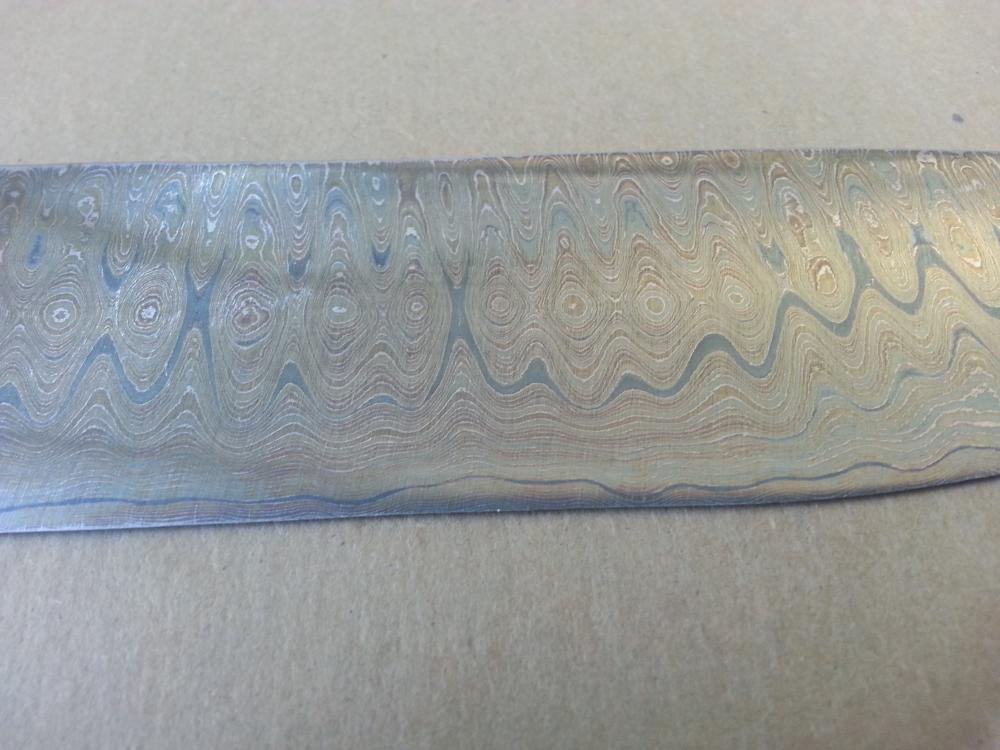
So when i first started doing my knives using damascus steel i etched them using boiling vinnegar. Then after that i was told it didnt need to be boiling and that it could just be room temp vinnegar. And then somone suggested i might see better results by using coffee. So i decided to give it a go and here are the results. Now im happy with the etch for the most part but this etch method has left the steel with these weird colours on it, kinda gold to almost a grey blue. Is this the normal effect of a coffee etch? Also this was after 1.5 hours of etching. Over all while the coffee definately works im not quite happy with it. Il be stripping this one off and trying to etch again later with something else. Trying to track down some FC. Any other tips or house hold etch solutions are welcome.

-
They both look really good shape wise but i would really like to see more pictures up close of the wagon wheel hawk. Id like to see up close of where you had to fix the melted portion, most people when they melt the steel they toss the piece so i would like to see one that had been fixed.
-
-
-