Dustin Quade
-
Posts
271 -
Joined
-
Last visited
Content Type
Profiles
Forums
Articles
Gallery
Downloads
Events
Everything posted by Dustin Quade
-

Damascus and RR Spike Tomahawk
Dustin Quade replied to Dustin Quade's topic in Axes, Hatchets, Hawks, Choppers, etc
Yea thats true. When i first thought about doing this project i had no intention of taking it this far. I intended it to just be an exercise but the further i went the more i wanted to see it cleaned up but there are alot more flaws in this piece than other recent projects i have done. But what i keep reminding myself id that this was my first of its kind and my recent knives and things are like the 20th. Just reaffirms you just get better and better with practice. -
Damascus and RR Spike Tomahawk
Dustin Quade replied to Dustin Quade's topic in Axes, Hatchets, Hawks, Choppers, etc
Yea your probably right about that. Semantics are important though especially when its a specific tool. Its like confusing a saber and a talwar similar but different in key ways. -
Damascus and RR Spike Tomahawk
Dustin Quade replied to Dustin Quade's topic in Axes, Hatchets, Hawks, Choppers, etc
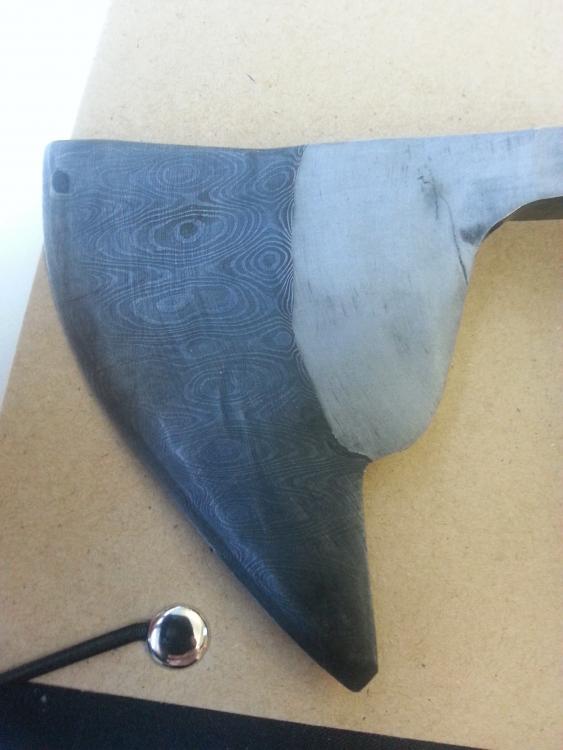
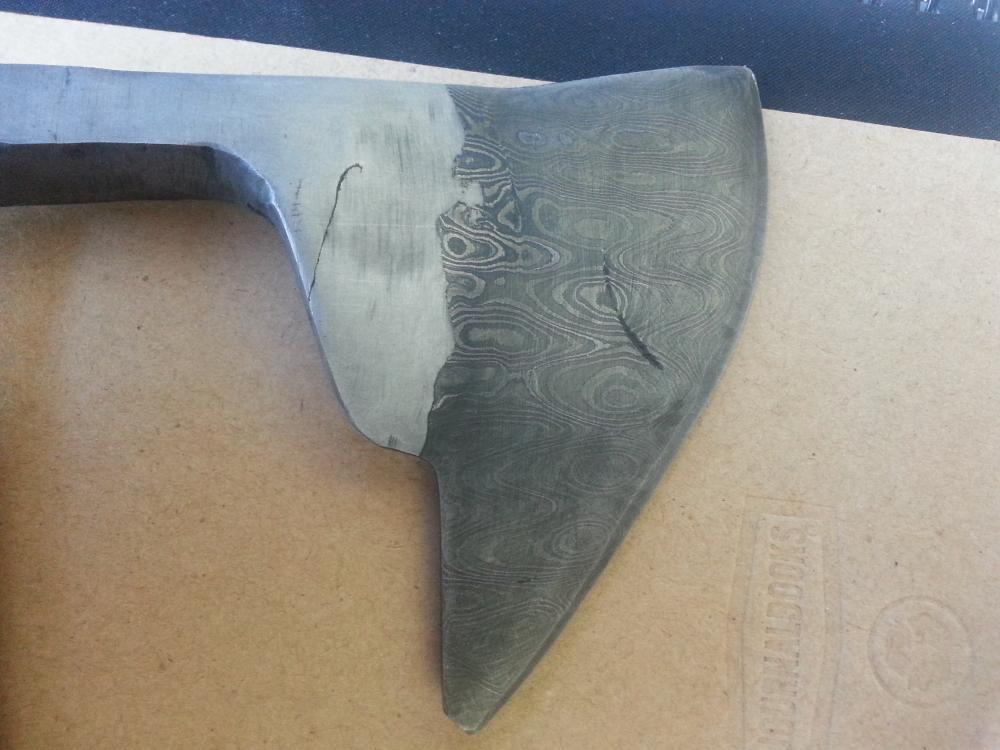
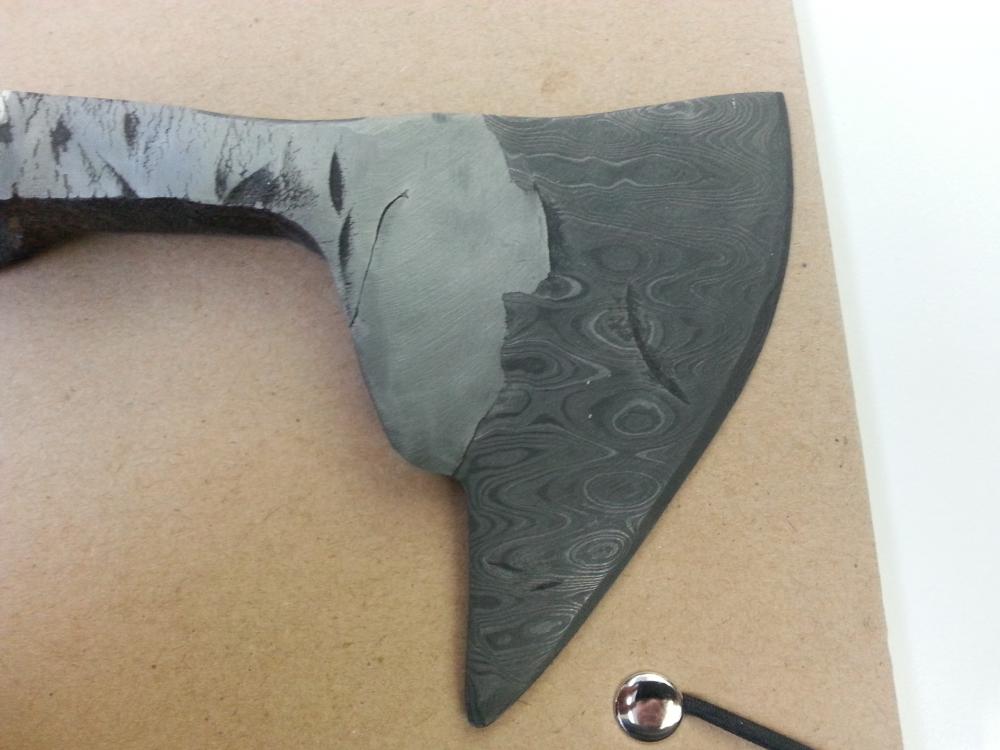
Yea that one is weird and i was looking at it this morning with my friend. It doesnt actually go around behind the piece it just shows on either side of the piece. So i think its not a crack... i think i folded over the metal of the head onto itself when i tried to flatten it so i think its a cold shunt. I know those are also bad but because it doesnt show around the back i dont think it will be a problem. -
If you are a DnD player or know some you can use a friend and a flatter and turn them into D20's
-
Damascus and RR Spike Tomahawk
Dustin Quade replied to Dustin Quade's topic in Axes, Hatchets, Hawks, Choppers, etc
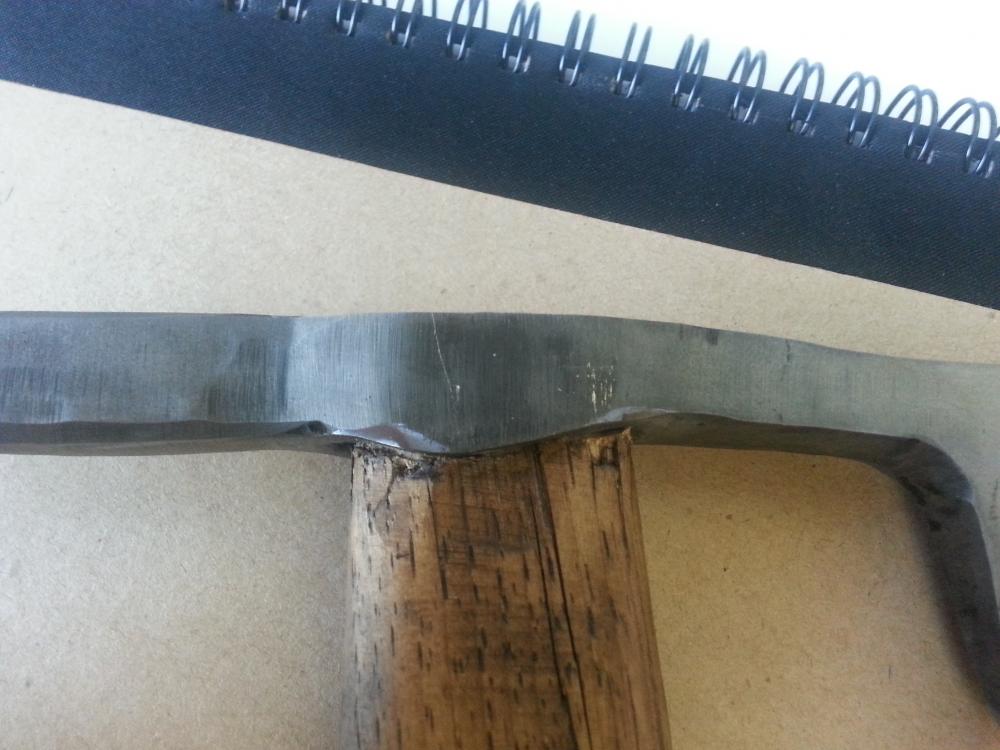
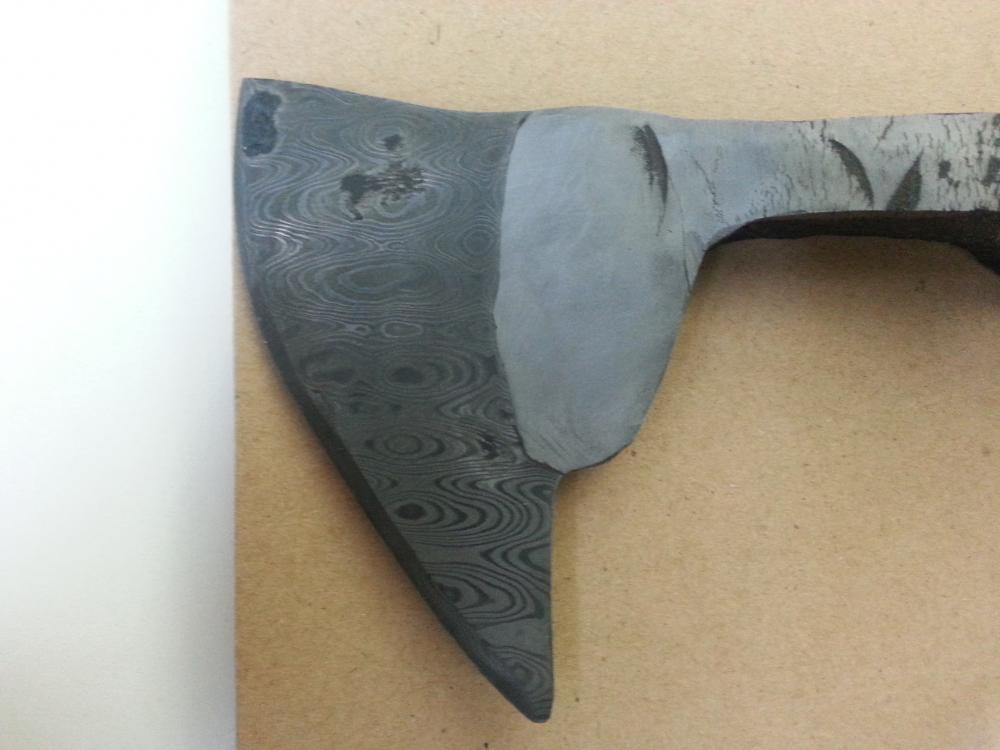
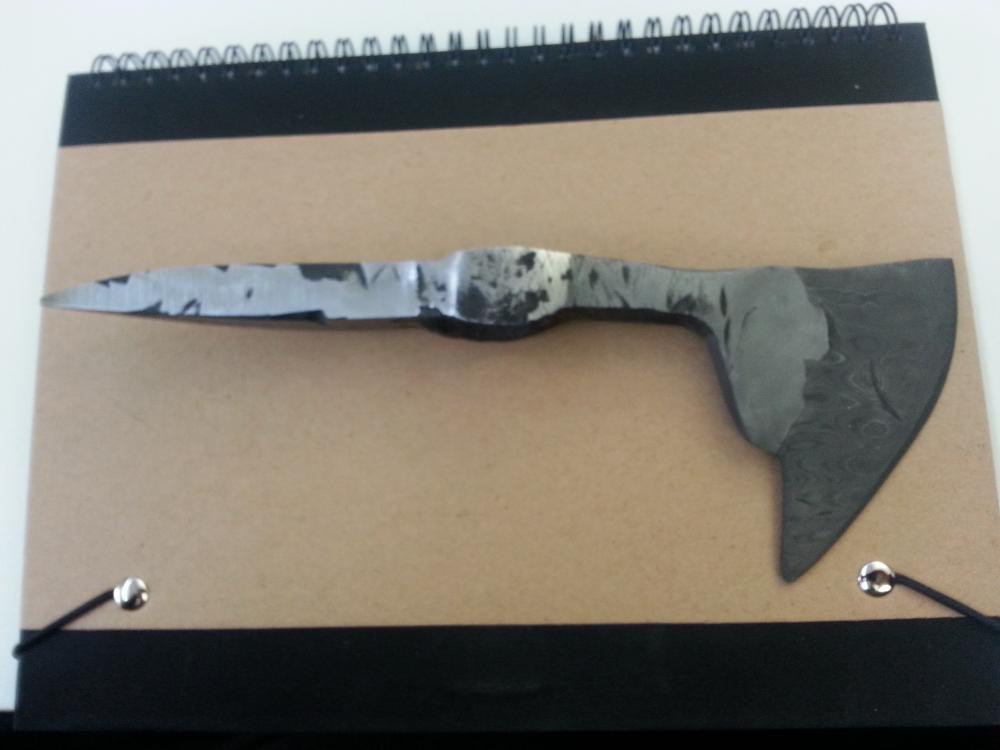
Ok so i got it all cleaned up and mounted on the handle. Most of those ugly cracks on the side dissappeared after a bit of grinding so i guess it was just surface stuff. Really happy with how it looks though. What i need to do is get some practice attaching handles to things though. I replaced 2 hammer handles but they are grabage and need to be replaces again because the head is too loose and the wedges have flown out the top while i was working with them. This axe here fits amazing on top but it got a tiny split in the side from driving in the wedge. But i guess practice makes perfect.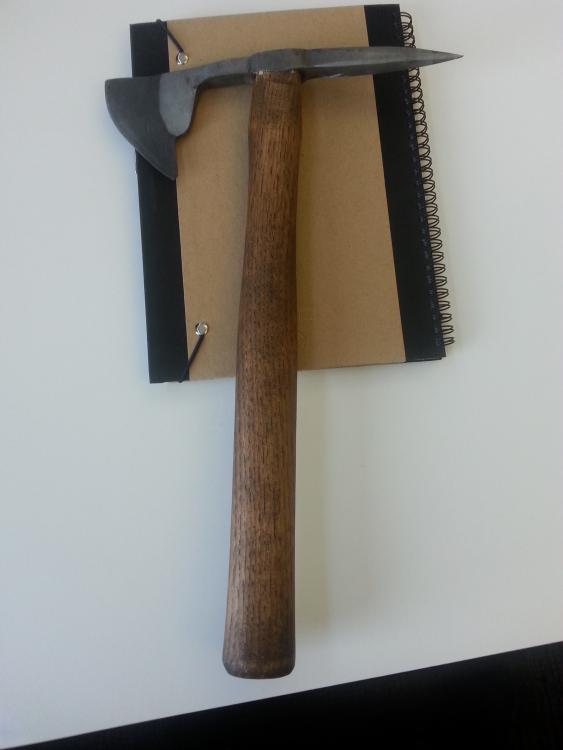


-
Those trees look great. Also really like the lilly.
-
Wow that is just a beautiful piece. The finished product is amazing and the dragonfly is a really great touch. Well done!
-
Great idea, now i know what to make for people next year.
-
I had honestly never considdered that, what a great idea! Thanks for the tip and the compliments, il be sure to post more flowers in the future. Il be trying to hit the craft store this weekend and get a jump on things.
-
Thanks
-
Pig themed kitchen knife and cutting board
Dustin Quade replied to TheoRockNazz's topic in Knife Making
Your handle work is always amazing to me. Way to go! -
Wow now that is a very cool looking idea right there! That demo is xxxxxxxx excellent. It is not at all how i thought it would be done. I hope more people look at this post just to learn that that method exists.
-
Its a shame the pattern didnt really come through on it. I do like the idea of recycling the little bits of damascus left over from projects. Just seems such a wast to scrap it. I have also never attempted a dagger point myself but the lines on yours look pretty close to symetrical which is imoressive, especially for a first attempt. Why didnt you temper it if you dont mind my asking?
-
Thanks man, it sounded good to me on paper last year but trying to find flowers that i can reproduce in metal with my limited skills/tools was not as easy as i thought it would be. Alot of the patterns are designed for use with paper and dont really transfer to metal. Im already hunting for more options and just trying to make a folder of them so i can be ready and get some of them done early.
-
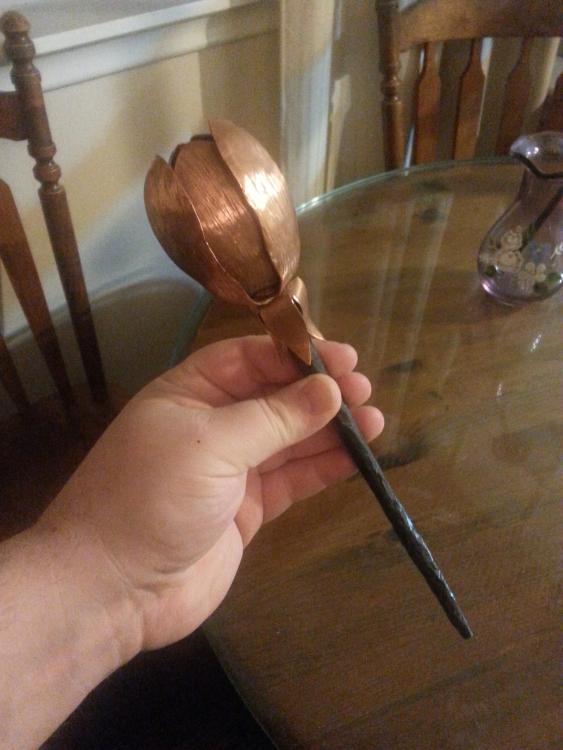
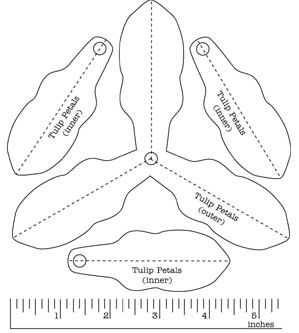
So as I have mentioned before I made my gf a copper rose for Christmas a year ago and she immediately decided that this needed to be a new tradition, every Christmas a new type of copper flower. This year I made a tulip, it is a marked improvement over the rose I made the year before, I did some texturing on this one and I used the spoon swage on my swage block to dome out the petals with a ballpein hammer. If anyone has any other metal flower patterns they can share it would be greatly appreciated. I have also attached to pattern I used to make this one. I did not make the pattern but I found it free online so I figure no harm sharing it.
-
First hawk... Damascus, of course...
Dustin Quade replied to HEAP of JEEP's topic in Axes, Hatchets, Hawks, Choppers, etc
As always your work is incredible! -
Damascus and RR Spike Tomahawk
Dustin Quade replied to Dustin Quade's topic in Axes, Hatchets, Hawks, Choppers, etc
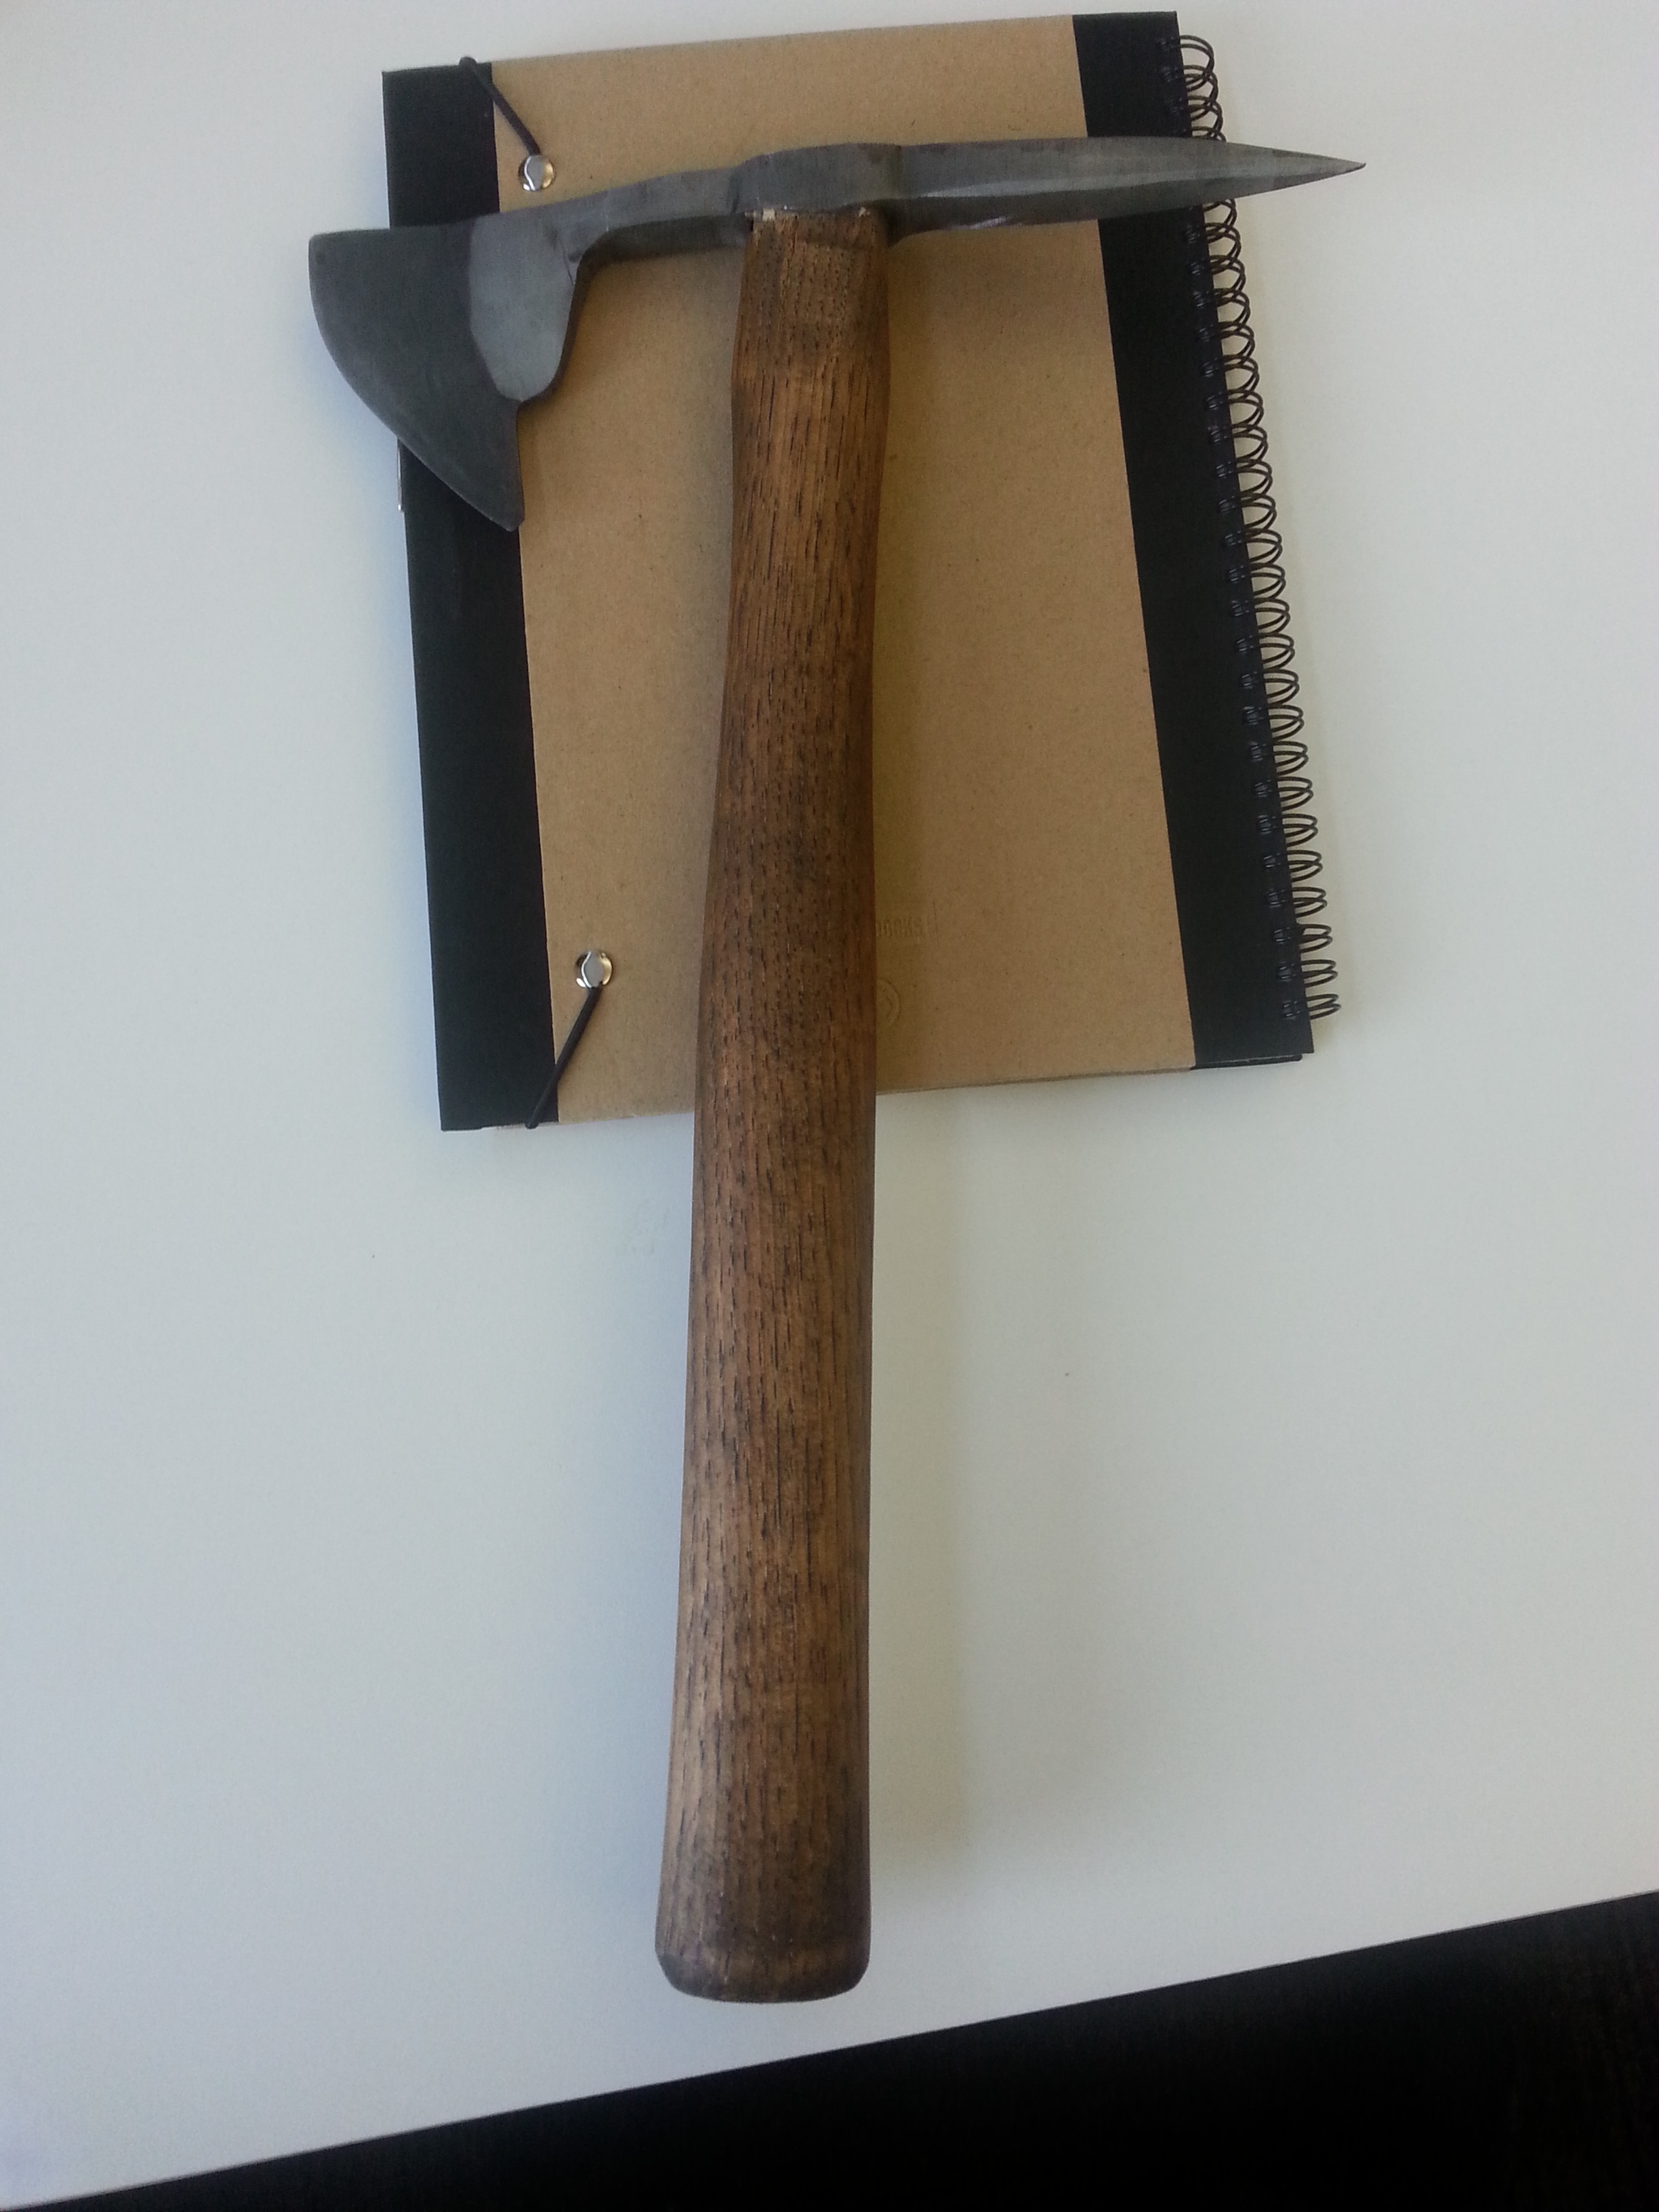
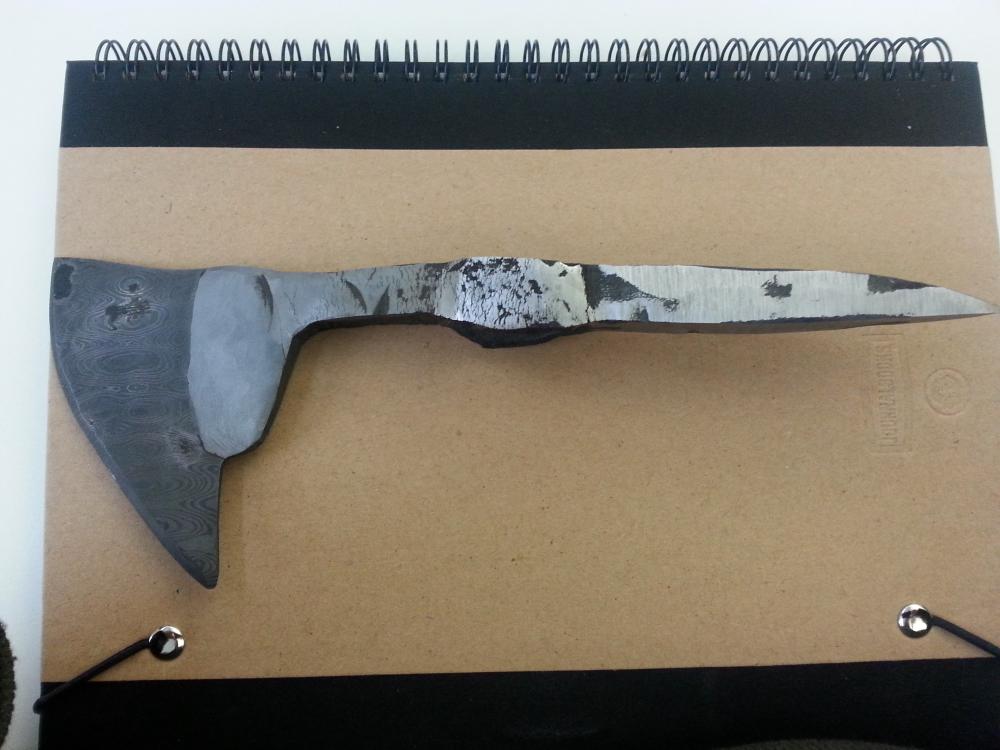
Yea i was worried about that as well. Most of the marks on the side dont travel to the top like as it rounds the corner and the ones that do dont make it all the way accross so im hoping it is not as bad as it looks, Im going to try to grind away at it and hope the problem solves itself . I wasnt going to sell this piece anyways simply keep it around as an example but i will try to be more mindful of the heat while drifting in the future. I mean it looked right whie i was doing it and tried to get the piece off while it was still a good red but maybe i should have stopped around orange? Thanks for the suggestions. I will try to impliment some of them in my future attempts especially the upsetting to gain some mass for they eye. I honestly had not even considdered that. I got a giant stack of damascus from a local guy getting out of the trade and i have been slowly working through it. It was cheaper to buy the damascus than it was for me to buy regular 01 from the metal supermaket. The piece i used here was a leftover piece from a few wedding bands i made earlier this year. -
Damascus and RR Spike Tomahawk
Dustin Quade replied to Dustin Quade's topic in Axes, Hatchets, Hawks, Choppers, etc
Thanks, the truth of it is that leaving the RR Spike head also just makes for a more practical tool in the end because it gives you a hammering surface to the tool. But that said, I do like the fantasy look that a nice big spike gives to the piece and the fact of the matter is I just really dont like upsetting, im not good at it and for this exercise the forge welding was honestly the main skill i wanted to test. I might try another with an upset face at some point. This was fun and good practice at alot of things, adding upsetting to the list of skills used in this project makes it even better. -
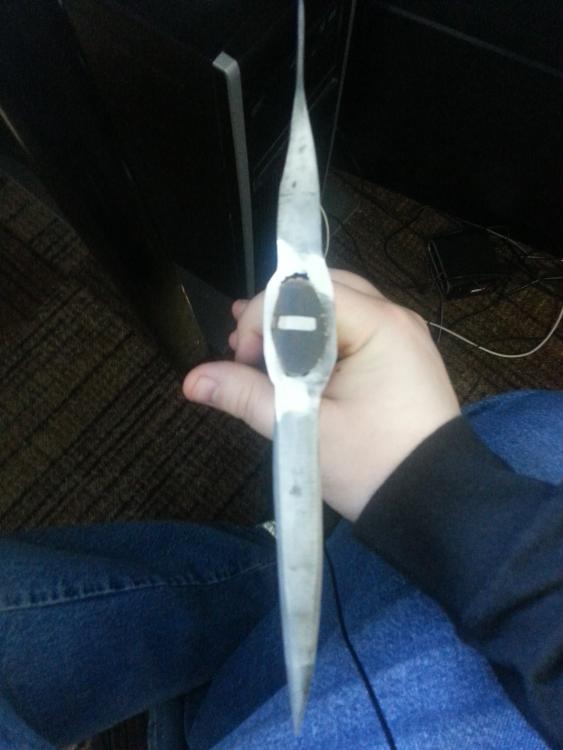
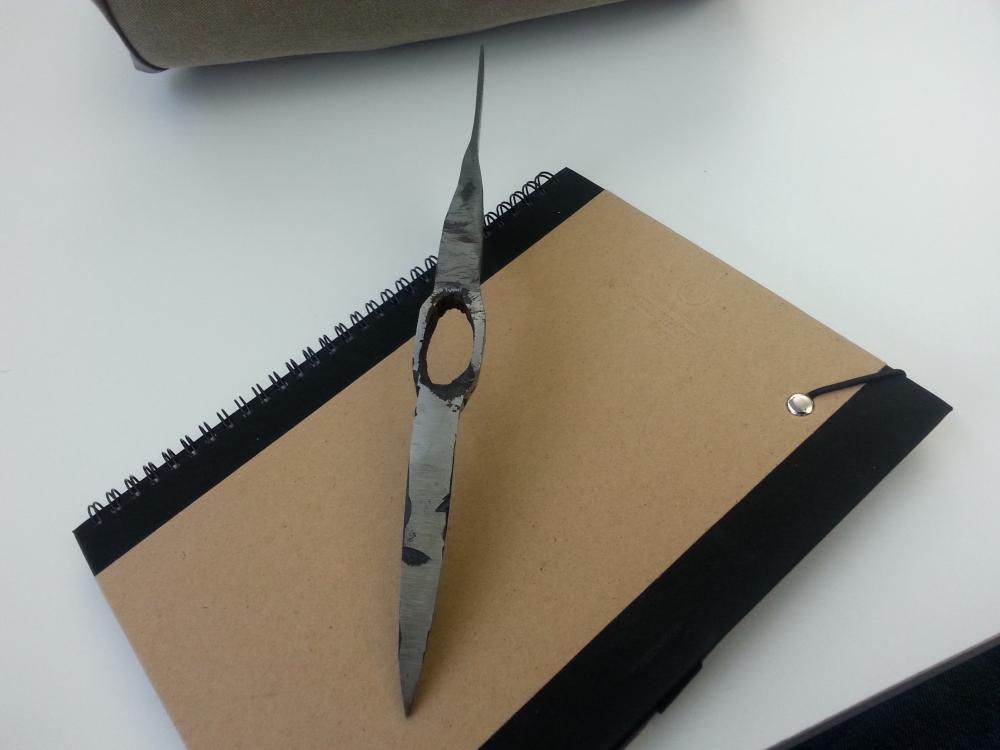
I had just finished making my first punch and decided i wanted to put it to some use. I have a ton of spikes in my shop and i also have some small pieces of scrap damascus from various knife projects and while i have seen this project before it is the first time i have attempted such a thing. This project marked alot of firsts for me. I made my first punch, used that to punch my first hole in material, used a drift for the first time to shape the hole how i wanted and my first forge weld of high carbon to low carbon steel. The forge weld was the real trick for me here. I did a forge welding seminar with my local group this summer and was like one of only 2 people who brought out a propane forge for the job. Everyone acted like i had lost my mind and like forge welding in a propane forge like mine was next to impossible and ever since i have had this worry in the back of my mind that no matter what my worge welds would not work. But this one was very successful. I used the head of the spike to hold the damascus bit instead of upsetting the the pointed end of the spike. Im really happy with how this has come out so far although i still have some work to do on it including the handle obviously. I will post some final images once i get it all done but i just love how it looks when its etched so you can see the different materials.
-
Oh yea i always do that, i was taught that if you round the spine before you heat treat i helps to midigate the risk of cracks. Dont know if thats true or not but i have always done it just in case lol
-
Thanks for the clarification. I will try to clean that up and round it out a bit before i deliver it to the customer. Last thing i want is anyone using something i made and hurting themselves while doing so.
-
Thanks for the idea about how to minimize warping. I dont have access to a press or anything but i suppose i could try to get my hands on some heavy steel plates instead of aluminum just for use in straigtening. I actually had fully annealed and thermal cycled the blade prior to heat trating. I do that for all of my knives now which is why i was so annoyed with the warp i kept getting. I had definately gone down much past 1/8 inch for the edge though which im sure is why it kept happening.
-
Thanks for the tips, I understood what you meant about the upset between where the handle ends and the blade begins. I usually think of this as an integral style blade and with the stock i am working with i cant really upset the stock to provide this, however i do try to leave the tang portion as thick as possible and generally keep that thickness about half an inch up the blade before i start the edge grind. Its not quite the same but it should midigate the failure possibility somewhat. The edge grind is something i would like to try and fix if its something that is a concern for user safety. As i said above the cutting edge doesnt actually start for about half an inch from the handle. Is this what you meant? Or were you saying the corner should be rounded?
-
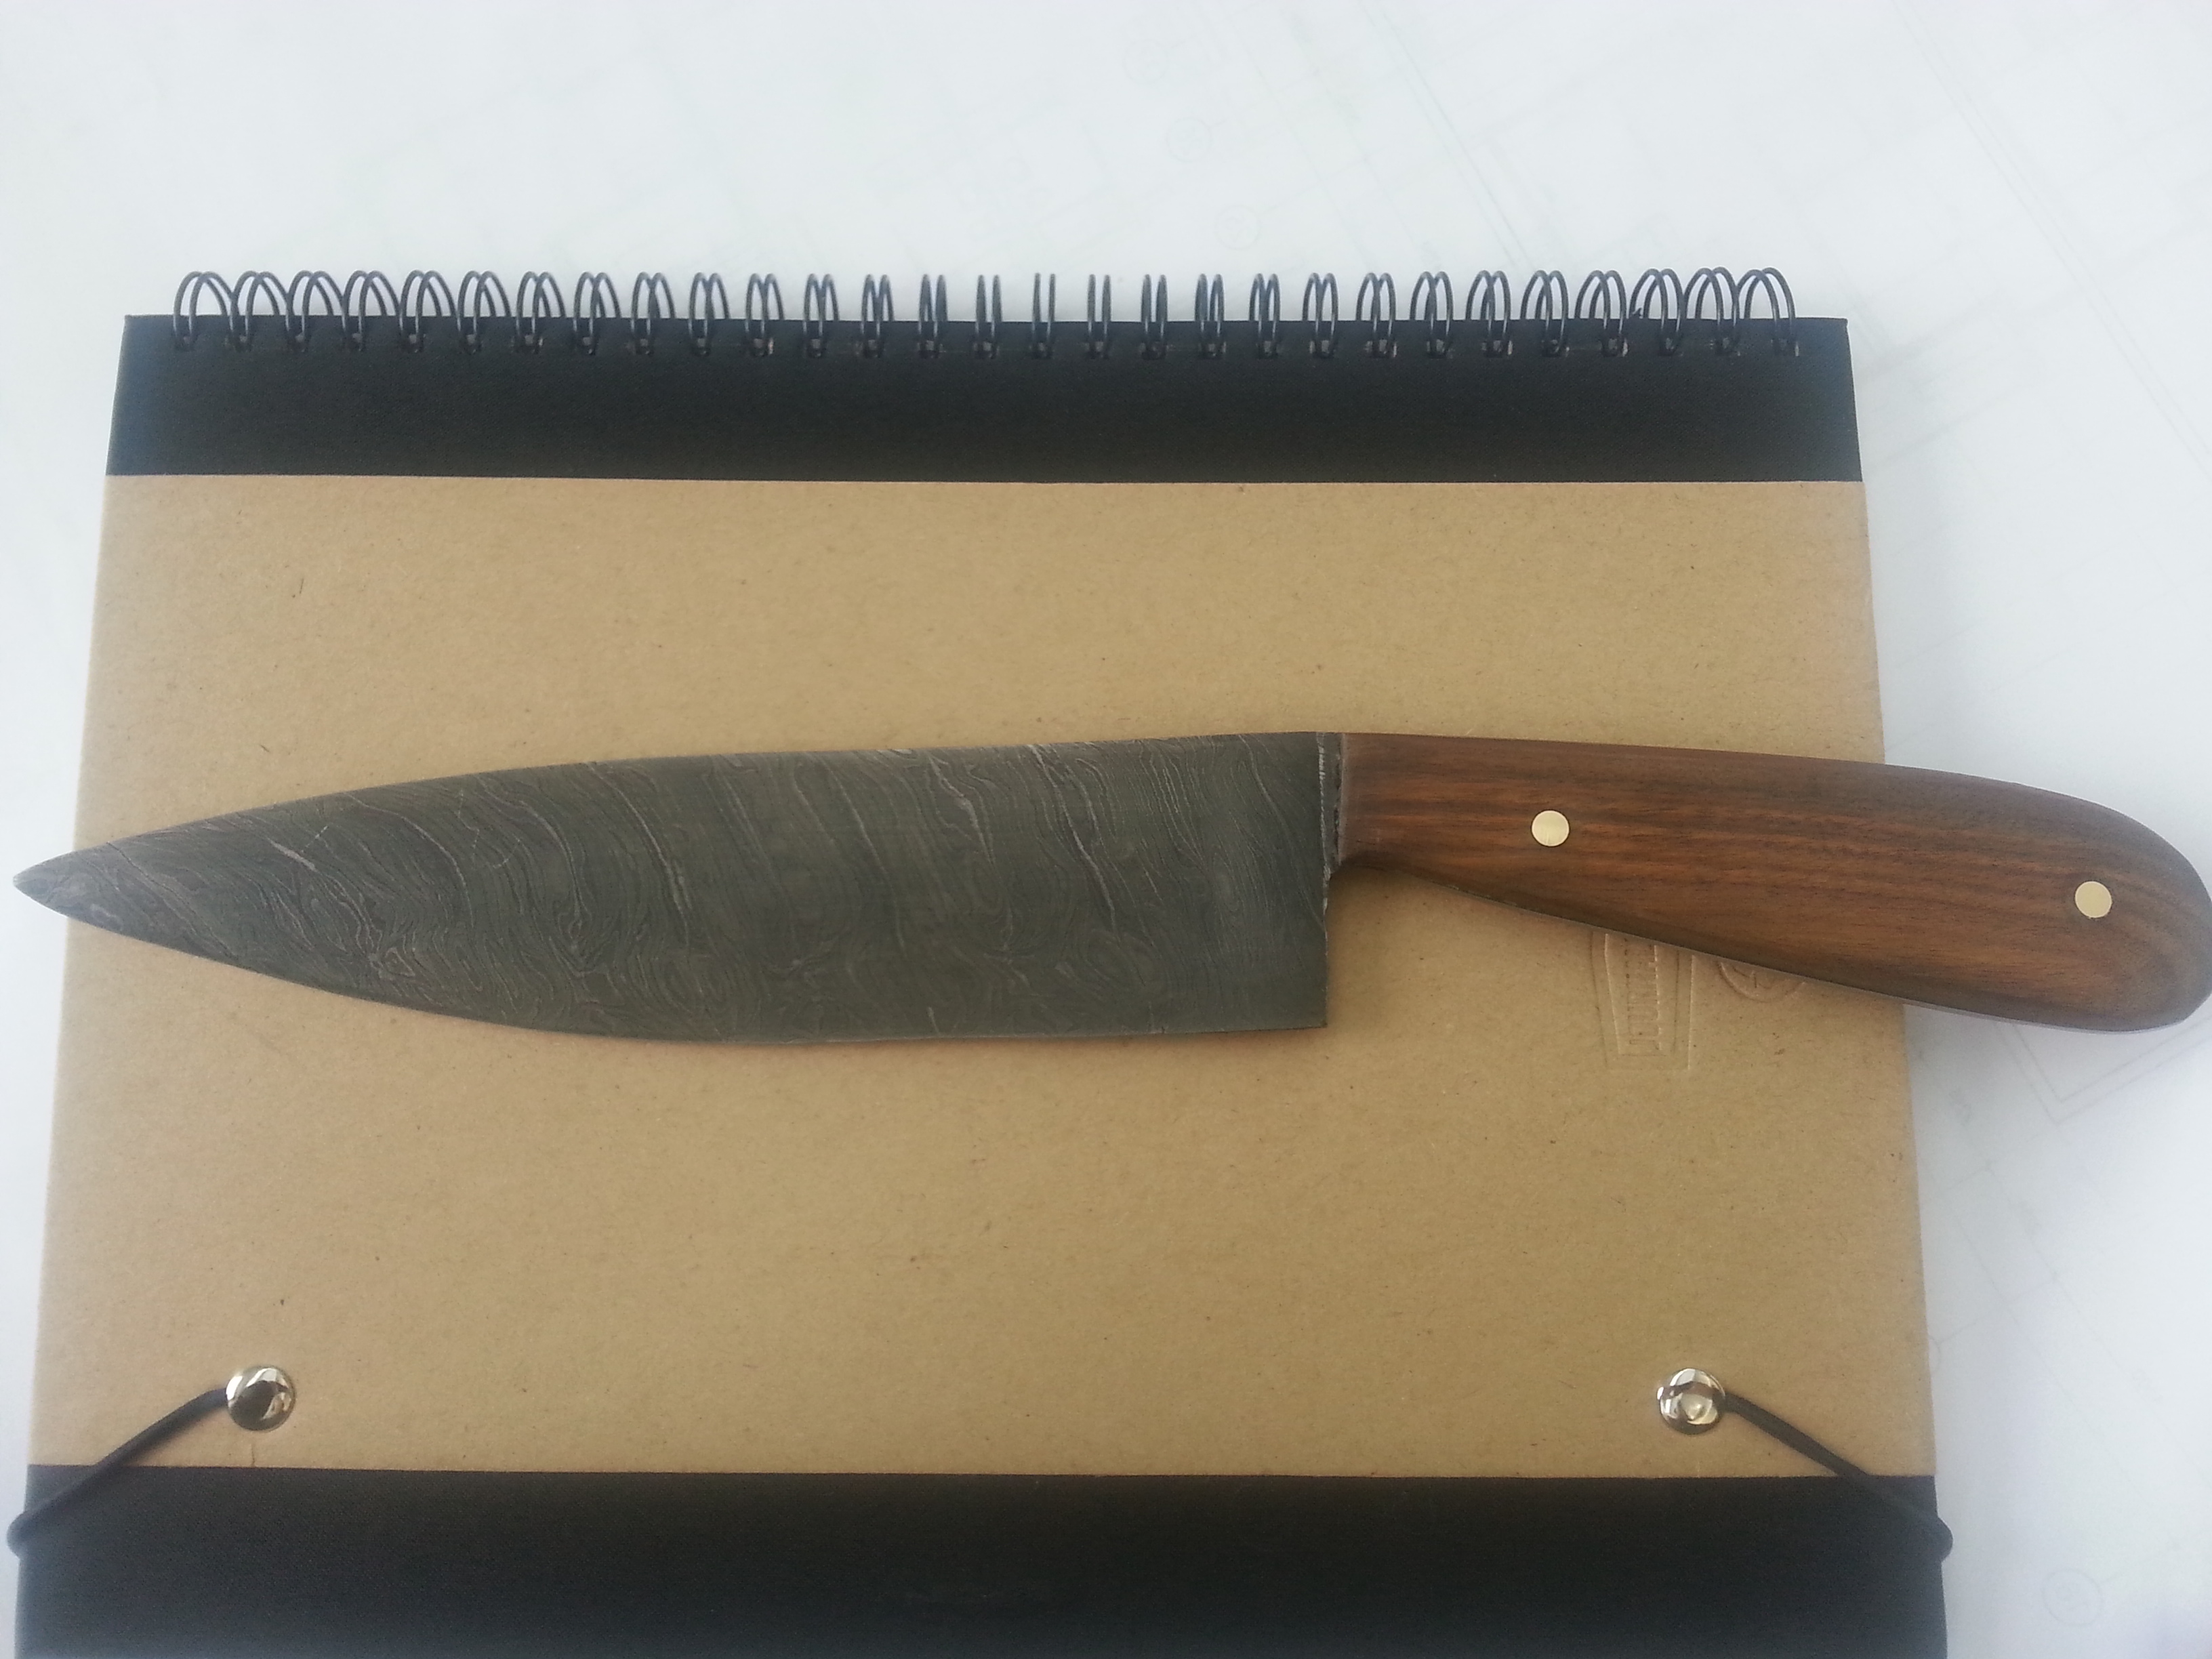
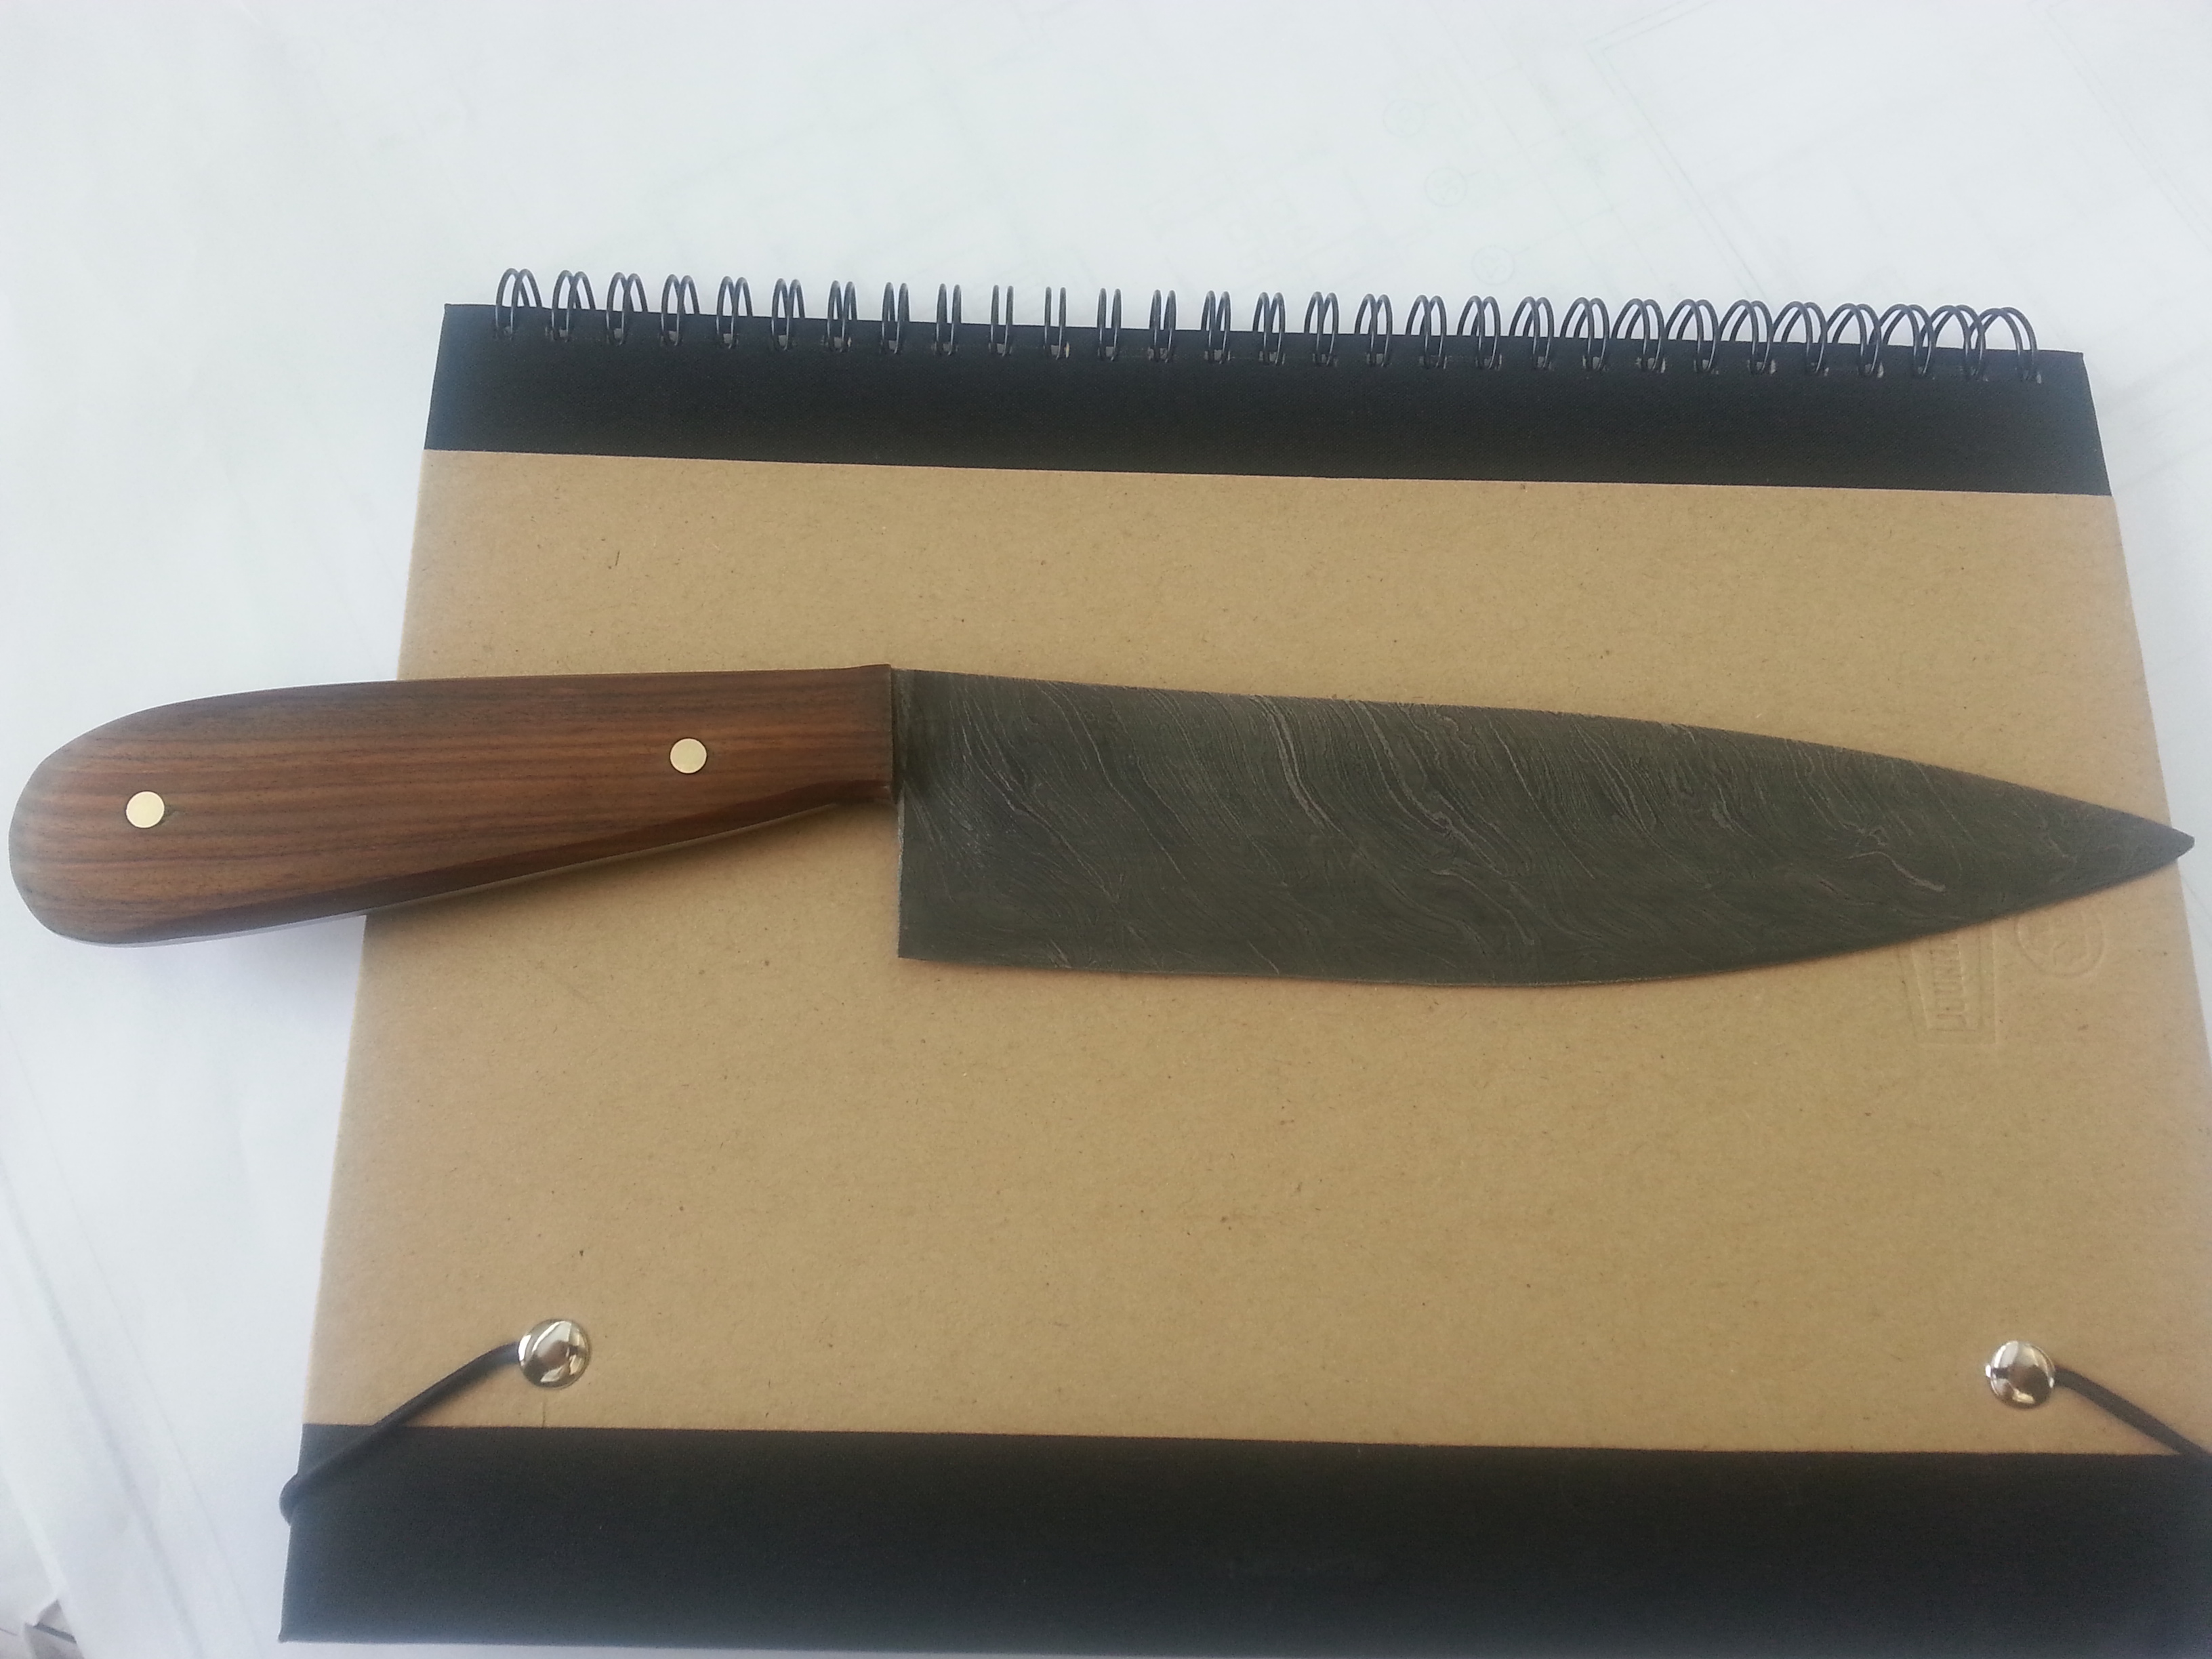
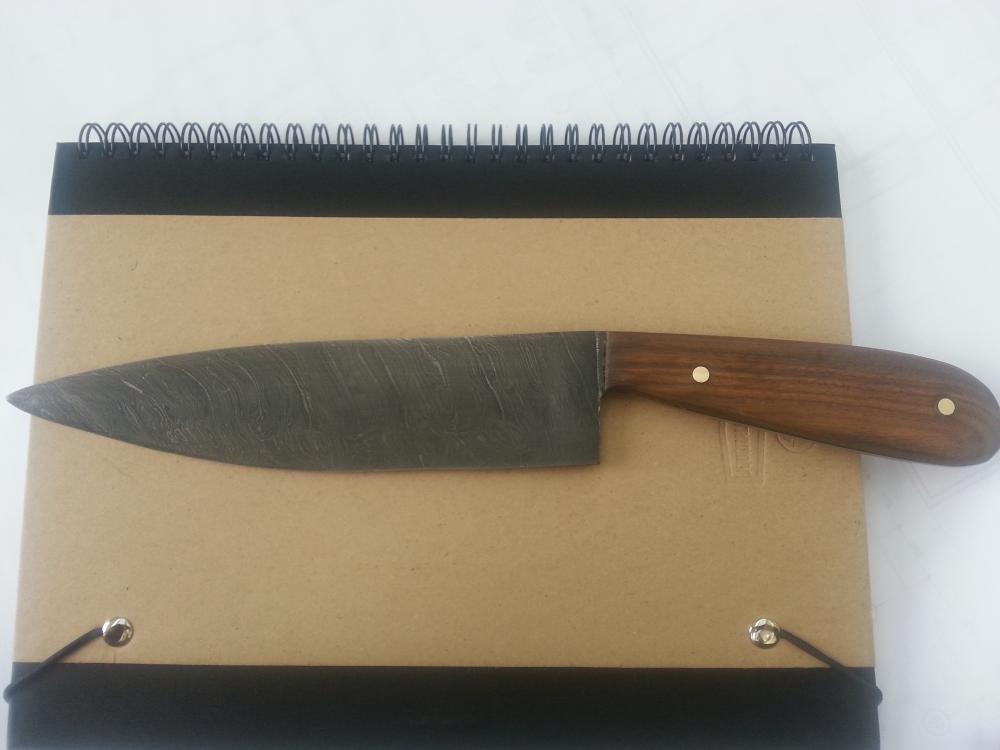
This was another kitchen knife order i had come in. The customer wanted a knife done in the french chef style. I looked on line for some image references and i think i got the shape down more a less. Heat treating this one was the most annoying knife i have done to date. I think i dook the edge down too close to finished before heat treat because the edge kept getting a very slight warp towards the tip 3 times, and it was just the edge, the spine stayed bang on straight every time. But in the end i got it to go right. Handle is my favorite i have done so far for shape and comfort. I rounded the top and bottom edges over with a slight rounding to the sides. It fits in the hand very comfortably. Hopefully the customer agrees.

-
Like where the stright portion of the stem is?