Kozzy
-
Posts
1,203 -
Joined
-
Last visited
Content Type
Profiles
Forums
Articles
Gallery
Downloads
Events
Everything posted by Kozzy
-
The issue isn't as simple as repurposing old material, it's the risk/cost ratio. When labor is only valued in pennies and good material is relatively costly (compared to income and potential sale price of the product) the risks of problems or deficient final product are nil. However, for most of the "western world" (used loosely), time is valuable and proper material is relatively cheap. Why risk an inferior product to save 5 bucks in material when you are putting hours of labor and $$$ of fuel in? That's not saying to simply never used "found" material, it's just the risk/reward ratio should be weighed based on YOUR situation and expected final results. Doing things on the cheap is sometimes more costly in real terms than doing them right to begin with. Plus if the product itself is meant to be sold, good business practice is the ability to stand behind your work--can you do that with mystery metal on something like a quality knife?
-

A question from a young man
Kozzy replied to Mel Le Roux's topic in Blacksmithing, General Discussion
One piece if advice I wish I had taken when young was to "live light". Instead of bogging one's life down with material goods, stay mobile and "light" enough that you can give your dreams a try...and if it doesn't work, try again elsewhere but with some changes. Once you have car payments, expensive rent, credit cards that bought the stuff to furnish that expensive apartment..and yes, even a spouse to maintain... it gets a lot harder to take a long-shot at your dream. (If you find the right person for a spouse...which is rare...then go for it but don't fall into the trap of thinking you need that because society expects you to do the marriage/kids thing). Fabrication..especially with the ability to design..is where the money is. Smithing is a bit harder to pay the bills with. That doesn't mean you don't do smithing, what it means is that you use an alternative product path to build the smithing business. Even if that's repairing cars part time, it smooths the low paycheck months (years) and allows you to build up a shop/skills/tooling that are marketable for the things you enjoy more like actual smithing. As far as smithing education, there is no single "right" answer. Some people do better with classes, some better acting as a cheap apprentice, some learn at the school of hard knocks all by themselves. The main thing is to make sure it doesn't turn into a job you soon hate. When deadlines loom for a project, the bill collectors are bugging you, a customer decides you did it wrong when you didn't and 12 other things are beating on your brain, even something you love to do can get old. Oh...and don't neglect a business management, accounting, and marketing class or two. That background stuff is just as important to making your dream come true as banging on hot iron. If you ever get to the point of running your own business, you'll find that about half your time is not at the forge (if you are actually making a living at it). -
TP is right--clean and dirty side. And while I'm spending your money, you might consider a separate room for an assembly area/cleaner stuff. Can't tell you how many times a clean bright work area would have come in handy out of the shop to do things like complex repairs on some machine part ...just did one the other day on the lathe saddle with a stack of small pins and parts that would have been nice in a more "dedicated" room than a work table in the main shop area. It also allows you to go back to making dirty work while a fixit is only partially done. You can also use that room, if designed well, as your tool room. It's nice to have a lockable separate room for the actual tool boxes of fancier stuff...as well as storage of nuts and bolts, etc that you don't want to get scattered around the shop. If you have other people working in the shop (and I'm assuming that to be the case due to the size), you really need to add a bit of security to YOUR tools so they don't walk off and you can control who might be digging into them. Since a big shop can also put you on the OSHA (or equivalent) radar a little more, tank cage somewhere near whatever roll-up door for any "not in use" welding tanks etc. Plus you should have a flammable liquids storage cabinet. Be sure and document a "safety meeting" each month, even if that meeting is only with yourself. At least around here, that documentation is the first thing that they ask for because inspectors know that instant fine is what pays their salary--almost everyone gets nailed on that. And of course more fire extinguishers than you ever think you will need. Gee...spending your money is easy :-) Oh...the other big OSHA gripe is extension cords. Any fixed machine is supposed to be hard-wired and cannot be on an extension cord or "plug" in theory (without going into details or exceptions). That one is dumb in my book but to them, it's a place to poke you. That means good planning on your electrical availability around any machines--don't assume you can just run a "soft" cord the 25 feet to the nearest outlet if some machine itself is bolted down.
-
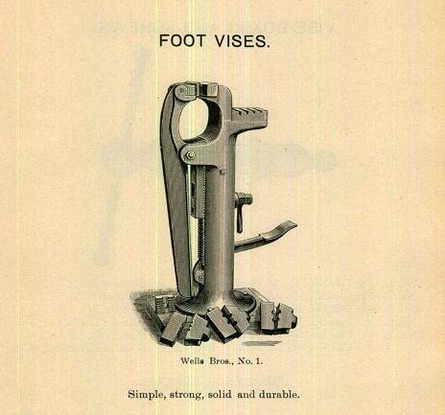
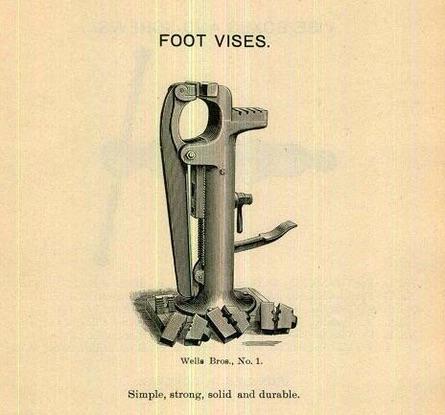
That would be one awesome filing vise. I can't tell from the photo but the gap and strength of the shear section don't seem shoe oriented to me. Maybe one of the farriers here would know better regarding what on shoe production might need to be sheared and if that shear looks like it might work for the stock involved in shoes?
-
Yes, there are calking (caulking, corking...they are used interchangeably) vices but those all take a downward hammer hit and are pretty robust. This one is a bit weak in the vertical direction and I don't think it could take any serious pounding--it's more like a quick clamp for some operation than an actual beating-on vise. Still might be for shoeing but it's definitely a vise of a different color. Typical calking vice looks more like this
-
That's a neat toy--never seen one built that way. Any chance of a couple of more photos please? Some aspects seem a little light in places for smithing--maybe aimed at a different industry? Any chance the shear would have been for thin wood slats? For some reason this is reminding me of some of the old box making equipment I've seen--for stuff like the old wood fruit crates (the light ones). Might be way off base but there is some brain-wire pointing that way for some reason. Maybe because it's similar in build to a foot stapler for those crates I've seen.
-
I never got great results with mine. Note that I've only used it to mark 300 series stainless so YMMV. I found that I needed to keep things a bit more "wet" to get consistent etching...and one part would work very well while the next had problems. That was mostly due to poor masking but as you go deeper, fine details tend to get blurred. I found the "black" to be less than robust...rubbing removes it pretty easily. If I was doing cosmetic stuff rather than just simple marking, I'd find a way to blacken other than simply the etch. Not much else I can say except your mask tends to be the weak point on these. I'd focus on tests with something simple--even just a "dot" and you'll find the right tweaks for the etch itself. Then you can move on to a more complex mask and work that whole new set of bugs out...
-
I also saw that there was a current company by the same name in Green bay. Their website seemed so far a different direction that I didn't think they were related. Also found another that recently sold for $ 165 at auction that was in only slightly better shape than yours. Anyway..the reason I am adding is that you should look around for an extension---it attaches to the lower arm of the "C". Most of these were apparently used as circle shears and that extension forms a pivot to make a circle. Having that might add to the value and usefulness to someone. Maybe it's in another junk pile around there somewhere.
-
Well, I did spot one that sold in 2016 for $ 700 bucks...similar model but in excellent working shape. There are also a couple in current equipment auctions of recently closed companies implying that some people still use them in production. It's curious that there are several google images and a few other references but I can't seem to find one single true company reference to Libert. All I could find is a mention in someone else's ad from about the 40's. It seems they would have been big enough to have a mention on *some* internet page...I can always find something on these quests but this one has stymied me so far. There is also a member of this site who got one for $ 250 a while back who might chime in. Not much other info in the post but you might use the search function to take a look.
-
The blades basically "vibrate" (used loosely) up and down to chew their way down a piece of sheet metal and cut it. The C shape, called the throat, sets how far from the edge of the sheet you can cut. It's a good tool for complex shapes that need to be cut into a sheet..and by the looks of it, possibly a fairly thick sheet. Handy tool in the old days but you can do the same job far quicker and way better these days with a plasma cutter in most cases. Value..well, you are into 2 different realms there. Someone might have an idea of how to use the frame for something else like a planishing hammer. Or you might find someone who simply likes old-school stuff. Neither is going to bring much money although you might save a treasure from the scrapper. I'll check out the history part and post more if I find it.
-
First off...I'm no expert so take it with a grain of salt... Since a honing steel does not grind away any surface...it only pushes the edge back into proper position and burnishes it a bit...wouldn't that require a hardness that is higher than the knife itself? If softer than the knife, it'd tend to potentially have the knife cut in. IIRC, any texture on the steel is actually so that it increases the pressure per unit area--by having basically micro gaps between the bumps on the steel so the micro bumps can each put pressure on a smaller unit area. When putting the edge on a woodworking cabinet scraper, you use a perfectly smooth and extremely hard round bar to draw out a wire edge-slightly deforming the edge of the scraper under the bar. That often means a good hard-chromed surface so even the shaft of a good quality screwdriver can work. A knife steel is not much different except the knife starts out harder so you aren't drawing as much "edge" under the pressure.
-
Like TP said, you might carefully grind the welds around that mess. That was my first inclination also...but....none of those mounting parts or the spring are sacred. They're all pretty easy to re-make from scratch. You might want to consider sacrificing those when removing the welds in order to better save the body of the vise. If those welds are darned solid and deep, skip the hours of fiddling and just move on to any removal method that gets the job done and better protects the main body. You might also want to try a few careful but strong whacks on the welded parts with a chisel and hammer. It's possible you'll get lucky and the welds themselves will be brittle and crack. I'd spend the 5 minutes to give that a shot if it was mine.
-
Are those torch marks or did someone run a hard-facing or plain weld bead up and down the sides and grind them down a bit? Looks a little like that to me. Of course it could also be a plasma cut---back in the 70's when my Dad worked for U.S. Steel, that branch had a "point to point" NC plasma cutter that'd do 24"+ thick material. The crew would sometimes cut big stuff (drops from billets) into shapes just to play and see what they could do. My gut wants to torch off that flange on the base plate...but it's not really hurting anything. Just build your stand to insert in that recess. The bad edge...gently round it with a flap wheel in an angle grinder. Don't get too picky or aggressive...just knock enough off that it isn't likely to crumble more and consider it a "feature"--which it actually is. I 'd probably slightly round a section of the good edge too, while leaving the rest fairly sharp just so you have options. If the situation warrants, you can also sometimes get a variable radius when "cleaning" a bad edge which increases options even more One mine, one edge varies from about 1/8" to 3/8" radius over about 8 inches of edge.
-
The problem with an air wrench is that you won't be able to change the direction "hand's free" so it might defeat the purpose of the whole thing. The idea is great for simplicity but might not quite get you where you want to be. Happily spending your money for you, I'd go with an air over hydraulic intensifier--simple construction system where you get hydraulic pressure from an air line (and easily adjustable for pressures via the input air pressure). An example is https://www.bimba.com/Products-and-Cad/Safety--Production/Inch/BoostersIntensifiers/Air-to-Air-to-Hydraulic-Intensifiers/Intensifiers but there are some I see on e-bay at appropriate prices. Then I'd use a hollow hydraulic cylinder over the screw..or over an extension out of the back attached to the screw..similar to this https://www.amazon.com/TEMCo-HC0001-Hydraulic-Cylinder-Warranty/dp/B06XKK8YD4 with the hole an appropriate size and a spring return. Fab with that would be easy. Just add a good air foot pedal, backing plate for the cylinder, and you're good to go. It's quite similar to a lathe air collet closer but the hydraulic part shrinks the size down to something appropriate for a vise and gives you the longer stroke needed for a vise. I didn't dig into those links so they are just a rough example. Going with the air over hydraulic intensifier eliminates the "snap" problem both ways. Hydraulic flow is much easier to control and throttle and there are simple throttles available that you could slow the closing operation for good control but free-flow the opening (return line) so it opens faster. And...don't skimp on the foot pedal. Good ones aren't that expensive and are worth it.
-
What Should I Offer for This Anvil?
Kozzy replied to Chelonian's topic in Anvils, Swage Blocks, and Mandrels
That's an interesting point. Is that all the photos? If it is, it is also a bit weird that there is not shot of the face...almost like the seller is hiding that detail. I'd be a little paranoid too if there wasn't face photo: Maybe request one? But you should be able to tell petty easily if the hard face is gone. Tapping will be pretty darned "thuddy". Rebound would tend to feel pretty mediocre. Any chance you can tap a good anvil first just so you know what a good one feel like? Even the 3 I have access to all feel a bit different..with the Vulcan being clearly the worst on rebound. The Kohlswa bounces a hammer back like it's a rubber superball. -
What Should I Offer for This Anvil?
Kozzy replied to Chelonian's topic in Anvils, Swage Blocks, and Mandrels
That's a useable wreck. Keep reminding yourself that another will come around at the right price and better shape...if you have patience. Don't let buyer's fever take over. Purchase price...That's a tough one on a damaged anvil. I certainly wouldn't ever go over a buck a pound due to the first line above. In some areas of the country, a buck a pound would still be way high. That buck assumes it has a lot of weight (bigger anvils tend to go for higher prices per pound than lightweight ones) and the face is quite usable and with decent rebound. As to being non-symmetrical in weight due to the tail being elsewhere, it just means you need to be more clever with the mounting. It shouldn't be a huge problem for average smithing. YMMV and others might have completely opposite opinions. Broken anvils tend to be like that--often because in some parts of the country, you can find a good anvil on every corner for pocket change (exaggerated, of course). -
Why does my Vulcan 8 also have a 2 on it ?
Kozzy replied to Chuckbuckeye's topic in Anvil Reviews by brand
You said "8" chimney pipe"....although I know not what your plans are, the general consensus here has been that 8" tends to be too small. You might want to search the site on the subject for better input but IIRC, generally 10" is about the minimum and 12" better. I'm assuming a forge hood here so might be far off base. -
Money there waiting to be made. Here's one example but they make nice dogs etc with a little fiddling and some other scrap bits. These would be the grand-daddies of yard art at their size. That's good..makes em harder to steal.
-
We just finished tweaking some boiler issues on the Case traction engine at our museum. Had a very small leak that had to be welded up. Boiler work on these things is not for the faint of heart--the re-certification process was a nasty nightmare. Even the individual gauges have to be certified to read properly and you need to be able to prove that out for the State board. Every inch of boiler surface needed ultrasonic testing to verify thickness. Fortunately, a very nice boiler service company donated much of the work and cost to make sure it could be run safely and properly. Total cost for a pinhole in the mud ring was about $ 5000 USD...plus almost a year of paperwork fiddling. Driving the thing is interesting...it feels like you mostly guess where you are going and adjust steering as those guesses constantly go off track. Backing is even worse with that chain steering system. They certainly don't back like a car
-
An alternative to waxed paper is mylar sheet. It's been ages since I did resin casting but back in the day, mylar sheet would not stick to the resin and would leave a glossy surface to start with (handy in some situations). Gotta be decent sheet....and I'd run a simple test just to make sure nothing has changed between 1977 and now in materials. Waxed paper aint what it used to be--the wax used to be far heavier. I always get a kick out of it being mentioned because it reminds me of my Dad. He always called it "bread paper" because in the 20's, "store-bought" bread was always wrapped in it. The benefit to him was that you could slide down the playground slide on it and get the thing really slick and fast to make sliding more fun.
-
Just tossing a bit more out there. I have a set that goes up to 3/4 where the dies are screwed into the handles...basically the old set is more handle than die. It was missing the tap wrench and a couple of taps when I got it but the die handles are so nice (and the dies are still good)--couldn't pass it up. Those handles take up so much space that it's a 2-layer box. Not sure what the value is in having them mounted in handles rather than one handle for several dies. Seems like it really increased the original cost for someone. Just to confuse things, In going through my box I found dies with 3,4,5,and 6 lobes. The "one" lobe shown is actually a thread gauge..go, no-go just as an example. I suspect there are no true 2 lobe dies as they'd cut unevenly but now I have to hunt for the anomalous 2-lober just to see.... And an old [amateur] blacksmith-made tap wrench. Back in the long-long ago, many taps didn't have a square top, they had a tab on top. This is punched for 2 sizes of tab. Once in a while you'll still see a tabbed tap today. I suspect that 1/32 stamped on yours is the adjustability range. All older dies were meant to be sharpened so needed that adjustability to compensate for wear and sharpening. Finally, if buying new dies and taps, it REALLY pays to buy quality. The home center/hardware store versions are pretty crappy. Once you use a good quality tap or die, you'll never go back to over-the-counter consumer-brand stuff. Well worth the little extra money (and that's an understatement). Oh..and once you try gun-taps for through-holes, you'll never go back either. Forgot to mention...my 3 old wooden-boxed sets are not labeled as taps and dies, they're all labeled as "screw-plate" sets. The one I didn't show has replaceable teeth sections in the dies for both adjustability and ease of sharpening. I'm not sure when the terminology actually changed to taps and dies rather than the much older "screw-plate".
-
If I had to guess.... That company was big into drop hammers to make ceiling tin tiles--those decorative roughly 12" x 12" stamped tin pieces that get nailed up in old-school ceilings. Those have some thickness..often more than 3/8" after stamping... which would account for the wider duck-bill portion but are lightweight and easily damaged which would account for the small gripper part. I certainly would prefer to put those in and take them out of the hammer with tongs rather than my hands, especially when working fast.
-
Any Idea of the Make on this Hammer?
Kozzy replied to Jboon's topic in Power Hammers, Treadle Hammers, Olivers
Just a theoretical question...a-cuz I have never run a power hammer. Most of those larger machines seem to run with a really high upper "blows per minute" that seems designed for a fast-paced factory setting. In a more "art shop" situation, would such a hammer still give reasonable service if one were to use something like half the HP, changing the motor pulley so that the blows per minute were also halved? In this case, that'd effectively mean changing to 5 hp (ignoring other machine energy losses for the question) which is more reasonable for a single-phase shop. Yes, you'd lose the top end and the full benefits of a 150 lb hammer but do most small shops really need that top end performance vs usually working in the lower-middle range of a big hammer? I see a shop like the O.P.s being oriented toward needing finesse in a hammer rather than brute beating force at breakneck speeds. -
Excellent work and I really appreciate the detailed write up. I have a very similar vise that I started disassembling but put aside when some of the bolts fought back. You spurred me to get back to that project. Although mine looks physically almost exactly like yours, the calking plate on mine is separate from the casting (a steel insert) so can be removed if the bolts/pins ever cooperate--allowing that plate to be replaced with something more functional to the non-farrier. I just haven't figured out what that might be yet.
-
You did excellent there. But being a curmudgeon, how did you not roll your eyes with a couple of those questions? I guess I just wouldn't have the fortitude to not have given a face-palm at least once.