.JPG.2f3624accaac3d3b9eda127ac2e5aecc.JPG)
Chelonian
Members
-
Joined
-
Last visited
-
I haven't had any issues, and I'm happy that I repaired it. The 4140-ish steel also has been plenty hard enough for my use.
-
Thanks! I used two pieces of tine. One is horizontal acting as the face of the heel, and the other is angled at around 30 degrees below the first. Looking back I'm not sure if that was the most efficient arrangement, but it ensured all the welds were full penetration.
-
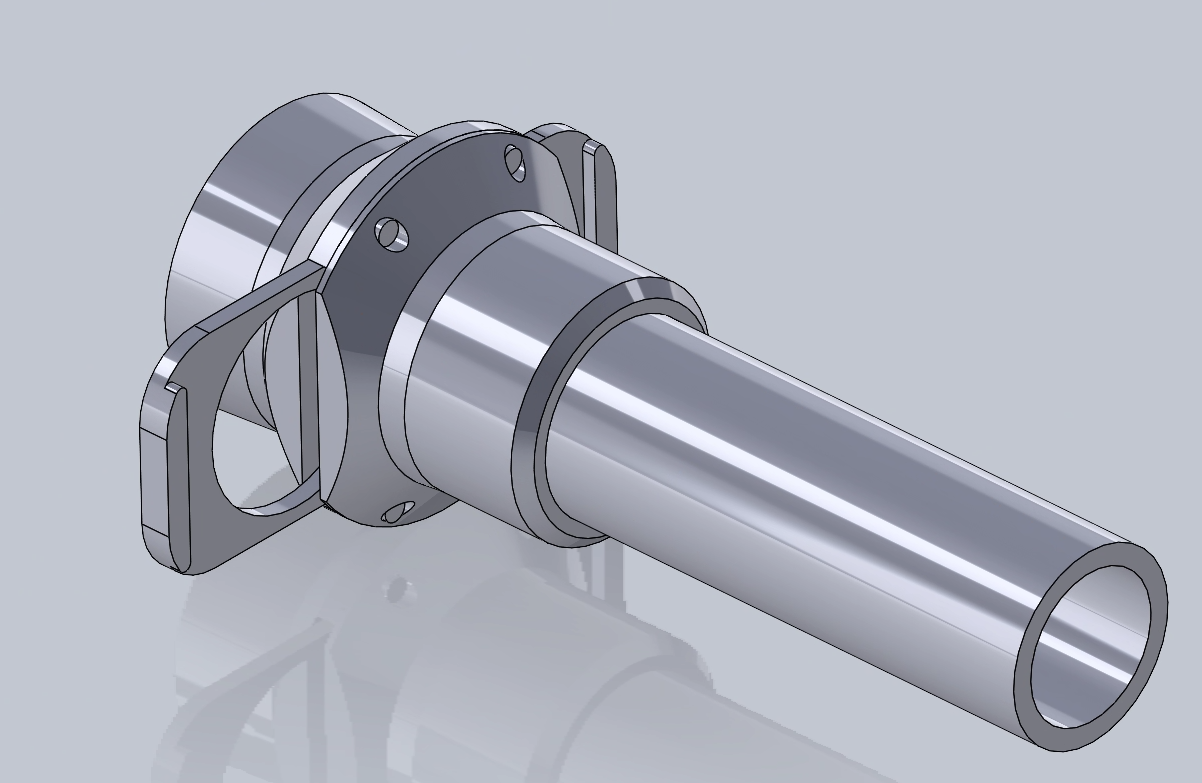
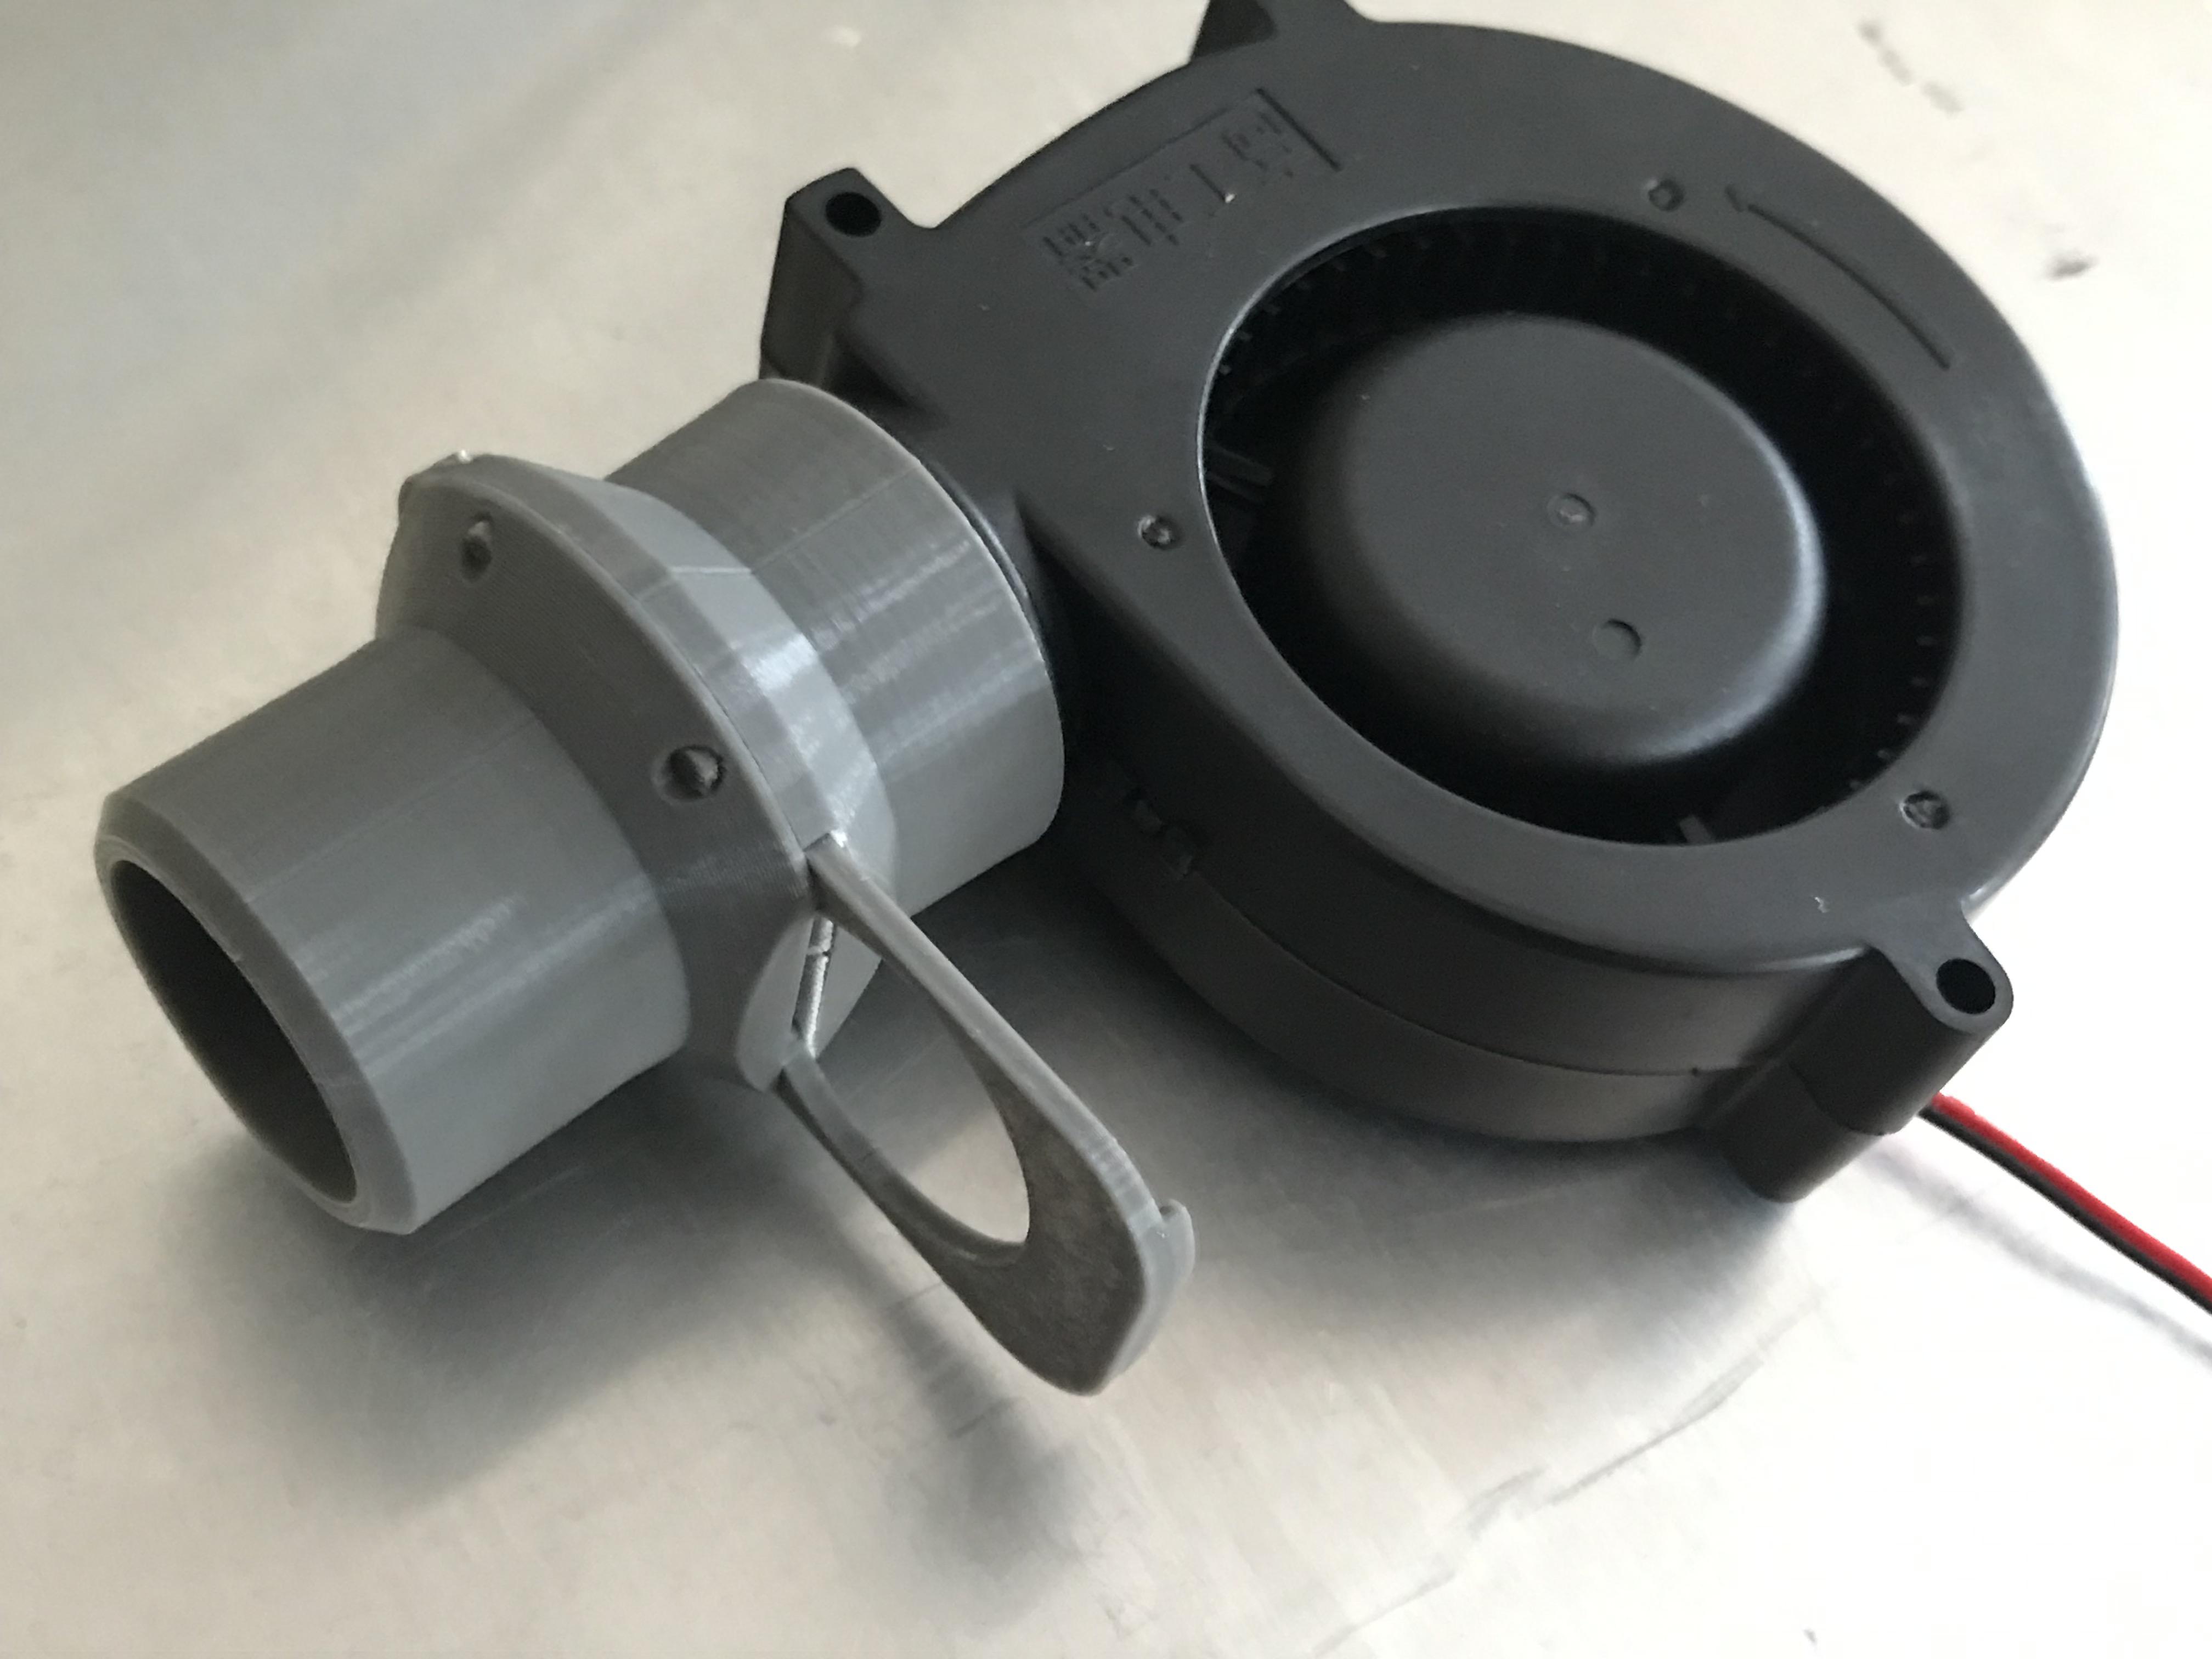
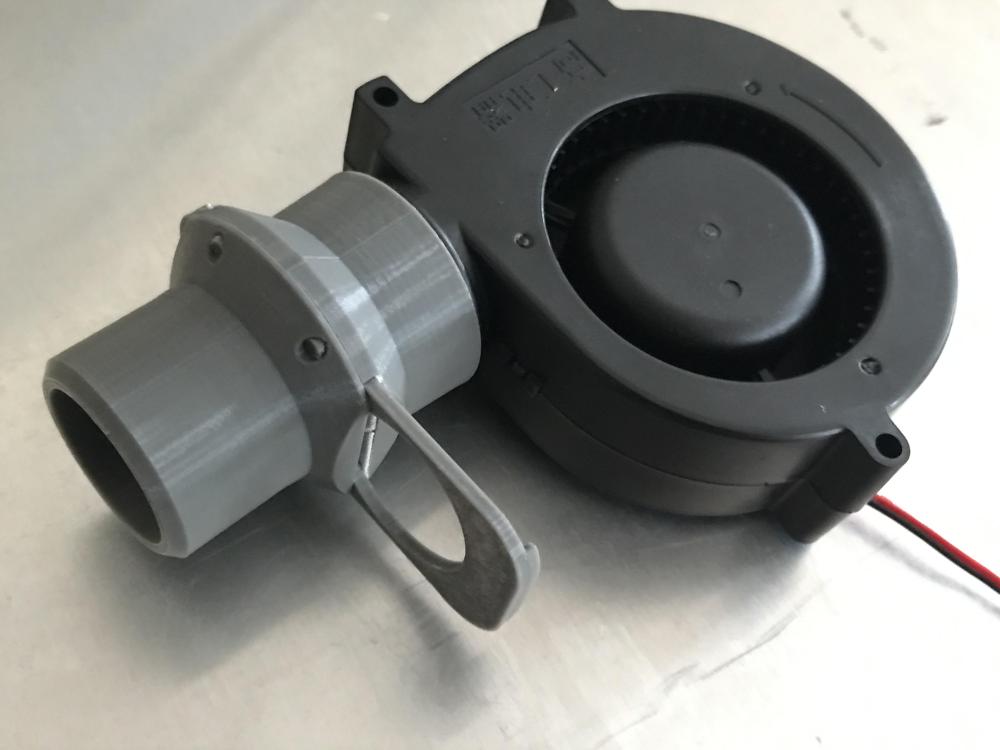
Recently I designed and 3D printed an air gate and adapter for an electric blower. It has worked well so far.

-
That's a very nice anvil! My Wilkinson anvil has an upward-sloping horn, but to a lesser extent.
-
Thanks Frazer! Yes the tail does sit against the wall.
-
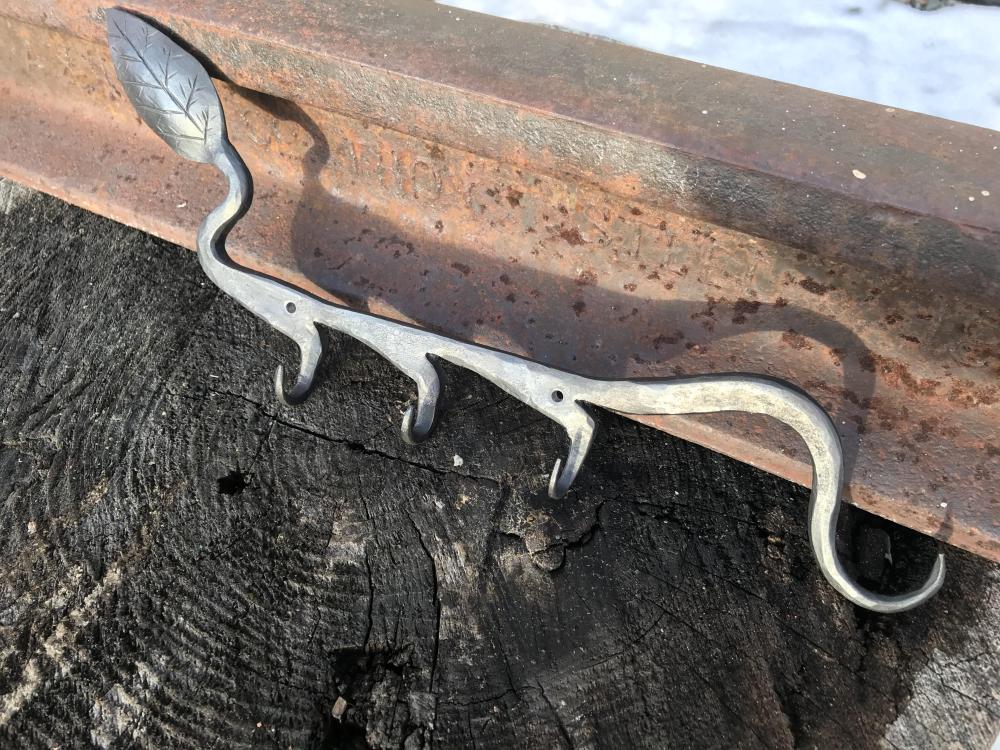
I gave it a go! I decided to try making a small hook rack for keys from a single piece of 1/2" round. It was pretty fiddly at times and there are definitely some things I would do differently if I made another one, but I wanted to try something totally new to me for the contest.
-
Here is a link to the method: https://www.anvilmag.com/smith/anvilres.htm I used this method when I repaired the heel of my anvil, and had good results (although I avoided welding on the face as much as possible): I don't think welding just around the perimeter will give you good results. There will always be a small air gap in between the plate and what's left of the anvil face. I think building up the face is a much better option, although it will be a lot of work and the rods are quite pricey.
-
Personally I prefer a crowned (convex) face over a dead flat one. They were very often were manufactured crowned since it has some advantages.
-
It's totally fine. Don't worry about the shiny spots.
-
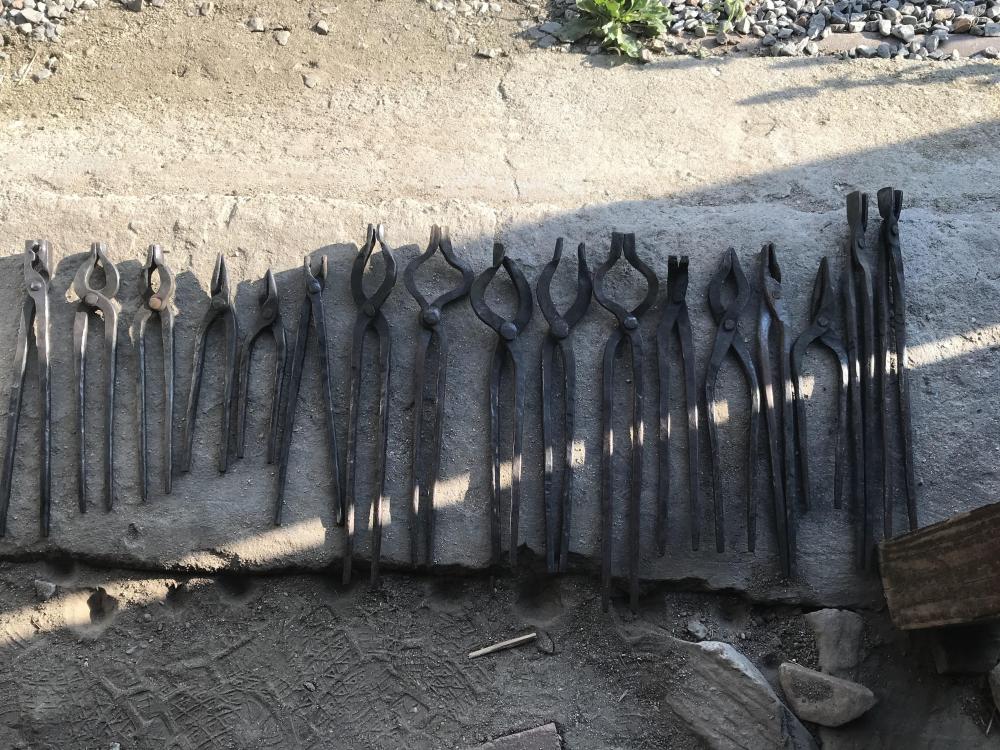
Those don't look too bad to me! I always find it interesting to see the tongs I've made and how they've evolved. Here are pretty much all the ones I've made, more or less in chronological order from right to left. I still use some of the earlier ones occasionally.
-
I certainly plan to go to the Fitchburg Forge In! Will you be demonstrating there this year? I probably will not make it to the NEB meet since college classes will have started again. That older hammer also looks excellent!
-
Very nice looking hammer! I really like the pattern you chose.
-
I didn't want the mold to come back so I pretty much charred the whole handles, although not that deeply. All the non-charred handles that grew mold had linseed oil on them, so I don't think it does a very good job at protecting the wood, at least from this species of mold. The mold hasn't ever been a problem previous years though, and if your shop isn't in a cool and humid underside of a barn it probably isn't needed.
-
Nice tomahawks! When it comes to hammer handles, I char them mostly for mold protection. After this very cool and damp spring/summer, I noticed all the non-charred handles were growing mold, but none of the charred ones were. I ended up charring all my hammer handles after that.
-
It's almost definitely forged. The cast anvils made later by Brooks had letters cast protruding from the anvil and their pattern changed a little. (not my photo)
.thumb.JPG.709dad07e8fea36ff1bade44acc98e95.JPG)