anvil
-
Posts
3,246 -
Joined
-
Last visited
Content Type
Profiles
Forums
Articles
Gallery
Downloads
Events
Everything posted by anvil
-
Late response. I've never used flux with borium. But maybe some do. The only flux Ive used for shoeing is toe calks. Toe calks are an applied piece. Made from say 1/4" square stock shaped to fit the toe. Its then braised on the ground side of the shoe.
-
Nope, that style was started by GE tool company back at least before the early '70's. Then a man named Dale Sprout quit GE and started making nippers and other tools of the trade. He used the same style. Jay Sharp came ionto my radar some 10 years later. He was one of the first farriers to become a custom backyard tool maker for our tools. Dale Sprout is making tools to the day, but he works under Thor at the great forge just beyond,, GS is still in business. Jay Sharp still makes tools to the best I know. All three make danged fine tools. I have no clue of makers beyond Jay, other than an occasional pic/story here and there.
-
One of the things Ive seen that makes a good farrier is to understand a horses confirmation. I dont mean for setting them up correct for shoes, but for working on them. Take a lanky thoroughbred type build. When you get under his front foot, your body and the hoof are along the horses side. Easy to work on and the horse is not in a physical bind. Now take a Poco Bueno bull dog type quarter horse. Pull his foot back to work on and the hoof is closer to his centerline than inline with the side of his body. The farriers choice is to get farther under the horse, or pull his leg out in line with his body. The first way is harder on the farrier both for physical comfort and far more awkward working on the hoof. The second way is far easier on the farriers body and using his tools. However it puts the critter in a physical and painful bind. And, now you have to deal with a jumpy 1100 pounds of pain. Too many farriers then revert to a kiss of the rasp or a twitch to "settle" him down,,, As a 6'2" farrier I learned pretty quick to get down, get under, and get the job done. As far as the owner being around, I too required their presents until I got to know the horses. Then they could stay or go. However pretty much all the time it was their job to catch and release the horses. I was a horse shoer, not a horse chaser.
-

Will This Questionable Chimney Help With Coal Smoke?
anvil replied to Chelonian's topic in Solid Fuel Forges
the best way to deal with smoke reduction is to learn fire management. then you will get very little smoke. never seen a setup like yours, but i dont think it will work. 12" + dia pipe is best. join 2-6" sections lengthwise and you will have a 12. your 8" and a 4" works too. pretty cheap. -
How about hand holding your parent stock, then forge your shoulder and tang on the near side edge of the anvil using edge to edge blows. Then make a suitable monkey type tool and set your shoulder between tang and parent stock. Simple basic smithing.
-
Tooling direction... need advice.
anvil replied to Allen Corneau's topic in Tools, general discussion
I use 3 tools to make tenons. 1: a hot cut. This has one vertical side, and one beveled side. This starts my right angle between tenon and parent stock, and separates the mass for the tenon from the parent stock. 2: I use a multi holed spring fuller to forge down the tenon mass to the proper diameter and length. 3: I use a monkey tool to set the right angle and shoulder of the tenon. The face of my monkey tool is slightly concave. -
can high alloyed tool steels quenched in brine ?
anvil replied to Iron Madara's topic in Heat Treating, general discussion
Read the spec sheet on the steel you are using and it will tell you the proper quench medium to use. -
How many anvils do you actually need ?
anvil replied to BartW's topic in Anvils, Swage Blocks, and Mandrels
I do use tooling with both hammers. No such thing as cheating. Generally speaking, I use the treadle to separate mass, the lil giant to forge these masses, and my hand hammers and anvil to clean up transitions, straighten, and to create the finish I want. Pretty general. -
How many anvils do you actually need ?
anvil replied to BartW's topic in Anvils, Swage Blocks, and Mandrels
My experience as well. I'm not a collector, and I've never, till the internet, known many of the manufactures Not for me. The addition of my 25# lil giant and my 25# treadle did not remove or replace my anvil. They all are primary tools with very needed abilities. If I had to limit myself to primary needed tools, it would be my shop anvil, the two power hammers my post vice and forge setup. -
Common Basic Mistakes That Beginners Should Avoid
anvil replied to JHCC's topic in Blacksmithing, General Discussion
#23: proper setup, proper tools, proper job. Clean all the boogers and traps from your workspace, then figure out what stock, rivets, collars, detail,samples, tooling, full size drawings etc you need. Then make any needed tools and make sure all needed are functional and ready for the job. An example of the latter is say nuts and bolts. In my shop, these are not consumables. They are used as tools to hold my work together then each are replaced by a rivet. So, it's a real xxxxx to start assembly and have the nut or bolt hang on bad threads, so I always run a tap/die over the threads to clean them up, and make sure they are straight. -
help construction digging homemade bar
anvil replied to angiolino's topic in Blacksmithing, General Discussion
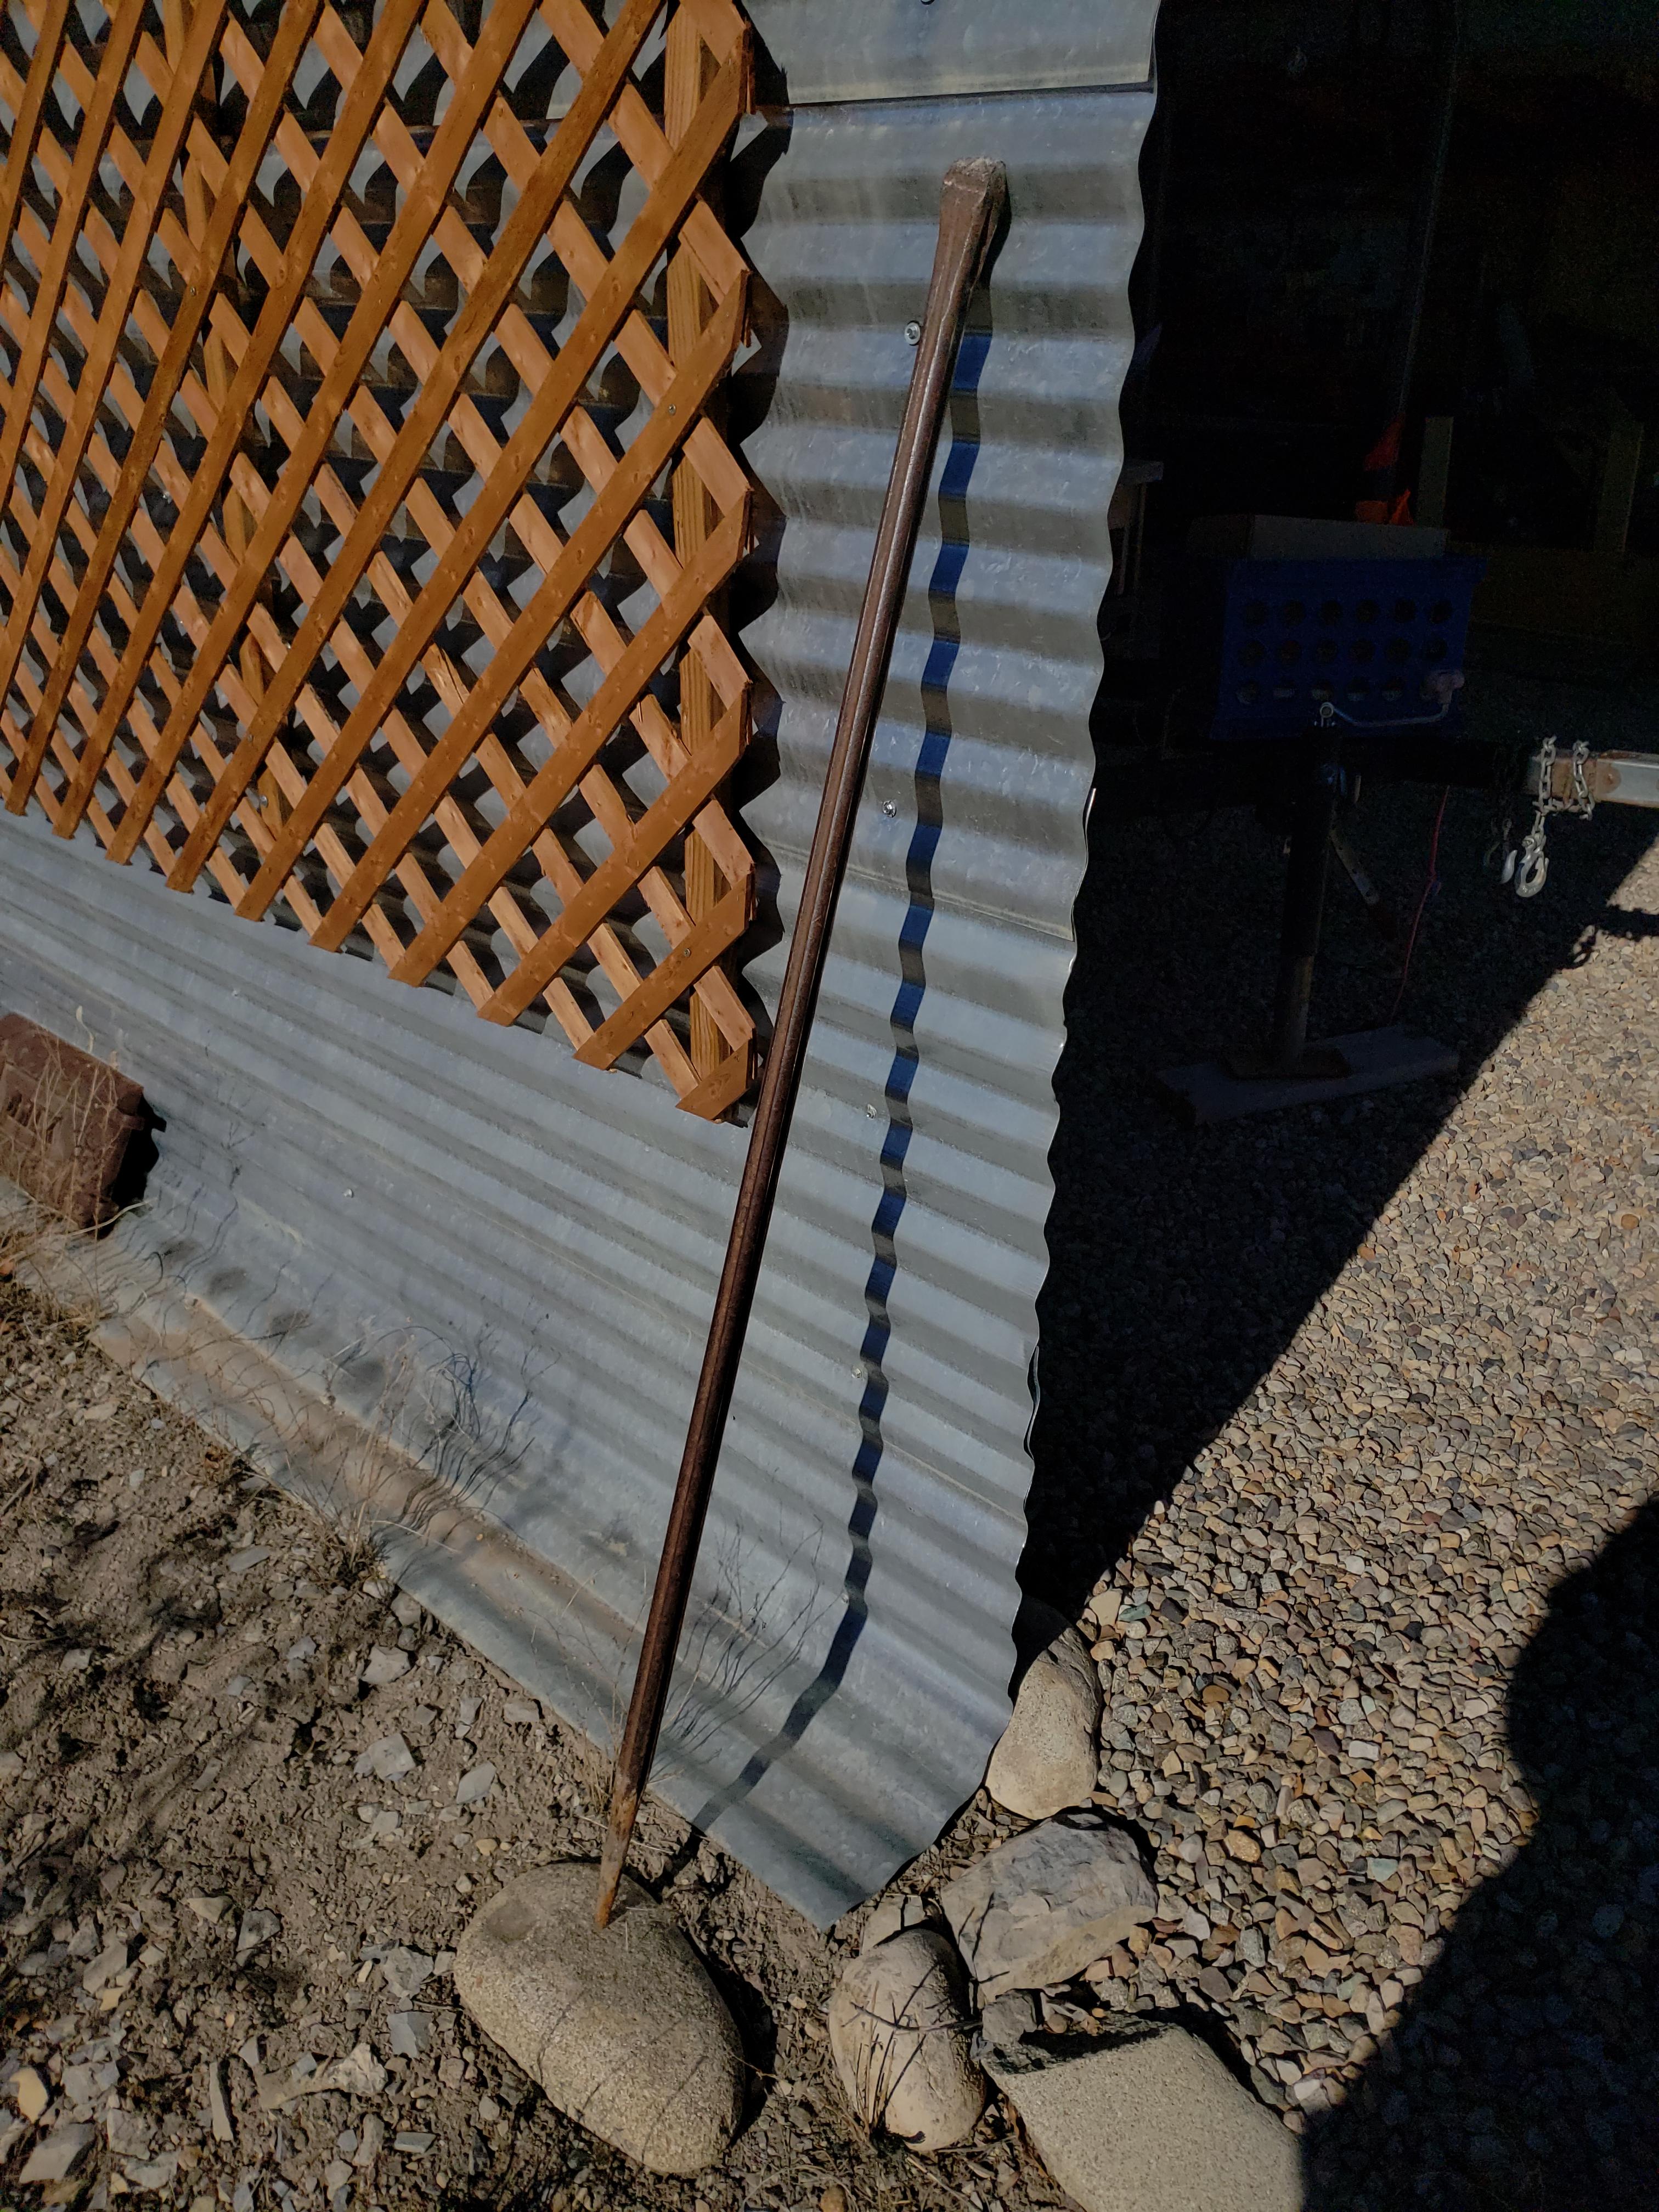
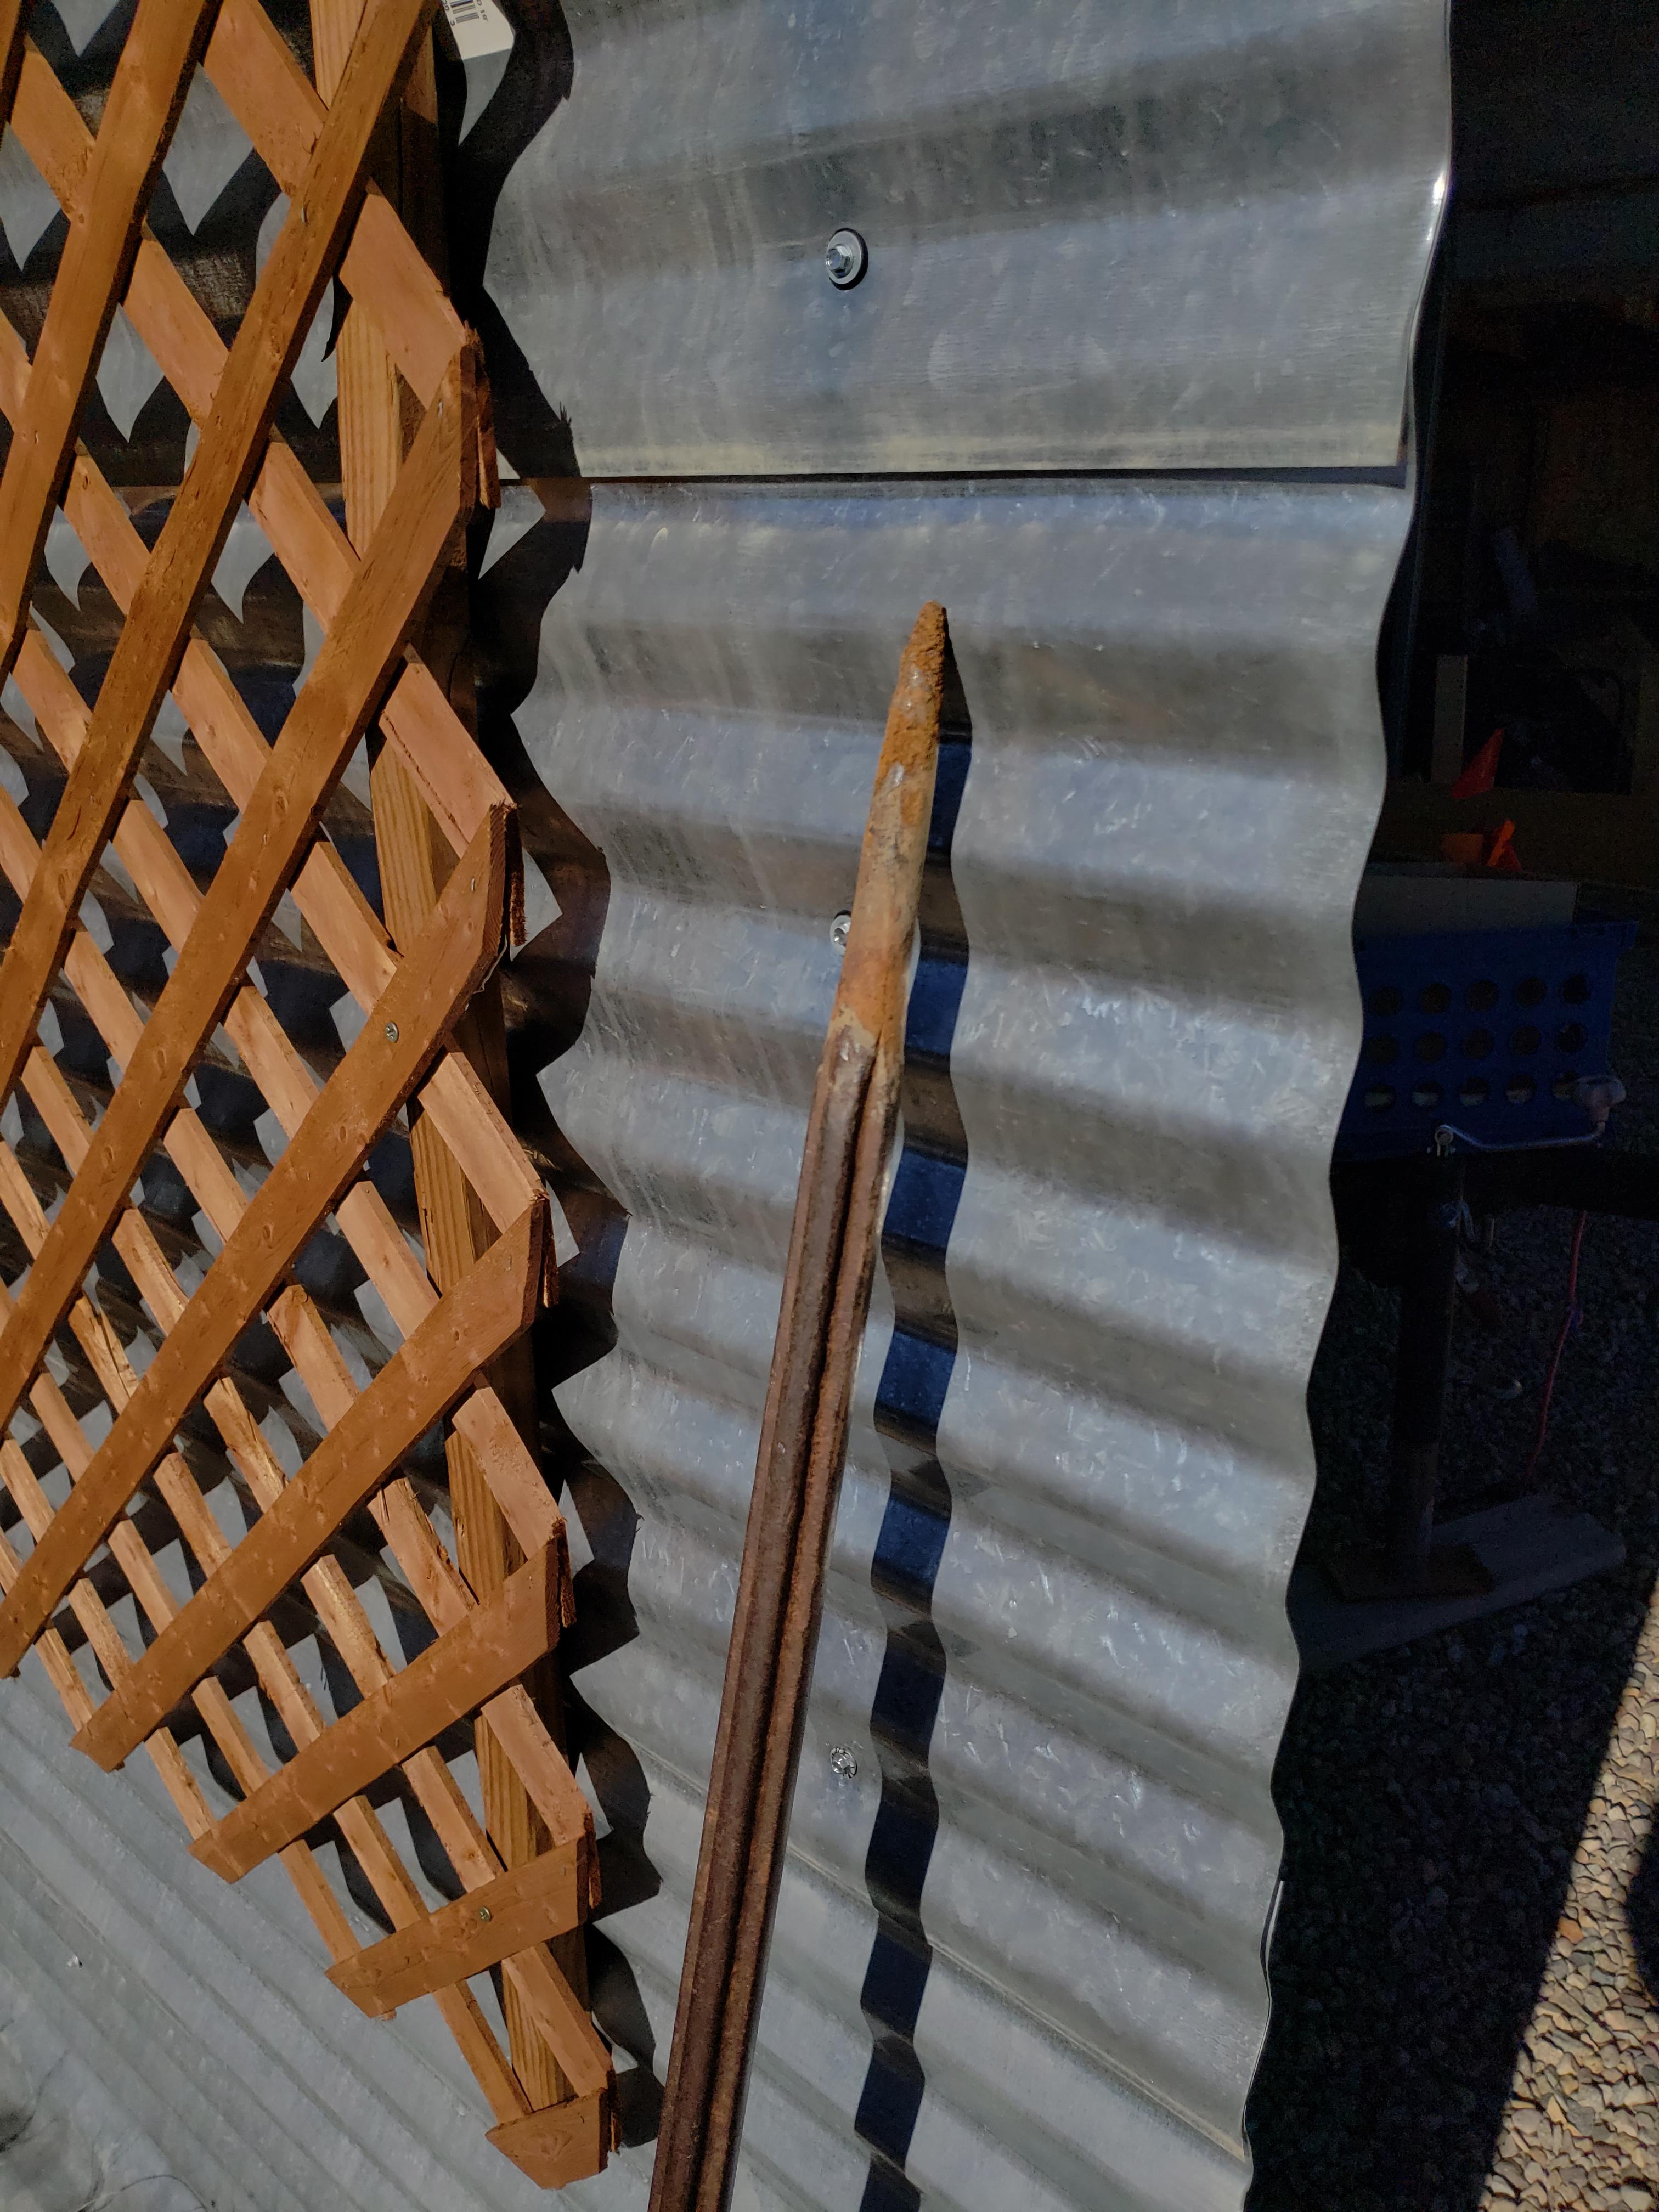
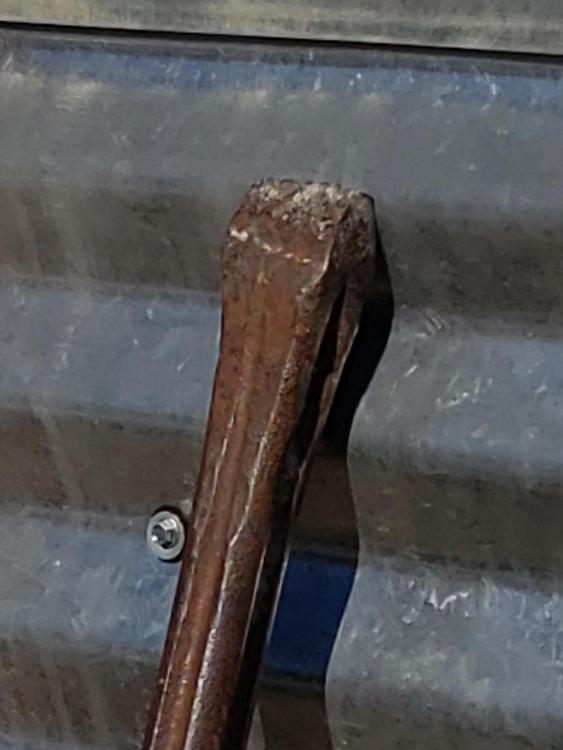
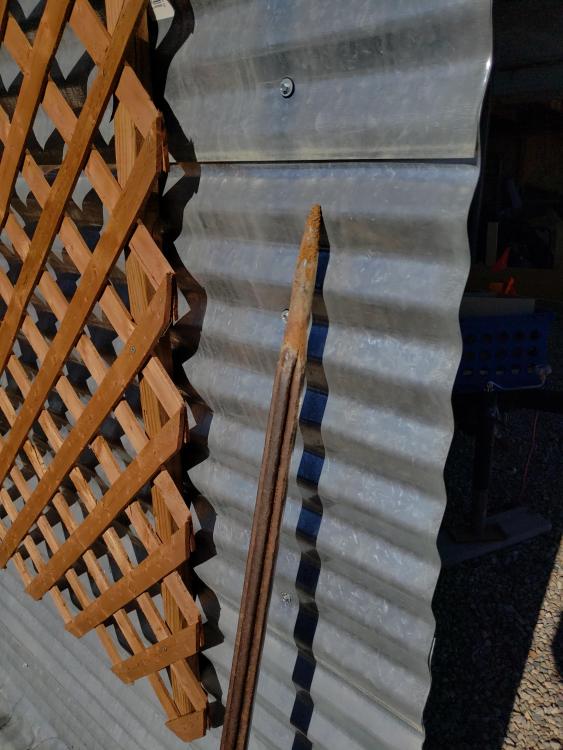
Heres a pic of mine. Made long ago and still in use on the new shop. The round point is great for many things. Popping rocks, rolling logs, and getting in between rocks when breaking into rocky soil. The chisel end needs a tuneup. It's a bit short and stubby, but works well. Personally I dont like the style in your pic. It's too heavy and not well balanced. Makes me work too hard. However the straight side is great for cleaning up holes.
-
Common Basic Mistakes That Beginners Should Avoid
anvil replied to JHCC's topic in Blacksmithing, General Discussion
Mistake #14: Believing your layout table is for layout and not actually a flat space needing to be filled. -
How many anvils do you actually need ?
anvil replied to BartW's topic in Anvils, Swage Blocks, and Mandrels
I'd say one anvil is all you need. However need is relative. I have my 255 Trenton for my shop anvil. My 184 Peter Wright is a second shop anvil located at the other end of my table. Its portable and handy to tweak my work when fitting. It also serves as an anvil when o have someone work with me. Then I have two 124#, one for travel, the other because I couldn't pass up the price. I've had up to six. Two were stolen. I truly miss my enders farrier anvil. It was my first and I just couldn't use it up. When I transitioned to blacksmith, it grew a coat of dust. Then I rediscovered many uses for its unique horn shape. It is missed. I do far fewer classes now then in the past, and more one off teachings now. Um not a collector, so can't add to that. Enough stuff just wanders into my shop, so no need to look. -
Common Basic Mistakes That Beginners Should Avoid
anvil replied to JHCC's topic in Blacksmithing, General Discussion
Well done! -
Forge welding failure.... too hot?
anvil replied to olydemon's topic in Blacksmithing, General Discussion
Lighting is critical. It was once said that the best compliment you can give a blacksmith when you turn on the lights is,,, "oh, that didnt make any diffedence!" No matter what copper may or may not have done, you burnt it. Also it's a good practice to work any forge weld at a good yellow heat such as doing a twist. -
Great helper!
-
good topic. i agree with you, Marc, heres my two cents. art/fine art has one purpose and that is to create an emotion. craft/applied art has two purposes and that it must do something and it must create an emotion. and perhaps a third is commercial art. it must create an emotion, but must also intend to sell or influence as well. simply said, forge a leaf and it is art. make it a key ring and it becomes craft. stamp your logo on it and it becomes commercial art. by logo i don't mean makers mark. and alas, we cannot define emotion. some may remember that national council of the arts grant that produced a cross in a mason jar full of, well you either remember or you don't. it definitely created emotions. i certainly don't consider it art. so perhaps we must all agree that just because something fulfills these, or any criteria, does not mean its art. which brings us back full circle,,, I wonder just how you define the difference between craft and art?
-
im not far behind you. just waiting the snow to melt.
-
its a ready made bridge anvil.
-
the oldies are great, and fine toolsd as well. another quality maker is Snap-on. the sets are often a good ebay deal.
-
Use your router and go deeper. Deep enough to put an inch or so of sand in the bottom and the base is seated at least half its height. The sand will deaden the ring and makes it easy to level your anvil. You should not need any other fasteners to hold your anvil in place.
-
~Humor attempt!~ I have this vision of a class like that with 10 or 15 wild college students whooping and a hollering, huge hammers flying and beating large 1" sized iron into 1/4" submission,,, with more fire in their eyes than in their forges!!! I guess all you can do is wait for them to tire out,, then head on out the door. Lol Nope, in truth, I've never had a class, or anybody in my shop, for that matter, where they are doing something I dont feel they are qualified to handle. At least, not for long. I know you teach classes. I'm guessing you have multiple forging stations. Do you have a striking anvil at each station? And to be sure, a tool is a tool, and if you have, or see a reason for any tool, then go for it!
-
Very cool! Are there any adjustments as to where it hits? Meaning can you do an edge to edge or half faced blow?
-
Interesting. Do you have a pic? And is this a permanent attachment? No critique, I'm just curious. For what it's worth, both my anvil and my post vice are set up for 360 degree access. I've thought of this as a reason, but discard it. First lesson should be to NOT EVER strike an anvil with a heavy blow on the horn or heel. Second lesson is to not strike your anvil unless there is something to strike beneath the face,, especially with a heavy uncontrolled blow. And third, before they use a striking hammer, teach the proper way to strike. And for me, that's never a hard overhead uncontrolled blow. I teach this style of striking.

-
An excellent how_to!. Thanks. I was unable to view your pics. I used ripstop nylon instead of leather. They worked fine. Also, I found that the action improved when I hung horse shoes on the end of the pole. I was able to add them until I got the action I needed.