anvil
-
Posts
3,246 -
Joined
-
Last visited
Content Type
Profiles
Forums
Articles
Gallery
Downloads
Events
Everything posted by anvil
-

Bitluminus and anthracite combination
anvil replied to Brian Evans's topic in Solid Fuels: Coal, Coke, Charcoal, Wood, etc
that's a big Yup! -
You need at least another tool. You need a water can. You should start your fire, then bank "green" coal around the sides and back. don't scrimp on the coal. But put it outside your fire twards the sides of the forge. Then use your water can to keep the "green" coal wet and not burning. Then use your poker to gently pull the coked coal into the center of your fire to keep your work at the temp you want Green coal is the unburnt coal that is waiting to be coked. Do not let this get into your fire, let it coke around the edges. When the green coal gets into your fire, you get smoke. More green, more smoke. In my forge, I usually start the day with a 5 gal bucket of coal. This is your basic fire control.
-
Another way is to make a layout stick from the parent stock. Once you know how to make it, try this. Say we are making a simple tapered drawer pull with a boss on each end that the screws go thru. Start with a piece of parent stock the correct length. This can be on a longer bar. Then mark the center. Then mark the transitions where the bosses are. Now forge half of the pull, not both sides, and scroll it to the proper curve and make sure the boss too is done. Basically a totally finished hslf. Then drill a hole in the other end and hang it on the wall with rhe rest of your layout sticks. You now have a physical piece with all starting dimensions, finished forging lengths, and proper shapes. It wont wear out, burn up, get eaten by the dog. Good to go tomorrow or 10 years down the road.
-
What Thomas said is good advice. Especially when you are starting out. However, keep in mind the direction your improvement will take you. when you make a hook that you like, pay attention to how much material you need. Then when you start with a longer piece, make all your center punch marks where one ends and the other begins. If you keep this in your mind, this will start you down that road of forging to dimension and starting the process of being able to forge matching pieces. Oh, and when you are comfortable with the above, you are ready to add more irons in your fire. Then you are getting close to a fine product that you can make some money with.
-
ive used wood, steel, Damascus once, soaked them in anti freeze, but what ive found best to keep them tight is using them every day. Try it and see if it works for you.
-
I did that with all my crafts fair demo thingies that went into wood. And told the same story. It works, by the way.
-
Nice work, and a tight screen!
-
nice. heres an "addon". on the nail, the part that goes in the wall, take a cold chisel and on the edges, drive up little barbs called "rags". Chisel twards the pointy end. do a few on each edge. Then when you drive your hook into wood, these rags will help keep it tight.
-
Bitluminus and anthracite combination
anvil replied to Brian Evans's topic in Solid Fuels: Coal, Coke, Charcoal, Wood, etc
Yup, your fire management is lacking. First thing id do is remove those bricks. And, I did mix some really good smithing coal with anthracite. Screwed the good coal totally. Thanks for bringing back the memory. That was long ago. -
Nice! Classes really pay off.
-
I'm pretty sure the formula for collar length to deal with measuring the centerline is (perimeter + 2-1/2 times the thickness of the collar). If anyone has Francis Whitaker's "cookbook", check it there. Mine is packed.
-
Jen, you need to add half the thickness of the collar material to get the correct length. To determine length of bent iron always measure the centerline. Because: The inside will be upset and be shorter than your original length, the outside will draw out and end up longer than your cut length, but the centerline will not change its length at all..
-
What Thomas said.
-
If you need a portable anvil you cant beat a metal stand. Ask any farrier who sets up 6-8 times a day. If your setup is permanent, you just cant beat a stump buried a few feet in the ground and the anvil set into the stump on a bed of fine sand.
-
What did you do in the shop today?
anvil replied to Mark Ling's topic in Blacksmithing, General Discussion
Cool! And the painted iron is a great finish. -
inspiring stuff!
-
Hay Rake Tine Striker Problems
anvil replied to MC Hammer's topic in Heat Treating, general discussion
i treat hay rake tines as a W1/1095 tool steel which is water quench. and i always anneal unless its a tool i need immediately. With these, i always come back later and re heat treat including anneal. -
drank a bit of Bud here and there, but im certainly no wiser. but, never say never
-
Maybe it went thru a fire amd the face lost its hardness. So it became the tool to test the hardness of chisels, picks and the like.
-
My journey has been different. No matter what the job, that's how good I was at that moment in time. one off, or a run of all the same, my skill level of the moment went into all equally. imagine what your customers might think if their run of 10 was a lesser than the guy who ordered only one? You are sunk. And I don't call it "production". I call it "limited production". The difference is there is no reason to compete with those boys,, their tooling is different than what a blacksmith will use. And, they cannot possibly match our limited production and one offs and make any money. Why? Lol, strictly because of "the finish"!
-
What did you do in the shop today?
anvil replied to Mark Ling's topic in Blacksmithing, General Discussion
Nice! Clean work, well balanced and totally hand forged. Especially the flowers and the tenons. Apparently the thought time was time well spent. -
Perhaps the real question should be "WHY" do we finish our iron. Answer that and the what becomes self evident. And finish must include any applied coating or developed texture as its a part of the process. Developed texture can be anything from some degree of peter tracks,,, I mean,, peen marks( ) to make it look hand forged to the techniques needed from the very first heat to the last to develope a velvety, warm, texture that invites you to touch it and feels warm to your touch.
-
Lol, I feel like a kurmudgon raining on a parade! But hey,,,, Personally I think that blower technology was maxed out somewhere between the design of the great bellows with the champion 400 and the buffalo design running a close race. I've used all three and am seriously considering a properly balanced set of bellows in my new "dream" shop. Anything beyond this tech pushes hard against the KISS principal. But its fun! So don't let me stand in the way...
-
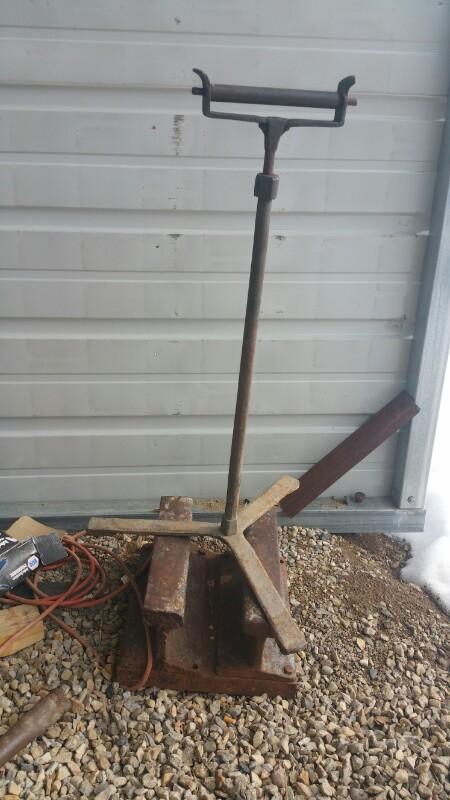
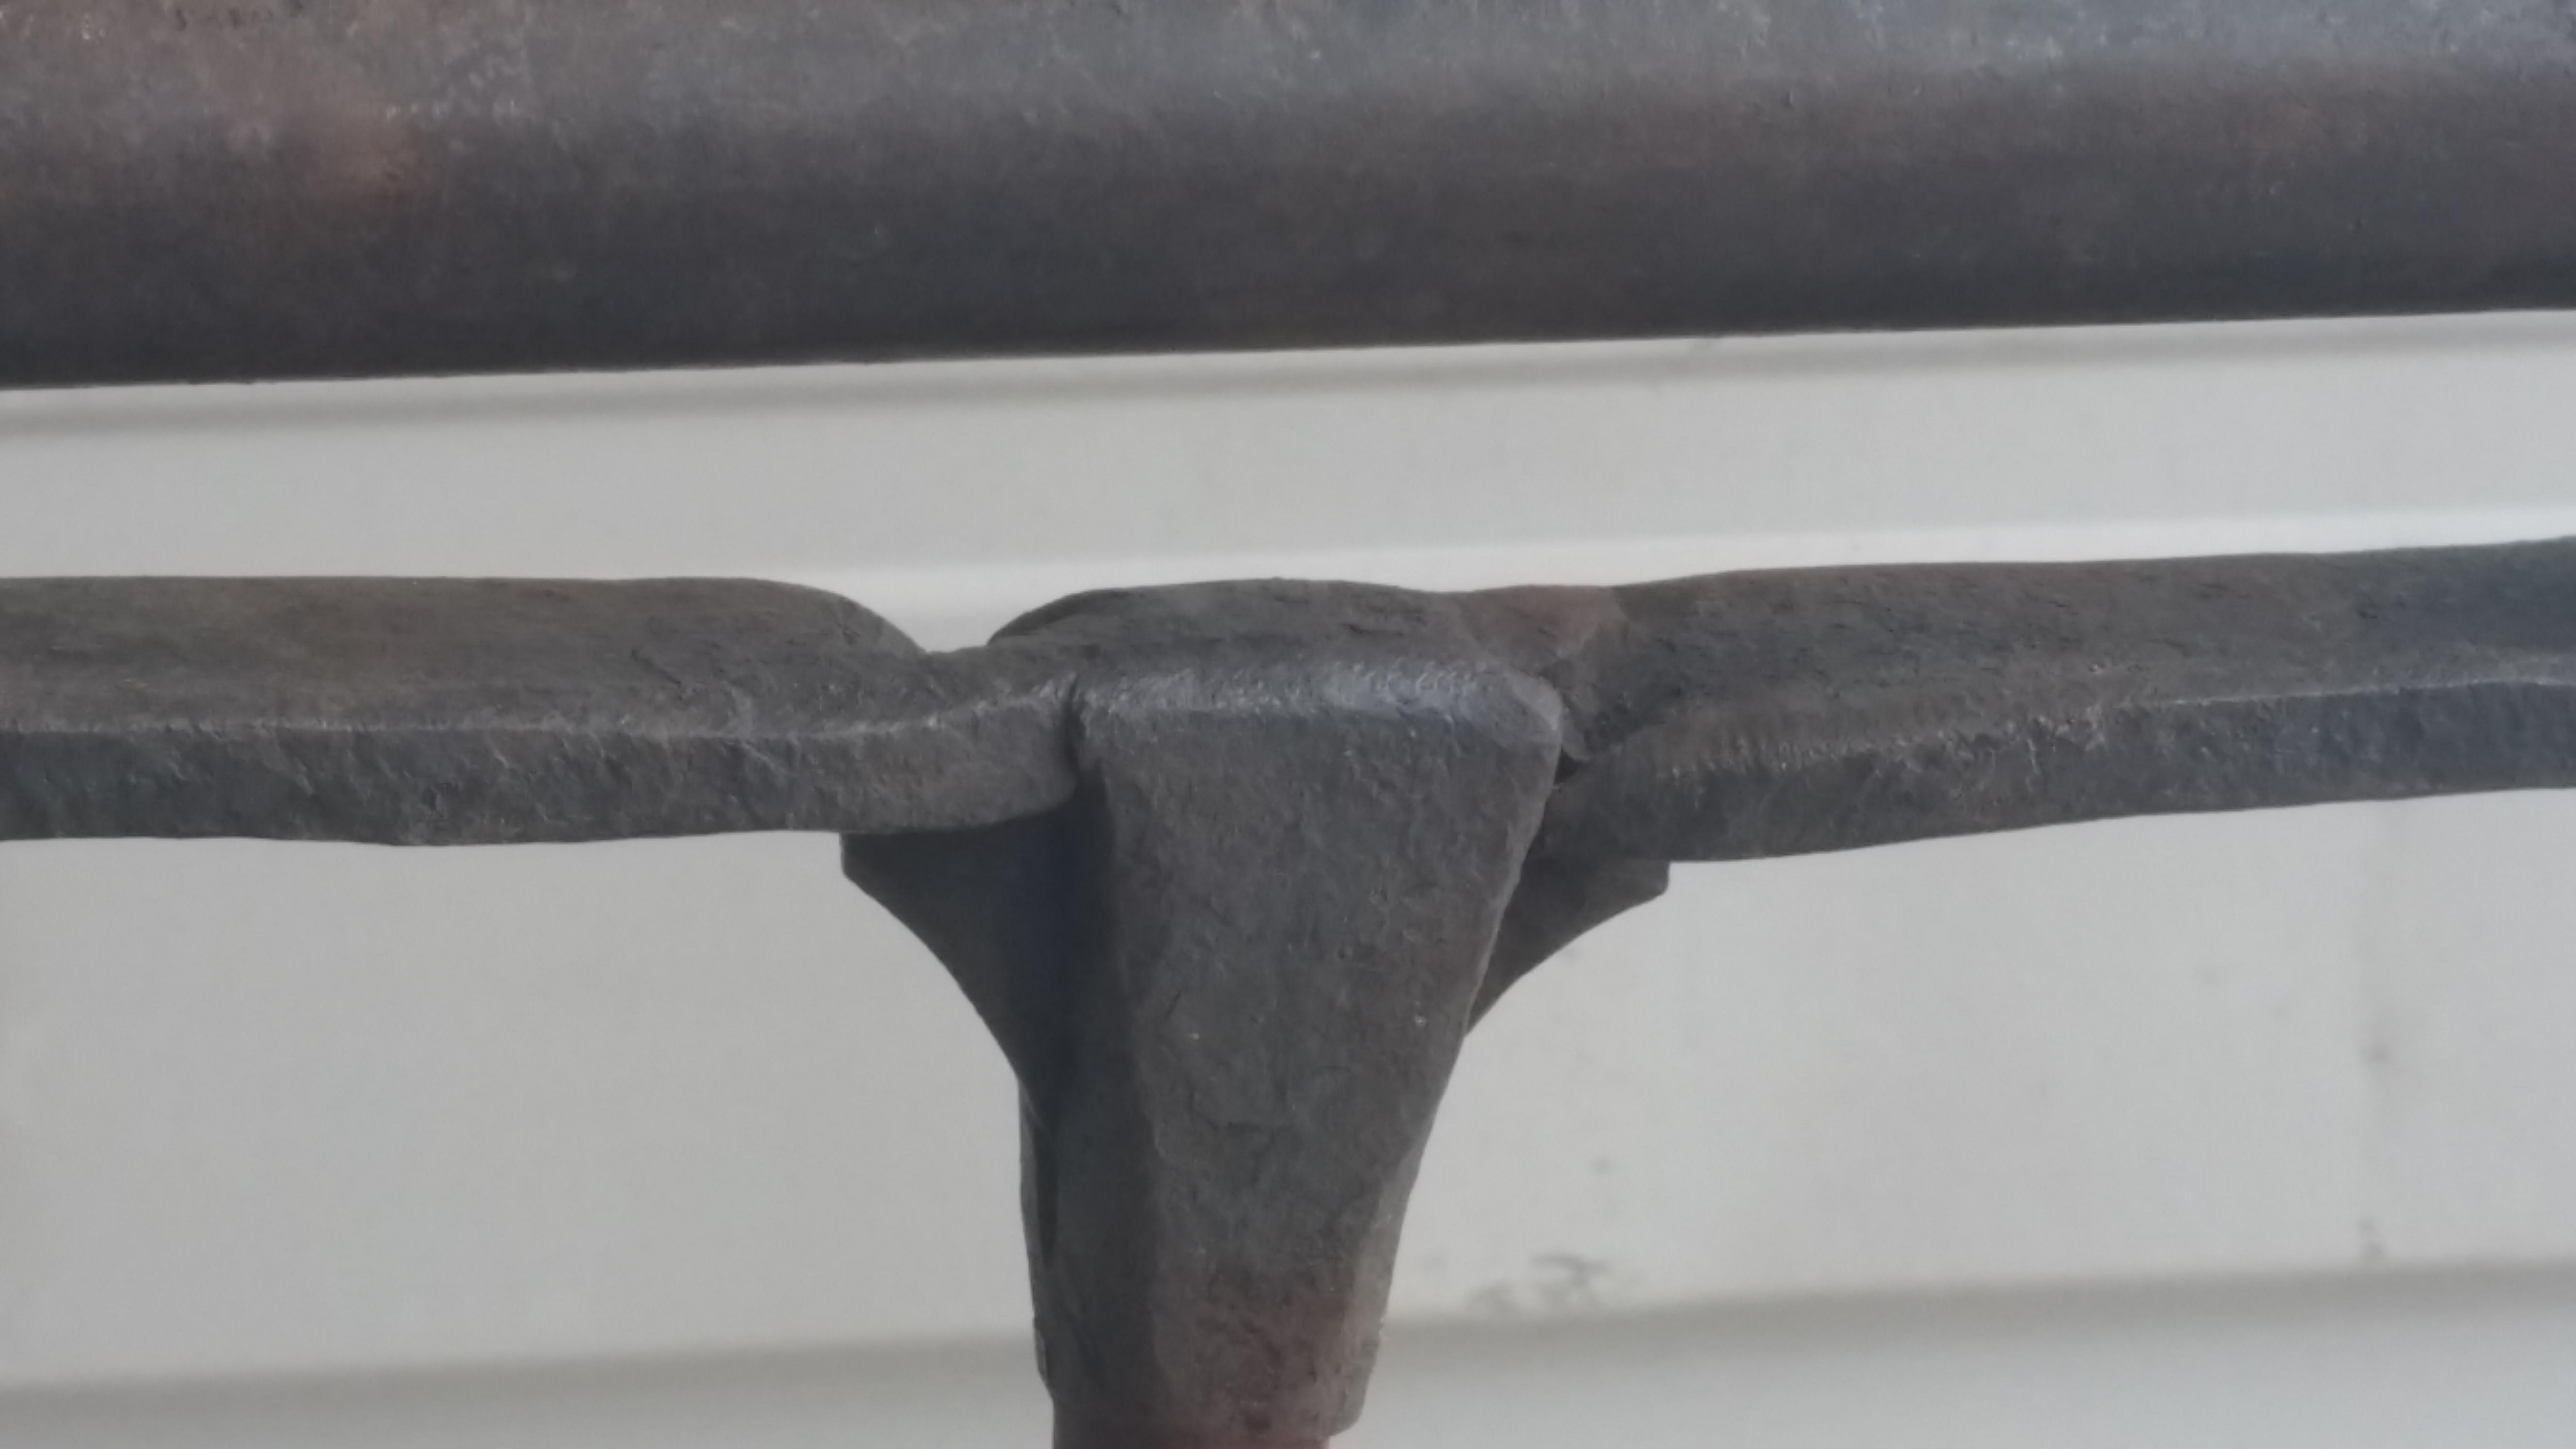
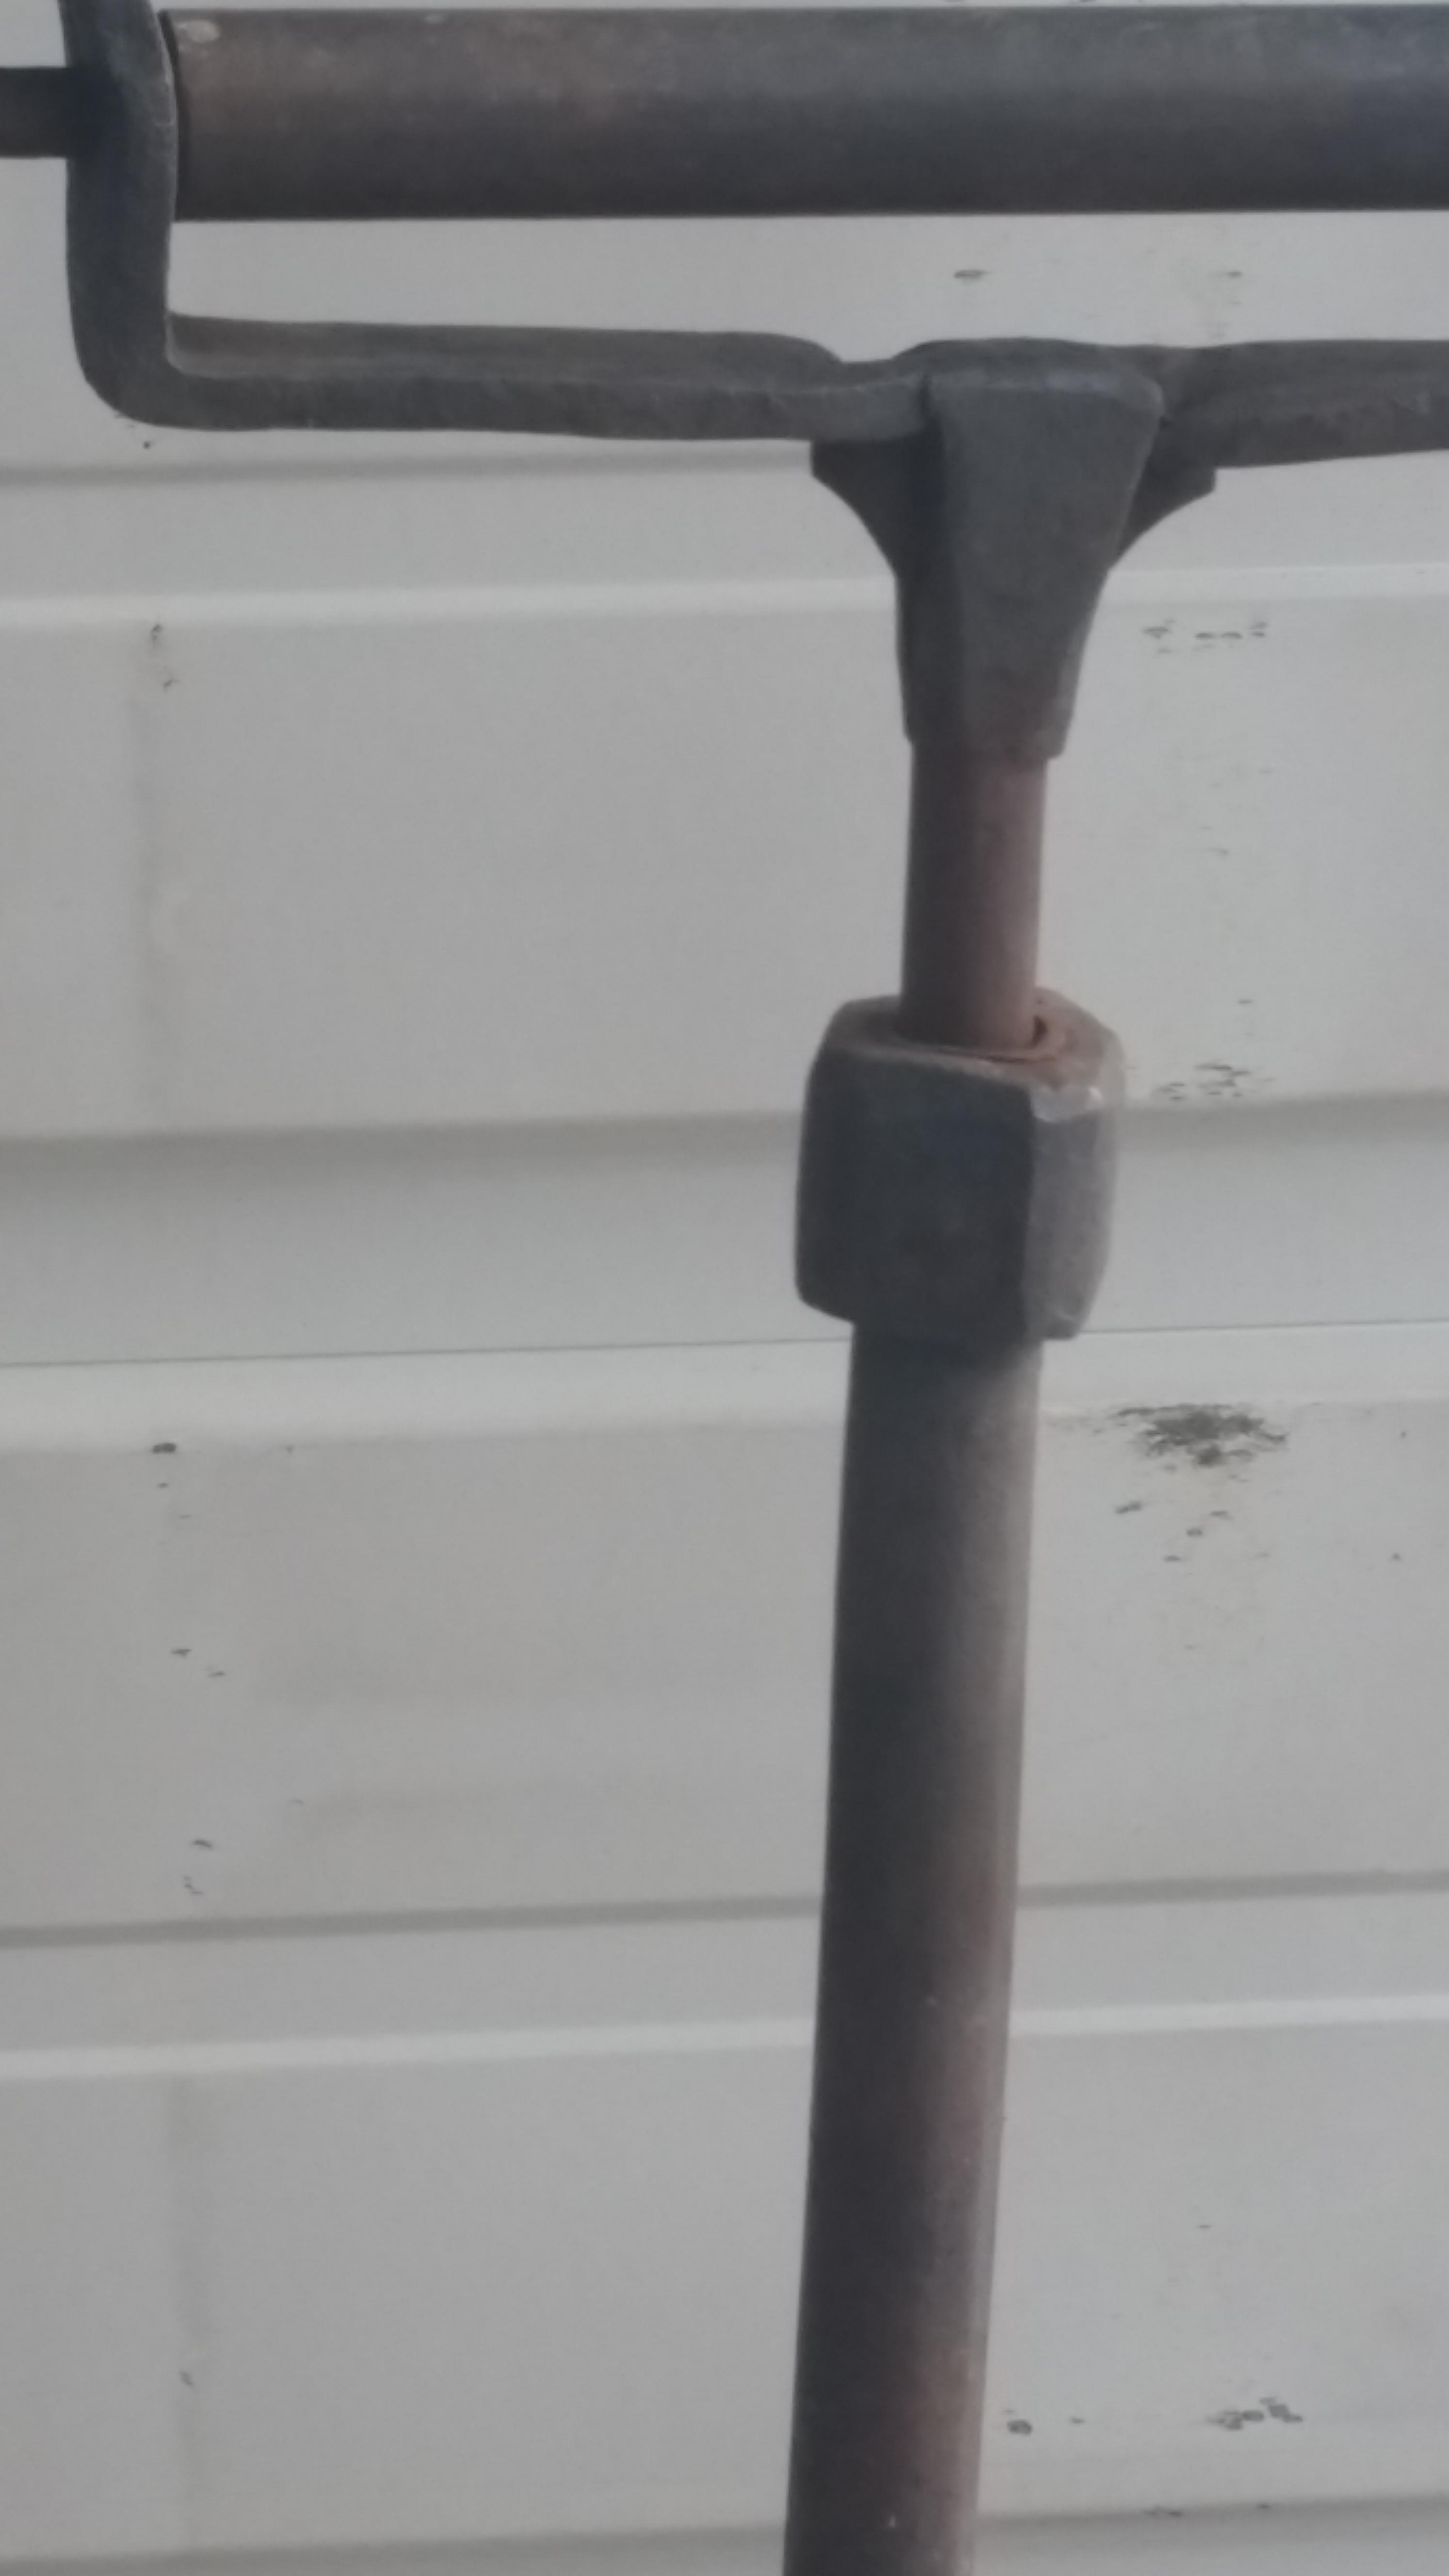
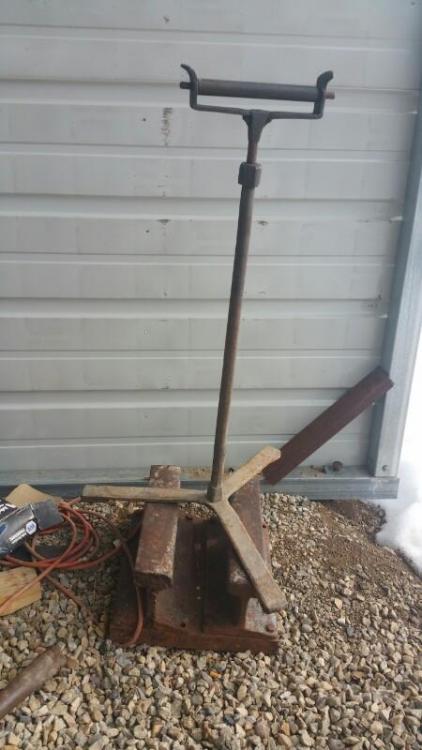
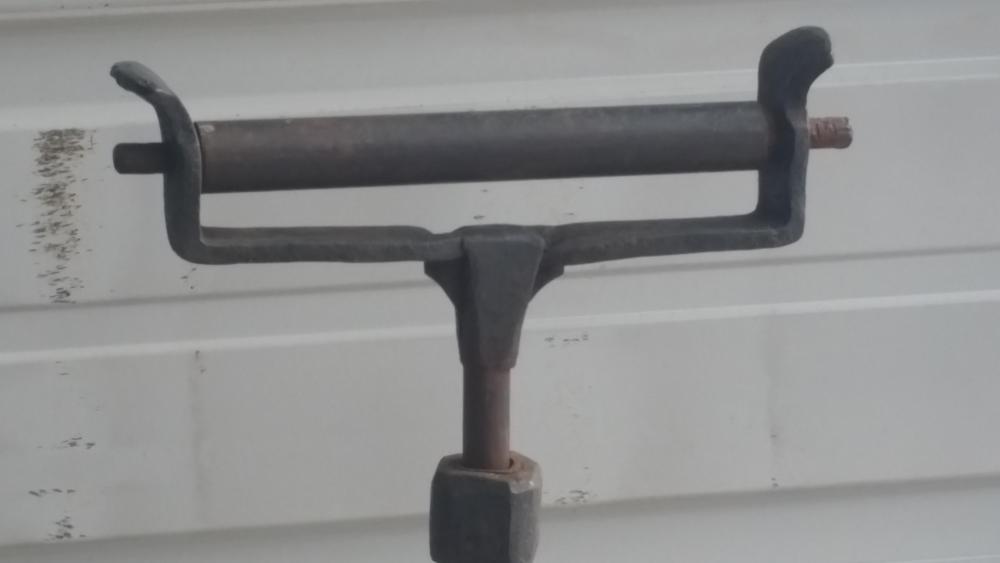
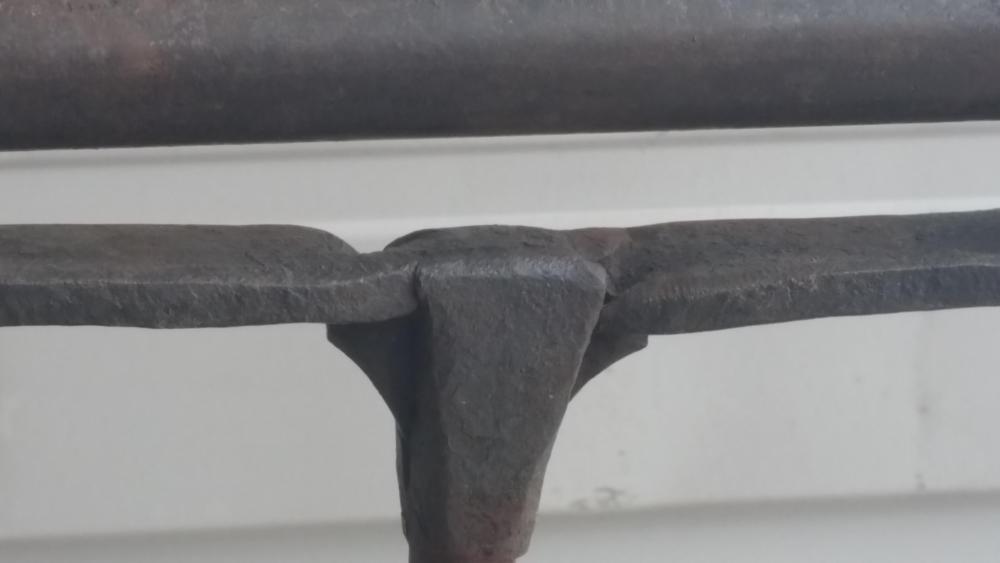
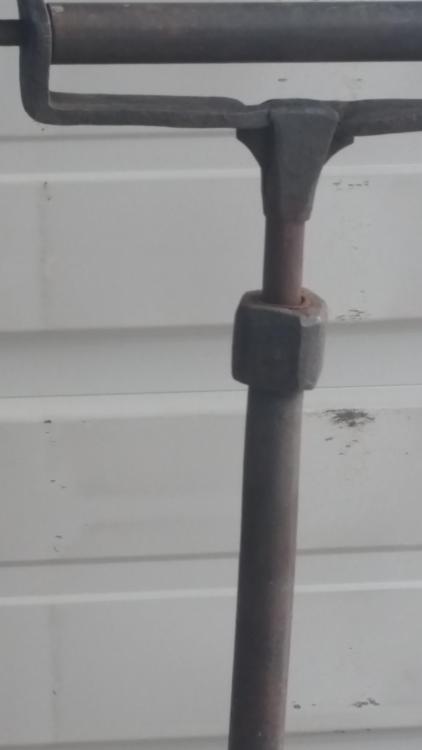
here's mine. All hand forged/traditional joinery. I have found I need a 3/8"x2" or so ring underneath the legs for more weight and to keep them from bending out of plane. The movable shaft was forged down with my tenoning tool(basically a top and bottom spring fuller) to about a 6" length, then filed a bit to fit the opening. Then I forge welded on a piece of round stock to get my final length. It is a roller type. I believe I used 3/4" pipe with a piece of 5/8" solid round inside. You can see the two tenons ready to be peened. I have 3 of them. One for long iron at the forge, and one on each side of my anvil, 25# lil giant, or post vice. The legs were fun. 2 pieces of 3/8"x2". One edge bent to a "vee", the other forge welded to it with a "tee" weld. Its hard to see, but rhe leg ends were folded back and forgewelded to create the raised feet. The frame piece was made from 1/4"x1". I used a "cleft weld" to the shaft, then twisted and forged the frame so the flats are as you see. A little file work amd it created a nice transition/detail from vertical to horizontal. The bottom boss was from 1-1/4" solid square with a 5/8" top tenon forge welded into the pipe and a 3/8" tenon on the bottom to attach the legs. Playing in the fire is fun,,
-
don't chase it, just leave your hand in one place and let it come to you. And if it stops, you know where it is.