

Frosty
-
Posts
47,373 -
Joined
-
Last visited
Content Type
Profiles
Forums
Articles
Gallery
Downloads
Events
Everything posted by Frosty
-
 I don't want to sound too picky but there's no good reason to post each photo to the general forum individually when you have them in the gallery. Once with a description of the what and why of your message and we can look at all the pics on your gallery page. Two issues with posting individual pics to the general forum: First, it's a waste of bandwidth with no gain on your part and means we out here have to open every single one to get then off our "new" post list. Secondly, it takes a LOT longer to download off the forum than to go through your Gallery. AND right here is reason 3 we don't see replies to this kind of post. Now I'm clogging the forum with another copy of a gallery pic. Frosty The Lucky.
 -
What fun's that? Couldn't you have at least made up something to amaze and amuse us? Don't tell me I have to explain the whole blacksmithing and Bull Shooting abbreviation thing? Frosty The Lucky.
-

Few questions on some equipment
Frosty replied to remist17's topic in Blacksmithing, General Discussion
How much blast to use at the time is a matter of experience and something a little time with an experienced smith really helps learn. It's entirely possible to put so much air to the fire it hardly warms the steel let alone heat it like it should. I'm pretty sure he meant rail rather than tie Bill. Getting the terms right is part of the learning curve no matter what some folk think. I'd love to follow some of the guys who don't think the right name is important while they shop or see their faces when they open the UPS package with their order. We still gotta point it out though. Frosty The Lucky. -
Wayne: Where are the pictures? You've been a member long enough to know we LOVE pics. Heck, if we can get a gander at what you're talking about we might have some ideas and maybe folk who don't know what's what will not post their ideas. Frosty The Lucky.
-
What we Call stuff. A turn of phrase...
Frosty replied to Borntoolate's topic in Blacksmithing, General Discussion
I had my computer in to my comp guy for a printer problem and he was on the Beta and final test "team." He's still getting used to it but says they debugged the whole program and it's a lot easier to use than Win 8. I was saddled with Win8 with the new comp, I wasn't even given the option to stick with win7 like Deb did. I guess I'll gird my loins and upgrade. I don't know what it is about upgrades and updates that has me so gun shy. Maybe tonight after I go to bed. I think it'll take a little time to save stuff I really want to keep to Flashdrives. Frosty The Lucky. -
I believe we talked on the phone a couple days ago. Yes? Welcome aboard Gonzo, glad to have you. If you'll put your general location in the header you might be surprised how many of the IFI gang live within visiting distance. Whew! That was close I almost forgot my customary welcome. I'd never live it down if I let an Alaskan get off without the location thing. Do you have my email address? Shoot me a line and I'll get you hooked up with the gang email connection. Frosty The Lucky.
-
Yeah, life is full of lessons, I just try not to learn directly. About holding your beer. Your Avatar looks like someone with his/er head on fire, that isn't a picture of you is it? I can spit fire, hold my beer, watch THIS! Frosty The Lucky.
-
Few questions on some equipment
Frosty replied to remist17's topic in Blacksmithing, General Discussion
I love it when I see folk start to see steel for what it is. The picture of an anvil has morphed from a "REAL" anvil to what an anvil really is: a piece of steel heavy enough to be a base that will resist movement well enough to make a smith happy. Once you stop thinking an anvil has to have a certain shape the world open right up and you start seeing all the useful shapes available to you everywhere you look. RR Rail is such a good starter anvil for this very reason. It's pretty easy to make into a London Pattern but with a little experience you discover what a limiting thing a London Pattern really is, rail has so many other good dies just waiting for us to cut and grid them out of it. So, what else do you see out there that'll make a fine anvil? Frosty The Lucky. -
I really had to disable a bunch of my ad blocks and filters and shut of the ads to watch the program. It was certainly worth it, I would have LOVED to get to take your summer camp as a kid. This summer even. WOW what a summer camp! No wonder it's booked in advance it's worth waiting for. My hat is off to you, you are doing a great service to your community, the kids and the craft. Thank you for the service. Frosty The Lucky.
-
Sure you can cast brass but the zinc content makes fumes that are a health hazard and if you over heat it they can be a serious and significant hazard. Most folk are not willing to mess with casting brass in a home shop foundry. I have a good friend who is a professional caster and scraps or gives away brass donated to him. What brass he keeps is for brazing and forming as components of sculptures or tools none goes into the crucible, none. Frosty The Lucky.
-
Sorry I'm late replying, I'm running amazingly short of time for a retired guy. I'm still editing my T build directions, I'm a naturally wordy guy and have been doing a lot of cutting to make it reasonable size and still cover the bases. No chokes on the T under normal conditions though some guys need more control of the atmosphere. Properly tuned a naturally aspirated burner's fuel air ratio is an almost flat curve at different gas pressures. Part of the reason I was messing with my burners recently was to make altering the ratio easier, that turned out to be more trouble than it's worth. The gas jet sizes are different according to tube size but I'm not good enough at mathematics to develop a formula. What I did was experiment till I got good jet sizes for the burner sizes I've made. They are as follows. 1" burner = 0.045" mig tip. 3/4" burner = 0.035" mig tip 1/2" burner = 0.023" mig tip. The above jet sizes work well enough but may need adjustment. I tune my burners by trimming the mig contact tip length, the farther the tip is set back from the beginning to the burner tube the more air it entrains and the leaner the ratio. As you can see from pictures of other burner builds the set back can be very different but you'll also notice they are using a different air intake port design. The Porter design vs. Ron Reil's EZ, vs. Mike Hammer's design, vs. a T, vs. Side arm, vs. whatever someone comes up with. They all work and once you understand the basic mechanics you can make a surprising number of configurations produce a flame to your specs. Frosty The Lucky.
-
What we Call stuff. A turn of phrase...
Frosty replied to Borntoolate's topic in Blacksmithing, General Discussion
Let me know what you think of Win 10. I've been cursing Win 8 far too long now and still don't know how it works. Yeah, that's the finial, from the latin meaning "thing on the end." "Fin" being end and "ial" being of. Hmm, maybe at? For all you folk who speak Latin I will gladly accept correction once you get finished laughing. Or crying. Frosty The Lucky. -
Hang a light bulb close over it and it'll cure much more quickly. A fan helps too but not as much. Frosty The Lucky.
-
Where's the incentive in only doubling the price? Frosty The Lucky.
-
A well tuned 3/4" burner is enough to bring 300-350 cu/in to welding heat. At 395 cu/in it's close enough with a single burner you can probably do it by turning the gas psi up. Put a split fire brick or kiln shelf in the bottom for a floor and you should be in range. However it's pretty long so the heat will be uneven. Use two, 1/2" T burners spaced about like you figure would even the temp up nicely. Three 1/2" burners wouldn't be an unreasonable level of overkill at all. Frosty The Lucky.
-
Probably not this Saturday but one of these days. I've never been to Tennessee either. Frosty The Lucky.
-
Is the bottom of your tuyere open? It needs to be closed or the air won't be blown up through the fire. An exhaust flap cap works very well for an ash dump, clamped upside down on the bottom of your tuyere iron. Mount it so the counter weight is facing your working position so you can reach under with a tong, piece of stock, hammer, whatever and flip it up to open the dump and clear the ash. A slot or bar grate works very well for an air grate. A simple fire rake or poker can slide along the slots to clear the clinker. That's a nice forge you picked up, you'll love the larger table. Frosty The Lucky.
-
Won't play for me. Drats! I'll try again in a little while. Frosty The Lucky.
-
I like it Theo then again I like all your knives. The pins are okay but don't fit the cast furniture. They're little roundish bumps in a basket of clean square/angular material. Perhaps diamond pins, something that fits the theme would look better. The wood looks nice, I like the brain and texture maybe a red stain? There are a lot of really flashy woods that would look great. I assume you have this rendered on computer, yes? Experiment with woods till you find one that really sets it off. I have some Myrtle I was going to use for handles but never did. It has a very chatoyant grain like tiger eye. I can't think of the fellow selling it in S.W. Oregon I believe along the coast. I see places selling it with an online search. I'm not selling the stuff, it's just a flashy thought. Frosty The Lucky.
-
Forklift Tine Anvil, Need Ideas!
Frosty replied to TimberTim's topic in Anvils, Swage Blocks, and Mandrels
Nice score Tim!! I'm sure Thomas Powers will see this and respond, he's made a number of anvils from forks so I'll let him pass on suggestions. Just do NOT get in a hurry, what you have is gold and rushing things can leave you with oh, okay, I'll keep looking. <sigh> Frosty The Lucky. -
Light fire brick doesn't like thermal cycling and doesn't last very long in a forge unless you're pretty lucky. Try this instead, drill the burner hole and score the brick through the hole and down both sides. This will make the brick break through the score, just like cutting glass. This will leave you with two halves that can still support the burner but hopefully won't heat check more. I've stopped using light fire brick in forge lids but Kaowool can be hard to keep in place in a flat roof. I've had luck kiln washing soft brick using "Zircopax" from Seattle Pottery Supply and sifting the grog from my castable refractory. I mix it approximately 2pts. zircopax to 1pt. refractory fines as the matrix. So far it seems to be working but I still haven't gotten my new forge tuned well enough to get really HOT. I've been experimenting with the burner ports and may have to scrap it . . . again and try something else. I'm trying to mold the refractory to make a burner flare that makes a fan shaped flame. No joy just yet, I get the shape fut not a good burn ratio. Frosty The Lucky.
-
Just inside the top of the brick works well to keep the burner tube out of the fire. Yes, that's why it was getting red, give it a little time and it'd be drippy yellow with sparklers. With the T so close to the forge body it was probably intaking some exhaust fumes and not developing as much heat as it could. Frosty The Lucky.
-
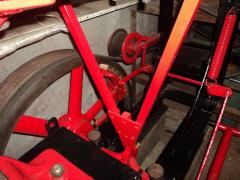
Leaf spring splitting froe
Frosty commented on DUNSTAN's gallery image in Other sharp or pointy things
 Birch bark is natures tar paper under a sod roof. I like putting about 3-4" of gravel between the sod and bark to let water flow out. Just remember to drill skuppers in the sill boards and you can plant strawberries in them. It's really hard to beat a snack growing out of your roof. Anyone know how camel tastes? Wait a second, Deb came with a herd of goats. . . Nevermind. Frosty The Lucky.
 -
Do you know how to calculate the VOLUME of the forge chamber? volume and shape (to a lesser degree) are the things that dictate your burner requirements. You need to do some of this stuff yourself you know. Frosty The Lucky.
-
You want the burner OUT of the forge chamber or it WILL melt off. It doesn't need anything fancy I started running brick pile forges at demos because folk could imagine using one rather than fabbing up what an old fabricator thinks of as easy peasy. The hole you drilled through the fire brick will act as an expedient flare so use a short piece of angle iron and pipe/hose clamp to get up and out. Just needs a LITTLE tweaking, otherwise looking good. Frosty The Lucky.