Frazer
2021 Donor
-
Joined
-
Last visited
Everything posted by Frazer
-
Best of luck to the both of you!
-
For forging, hot rolled vs cold rolled doesn't make a difference; it's all hot formed when you're done with it. If you have any leftovers from previous jobs don't put any of the chrome plated stuff in the forge. For chrome you'll have to mechanically remove all the plating before heating. You're a machinist, I'm sure you have a way (or several) to do that. Work hardening WRT machining isn't an issue while forging. It can come into play with struck tools where the struck end gets mushroomed out after long term use. That can be safety concern since chips can break off and cause injury. However, that isn't specific to 1045. Other than that (as mentioned above) it's a great alloy for tool making, especially those you would prefer to be tough rather than hard. Hardening is relatively straight forward and forgiving, which can be a benefit. Some people will say not to use it for edged tools. That's arguably true for something like a knife, but for chisels, hardies and other edged blacksmithing tools I think it works just fine since edge retention/hardness isn't all that important.
-
That's a mighty fine pair of scrolling tongs! Goods choice to use a coil spring.
-
Unless this knife was stock removal it's possible you have a layer of decarburized steel that's softer with harder steel underneath. You're giving rather specific numbers. How do you know you're at 815C? If you're using a magnet, just bear in mind that nonmagnetic is the lower critical temperature and (in general) the quenching temperature is 90-150C hotter than that. Those sorts of differences can be hard to tell by eye, but just keep that in mind. Personally, I would skip the soak. IMHO with thin cross sections like a knife it's more likely to cause problems than provide a significant benefit, even with a muffle. As quenched O1 should skate a chainsaw file. O series tool steels are oil quenching W series are water A series are air I believe for large cross sections and/or simple geometries there are multiple quenchant options.. I would have to check my book for examples.
-
You could use fender washers or something under the plate as spacers to bolt it down to something flat. I don't think the whole plate needs to be in contact. Seems safer than trying to straighten it, but I'm interested to see how it turns out. It looks to be in great shape otherwise. Brake rotors are cast and they are known to warp, but that's from heat. I wonder how that would've happened to that plate.
-
Look, if it causes any marital strife, I'm willing to take the anvil into my care.... You know.. For the good of you and your marriage. Welcome aboard, looking forward to seeing what you make with it.
-
Latticino types faster than I do. I wont rehash everything he wrote, but I will say hello and welcome from a little ways north of you.
-
Through the magic of editing I've replaced the long version of the video with a heavily edited one. The full version with more discussion is still available if you prefer that format. However, I feel most of the people here would prefer 20 minutes rather than 1:20:00.
-
I can't help you with a date, but that's a beauty of an anvil. Seconded on the great deal (if it was in fact only $150).
-
Make sure they are insulating fire bricks, not hard firebricks like you find at most of the hardware stores. Again, I would get a second opinion before you run out and buy anything. No need to hurry that much.
-
I don't know much about burners/gas forges so I'll leave those recommendations for those qualified to make them. That forge looks pretty big. Have you tried reducing the volume inside by adding some IFBs to the bottom? That might help and would be a relatively fast, inexpensive option. I'd get some input on the burners before you buy anything though.
-
-
-
Happy Friday! I too am brimming with excitement. I'm envisioning that Buckethead will pail in comparison to the almighty Frankenbucket.
-
Chelonian, very cool. I like that. Does the "tail", for lack of a better term, sit flat against the wall? It almost looks slightly conical from the picture, but it may just be the bevel and my early morning eyes. Either way, nice use of material there. BillyBones, nice swivel hook. I haven't tried to make one of those yet, but I'll have to give it a go. I remember watching one being made in the chainmaker video JHCC shared I little while ago. That one was a little different, more of a swivel than a hook, but same idea. It's funny how things always end up looking different in pictures.
-
I appreciate the feedback. I'm in no rush at all. Lets see... how about Monday, February 14th (Valentine's Day). That should be plenty of time for everyone who wants to participate.
-
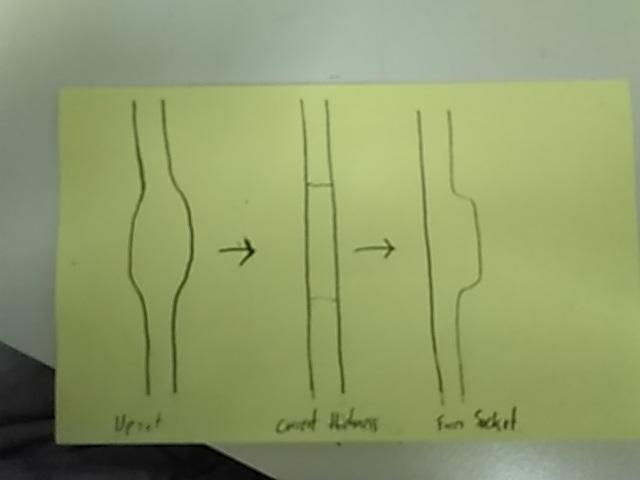
It's not really shown in the pictures so I'll be a little more specific on how I formed the socket. I upset the bar, corrected the thickness in one direction and used the edge of the anvil, a set hammer, etc. to push either end to one side. The last step makes it a little easier to slit and I think it looks nicer to have a flat front.
-
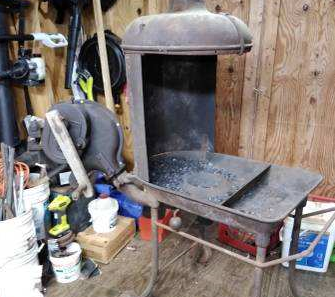
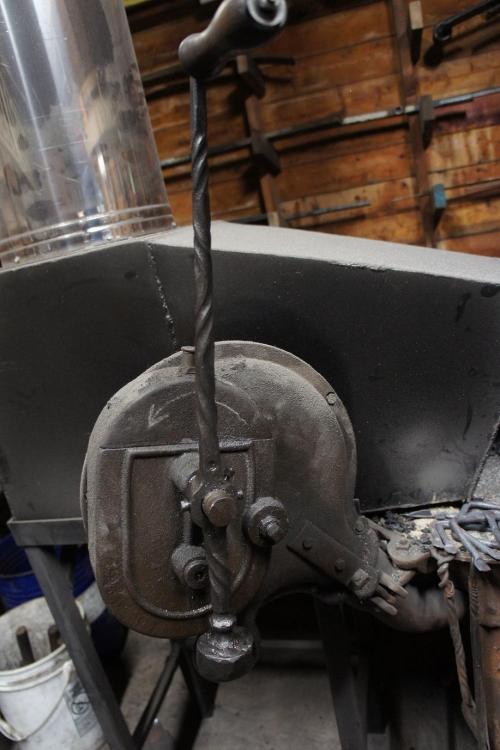
I recommend it! It was a fun project. This is what it looked like when I got it (I don't have a better picture handy, this one is from the original Craigslist post for the forge). I needed the upgrade from the wooden block approach taken before. Both work... Mine looks nicer in the shop. My one regret is the handle side is longer than it really needed to be. I could always cut it off, but ehhhh... it doesn't bother me that much.
-
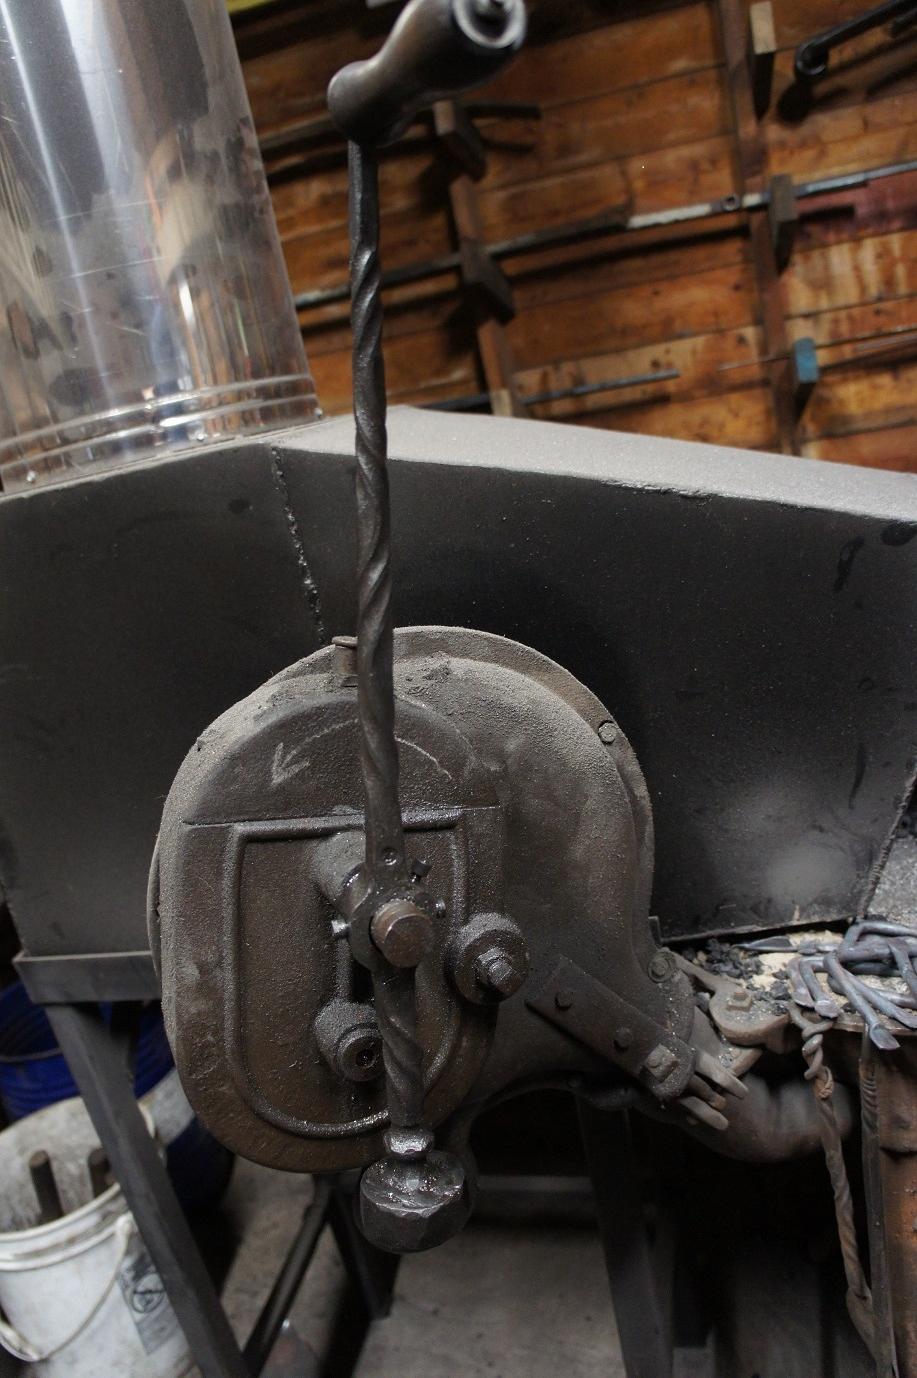
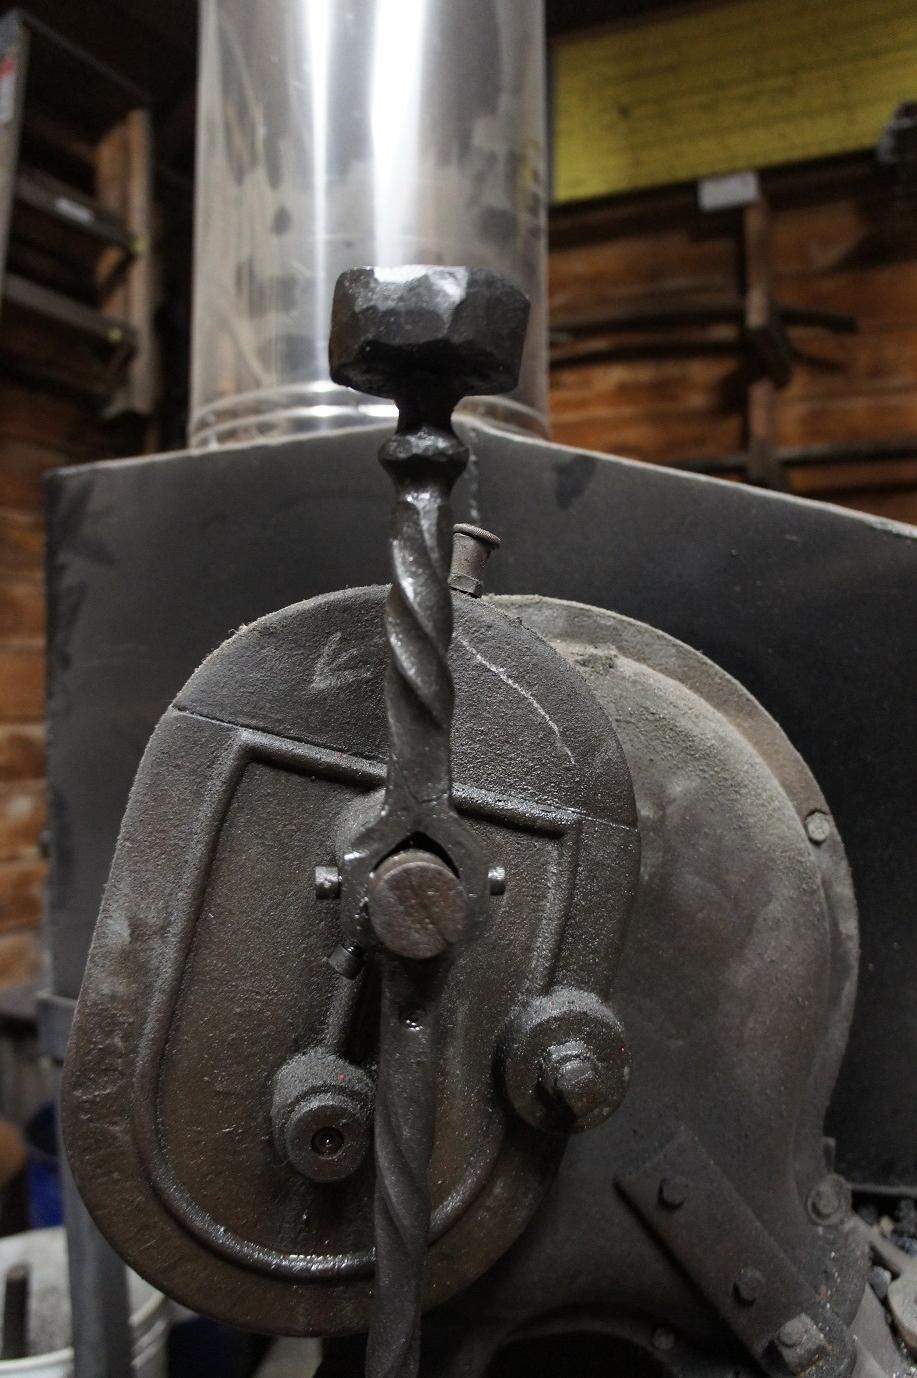
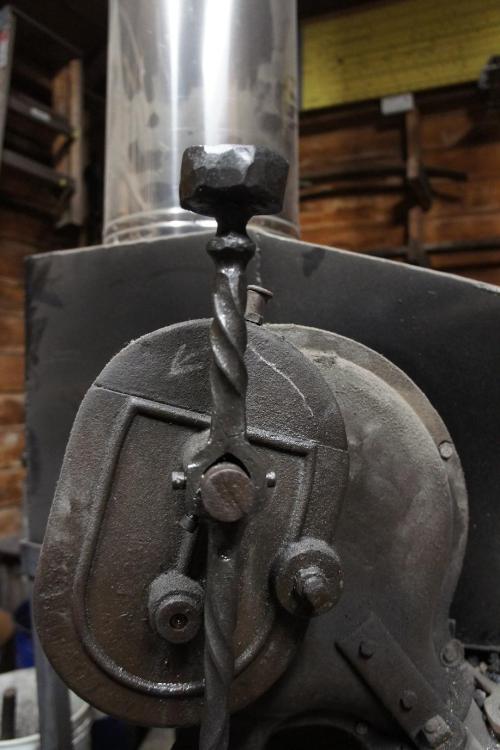
So there are 3 pieces (4 including the counterweight). 1" round, forge welded to 3/4" square, forge welded to 1/2" sq that was drawn out into the handle portion. Part of the 3/4" sq. piece was upset, slit/drifted to fit the the blower and holes were drilled and tapped for 3 cap head screws (I ended up needing 3 staggered axially) to lock it in place. There was a recess in the blower shaft for one set screw, but it was pretty wallered out when I got the blower. I probably didn't need to forge weld so many pieces together, but I wanted to practice With a better fit between the shaft and the handle I probably wouldn't have needed all 3 screws. Alas, I mismeasured my marks for the slit ---- Finally, the mystery of your search for steel balls reveals itself!
-
This is how I did mine. 90 deg bend, threaded the end and put a nut and washer on there. I like the riveted method too. Different mounting method at the input shaft though.
-
I know you wouldn't do that in the shop, more of a how to get the volume of irregular shapes in general. wcf is just starting out... "I am only researching at this point. Heating and beating is still a ways off." Of course he needs to address his forging techniques... I'm saying that the level of experience moving metal with a hammer needs to be taken into account before you say that loss to scale isn't (or won't be) a factor. Also, you're telling me that when you make a 3# hammer you start with 3#s of material? Of course you don't. You add extra to account for (at the very least) grinding at the end... I bet even you would add an ounce for scale too...
-
Immerse in water and calculate the displacement.. Supposing you have an appropriate beaker/graduated vessel, volume is easy enough. Weight is still easier, generally speaking. I usually start with one and switch back and forth depending on what I need to know or can easily measure. Working heavy stock like this will take more heats. Enough where scale will be a factor? If you're making an axe -- especially for your first few -- I would say it probably will. At the very least it will be more of a factor than on the hinge shown above.
-
I have read from multiple sources that there is sometimes retained untempered martensite after a single tempering cycle. Additional cycles at the same -- or sometimes slightly lower -- temperatures can improve the "completeness" of the initial temper. I'm not sure how this would interact with a differential temper that comes with drawing back the spine. Note: I'm not a metallurgist/bladesmith.
-
Hondo, that might be your best blade yet. Very well done. The bolt hole adds some cool character to it.
-
Just a reminder there is one week left to take home the tongs. In the event no one accepts the challenge they will be donated to the local blacksmithing school.