Frazer
2021 Donor
-
Joined
-
Last visited
Everything posted by Frazer
-
Hello and welcome aboard! My shop was outside for the first couple of years, but I had a roof (it was actually a deck, but close enough). I would prioritize adding some overhead protection to your pergola there, that will help keep some of the rain off. Granted you live in Florida so you probably get more rain there than I do in NY... Regardless, a roof of some sort can't hurt. Generally speaking a little surface rust isn't going to harm your anvil, etc., but prolonged exposure and standing water could be more of an issue. Other than that I don't have much to add to what George said above. Steel from a steel supplier is cheap and it's a much better staring material than rebar. It's possible that your piece of rebar is tough, it's also possible you're not putting enough heat in the bar to move material quickly. However, I'm going to go with it looks much easier on TV. Same applies to YT. Not only do they condense the number of heats down to fit in their time block, but they don't show you the years of practice, experience and, in most cases, training these smiths have received since they started to be able to work that quickly. Once upon a time they were almost certainly whacking away on scrap metal too. It takes practice and technique to move material efficiently. If you want to accelerate your ascent up the learning curve I would recommend you connect with your local blacksmithing group. It appears FABA is your local ABANA affiliate and meetings for the southwest region are on the fourth Saturday of the month. It appears they also have a Facebook group, but not having FB I can't say how active it is. Check out FABA's website here. Good luck, I'm looking forward to seeing what you make. P.S. If you haven't already, I recommend you READ THIS FIRST. P.P.S. The pavers under your anvil will sink over time, leaving a nice puddle there.. Ask me how I know
-
Most of mine have broken off at the start of the stem, but that's because of what I was trying to do with them (see my Rosa sapiens thread). I also first saw them at a demo, but that was a several months ago at our NYSDB meetings.
-
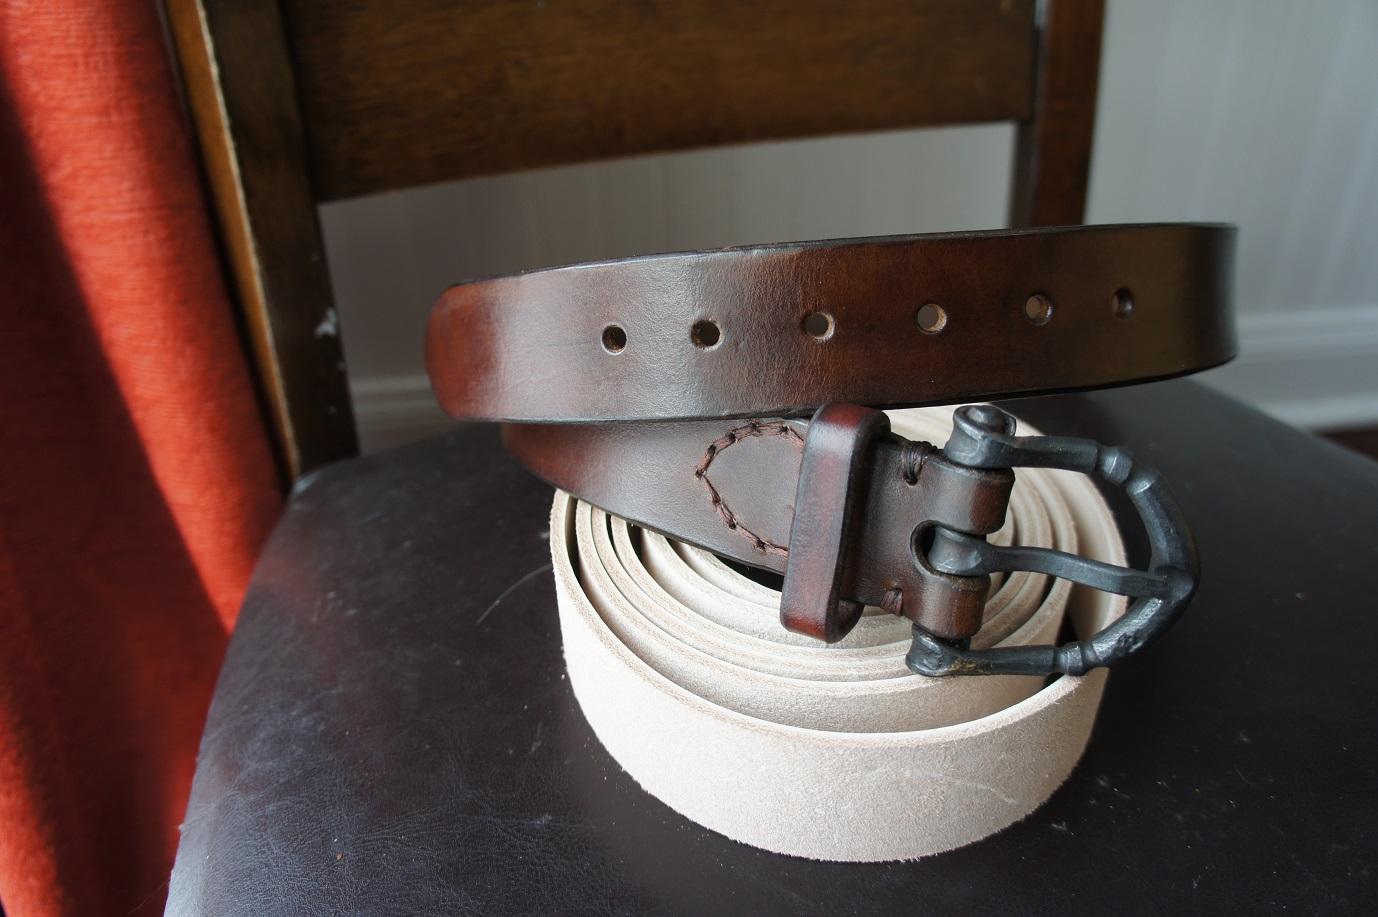
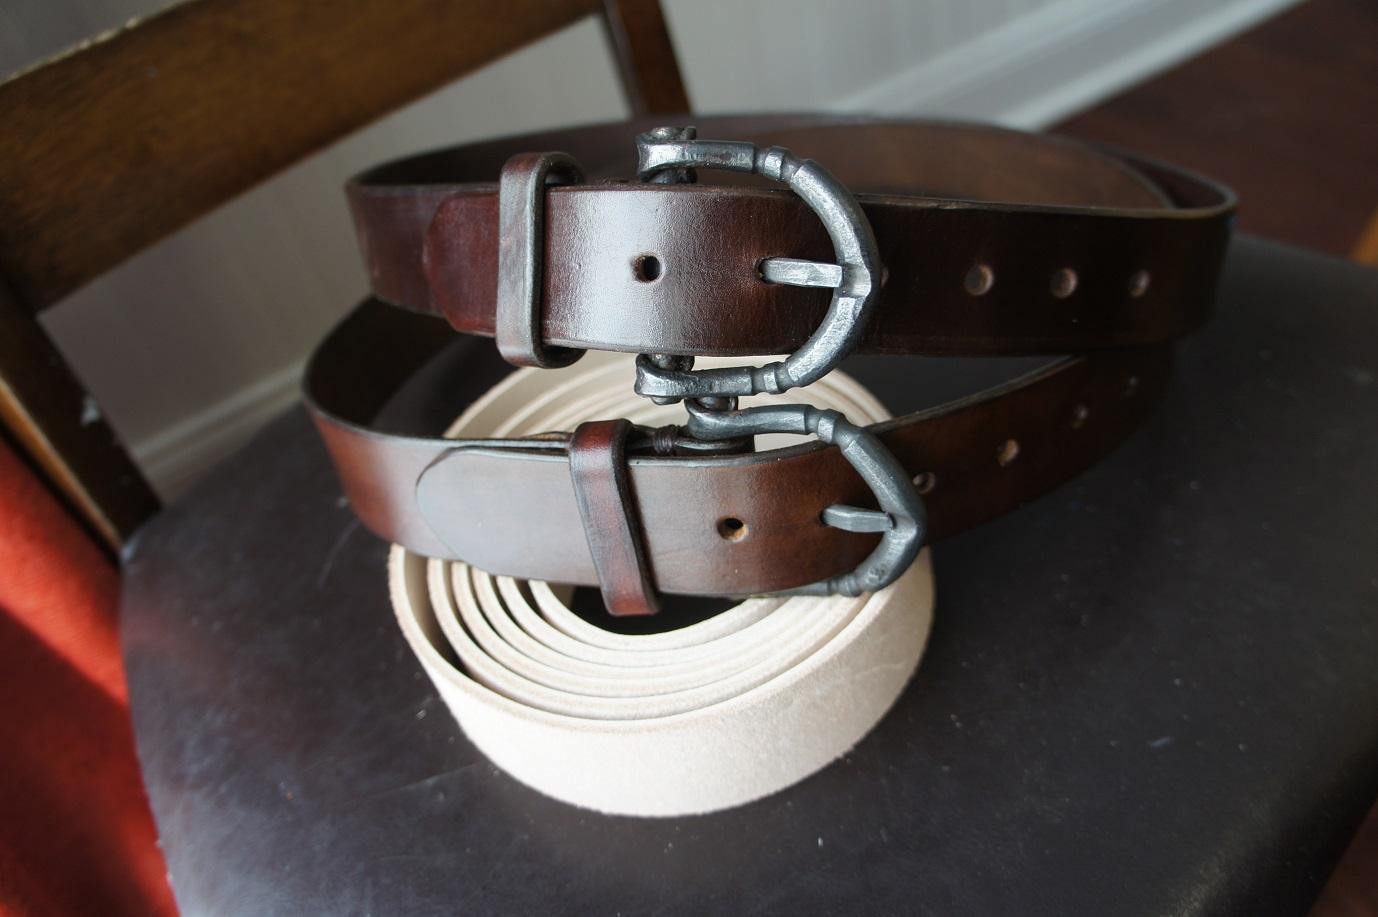
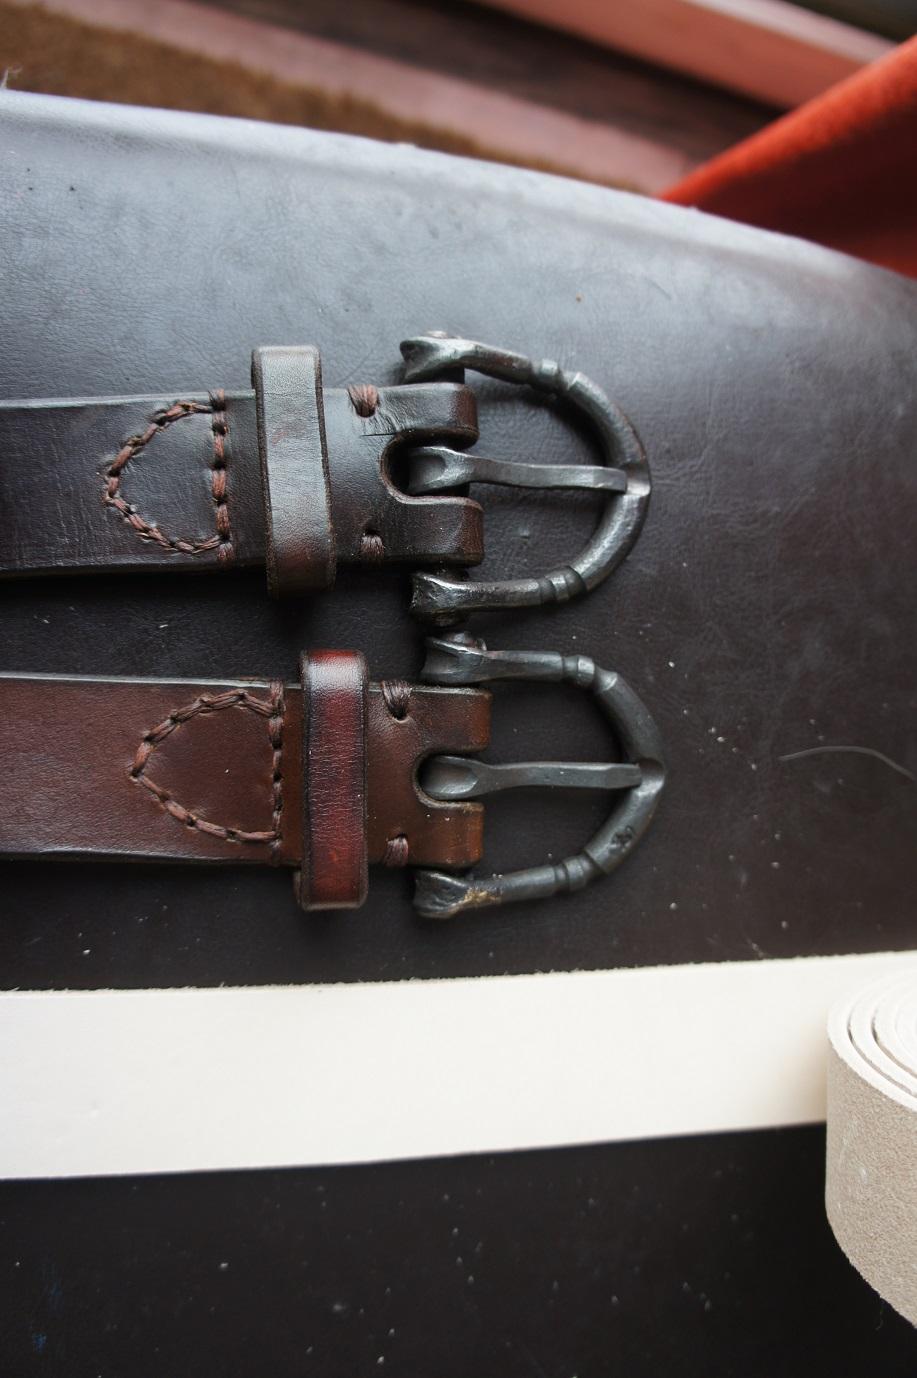
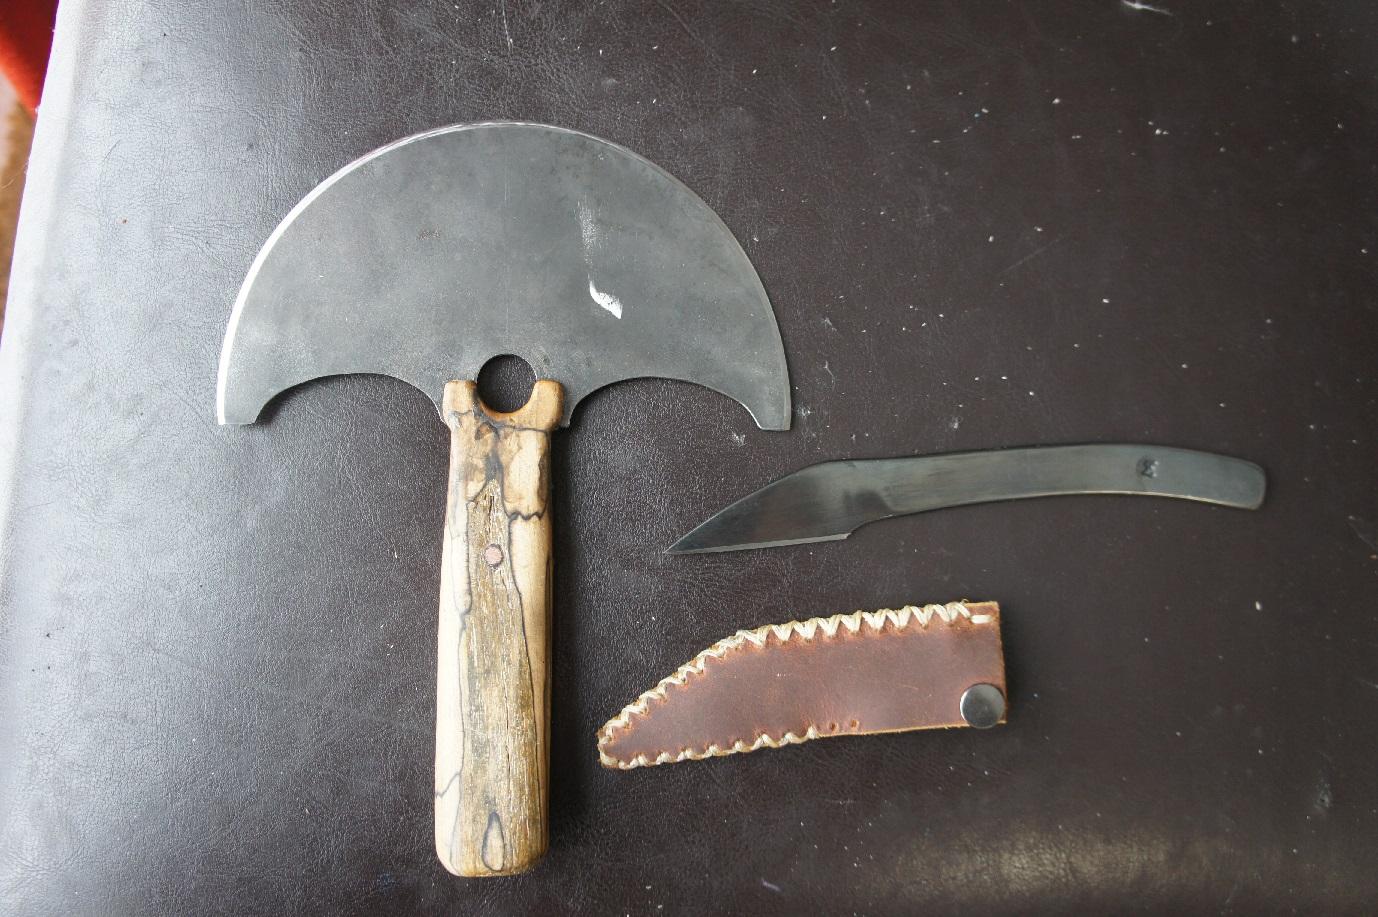
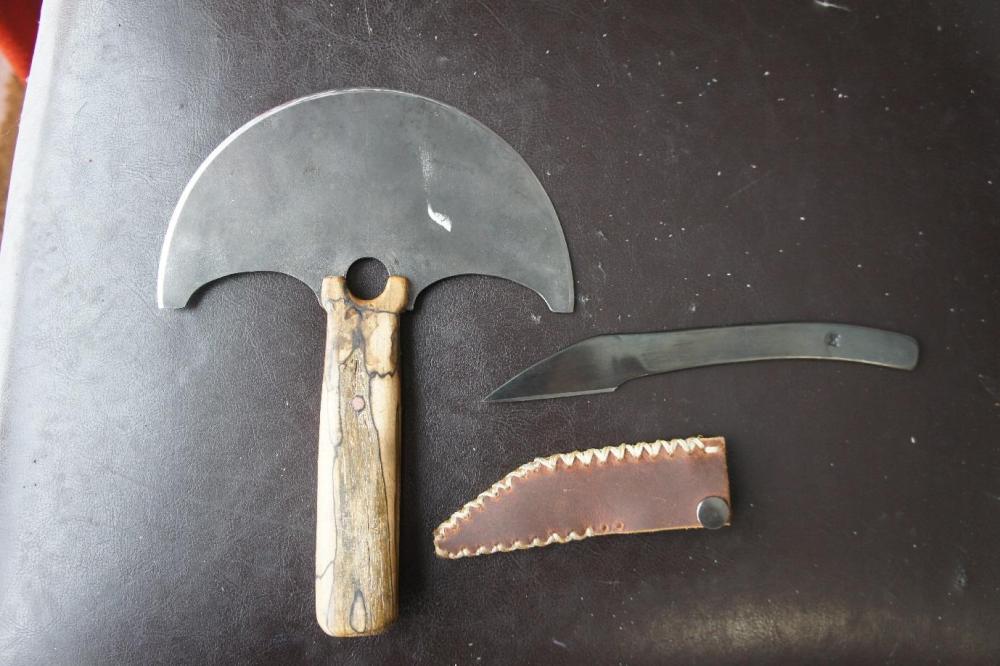
I finished up 2 belts. Not too shabby all things considered. I started with 1.5" wide, 9-10oz strips (also seen in pictures). Overall a good learning experience. I had to make a few leather working tools as well. A kiridashi (sort of) made from 1095 (gun blued for fun). And a half moon knife made from an old saw blade. Stabilized spalted maple handle.


-
Ah, yes, the Russian rose. The best way to curl it a little tighter and avoid it becoming boxy is to make it thinner. Then you can use the step (while you're wrapping it up) and a bottom swage (at the end) to round it up further. It may also help to make the petals a little narrower. When I form the petals I use a hardie to cut them out. This leaves the cuts with a V shape rather than the straight sided slots seen in your picture.
-
Welcome out of hiding M. Rivet and nice job on the hook! I'm glad you found it helpful.
-
For that you must find a Fangornian Oak. It might be hard to hollow out without the right tools.... Bring a squirrel.
-
If you found an acorn nut large enough it would make a mighty dunce cap...
-
Followed by, "Wrench, I said wrench honey! Because you turn my heart and... and because we're fastened together!" Then you bolted.
-
When I was in college I learned that it's not good to let the basement of your fraternity get below freezing... Coincidentally, I also learned how to replace sections of burst pipe tucked in dark, dirty, inconvenient areas. Sharkbite fittings are your friend. Being a glass half full sort of guy myself, at least the kegs were cold!
-
I've found I prefer the steel stand too now that I switched over from wood. As far as the legs go, bigger is better IMHO. Stronger, heavier, more peace of mind. I like that you went the bolt together route. I'm already glad I did. I've only had it for a month or so and I've already taken it apart to make some additions. With sand in the legs the stand weighs ~220#, add my 150# Soderfors on there and you have a tough thing to move if needed... unless it all comes apart.
-
I tend to avoid that word Everyone's perception of it is different. It's sort of like Beetlejuice. If you say it too many times, people start popping up out of the woodwork offering definitions and corrections on your having said it.
-
Nice Soderfors. I would have trouble working on a stand like that personally. With 1/2" plate and relatively thin legs I'm not sure it would be rigid enough, even with a lighter anvil (47kg isn't very light). Everything is a spring and the more the stand deflects the less force is transmitted into your work. You might not feel it deflecting with each blow, but is and probably more than you think. At the very least I would try to add some cross bracing to legs somehow to stiffen them up a little. My stand is all bolted together together too, but I used 4x4x3/8" sq. tube (stood on end) for the 4 legs, prestressed 3/4" plate for the top and 1" plate under the feet. I'm not being critical, just my 2c.
-
Lary, very nice trivet. I think it was a good choice to tack weld them together. Some things look best with rivets, some with collars, others with welds. I think you made the right choice here. Thanks Jennifer. Not the cleanest pair of tongs I've ever made, but they work well. --- A quick reminder: Just under 2 weeks remaining! Time flies.
-
I've shaved exclusively with a straight for the last several years. It is more of a process and you do have to do more maintenance, but I find it to be much more enjoyable. Plus with proper care my razors will probably outlive me. I've tried making them in the past, but I just don't have the tools/skills to get the grind down as thin as I would want to go. For my main razor I touch up the edge every year or so with stones up to 12k grit. Before every shave I use a leather strop treated with chromium oxide followed by plain leather. I know it's shave ready when I can pop thin arm hairs off without touching the razor to my skin. Some people have qualms about the so-called hanging hair test, but it seems to be a decent starting point. My back up razor is a custom piece from a blacksmith. Unfortunately, when I received it the the bevel was (to put it nicely) totally messed up. It looked perfect to the eye, but it was almost impossible to sharpen properly. I was able to reprofile it, but it took many hours with wet stones to get it there. That's how I learned what a huge difference edge geometry makes when you go to shave. I like the suggestion to refurbish/practice on an old (or perhaps a cheap) one. I'll add the caveat that if the price is relatively low and it looks decorative then chances are it's meant for decoration. Straight razors can be like bathroom jewelry for some people so there are many decorative models out there that are also high quality. However, it's always reflected in the price.
-
Wooo Friday! All hail (sic) the punapalooza!
-
Rather than typing it up again I'll share my comment from a previous thread... Basically, there is a big difference between a thin knife that cuts paper/arm hair and a straight razor. Getting one to shave is a bit of an art and I don't think it's something you can be impatient with.
-
Buy the grate or leave the scrap pieces long enough to be partially covered/held in place by your clay lining. Whatever works.
-
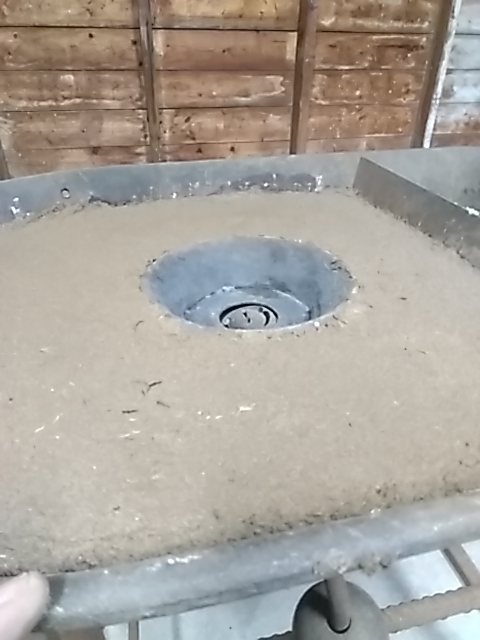
No, probably not. It doesn't need to be special clay, kitty litter works. For the grate I've seen people lay round stock across the opening and call it a day. The larger openings make it less prone to clogging up with clinker/ash. (Credit to Bluerooster for the picture)
-
I think TP's point is you smelt ore, but you melt steel. Different processes different names. It helps people like me who get confused Out of curiosity are you just getting started in blacksmithing/bladesmithing? If so, then it might be worthwhile to try to connect with local smiths before you go whacking on your meteorites. Normally I would recommend an ABANA or NWBA affiliate, but I don't see any results popping up. Maybe someone out your way can offer a suggestion. If not then never mind. Well, I'd still recommend meeting up with local smiths, we're constantly learning from (and heckling) each other. Plus some guys might have tools/toys that could limit the number of iterations/setbacks you go through to get where you want to go.
-
Not refractory, but a nice clay/sand mixture (roughly 1:3 mix IMO) should do the trick. My forge has a ducks nest firepot (it's cast iron, but you could mold the shape out of clay too. Clay rich soil is fine for the clay portion. Some people use cheap unscented (clean) kitty litter. (Cross posted with quick-draw Thomas; bested again! I thought the same thing about the grate. That one will probably work, but might clog up due to the small holes)
-
Best of luck to you and if/when you get started, please share your journey. I find the process fascinating even though I don't have the skills/know-how to do it. I would like to do a smelt someday, but that's beside the point .
-
DanielC was the guy I was thinking of that was exploring crubible steels. He shared some interesting pictures here and here . It seems like quite the process to undertake. I'm not sure where I'd start! Maybe you could reach out to him, he hasn't visited since July 2021, but who knows. He can probably give much better info than any video. P.S. welcome aboard, please read this first. You'll find useful information in there to help you get the most out of the site. P.P.S No need to quote my whole post, especially if it's the one just before. If there is one line/statement you wish to respond to, you can highlight it and click the "Quote Selection" box that appears. This saves bandwidth and people from needing to read the same thing twice. No hard feelings, just a general housekeeping note.
-
I'm no metallurgist, but I remember the patterning of wootz has to do with the carbides that precipitate out (I think the vanadium facilitates this). So you pretty much have a monosteel with bands of carbides interspersed throughout the material; that's different from the etch/resist patterning of modern damascus. I think FC is still the way to go, but have no idea what the concentration of the FC should be (I usually dilute mine) or the soak time. I remember seeing a really interesting thread on crucible steel on this site. Have you done a site search on the topic yet? Sounds like you'll want to experiment with different acids (ferric, muriatic, vinegar maybe, coffee etc.) and see what results you get. I wouldn't expect a whole lot of contrast until you get the whole process right, but what do I know?
-
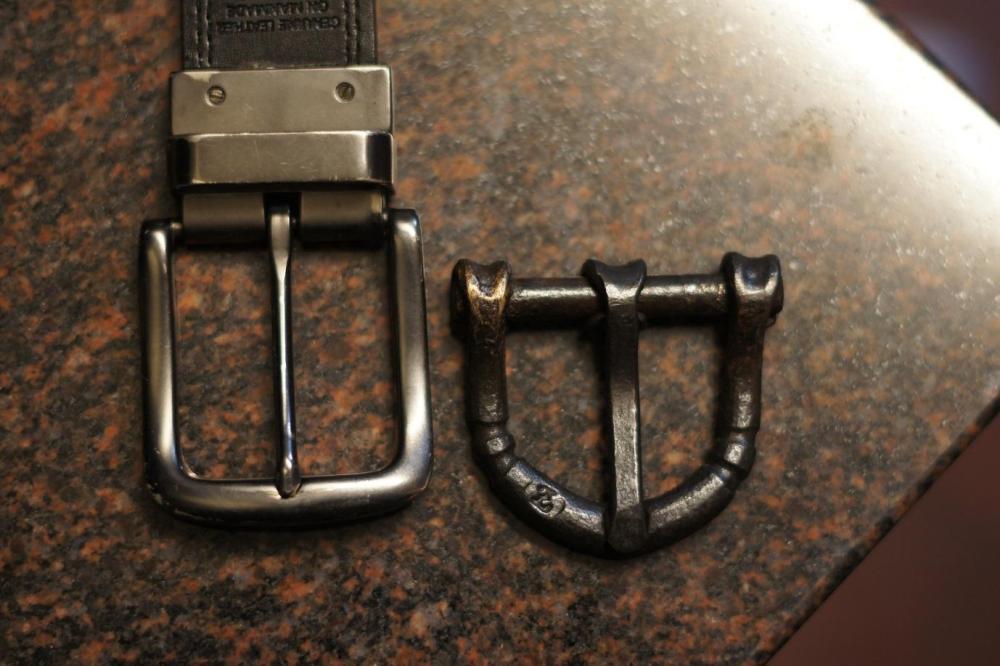
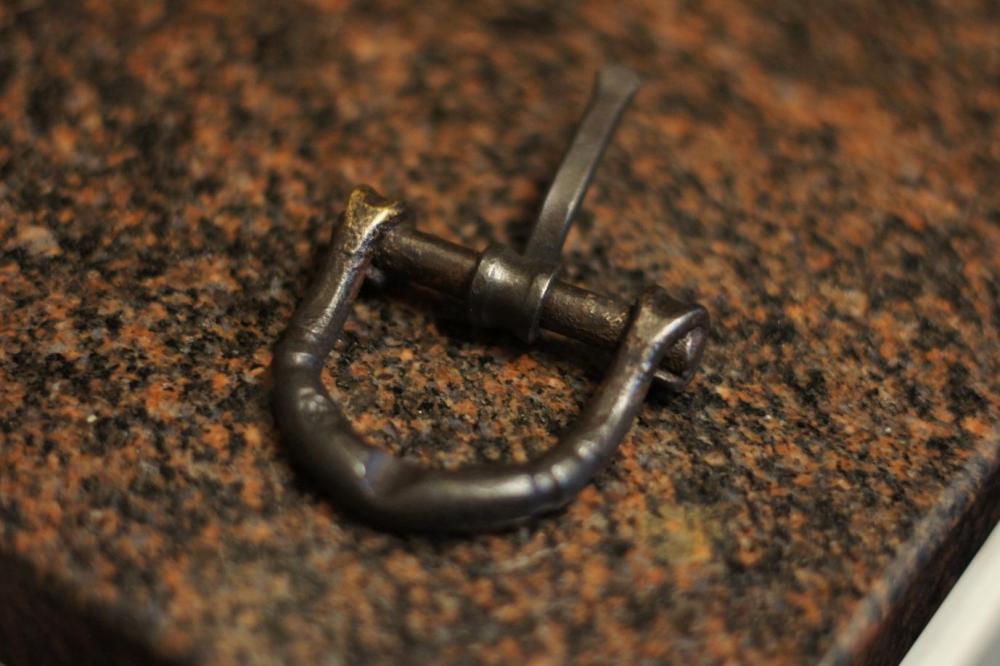
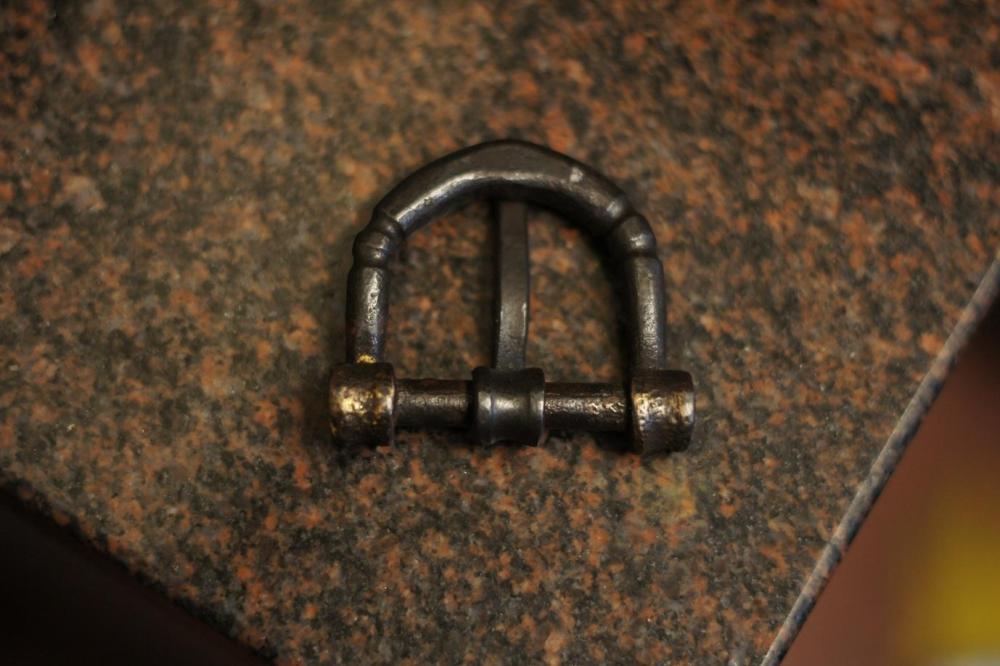
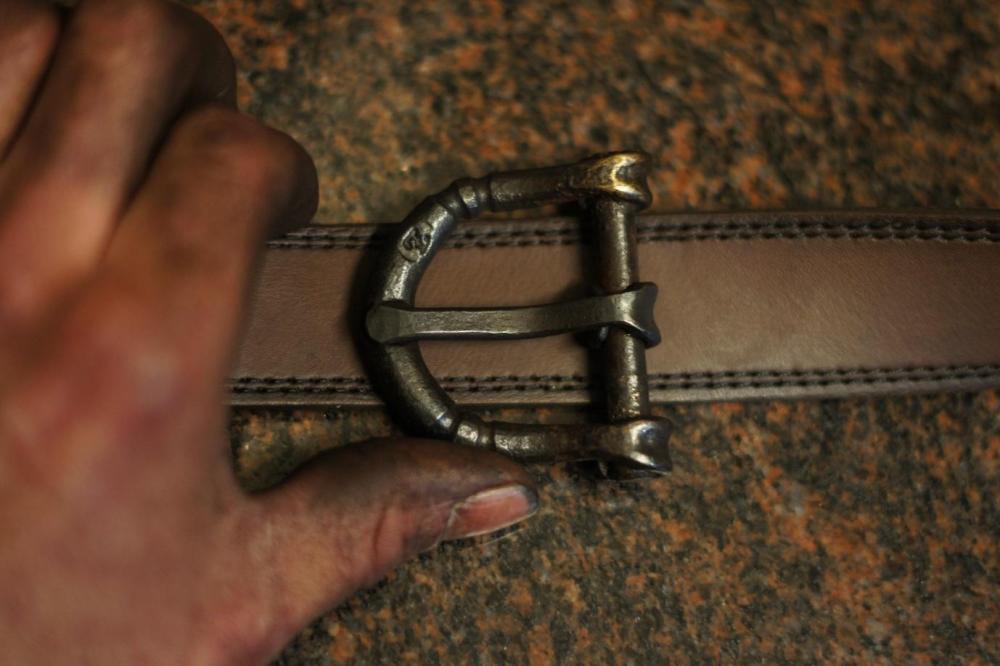
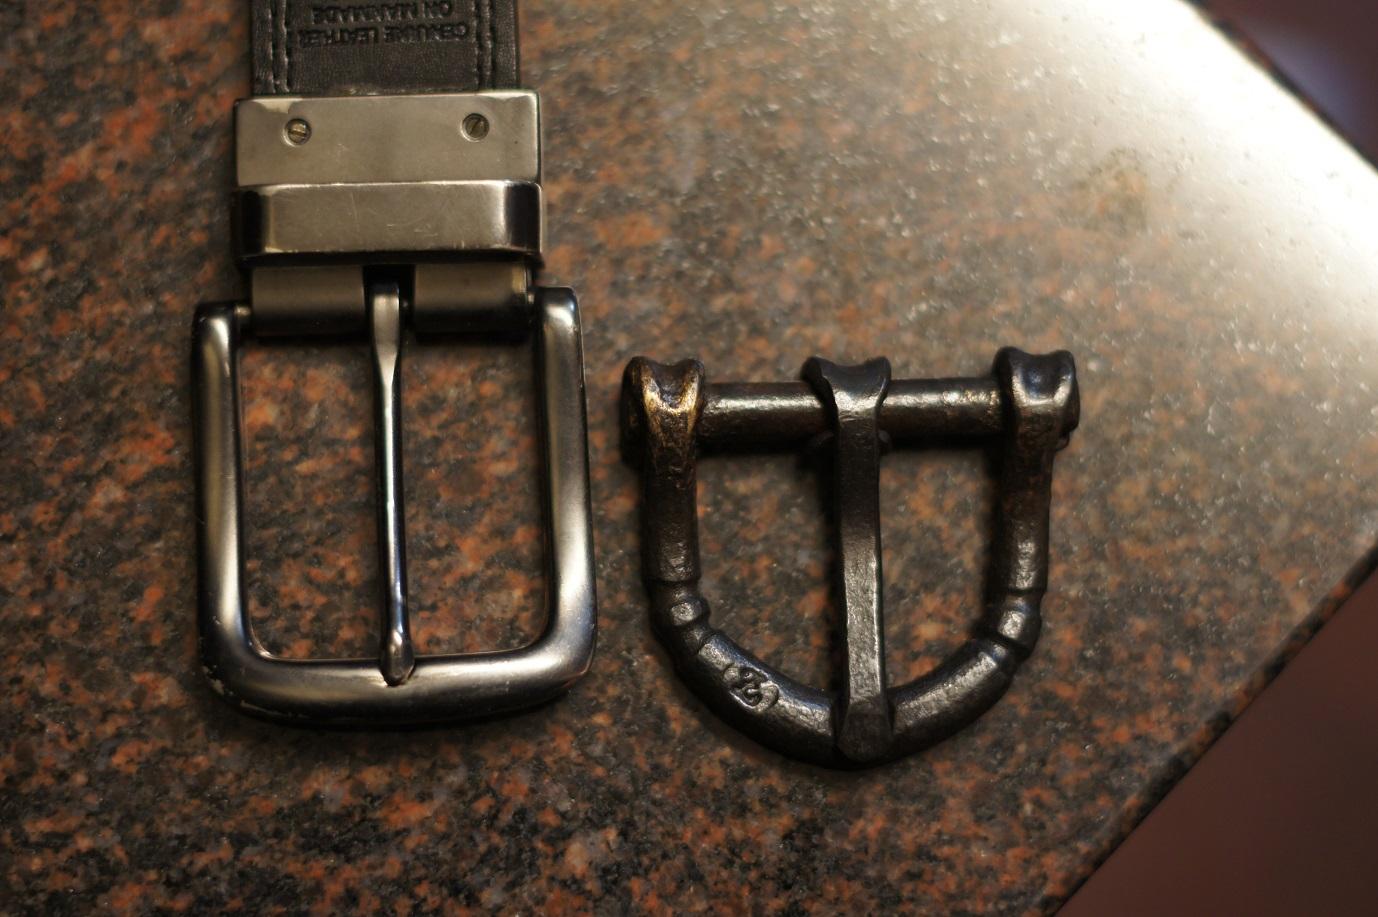
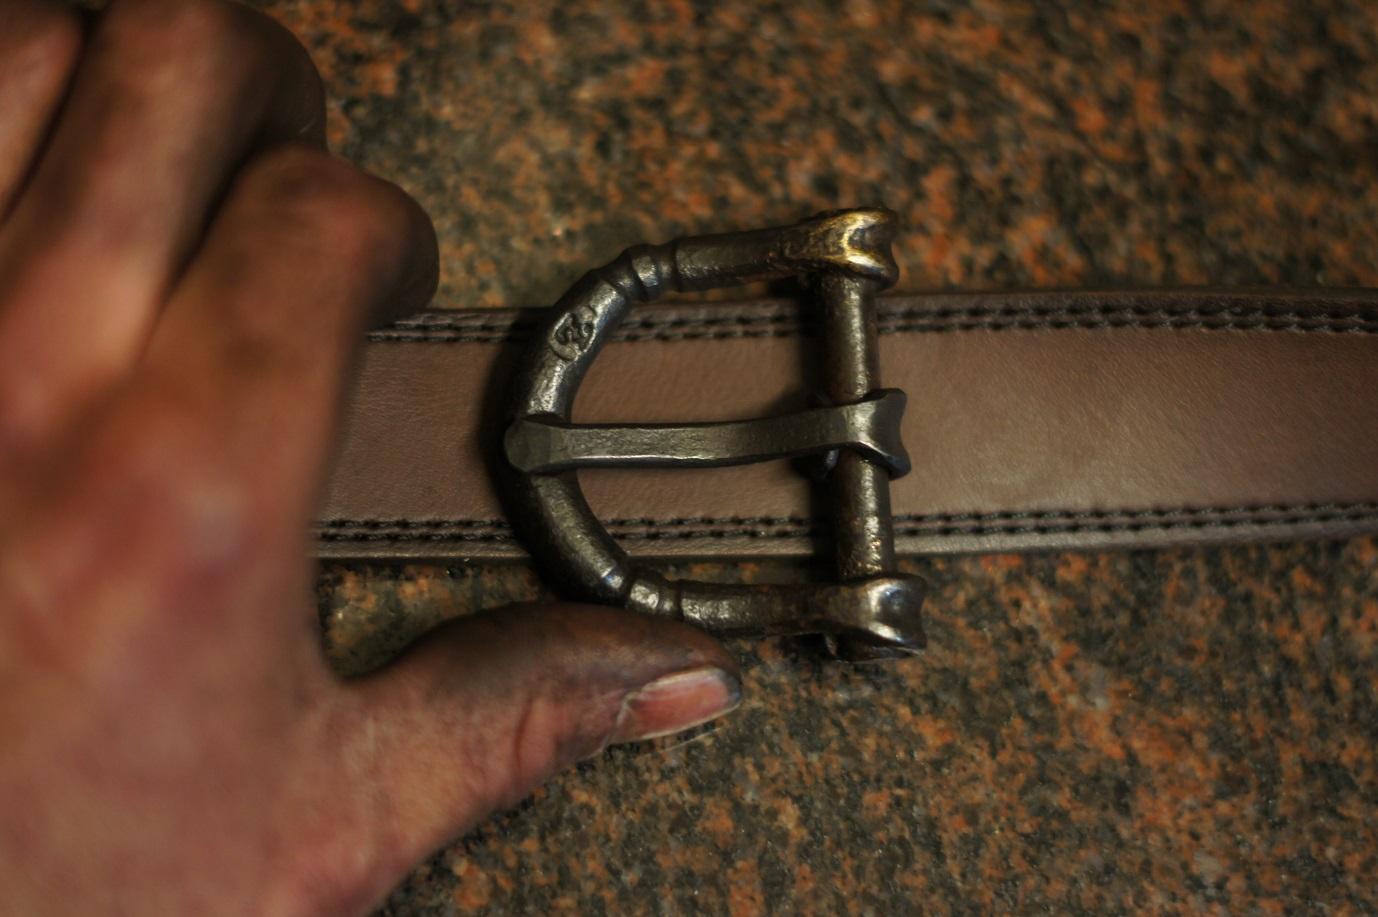
Nodebt, it's a pretty easy little project. I used 3/8" for the frame, 5/16" for the bar and a little cutoff of spring steel for the prong. The buckle is sized for a 1.5" belt. People are now asking me for them so I'm running through variations of the design in my mind.. I don't particularly like selling things that are (more or less) direct copies of things I find on YT. This is one project where ~15 minutes with a file makes a big difference to the final product. I like the way the forge braze ran out a little on one side. If I could make that a little more purposeful it could be an interesting touch. TP, ha, no. Maybe one of the belts the mall ninjas have with the black and neon green spikes coming out the sides? Studs perhaps? No... John has enough on his plate (that's an old reference). Biggun thanks for the tip! My leatherwork skills leave something to be desired. My sheaths have gotten better over time, but I really only do the one style. Glad to hear truoil holds up. So far I have enjoyed using it. I have a vacuum chamber that I use to stabilize all my wood. I'll have to give it a try with the finishes are share the results. As for hammer marks, I like the clean look as well. It's another area where taking the extra couple of minutes to brush often and planish makes a big difference to perceived quality. If I want texture, I use a texturing hammer or something that creates a more uniform hammered look. Of course folks have different tastes; I don't judge.
-
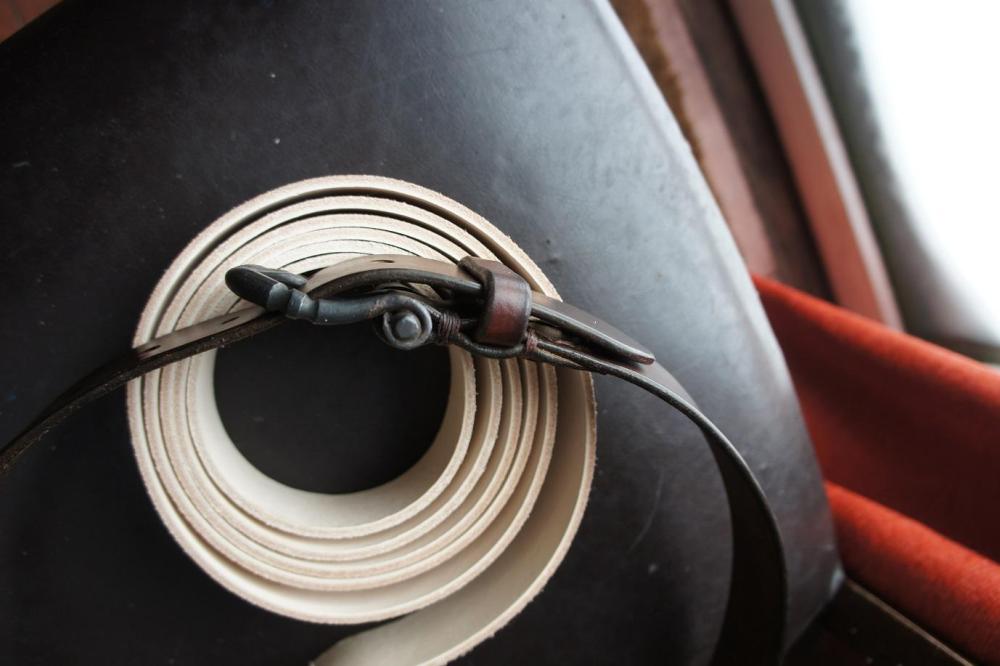
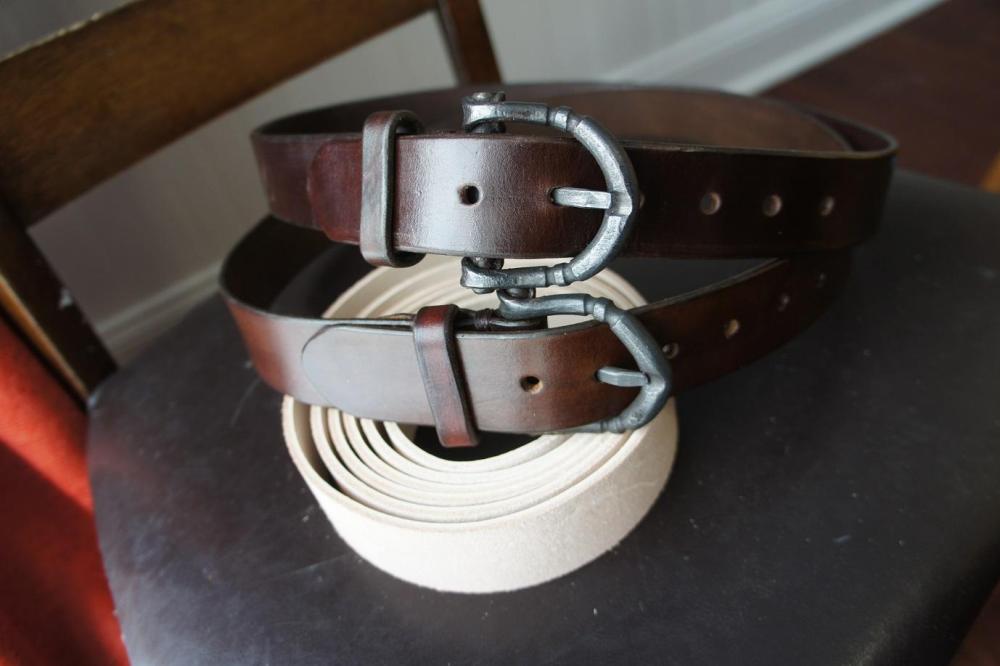
Made a belt buckle a la Torbjörn Åhman (aka Tubbe here on IFI). Now I just have to make the belt...