Frazer
2021 Donor
-
Joined
-
Last visited
Everything posted by Frazer
-
Two sets of key hooks for a couple of coworkers. I like the second one better.
-
That's also why each brand generally has proprietary cartridges that only work with their product. That's not really the case with kcups, but perhaps that wasn't a great example from the start.
-
When I think of loss leaders I think of items that have necessary refills/consumables that have a high profit margin. Kcups, razors and tool batteries come to mind. For many bare tools the profit margin is very small or nil in some instances. However, the margin on the batteries is large enough to offset that cost.
-
Compression, no. Scale, yes. Assume conservation of volume, add a "scale factor" (say, several ounces) and grind out the excess in the end. Just my 2c.
-
Are you talking about quenching in oil, heating it back up to critical temperature and quenching it again? I've heard of people doing this, but I don't see the point personally. I quench once and always temper 2 or 3 times. I don't have a smartphone, but I think there is an app called Heat Treatment Guide (or something like that). That will give you the optimal normalize, harden, temper sequence.
-
There are too many variables to give you a meaningful answer. The amount of scale is going to depend on the forge, the number of heats, the surface area of the stock, etc. I suppose you could weigh a piece of steel, forge it into something, weigh it again. The difference is your answer. You can scale (ha) that number based on the number of units, an estimate of how many additional heats it will take to go bigger, or whatever you're trying do... Speaking of which, what are you trying to do? I've heard damascus can be upwards of 50-60% depending on how many times you stack and weld. I don't do large nor complex billets so I probably lose less than that; I don't have numbers for you.
-
Wooo! Nice! On your scarves, thin out the toe some more to make it easier to blend. Jennifer shows one way to do it in her video (8:50) and in mine it's at (7:15). It happens pretty quick, but she uses a cross peen and I use the far face (perpendicular to the working face) of the anvil. Both work well. This is the shape I make them... Notice the toe tapers in both directions.
-
As riveting as this conversation is I may have to bolt for a while.
-
I'm not trying to perswage anyone here, but there's nothing like a Friday punapalooza.
-
The boss says it's time to rein you folks in anyway.
-
I trimmed down the video to make it a little more manageable. I had added timestamps, but after trimming they will need to be updated.
-
-
Salty water is a very aggressive quench for spring steel (usually 5160 or 9160 or something similar). What TP said is also very true. Steel should be tempered immediately after quenching. I generally try to start tempering before it even reaches room temperature. I've had tools and one knife crack on me because I let them sit around before tempering. In extreme cases they will break into pieces, but I've never seen that happen myself. What kind of oil did you use? Did you preheat the oil? P.S. No need to quote me if my post is the one just before. No hard feelings, just a friendly reminder. Read This First
-
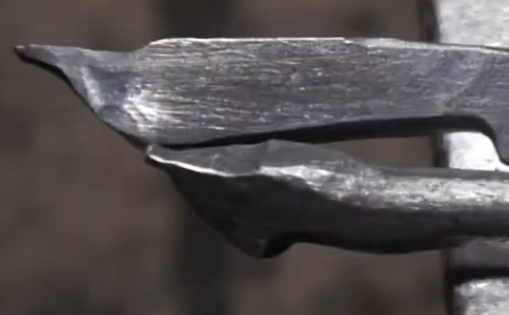
You may want to edit the title of your thread before the mods do it for you... Etching will show cracks and delaminations. This happens with damascus sometimes as well. My guess is there is more surface area so the etchant oxidizes and/or eats away at the walls of the very small crack, both darkening it and making it wider. It kind of looks like quench cracking.. I'm guessing these were hardened before etching?
-
Howdy everyone. I made a video demonstrating one of the ways I forge bolt jaw tongs. The video is quite long. The first drop tong weld is almost painfully so. I left it in so you can see things don't always go as planned. Fair warning, 39:00-49:30 is almost entirely me fumbling around trying to get my first weld to stick. That being said, I hope the process and discussion will be still be helpful to those who are interested. If I get a chance I'll edit the description with some timestamps of what's being done when. That should make it a little easier to navigate. On to the challenge! I would like you folks to make something out of either 1/2" square or 1/2" round stock. It can be one or multiple bars of any length you choose. As long as you're using 1/2" stock to start the world is your oyster. Post a picture of your finished piece in this thread and on Monday, January 17th I'll pick my favorite one and send you the tongs I made in the video. This should give the folks who are only able to light the forge on weekends some time to experiment. Shipping is on me (continental US only). Bonus points for creativity! This is purposefully a very open ended challenge. I'm interested to see what you guys come up with. If you already have a rack full of tongs in your shop and/or have the means to easily forge out a pair yourself, I still encourage you to participate in the challenge. However, if you could indicate in your post that you just did it for fun that would be much appreciated. If possible I would prefer to send these out to someone who needs them. Hopefully this gives some of you an excuse to get out to the shop! -Frazer
-
I'm not sure, but I can tell you how some of the more... uninhibited college students made use of his protest. Actually, I probably can't do that either.
-
When I was at college there was a guy who had a dispute with the town about what he could and could not use to decorate his yard... So he bought up about 50 old toilets, planted flowers in all the bowls/tanks and and put them all over front yard. Good times.
-
I agree it's possible and even relatively easy to do. I just feel there are lots of vessels out there (probably even in his own possession) that you wouldn't need to fill up with... Let's see... Assuming a 10" depth that's 1.47ft^3 per side, density of dry dirt is ~76lbs/ft3 (clay would be even heavier), minus a bit for the pipe... That's ~200#s of dirt to make work. Or half that if you're only doing one side. Sure, it doesn't have to be all dirt, but still. I like your "can-do" spirit though, I suppose 100# isn't that heavy. Flowers in the sink for everyone!
-
It looks pretty deep. You would have to fill it up quite a bit to bring your fire up to where you could actually lay stock in flat.. It seems possible to do, but there are plenty of other objects that would be much easier to make a forge out of IMHO. Cross posted with Mr. Powers; he was slightly quicker on the draw.
-
You could if you wanted to. Thanks, it took me a couple of iterations to get something I liked. I started out just trying to freehand something together, but I didn't like the way that was going. So I made myself a drawing and that's what I came up with. I used some 0.75" x 0.25" flat stock. The length will depend on the size of your cross.
-
Similar to mine (seen on page 777). John, it might have been one of your posts that put the idea in my head.. Hard to say. I did it a couple of years ago.
-
TW, nifty hammer and nice crosses. I have a texturing hammer I use to create the wood-like appearance with rather than a peen. It's basically just a junky hammer head that I had a go at with a zip disc and a grinding wheel until I was happy with the look I got. I've found I get a more repeatable texture with that. Your way looks nice too, I'm just throwing the idea out there for folks.
-
A quick note: I would not recommend using barbed wire for your fire poker handles. Unless you don't particularly like the future recipient. In which case, best pick the extra rusty stuff.
-
This is why I wanted to do it the way I did, call it a skills test I have a Soderfors with 85-90% rebound and I can honestly say (based on 2 days of use) the steel stand is not only more lively, it's also quieter than the wooden block. I took the chain off the waist and the magnets off the anvil and it's still quieter than before. I'm guessing it's just held down much better. So far I love it. I did add another piece of 1.25x0.5" flat stock between the 2 legs facing the camera in the last picture (and the opposing two legs facing away from the camera). I also put another piece of 5mm soft plywood under the feet to protect the concrete floor a bit. You becha. Part of that's done, more to come....
-
If your weld won't stick after a couple of attempts (and your fire is clean and it's coming out at the right heat etc.), try turning your hammer slightly and give it 1 (or 2) good hits in the center of your weld and 2 (or 4) good hits right on the toe with just the edge of the hammer. The parentheses are depending on how fast you're working. If you watch my video starting at 29:43 you'll see I'm only using the edge of my hammer to get them tacked together. Also, bring each piece up to a welding heat, then brush, then apply flux and back up to a welding heat (this wont take long), then weld. This leaves less time for the flux to "degrade" (-M. Aspery) The another thing is to make sure the piece that goes against the anvil is tall. That will give you a couple extra seconds before the anvil sinks the heat out. George brings up a good point too, I keep a piece of 1.5" sq. stock in the pan of the the forge just for that purpose.