Buzzkill
-
Posts
2,049 -
Joined
-
Last visited
Content Type
Profiles
Forums
Articles
Gallery
Downloads
Events
Everything posted by Buzzkill
-
Hardening Mild Steel
Buzzkill replied to Blacksmith Jim's topic in Heat Treating, general discussion
YOU came up with .46% He was referring to Si with the .46%. I added the bold and underline to make it stand out. That doesn't mean the rest of it holds water. While it doesn't amount to irrefutable proof to the contrary of the rest of his claims, I'd bet that people in the steel industry would be using hardened mild steel if it was an appropriate substitute for high carbon steel. The funny thing about businesses is that those which survive tend to be the ones that waste as little material and energy as possible while starting with the least expensive raw materials that will be adequate for their purposes. With the steel industry being a massive world wide sector, I feel fairly confident that if mild steel could be sufficiently hardened to the point where it could substitute high carbon steel we'd know about it and it would be the industry standard. Can mild steel be hardened? Sure, to some degree. Can it take the place of higher carbon steel for specific applications? Not likely. -
I did a fair amount of switching back and forth between SQL view and design view. I'd get a small piece to work, then copy and paste the SQL line into another object. That got me through some of those hair-pulling chunks with lots of double and single quotes. I didn't have enough foresight to put detailed comments in with the code. You won't regret taking the time to do that.
-
I feel your pain. When I started working in the office in 2005 we were in need of some software. The available programs were 10's of thousands of dollars (a couple over 100K) and none of them really met our needs. I volunteered to create the needed database without ever having used Access or written code in Visual Basic. It's really frustrating to know the logic, but not the syntax for operations. There were times I spent hours working on one or two lines of code. All those double quotes have to be in the right places. It took me more than a month to get it up and running, but we still use it today. However, now when I go back and look at some of the code behind the objects I can't even remember writing the code much less remember what it all does. I need to do some updates on it, but I'm really dreading having to re-learn all the stuff I've forgotten.
-
What's your latest blade look like? Post em and let us see.
Buzzkill replied to HondoWalker's topic in Knife Making
I don't know if this will apply to your situation or not. If you are going for a mirror finish it is absolutely essential that you erase every single mark from the previous grit before moving up. For all practical purposes you will never get rid of a scratch made with a lower grit if you leave it there and continue to move up. It's also essential that your buffing wheels are clean and have only been exposed to one buffing compound. If you get any residual abrasive dust or even a buffing compound not designed for that mirror finish then you will be frustrated. Even with a buffed mirror finish after 3000 grit if you get the light just right you can typically still see some tiny lines. However, you should be able to see yourself just like a .... mirror when looking directly into the polished surface. I've only done a few mirror finishes and I do not recommend it for any piece that will see real use. It doesn't take much to scuff up that shiny surface. Even cutting through cardboard can do it. I'd reserve that finish for showpieces and wall hangers. -
What did you do in the shop today?
Buzzkill replied to Mark Ling's topic in Blacksmithing, General Discussion
Outstanding choice of music! Shine on you crazy diamond. -
Let us know how the tension system works out. Usually a spring (or other suitable device) is used to keep constant tension on the belt. As you use belts they can stretch a little bit. This is pretty much undetectable with constant tension on the belt, but it could result in some extra slack in use in a system without that. One hp is enough to get you started, but more power is better. Lower power does help teach you to let the belt do the work and also to change out belts when they stop cutting well. However, when you really want to hog off some metal, a low grit belt with lots of power behind it just can't be beat.
-
Redressing anvil welded edges
Buzzkill replied to PHDforge's topic in Repairing and Modification to Anvils
Unless repairs were performed by someone who really knew how to properly weld an anvil and then heat treat afterwards I doubt it's been repaired. The damaged areas clearly have chipping which indicates hard steel. Someone who didn't know how to properly repair an anvil would most likely have used a softer material for welding which would result in more of a mushrooming over the side rather than brittle pieces breaking off. Also, unless a repair was done well there would probably be some significant variance in rebound where the repairs met the original material. It's pretty clear that someone did a fair amount of forging over the edges in the sweet spot. 3/8 to 1/2 inch is not unreasonable or out of the ordinary for the thickness of the hardened face plate. Someone with better eyes and/or more knowledge than me might pick up something I'm missing, but nothing I could see in those pics indicates that the edges were welded after manufacture. -
Redressing anvil welded edges
Buzzkill replied to PHDforge's topic in Repairing and Modification to Anvils
I don't think the edges have been repaired. That looks quite similar to the damage on my PW when I acquired it. To me that looks like more or less normal wear and tear on the hardened face plate. I ended up using a flap disk just a little on the edges to create a radius that would be less likely to chip out more. Keep in mind that any metal you remove is gone forever. You may want to use it as is for a while before doing anything at all. If it's like my PW, you probably get 90+% rebound since that face plate is quite hard - which also makes it more prone to chipping. Unless you need to work small eyes or other small circle shapes I would not change the horn. Even if you do have that need you can create a hardy hole mounted bick (small horn) to handle the job. The first time you accidentally run your thigh into it you'll understand why many horns are blunted. If you do change it, grinding would be the better method. Heating that spot to the point where you can forge it could easily transfer enough heat to the hardened plate to soften it more than you'd like. -
Note that 1/3 pressure does NOT mean 1/3 fuel used. I'm interested to see how the burner works out for you. I don't think I've ever seen one that long and narrow in action.
-
A vacuum chamber need not be elaborate. I used the compressor off a dehumidifier someone was tossing out and a 2 quart canning jar when starting out. The Cactus Juice cost more than the fittings and other parts I used to make it.
-
The Absolute Last Final Word on Anhydrous Borax Flux
Buzzkill replied to JHCC's topic in Fluxes used in blacksmithing
Hmmm. I thought that was from Donald Sutherland's character in the movie "Backdraft" -
How do you grind the bevel on a recurve blade?
Buzzkill replied to White Nomad's topic in Knife Making
Got any pics of your sen and the blade you used it on by chance? -
Standard 7018 rod is a challenge to use with an AC only buzz box. The 7018AC rod works much better, but I always end up using significantly higher amps than the same diameter of 6011 or 6013. For 7018 rod especially, keep an old file nearby that you can use to rough up the end of the electrode if it has cooled down. That makes striking your next arc much easier.
-
My personal experience is different than yours. I agree in the sense that it takes a certain amount of fuel combined with the right amount of air to produce a certain level of heat per unit of time. However, I get plenty of swirl in my forge using a naturally aspirated ribbon burner. I also get a far more even heat than I did with a single port burner. There is no noticeable hot spot anywhere in the forge once up to temperature. My forge is quite small - around 240 cubic inches. It also seems to me that since the smaller flames lose momentum more quickly than a single larger flame, more of the heat stays in the forge a little bit longer which results in slightly better efficiency than I got with the same orifice/mixing tube setup as a single port burner. Your mileage may vary. BTW I've never heard of anyone running a forced air ribbon burner using 5 psi through a 1/4" gas supply orifice. Usually people with that size gas supply opening report running around 1/2 psi.
-
I'm fairly certain it's illegal to have a flat horizontal surface that large with no appreciable amount of clutter on it. I've never used unistrut on anything, so I have no frame of reference here, but I'm curious if you have trouble with debris falling in and making it difficult to slide items along the channels.
-
What did you do in the shop today?
Buzzkill replied to Mark Ling's topic in Blacksmithing, General Discussion
Yeah, but what's more fun and satisfying? Pushing a mower around someone else's yard or playing with fire, steel, and hammers? Plus after succeeding on a project like that there is a profound sense of accomplishment that has significant benefits to mental well-being. At least that's the type of reasoning I use to justify my actions to myself and my wife when engaging in a project that doesn't appear to make economic sense. -
Since you are using a blown burner this is mostly irrelevant. Too small an orifice can limit the gas flow and therefore your max temp, but you do not seem to have that issue. The only real value of a small gas inlet orifice like a mig tip on a blown burner is creating pressure in the supply line that you can reference with a gauge which will allow you to "dial in" specific temperatures that you can repeat easily. You still have to adjust the air supply properly, so even that is of limited value. If you're getting the temps you want then there is no need to change it. If you can't get the temps you desire then you may want to use a larger gas supply orifice.
-
Keep in mind that the size of the drive wheel makes a big difference in speed and power. The bigger the drive wheel the greater the speed (surface feet per minute), but the lower the effective power. Normally you see drive wheels in the 3 to 5 inch diameter range even with 2 or 3hp motors powering them.
-
Interesting design. A couple thoughts though. If it has a belt tracking adjustment I didn't spot it in the photos. The variation in belts makes that a necessity. Secondly you will need a flat platen, but I assume there is a plan for that. Most importantly, that is not nearly enough HP for a 2x72 belt grinder. You really want to be in the 1.5 to 3 hp range if you plan to do any real grinding. I stalled a 1 hp motor frequently with moderate pressure before I upgraded. Looks like TP beat me to it and with pretty much the same issues.
-
First the disclaimer: I haven't used fibre board or the specific castable refractory you've used. However, the last 2 or 3 gas forges I've built tend to get uncomfortably warm on the outer surface of the shell after running for an hour or so. I can place my hand on the surface briefly (about a second or so) with no burns or damage, but I can't rest my hand on the shell for any length of time before it's too uncomfortable. I'd guess the temperature is between the upper and lower limits you gave. I will also say it depends a little on what I'm doing. Running at forge welding temperatures for extended periods of time does tend to produce a higher outer shell temperature than general forging temperatures. If you aren't seeing any cracks in the refractory then you most likely did a satisfactory job when curing it. Don't worry, it will probably crack at some point anyway. The difference between ambient temperature and forging temperature is a significant thermal shock that eventually takes a toll on almost everything that is subjected to the extremes. If it were me I'd look for any obvious spaces between the insulation and the shell or any other route for heat to go places I didn't want it to go. If I found anything I'd probably fill gaps with extra fibre blanket and/or refractory. If I didn't find anything obvious I'd just "forge on" and try to avoid touching the shell when it's at high temps.
-
Generally speaking, a choke on a T burner is a step backwards. When properly tuned a T burner pulls in the right amount of air for the volume of fuel being injected across the operating pressure range of the burner. So, if you have to choke the burner then it wasn't tuned properly to begin with, and most likely is not burning as hot and as efficiently as it should be. My personal experience with a NARB powered by a T burner is that it tended to run richer than it had as a single port burner. I had to make some modifications to allow more air to be induced, which is the opposite of what you're suggesting. However, with all these DIY projects no two are identical, so you can't assume you will get the specific results as me or anyone else.
-
What's your latest blade look like? Post em and let us see.
Buzzkill replied to HondoWalker's topic in Knife Making
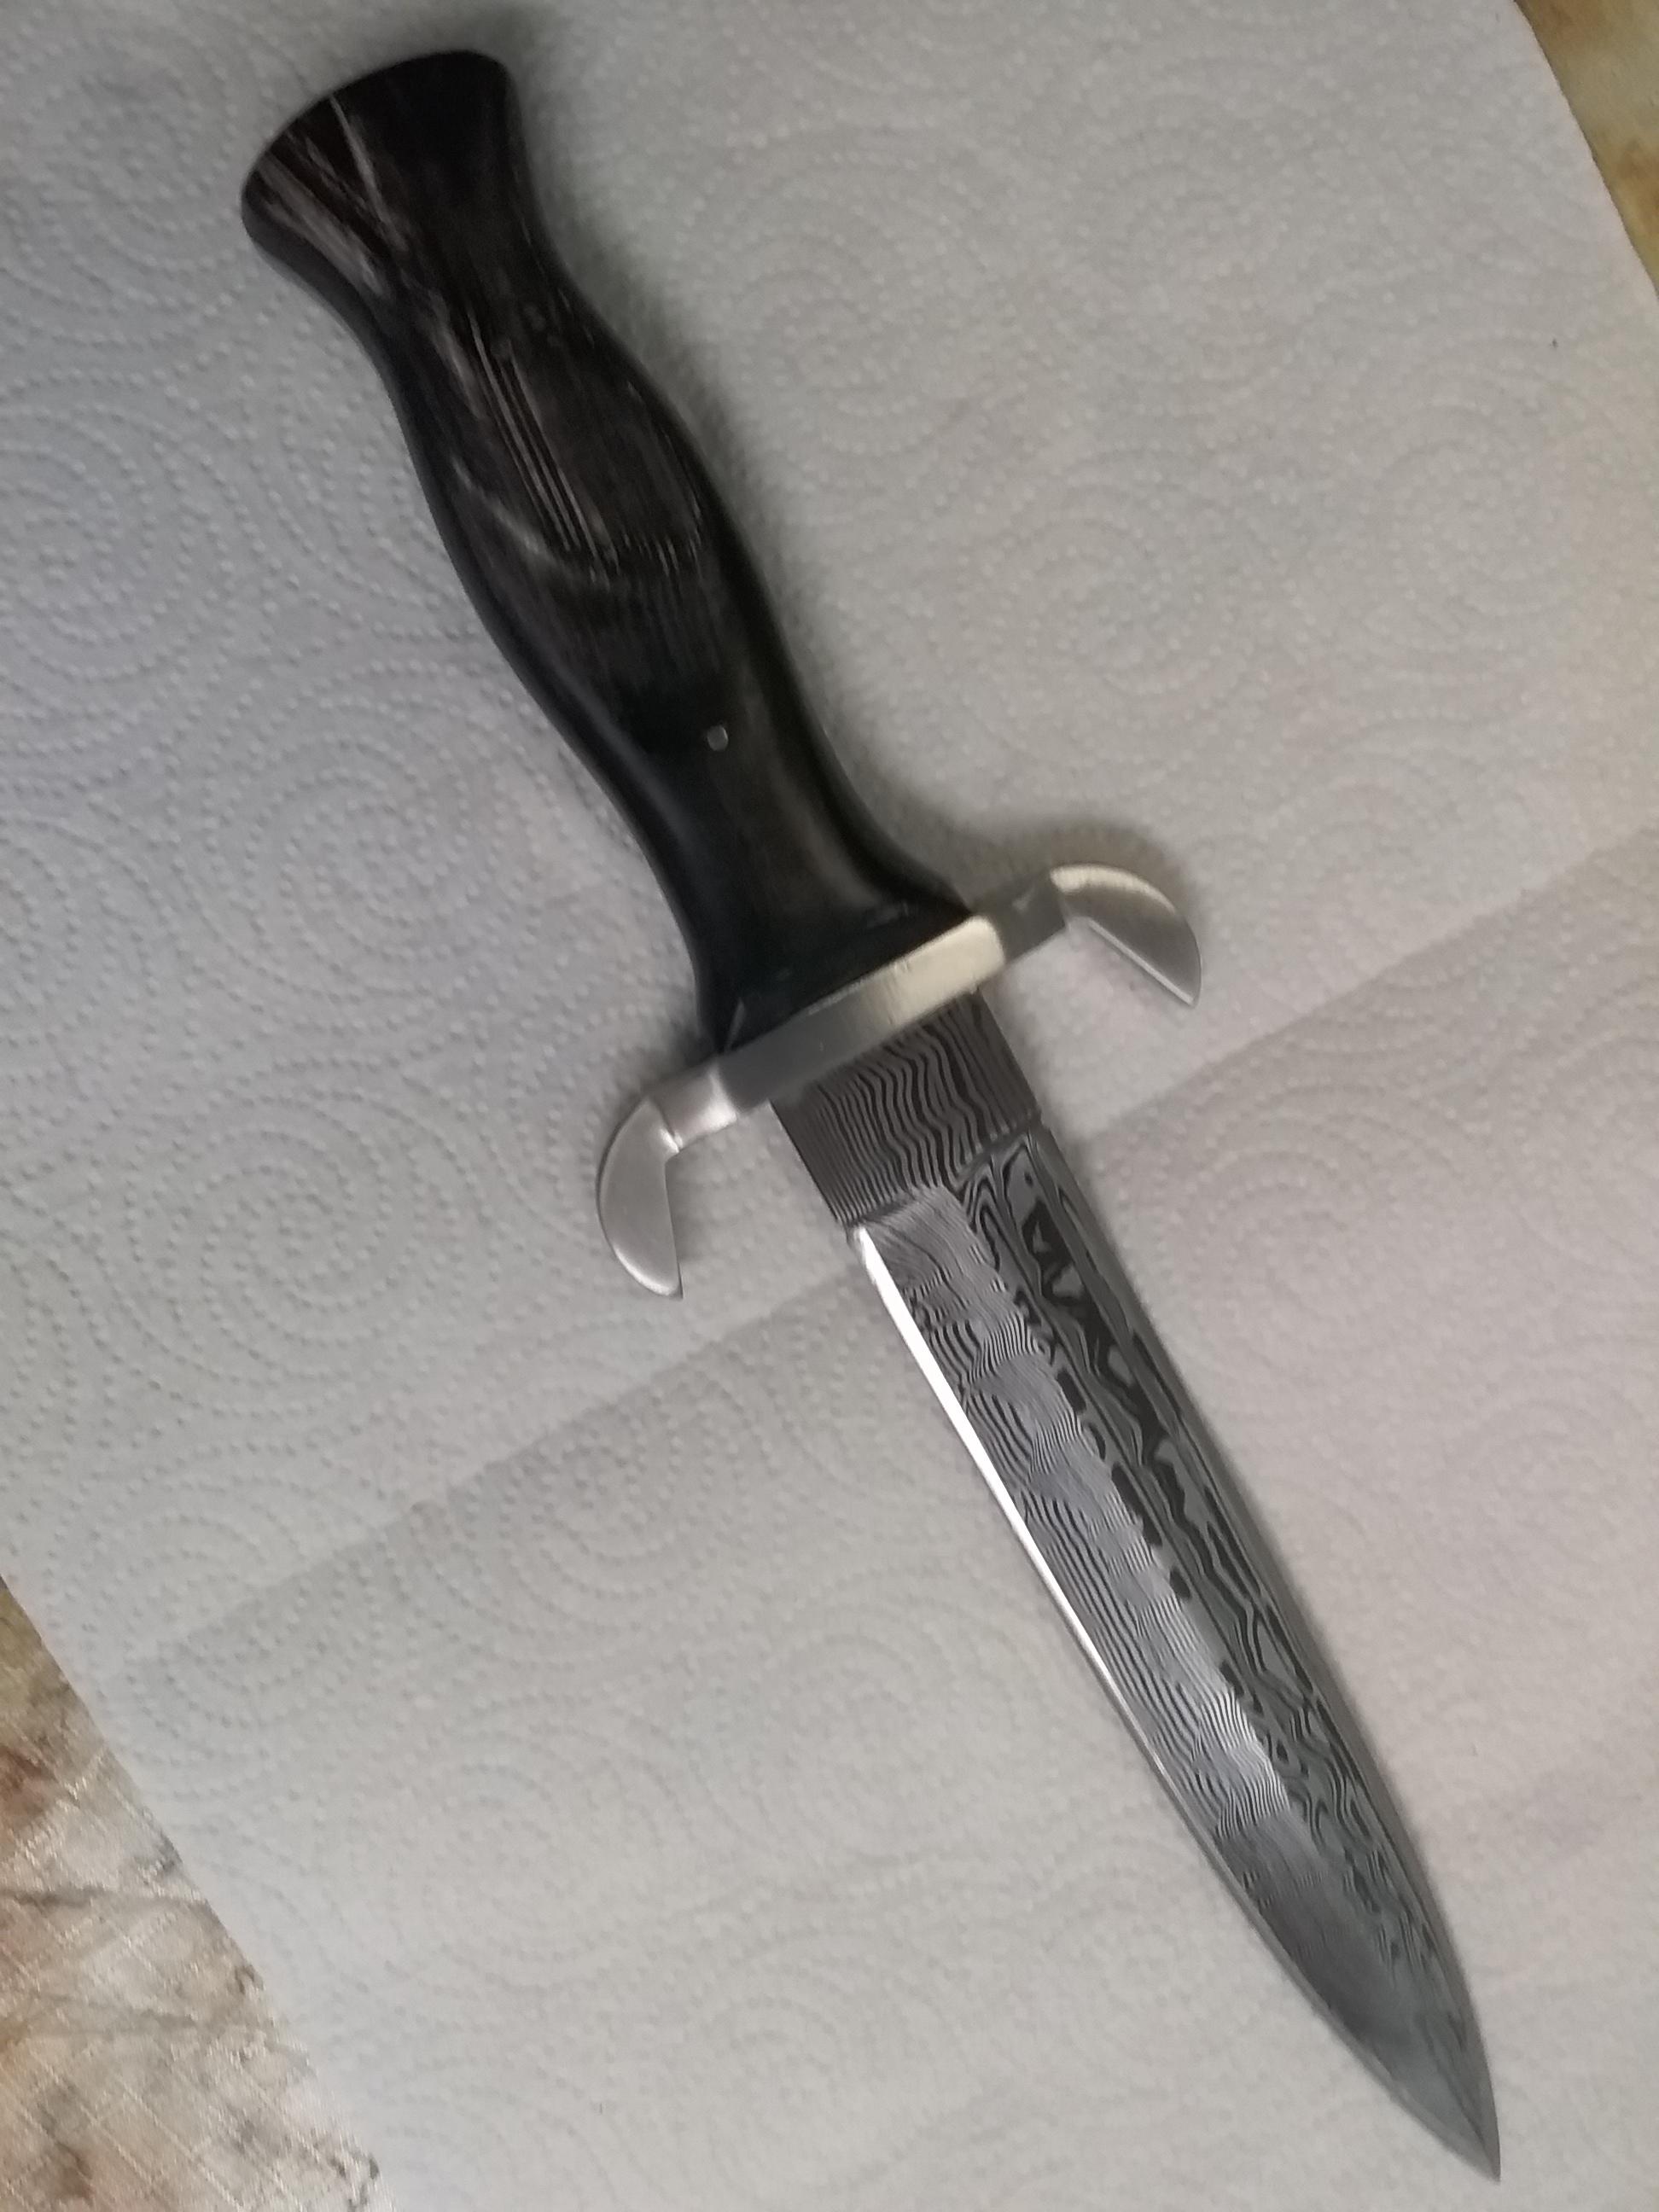
Finally got this one done for my brother in law. Blade is 1095 and 15N20, hollow ground on an 8 inch wheel. Hand sanded to 1000 grit after grinding and then etched in coffee. Guard is stainless, and handle slabs are water buffalo horn. Overall length is about 12.5 inches.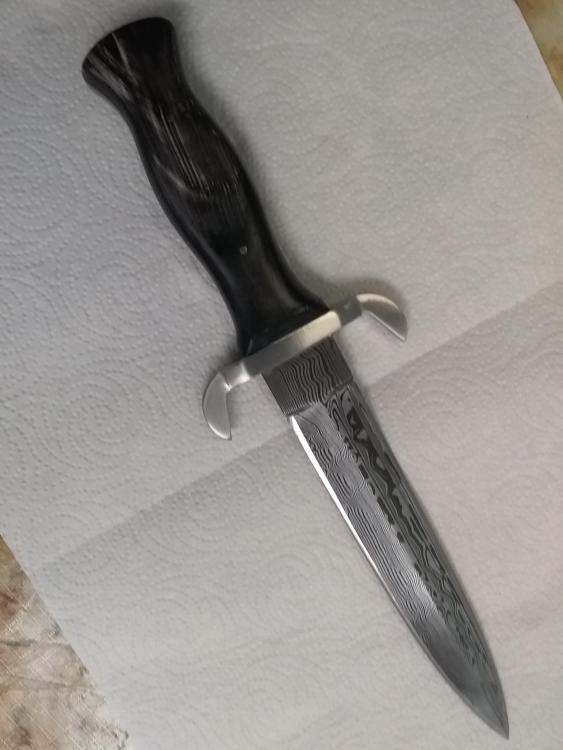
-
I have limited experience casting and have never tried cast iron. However, I do know that you need to be able to melt more material than your finished product will weigh. Typically there are risers, sprues, and/or runners which will contain some of the melted metal, so you need to compensate for those things. In addition most castings require some cleanup or machining which will also reduce the final weight. I have built a heat treating oven which uses 110v. I built it to pull slightly under 15 amps. Just to heat the interior of the oven up to 1950 degrees F takes about 3 hours. That's for a space much smaller than you would need, there's no big heat sink (crucible) to add to the time, and it's still a few hundred degrees below the temps you would need. The bottom line is you were right to be skeptical about that furnace being suitable for your desires. I know you're probably already tired of reading it, but what you want to do is extremely dangerous and is far from a beginner's project. If you're serious about casting you should start with easier metals and smaller projects to get some experience before diving into the deep end of the pool. Aluminum and brass casting are also dangerous, but less dangerous than cast iron. If your budget is $6,000 USD you should be able to get the proper PPE, but I would also highly recommend using a portion of that budget to take a casting class or get some other personal instruction from someone who has experience doing what you want to do. You're much more likely to get the results you want and avoid serious injury or death that way.
-
It looked stainless rather than plated to me due to the fine machining marks that would probably be covered, or at least not as defined, if it were plated. However, at least one of the wear surfaces appeared to have rust, so I'm reserving judgment. If it is non-magnetic it is almost certainly stainless. If it is magnetic it could still be either plated or stainless, depending on the alloy.
-
First off. The party size helium tank is fine. There is more than one size, but if it's comparable to a disposable refrigerant (freon) tank then it's a good size for a first propane forge. I used one for a while with a single 1/2" Frosty T burner and was able to forge weld in it. However, if you think you are frustrated with getting odd-shaped pieces placed properly to heat a specific section now, that will only be magnified with a gas forge. Small gas forges do quite well with straight or nearly straight pieces that need less than 12 inches heated at one time, but when you are dealing with a chamber opening which is typically between about 4 and 8 inches in the largest dimension, that does create some additional challenges for irregular stock shapes. Breezes also tend to be an issue for a lot of naturally aspirated burners. However, the NARBs I have built don't seem to be quite as sensitive to wind as the single port burners were. If by "shelf" you mean the floor then soft insulating firebrick is not a particularly good choice. Between the thermal shock of repeated heating and cooling and the mechanical abuse of dragging hot steel across the forge floor an IFB will not last long. If you use flux you could destroy it in a single forge welding session. You're better off with a castable refractory floor or even a split hard fire brick. High alumina kiln shelf is better yet. Regulators designed for gas grills only operate at a couple psi usually and are not adjustable. That's barely enough pressure to make some naturally aspirated burners function, and not enough for others. If you want to build it right then you want an adjustable regulator. If possible you want to get one that can go from 0 psi to at least 20 psi. It's not so much about the "dial" (I assume you mean gauge here) as it is about being able to change the pressure of the fuel going to your burner. That pressure will be a major factor in the temperature achieved inside the forge, and while we caution people not to fixate on specific numbers, you probably won't be able to achieve the temperatures you want using a regulator from a gas grill. You do not need welding skills to build a brick pile forge. Many people have built them with a few pieces of angle iron and some all-thread rods for the main components. Frosty has shown pictures several times of forges built that way at his local club and they clearly work well as they are built. The best advice I can probably give you is this: pick one plan known to function well and strictly follow that plan. Don't substitute or change anything unless/until you ask the designer or a knowledgeable person who has used that design if it will matter. Once you build and understand your gas forge you will be in a position to incorporate changes/improvements into your next one - and there will be a next one.