DHVidrine
-
Posts
16 -
Joined
-
Last visited
Recent Profile Visitors
413 profile views


-
Yes, I saw the fireplace set. Quite impressive.
-
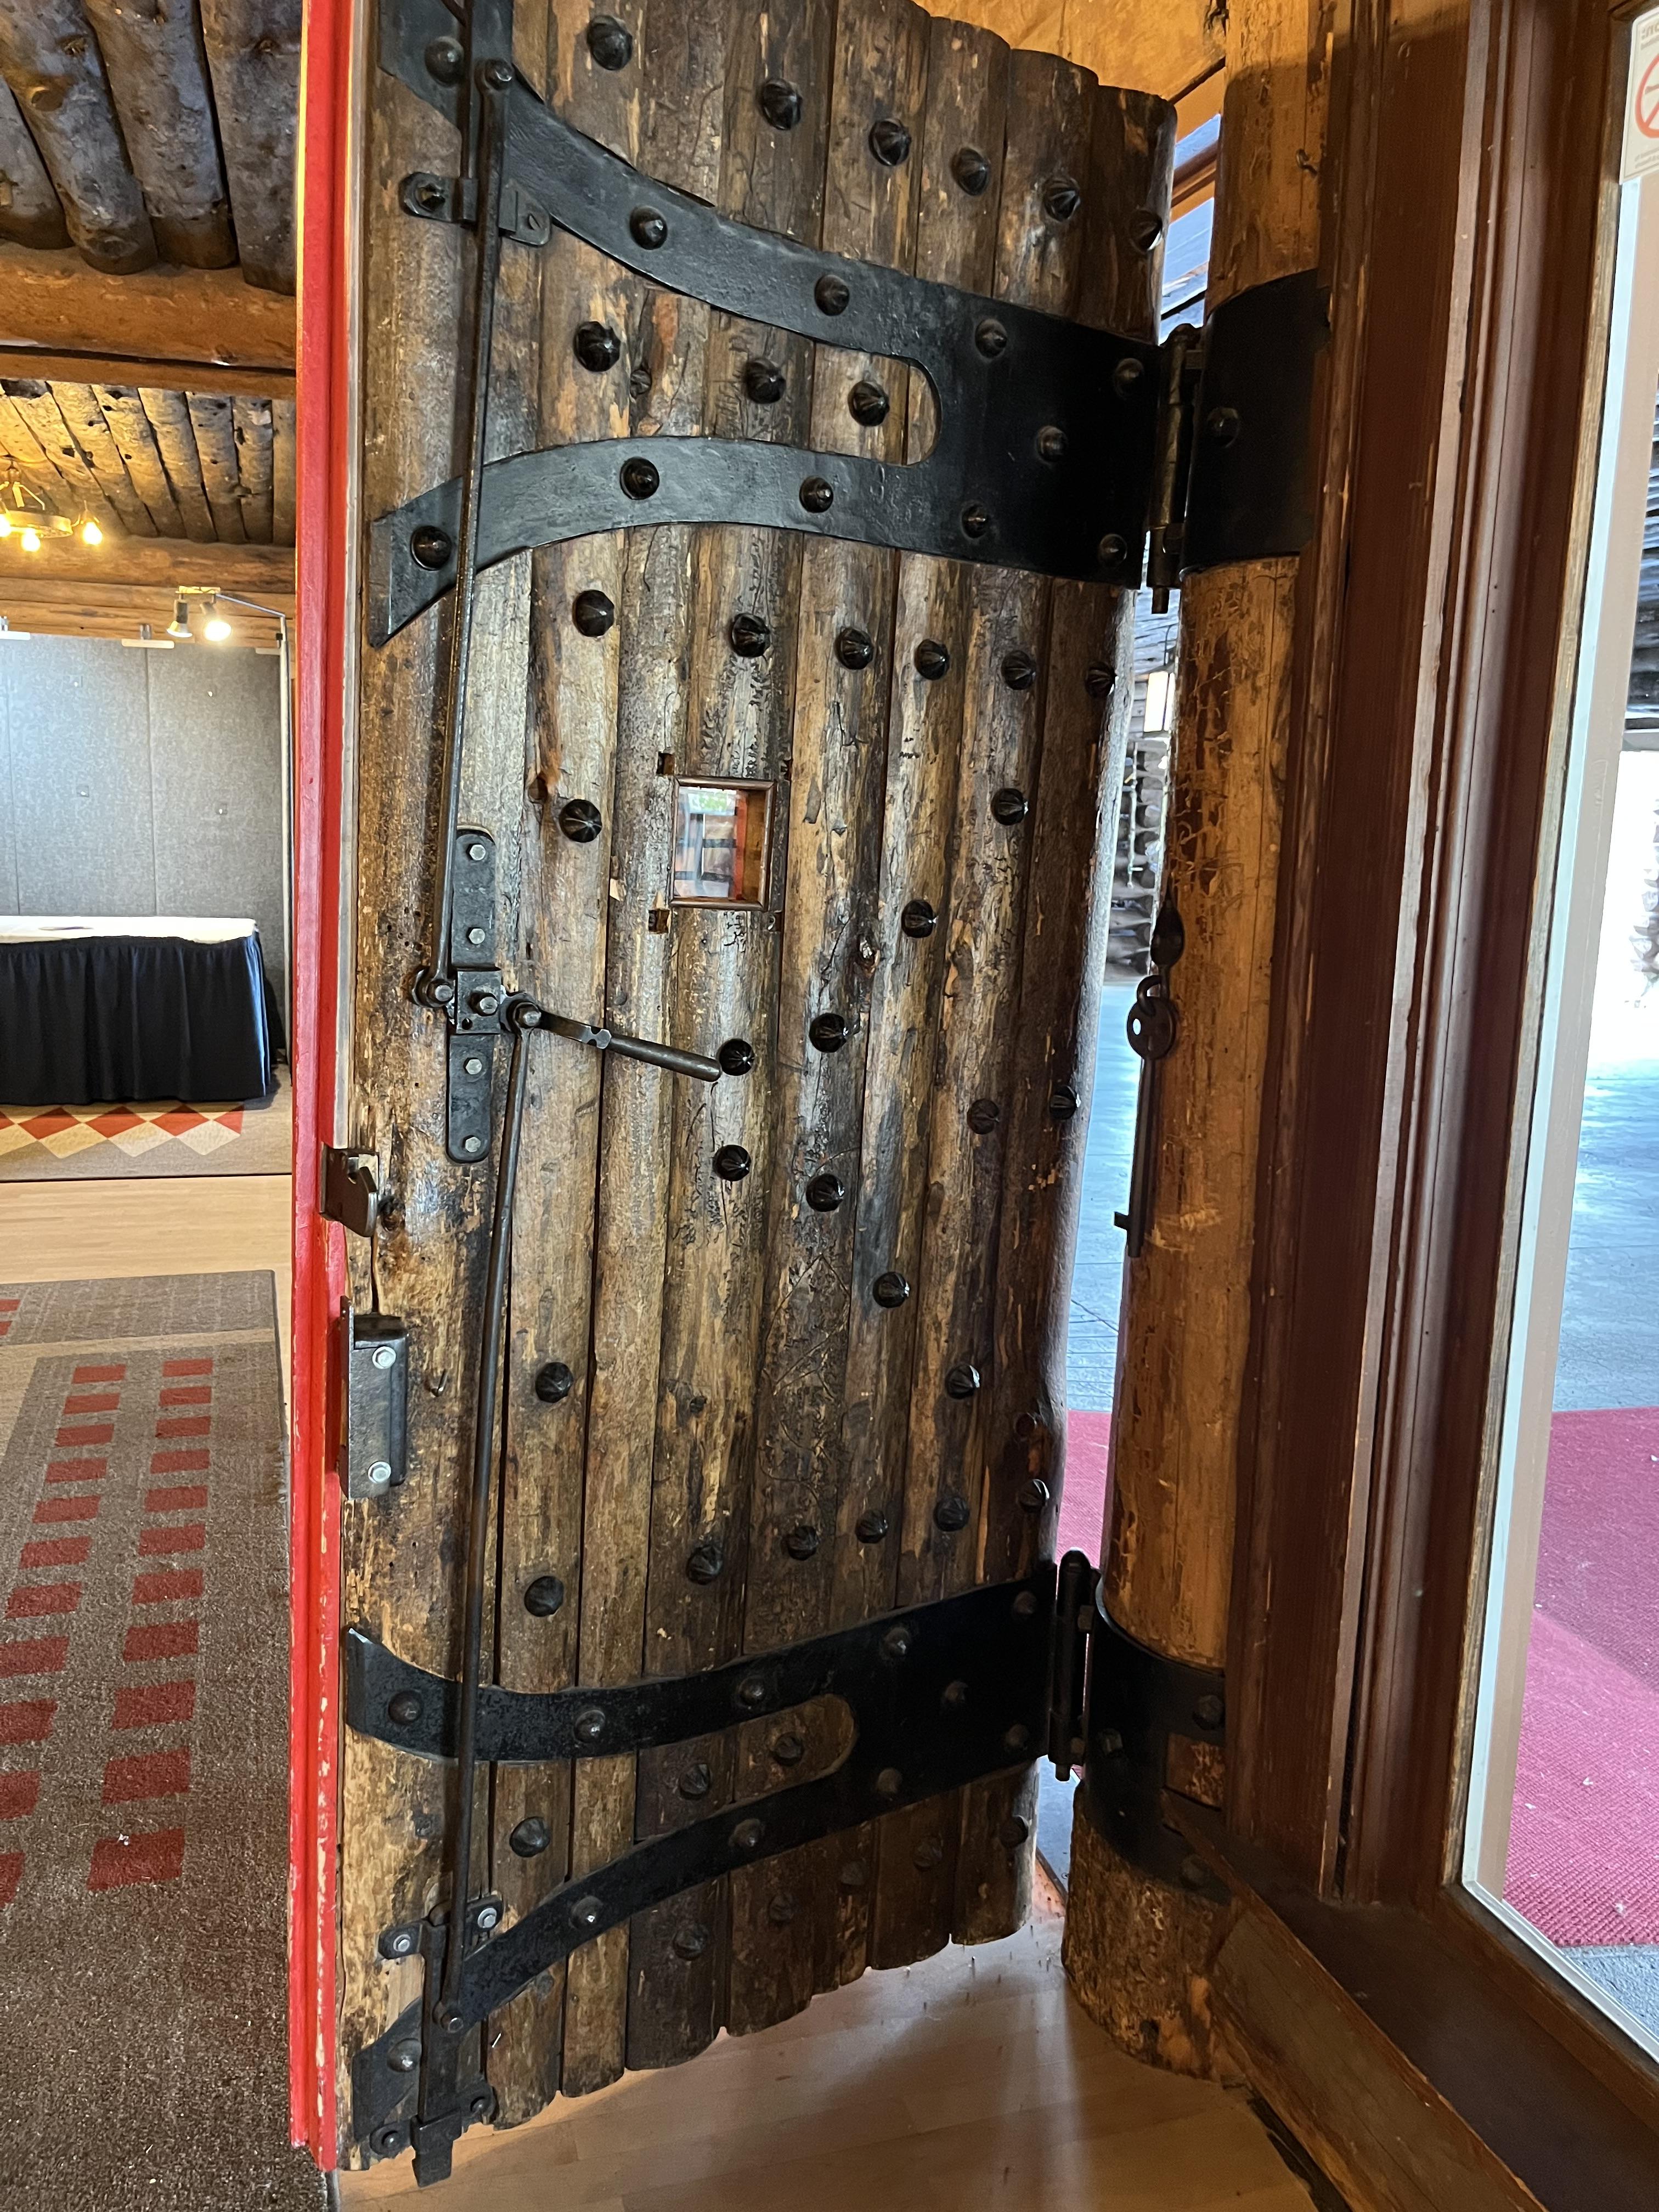
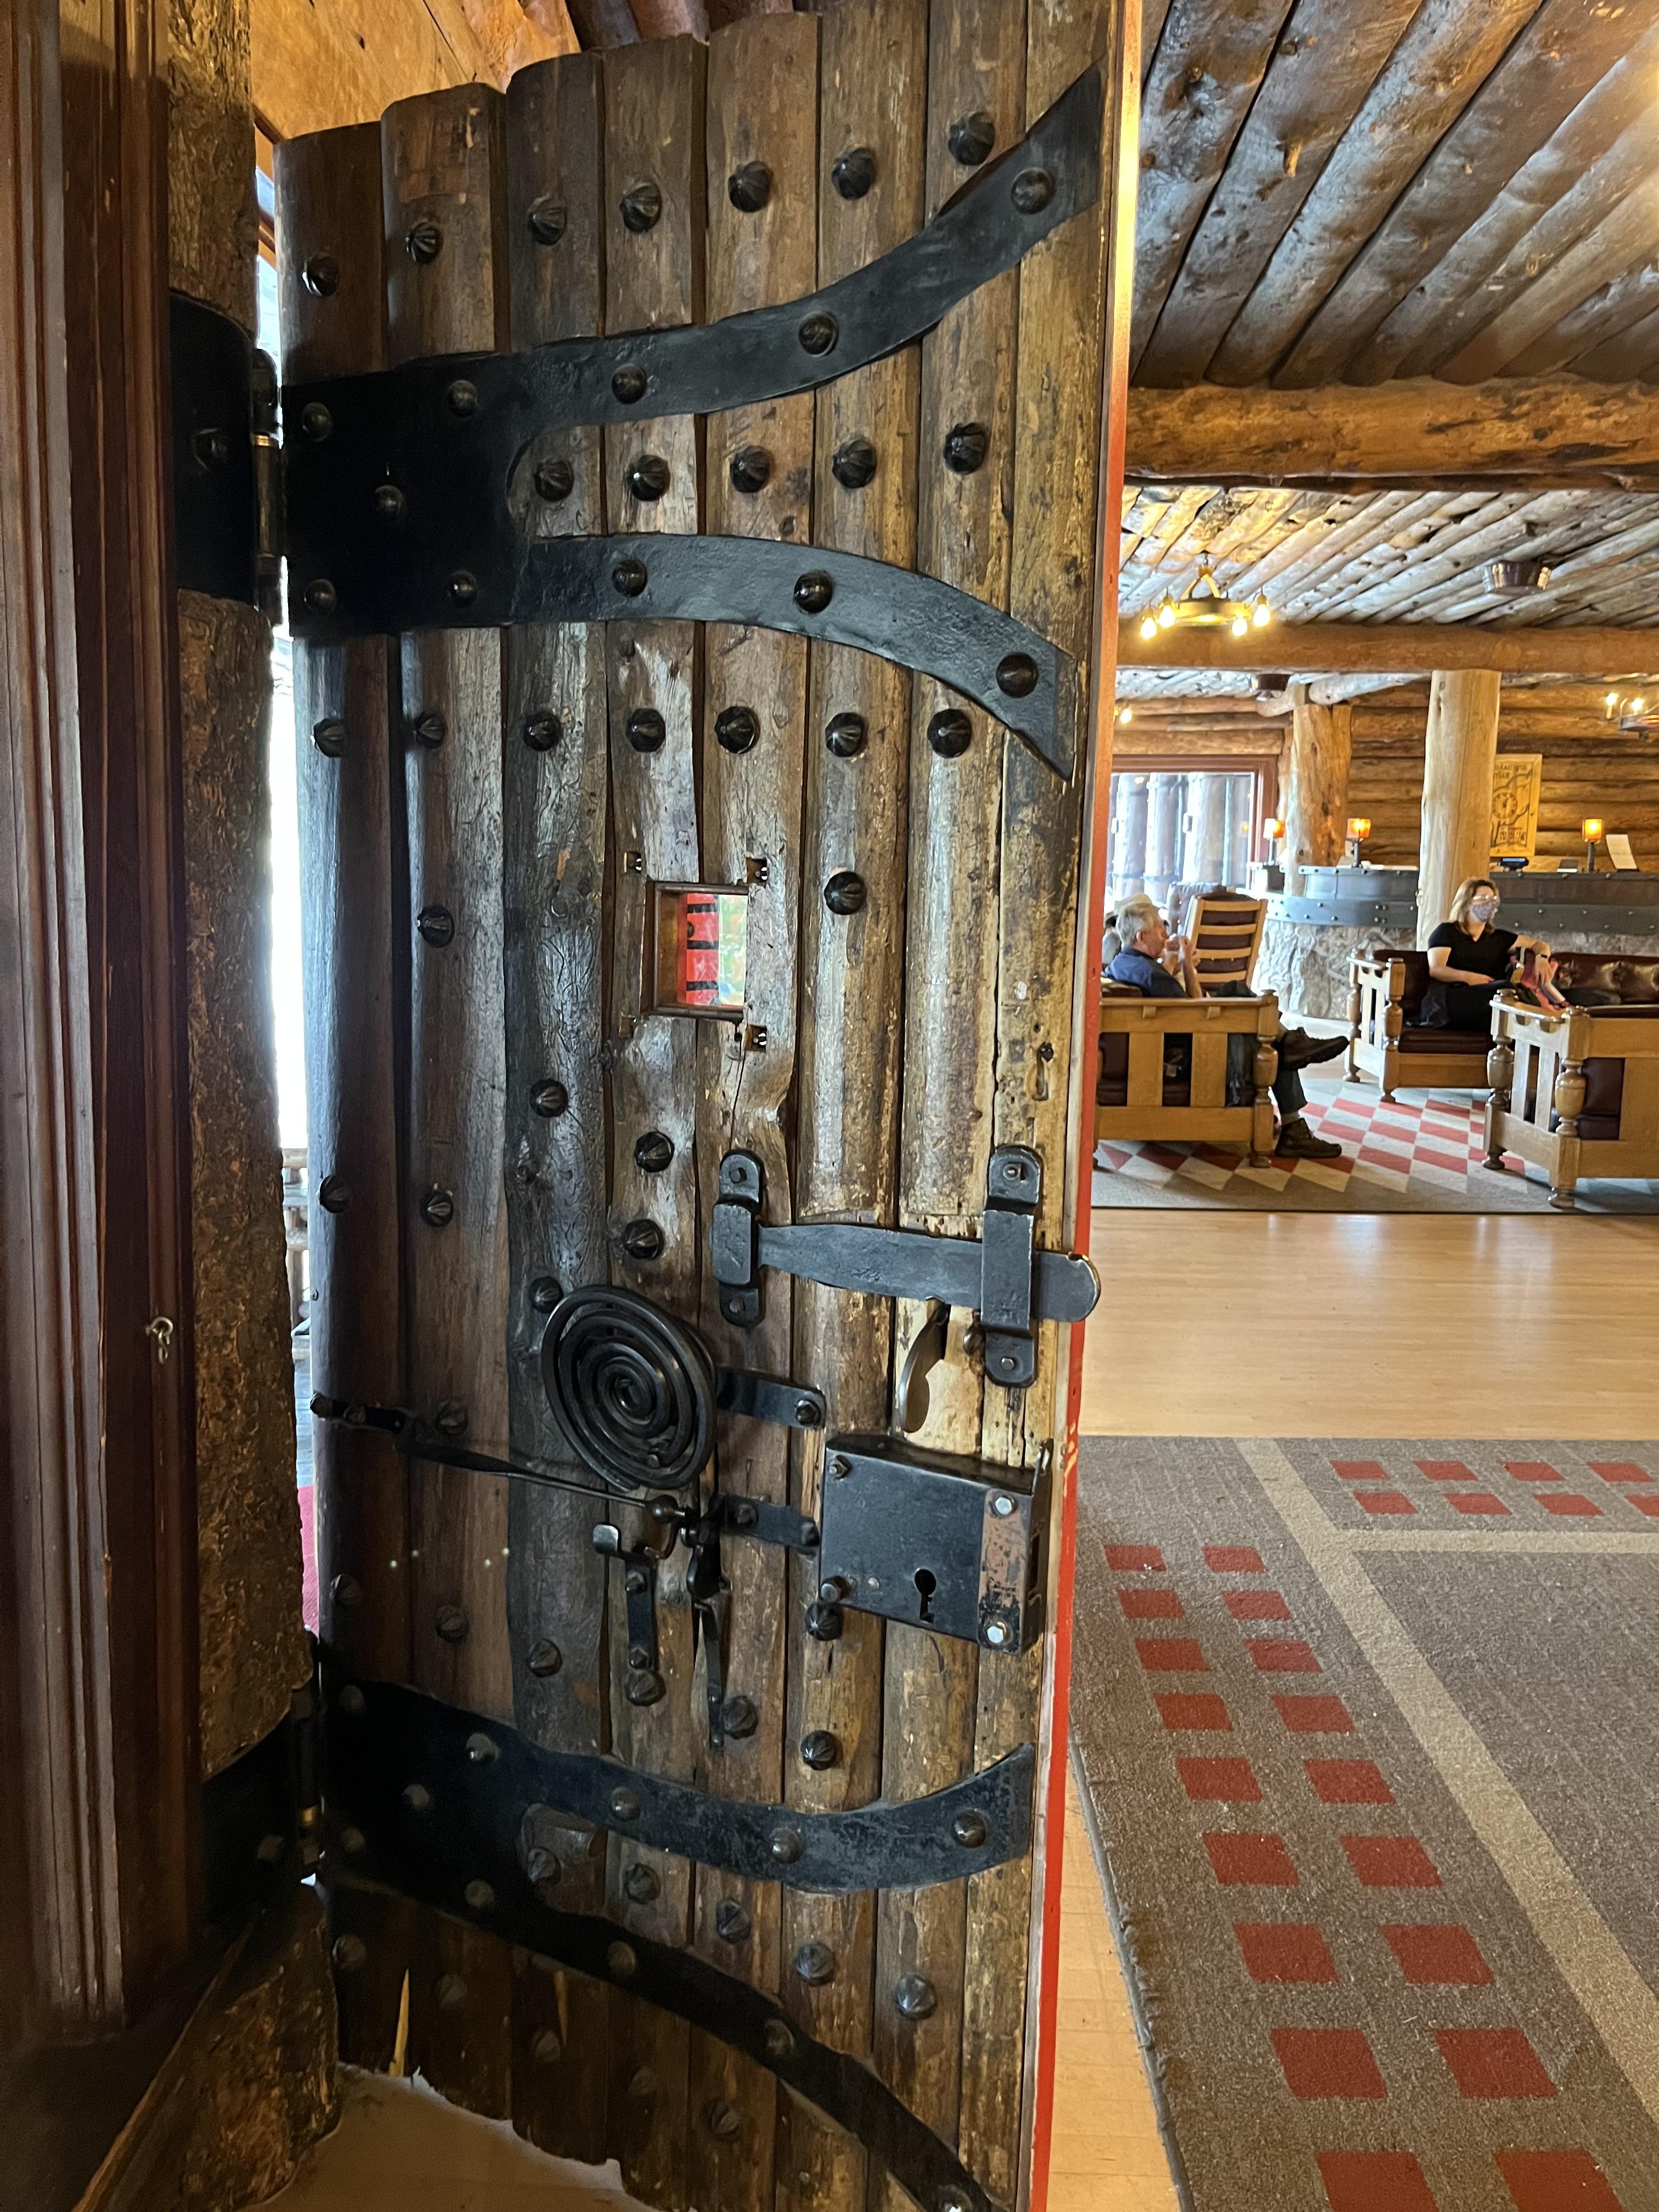
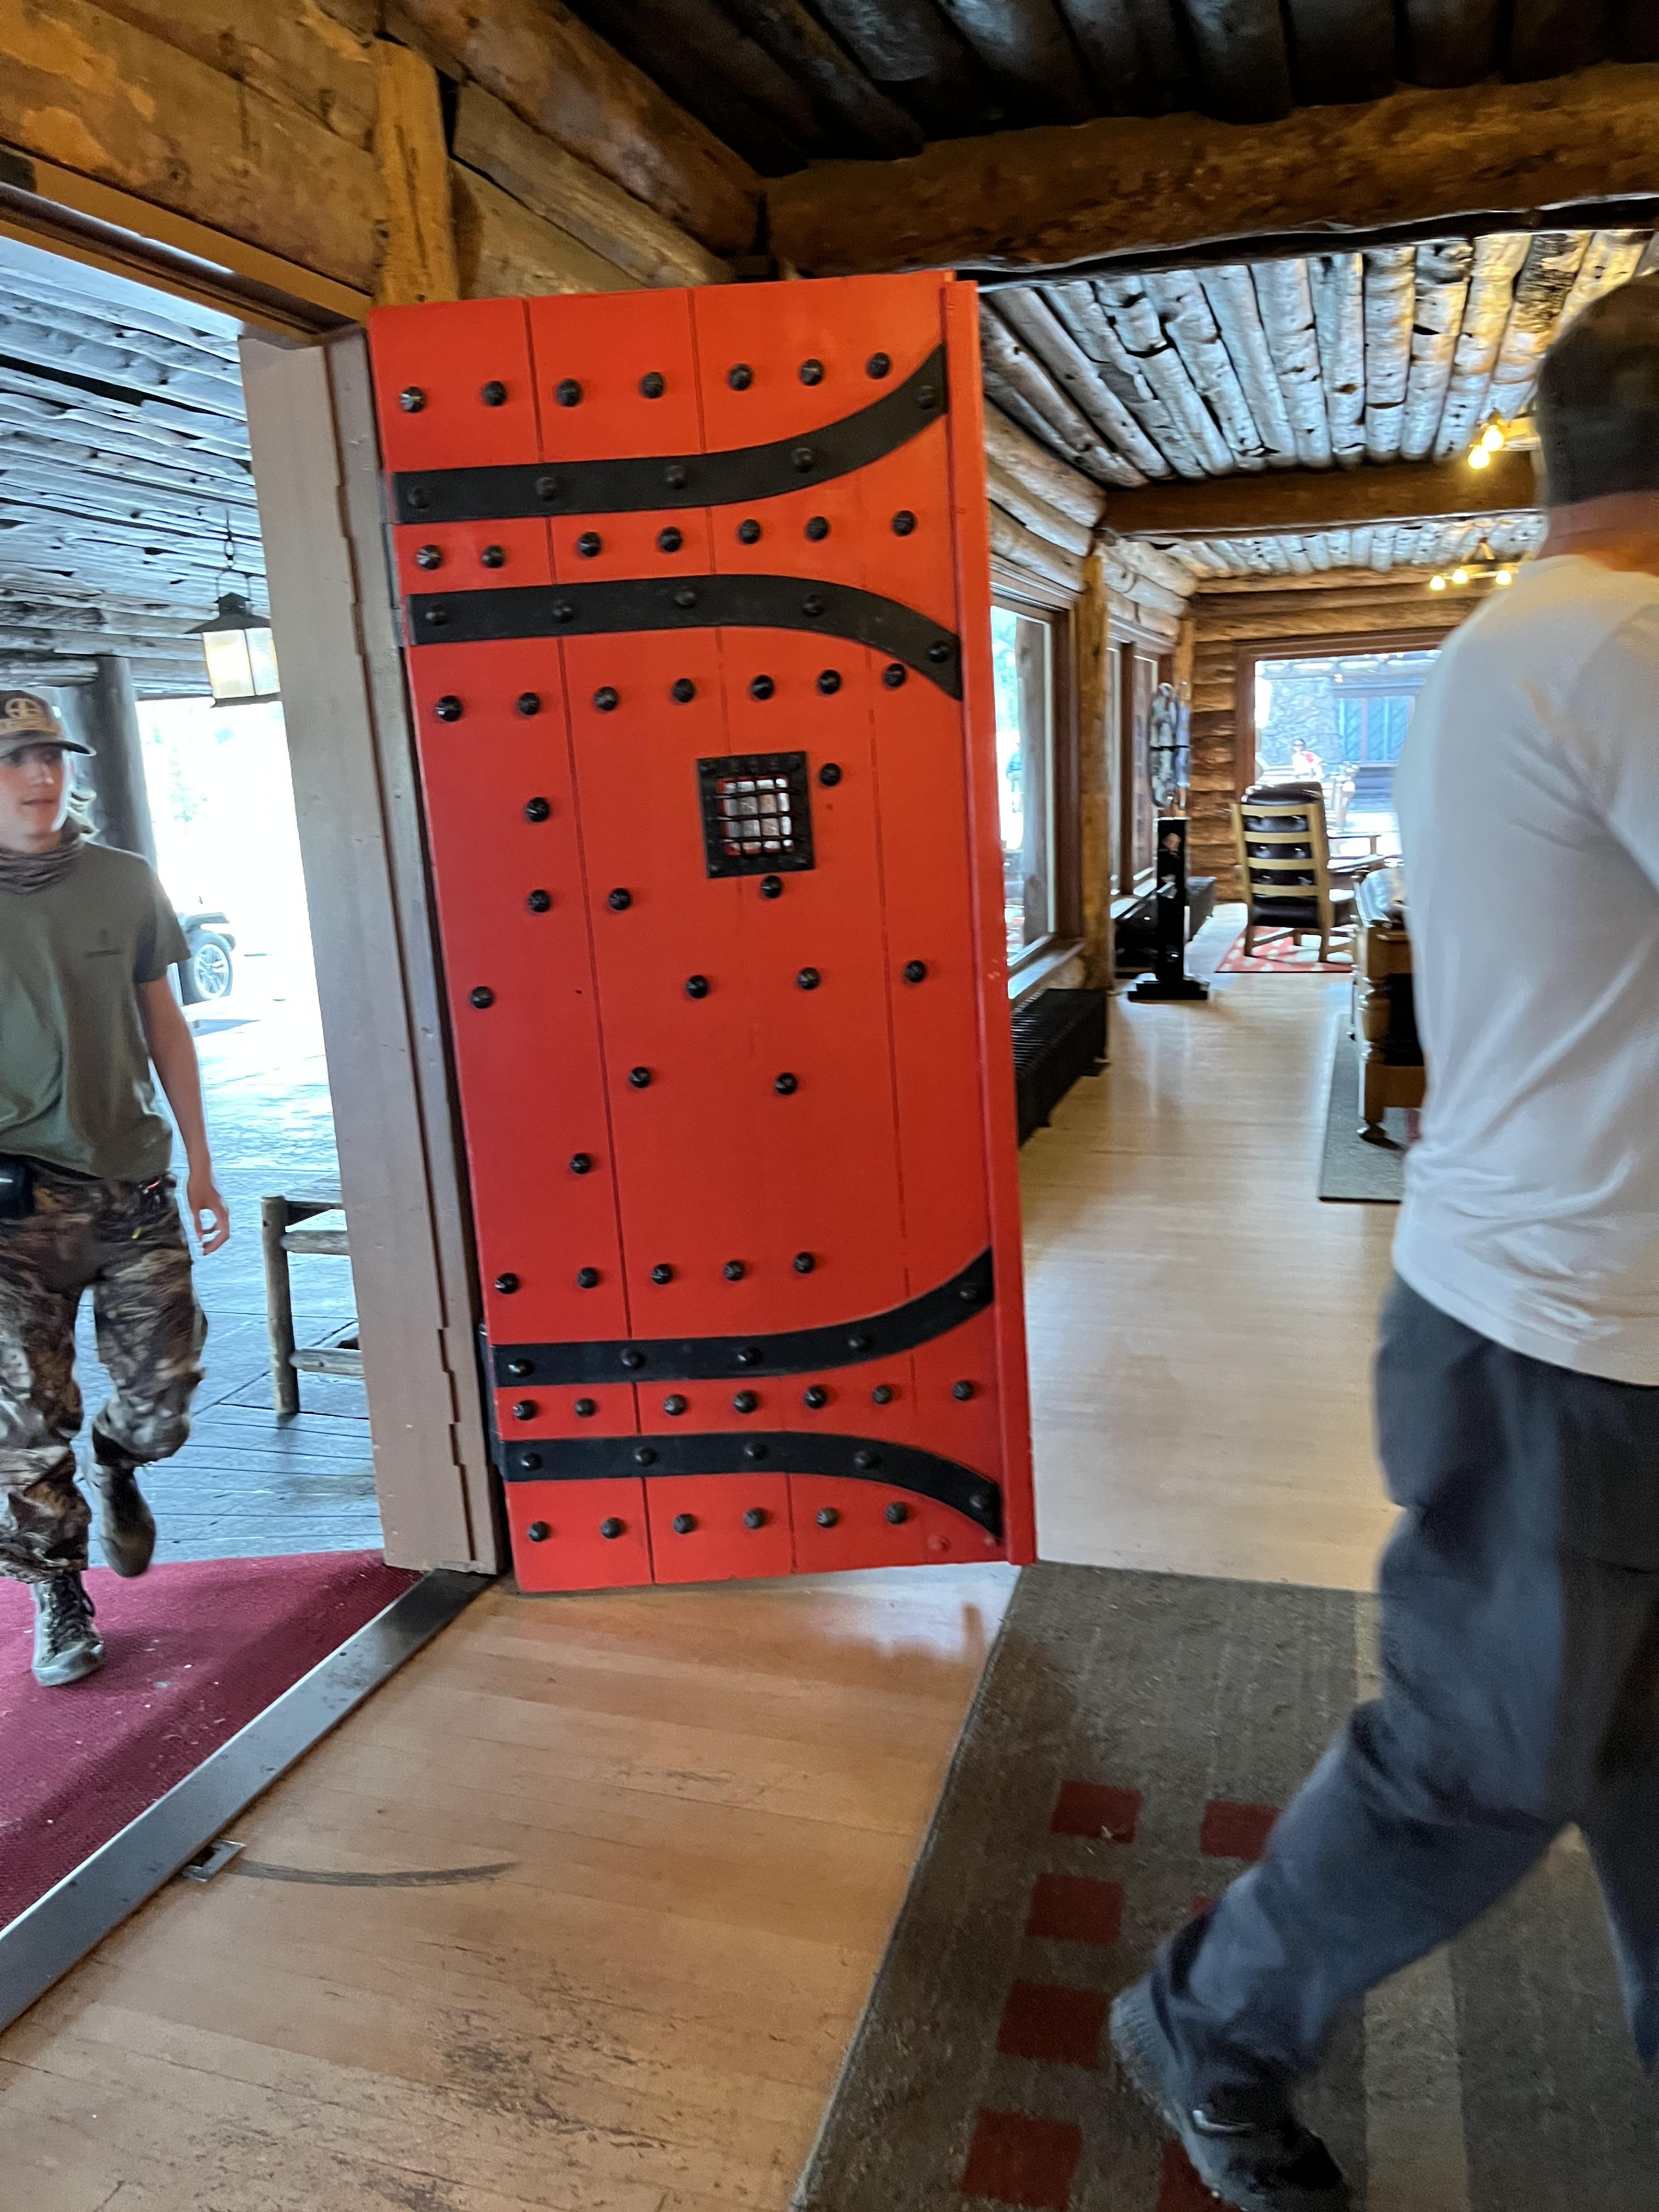
This past August I spent four days in Yellowstone National Park. One of the most majestic facilities there is the Old Faithful Inn. The two main entry doors are hand crafted of wrought iron and rough hewn lodgepole pine wood. When I walked through I had to photograph them. I am sure they are over 100 years old and the names of the craftsmen are lost to history. Have any of you taken on a project such as these doors? I would cerntainly like to read about your experience if you have. listed below are two web links if your are interested in the history of the Old Faithful Inn. Put Yellowstone National Park on your bucket list. Old Faithful Inn | Yellowstone National Park Lodges Old Faithful Inn - Wikipedia


-
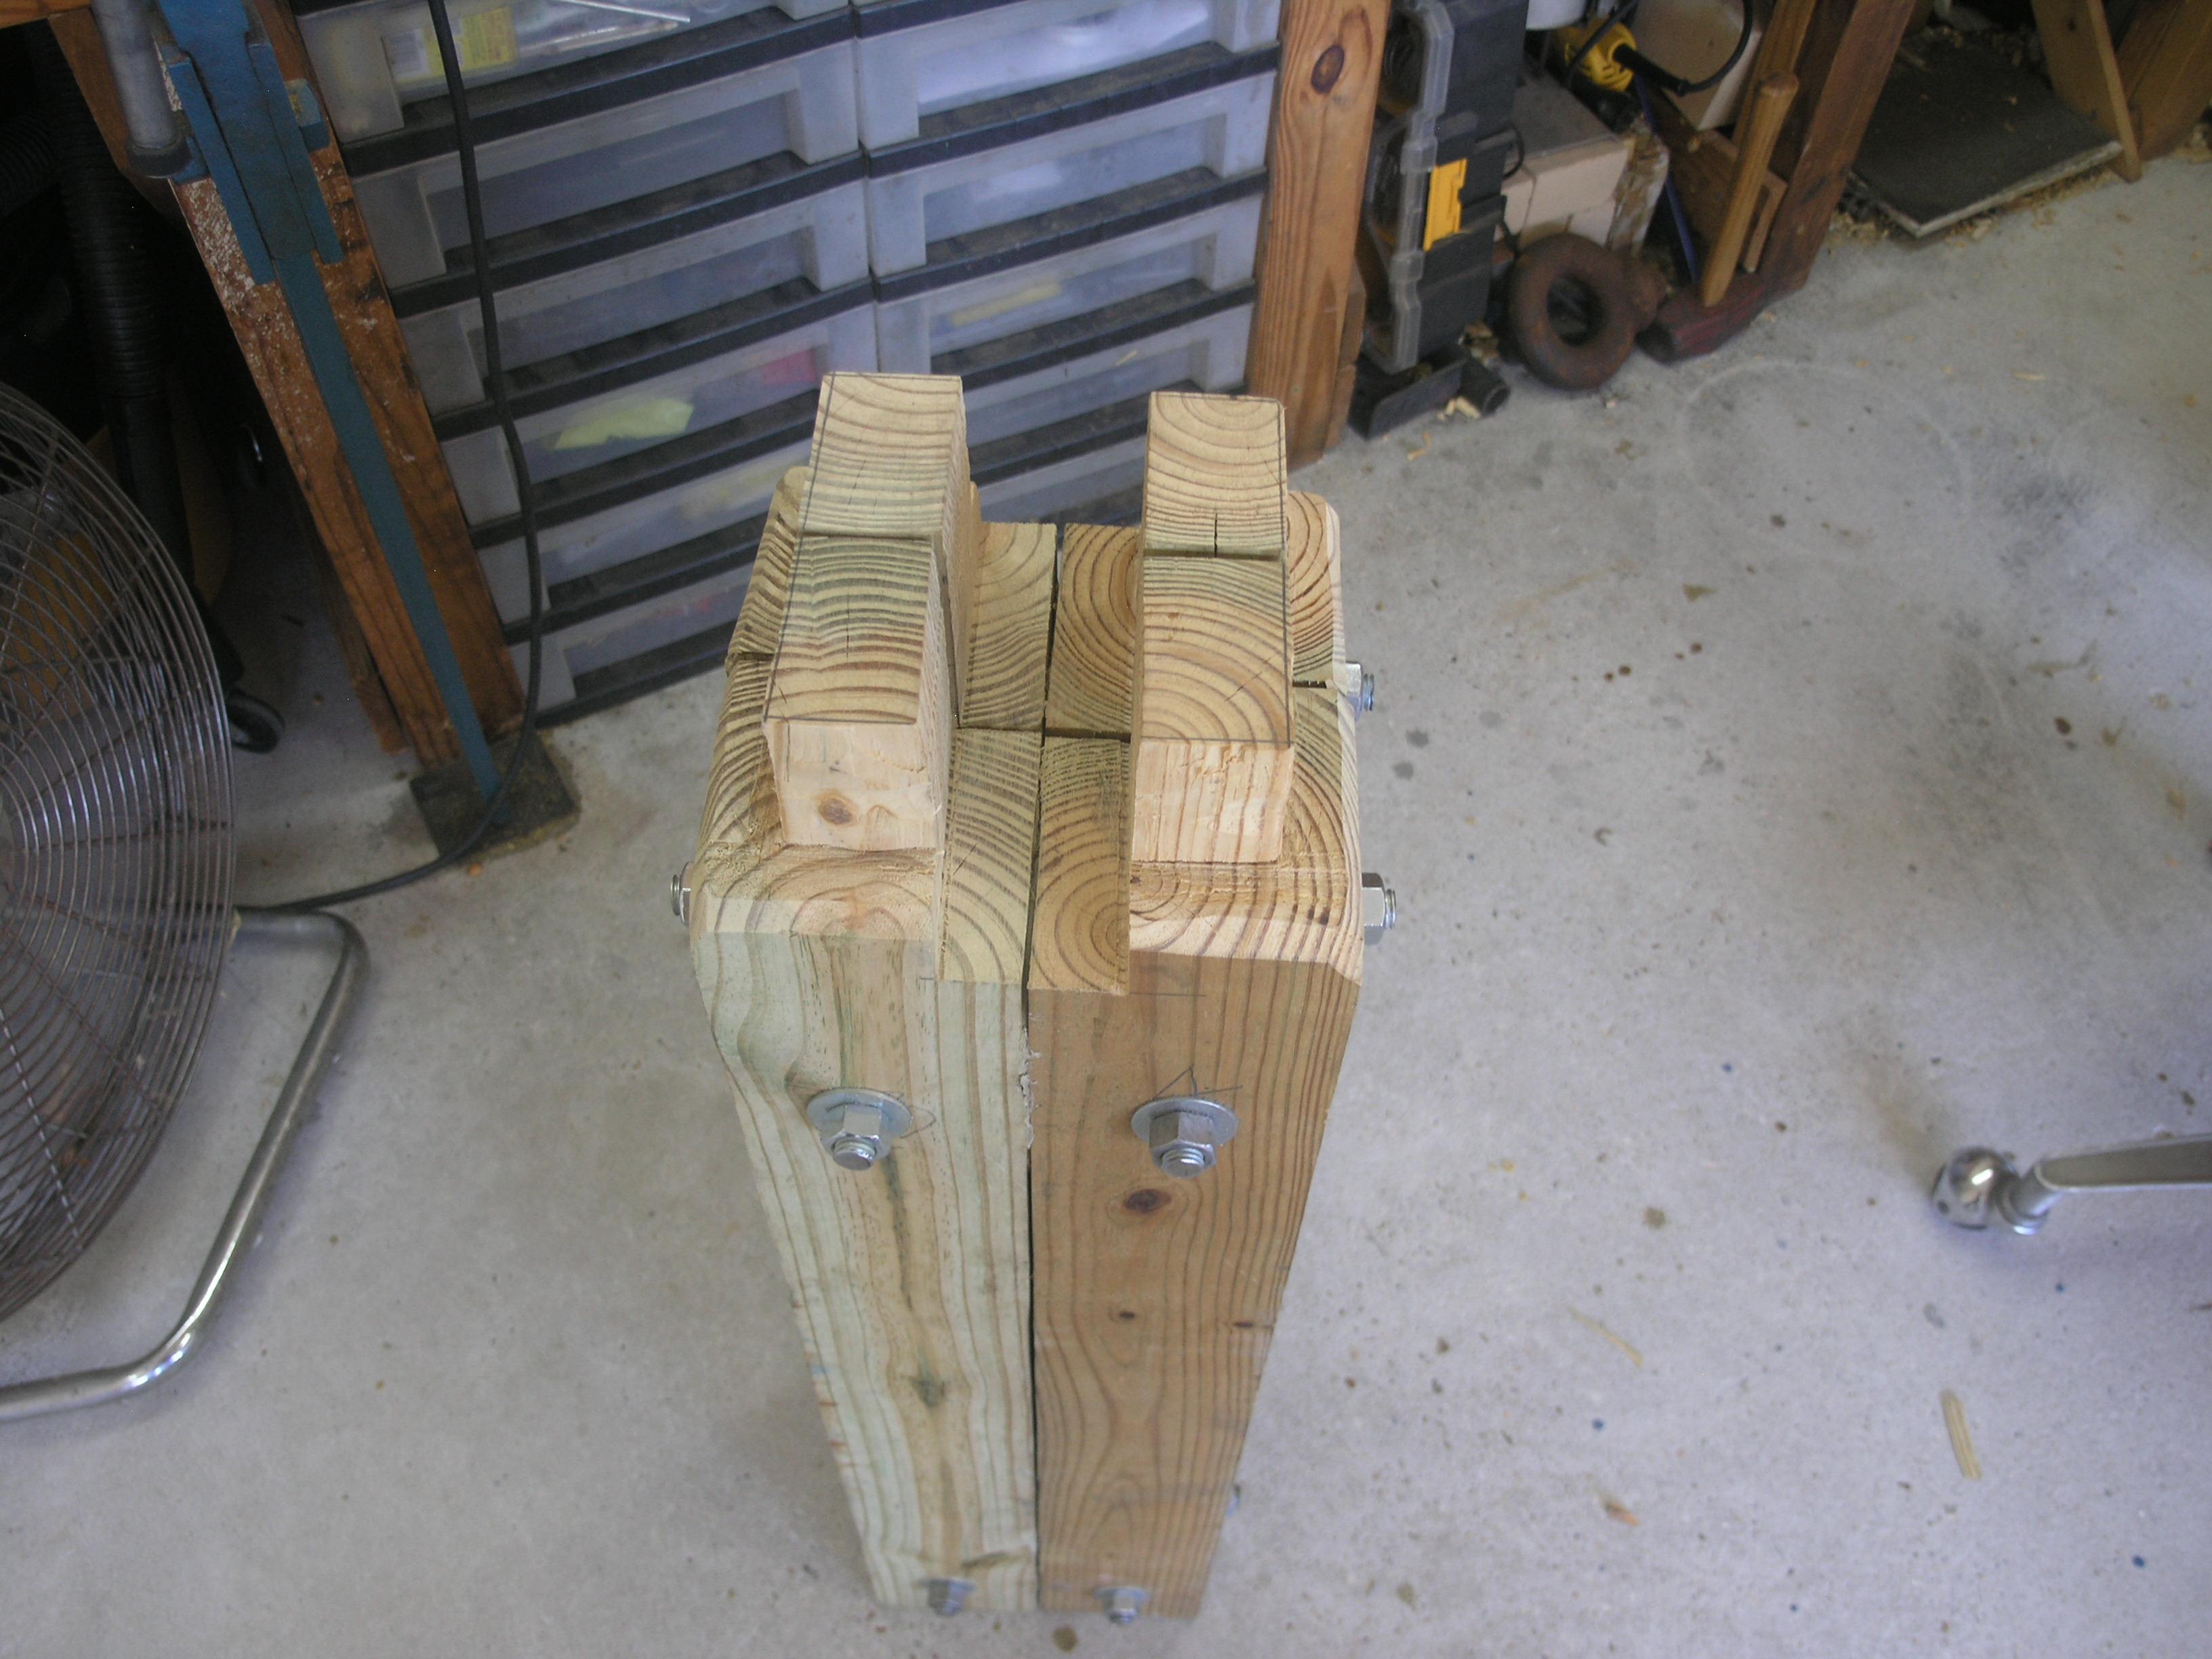
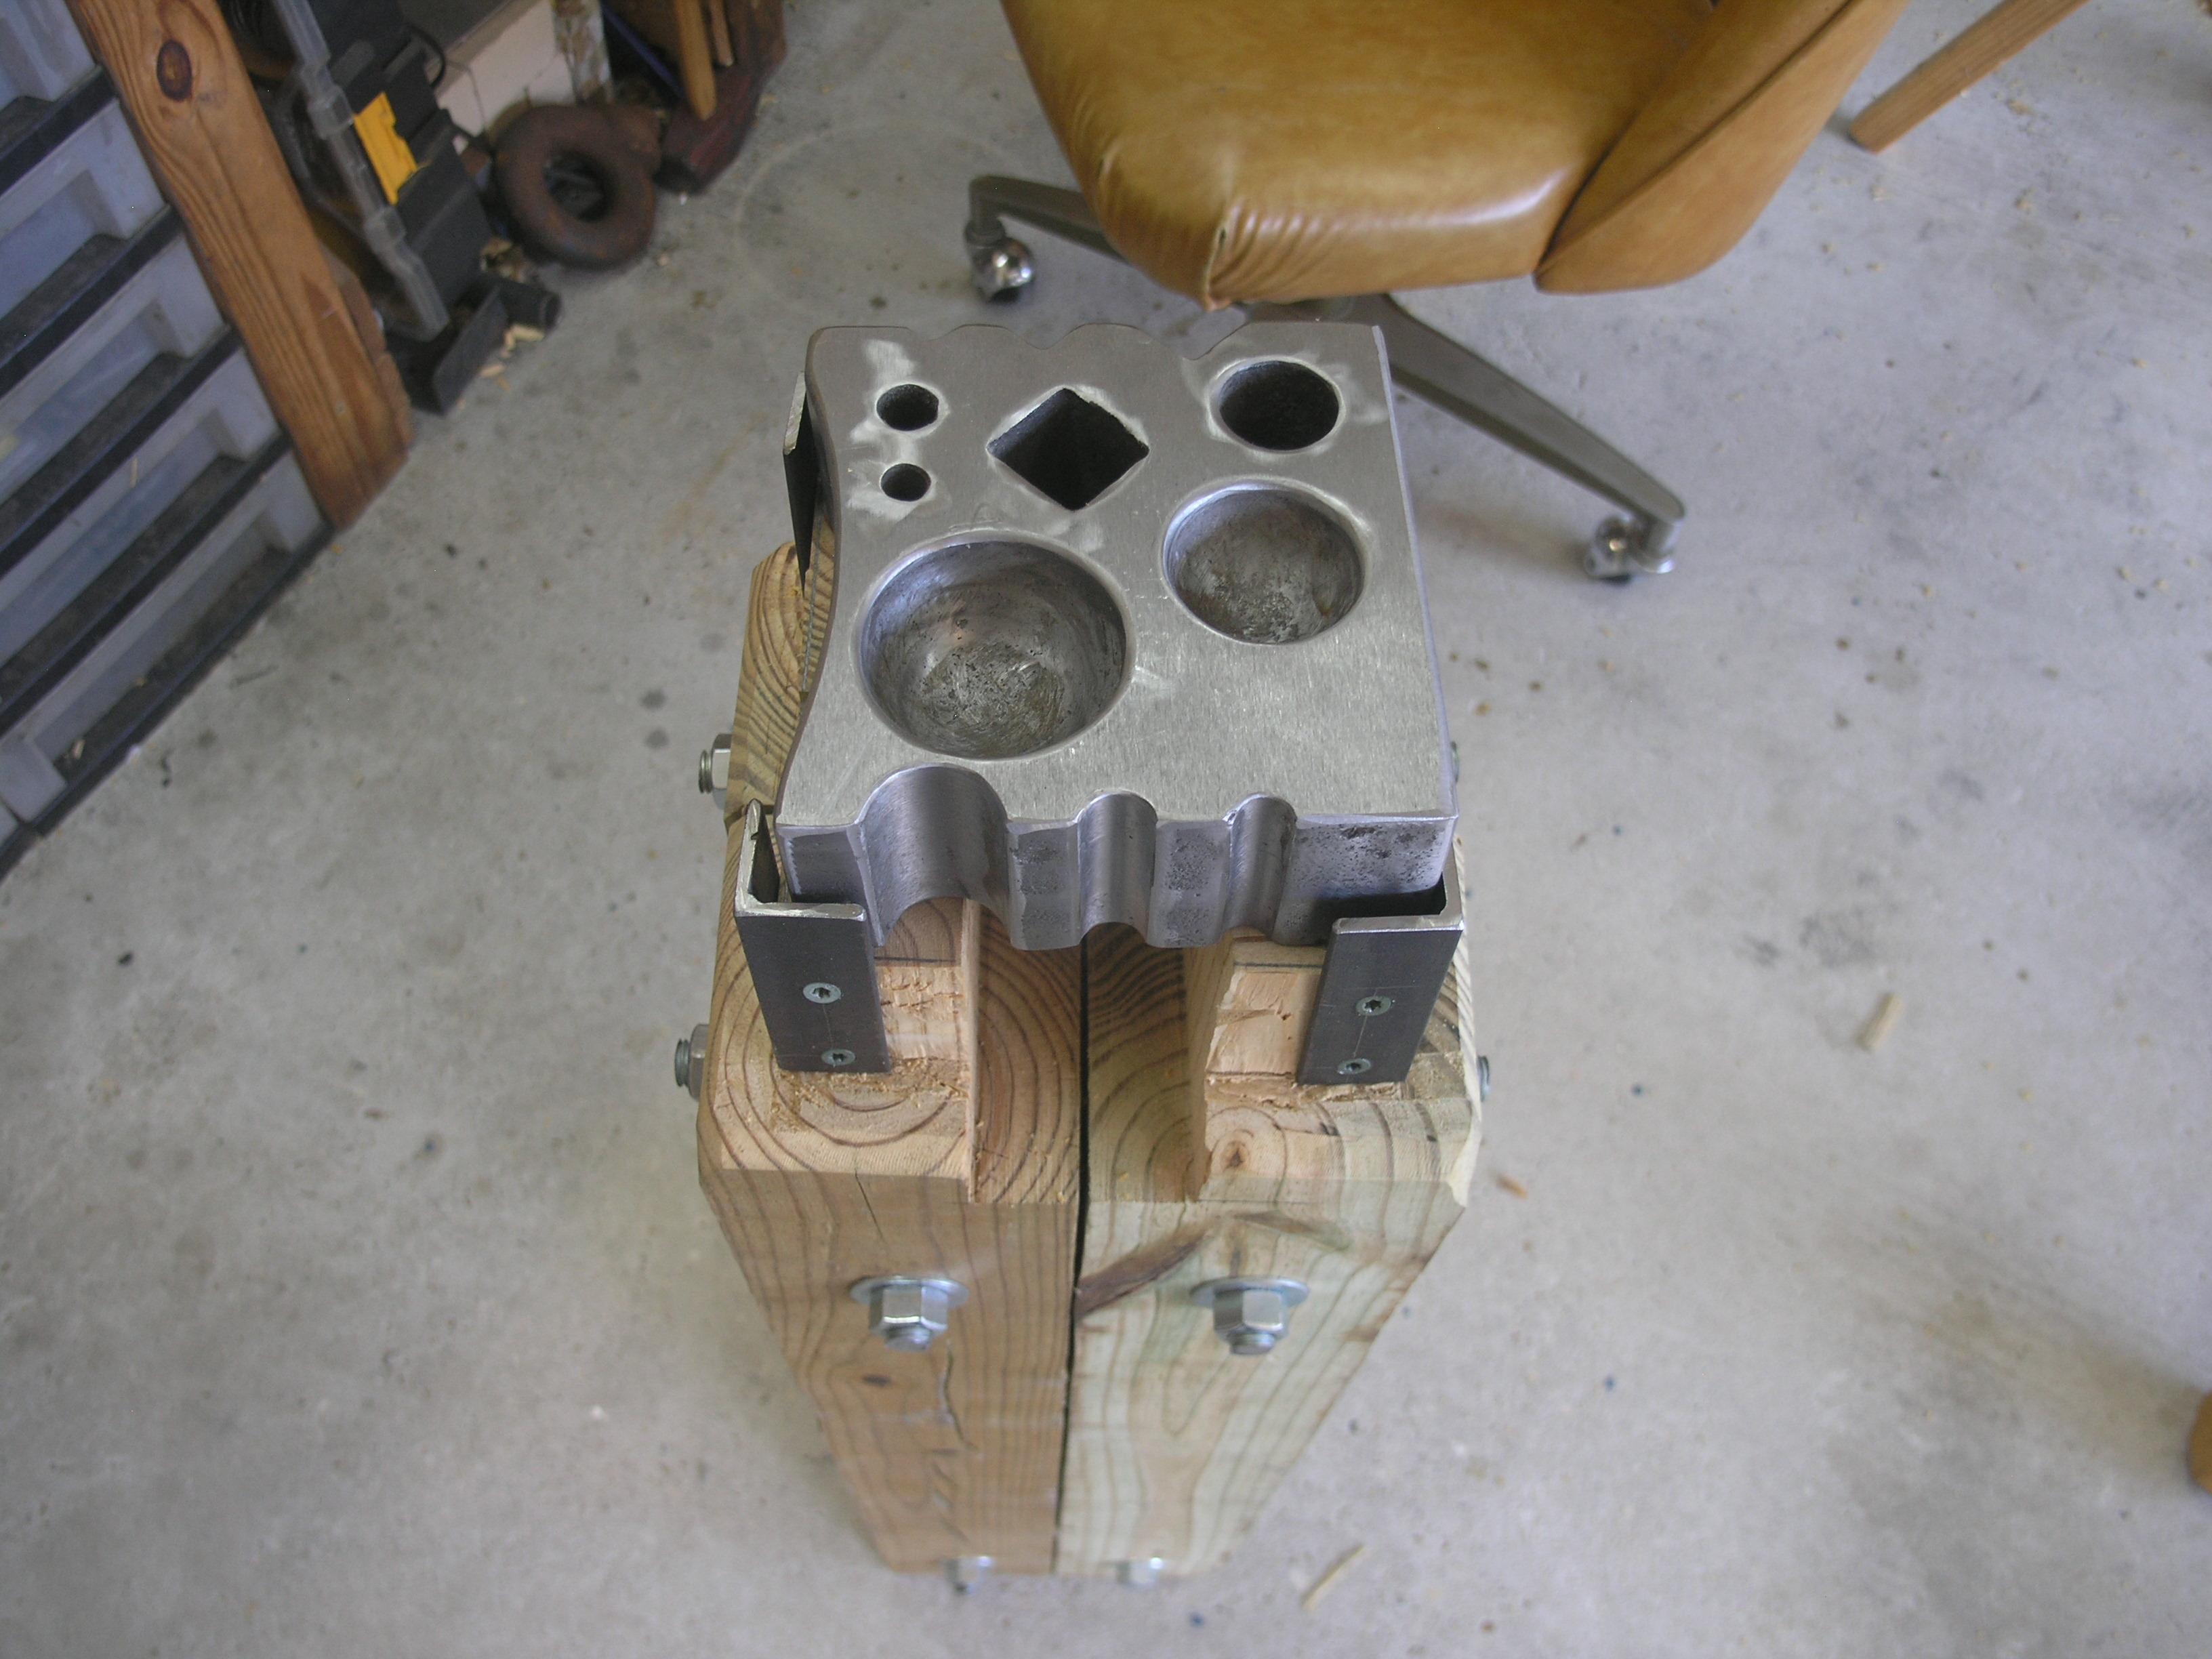
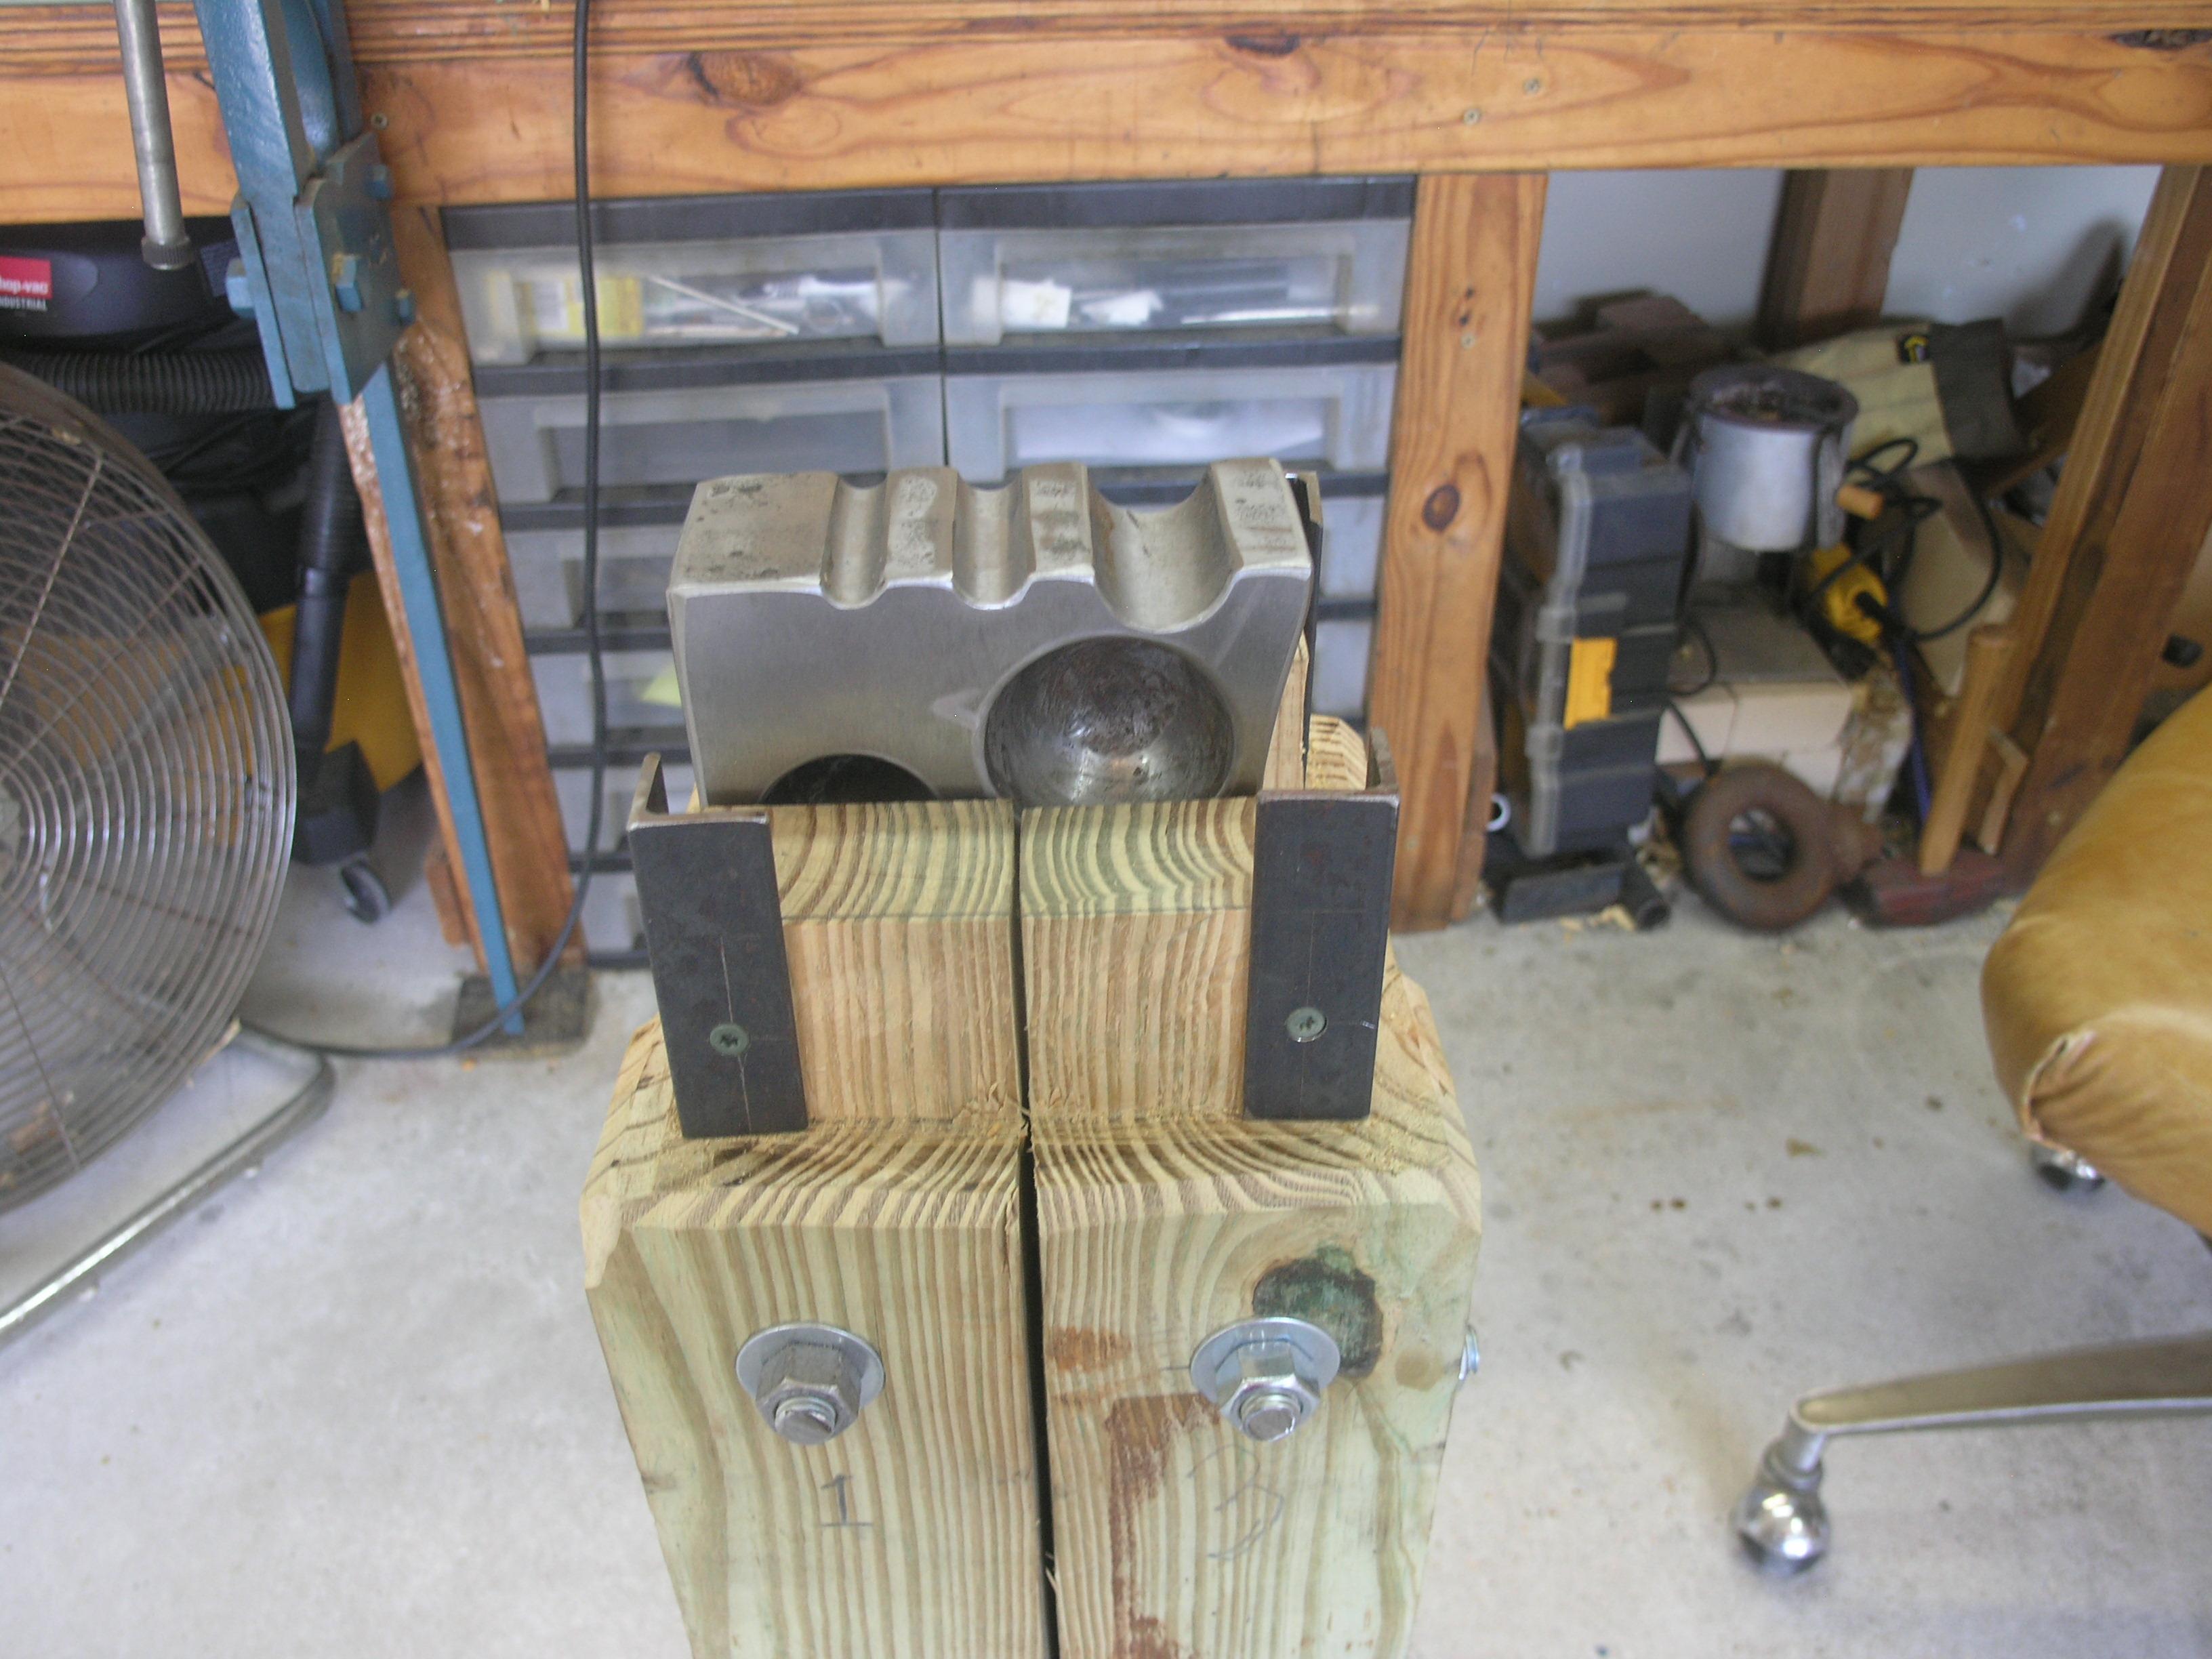
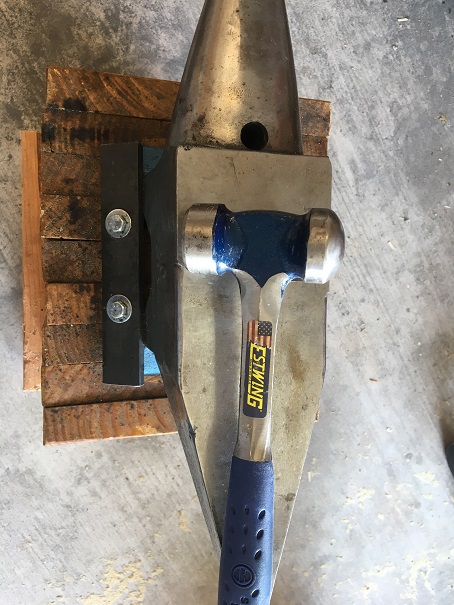
Attached are pictures of the base I made for the mini swage block. It was assembled from 4"x4" treated pine sections bolted together with 1/2" threaded rod. 1"x1" angle is attached with wood screws at the top to keep the swage block in place. It fits snug in the base notch in the verticle position. I think this will work well. I may brace it to my work bench with a bar clamp if needed.


-
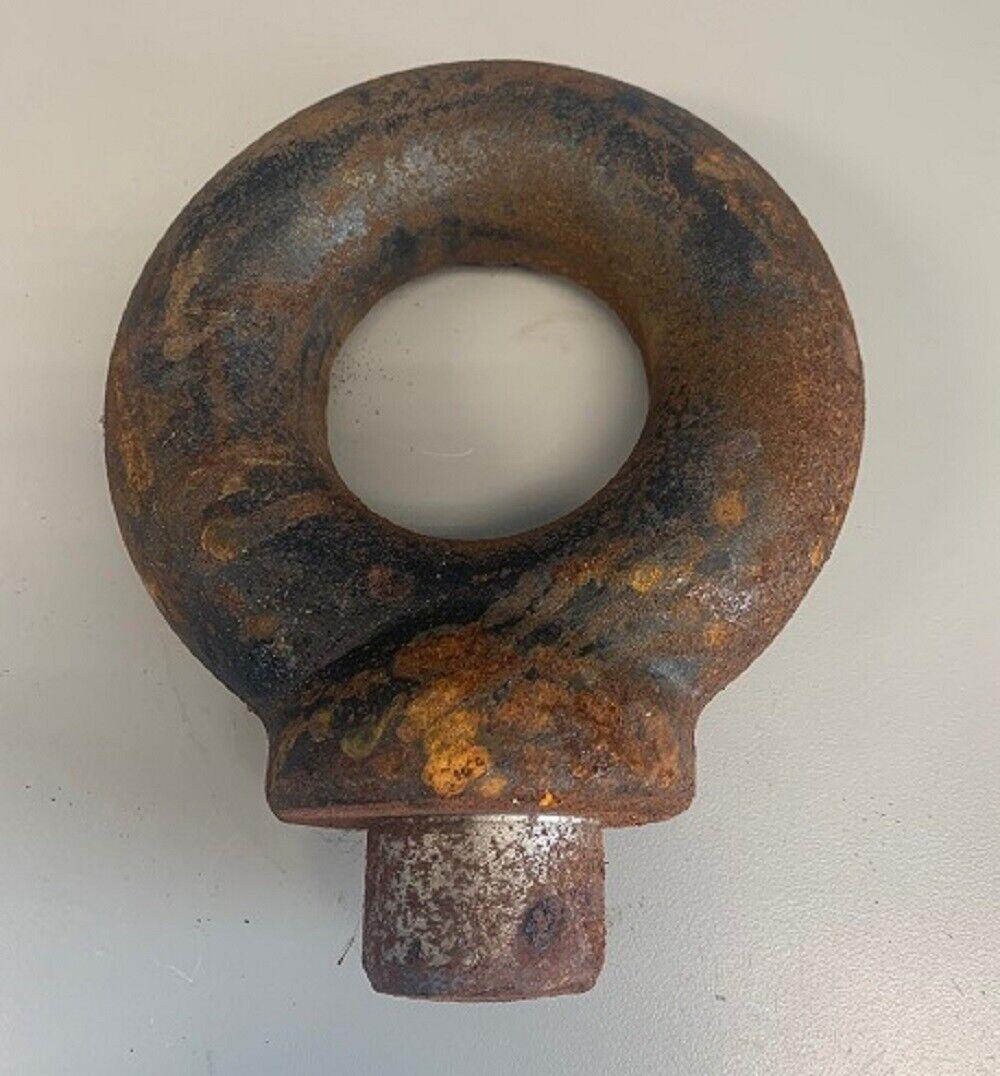
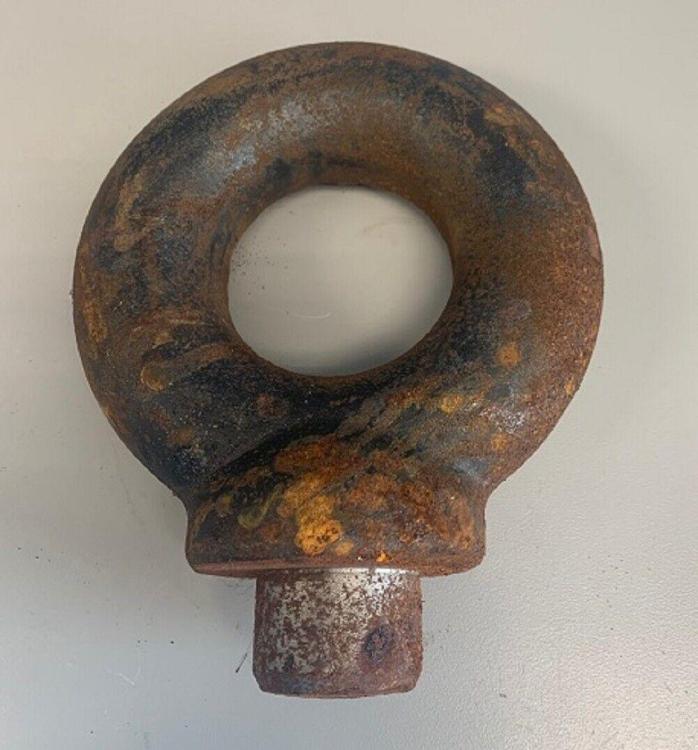
I bought a pintle tow ring on eBay for $15.25. The dimensions are 5 ½” OD, 2 3/8” ID, 1 5/8” thick. It has a 1 ½” diameter tenon 1” long. It was likely forged of tough and weldable medium carbon steel. This might be a good swage for forming a large ladle. I will need to forge or grind down the tenon boss for it to lay flat on my anvil. The tenon could be forged square for it to fit the hardy hole to allow the ring to be used upright as a bottom fuller. I will let you know how this works. There are plenty more pintle tow rings on line if you want to try one. What do you think?
-

Most useful tool in your shop ?
DHVidrine replied to Glenn's topic in Blacksmithing, General Discussion
My $15 hook rule. -
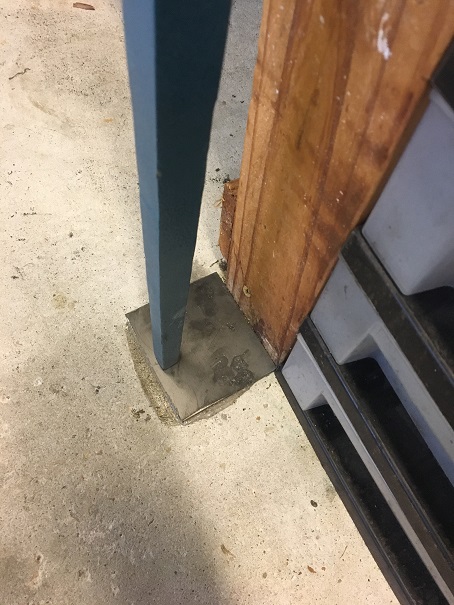
I have not needed to move this leg vice yet. If I do I will glue another piece of plate to the floor. So far the end of the vise leg has not shifted on the floor plate.
-
I did clean up a bit before the pictures were taken. Rubber exterior door mats keep most trash out of the channel. The mats can be seen in the first two pictures. My shop vacuum sucks out any trash or grit that may fall in.
-
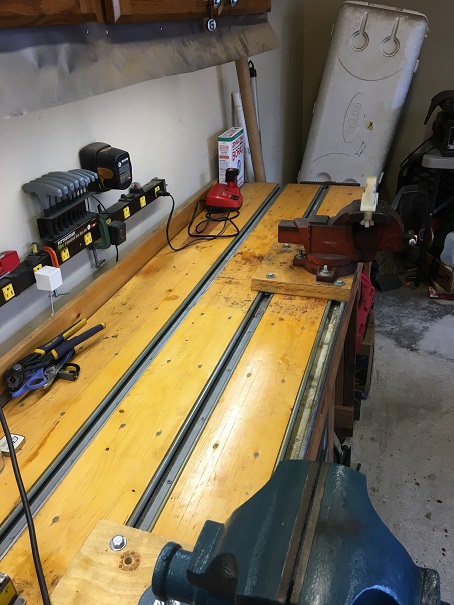
Attached are some pictures of my Unistrut bench top. The bench top is two layers of 3/4" CDX plywood. I used roofing felt under the pine boards to make them even with the Unistrut. At the right end of the work bench is an 8" cast iron wood worker's vise. By bolting stops to the Unistrut and using the raised vise jaw dog on the wood worker's vise I can clamp something as long as bench. I hope somebody can make use of this system. It has worked well for me.

-
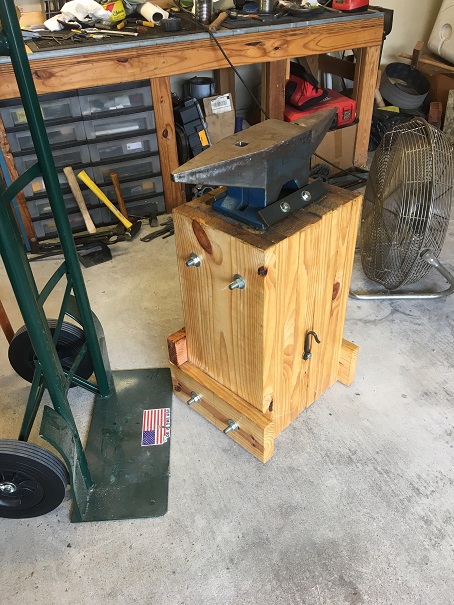
My Stand for a 30 kg Acciaio Anvil
DHVidrine replied to DHVidrine's topic in Stands for Anvils, Swage Blocks, etc
I added a tool rack to the two upper ends of all thread as suggested. It will work well. Tomorrow I will trim the ends of the lower all thread.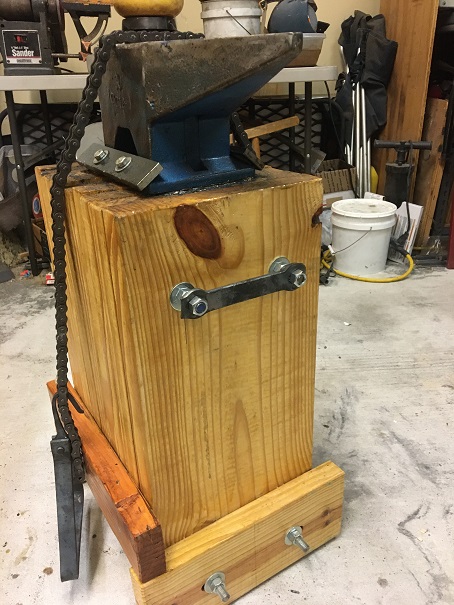
-
Correction, there are three runs of Unistrut down the length of the work bench. One run is along the near edge and the other two are spaced 5 1/2" with 1x6 pine in between. I will post a picture of tomorrow without the mats. I have only had this vice for a few days. So far I am pleased with it.
-
My Stand for a 30 kg Acciaio Anvil
DHVidrine replied to DHVidrine's topic in Stands for Anvils, Swage Blocks, etc
Yes, I think I will attach a tool rack to the ends of the all-thread. Good idea, thanks. -
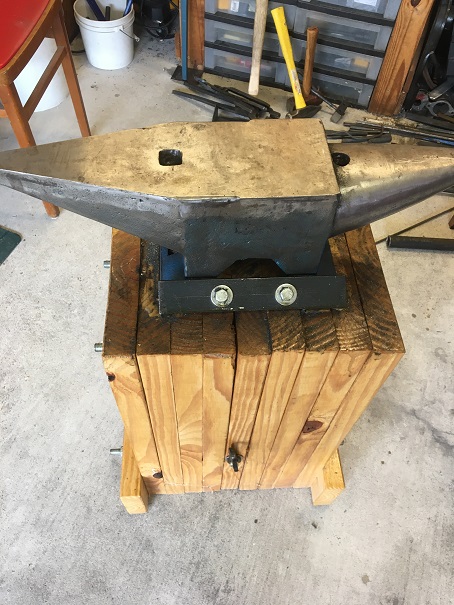
Pictured below is the wooden stand I made for my 30 kg Acciaio anvil. Two 2x12x10’s were cut to make eight panels 24 1/4” long. This will raise the anvil face 30 ½” above the floor as best suited for a person my size. Two pieces of 2x6 were also cut to 24 ½” in length. These 2x6 pieces are needed to form the center laminate. Eight 2x12 sections plus the two side-by-side 2x6’s makes nine laminates. It is easier to center the anvil on the block and properly space the lag bolts with an odd number of laminates. I used two pieces of 2x6 rather than buy a 2x12x8 for this one 24 ½” section. Layout and drill four 5/8” matching holes in each of the eight 2x12 panels. Layout and drill two 5/8” holes on each of the 2x6 panels to match the holes in the 2x12 panels. On my anvil stand I used the remaining 2x6 lumber to make an outrigger at each end. These are not necessary. Assemble with ½” threaded rod and nuts. Apply a thick coating of silicon caulk to the bottom surface of the anvil base and center the anvil on the stand. Let the silicone caulk cure overnight. The silicon caulk will fill any uneven wood gaps under the anvil base and silence that annoying ringing sound. Drill and bolt down the anvil with the four 3/8”x6” lag bolts and two 3/8” flat bars. This simple stand has worked well for me. I use a two-wheeled dolly to move the anvil and stand in my garage when it is not in use. Bill of Materials Two 2”x12”x10 ft yellow pine One 2”x6”x8 ft yellow pine 6 ft ½” all thread steel rod Eight ½” nut & washer Two 3/8”x1 ½” steel flat bar 8 ½” long Four 3/8”x6” lag bolt & washer One silicone caulk cartridge
-
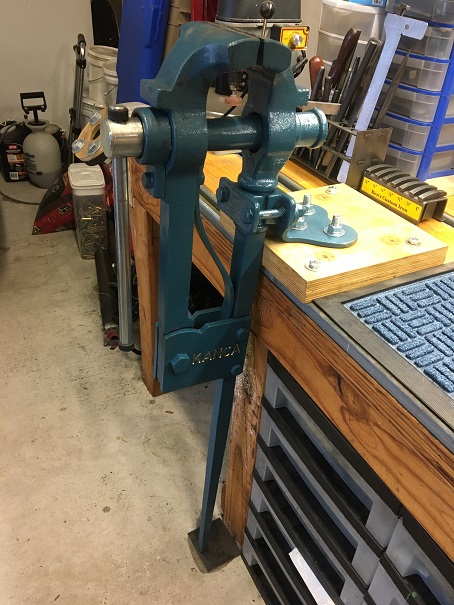
I installed my new 5” Kanca leg vise today. This 5” Kanca vise was purchased from Centaur Forge. It was expensive but I feel is a good value. My work bench has a wooden top 30” above the concrete floor. I built this bench several years ago with two runs of 1 5/8” x 13/16” Unistrut channel recessed in the top. The vise mounting plate is secured to a 1 ½” thick plywood spacer block with three ½” carriage bolts, washers, and nuts. The spacer block is secured to the work bench by bolting to the Unistrut with four 3/8” bolts. The end of the leg butts to rectangle piece of 1/8” steel plate glued to the floor with RTV silicone. This is a very secure and solid mounting system. The Unistrut channel allows the vise to be easily removed and remounted to any other location along the length of the workbench.

-
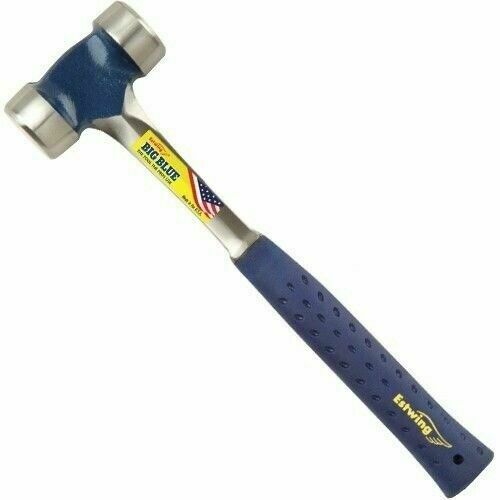
Lineman’s Hammer to Rounding Hammer I purchased a new Estwing 40 oz lineman’s from an eBay seller for $41.89. A little work with an angle grinder turned it into a good rounding hammer.
-
Thank you all for such a kind welcome.