

billyO
-
Posts
545 -
Joined
-
Last visited
Content Type
Profiles
Forums
Articles
Gallery
Downloads
Events
Everything posted by billyO
-
I think most of us here would agree 100%. Keep up the good work.
-
Looks great! Welcome to the never-ending path of pattern welding. PCB etchant from Radio Shack is ferric chloride. I am currently using a 3:1 water to acid ratio. It's my understanding that most folks (myself included) will do a ferric chloride etch to get some topography to the blade before soaking it in the coffee. I've heard that the coffee "etch" is mainly a resinous buildup on the surface caused by the coffee. It rubs off fairly easily, especially if there is no topography on the blade. When you etch to get some topography, the coffee coats the carbon steel (the depressions made by the ferric chloride) and the nickle steel is higher in topography so that protects the coffee from rubbing off as easily.
-
Very nice! I'm liking the stand tool. I may have to start doing something like that for my damascus. I'm also liking that box elder. Almost as nice as my maple. as always peace and love billyO
-
Make a plan to head down to Longview for one of their Mentoring Center demos on the 4th Sat of the month (but you probably already know about them). At least plan on going down to Swaptoberfest. Stay cool! as always peace and love billyO
-
Show me your Bottle Openers!
billyO replied to Arbalist's topic in Blacksmithing, General Discussion
Are you talking about the texture or the contrast? If the physical texture is what you're referring to, then you merely need to etch it longer. The longer it's in the acid, the deeper the etch. If you're talking about the contrast, there are a couple different ways of helping this. First, etching longer (and deeper) helps prevent the oxides wearing/rubbing off. A chemical process called parkerizing is used a lot and is probably the most durable. A lot of smiths (myself included) use cheap instant coffee to improve the contrast. I etch my blades long enough so that I can feel the pattern with a finger nail (neutralizing the etch by dunking in boiling baking soda/water, then let it sit overnight before cleaning). Then I wet sand lightly with 5000 grit paper and a hard backer to clean off the nickle steel that has resisted the etch. Finally, I dunk the whole blade in a STRONG batch of instant coffee (the cheapest you can find). I used 1/2 a can to 1/2 gallon water, stored in the fridge and have been using it for about a year now. IMO, there's a "sweet spot" eventually you'll learn, of how long to keep your blades in where all you have to do is rinse off the blade well and have the contrast. Not long enough, you don't get enough dark. Too long and the worst that will happen is the 15N20 gets too dark and you have to scrub harder and usually will have to re-dunk in the coffee. The 2 best things about using coffee is that you really can't do any damage by keeping it dunked too long, and with my stabilized blocks, you can re-darken with the handle on and dunk the whole knife, handle and all. If you like the pattern, I'd re-etch in the acid, then try the coffee. Also, before use, you're sealing the steel with something, wax, oil, clearcoat, no? Have fun. as always peace and love billyO -
Some of my recent work - comment/critiques wanted (pic heavy)
billyO replied to billyO's topic in Knife Making
Nope, I made those myself. Pretty easy to do. Yep, A couple/few years ago I cut down a maple on my property, mainly for firewood and saw all the spalting. I did choose that tree because of the root burl. I've got another one a bit further back on my property with a 3' dia burl that I'm thinking about being my firewood tree this year. I just need to find an easier way than manual labor to get the wood up to the house. Thanks for the compliments all. as always peace and love billyO -
Some of my recent work - comment/critiques wanted (pic heavy)
billyO replied to billyO's topic in Knife Making
Thanks Dave! BTW - are you a member of the NWBA? If so, have we met at any of the conferences? -
What did you do in the shop today?
billyO replied to Mark Ling's topic in Blacksmithing, General Discussion
I'm honestly not sure how it ended up fatiguing. Have I really been that rough with it over the last 18 years? I thought I had noticed it getting loose over the past few weeks and so the other day, took off the rubber collar and noticed the tube starting to tear (which was making the shifter loose), so I re-fit the piece and then used a pipe clamp to hold it on, but that only lasted 1/2 day before fatiguing completely and breaking. And yes, paying attention to how heavy this would be on your vehicle is a good idea. -
What did you do in the shop today?
billyO replied to Mark Ling's topic in Blacksmithing, General Discussion
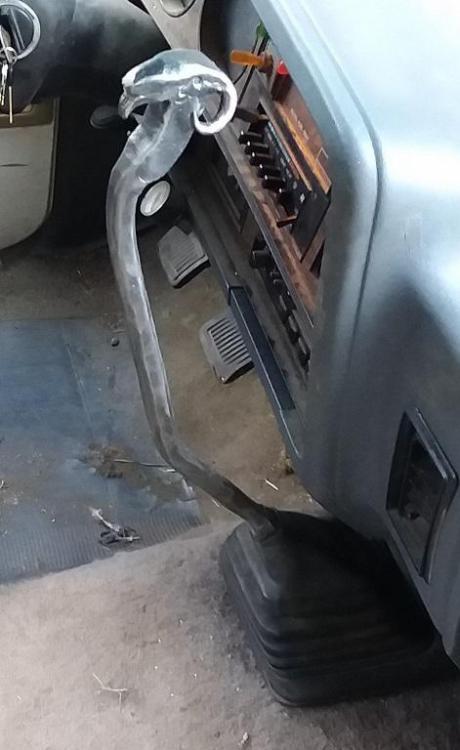
Hello all. Thursday afternoon, my stick shift broke while shifting into reverse (fortunately, I was at a friend's where we found a piece of pipe to get me home). Part of me wants to be ticked off that Dodge used a sheet metal sleeve to slide over a steel piece bolted to the lever into the transmission and looks like this finally wore out and tore (the right handed bend should be straight). The conflicting part recognizes that it it a 25 y/o diesel with 417K miles. So I decided yesterday that now was a time to do a project that's been on my mind for the past 5-6 years. Done out of 1" square. I'm a bit upset that I had to rush it to get it finished so I could drive last night, so it doesn't look as good as I'd like, but I may re-do it someday... Have a good summer. as always peace and love billyO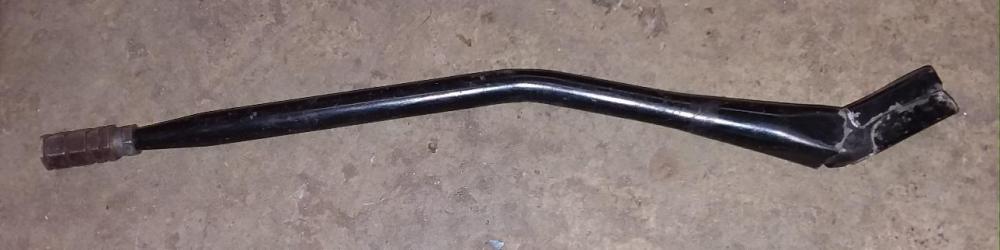
-
Andy's pretty much back in filling orders, so I'd start trying and contact him.again.
-
Yes, the mentoring center is a great resource. I was the coordinator until health issues made me step back. I hope to get back there soon.
-
In answer to your initial question, no it is not necessary. Burning the tang in is the way it has been done, probably since the start of knife making. I know of some professional makers in the US that burn in the tang (and it's my understanding that many of the masters in Japan still do it that way). The benefits of epoxy is extra insurance and it can help seal the slot so water can't seep in. I've had the same problem in the past, and instead of buying large amounts of epoxies like West Systems g-flex, get some 30-60 min epoxy at your local hardware store that come in the tubes with the plungers, they last a while when stored properly and aren't as expensive, so if it does you're only out $3-4. as always peace and love billyO
-
And Jack, I hope to see you at one of the NWBA events in soon. as always peace and love billyO
-
To answer your initial question, a simple one turn twist of a piece of 1/2" square takes me about 30 seconds to do the twist, 20-30 minutes to heat the forge, a couple minutes to cut the stock to length, depending on which tool and if it's set up, a couple/few minutes to heat the stock, and about 10 minutes to locate the twisting wrench. To do a combination twist like you did takes significantly longer to make the twists even. Doing those 2 in 2 1/2 hours is a decent time, especially for someone who calls themself a newbie. A well known US author wrote that it takes 10,000 hours to become a master of most things. If you actually timed yourself, do a couple more of the same and you'll be surprised at how quickly the time drops. As stated above, doing one-offs takes significantly longer because even though you may have an idea on what you want it to look like, you are coming up with the method and order of doing things (this is more important than most newbies realize) on the fly, and I'd estimate that for 99% of the smiths out there, even though they have a clear idea on what they're shooting for, they don't get it right on the first heat and have to tweak things and often re-tweak them and that's always a "fun" challenge, depending on how much a perfectionist you are. There are many things that can cause this need, for example, as the piece retains more heat, the less you have to schwak/coax it (this is especially true with twists). And the more experience you have, the less you have to adjust what you're doing because you can anticipate the necessary changes you need to make to your manipulation of the steel. Pay attention to what you do and what happens with each heat and your time will start to decrease, but remember, there is only so fast one can go and even the experts have a lower limit. as always peace and love billyO PS - can you tell I'm part Italian?
-
Or if you belong to a black smithing group who has a fundraising auction, you could submit a bag for a smith who wants to look like they've been working to sprinkle around their anvil.... as always peace and love billyO
-
SLAG - not sure what you're interested in, but if it's a beginner's set, I packed up 7 sets today ready to ship. You can order through either his website or on line called 36Grit. If it's a specific pair of tongs or set, let me know and I'll see when we have those ready and let you know. Thomas - If it hurts, don't do it. There's only a couple of conditions where no pain no gain actually means something. Usually when someone doesn't do their rehab after surgery and let the soft tissue shrink, and wee need to stretch it out, because the patient didn't. As related to the shoulder, there's a condition called "Frozen shoulder" where the soft tissue in the joint shrinks/tightens and the PT's job is to stretch it out again. But even then, if there's no improvement after 6 or so weeks, then we stop and let it run it's course, usually resolving with as normal use as tolerated over a year or 2.
-
What weird animals have been in your shop
billyO replied to Glenn's topic in Blacksmithing, General Discussion
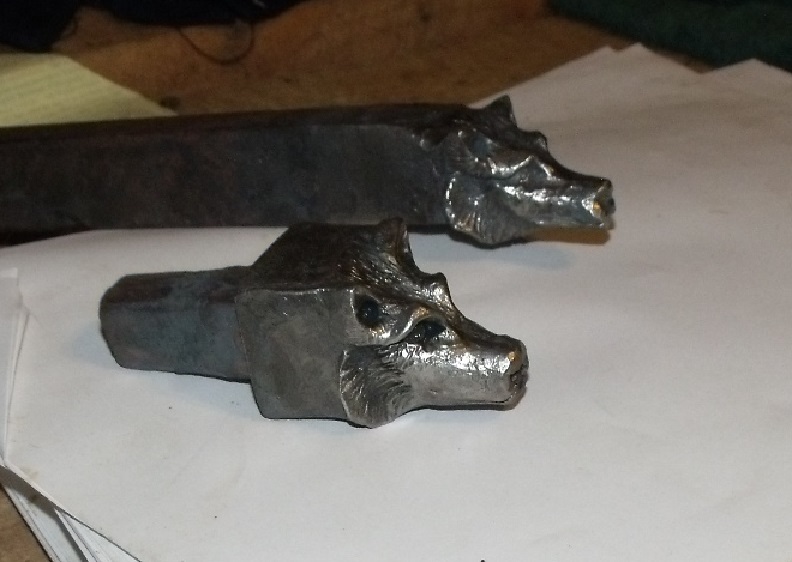
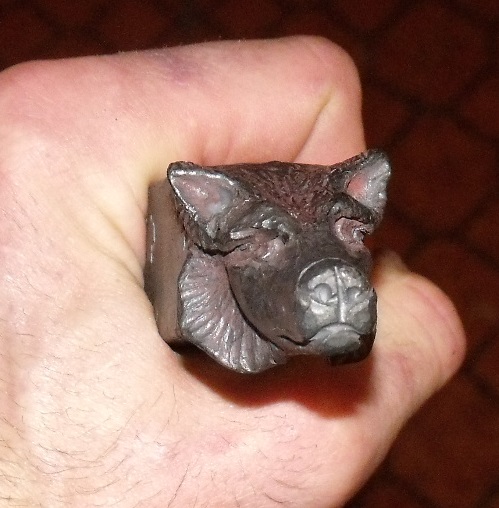
That one was 1 1/4" square stock. In my experience, animal heads up to 1 1/2" square aren't too tough. I'm almost finished with a husky out of 2" square, and not sure I'll do that again. It took 2 days of hammering just to get the pre-shape formed. But I guess I'm getting some good definition in my hammer forearm muscles.... Yes. Please do, I'd love to see it as well. -
What weird animals have been in your shop
billyO replied to Glenn's topic in Blacksmithing, General Discussion
Thanks for the compliments. I'm not sure I can explain in words how to do this, but I'll try. There's actually a couple of ways to do this, depending on the approach you take to the head. One way is to take a hot cut to peel a chunk of material off the parent stock from the back, then draw out the ear with a cross peen (you can see the hammer marks). Another way to get the mass needed is when you forge the pre-shape of the head, using a spring-fuller or guillotine tool to isolate the head from the parent stock, then use a fullering tool in a "scooping" motion with your blows to pull out the material, then use the cross-peen as above. The first way is much easier. For a better explanation, I'd suggest trying to get a hold of one of Darryl Nelson's animal Head DVDs. Either the bear's head or lynx head would show the basics for this. as always peace and love billyO -
Wow, I'm surprised I haven't added this one earlier "Ask 10 blacksmiths how to do something and you'll get 12 different answers." ~unknown as always peace and love billyO
-
What weird animals have been in your shop
billyO replied to Glenn's topic in Blacksmithing, General Discussion
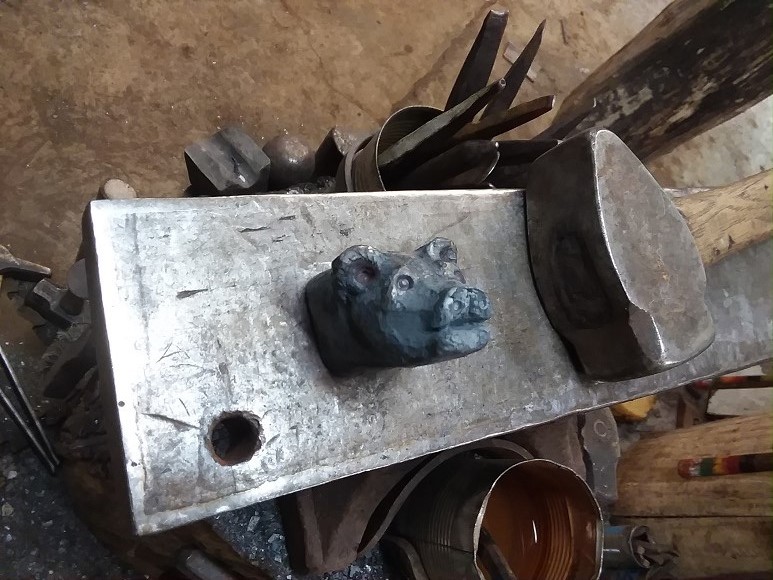
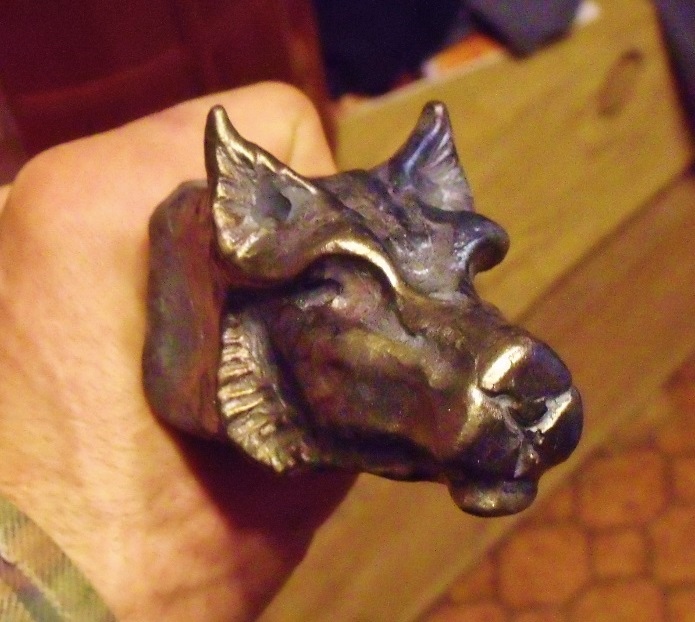
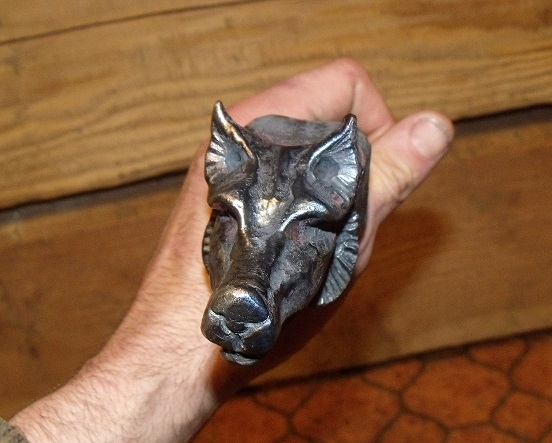
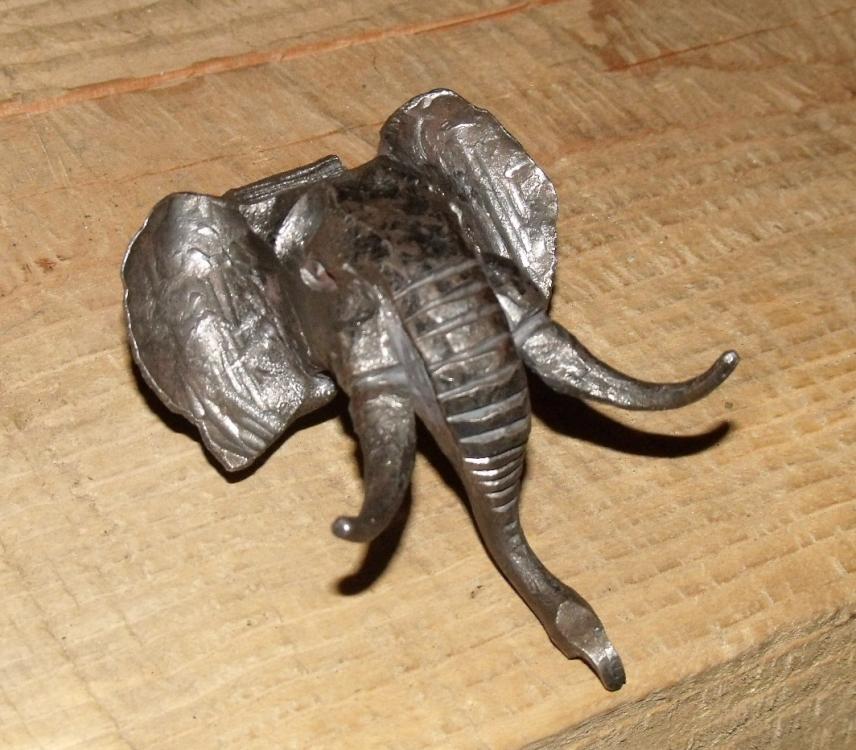
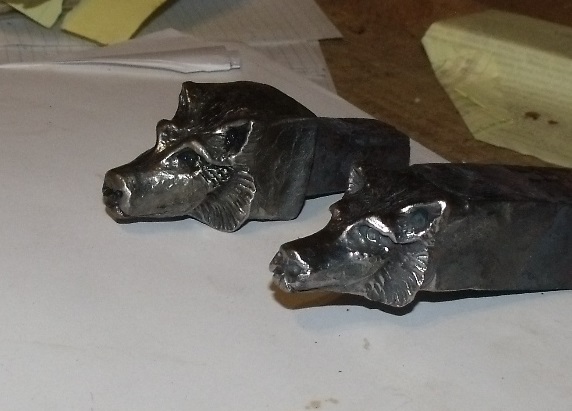
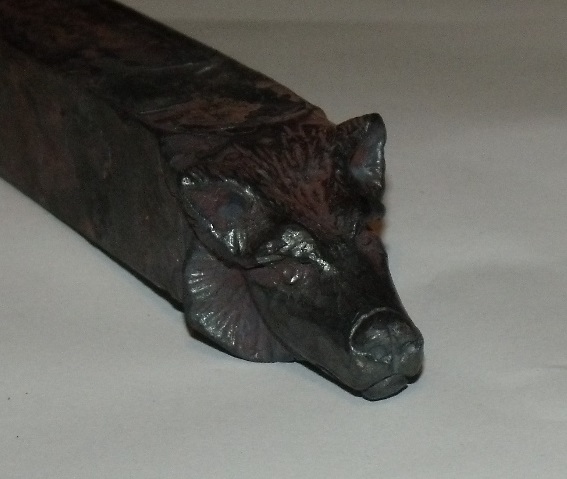
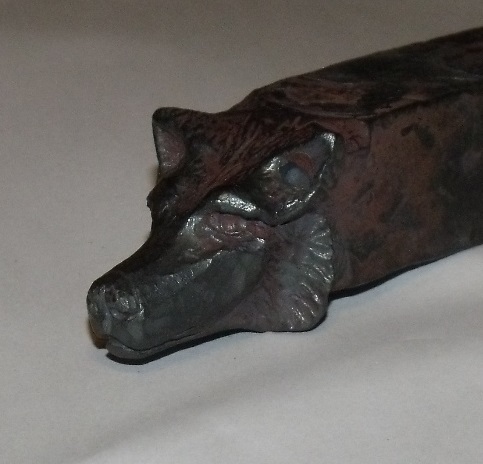
It's been a weird couple of weeks in my shop for animals. A bear cub, a couple of wolves, and an elephant (REALLY rare here in the Western foothills of Mt Rainier). Fortunately I got pictures of them all in case none of you believe me. Here's the bear cub: Here're the wolves: And here's the elephant (thanks to Freddy Rodriguez): as always peace and love billyO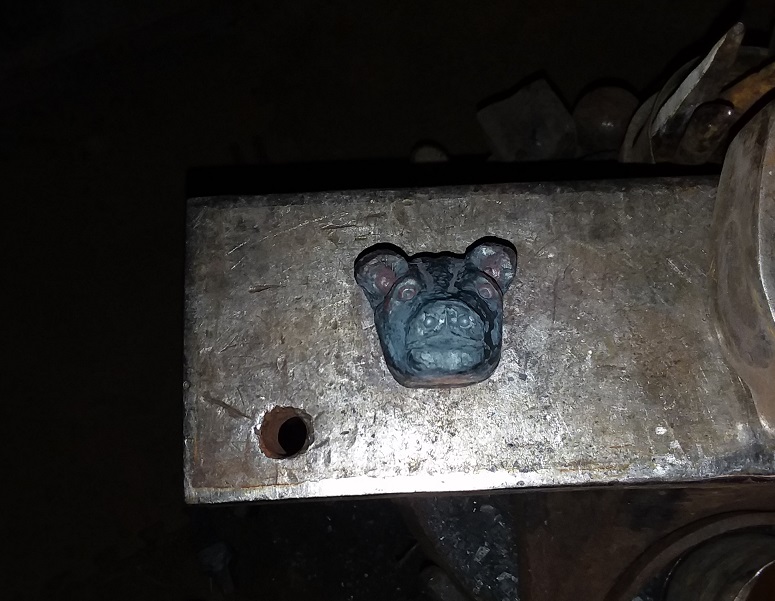
-
I'll have to modify that a bit, Thomas. For most orthopedic surgeries, following you PT's order is the way...(but I may be biased, being a PT for the past 22 years....) as always peace and love billyO
-
SLAG. He has quite a bit of inventory saved up for this period. I saw plenty today. In fact I'm going back next week to pack up and ship orders for him while he is restricted from lifting over 3#. He told me today that he has been focusing so much on getting product made/preparing for his surgery that he has neglected updating the website. Also, he's training another friend and I how to make the tongs and we'll be helping him keep up with his inventory, so don't worry, he'll be back in 6-8 weeks and will probably update his site soon, now that he's out of the acute stage of healing. Feel free to contact him with an order, if he doesn't get back, I can play middle man. as always peace and love billyO
-
Hello. Andy just had shoulder surgery last week. I'm heading over to his shop in an hour or so to see how I can help him maintain his business while rehabbing. I mentioned yesterday that I read this post and he said that he planned on this surgery so made a bunch of tongs ahead, and said he has a decent inventory. My suggestion is to try contacting him again, and if no luck feel free to contact me directly and I'll try to get answers. as always peace and love billyO
-
To all those who want to pray for Larry and family, please pray that the pain that they are going through is eased. I don't think I'm at liberty to disclose how he died, but if you believe in this, please pray that he has relief from his suffering and that it doesn't extend into his next incarnation. as always peace and love billyO
-
Would you please explain, Steve? More work...are you going to do some more folding/welding to get there after forging out the shape? Thanks as always peace and love billyO


