billyO
-
Posts
550 -
Joined
-
Last visited
Content Type
Profiles
Forums
Articles
Gallery
Downloads
Events
Everything posted by billyO
-
Also late to the game, but looks great. One question to the more experienced with Damascus patterns, if I may... I notice on the final blade there are a few twists (X's) that are the nickel steel and a few that are carbon, not entirely uniform throughout the length of the blade (not a critique, mind you). Is this normal for a twist pattern?
-
Not sure how you'd define electricianally-inclined but when I read the post I had to check to see if I hadn't written it and forgotten because it's almost exactly what I'm doing. The answer I got when I asked the same question was that it depends on how many amps you're planning on drawing/what equipment you'll be running. I'm planning on adding a heat treat oven, and occasional welder use so was told I could run an adequately sized line in a trench I dug and put a 50amp 220V breaker on the main panel in my house and I'd be OK. I'd be curious to if others have other opinions. BTW, I live by myself and heat with wood so there will be no other real loads on the main panel when I'm in the shop..
-
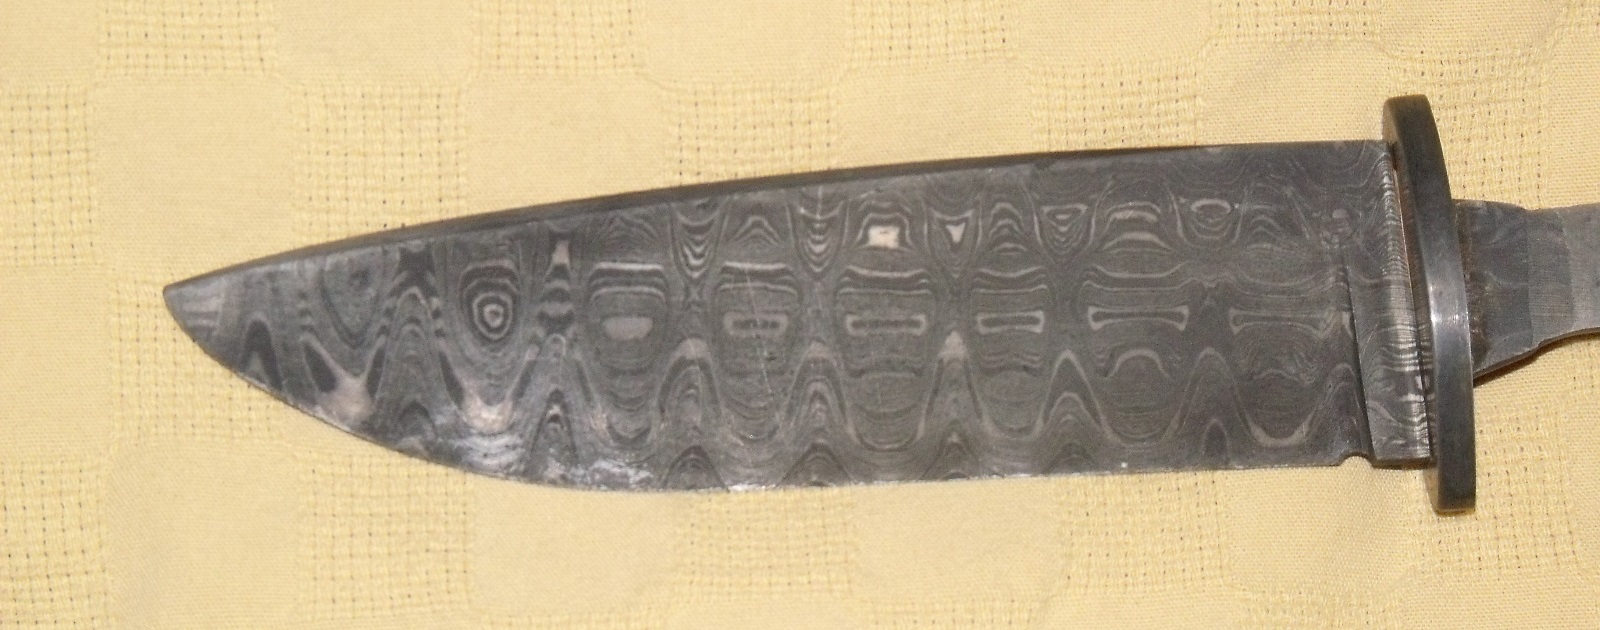
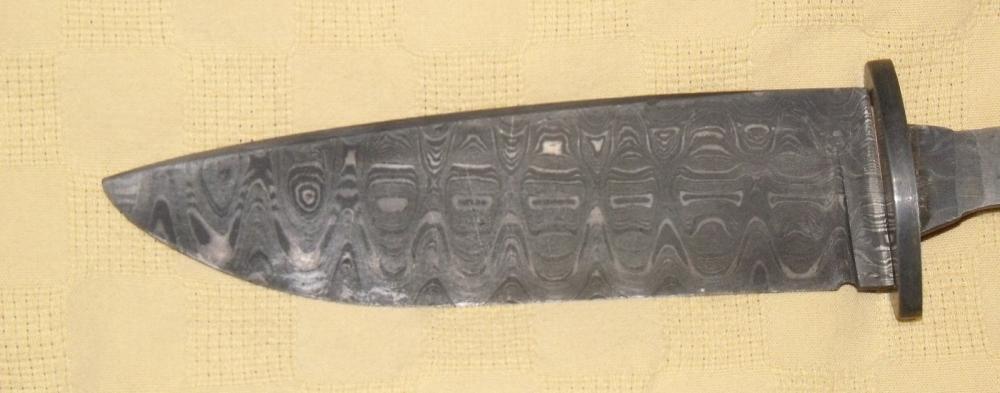
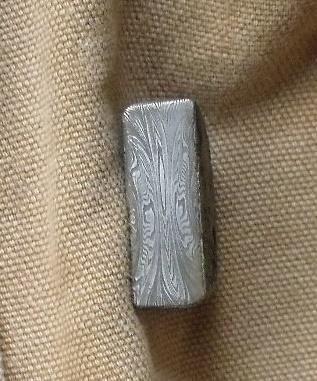
Hello all, hope the holiday season is treating you well. Not much of a WIP, sorry about that but with only 1/2 day a week in my shop/forge for the past 9 months.... Anyway, I'm making progress and am almost ready to glue on the handle and do final shaping, but have a question about final etching before gluing the grip on. I polished to a near mirror finish to 1000 grit, washed the blade, air dried then soaked in vinegar for about 6 hours while at work. Got home to a nice black blade, neutralized with baking soda, rinsed oxide off while rubbing with fingers under running water, and had a really dark, pattern like shown in the picture, only very uniform and not washed out at the tip. I wanted a sharp/bright contrast, so I gave each flat a few swipes with a hardened and polished block of 4140 and 2000 grit wet/dry paper. The pattern got really washed out and looked mottled and awful, so I re washed, re-etched for a few hours in the vinegar and after neutralizing and rinsing with mu fingers, here's where I am, afraid to go further and washing out the pattern again. Notice almost no etching on the guard and lack of black on the tip in the second picture. Any suggestions? Thank you

-
At risk of getting banned from this site.... My biggest pet peeve(s) are updates/changes to computer programs/websites that MAY "improve" the overall functions of the program but usually don't, but DO force the user to learn a new way to get the same result. as always peace and love billyO
-
Here's a link for those of you that want to help. Taken from the NWBA website. If this link is not allowed, my apologies to the moderators. link removed Given his long time support of us here at IFI we will allow this, all are case by case decisions with the owner.
-
I did it! My first time forge welding.
billyO replied to MarcyOHH's topic in Blacksmithing, General Discussion
she says as her life takes a slight turn down the road to Damascus......... -
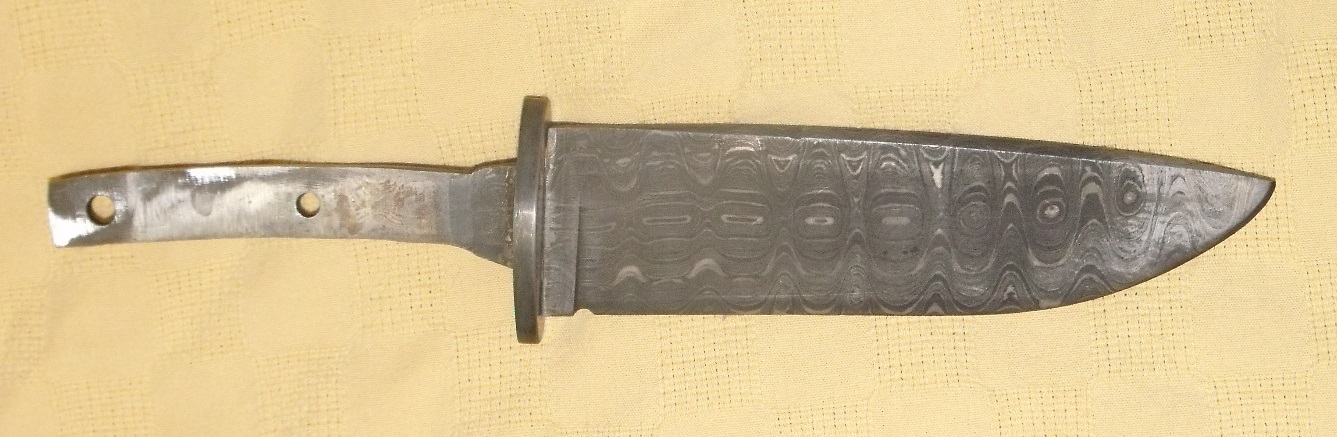
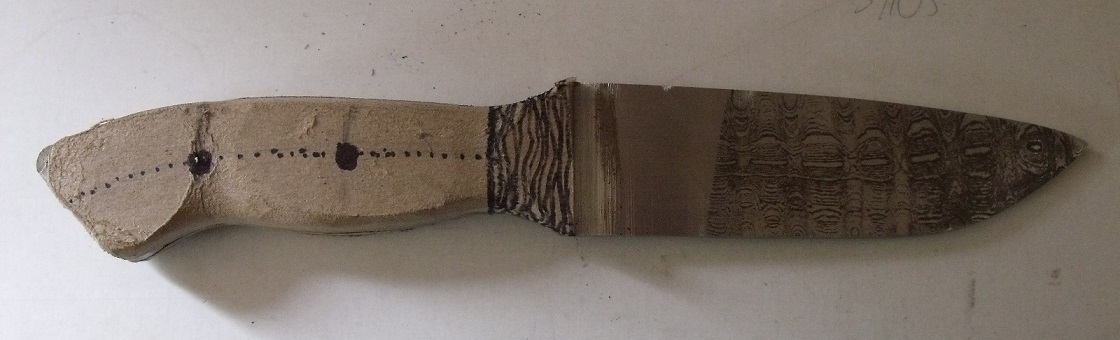
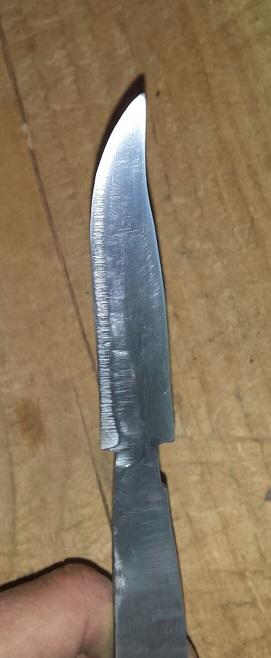
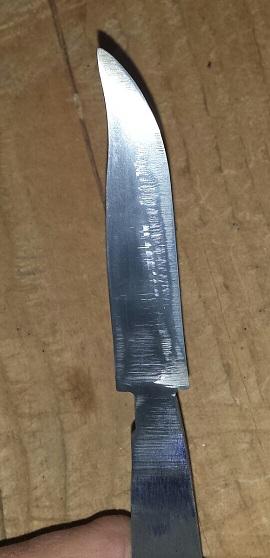
let's try this again, here's my progress to date Well, seeing as how I can post again, here's my progress to date. ground, filed sanded to 800 grit and quick etch. Not sure if I should go with the scales and a full tang, or should I use the little finger guard and a hidden tang using another piece of the same tree. What do you guys think?
-
forging 1/4 x 1 to 1/2 square isn't too difficult...
-
1/4 x what?
-
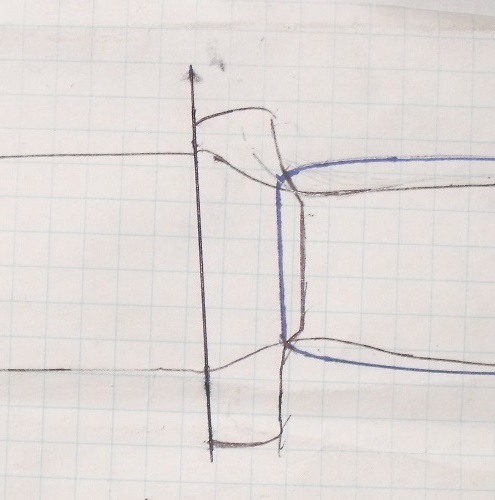
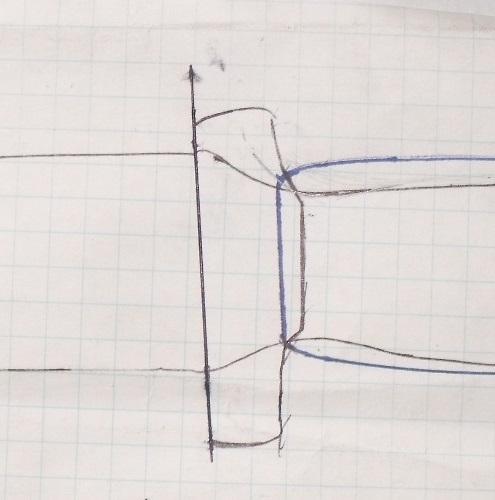
forbidden What the F?? I can type forbidden but nothing else??? hard to see, but there's a pencil line between the indicating the final grind pofile, the blue is the handle and the black is the finger guard Is it as simple as fitting the bolster to the tang, mill the scales to fit the bolster, fix to tang and grind to handle shape, taking extreme care at the very end to merge the 4 pieces properly?
-
...about this
-
Trying again

-
looks like I'm forbidden from updating... Very slow, sorry for that, but not much time these days...? Here's a pic of what I'm planning for handle shape and rivet positions. A couple questions/opinions/suggestions from the more experienced of you out there. Thanks in advance: 1. Does the pin placement look good and what color pin would you suggest to go with the Damascus and maple handle? (or should I go through the trouble to forge out some pins with the leftover Damascus stock? which would entail making another spring fuller but then I'd have another tool) 2. I was planning a full tang with the bolster, but after thinking
-
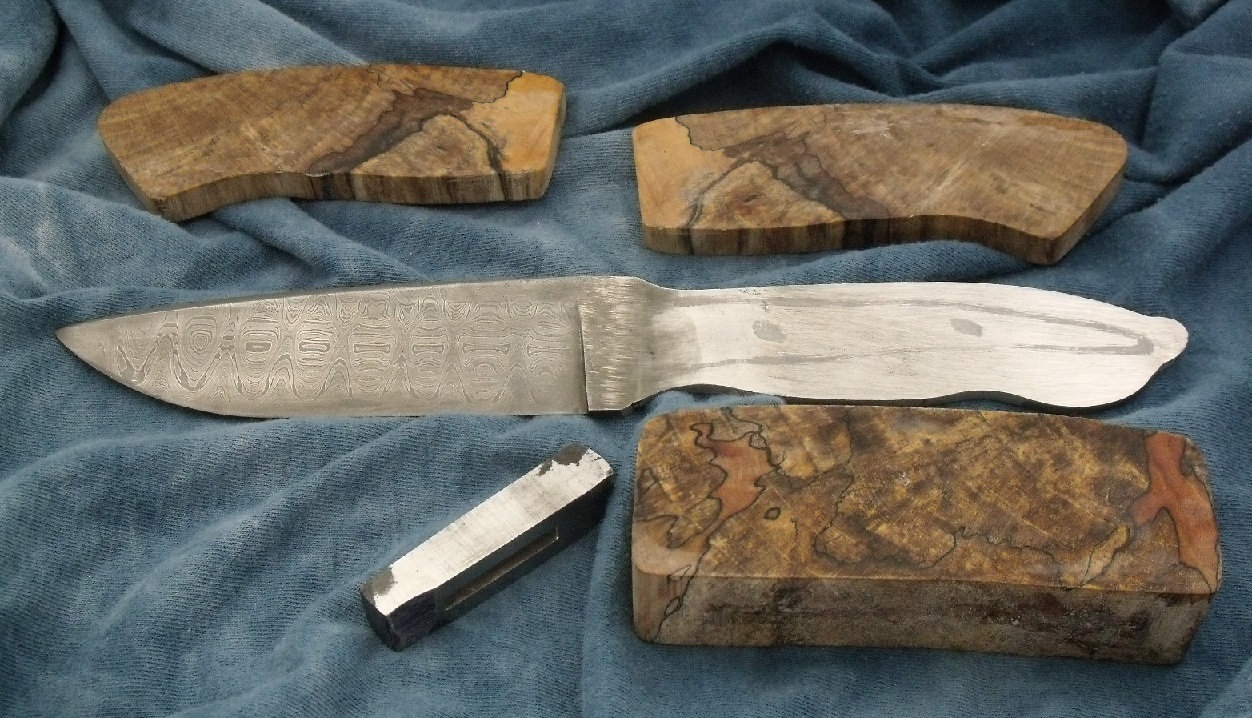
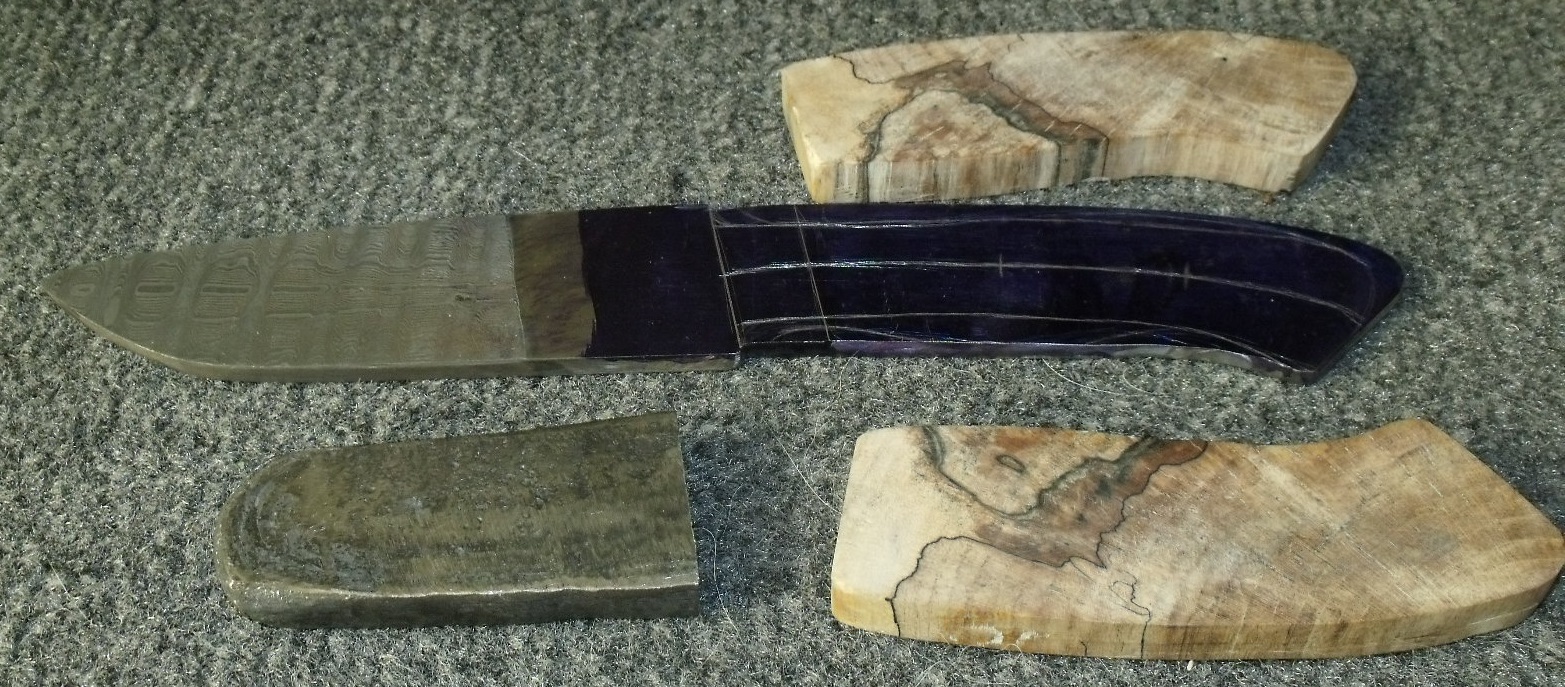
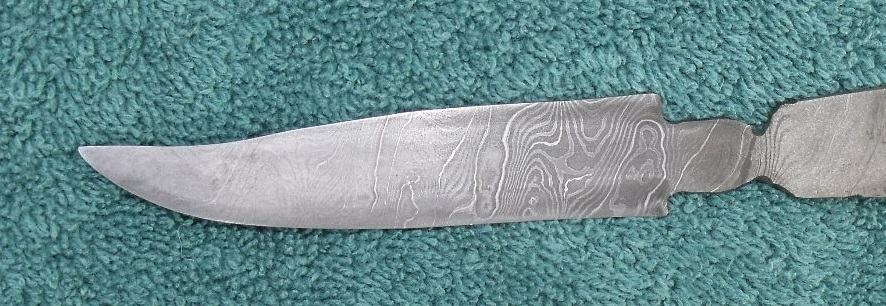
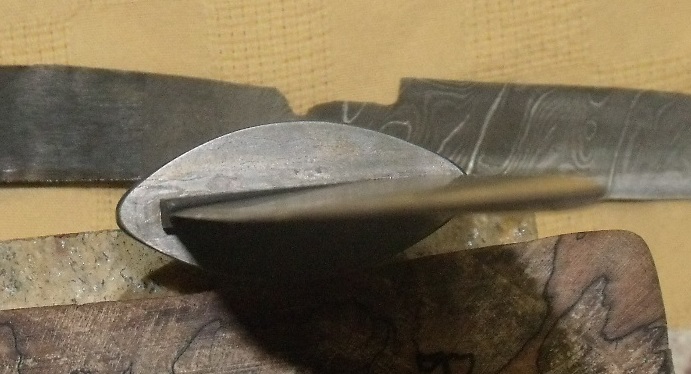
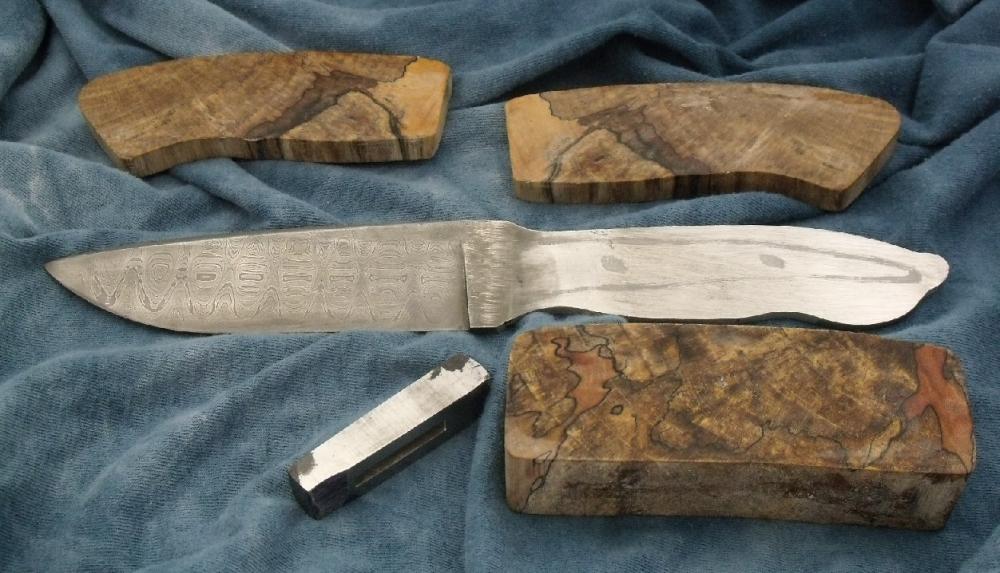
Hello all. Hopefully it's cooler where you are (I have no understanding of how you S.O.Bs (Sole Occupation Blacksmiths) work in the summer months, especially you guys and gals in the more equatorial climates....) Well, I thought I'd do what I do best and jump in with both feet and bite off more than I can chew....My new life gives me the ability to get into my forge on weekends, and so I thought that's e a good way to do a WIP. As this is only my 3rd blade/knife I may make some mistakes, but I can't learn if someone doesn't teach me, so feel free to add suggestions/corrections as needed. Here's pic of where I am at this point. The billet is 352 layers of 1095/15N20 with a ladder pattern with grooves cut in with an angle grinder. The chunk for the finger guard is the tip of the billet after the initial weld when I didn't pay close enough attention and tapered the billet. It's 22 layers, and I need to do a little forging to thicken the piece for the guard line scribed. The handle material is some spalted maple from one of my trees I took down about 6 years ago and had stabilized this spring by K&G.

-
Hi Larry, good to chat at the swap meet and glad to hear the summer's treating you well. (You didn't have to start this thread just to prove to me you're working on these...) Personally, I'm much more interested in speed than power, as most of what I want to do is Damascus billets, and would also want an up/down foot pedal. PS - pm sent
-
See you this weekend at the swap meet then???
-
ThorsHammer - You should check out Darryl Nelson's DVDs on animal heads. I've got 2 and they will teach you all the techniques you need to know to make any type of animal head, read or otherwise... Are you a member f the NWBA? If so you can check them out of the library.
-
My 2 cents...and what I was taught by 40+ year smiths when I purchased my first anvil a number of years ago was to take a flap disc lightly to the face and horn to smooth it as best as possible without taking too much metal off. If you don't hav a smooth surface, it'll be harder to tell if the marks on your work are from your hammer blows or from the anvil.
-
not very....or I move VERY slowly.... And as I think back, this billet may have been a combination of sawzall blades and various circular saw blades cut up to match.
-
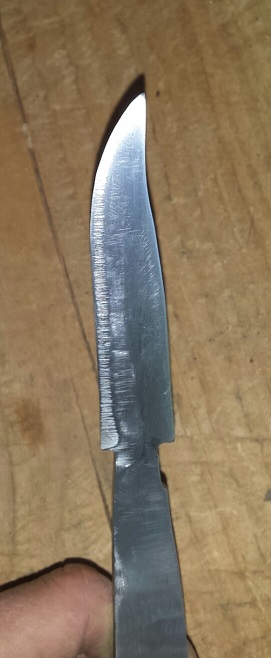
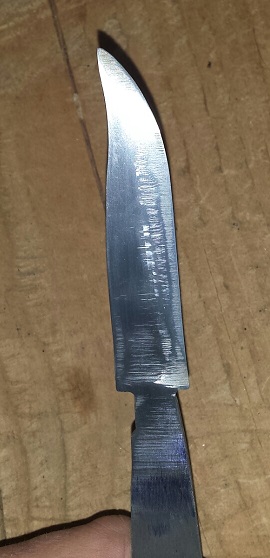
Hello all, hope the summer isn't causing any body parts to melt..... Too hot to fire up the forge, so thought I'd do a bit of grinding/filing/sanding. This is a replacement blade for an Opinel with a broken tip I've had for years. And, being impatient (although I justfy this step as an aid in looking for flaws...) Starting billet: 11 old sawzall blades (with teeth ground off). Folded 3 times (88 layers), twisted, flattened and grooves cut diagonally across the billet opposite to the twist. Quenched in hot oil, tempered at 450 for 1 1/2 hours. Hope I remember to finish this... as always peace and love billyO

-
Sounds like this is the consensus, and what I'd suggest as well.
-
Unfortunately, an AC machine. If I remember correctly, it was mainly used for welding aluminum???
-
Hello all, hope the end of spring finds everyone well. I imagine there are many variables that will effect the outcome, so here's what I did: Starting billet: 22 layers (alternating 6" long layers of .072 15N20 and .070 1095) clamped, handle welded on and one bead ran down the end of the billet. Forge welded, drew out, cut into 4 pieces, re-tacked and repeated 2 times to end up with 352(-) layers. BTW - all surfaces were ground clean before re-welding, and after the initial billet weld, I drew the tip out too much being the first time I've used my friend's 250# Chambersburg so had to lose 3" of material before the second weld. (Final billet size before final forge weld/drawing was approx. 5"x 1 1/2" x 2") Anyway, I ended up with a billet, 1 1/8" x 1/2" x 18". I cut off an inch of the tip polished and etched and the result wasn't what I expected, I took pictures and was going to ask what happened when I realized what I was seeing was most likely the 3 tack welds. I cut another 1/2" off and repeated the polishing/etching and am seeing the same strange pattern. I figured I should see pretty flat layers because all the work was done on the 5" x 7" flat dies, but there's a butterfly pattern. thanks I was planning on continuing to cut 1/4" slices off the end of the bar for another inch or so before cutting the grooves for a ladder pattern as per the original plan. Any ideas on how much of the tip I should plan on loosing due to the tack welds of the 4 pieces?
-
if you're willing to drive to the tide flats in Tacoma, Interwest Metals has a yard to walk through (at least a few months ago they still did).
-
I think that's a question the target would be emphasizing...