Frazer
-
Posts
1,403 -
Joined
-
Last visited
Content Type
Profiles
Forums
Articles
Gallery
Downloads
Events
Everything posted by Frazer
-

What did you do in the shop today?
Frazer replied to Mark Ling's topic in Blacksmithing, General Discussion
Pipe is measured on the ID so 3/4" schedule 40 pipe has an OD of 1.05". I used a similar set up when I was using a side blast forge and was somewhat surprised by how slowly it burned up. I was using 1" SCH-40 pipe, but after using it for a year(ish) maybe a half an inch had eroded away. So that 2' of pipe ought to last you quite a while. -
Quartz, if you have some pictures of the anvil you could share it may help others provide you with more information.
-
If you have a way to heat 88#s of steel evenly to critical temp and a large enough quench vessel to cool it fast enough then sure it's possible. I'm not sure it would be practical or economical, but you could do it. IF you had someone experienced enough with you to manage the affair. I certainly wouldn't be able to do it. If it's lost it's temper you're probably better off being patient and using an improvised anvil while you search for another. However, don't worry too much, it takes a lot of heat to cause an anvil to lose it's temper so unless it's been in a structural fire or something like that it will be fine.
-
I have a 151# Soderfors cast in 1920. Not a double horn like the one you're looking at though. I will say I love mine. Rebound is 90% and she rings like a church bell. I paid somewhere around $3.50 per lb, but it's difficult to say with certainty since I bought it with several other items. I would say the price is about right, maybe even a little less than what I would have to pay where I live. If it were me I would definitely take a look at it in person before buying, but if the rebound was good and I liked what I saw, then I'd jump all over that deal. She's a beauty, even with the dings. Soderfors are by and large very high quality anvils and from the picture that one doesn't appear to have been abused. Good luck!
-
I usually use 5/16" round for rivets. You could use 1/4" as well, but if you size your boss accordingly, 5/16ths will suit most of your tong making needs small or large. Well, what one might consider to be large is somewhat relative.. The largest pair I have is for holding 1" sq. and those are pinned together using 5/16ths. I recommend making yourself a rivet heading tool so you can peen one side of the rivet outside of the tongs. Then you can drop it in place while hot and finish the rivet. I use coil springs for all my punches (and chisels) since it's easy to find. Quench the last ~25% of the tool (the end that will be punching the hole) and temper to blue/purple. I don't see any reason why you couldn't use the body of one of your chisels to make a punch. However you would want to do some experimentation with heat treating that steel since it could be many different alloys. Heck, you could probably get by with a mild steel punch, but you will have to straighten/clean it up every couple holes, which is a pain. Your first pair of tongs will probably be better for picking things out of the fire than holding them while hammering. Especially if it's flat stock. Even after I made a few pairs I still used vice grips to hold things while I was hammering as they held better than what I could make at the time. I just wouldn't recommend holding round stock with vice grips. Sometimes it comes out and you end up with a large 3rd degree burn on your forearm... learned that one the hard way..
-
4140 is a little low in carbon for use in knives, so if you're doing to use it for damascus I wouldn't include it anywhere that will make up the your cutting edge. You also won't get much pattern when combined with 5160/6150. Out of curiosity, what are your 11 herbs and spices?
-
What did you do in the shop today?
Frazer replied to Mark Ling's topic in Blacksmithing, General Discussion
Rojo, looks good, I often will clean up the forge scale and file/grind in the profile, choil and start of the plunge grinds and before heat treatment. Makes the finishing work go a little faster. When you go that route, make sure you leave enough material behind for heat treatment (2-3mm behind the soon to be edge). Just a personal preference thing. -
What did you do in the shop today?
Frazer replied to Mark Ling's topic in Blacksmithing, General Discussion
Virusds, maybe, but I think you were right initially, It was probably from the quench, or was just left too hard after tempering and broke from hard(er) use than it could handle. I guess that is one of the nice things about making your own knives is if something goes wrong you can just make yourself a new one. A long as no one was hurt by the failure then no harm done, other than you lose the time you spent making it. Which in the grand scheme of things is no big deal. And you learn from the failure right? I don't know much about swordsmithing. In fact, I know next to nothing. But once you pick a style, see if there are any books you can rent or buy that give you all the critical dimensions you should be working to. When you make a sword there are a lot more things to consider than when making a knife. Weight, harmonics, balance, heat treatment, all become much more important. Plus if your knife breaks it's a bummer and you lose several hours of time, but if your sword breaks it becomes much more dangerous and you lose a hundred+ hours of work. -
I think it looks good! Use whatever works. After all it is just a stand. I still really like that anvil with it's narrow face.
-
Re-Etching a Damascus Blade Question
Frazer replied to GrumpyBiker's topic in Finish and Polish for Knives
I'm not sure whatever remains on the steel after it dries is enough to neutralize any meaningful amount of FC when it's immersed, but I see your point I suppose. I have used it in the past with no detriment to the finish, but let's just say acetone or a streak free cleaner then. -
Re-Etching a Damascus Blade Question
Frazer replied to GrumpyBiker's topic in Finish and Polish for Knives
To re-etch your knife, get the whole blade to the same wear level. Doesn't have to be perfect, but close enough that you don't end up with an uneven, blotchy finish at the end. The scrubbing side of a sponge is often enough to make things uniform. After that I would fix the rolled edge, but you could do that at the end if you prefer. Next, while wearing gloves (the oils on your hands may be left on the blade otherwise, resulting in an uneven etch) thoroughly clean the blade with acetone, glass cleaner, or anything that will strip any oils from the blade without leaving a residue. Then apply nail polish to the cutting edge and pivot area so they aren't damaged. Ferric is the most commonly used etchant, but a very very strong cup of instant coffee also works well. I have never used vinegar, but in my experience metal tends to rust pretty quickly after coming out of vinegar so I'm not sure I would recommend it. I have heard of people using mustard for etching and I'm guessing that is somewhat like using plain vinegar, but still, I'm not going to assume one way or the other. If you're using FC, leave the blade in there for 2-3 minutes and take a look. Different suppliers mix it at different concentrations or recommend diluting it before use so your etch time may vary, depending on the concentration, how deep of an etch you like and what steels were used in the blade. If the supplier recommends dilution, then follow their instructions as you can over do it. If you're using instant coffee it takes a lot longer sometimes ~30 minutes sometimes a couple hours to get it where you want it. After it comes out of the etch the darker steel will be very dark. For me, almost black. Neutralize in baking soda and water. Then I take a piece of very worn 2500 grit sandpaper and lightly wet sand the surface. I just do single pulls all in one direction so one area doesn't get sanded more than another. Disclaimer: Different companies use different steels that may have different processes. This is how I have always done my etch on damascus I have made using 1095 and 15N20, and once used on a fixed blade that I bought online. Your mileage may vary. -
What did you do in the shop today?
Frazer replied to Mark Ling's topic in Blacksmithing, General Discussion
Virusds, looks good! Hopefully this one works better for you. Out of curiosity, was the one that broke also made from a leaf spring? I'm just wondering if this might be an example of the often mentioned high cycle fatigue/micro-cracks that can be present in springs when you acquire them used. A sword? That sounds like quite the endeavor. What style do you have in mind? -
Is this 160# fisher anvil worth the asking price?
Frazer replied to Hines's topic in Anvils, Swage Blocks, and Mandrels
Good to see you got going on your journey! It's *mostly* downhill from there! I'm glad you found a section of rail you can use rather that working with that guy who was obviously just trying to make a buck, many people have done the same with good results. However, to get the best results out of you track, you will want to mount that piece vertically rather than horizontally like you have it. The extra mass under your hammer will make it much more efficient than it is in it's current state. You can also grind in features like a fuller or a cut off tool into the web or the feet of the rail Making it a multi-purpose anvil, which can be nice. No need to buy anything to do this, just take the stand you have and remove some of those pieces of wood you used to make your stand wide enough, and cut them to now make the working surface of the anvil tall enough. I realize that is poorly described, but Jealdi does something similar to what I am describing and posts a picture here. Tongs are a tough project for a beginner. Heck, they can be tough in general. But sometimes it is necessary to have a pair or two... or 20... laying around to hold things. My suggestion is to work with a piece of stock that is long enough for you to hold the cool end while you work the hot end. If you really need to hold something, a pair of vice grips are going to give you a much better grip than any flat jaw tong. They were actually made by a blacksmith for this purpose. If you really want to make your own tongs, rebar will work, but it's not going to be the best starting material. In my experience, rebar tends to split apart more readily than mild steel which can be very frustrating. It always happens right where you don't want it to. There is a also a lot of variation between not only different pieces of rebar, but even within different sections of the same piece. I generally avoid forging things out of rebar as I found I was fighting with with the material itself more than necessary. That being said if you're going to use it, you may want to forge the reigns round or hexagonal, so they feel a little nicer in your hand. You may also want to watch a few videos (JLPservicesinc, who you will see often on the forum, has a great video on making flat tongs with very few tools) or talk with someone that is more experienced (I know the latter is more challenging now given the current situation) about the process(es) for making your boss. The reason most tongs have a similar boss design is because it gives you the strength you need where you need it most. I'm really not trying to be critical, I think experimenting is one of the best ways to learn. I'm just offering my 2 cents, so take it for what it's worth to you. Finally, when using your top tools, your anvil should be set pretty close to a height where you can hold the end of your stock between your thighs. That way you have both hands free to hold and hammer comfortably. There are a few names for this technique, but it is very common among smiths in need of an extra hand. -
I will say she is a beauty. I love Swedish anvils. I have a Soderfors and she rings like a church bell. She has a few blemishes, but then again so do I. You learn how to work around them or use them as features over time.
-
There is a proven process to reface an anvil. However I think you will find that the cost and skills to do it properly may far outweigh the downsides of leaving the marks on the face. Glenn often recommends (wisely) to spend 2000 hours working on the anvil before deciding whether the "imperfections" are worth repairing or not.
-
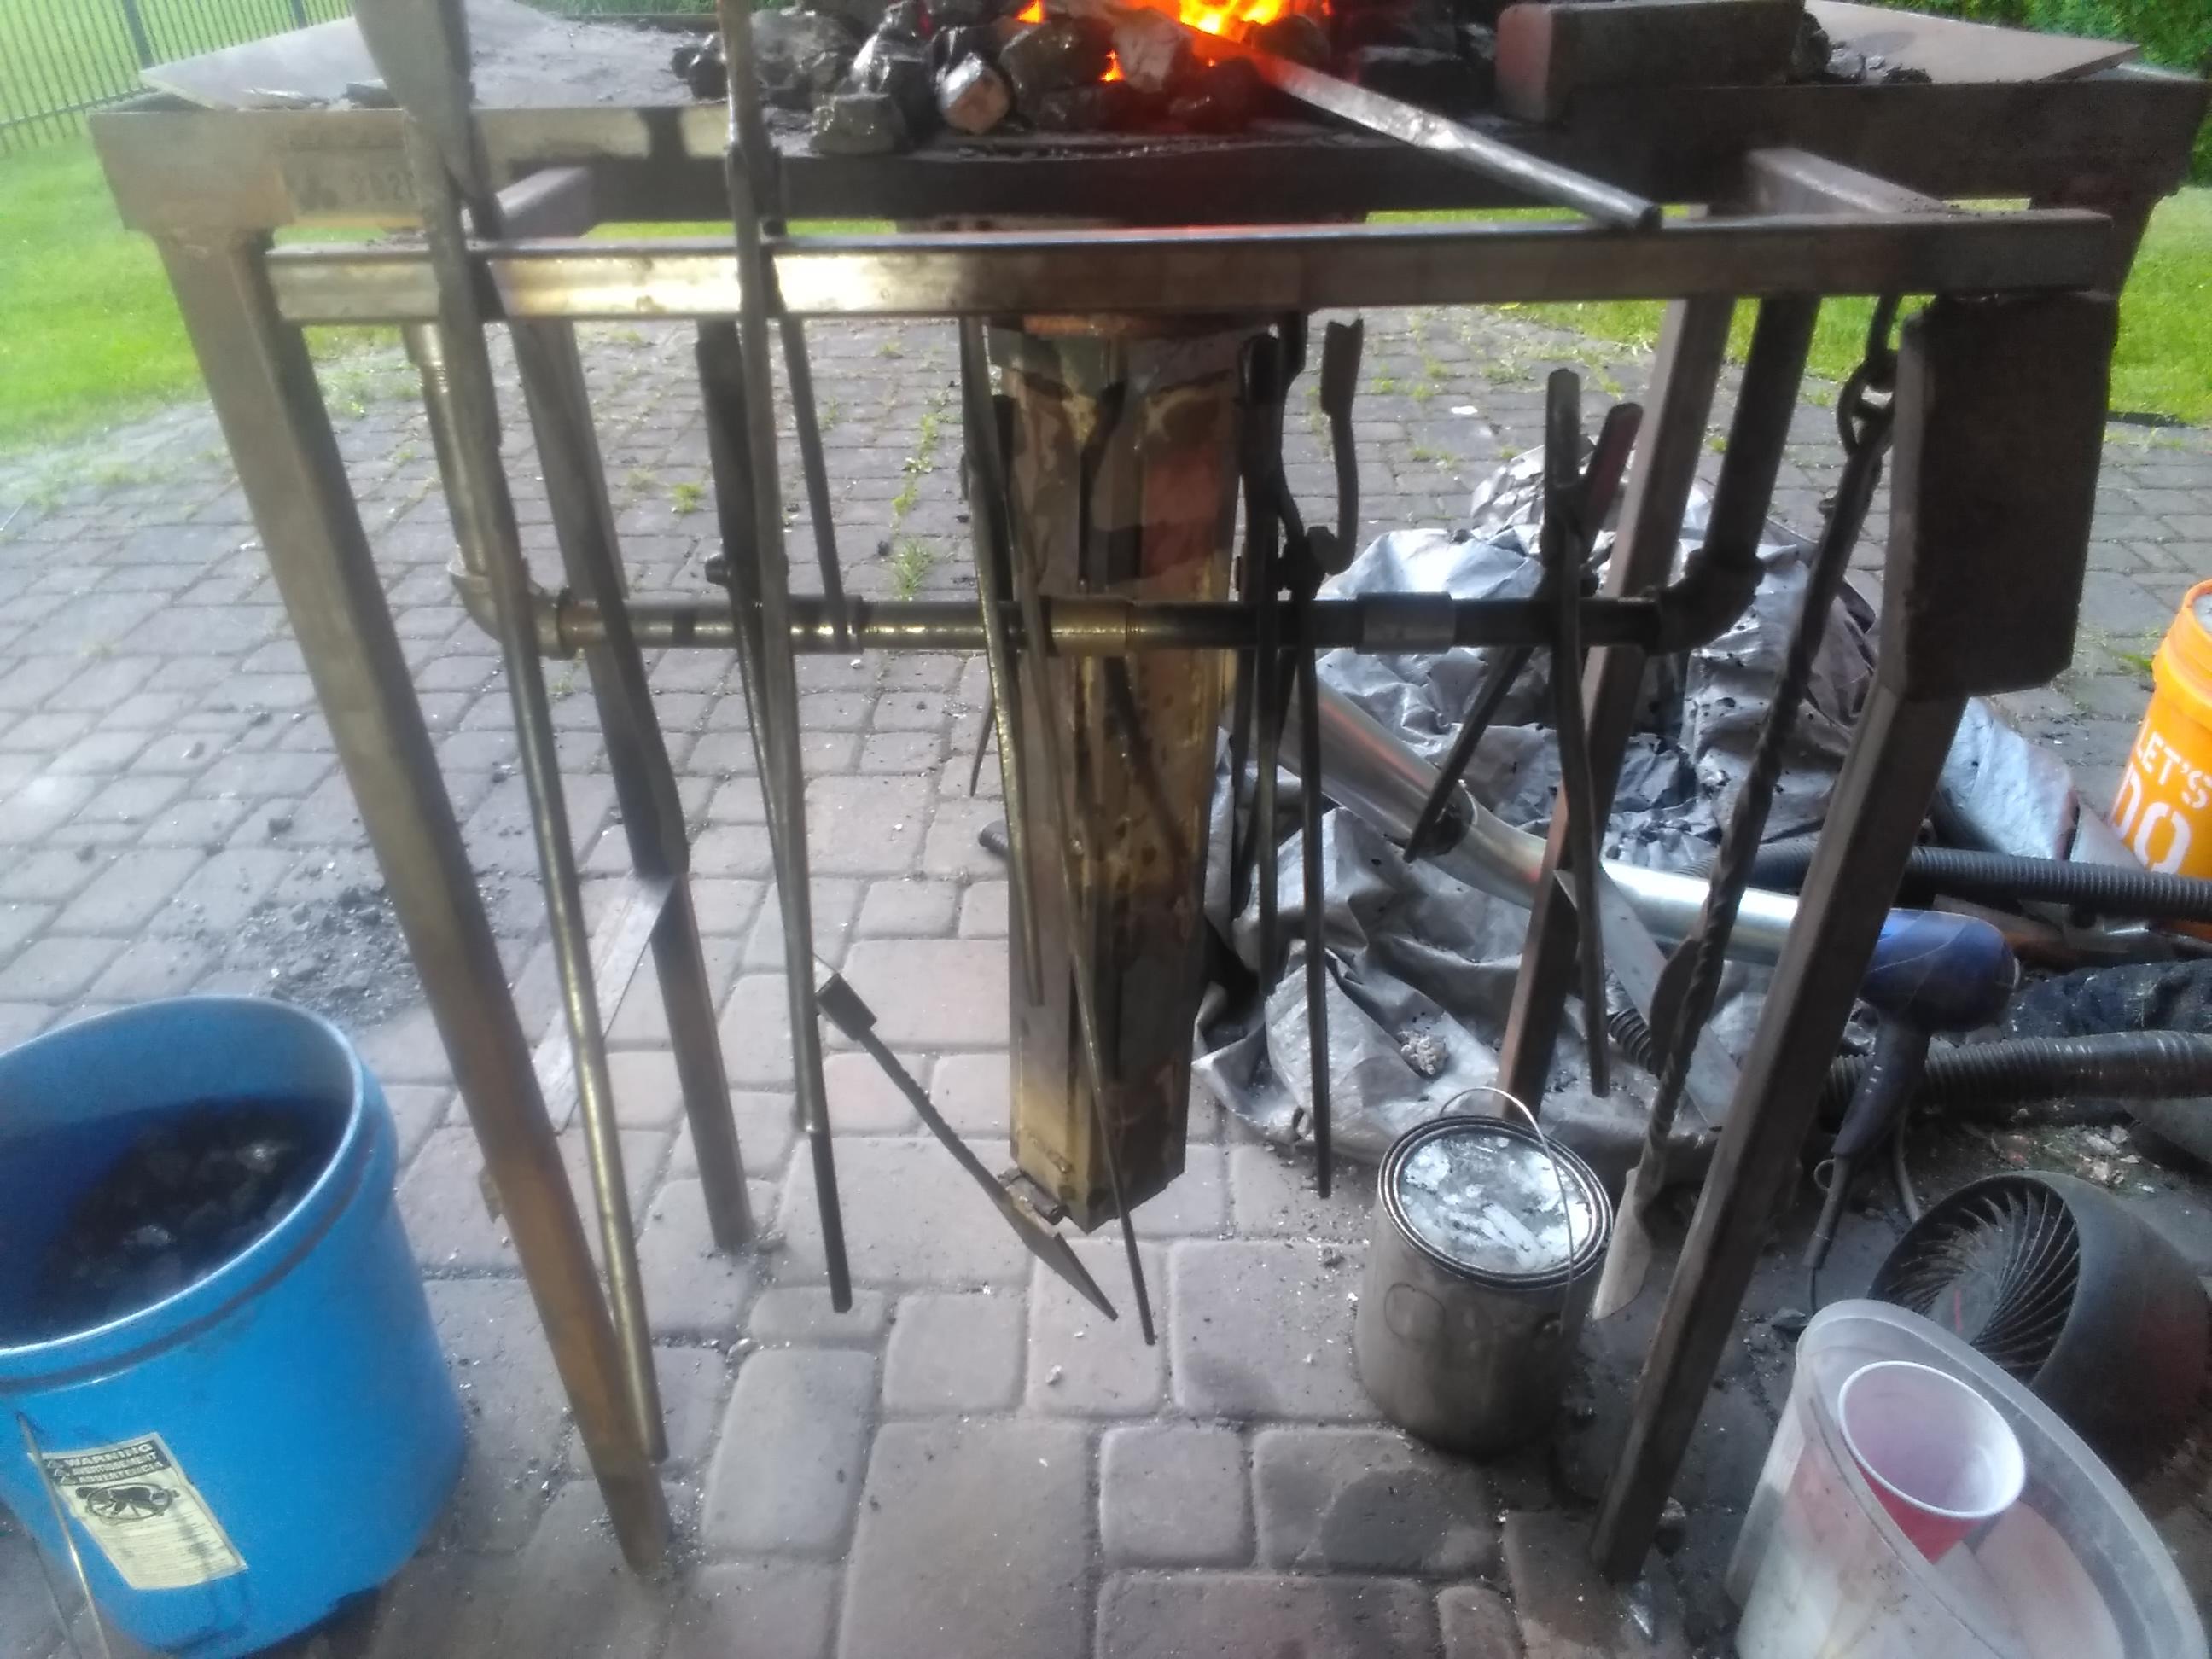
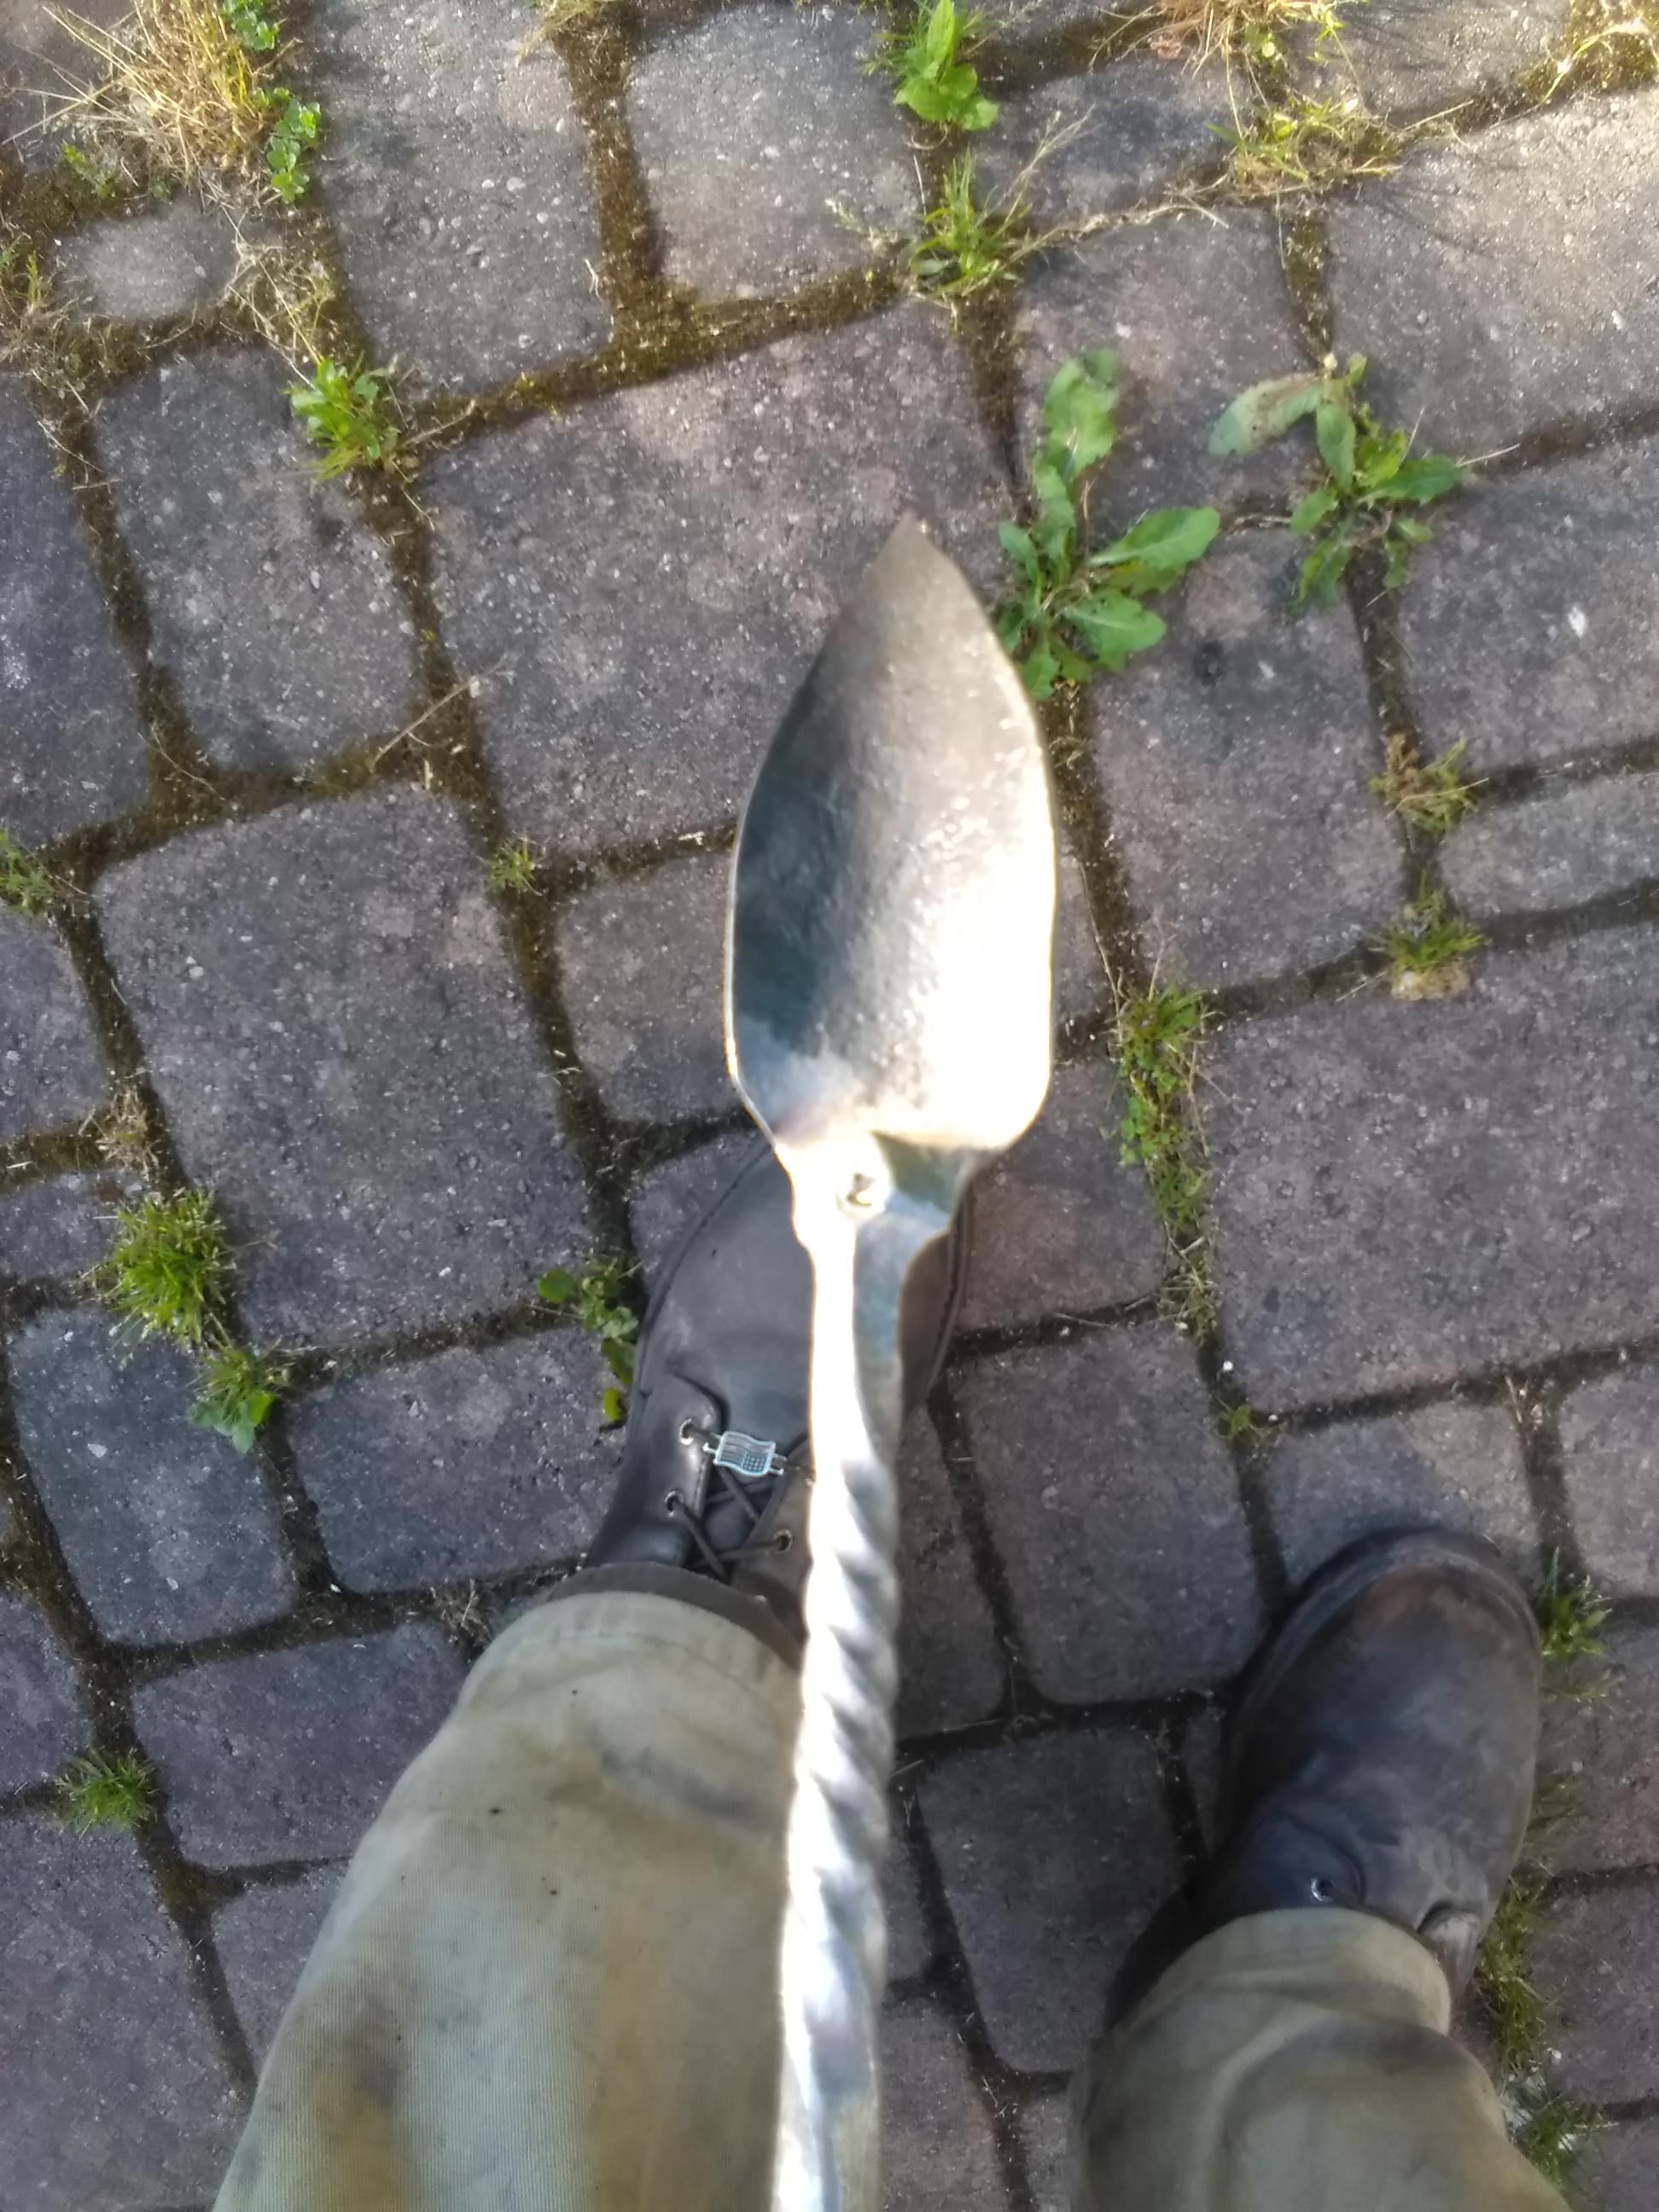
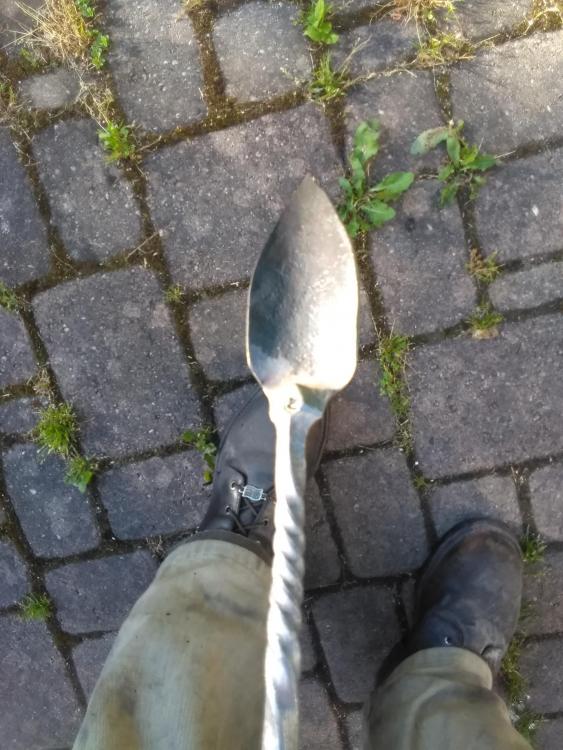
Wirerabbit, here is the forge shovel I use. I have a large one and a small one . Since you're using charcoal you may want yours to be less pointy and perhaps wider, since you'll be scooping ash rather than clinker, but this works well for me. They hang from a hook welded to the frame of my forge next to my tongs. Best way to make a tool for your particular setup is to make a few of them, and tweak your design along the way, it's okay to have a few of everything. Think about your space and how they fit into it. The easier it is for you to put your tools "where they belong", the more likely you are to find it when you need it.


-
Thanks for the pictures. The face and edges of the Fisher look to be in much better condition than the Vulcan. I'm guessing the edges on the Vulcan chipped so much due to them being so sharp. Not a deal breaker by any means, there is still plenty of good edge there to work with, but if you were to go with that one you may want to add a little bit more of a radius on there. Both to reduce the potential for chipping and because a radiused corner is useful for some knives. An integral bolster for example. Looks like both have been cleaned up with a flapper disc or something similar, not a huge deal, but I have read that Vulcans have a thinner top plate than anvils from other makers, but it doesn't look like they went too crazy with the grinding. For my money I would probably go with the Fisher for a couple reasons. One, the face is much smoother, those dings on the face of the Vulcan will be translate over to your knives and lead to extra grinding time to remove them. Two, the edges are in better shape and won't need to be cleaned up. Three, it has better rebound which will make you work more efficiently. The only thing the Vulcan has on the Fisher is weight. But for knives, I think 120 #s will be more than enough, especially with a nice heavy stand. If you planned on beating on the anvil with a 5# sledge all day, then maybe the Vulcan would be a better choice. Just my 2 cents, I don't claim to be an anvil expert by any stretch of the imagination. How about you, do you have a preference? Does one speak to you more than the other? I know when I saw mine I was immediately drawn to it. Anvils are, for many that use them, a long term purchase. Sure it's just a big block of steel. But it's YOUR big block of steel! It's best if you like it yourself. -Brady P.S. have you read the info in the "Read This First" tab at the top of every page? It's full of information to help you get the most out of the site. One such item is to add your general location to your profile. You may find there are other smiths near you that you can connect with. It will also play a part in what the "reasonable" prices might be for those anvils, as often price is relative to where you are in the world. *Edit - Sorry, I missed the part where you said you picked up both. I think that was a good idea. Now you have one for your lighter work, and another for beating on! Good luck and looking forward to seeing what you make with them!
-
Would you happen to have any pictures of the two? You might receive more input if one can see what you're looking at. Or at the least, more informed input. This is a bit like saying you have a Toyota Camry and a Honda Civic that appear to have about the same mileage, but one gets better miles per gallon. Which should I buy?
-
How to get started black smithing ?
Frazer replied to Jacob1's topic in Blacksmithing, General Discussion
Unfortunately no scrapyard around me accepts or stores any steel that comes from a railroad (to discourage scrappers from just walking the track picking up anything thy can get their hands on I imagine). The RR company uses specific yards for disposal so the availability is going to be regional. I know around me there is a "Rails to Trails" program where they tear out old track and pile it up for scrap to make way for walking trails. That's where my heap of spikes came from, with permission. If VA has something similar then you may be able to save a small piece of track for yourself. Heck, you could probably save a 10' piece if you wanted to and asked the right person. Unfortunately, a short length of track (10-24") isn't something you just find laying around very often in my experience and the RR company doesn't really appreciate one's attempting to free a piece from.. well anywhere with a hacksaw.. or an angle grinder or whatever. Of course when all else fails there is always ebay. If you don't mind spending 50x (or more) the scrap price... There are also a great number of other large pieces of steel you can find that will serve you well if the track is too difficult/expensive to acquire. -
"Measure with a yard stick, Cut it with an Axe, Heat it and Beat it, until it fits perfectly. the Blacksmith Poem." -swedefiddle
-
How to get started black smithing ?
Frazer replied to Jacob1's topic in Blacksmithing, General Discussion
Depends... Yes you can, my first pair i made with rebar. However, IMO, it's not great for tongs. I'm not really a fan of forging anything out of rebar. I find it to be a very heterogeneous material, even one piece can have sections that forge differently than others. Let alone different pieces. I also found it tends to split apart more readily than other steels, which is not a good thing, especially when it splits right around the boss. Mild steel is going to save you a lot of unnecessary fighting with your material... TP, again beating me to the send button haha -
Agreed, after forging stainless you have to passivate it to restore it's bright appearance and corrosion resistance. Citric acid or nitric acid can be used for this. You can also buy passivation fluid that is made specifically for this purpose.
-
The 153 pounds comes from the hundred weight system where the 1+1+13 weighs 112+28+13=153 pounds. It probably weighs slightly less now, but it's close enough. As far as any further information I don't have much else to offer. Regardless, looks like she's seen some heavy use over time, but she'll probably still outlive me.
-
What did you do in the shop today?
Frazer replied to Mark Ling's topic in Blacksmithing, General Discussion
Buzzkill, there are actually several things I can think of using the rest of it for. I'm glad I decided to try forging the head. What would the square tubing be for? The shank of the hardy? There is plenty of material to forge that. Apologies if I am misunderstanding. -
I believe I will try to make a steel faced WI hammer
Frazer replied to Donal Harris's topic in Hand Hammers
Should leave a nice scar as a reminder not to reopen past wounds! Super glue and/or butterfly bandages and/or some neosporin and a few days off and you'll be good to go! (Disclaimer, I'm not a doctor). I can however say that things heal much faster when allowed to heal. But of course we all know that... At least this can be a good lesson to others to sharpen your knives last. Less risk of it slipping and cutting things it isn't supposed to.. Regardless, hope it heals up soon and you can get back at the hammer!