Frazer
-
Posts
1,403 -
Joined
-
Last visited
Content Type
Profiles
Forums
Articles
Gallery
Downloads
Events
Everything posted by Frazer
-
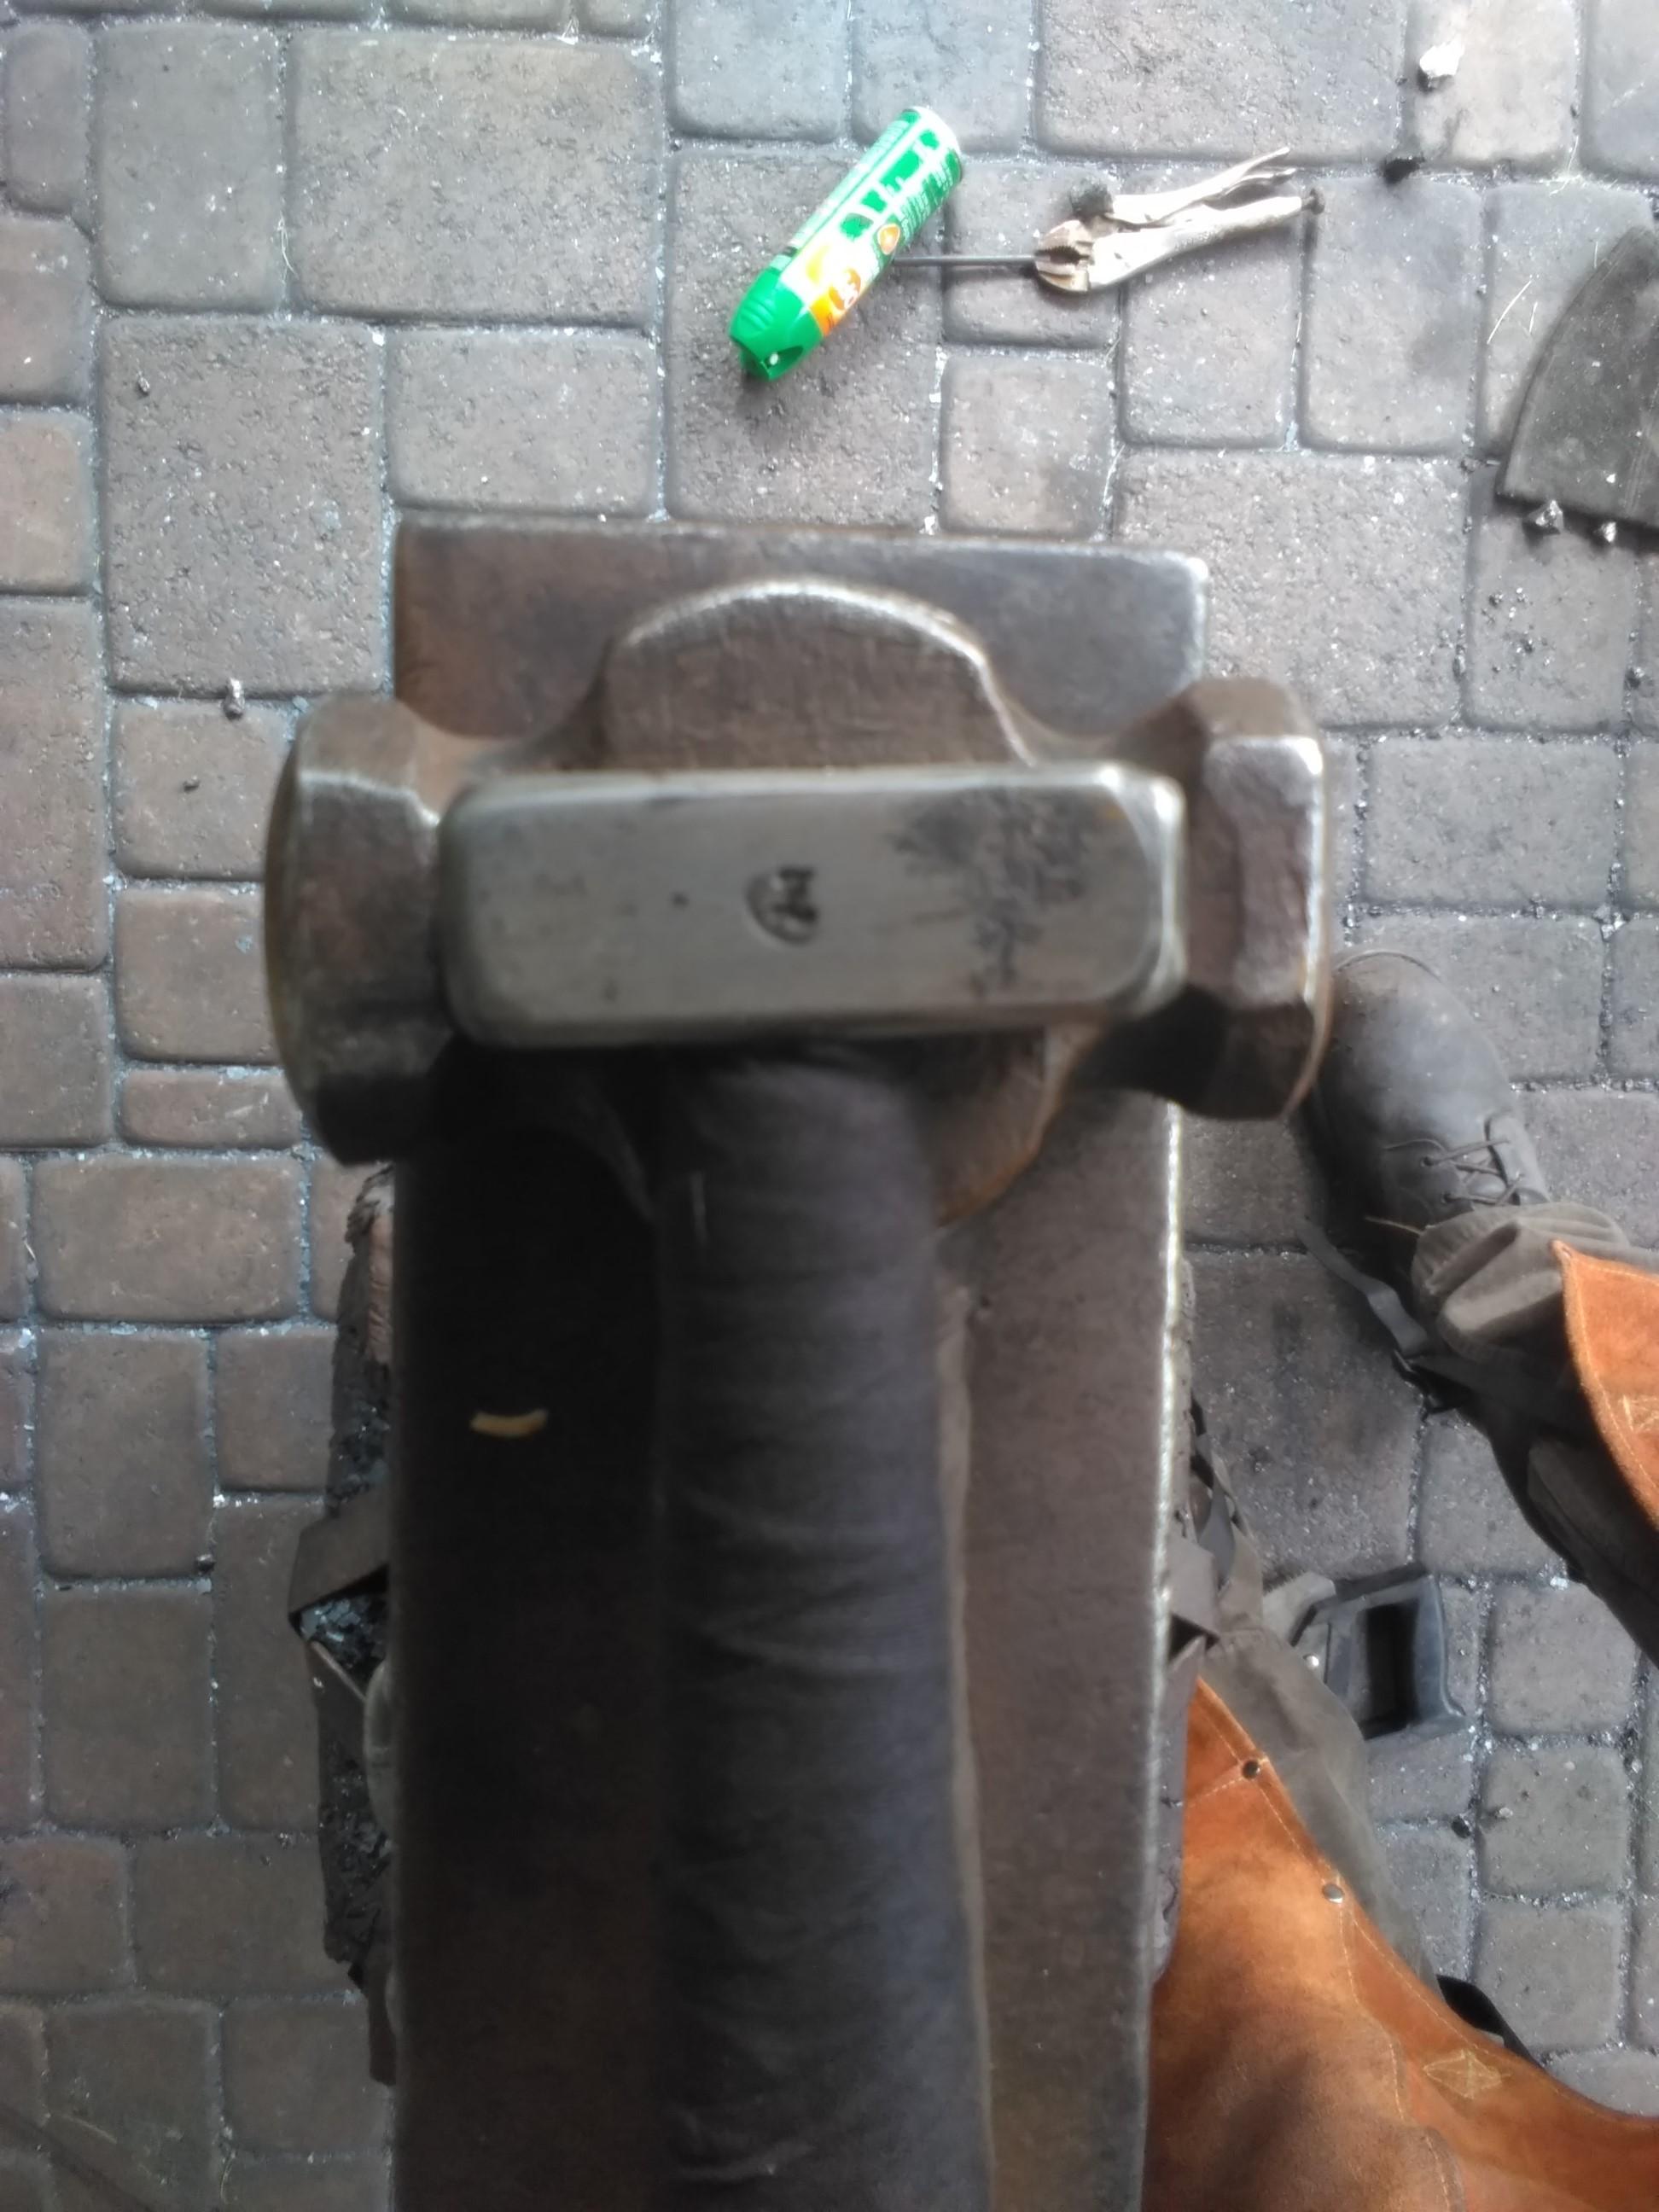
Marcus, Wrought is a lot of fun to forge, even more fun to weld. It's like butter. You just have to keep it hot,and for the most part keep your heavy forging on the face of the anvil so the whole piece is supported. It doesn't like to be sheared across the grain so to speak which makes it easy to split, but also means it punches easily, that plug drops right out when you want it to. Great for hooks and anything with holes for mounting or joining or whatever. Not great to draw out thin in my experience, but I'm sure others do this just fine. I wish I had more of it than I do. TP, my go to hammer for general forging is the 3# in the picture, but my 2# cross peen and 1.5# ball peen see a lot of use as well. The plan for this one was to be a little bigger than it is, but smaller than my ball peen for the lighter work I have been doing a lot of lately. Like you both said another way, there is no need to use a heavier hammer than the work requires, if you're holding back the hammer while you swing, you're probably using too heavy of a hammer. Something I think everyone is guilty of from time to time. Maybe I'll find more uses for this little guy as have it longer. Frosty, according to the kitchen scale it weighs 7.375 oz, but the handle is anything but whippy.
-
It definitely looks a little silly on top of the 14" handle. I probably should have selected/shaped the handle to be smaller to match. A can't really make the eye any smaller, but the handle may be something I address down the line. I'm currently using it to make the points on the corkscrews I have been working on, and for rounding out some of the length of the screw. It's so light it really isn't useful for much besides real thin ~1/8" round. And even then maybe I'm a little biased when declaring it's useful at all
-
I made a slot punch that tapered into an oval drift so I could do the whole eye with one tool. Punched the slot from both sides, then drifted it open. It took quite a few heats to do since I was worried about it splitting, but it went smooth enough and the amount of material lost to the plug was negligible.
-
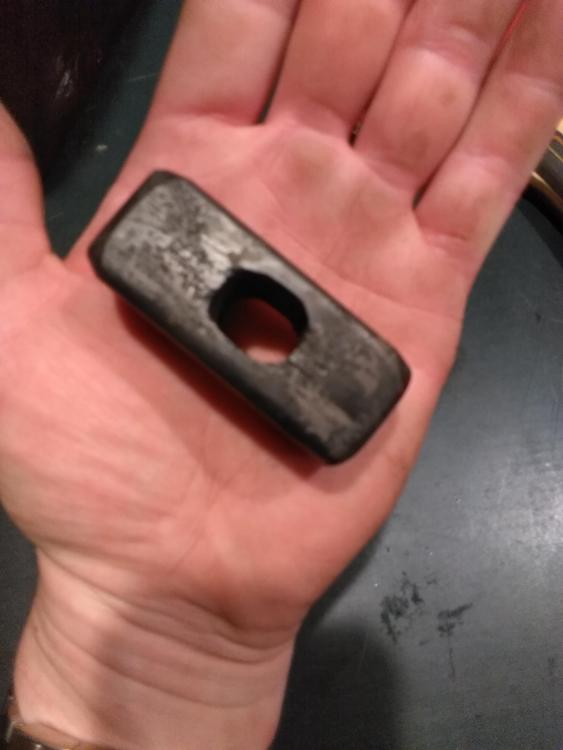
I made my first hammer. It looks somewhat ridiculous being so tiny, but it's still pretty cool and I would call it a successful endeavor. It weighs about 1/2 lb and was made by forge welding 3 and a half WI RR spikes into a billet and adding a 1/4" HC steel face on the striking side. I expected it to weigh closer to a pound when all was said and done considering how much WI I started with, but after welding the head of each spike back into the shank, I refined each piece by folding it over and welding it back into itself, and I guess I lost more material to scale and general clean-up than I anticipated. Still, it was kind of a fun side project. If I were to do it again I probably would have done it more like a dogs head hammer with the hole punched further back and added an extra spike to increase the mass. I love the seamless welds you get with WI. It's just a fun material. Here it is next to my 3# rounding hammer for size comparison. It's so tiny!


-
Very nice! One thing I like to do is take a round punch a little over-sized for the hole and add a countersink. While not necessary it's just a nice little touch to have the screw mount flush. Still, they look real nice.
-
Even, welcome aboard. That's quite the first post. Keep in mind this thread has't has any responses since 2006. Times, opinions, people, etc. change a lot in 14 years. This is a place for smiths to share their knowledge, ideas and work with each other in civil discussion. I assure you that many of us respect the air that that keeps the forges running and the Earth that gives us the materials we use, but like any community there is a spectrum of opinions on everything and we try to avoid heated debates about "hot button" issues unless they are blacksmithing/metalwork related. In which case civil debate is welcome. Anyway, since this appears to be a topic you are very passionate about, what build did you go with for your eco forge and how has it been working for you? If you could share some pictures maybe we could take a look. We like pictures. xxxxxxxxxxxxxxxxxxxxxxxxx xxxxxxxxxxxxxxxxxxxxxxxx
-
I agree, I have even seen people light their forge by hammering cold steel hot enough to ignite some paper. Conservation of energy at work. A real joule. I like that trick with the clothes iron. Winters in NY can be a pretty cold and preheating the anvil takes a long time. Working on a cold anvil when the shop is 10 degrees? Talk about metal cooling fast.. Granted this probably isn't much of an issue in NM or TX, but in sure you have worked in similar environments TP.
-
You'll get the hang of it. Getting it hotter will help, just make sure you don't turn your piece into a little sparkler! I think Irondragon's advice about planning out what you're going to do next is a good one. Those few seconds of "uhhhh where is my tool?" or "Where am I supposed to hit?" are important to get the most out of every heat. Of course I still do that all the time. Mostly the first one, but still. We all do it, just less and less as you go. The thing about youtube is people make things look so easy. Just do this, this and this and look it's perfect! What you don't see is the 1000 times they have done it before and all the mistakes/questions they had along the way. I too decided to start blacksmithing about a year and a half ago (I thought I wanted to make knives) by falling down that YouTube rabbit hole. I know it's tough right now, but when you can I highly suggest taking a few classes if they're available near you or to stop by a meet. Technique is something you'll learn by spending time at the anvil, but you learn much faster if someone is there to teach you the fundamentals in person.
-

What did you do in the shop today?
Frazer replied to Mark Ling's topic in Blacksmithing, General Discussion
Bleu, I have something that looks very similar to that! It lives in my box of things I made when I first started. Frosty's leaf procedure is spot on and better than I could have described it. The more of them you make the better they'll get. I think adding a little more of a radius on the edge of your anvil will help make those isolations for leaf itself. If they're too sharp you end up with a real flat looking bottom of the leaf, which is a little tough to fix after the fact. I also like to use a rounding hammer to widen out the leaf in specific areas if it's looking a little uneven, then use the flat side of the hammer for planishing. Leaves are a handy little addition to give things a finished look. Most of the fire pokers I make with a twisted handle, I add a leaf at the end of the twist. There are lots of places where you could throw one in, so keep it up. It's funny how when you start out you think you need a heavy hammer, my first one was 4 pounds and purchased at the hardware store. It did'n't take long to realize that was way more than I needed. Now my favorite hammers are my 3# square circle rounding hammer and my 2# cross peen. Aus, That's a nice looking set! I like the idea of the marshmallow roaster in there. I'm sure that'll get a lot of good use. -
The problem with cameras is that they have a tendency to misrepresent heat depending on the ambient lighting and the particular CCD in use. So what looks like white hot on camera in a dim/"normally" lit shop is actually a bright orange/yellow heat to your eye. Similarly, what looks like black heat to the eye may look like a dull red on camera. Unless your shop is set up in a location where the ambient light is the same as where the video was filmed and your eye processes that light the same way that camera does, then the temperature is going to look different to you in real life than it will on any screen. That being said, minimizing the surface area of your piece that is in direct contact with the face of the anvil will result in less heat being drawn out. This is especially the case with thin cross-sections (ie. the stem of a small leaf) which are going to cool down much faster. Another thing to consider is experienced smiths generally move material much more efficiently than someone who is still figuring things out. Every time you swing your hammer your are transferring the energy of the motion of your hammer into moving the molecules/grains/crystalline structure (however you want to think of it) of the steel. These particles don't want to move and so there is internal friction within the steel itself, which generates heat. This keeps your leaf (or whatever the case may be) hotter for longer. That is to say by working the material harder/faster (with proper form) you can also keep it hotter for longer. Points number 1 & 2 are generally made easier by doing half face blows. ..... Rereading your question it seems to drift from one thing to another.. is the problem that your material isn't staying hot or that it isn't getting hot in the first place?
-
It would be beneficial for you to take inventory, so to speak, of the space you have available to you. A space which you know better than any of us do, and better than your model is able to portray to my perhaps simple mind when I have to consider trees and a porch etc. I think setting yourself up where the bench, anvil stand/improvised hardie and forge stands are independent will give you the most effective use of limited space (since you can arrange them around you rather than in a straight line) and the most flexibility to move things around as you see fit down the line. I feel obligated to ask, what kind of forge do you have and what size is it? Did you have a shop set up in another location and are moving it or is this the first time you're getting going? If this is your first time then I'm glad to see you taking the time to plan it out. I only recommend setting yourself up in such a way that things can move around since, in my comparatively short time blacksmithing, I have moved the shop to a new location once and have reorganized it several times. Moving existing items around to place new ones in the most convenient places. It's just something to think about. Best to leave things as mobile as possible before you lock them in a specific orientation to one another.
-
You may want to reread the section on unnecessary/excessive use of quotes. Generally speaking you don't need to quote something that was said in the previous post. If there is a specific part of a persons comment that you're looking to respond to, you can highlight that part with your mouse and click that little "Quote selection" box that appears. I'm not trying to pile on, it just reduces clutter and time spent rereading the same comment multiple times. Whether you're using solid fuel or gas, I would be very hesitant to put my forge on a wooden surface like you propose. Like George said the forge and everything around it gets very hot and you will want to situate it were it will be a comfortable distance from you when you're working and with some sort of barrier between the bottom of the forge and the tabletop. Although I would recommend, if space is a concern, making the table smaller and having the forge as a standalone item not on the bench itself. If you're going to add a hardie hole to the table in it's current location, you will want to reinforce that area with an additional foot directly underneath the hole to support your hammer blows. If that area isn't rigid, much of your force will be absorbed by the table flexing under your tool. I too am unable to understand what the purpose of that structure that extends out beyond the one leg you show. Is that for your anvil? If so are you planning to mount it? Vvertically or horizontally? "All the free stuff is gone within an hour here" is quite an absurd statement. No one in your family/your friends/your friends family has something (it doesn't have to be a propane grill exactly) that may be able to serve the purpose T.P describes? There is no scrapyard or junkyard within an hour of you that you might be able to find some still useful materials at? It's really easy to get tunnel vision and think "this is the only way it can be done, and to do it I need to buy it brand new".
-
I always use several coats of polyurethane. It's durable, brings out the natural color of the wood and gets a nice glassy finish if sanded well between coats. The grip probably wouldn't be suitable for work at the vaseline factory, but I've never had any issues if the handle itself is contoured to fit your hand. You definitely want to seal the wood though. I often use my knives for food, which means they get cleaned with a water and sponge. If the unsealed handle gets wet, the wood will swell and contract again as it dries so wont hold up long term.
-
Yep, RIT is ~25 minutes from me. I would've gone there for college but I ended up going to Clarkson to get a little further from home. I took apart a hairdryer the other night to better answer your question and the one I took apart had a little permanent magnet DC motor in it. It was pretty simple, just a switch, the heater coils and a full bridge rectifier at the input to the motor. There was not a capacitor at the output of the rectifier, so what the motor is seeing is a bumpy DC voltage. But a DC motor doesn't really care. Some of the high end professional hairdryers use an AC motor, but most of the cheap ones are going to be set up more or less the same as the one I took apart. If you want to control the speed of the motor, PWM (pulse width modulation) is the easiest way to do it. There is a lot of info out there on that topic. You can't, well I suppose you could, but you shouldn't just use something like a potentiometer to change the speed of the motor. In a nutshell, voltage=speed, amps=torque, if you reduce the speed of the motor with a pot, you are also lowering the torque which will likely cause problems. You may as well just keep the fan and the housing since it has already been engineered for that little motor and it's one less thing to think about. I use a hairdryer for my forge, but I use mechanical methods to adjust the air since I find it easier to do, but to each their own.
-
Identifying my great grandfathers anvil
Frazer replied to Philip Crothers's topic in Anvils, Swage Blocks, and Mandrels
When you create a post, you should be able to either drag your image files into your text area or click the "choose files..." hyperlink at the bottom of the message box. If you put your location in your profile you may be surprised how many smiths live in your area that may be able to help. Have you read the "Read This First" tab located in the banner at the top of every page? That information will help you get the most out of the site and stay out of the crosshairs of the mods and admins. Welcome aboard, glad to have you! -
A light weight and mobile side blast forge without water jacket?
Frazer replied to DennisCA's topic in Solid Fuel Forges
My first two forge builds both used a Weber grill as the body, similar to the thumbnail on the video. My first attempt was a bottom blast, but I had major issues with the tuyere clogging up (I used 3/4" black iron pipe, bad choice) and with the sides being too tall to put long pieces in the fire. For version two I found a larger grill and that time I used the lid rather than the lower part. I also added some ball valves to adjust the air flow. It was a little ugly, but I used that thing for a long time before I upgraded to the bottom blast I'm using now (details on that build here https://www.iforgeiron.com/topic/27046-show-me-your-forge/page/21/), but I don't think you will want to use that design since you said you'll be using charcoal. I'll just say the side blast BBQ option worked for me, but I liked the shallow lid better than the deeper grill section. Yours could certainly look much better than mine did.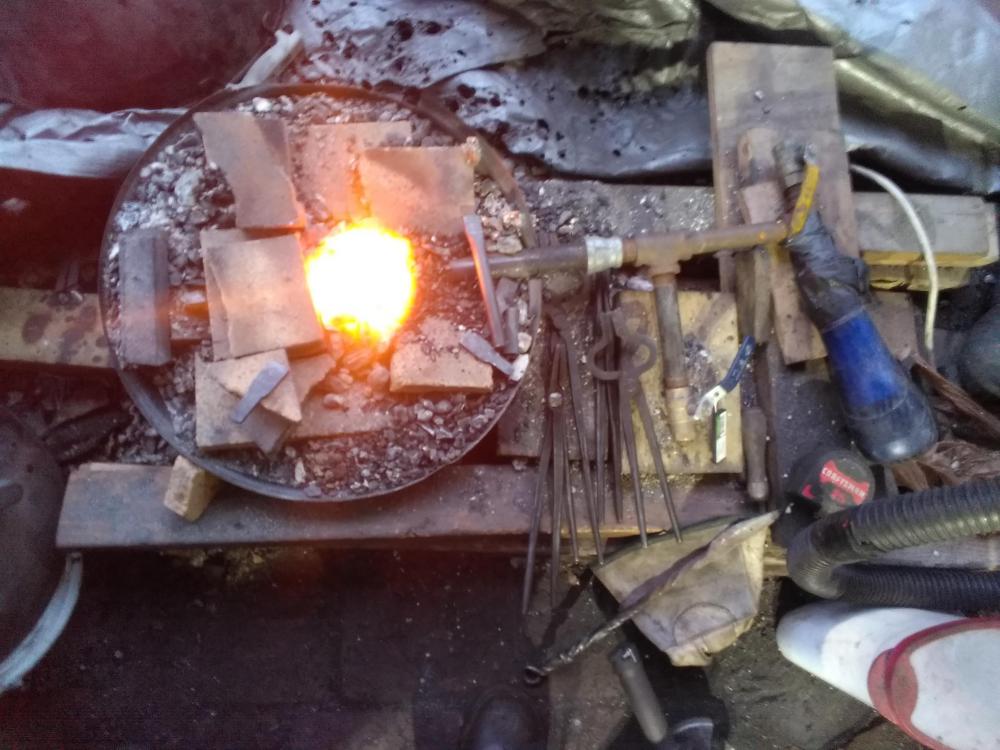
-
Hot cut tool not cutting
Frazer replied to Gabe Santoriello's topic in Hot Cuts, Anvil devils, metal cutting on the anvil.
I see that your improvised anvil is a 4' long piece of I beam. While the geometry of your chisel should be corrected, as others have mentioned, the fact that your chisel didn't deform your leaf spring at all, even when it's bright orange, seems to indicate there is more than just your tool at play here. With most improvised anvils (and anvils in general for that matter) the goal is to have sufficient mass under your working surface to support the strike from your hammer and to reflect or rebound that force back up into your material. By doing this you are effectively hitting both sides at once. The hardness of that working surface also plays a role, but let's put that aside for the moment. The problem with I beam is that there is very little mass to support that force you're trying to impart on the hot piece of steel, especially if you're not hitting directly over the web. This means that rather than the force traveling down, through your material, into the anvil and back up again, it's spreading out radially in the form of vibrations. Like dropping a pebble into water. When selecting an improvised anvil, it's all about the mass underneath wherever your hammer will be striking and not about the total mass of the object. My first "anvil" was a piece of steel I found at the scrapyard by me, it was ~2.5" in diameter and maybe a foot long weighing 20lbs or so. I set it up as a post anvil and I was off to the races. If instead of that piece, I grabbed a 20 pound piece of 1/4" plate the results would have been different. I think you should consider not only changing the material/geometry of the chisel, but also what you're chiseling on. Even a mild steel chisel with a super thin grind should be deforming bright orange steel. You might roll that edge over constantly, but it will cut. Unless all that energy is being redirected away from where you're pointing it. -
Taylor, I read this twice and it seems like you know what you would like to do. Are you asking for advice or just stating your intention?
-
What did you do in the shop today?
Frazer replied to Mark Ling's topic in Blacksmithing, General Discussion
With a maximum hardness of about 50HRC, I agree they would not make a very good blade. Which is why I've never used then for such. Drifts and some top tools (that you have to redress every now and then) and bottle openers and countless other things on the other hand, they are well suited for. So I wouldn't quite call them a one trick pony. There is plenty of material for a lot of small projects. Also, as an update, I think you (TP) and John were right (No surprise there) that the "feature" I observed on those older spikes are from the track and not from when they were made. Virusds, I like the knife. Nice work on the guard. How long is the blade? It could be cool to add some twisted brass/copper wire in those grooves spiraling up the handle on the next one? And no worries, I often post something I made on the following morning. This thread is full of "check out this thing I've been working on" and side conversations and miscellaneous other odds and ends. All 528 pages certainly have not been filled up with people sticking to what they did on one day in particular. Although that is the overarching theme. Frosty, I certainly could! However, the prospect of splitting 36 spikes with a hacksaw still doesn't sound too appealing. A power hacksaw.. or perhaps an unpaid shop minion with a hacksaw.. Now we're talking.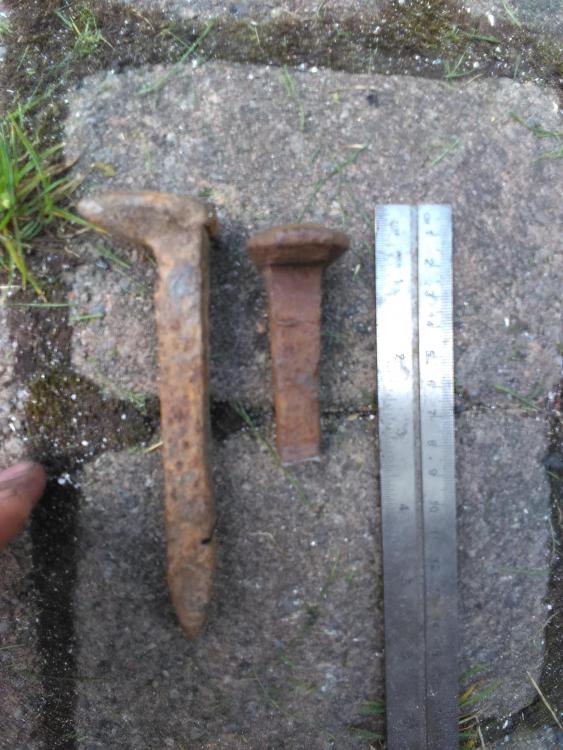
-
What did you do in the shop today?
Frazer replied to Mark Ling's topic in Blacksmithing, General Discussion
I don't have any data to support it since it's something I learned here, but the HC spikes are somewhere around 0.30% carbon, sometimes less. So yes, right on that border between low and medium carbon. I went back and searched for the thread where I remembered someone had provided a link. In the ""MC" Railroad Spikes..." thread, Bob JS does provide a link, but I can't open it on my computer. Possibly because of my networks firewall, but Glenn does thank him for providing reference material so maybe there are additional references on that page. -
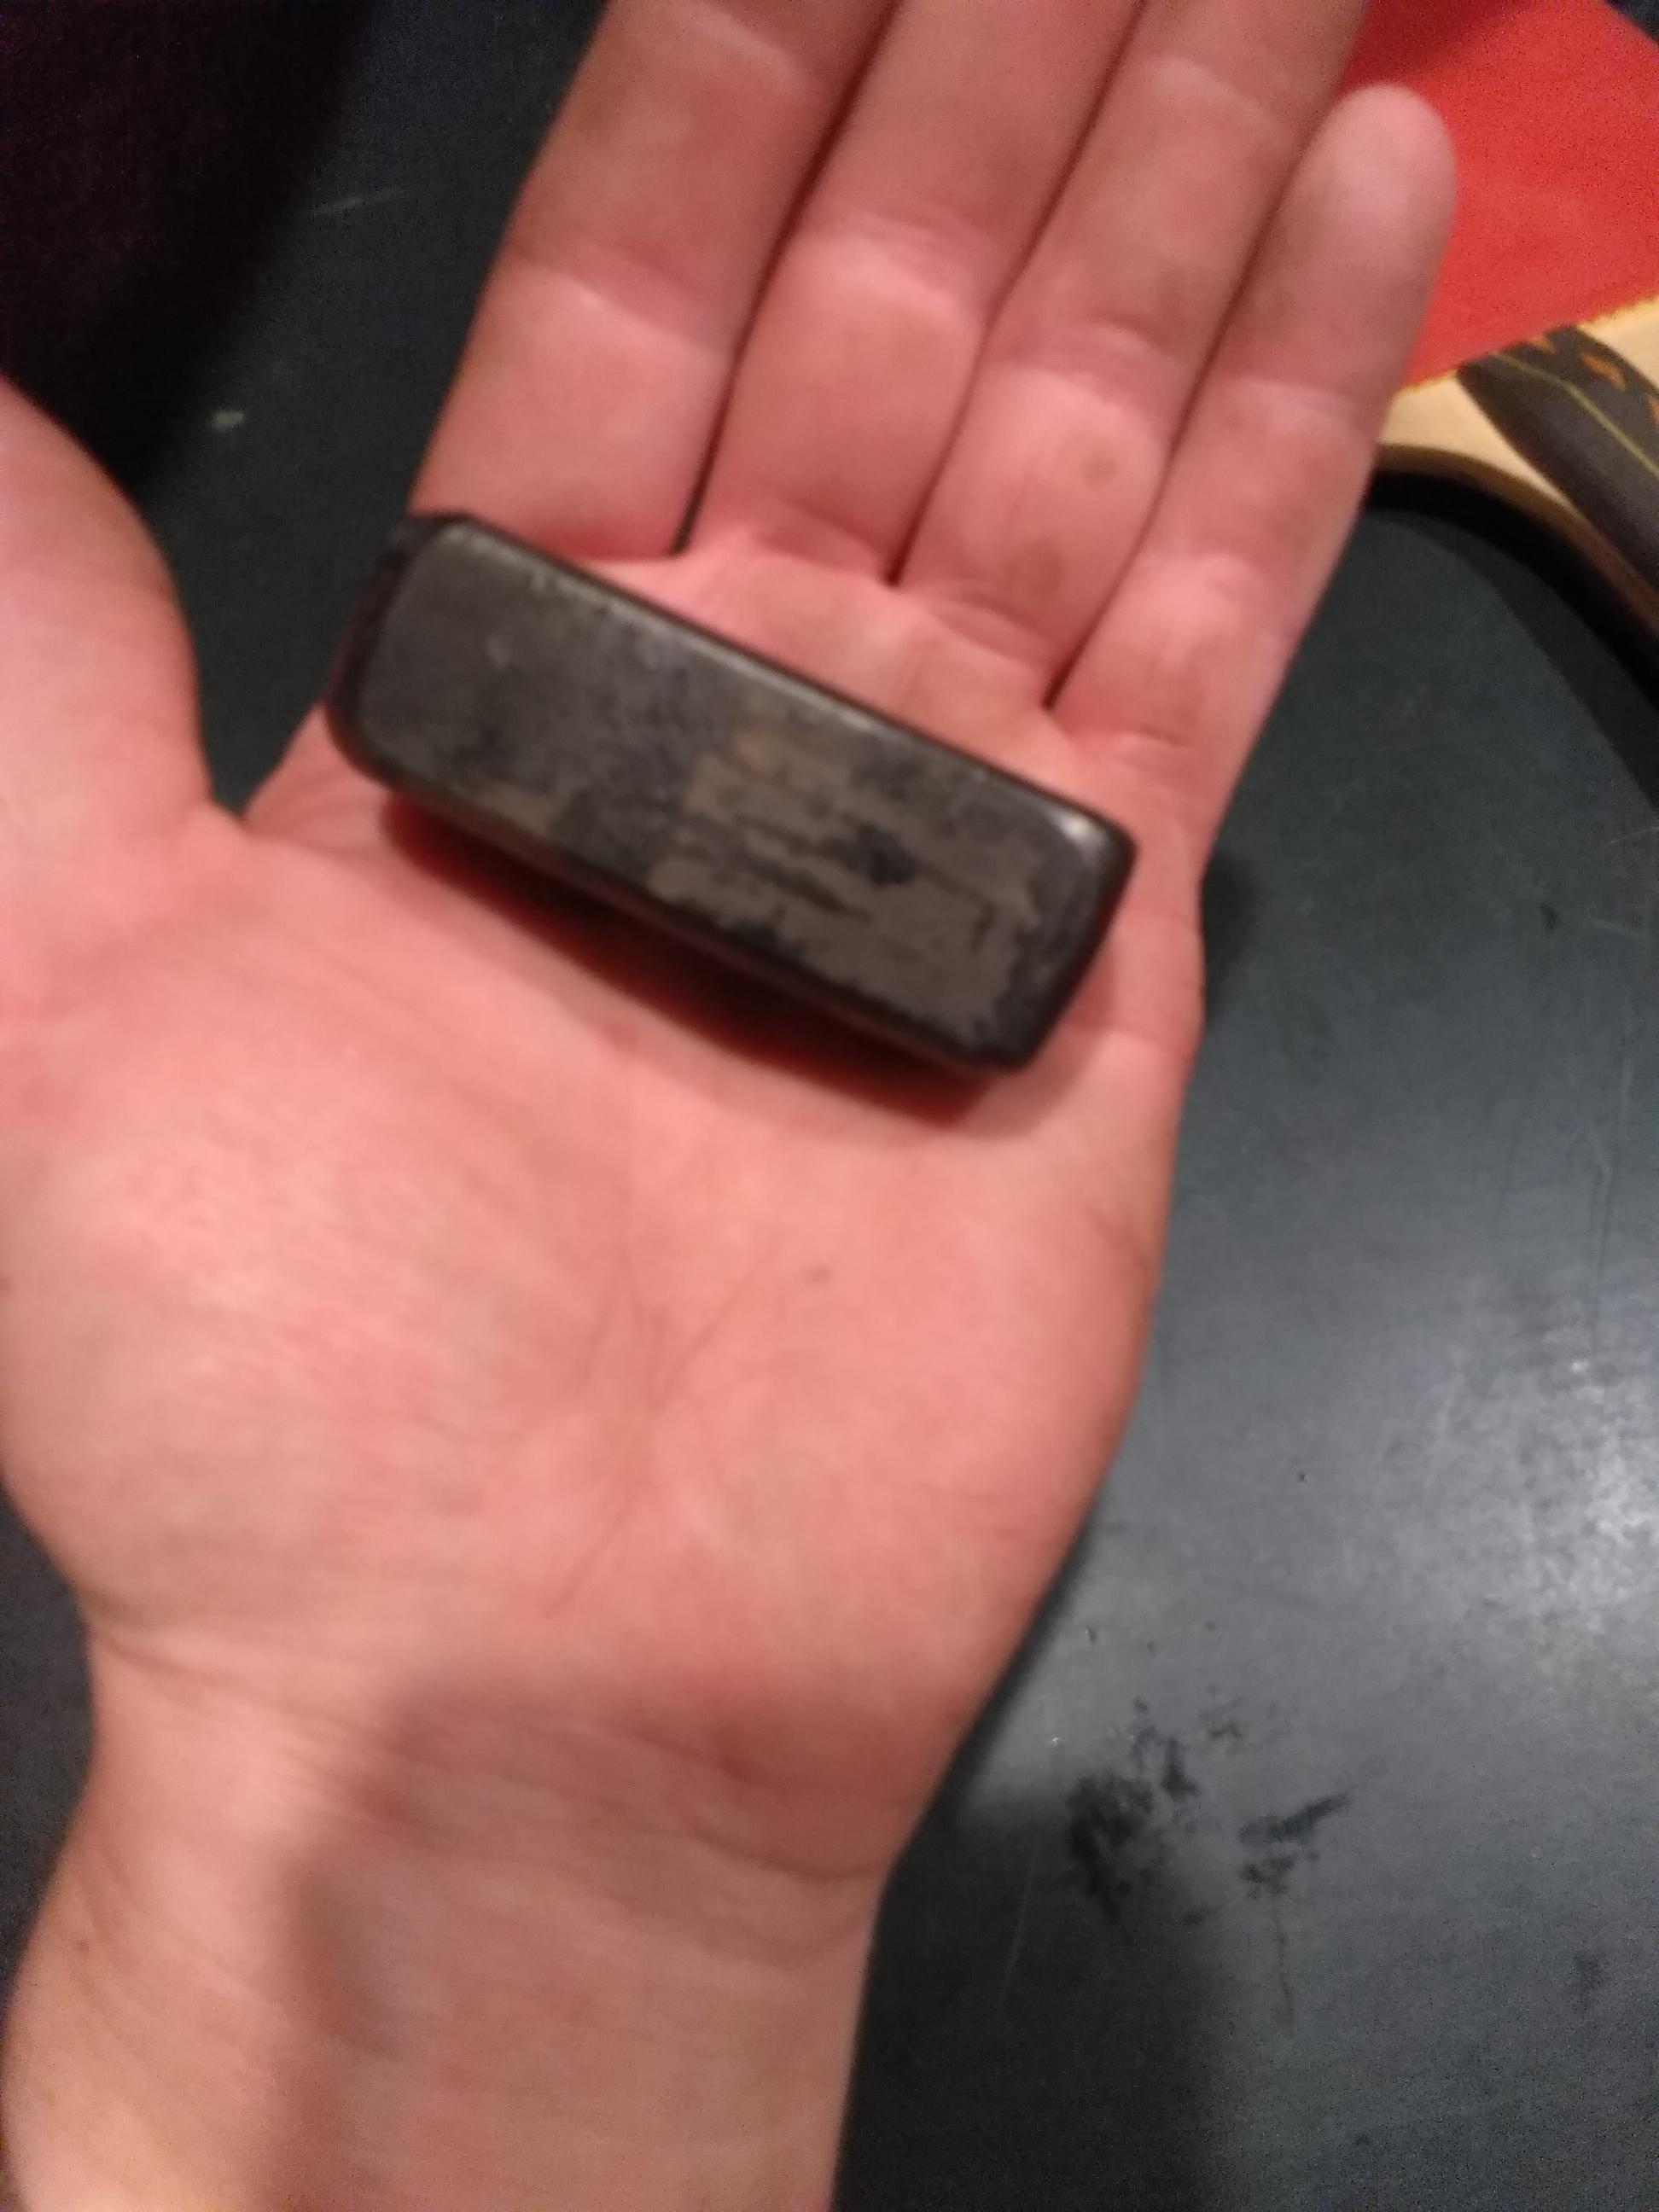
Is it an engineer's hammer? Like this?
-
What did you do in the shop today?
Frazer replied to Mark Ling's topic in Blacksmithing, General Discussion
George, I use 0.04" wheels so ~1.02mm. I always have my respirator and safety glasses on, both for the dust and so most of my face is covered. Every once in a while when you're not cutting straight or hit a transition (cutting angle iron starting on an edge rather than on the corner for example) they will indeed explode. I'm sure this happens with any thickness, but the thin ones are a little more prone to it I imagine since they have some flex to them and that fiberglass reinforcement is so thin. One should also keep their face out of the line of potential shrapnel in general, but when you're trying to cut a straight line down the length of something, sometimes it helps to get started looking down the wheel. It has always been my understanding that the high carbon designation just means high carbon as far as RR spikes are concerned, but medium carbon as far as steel goes. Just like you said. However, that makes a lot of sense. Put the tougher ones where they're needed and use the rest on the straightaways. I always find it entertaining when I see listings on etsy or whatever saying something along the lines of "High Quality Knife Forged from High Carbon Railroad Spike". I've never made a knife from a spike, but they make nice drifts and tools where I don't really feel the need to heat treat. -
It's very unlikely 4140 was being used for rebar.. I'm not disagreeing that there are different grades, but I don't know what benefit 4140 would have over something less expensive like a medium carbon steel with proper quality controls.
-
If you get an XRF scanner you could identify anything you want! Might have to break open your piggy bank though... I'd go with Frosty's suggestion first
-
This is Jango and Checker, Jango is pulling the *old yawn and casually slip the arm around her shoulder* move seen among timid youths in movie theaters. Smooth. They're good'ns. Checker doesn't really like people, but i forgive her because she was a stray and she has a nice face. Jango is a big doofus. He doesn't mind getting all the attention.