wirerabbit
-
Posts
139 -
Joined
-
Last visited
Recent Profile Visitors
871 profile views


-
Thanks for the info, Les. Going to be interesting to try out. T
-
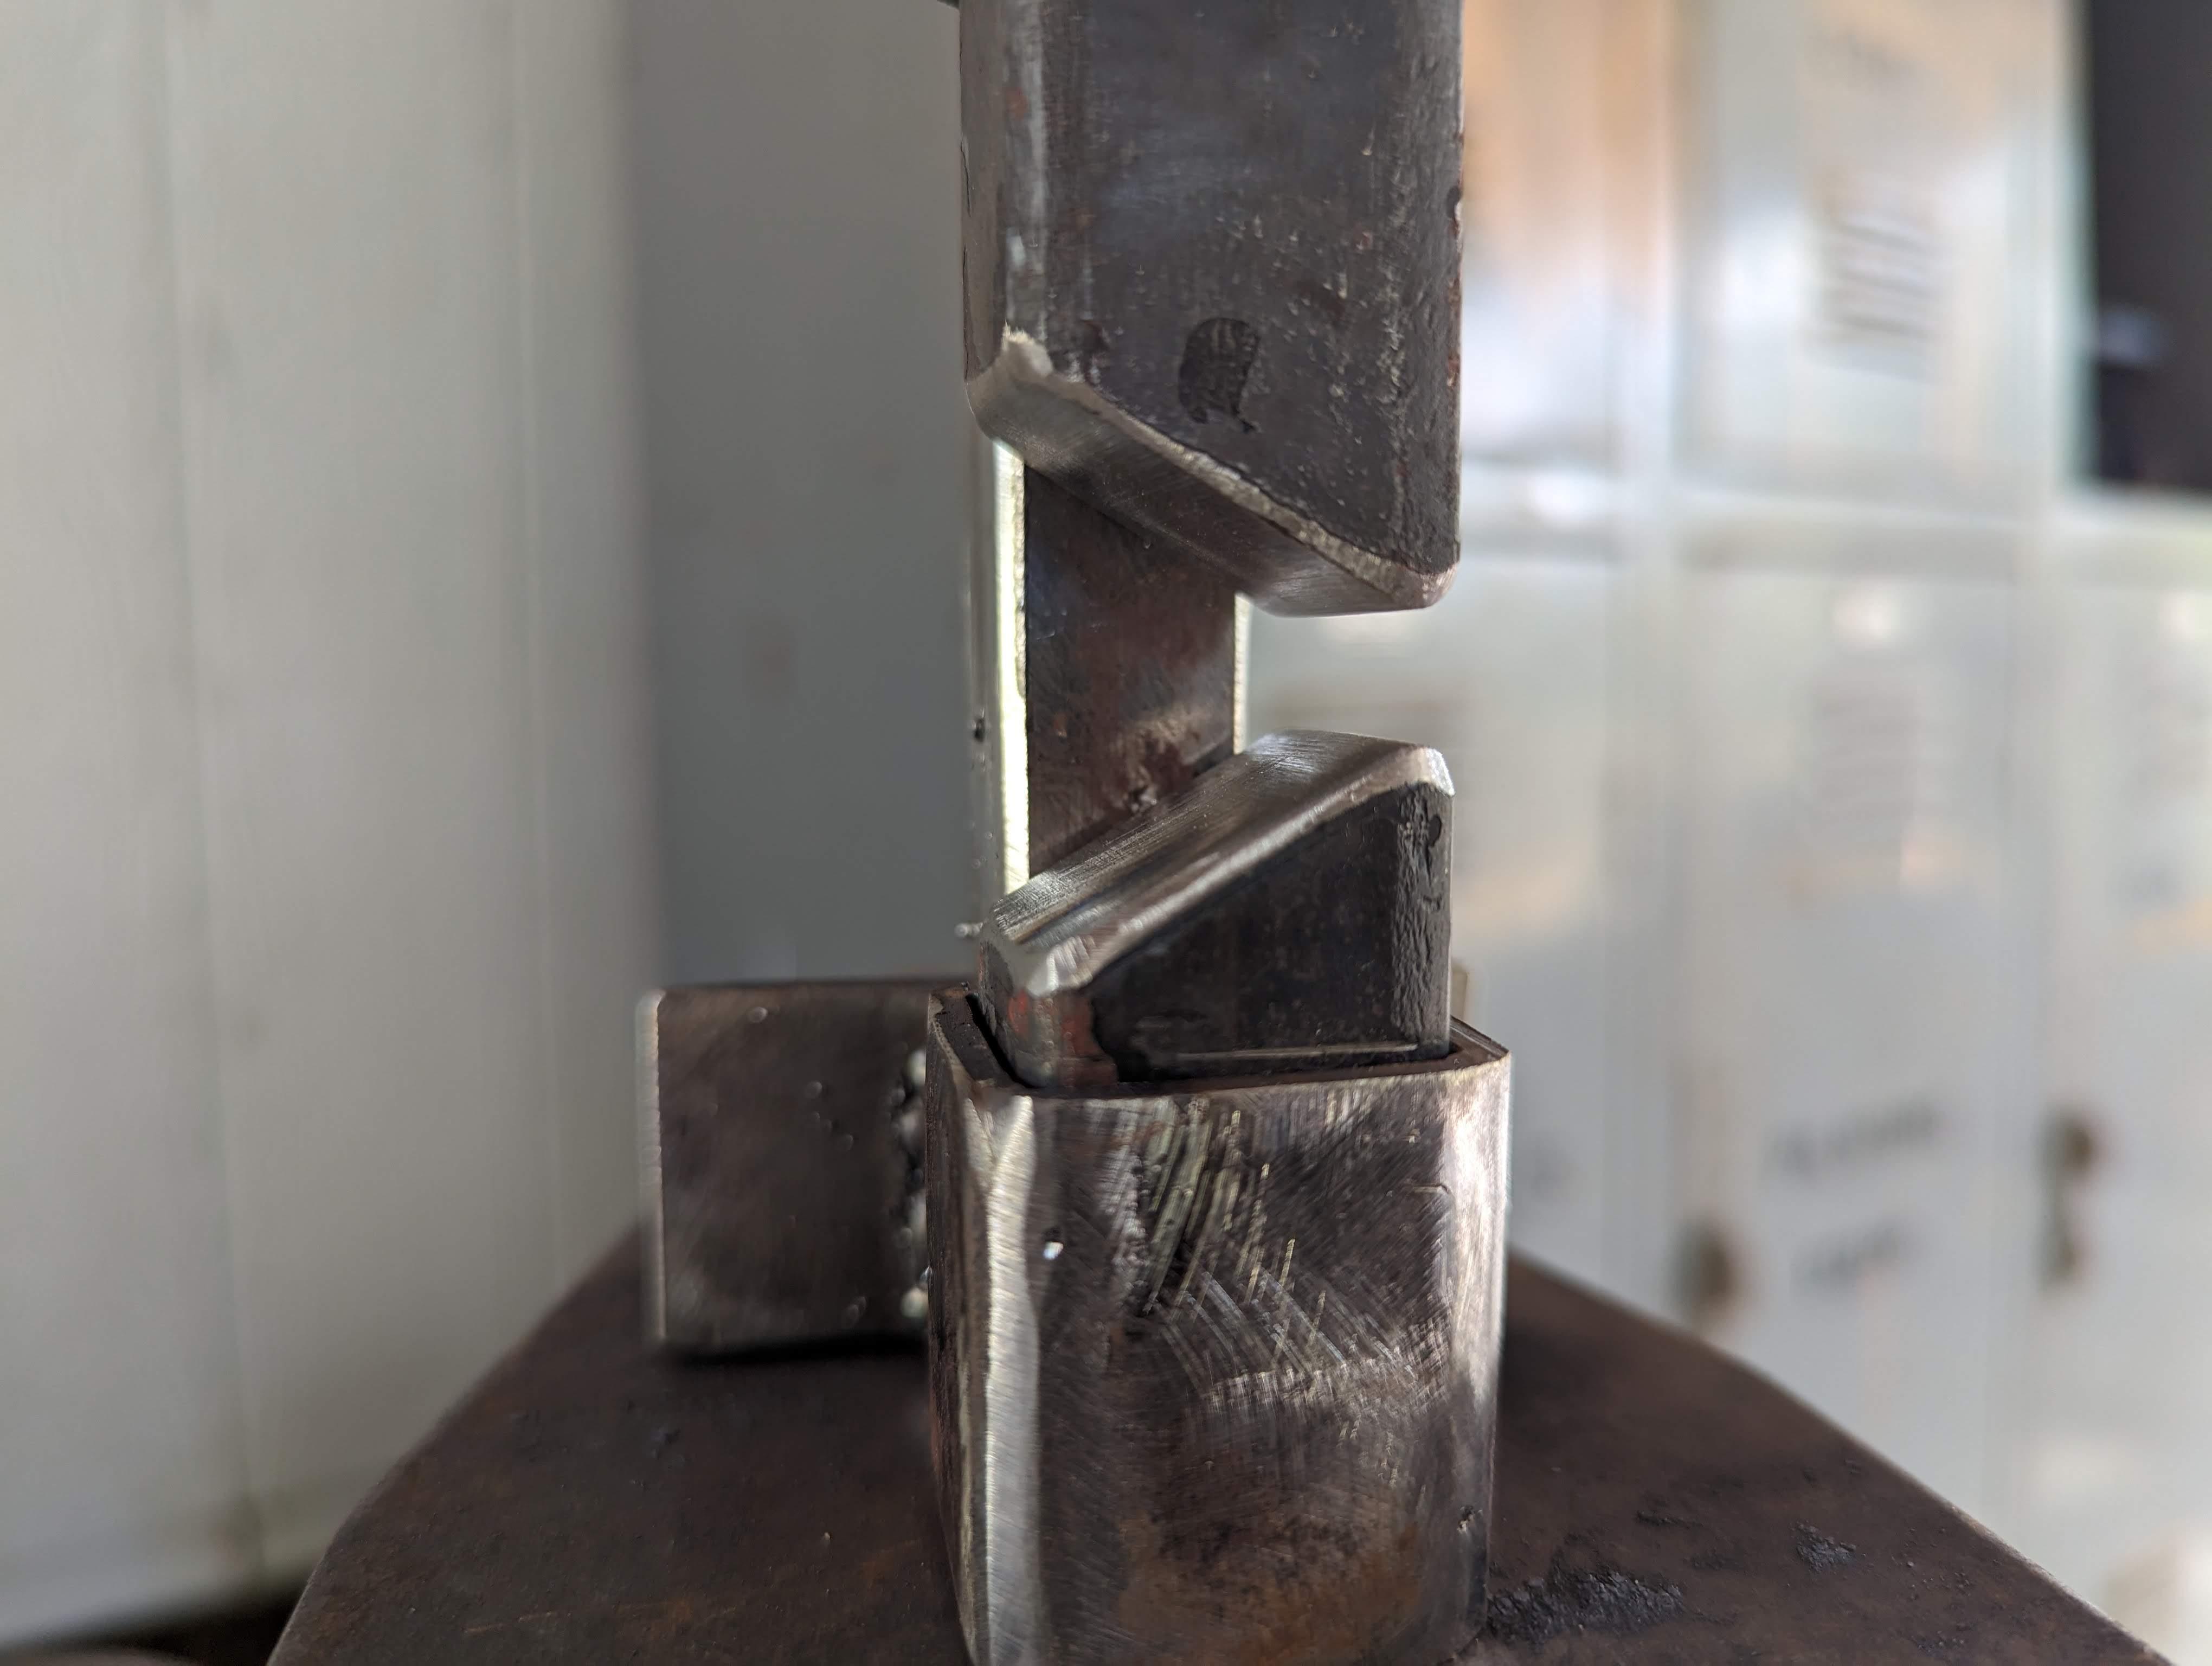
I've made Mark's tool for my small 30 kg anvil. Right now I've just got fullering dies made. Super simple, even for me! Because my hardy hole is less than an inch, I just used solid square bar. The dies are 1 inch square, and I took the time to case harden them after grinding the profile. When I make the tennioning dies, I am going to precut the stock bar then drill the hole. That will make the total height of the hole the dimensions I need. Much of the square corners will be ground off, and I expect my finished opening to be more flattened circle shaped than circular.


-
Slim, let us know how that alteration works and how it compares to what you did last. I can not speak to sideblast coal forging, but I do use charcoal in my small sideblast. I noticed that your tuyere is right down at the bottom of your bricked firepot. Do you know what series bricks you are using? If they are 3 inch, that might get the heart of the fire (with charcoal) just about where you need it. Be sure to notice that bit of information next time you use charcoal. For me, my bricked fire pot is 4.5 inches deep. I first has the tuyere just about a half inch from the bottom and I could forge things okay. I did have to dive a bit to really find the heart, but I made all my first tools and tongs no problem. Now I have moved the tuyere up maybe 2 inches and have much better access to the heart of the fire. Remember my forge is for charcoal. My suspicion is that coal will not like a side draft firepot that is optimized for charcoal, but I certainly could be wrong. Looking forward to reading more about your experiments in both coal and charcoal. I'd love to know how the charcoal and coal fires differ with the same set up. Would be instructive. If I get some time to run to goodwill tomorrow I'll pick up another cheap hairdryer and post the simple mod for a forge blower.
-
I like how you're trying everything, figuring things out. That is going to be the best learning experience for you. I suggest that you convert your hairdryer to dc power with a controller. The motor should be a dc motor that you can run off of a 12 or 18v battery pack . You will get much better control of your air. You might even find that running the hairdryer at less than "low" will get that charcoal to work great for you. With the controlled dc motor and an appropriate battery pack, you'd still have all the power to keep that coal working for you. If you want to try the mod, I can talk you through what I did with my dc blower, nee hairdryer. I'm currently using the 18v battery pack from my power grinder. Found a very inexpensive controller in the interwebs.
-
Why is anvil rebound important?
wirerabbit replied to rdennett's topic in Anvils, Swage Blocks, and Mandrels
Here you go. Enjoy. https://calsmith.org/resources/Documents/Technical_Documents_Page_Files/techdocs_thephysicsofanvils.pdf -
Ceramic crucibles
wirerabbit replied to Nobody Special's topic in Smelting, Melting, Foundry, and Casting
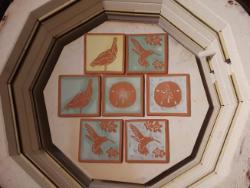
If you are making crucibles, you need only fire the clay once, but the rate of temp increase must be slow during a few crucial temp. ranges. I'm not surprised that you did not have much luck firing Hobby Lobby clay in a forge, George. Too hot too fast or it was not a ceramic clay. The internet will supply you with the details. Many "clays" used in crafts are clay in name only or have fillers that can render them useless for our purposes. -
Now I have to go out to the forge and check my bags of charcoal for little holes and missing coal!
-
This is a Vevor forge and will work just fine. You may be right, Mikey, about the burners. I have still used only one on mine and have had no problem melting small curls off my s hooks! You are seeing a small handle between the burner retention sleeves rather than a pipe. I have been running mine for several hours now and am still using the simple red-nobbed regulator that came with the kit. I set it at 1.5 rotations and leave the air shutter at about half way. I'm sitting at 400 feet above sea level and and pulling from a 33 lbs tank. Full disclosure, I have not really spent the time to dial in this forge, so no fiddling with the primary air or blocking off ends. I fire with both ends open, one burner, and a slight flame out the front. I'll put my charcoal forge up against my Vevor forge any day, but sometimes you want to experiment with longer heats, etc. It will do. Mikey's suggestions for improvements might be an option I take up at a later time. For now it's good enough. Enjoy Pigsticker. Taylor
-
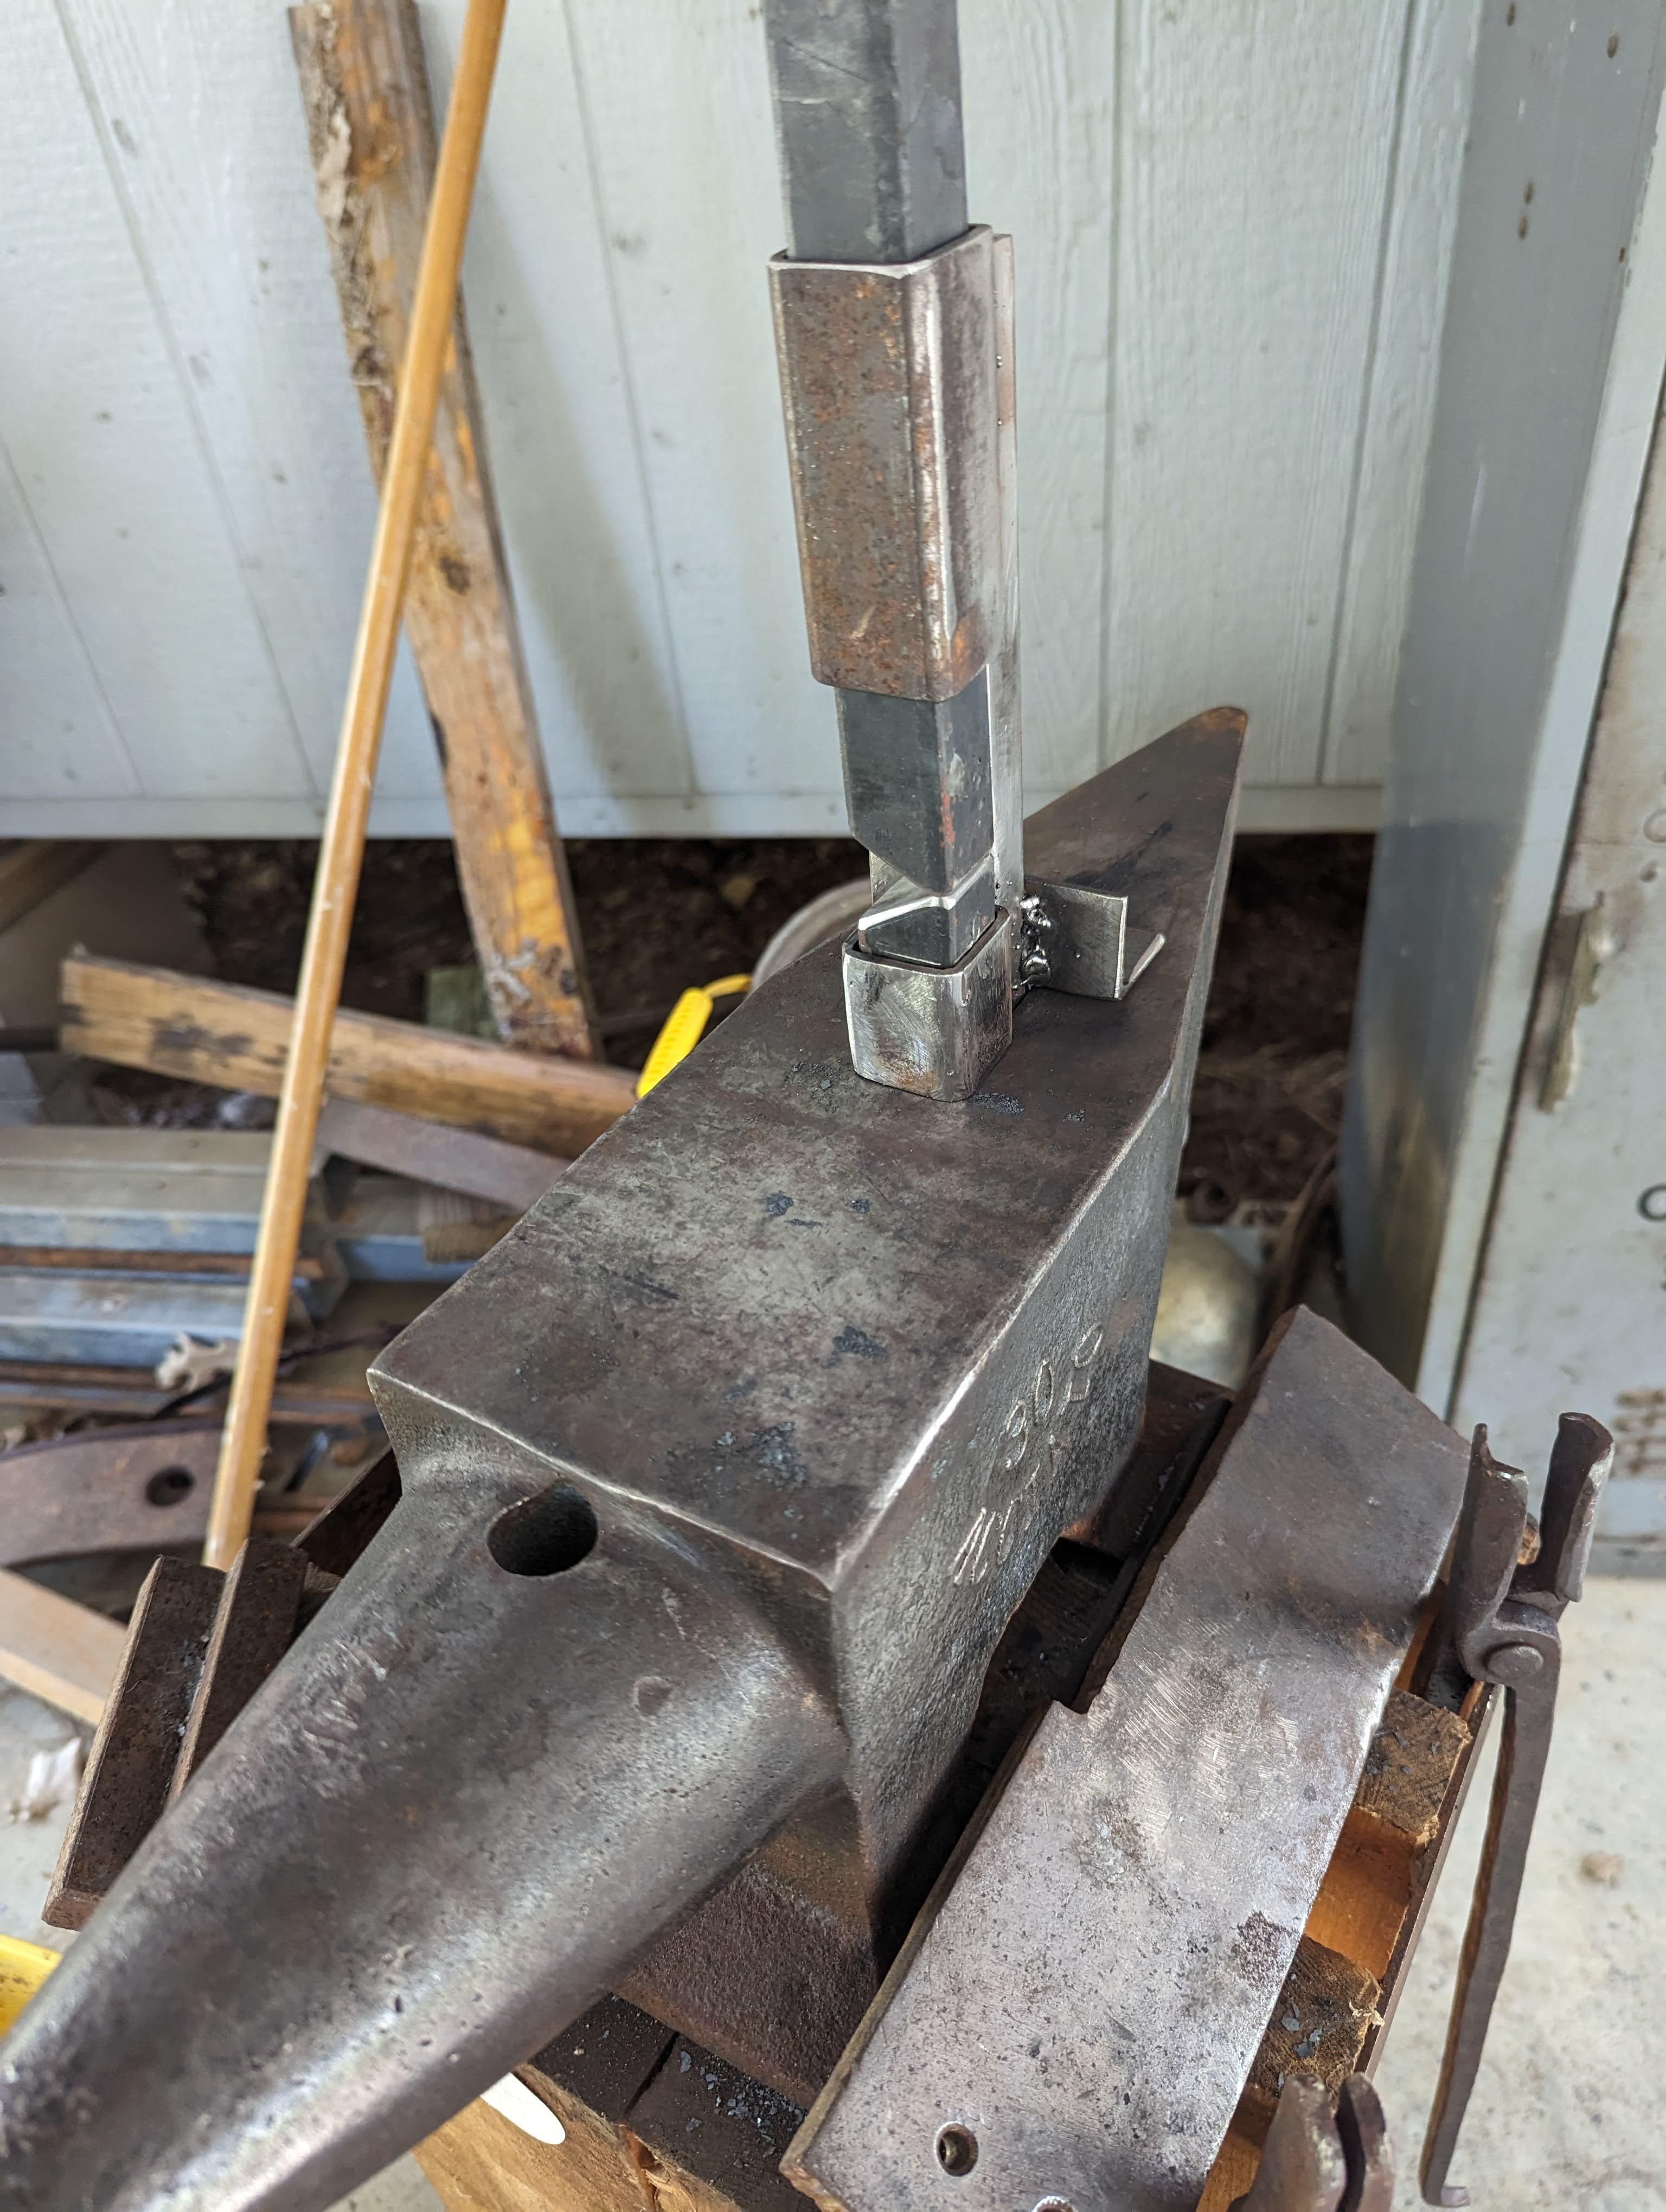
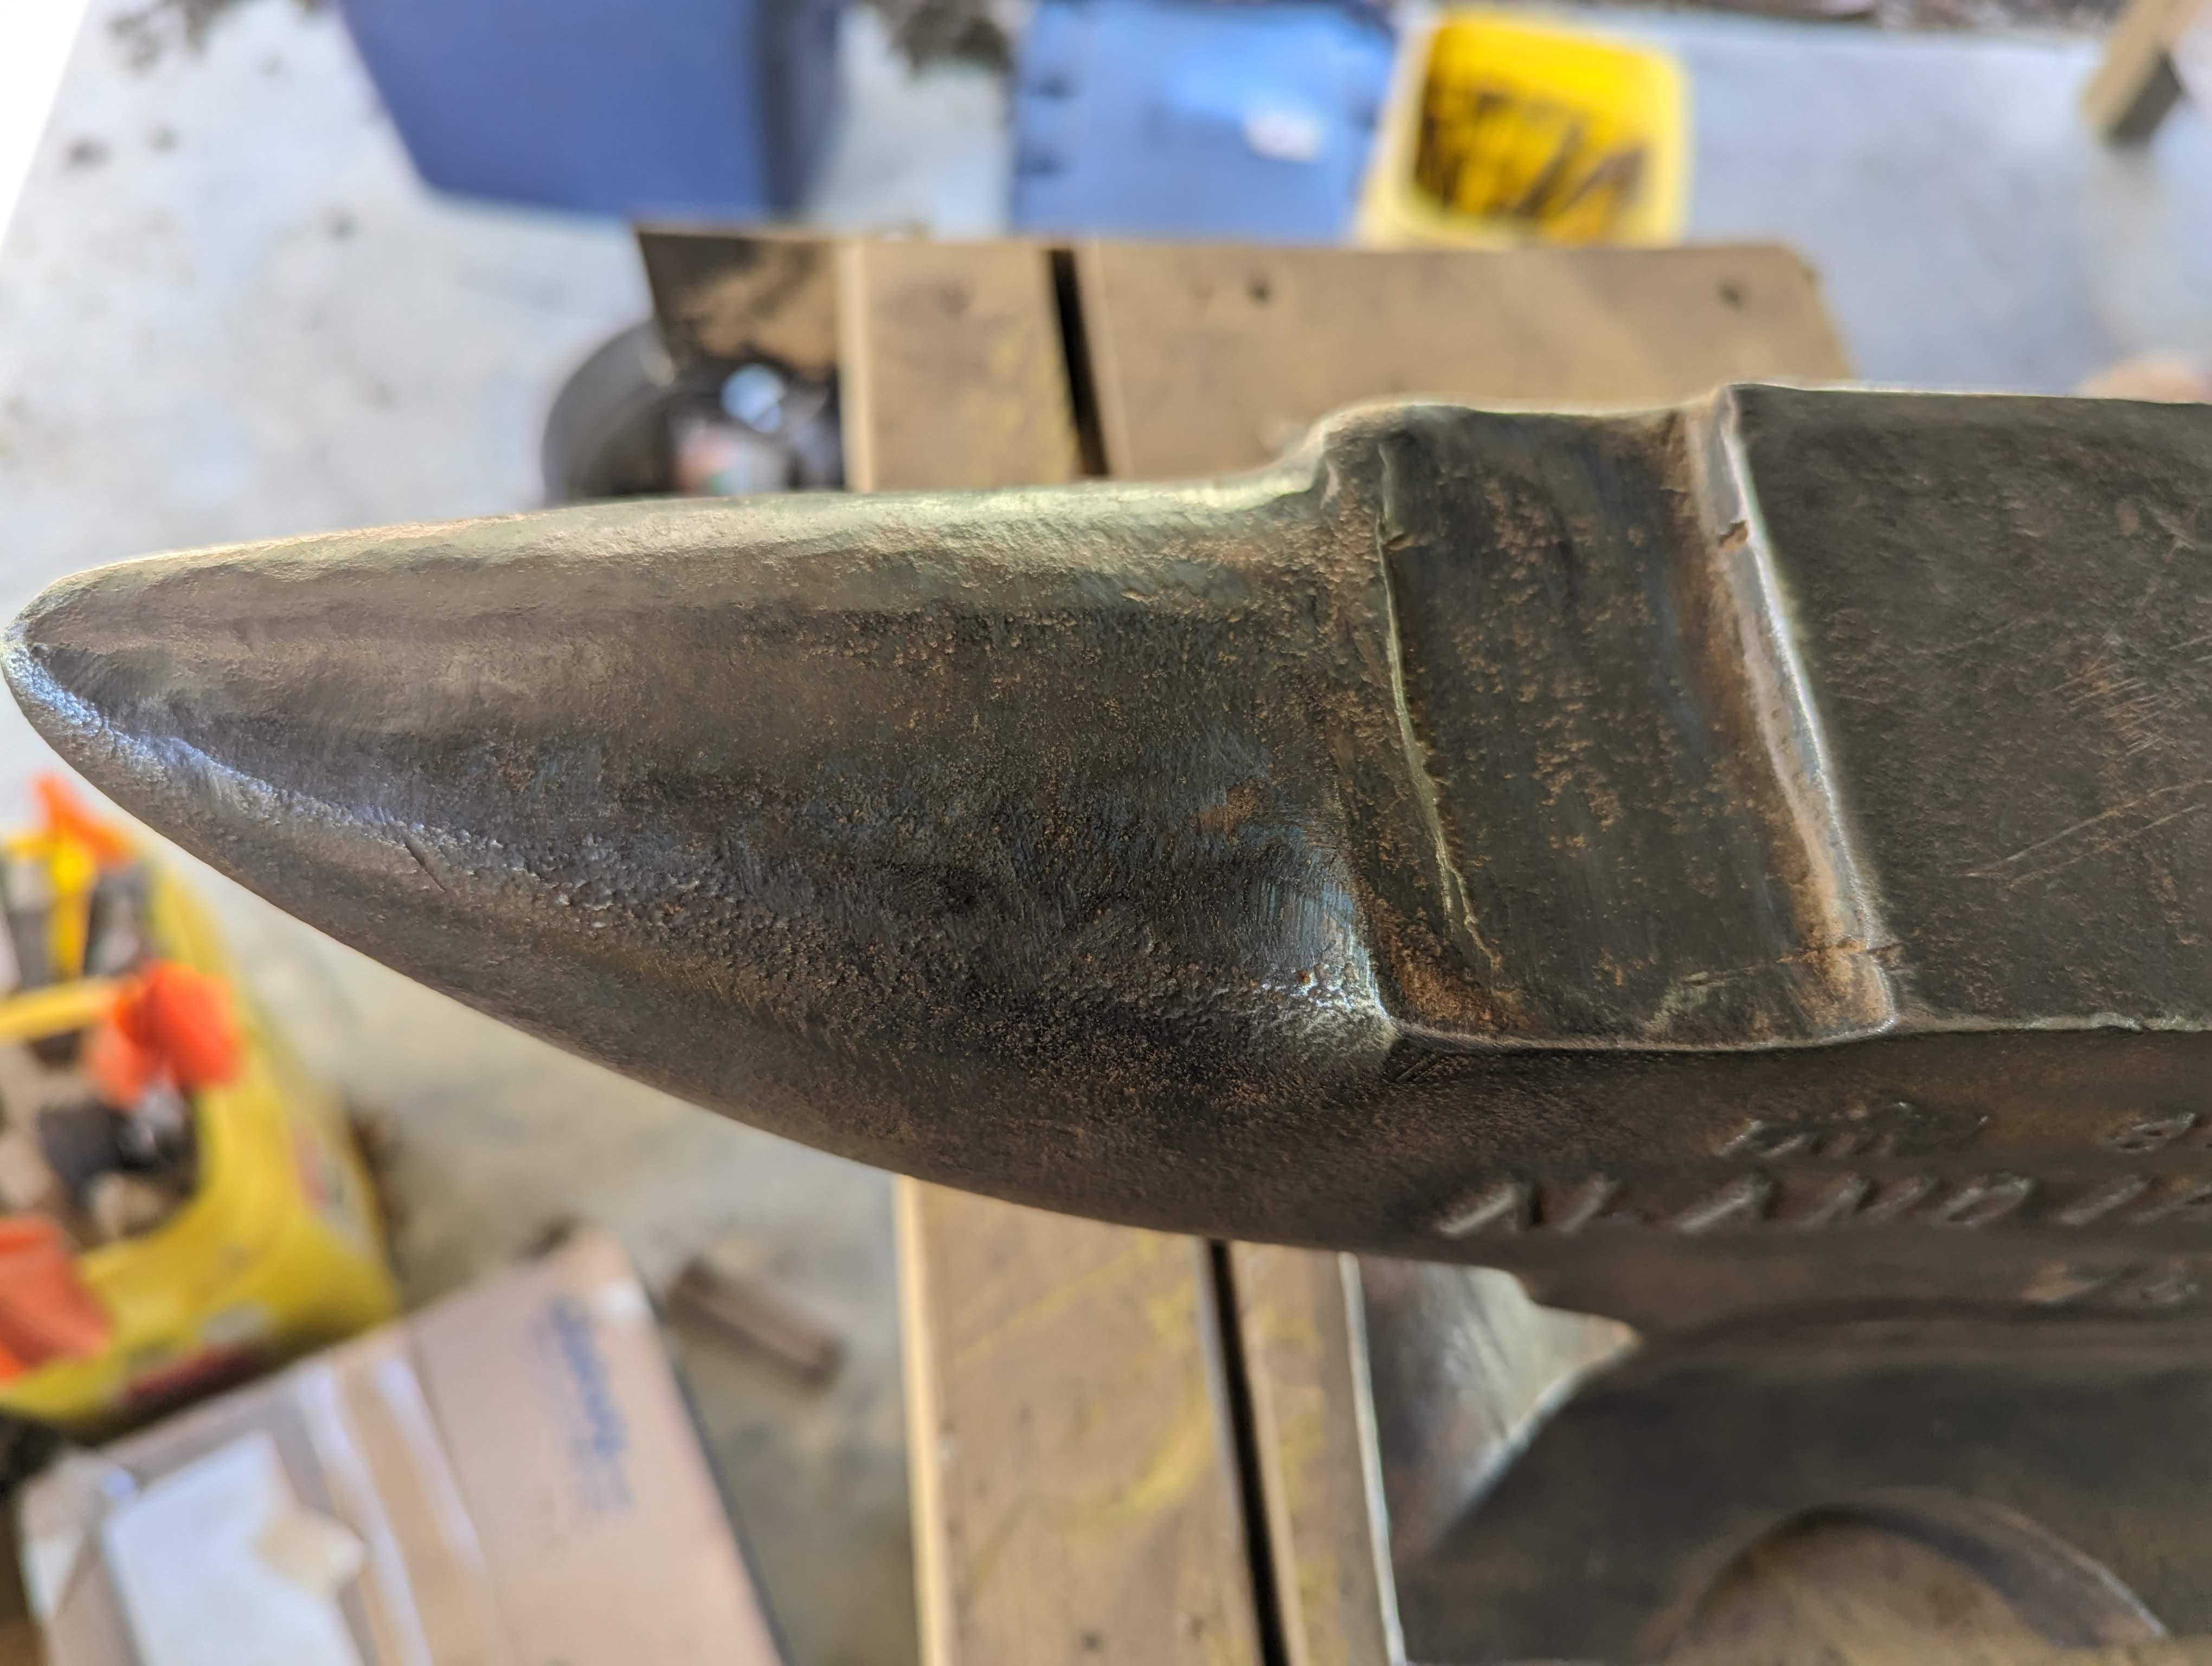
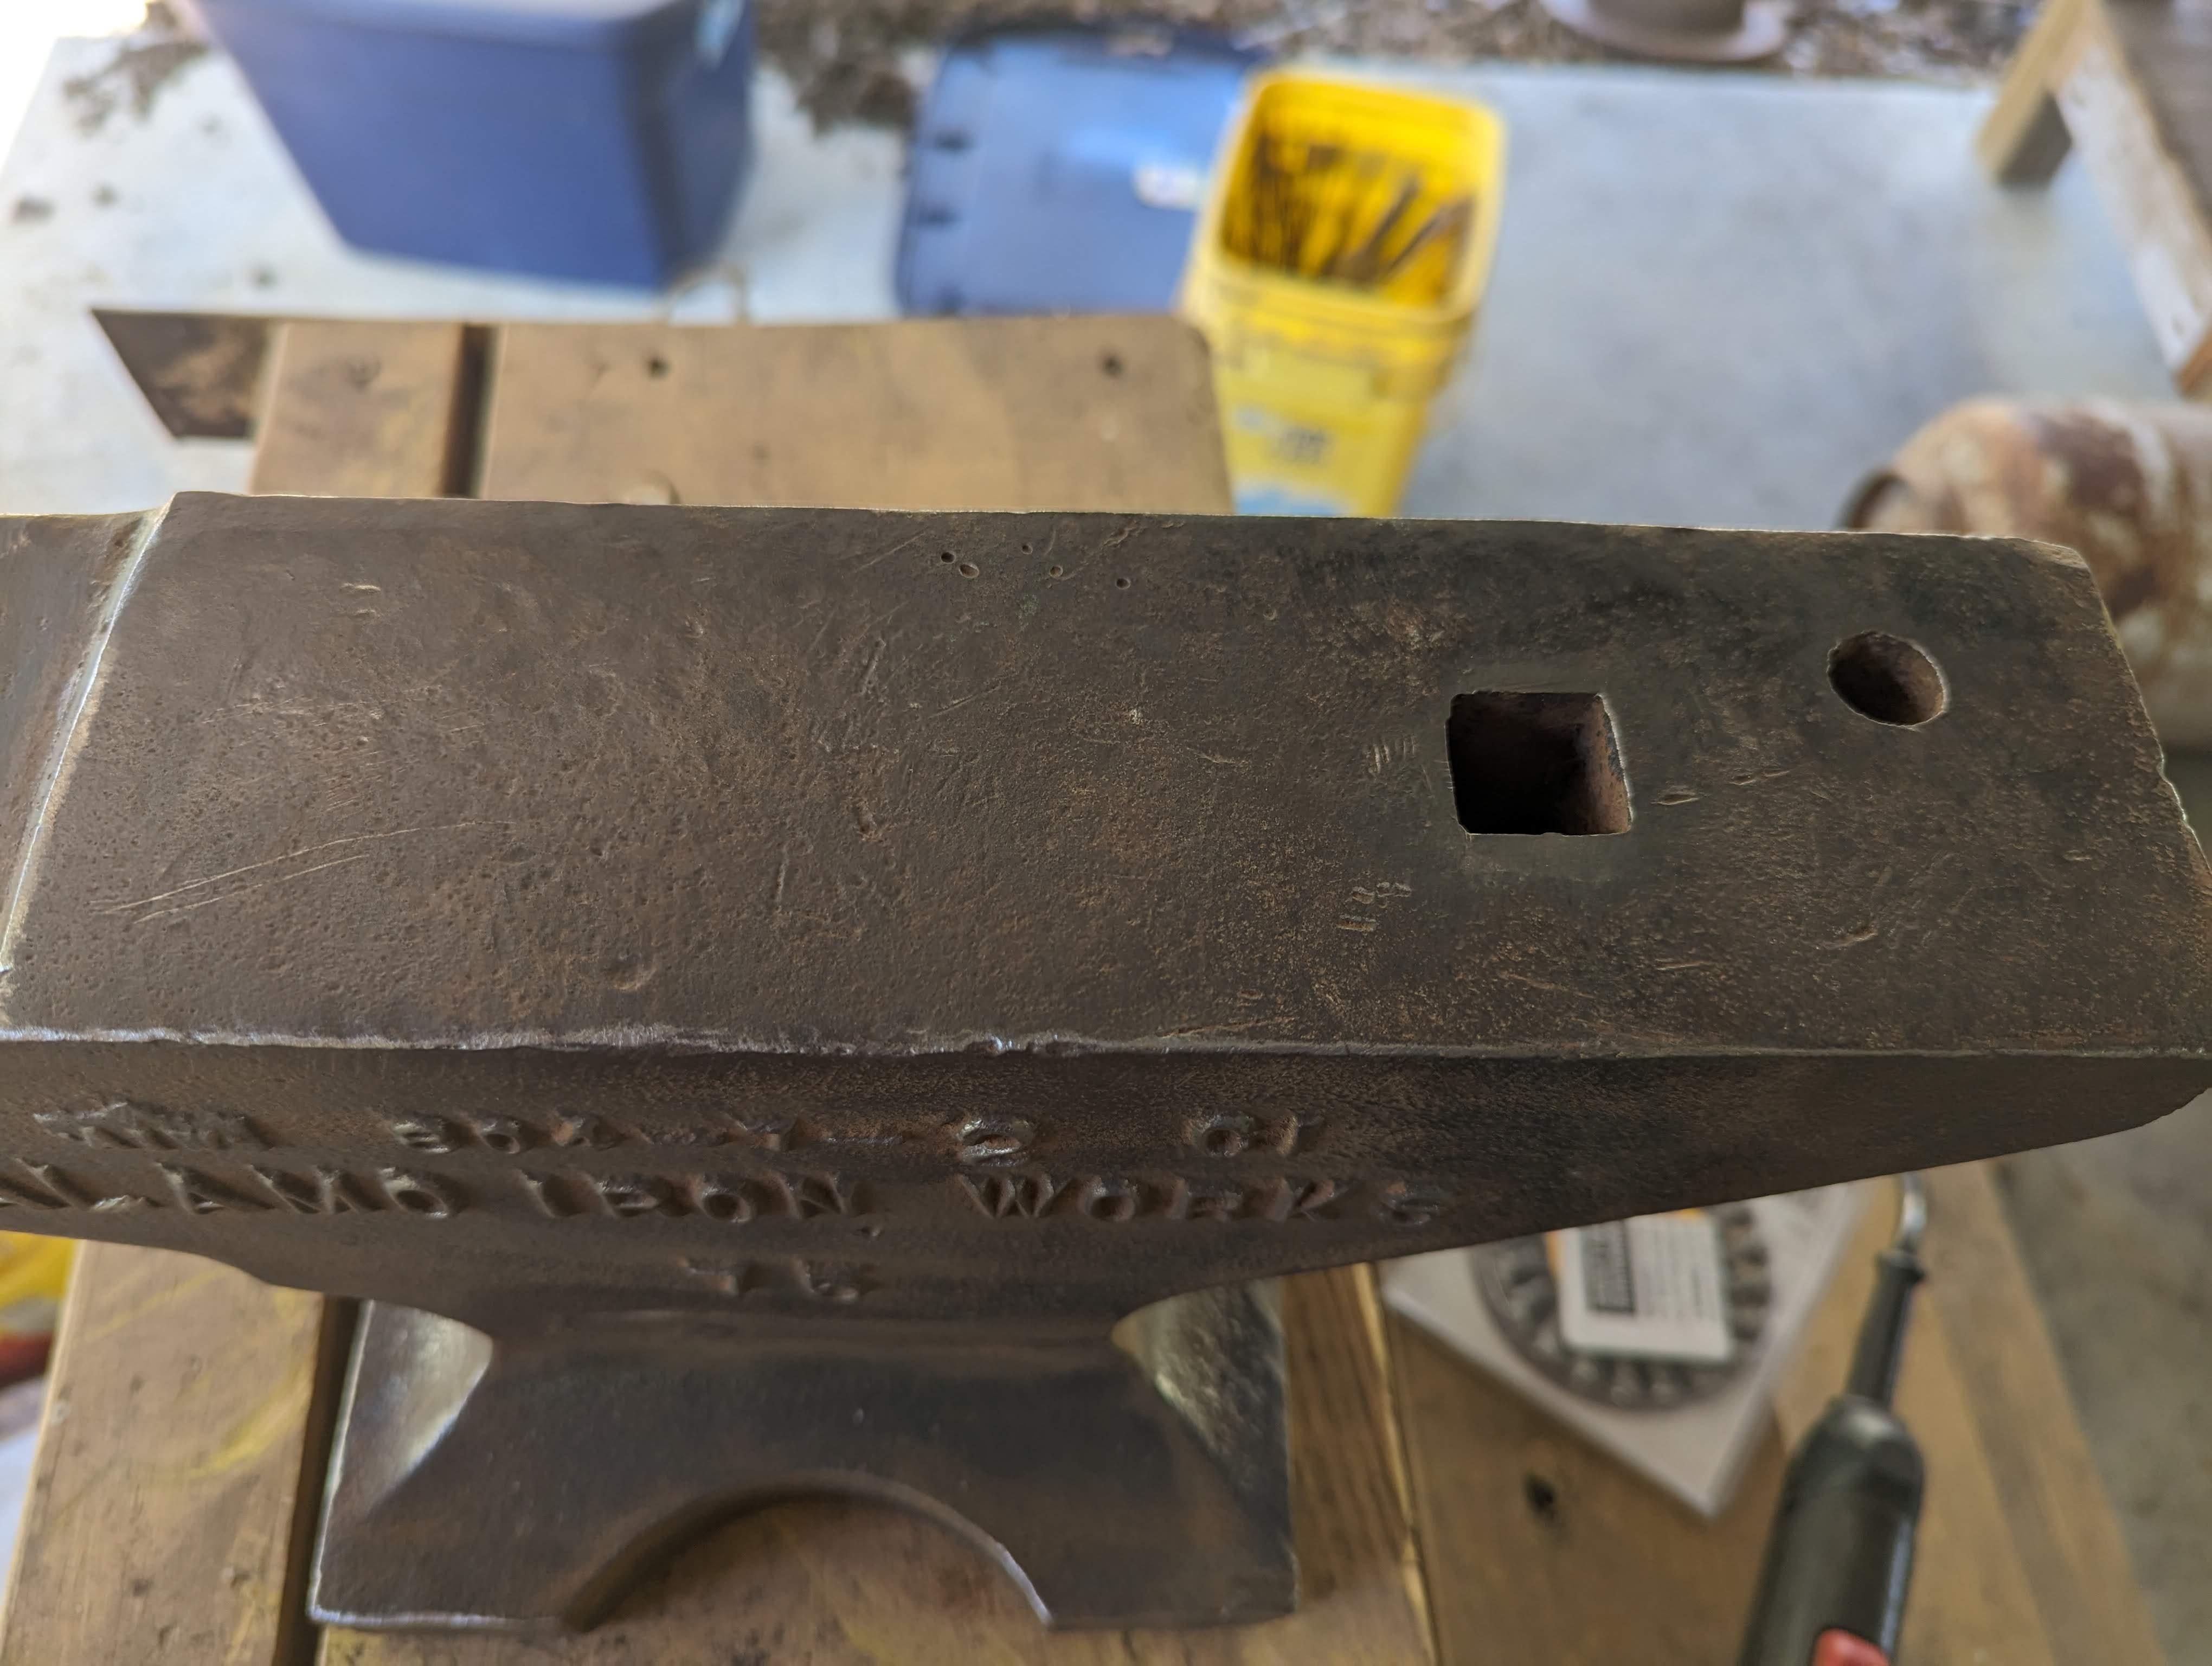
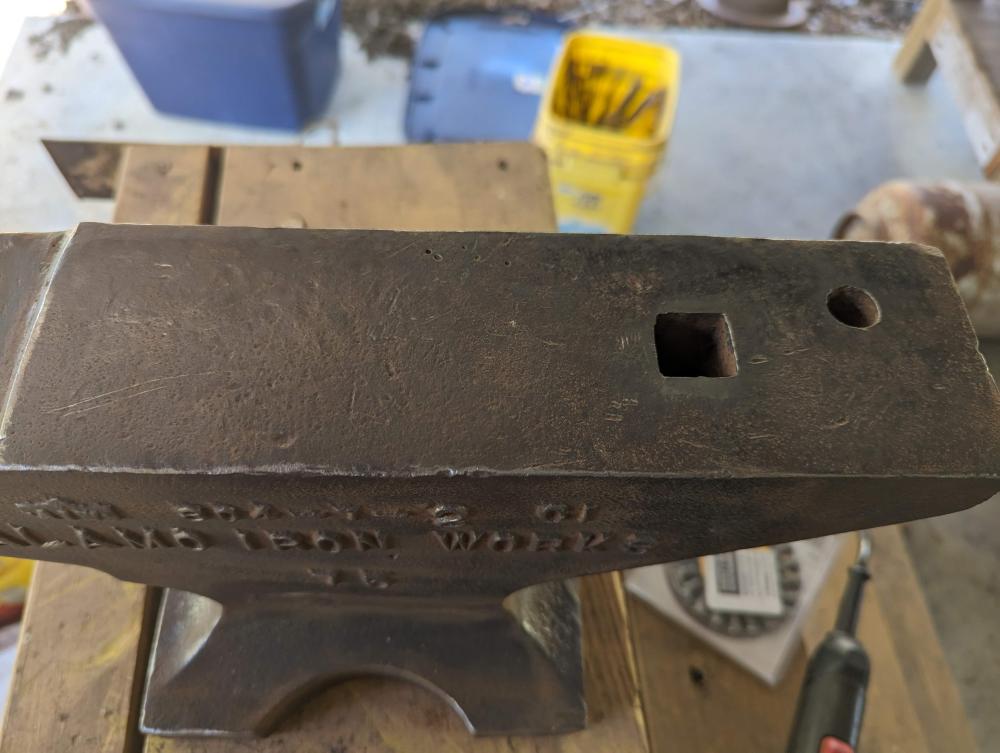
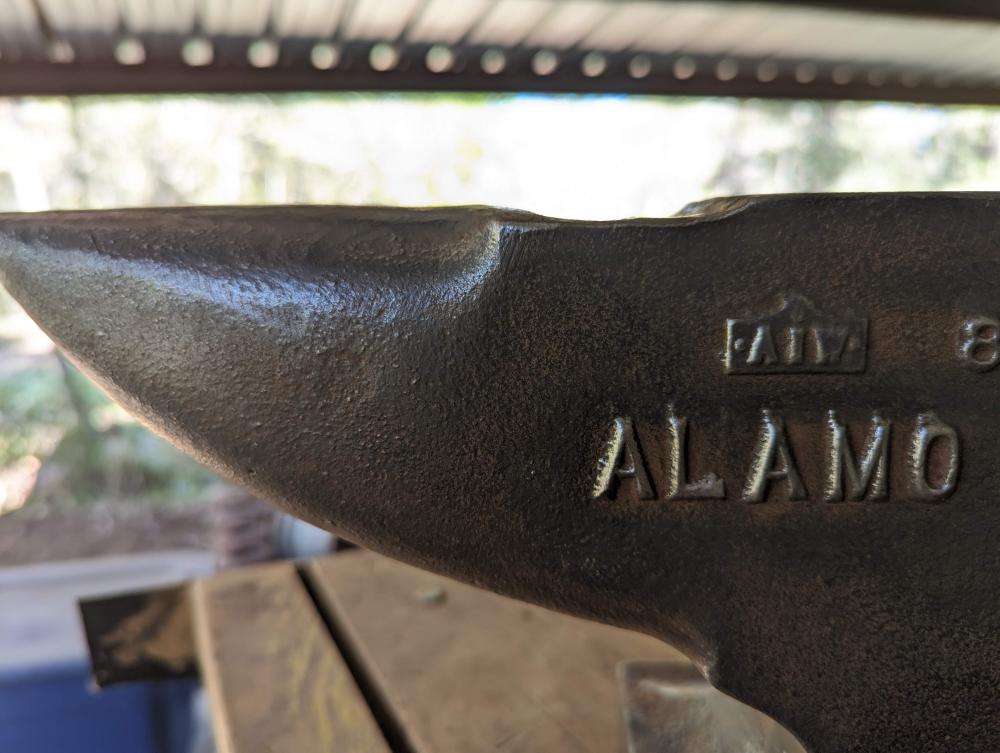
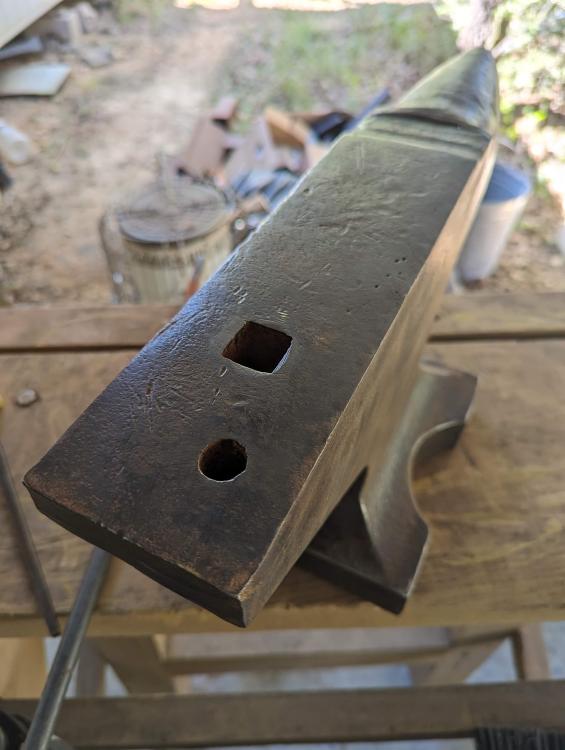
This is the chubby horn the Alamos are known for. But what's up with that crazy cutting table? 3 1/4 inch wide face, 10 3/4 inches to the step, and another 6 inches or so of horn. Hardy hole is 7/8 of an inch and the pritchel hole is 5/8". Lots of casting flash at each of the corners inside the hardy hole probably from a defective or misaligned core. Some minor markings to the face. Interesting holes there near the right edge. Check out that nice corner. Hammer rebound is the same as my Acciaio 30 anvil.

-
Was gifted this nice little (75lbs?) AIW (Alamo Iron Works), a Texas born anvil. Sorry for the quick picture. I'll do some wire brushing and take some better shots. The horn is more flat than conical, and the heel is quite beefy compared to a London pattern, but should make a nice narrow-faced addition to my shop. I do not have a copy of AIA, so I can't tell you its composition, but it is in very good condition from my quick examination yesterday. Some oddness with the cutting table which looks like a machining error?

-
My initial thought is the positives as you have stated them do not out weigh the negatives. In addition to the spark ignition danger, you risk failing to entrain all the fuel gas into the forced air volume, which would come with a few more negatives. Fuel gas injection down stream of the forced air will mix well if designed correctly. I am also not convinced you would reduce any piping with your hypothetical design. Fun to speculate, but this might be a solution looking for a problem.
-
Super easy. Check out the many, easy versions you can find online. All you will need is a plane of glass and a box. No lensing necessary. Let physics do the rest.
-
Have you tried making a solar melter to process your wax? You can decant off quite a bit of the unwanted sludge by putting your cappings in a bit of water. When the sun melts the wax, it floats and pouring off the top through a rough screen can clean up the wax quite a bit. The water will dissolve much of the honey as well. Saves you lots of cheese cloth when you do it the second time.
-
I was going to suggest looking for an old water heater, but that will do just fine, won't it? I don't know if it is just my specific situation, but I have never needed a hood for the small charcoal forge of mine. The only time I get smoke or fire fleas is on start up and that lasts for less than a minute. Of course, you've done this before, so you know what you're doing, but I'm curious about your experiences with charcoal and hoods.
-
Josh: In what part of Southern Germany was your apprenticeship? I enjoyed living in Germany for several years and remember it very fondly. I'm just a hobby blacksmith myself and only have an inexpensive and light "VEVOR" style (not marked but the exact same pattern) anvil with a double horn and I have actually discovered the great straightening use of the square horn simply by using it. I'm so glad you mentioned it as a function. It's not easy to figure things out on your own. Alas, my anvil pattern has a rather ugly step from face to round horn, and I look on with envy when I see that sumptuous transition of a beautiful German anvil. What you say regarding anvil edges make a lot of sense. 1/8" with chamfer sounds good. My poor anvil came with a terrible, ragged edge from the milling machine. No clean up that I could tell. I 'eased' that severe edge as little as possible but did add small areas of the face near the horn with larger curves. This is a very common suggestion for new diy-ers. Once you take it off, you can never put it back is often the counterpoint. I will be focusing my next few tong making sections over the more "crisper" edges next time. Thank you.