Yanni Rockitz
-
Posts
60 -
Joined
-
Last visited
Content Type
Profiles
Forums
Articles
Gallery
Downloads
Events
Everything posted by Yanni Rockitz
-

Anvil Edge Wear Question
Yanni Rockitz replied to GKChesterton's topic in Repairing and Modification to Anvils
Congrats, man -- that's about as nice a Peter Wright as you could hope to find. Wire wheel on a drill, a little oil rub -- she's your lady. Remember -- never hit 'er super hard with a hammer unless you have some hot metal in between -- but you already knew that. :-) Where are our pics of the forge, etc.? We want to see the whole score! -
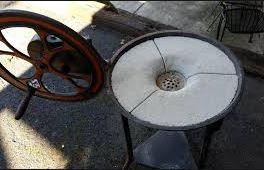
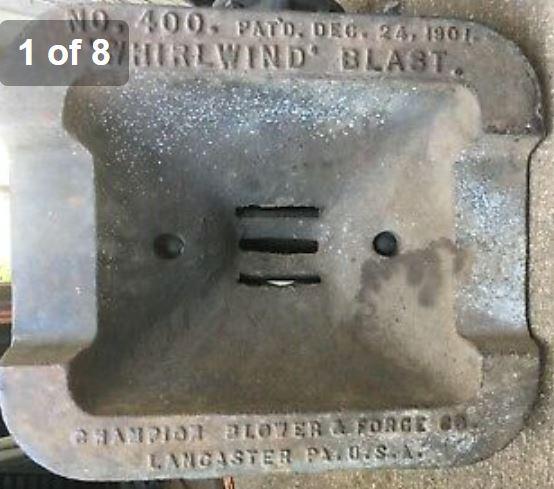
Setting up / restoring a vintage forge.
Yanni Rockitz replied to Frugal's topic in Solid Fuel Forges
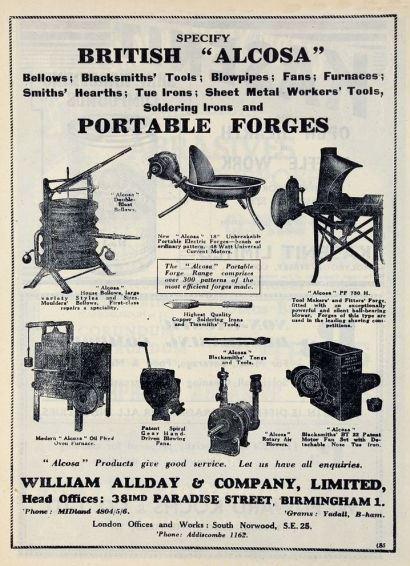
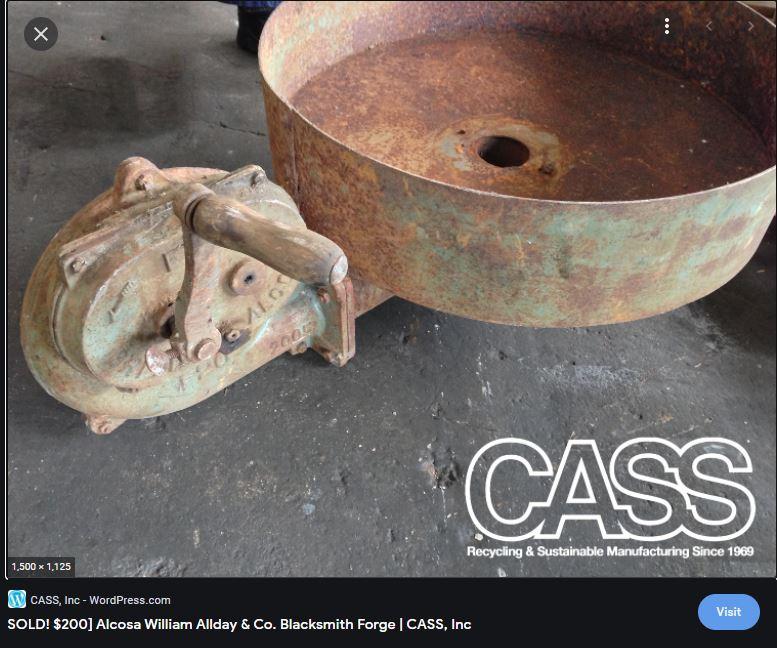
Your "Alcosa" forge from William & Allday was probably modified by someone who needed a very tight hotspot from that teeny air inlet that's in it now -- can't imagine why. A quick Google found that company definitely made forges, bellows -- all kinds of gear, back in the day. I say modify it back to what it started as -- a forge with a bigger air intake and a blower (if that's what it actually was.) If not, make it so! ;-) Check out some of the stuff that comes up for them (pics below.) Some of those deeper forges were "cavalry" forges, I think. All they heated up in them was horseshoes, so they didn't care about low walls to allow longer stock to sit in the fire. You could just cut out a couple of openings on either side for that -- but keep the nameplate -- it's a classic!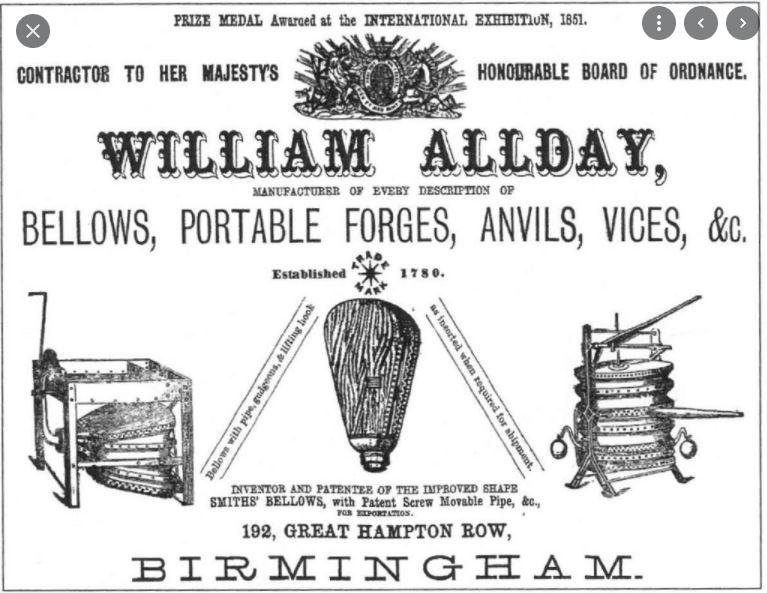
-
Setting up / restoring a vintage forge.
Yanni Rockitz replied to Frugal's topic in Solid Fuel Forges
You're in the right ballpark with the image on the right. The 2" tuyere under the firepot is spot on, but if I grasp Frosty's recommendations correctly, he was suggesting more of a flat "liner" of barely-moist soil (perhaps some clay mixed in to help it set -- my two cents) in more of a flat area around the air grate, about 1"-2" deep. I'd opt toward the 2" depth, as it will let you make a bigger/deeper "firepot" over the air grate and will shrink as it dries, anyway. If it's not great, bust it all out and do it again -- soil, sand and clay are mostly free (maybe not clay - depends where you live.) The old "JBOD" (Just A Box Of Dirt) forge is a classic and things don't really need to be fancier than that. Some folks like a mix of sand and clay for a liner... Search up images of "lined rivet forge", "coal forge liner", etc. -- you'll see people do this a hundred different ways. Having some kind of form, like a little cereal bowl, to form the liner around to create the firepot is an easy way to get the shape, but likely just as easy to form by hand. If it's flat around that, you can pile in your coal and rake it into the fire as needed. Pile it up higher for a bigger fire for larger stock... I guess it depends on what that material is that's in there now -- the gray stuff that looks like cement. If it's an actual fire-rated refractory, maybe you can keep some of it, but probably easier to just bust it all out and start over. If it was me, I'd overkill it by lining it with a couple of inches of KastOLite or some similar castable refractory -- would take crazy heat and should last a long time, but I overkill everything, so I'll defer to the guys who've done it with these types of forges more. Mine is the big, 5" deep steel one in the pic with the straight air grate. Here are a couple other pics of typical rivet forges in the same general shape (though lower-walled), snipped from google image searches. Lots of folks cut out a section of wall on either side so they can set longer pieces across, further down into the fire, as Frosty suggested. I agree on the straight-grooved air grate (instead of drilled holes) - easier to clean out with a poker. Good luck!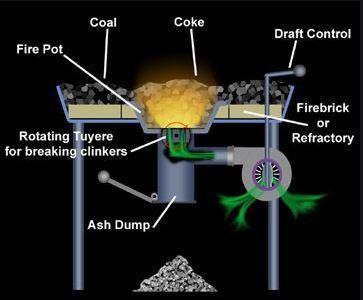

-
Who ships heavy/large items?
Yanni Rockitz replied to Adriaan Gerber's topic in The Business Side of Blacksmithing
TWillow -- I believe he might've meant that "Industrial" stuff would be charged less (by Customs) than "antiques" (???) Might want to clarify with him -- that's how I read it -- but I'm a part-time dolt. (Great word -- "Dolt" I always picture the dumb-lookin' cartoon guy from Gary Larson's work, pushing on the door that says "PULL") -
Jonathan -- how'd this go? I suspect you've figured it out by now, maybe? Curious what you did and how it worked out... For what it's worth, 2" of ceramic fiber blanket -- each rigidized, dried/cured separately, so that layer 1 is 'rigid' before adding layer 2 is the ideal solution, but you can also get away with just rigidizing layer 2, then coating it with refractory. Instuff Rigidizer is a good pre-made colloidal silica rigidizer for the money -- works great -- two quarts will more than cover two layers for a 20lb propane tank gas forge. Paint it on with a little cheapo 2" brush. I cut most of the handle off a wooden one so it's easy to manipulate inside the forge. Rigidize, air dry 24-48 hrs Low burn for a minute, let cool, low burn again for five minutes, let cool, low burn for 10-20 minutes to really cook it in. Add the second layer of blanket, rigidize using the same drying/curing process Refractory coatings: Either two 1/4" layers of Kast-O-Lite 30 (~1/2" total) or two ~1/8" layers of Satanite refractory covering all exposed blanket. Kast-O-Lite is way more flux-resistant, if you're forge welding. I did my forge bottom and halfway up the sides with two layers of Kast-O-Lite 30, then two layers of Satanite over everything after that -- finished with two painted-on ~1/16th" layers of ITC-100. The forge gets crazy hot. You REALLY want to make sure to follow the drying and curing instructions diligently. Air dry in warm, dry air at least 24 hours, then the successive low burns until steam appears - OFF - let it cool, repeat, longer each time up to full operating temps. If you rush the drying process, it'll fail -- the steam will blow apart the refractory structure, if 'boiled.' NOTE: Kast-O-Lite has to hydrate and cure in a 100% humidity environment for a good 24-48 hrs, so wrap a wet towel around the forge and tie it up in a trash bag to let it sit that duration. Once cured, air dry, then cook it at 200 F in an oven for a couple hours, maybe another hour at 300 to really dry it out, let cool, then the low burn cycles to fully cure. It's a lot of long, slow dry times and burn cycles, but you'll have a way better lining that'll get hotter, be more fuel-efficient, safe and last way longer. ITC-100 is stupid expensive and there are cheaper alternatives, or so I hear. Greenguard, maybe? It's in this forum... Hope it's all going well!

-
Man -- the old saying goes something like, "If there's a 50/50 chance of getting it right, I'll get it WRONG every time." I read about the gas forge lining for dozens of hours on here -- reading more, repeatedly, over a couple of years, as I slowly evolved my thoughts on building one. It's like Google -- there's TOO much information and a lot of it is focused on specific processes that only give you part of the story. I've only found an actual procedure two, maybe three times -- all a little different. They're similar, but often with different products for different 'layers' and some have changed over time. The ceramic blankets are pretty straight forward, but the refractories -- Mizzou vs. Kast-O-Lite 30 vs. Satanite, etc. -- have different arguments. Then, the final IR reflective coating seems to be the most mysterious bit to get a consensus on. I thought I'd arrived at a solid understanding about a year ago for two 1" layers of ceramic wool fiber blanket, rigidized -- each, in turn -- then two 1/4" layers of Satanite -- each air dried then progressively cooked in to cure, then ITC-100 for a final IR reflector, so I ordered all that. Now I've found people saying ITC-100 gets 'chalky' (so... don't use it?) When I rigidized the ceramic blanket, I found that my fumed silica "202" doesn't mix in with the water in the spray bottle at ALL -- like HATES water -- floats on top. I kept shaking it vigorously, as suggested here on IFI, spraying it on, but eventually clogged up the sprayer. It doesn't say on it anywhere whether it's hydrophobic (or hydrophilic) -- just that it's a thickener often used in epoxies. Urgh. It was well covered by the time it clogged, so I set it for several days by the wood stove in hopes some of the silica got mixed in, but now that it's dry, it's not even the slightest bit rigid -- still feels like out-of-the-box, soft, puffy ceramic wool blanket -- it's just blue, now. Apparently zero silica made it through -- only blue water. More reading, now I find this, above, noting hdrophilic (mixes with water) vs. hydroPHOBIC fumed silica. 50/50, so I got it wrong. Clearly, I got the hydrophobic stuff. It certainly doesn't dissolve in water, no matter what level of foul language I apply to it. I just bit the bullet and ordered some Inns-Tuff rigidizer, as I've read a few of our heroes have used with good results. $16 for a quart seems reasonable. For future re-linings, does anyone know where to get the water-friendly hydroPHILIC fumed silica for a good price?
-
Holland 100lb Long Rectangular Swage Block??
Yanni Rockitz replied to Greebe's topic in Swage Blocks
Greebster -- Inquiring minds want to know -- how'd the swage block and stand turn out? Any pics...? ;-) You like the Holland swage and new anvil...? -
Newbie looking to buy my first Real Grinder
Yanni Rockitz replied to Dangerruss's topic in Grinders, Sanders, etc
Thanks Buzz -- that's a good 2 cents. I'm now at the point of -- buy the best motor and VFD I can get and don't build this thing until I can afford them. Kills me -- I was about to buy the IronHorse 2hp TEFC 3-phase and now it's out of stock. There are a couple decent alternatives. The way inventory is crashing these days on almost everything, I better get something soon. I'm liking House's design for the frame -- NOT that I'm plugging any specific product here -- the rules are strict! -- but looking for best value for a totally stable design, that two-arm setup using 2x2" tube and 1.25" tube, .25" thick with 3/8" plate (or thicker) seems rock solid. The tracking has to move positively in both directions and the motor and VFD should really both be totally enclosed. Those two pieces cost a lot, but you do some welding, drilling and tapping and you end up with a ~$1300 grinder that would've cost $2-$3K, easy, to buy fully assembled. I'll use my DC treadmill motors for some non-griding application. -
You could ask Rommel for his German engineering tips on a proper axle/bearing assembly, but I'm pretty sure his "Patton pending issues" were never resolved to the Fatherland's satisfaction. ;-) I like the simplicity and general grouchiness of a big, oval 'Grizzly' type grinder like this -- even though it may be less nimble than a typical bladesmith's 2x72, like not sure how you're going to run small contact wheels, etc., and it doesn't look like it pivots -- still, this thing will grind metal for days and do the large majority of work you need done. Is that belt a 72" or a 48" -- sorry -- guess I missed that... Was the repair effort successful? Any other tweaks or upgrades since June?
-
2x72 number of receiver slots/bays
Yanni Rockitz replied to Bad_Rockk's topic in Grinders, Sanders, etc
How's your 2x72 build coming? I looked at that Wilmont Quattro grinder -- I can't see any reason for more than two tooling arm 'sleeves' / 'bays' other than just giving the user additional height options for whatever tooling setup they're using. You can't use more than one of them at a time, so like if you had the flat platen on and had something long you wanted to grind across the length of the platen, you could put the tool rest arm in the lower slot to have more platen exposed to grind against. An adjustable tool rest (which they also show) accomplishes the same thing, so not sure it's necessary. Maybe if you have several different people of different heights -- the lower ones for the shorter folks, the higher ones for the taller folks...? If it's just you and/or people your height, two is plenty. You could also make the stand or table height adjustable, if that really mattered -- which it probably doesn't so much. Build it to fit you. -
What is the fascination of knivemaking?
Yanni Rockitz replied to DerFeldschmied's topic in Knife Making
What a weaver of luxurious language that guy was... Reading that was like taking a little vacation, just now. ;-) Love it! -
What is the fascination of knivemaking?
Yanni Rockitz replied to DerFeldschmied's topic in Knife Making
My fascination with blades began with Tolkien. Every blade had a name and a provenance that often spanned many centuries. A deadly implement of honor and beauty, passed down from father to son, lost in battle, rediscovered in a Troll's cave, imbued with magical powers... as a ten year old boy, I didn't stand a chance. "This, Gandalf, was Glamdring, Foe-hammer that the king of Gondolin once wore." Words of Elrond from The Hobbit Made by the Elven-smiths of old, Orcrist had a beautiful scabbard and jeweled hilt. There were runes on the sword which bore its name. At first glance, Gandalf identified the sword as a "good blade." Like Glamdring and Sting, Orcrist glowed whenever Orcs were near. -
What is the fascination of knivemaking?
Yanni Rockitz replied to DerFeldschmied's topic in Knife Making
Man -- Fire, Filking, lava and liquor... enthralled amidst the music of Kipling while contemplating the intricate whittling of Gladioli as the steel heats in the forge -- who needs a xxxx TV! ;-) Long live the IFI forum! -
LOL - If his is haunted, mine is an absolute nightmare. I'm keeping it, though. The only way to appease the Ghosts of Smithies Past is to pound hot metal on 'er -- return the old girl to her divined purpose. That pill-shaped depression in the base and the shape and numbers all point to it being of early American manufacture. GREAT excuse to order yourself a copy of Anvils In America -- which is in its seventh or eighth printing now(?) - I need to get a copy... Most places sell it for ~$75, but I want to say I found it somewhere for about $60(?) That book should tell you what year it was made, based on the numbers.
-
"WTC" has to be the initials of the world renowned Blacksmith Woolard T. Carrington, of Boston -- famed Smith of the Commonwealth! Just kidding - I have no idea what it means, but it does look kind of hand-stamped, like someone did it post-factory -- maybe a former owner. Nifty historical value there -- maybe investigate who owned it in the estate you bought it from -- perhaps there's a great grandpappy with those initials. She's a right purdy anvil -- good score! I'm jealous of how smooth and flat and pristine the face of yours is. You should add a photo of the underside -- the shape of the cavity (or lack thereof, in my case) is one of the identifying characteristics. The numbers will likely get you to a positive ID -- you just need one of the guys in here who owns Anvils In America to look up the Trentons and see what your numbers mean. P.S. - the "H" is for "How the HECK is an anvil this nice just sitting in a barn?!" ;-)
-
I love the history. Interesting perspective on "old" -- so it's not officially old until its 200th birthday?!? Jeeze, man -- rough crowd. And there I was, thinking I was in some elite club of artifact owners ;-) The world of anvils is on a whole other scale. I fully agree about the relative emptiness of the terms "rare" and "unique" -- at least when used by sellers as buzzwords. I described this Trenton that way mainly in relation to my own personal search for a decent anvil for a good price, which has been a challenge. From my experience, if you have $800, or more, you can find a nice anvil, these days, barring the odd unicorn found digging up the garden. I already had a little old 80lb no-name anvil with a good face, so I told myself I would cap my "real anvil" budget at $400 -- more out of principal than anything else. This search has gone on for several years now, without success, then I found this one -- and the guy threw in several chisels and two nice pairs of tongs and a wooden base, so I felt like it was money well spent. One fine day, I'm going to get a huge double-horned beast, but this old girl should hold me till then. Thanks again!
-
TPowers and TwistyWillow -- you're officially my heroes -- thanks for the info! So great to have good people out there who just help a fella out like this. I'm thrilled to know I've got a really old, fairly rare and unique anvil in such relatively good condition. As I understand Trenton manufacturing history, now -- so far -- Trenton is an American brand from Ohio, but some of their earliest anvils, way back in this 1878-1898 timespan, were actually manufactured over in Europe -- I've read Germany(?) -- and maybe the UK(?) -- and these are identifiable by the flat / non-hollowed-out base, as well as the absence of any kind of lettering / numbering on the feet, which was started when they began to make them in the US. Why were they farming out the manufacturing to Europe, if it was an American company? Same reason we do that with China today? Like, maybe it was cheaper then, where Europe was all set up for it and we were still young and relatively underdeveloped here, in terms of infrastructure? It's such an odd phase in Trenton history... It's interesting to see how they copied the 'stepped feet' design element of the Peter Wrights, clearly trying to benefit from that popular brand's success. My inner anvil nerd is all excited over the fact that the youngest this anvil could be is 123 years old (1898) -- and just might be as old as 143. Wow... A real piece of living history. These things are such time travelers... The wear on the face could only have shaped it that way through many hundreds, maybe thousands of hours of hammering -- and now I have the honor of picking up the torch and taking my turn on a tool that has seen a huge amount of human creative effort over more than a century. You've made my month. :-)
-
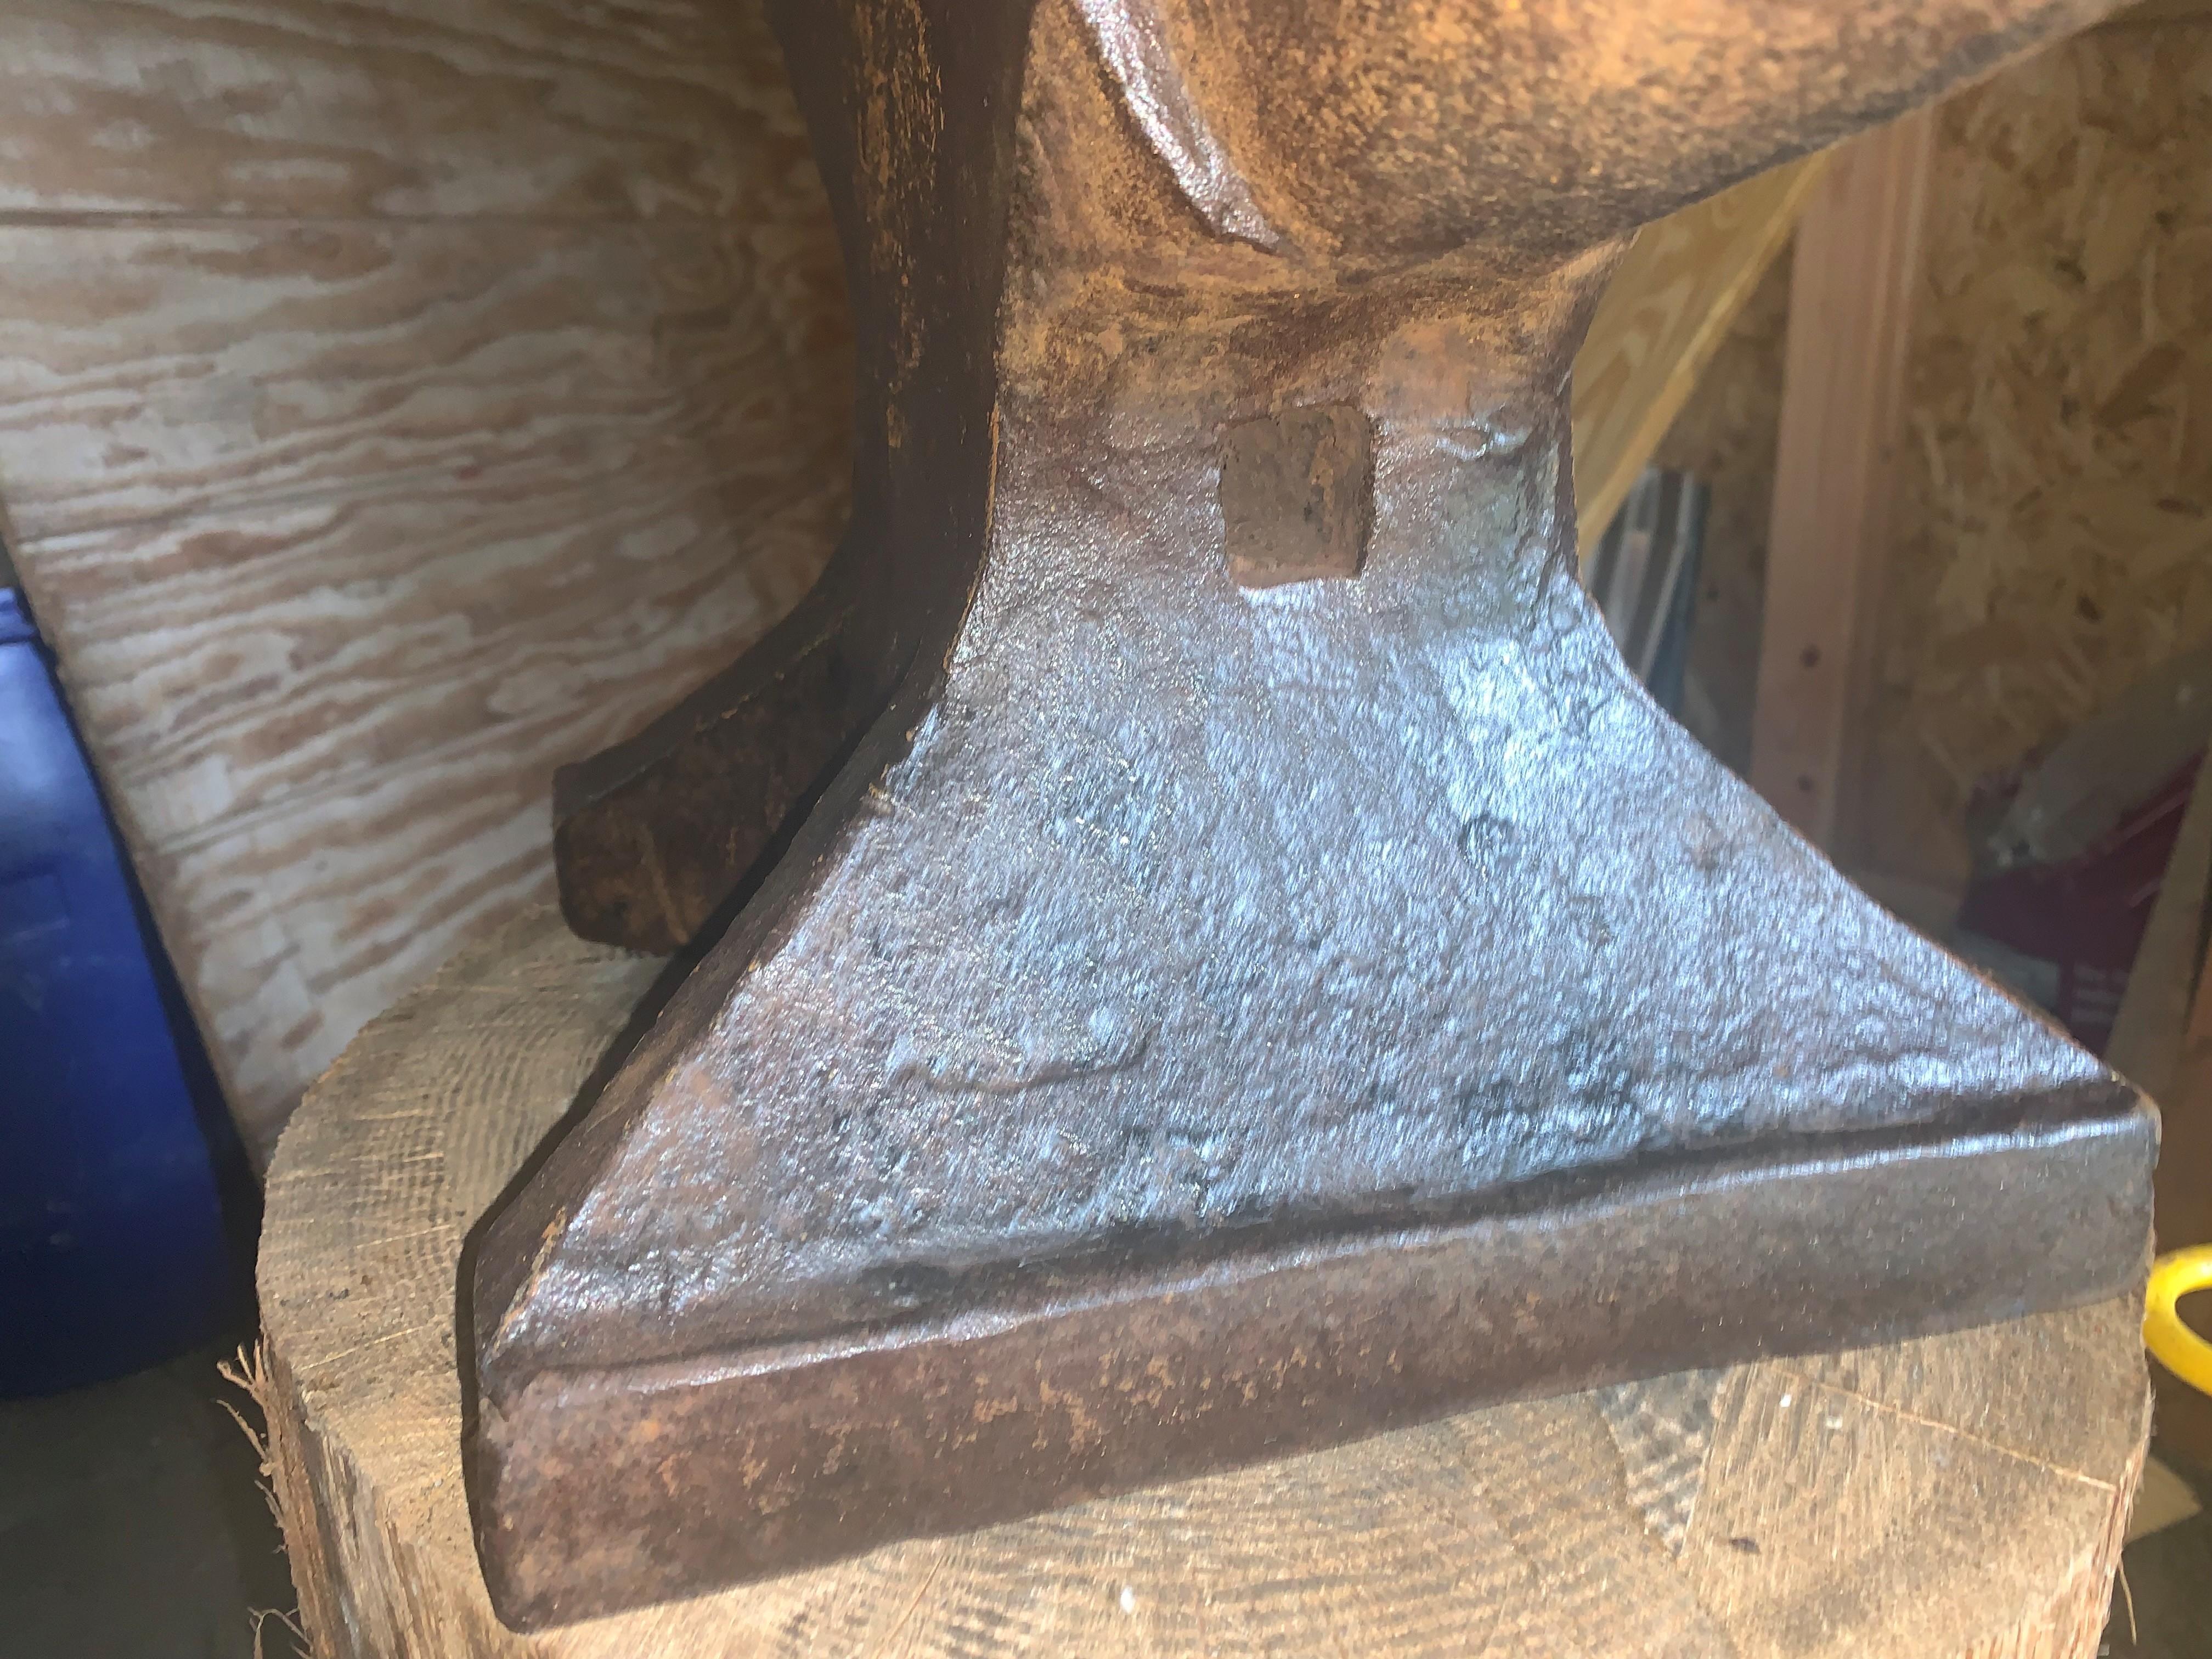
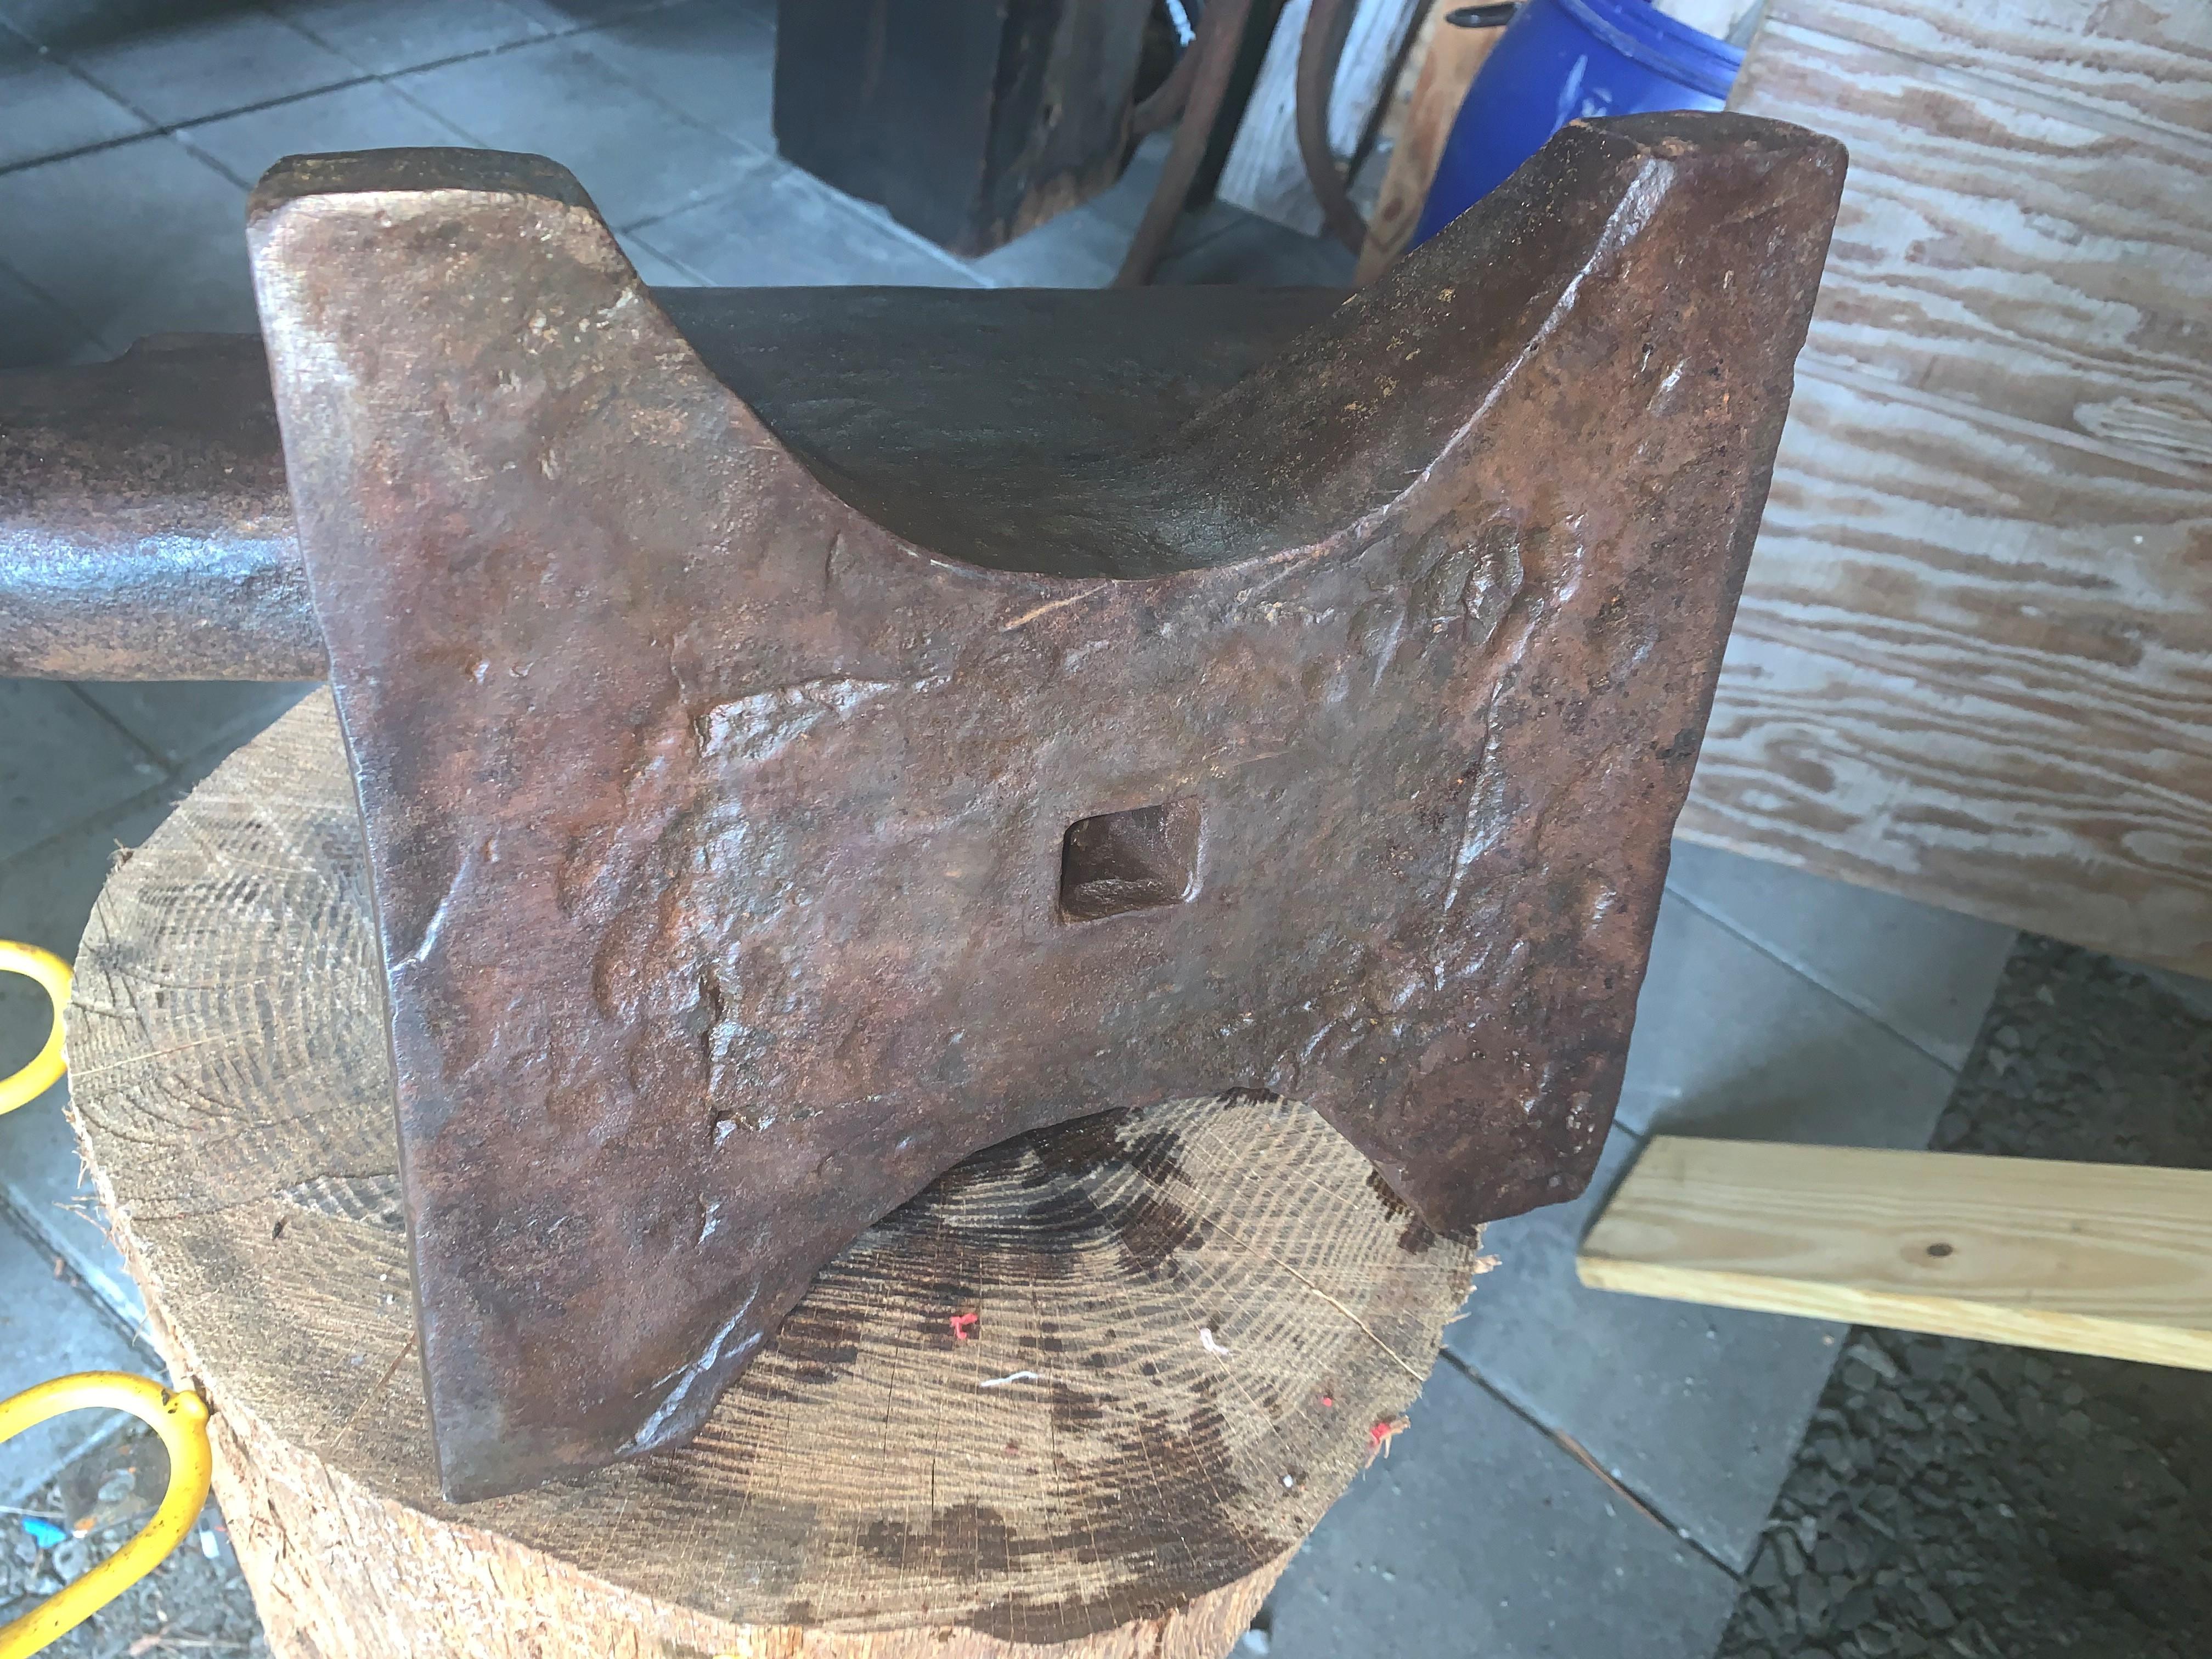
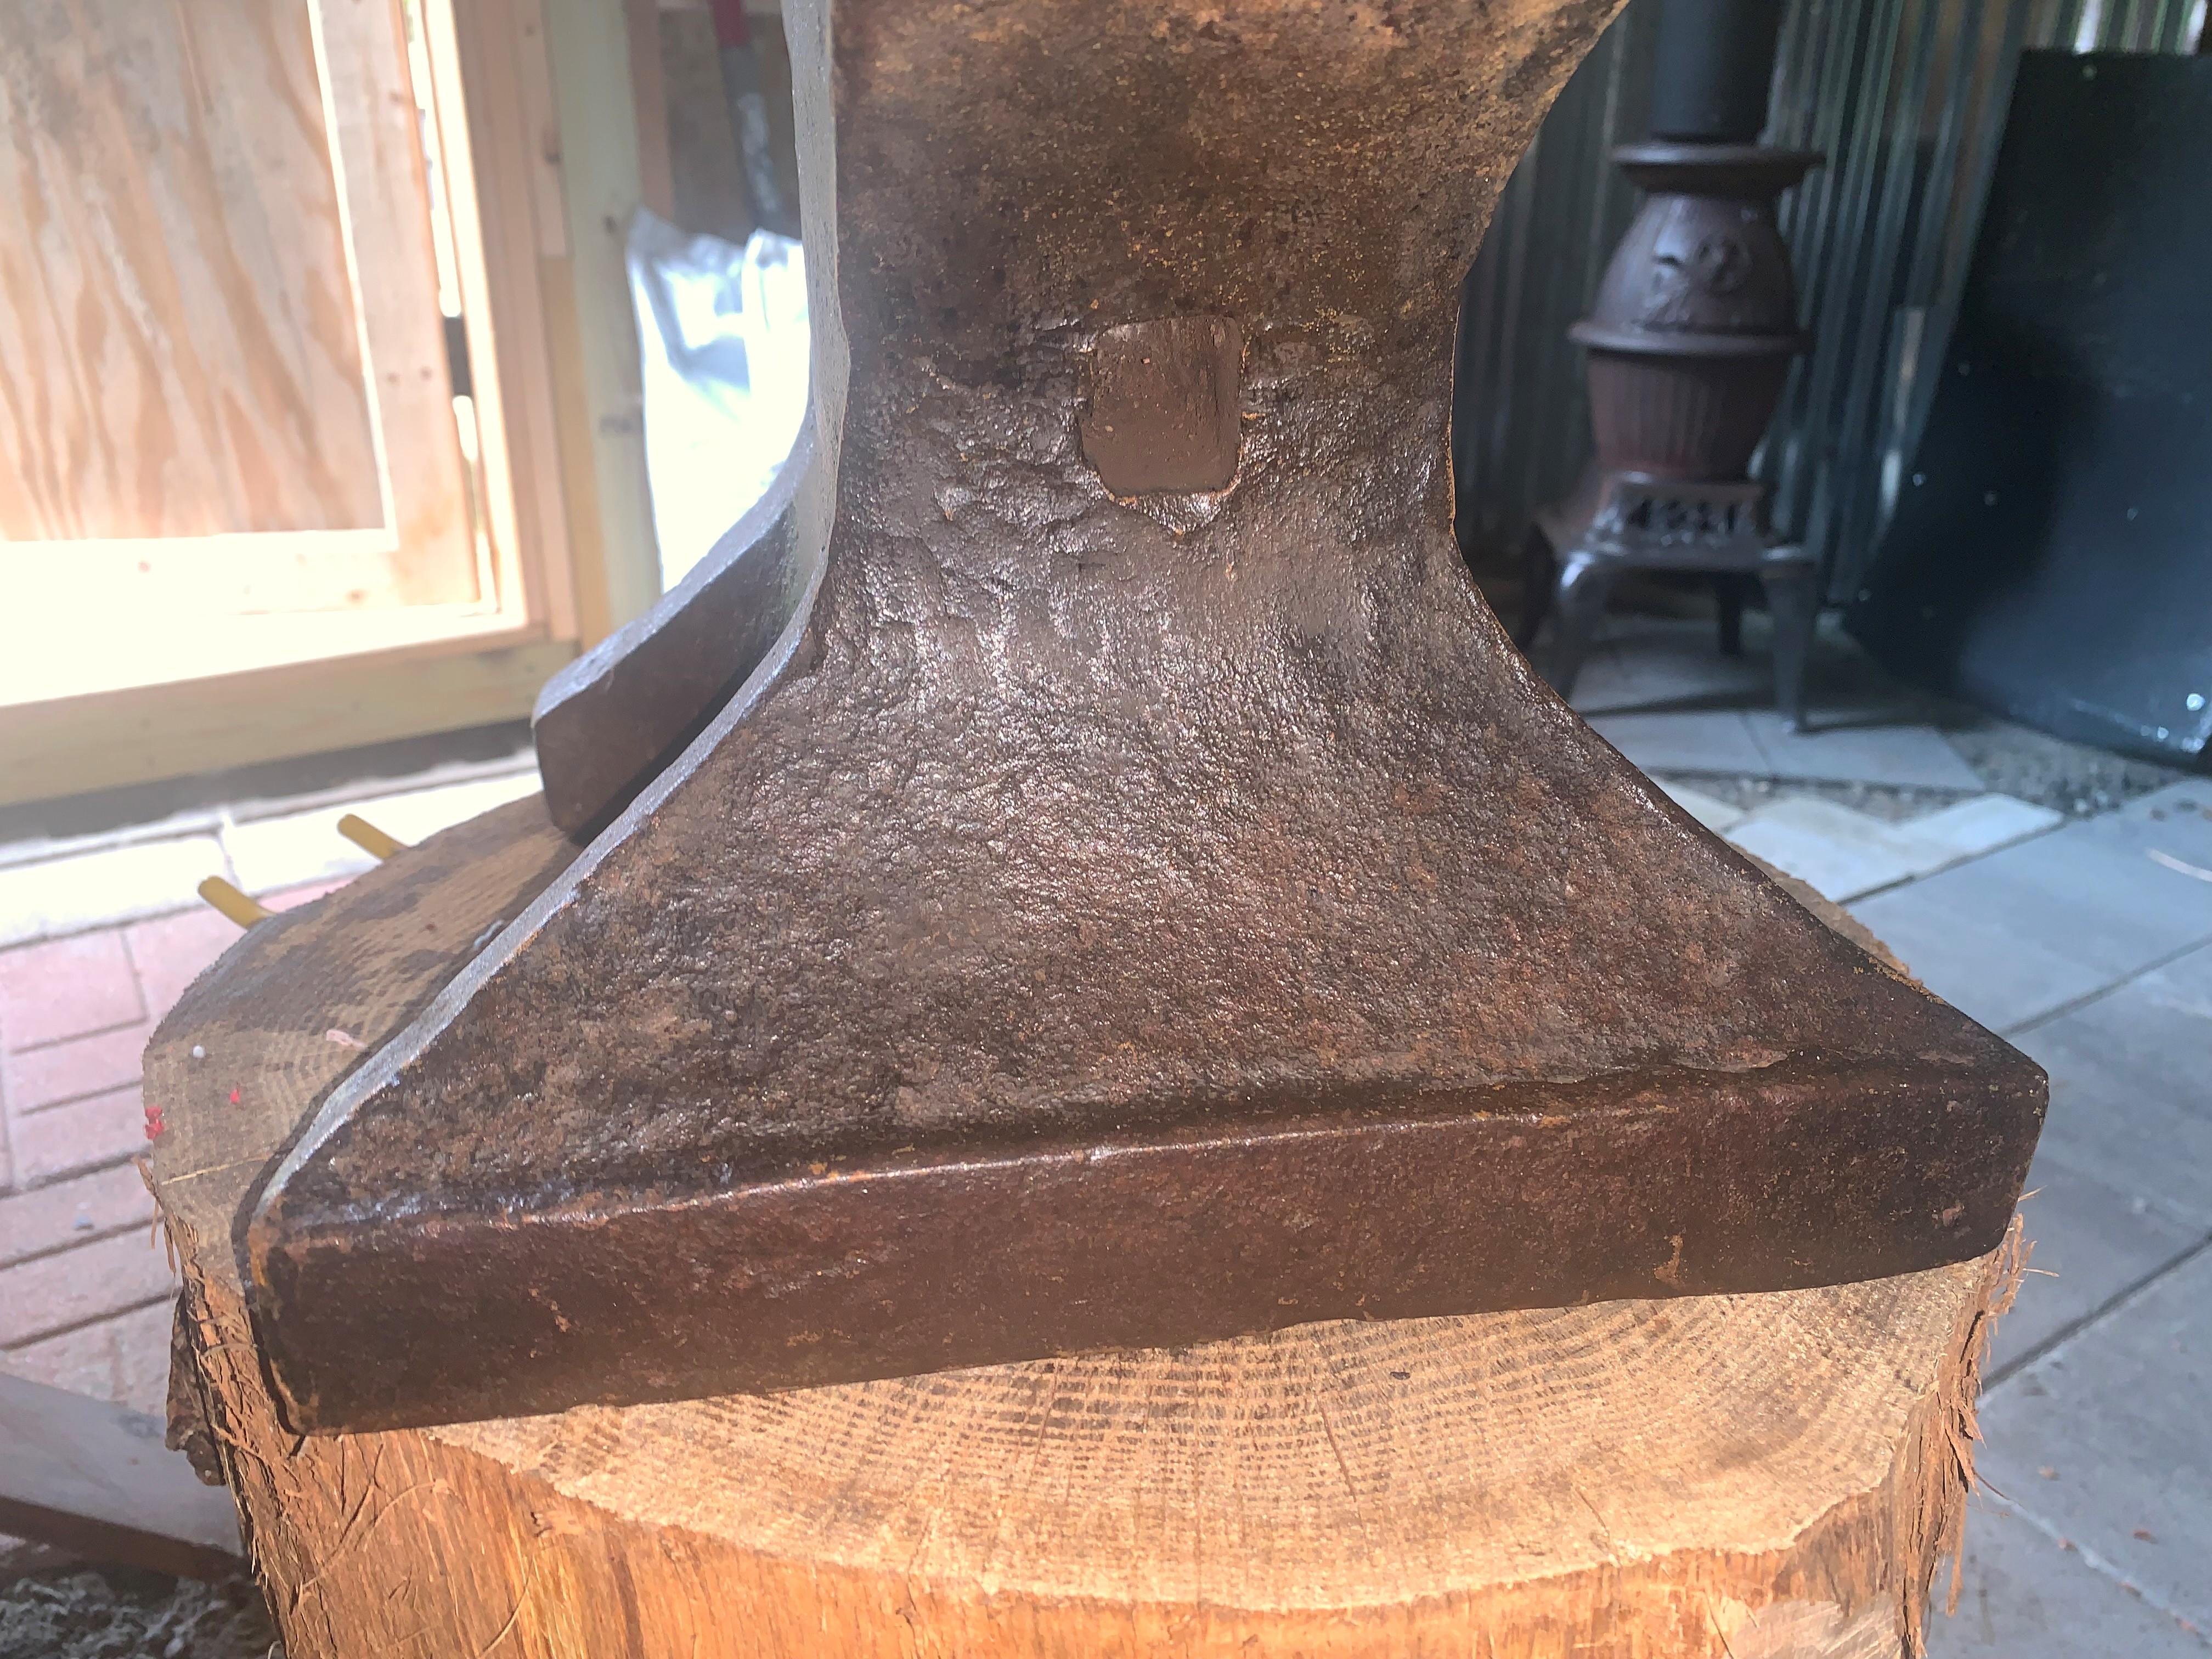
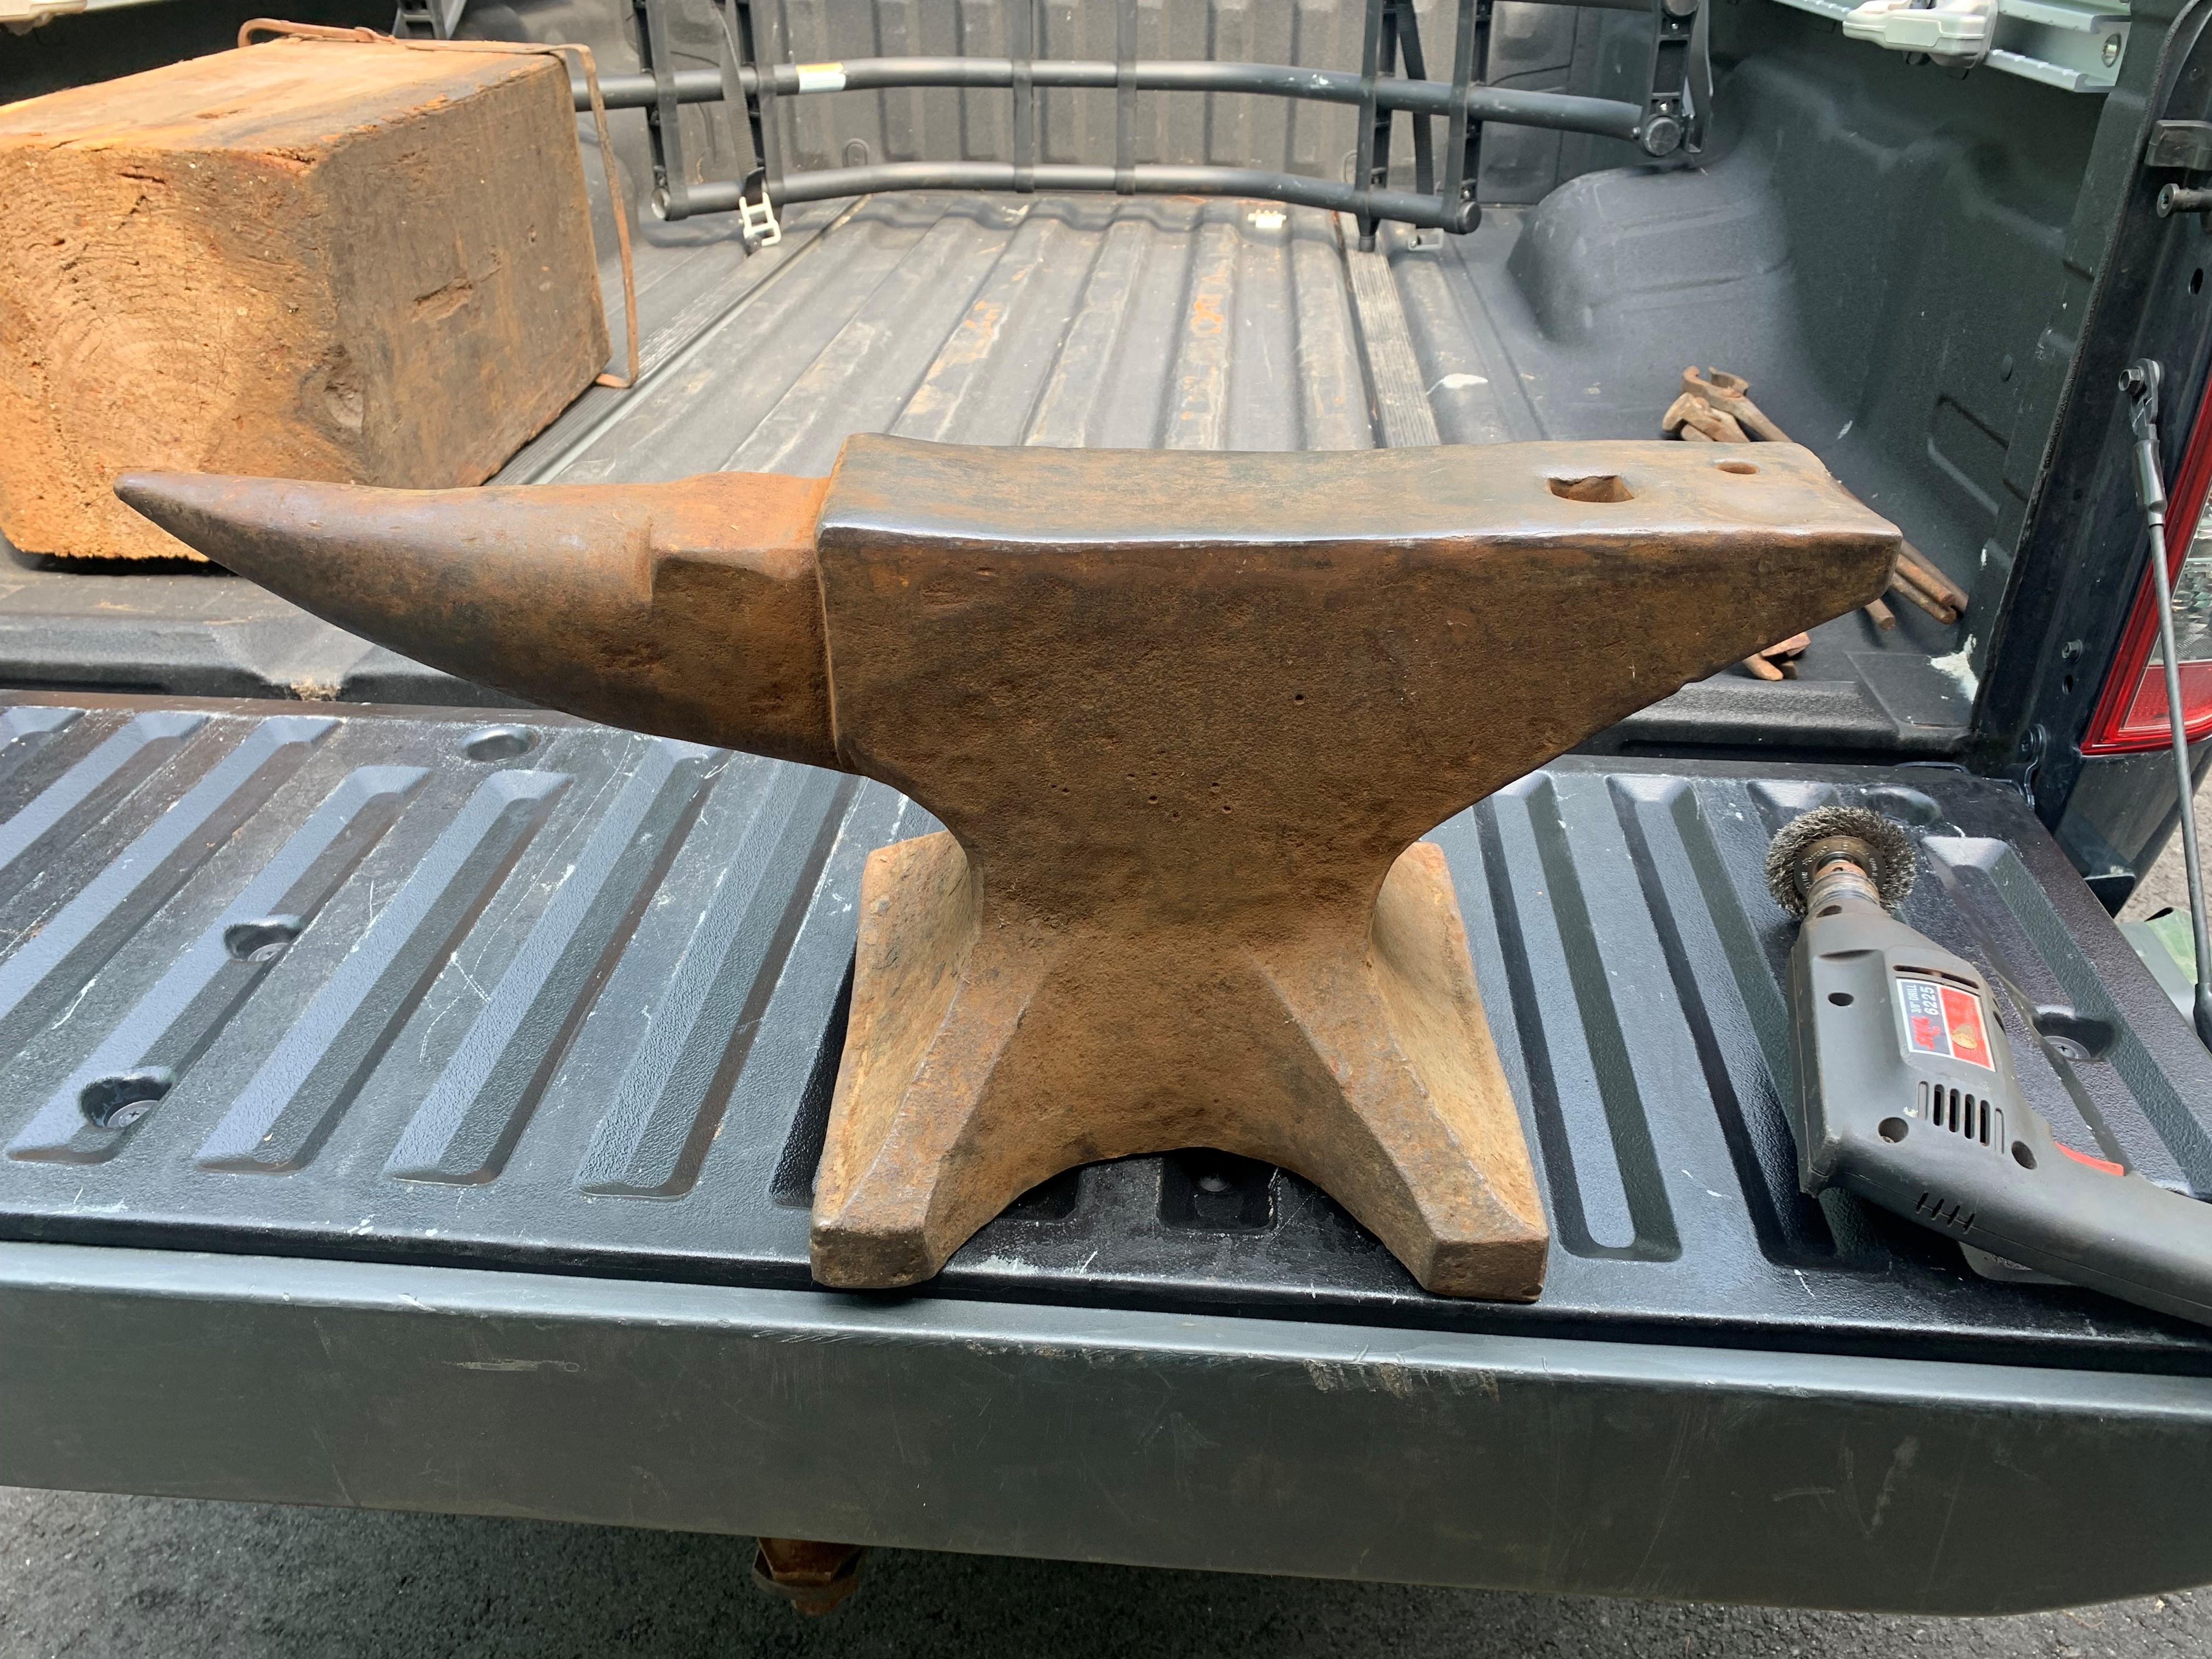
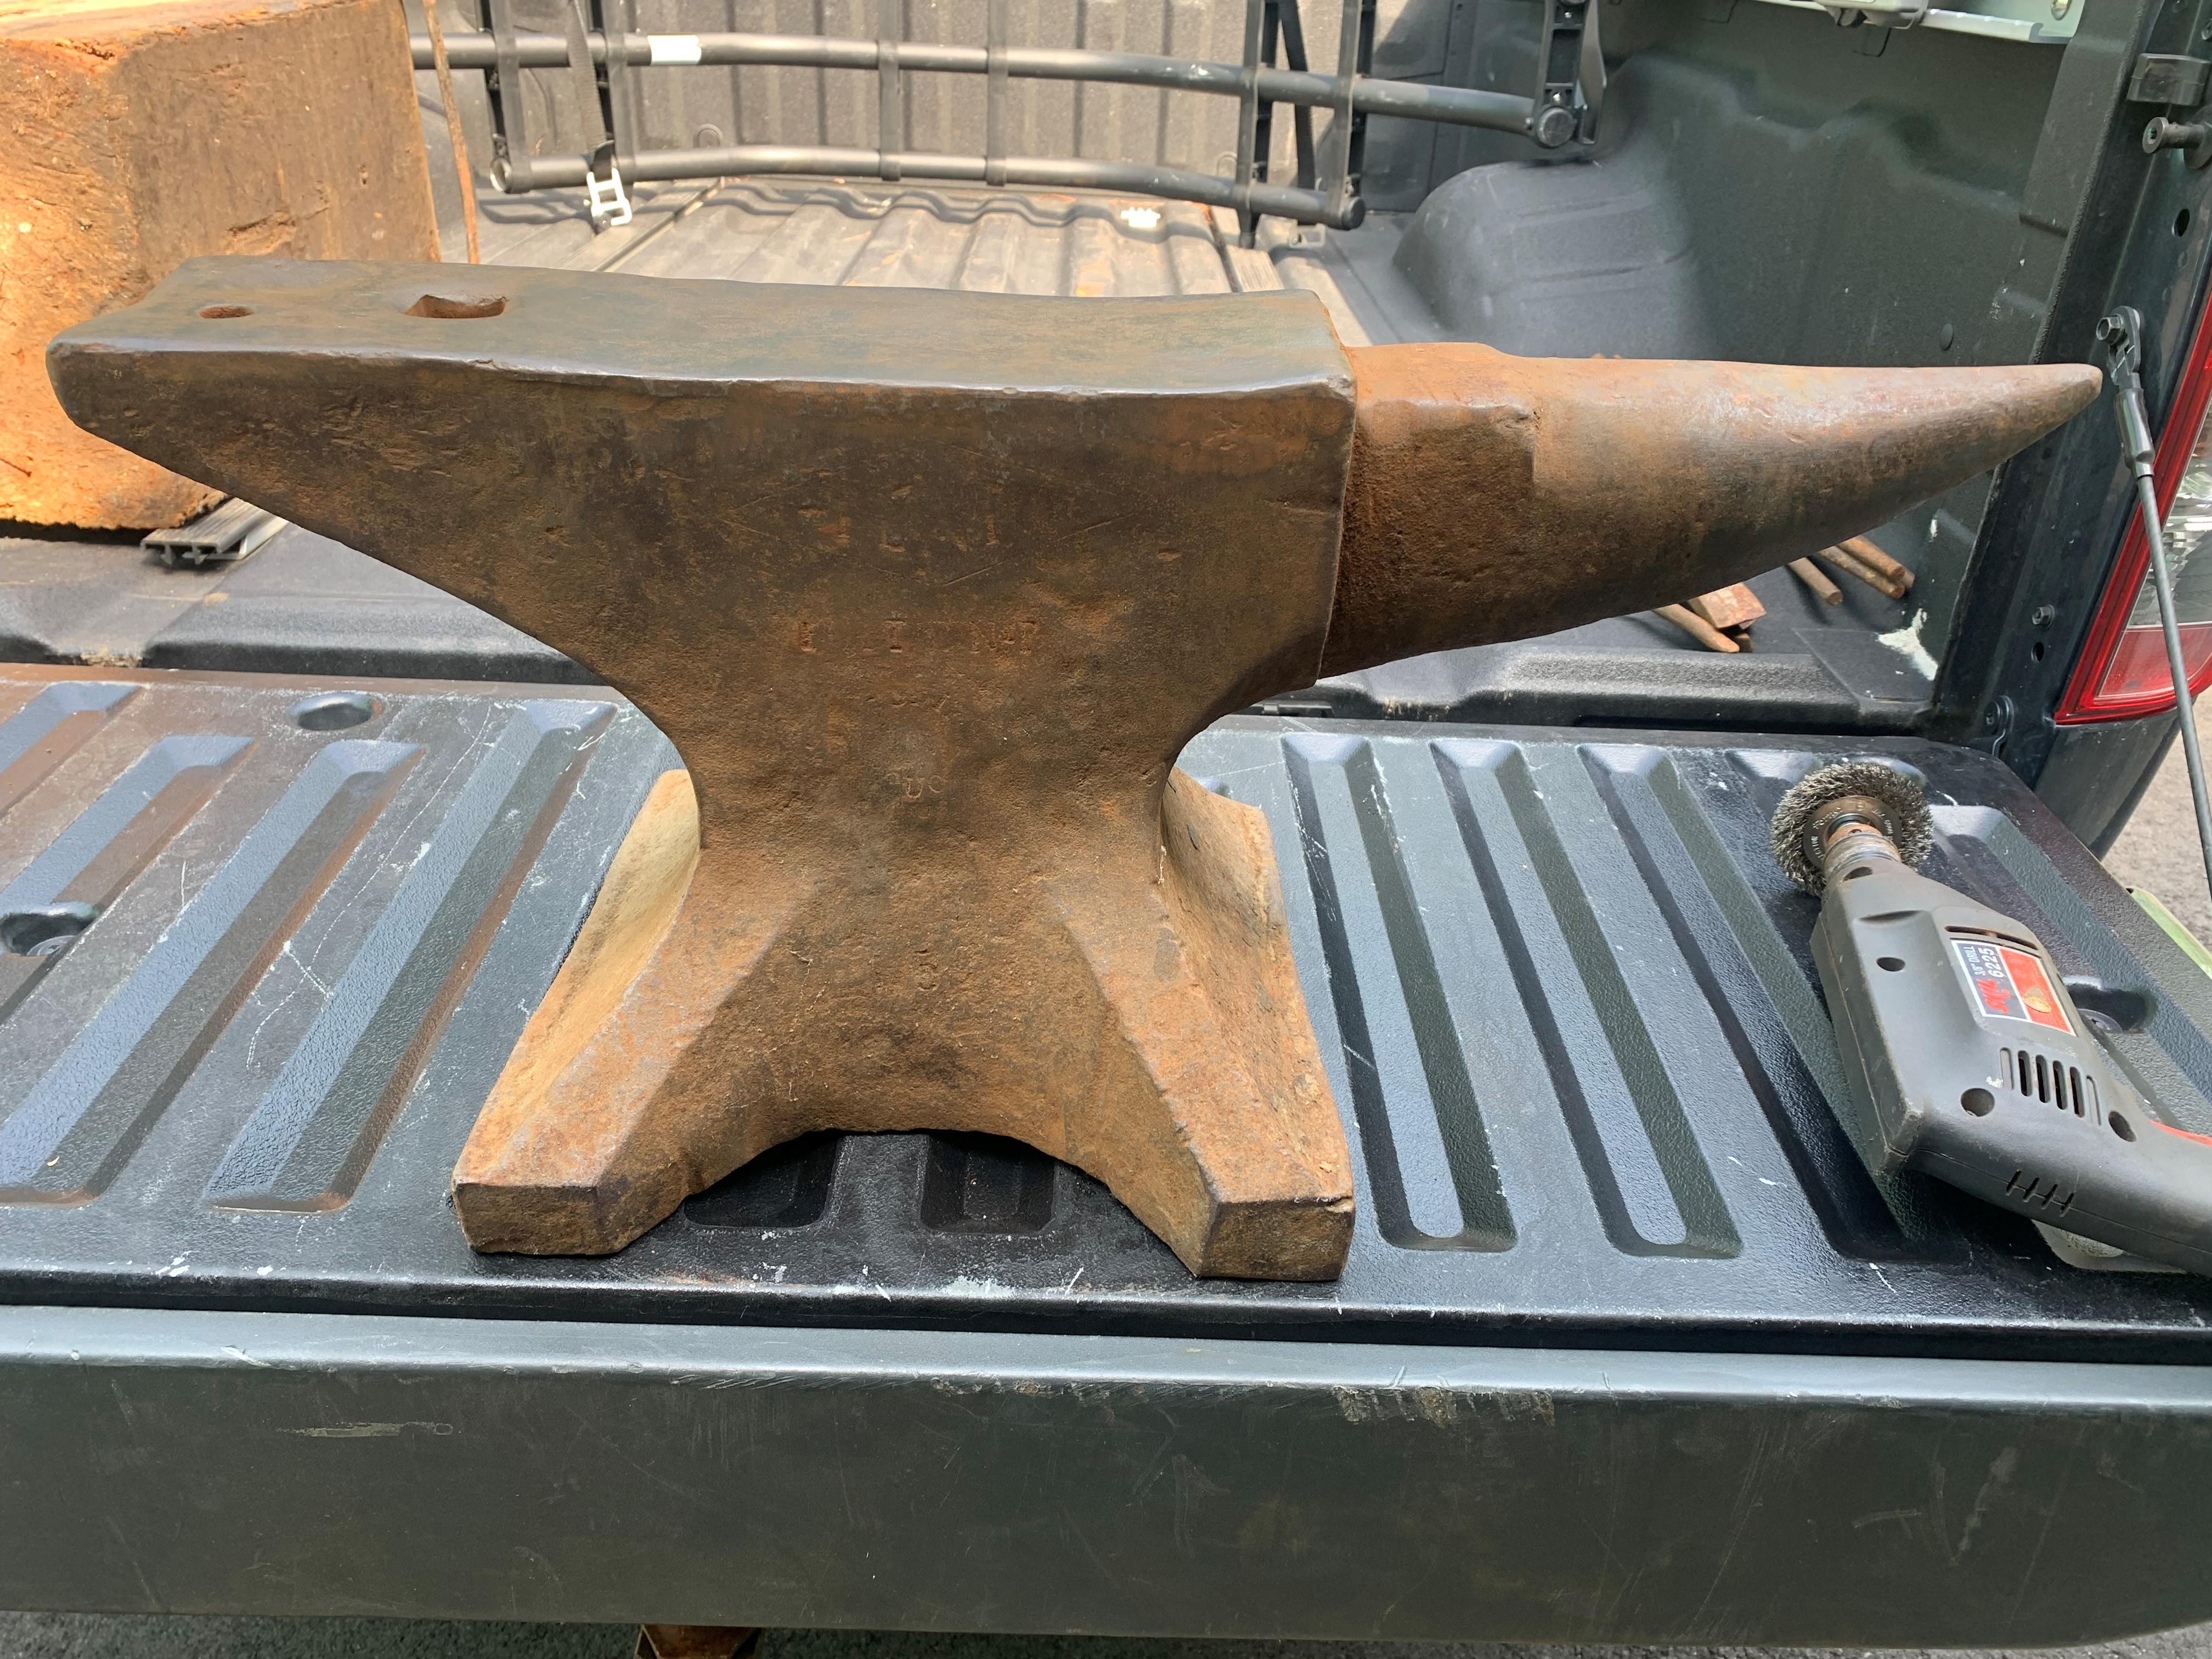
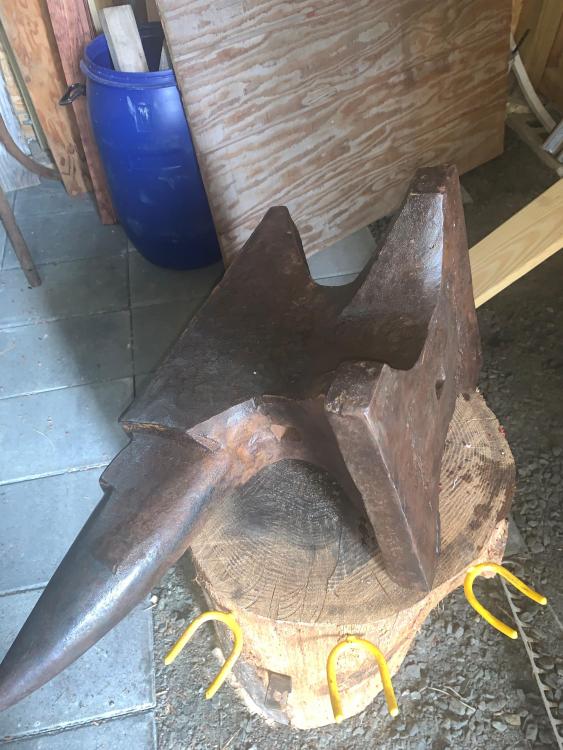
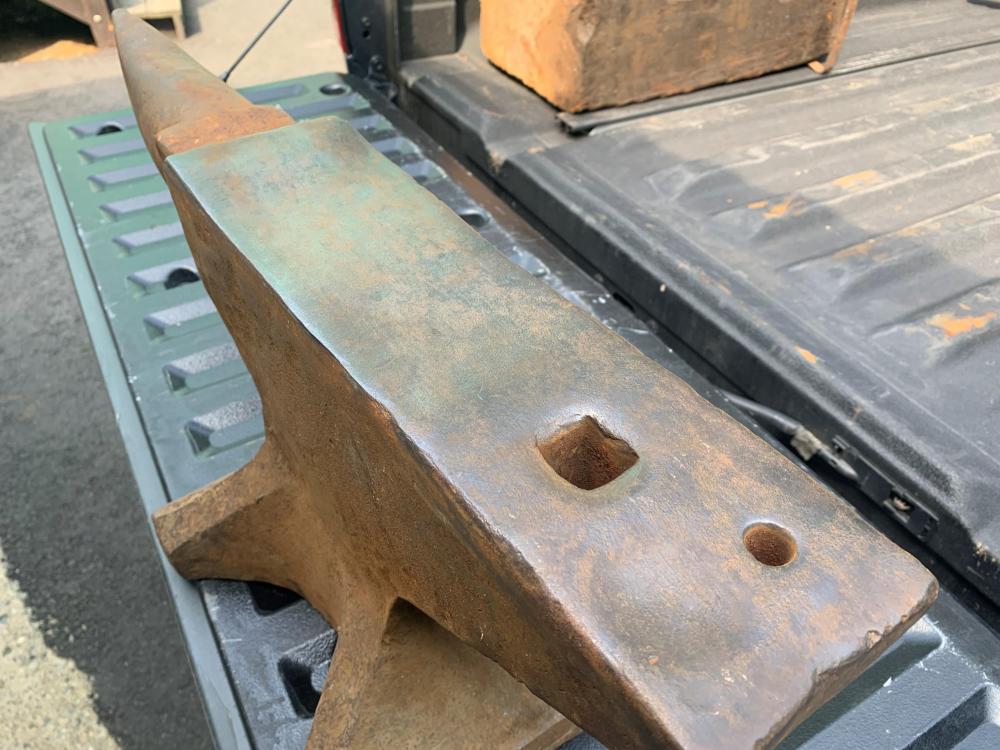
Additional pics attached -- it's actually not hollowed out on the bottom at all, with the exception of a square hardie-type lifting point(?) hole. Appears pretty much flat and rough. I also took pics of the two 'ends' of the feet where that Peter Wright-style 'step' is forged onto the feet where the weight and serial numbers are usually found on American-made Trentons. No numbers there at all -- on either foot. Does this mean I have a German production early-school unit? What years were those made? (That's pretty cool, methinks.) What about thoughts on the curvy face -- will it be a problem?


-
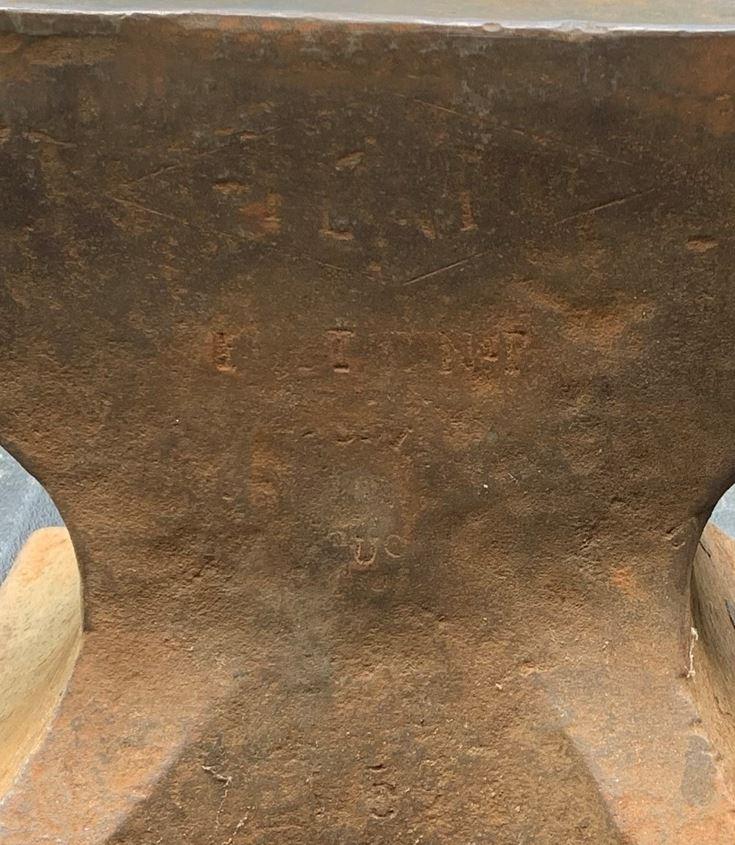
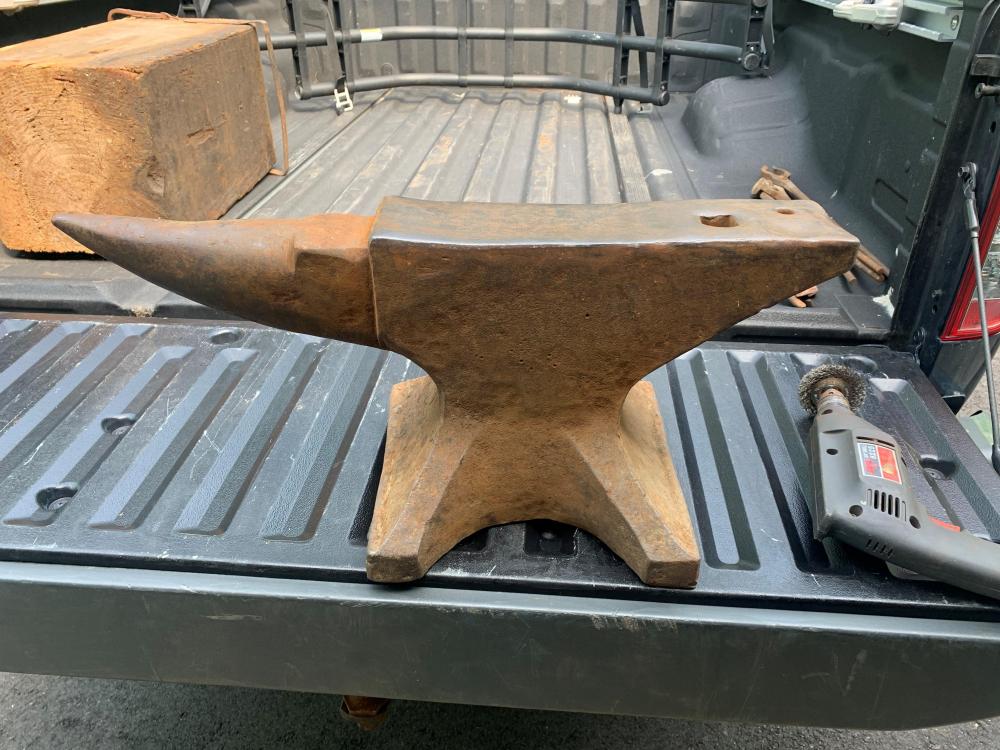
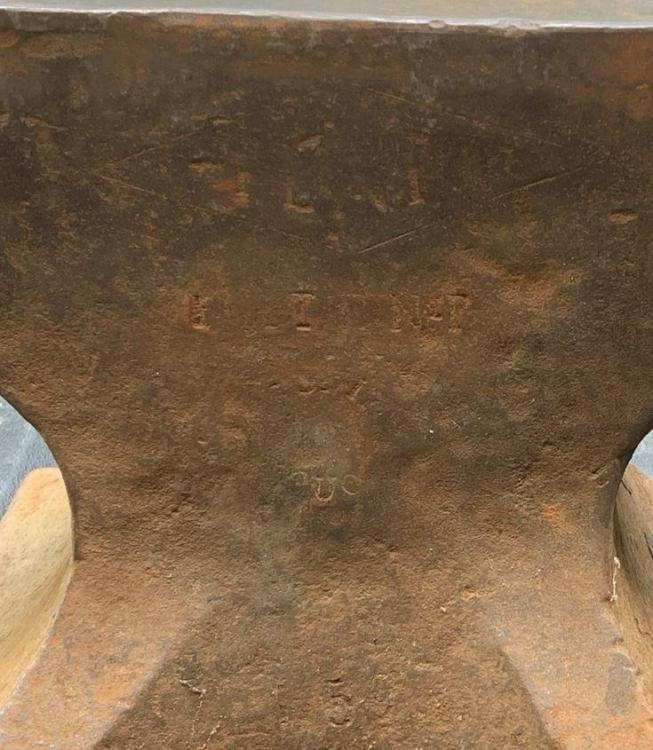
Here's my 'new' Trenton. Any thoughts on its birth date? No serial numbers or stampings of any kind on either side of the base, where the serial number should be, so I'm looking for help dating this baby. There's a fairly clear "Trenton" diamond logo with a properly shaped N in the center (not the one that looks like an X) and a partially obscured "SOLID WROUGHT" round stamp below it, with what I think is the word "PATENT" in between them and a "159" below that, near the base. Nothing on the feet... rough concave in the base, underneath. I haven't had a chance to get 'er on the scale yet, but I'm guessing she's 159 lbs or thereabouts -- looks and hefts about twice the size and weight of my little 80 lb anvil. Also looking for advice on the face -- there's a fair amount of cupping in the center and around the hardie (hardy?) hole, showing very clearly that a TON of work has been done on this old beauty over many years -- clearly by people who knew enough not to damage it, as there are very few dings or chips out of the edges. They're in remarkably good condition, given that amount of work that could put that amount of work-pounded curvature into the face. The front, by the step, is like a little ski jump and the hardie hole is quite dished out around it. I really wish I could have it ground or milled perfectly flat again, but I'm pretty sure that's a really bad idea with this particular specimen. I doubt there's enough steel plate (maybe 1/4" to 3/8"?) to sustain that and it would have to be water-bath milling or grinding to avoid ruining the temper. Even then... I'm thinking the main section over the waist is wide enough (~6-7") and flat enough that it'll work fine for hammering stuff flat -- and top tools in the hardie should be fine. I'll make a custom set for this old girl that will nestle into her welcoming bosom. ;-) There's a very dished out depression next to the pritchel hole, which almost looks like it was ground out as a rounding spot, though I don't see any grinder marks. Literally could've been deformed that way over thousands of strikes with a ball peen... and it's kind of a neat little rounding "swage". The face, despite it's curvaceous undulations, is remarkably smooth. Curious to hear thoughts from folks who've used old curvy anvils on whether these curvy areas will be an issue or can they easily be lived with. My little 80 lb travel anvil is perfectly flat, if I really need something to sit 100% flat, I guess. Gotta figure out a spot to put it as a second anvil in my little 12'x12' smithy...

-
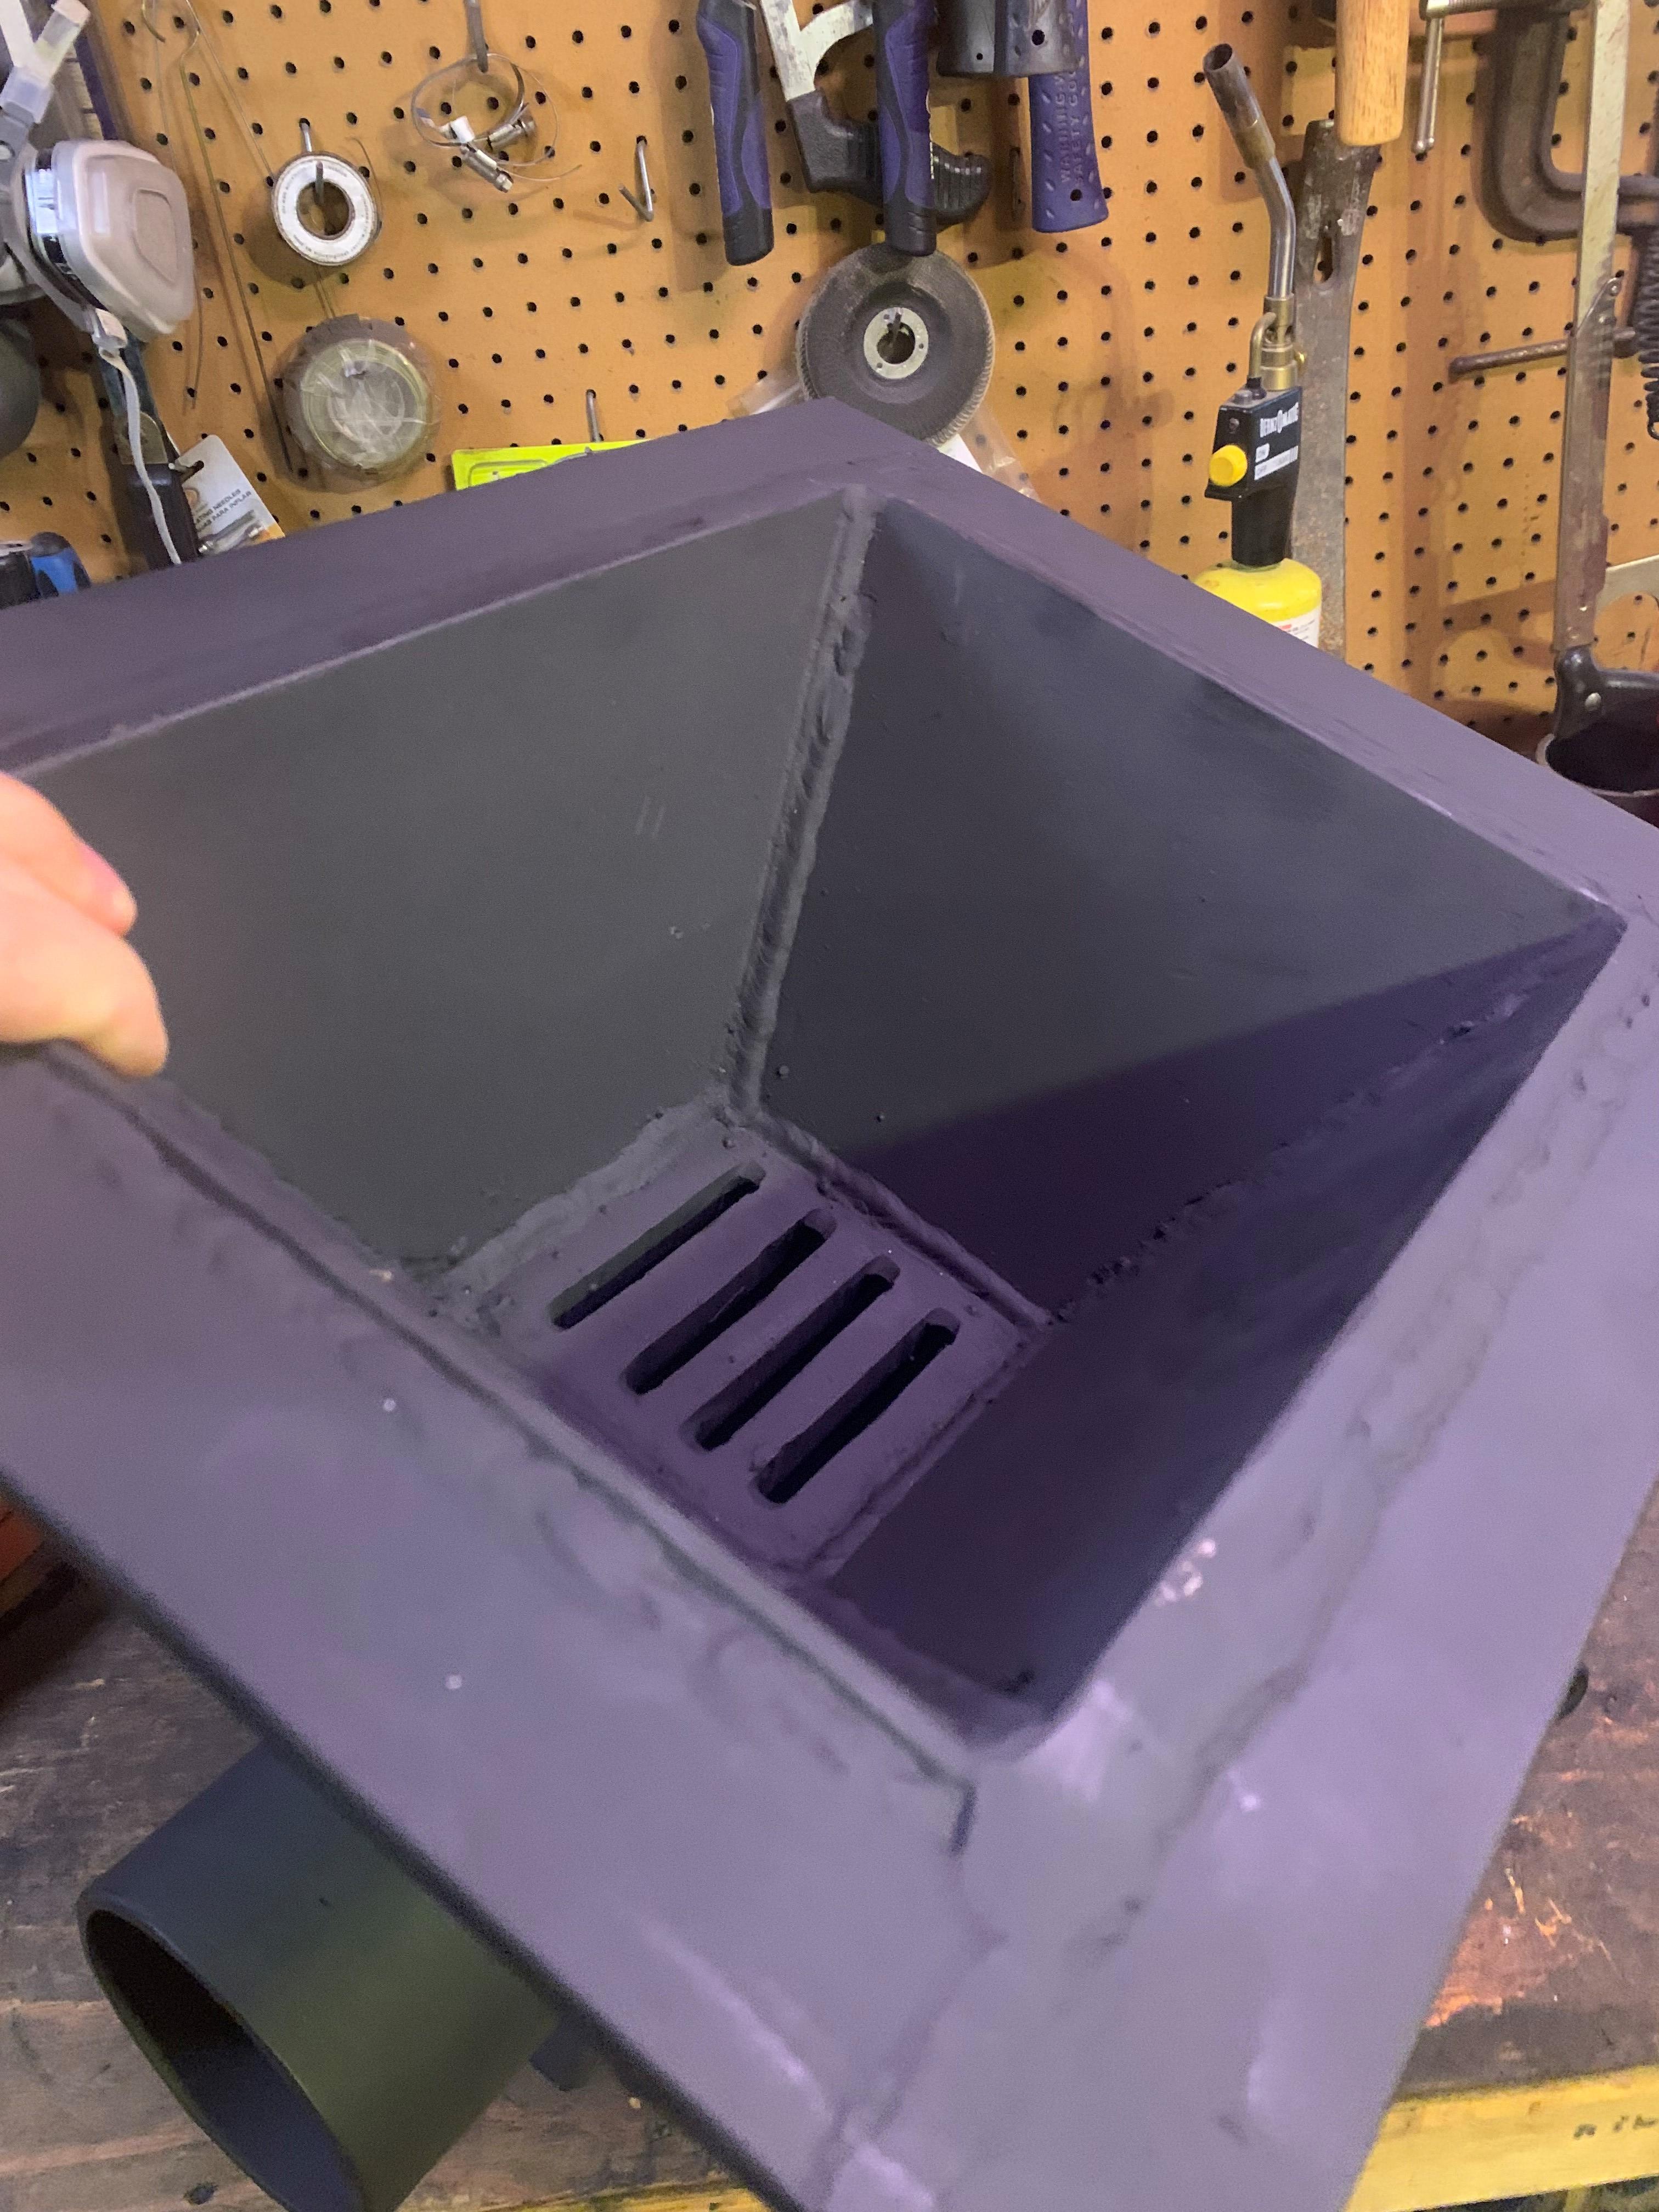
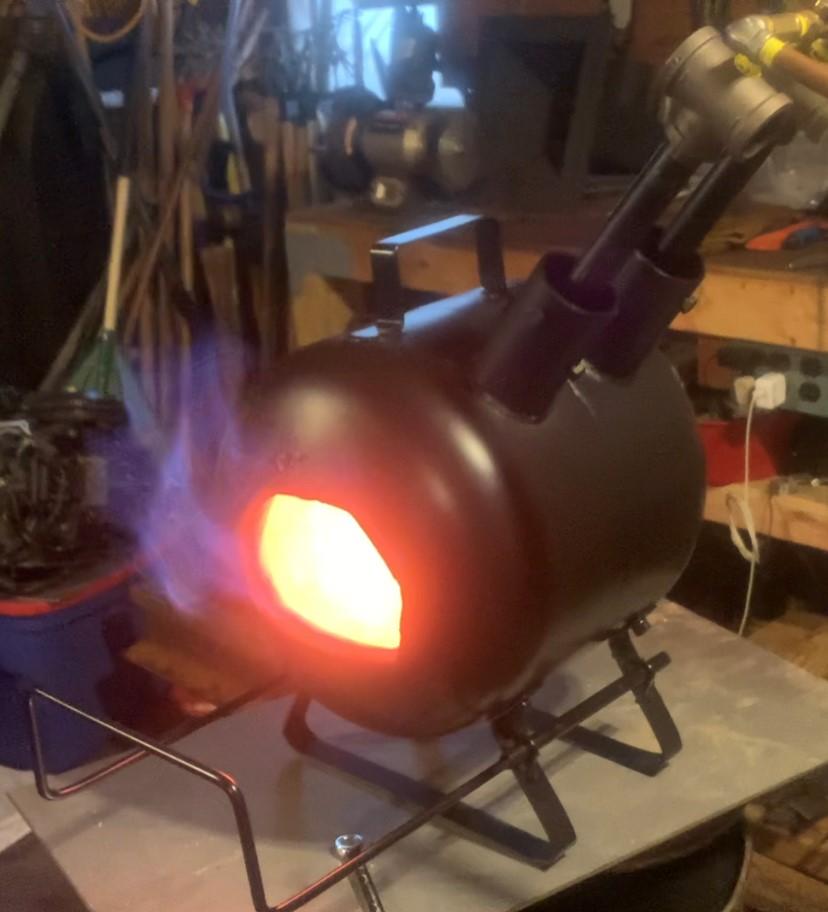
 You can definitely use a gas forge inside a building -- even a small one -- just make sure there's good ventilation and you have REALLY good heat shielding and fire extinguishing capabilities. If you have power to the building, a good setup is to mount an exhaust fan high up in the wall above the forge and crack a window or door across from it so you get a cross draft that flows across the shop and carries the forge fumes out the fan.
 -
2x72 number of receiver slots/bays
Yanni Rockitz replied to Bad_Rockk's topic in Grinders, Sanders, etc
More receiver 'slots' / 'bays' - whatever just gives you more options on where you can align the various attachments, contact wheels, etc. You might have one that contacts the belt with a smaller wheel and needs to be in the top receiver 'bay', while another with a platen or large wheel pushes out more belt and so has to sit lower, etc. Each manufacturer has a different setup - most common has two, I think -- not sure, as I'm also pretty new to them, but that's the general idea. -
Newbie looking to buy my first Real Grinder
Yanni Rockitz replied to Dangerruss's topic in Grinders, Sanders, etc
DangerDood: Curious to hear your feedback on this Ameribrade grinder after a year or so, now -- are you happy with it? Is it sufficiently powerful for the various tasks you need it to perform -- knife grinding, general grinding/sanding, etc.? Have you / would you change anything? I'm asking because I'm looking for a cost-effective 2x72, trying to identify the best bang for the buck. My house has 220 because it used to have electric heat, so I believe I could get a 220 circuit wired up in my garage / shop, but it would certainly be easier / cheaper if it ran on 110/120 out of the box with sufficient power. My little 1x30 just isn't good enough, of course... As I am gathering, the imperative behind the variable feed drive is to slow it down to reduce heat in certain situations, right? I'm sure the way longer belts also help there, and last longer and there's a greater variety of higher-quality belts available. I'm into bladesmithing, axes and general fab / blacksmithing, so this tool seems highly important to add to the the shop. Trying to figure out if I need a VFD and how many HP the motor should be etc. Anyones' thoughts / links to any supporting discussions are greatly appreciated -- I'm sure there are loads more in here that I haven't seen yet. I'm pretty sold on a 2x72 -- just want to identify a platform I can get the basic setup for at the best price/quality point to start, but which can be added onto later with the small diameter / fine radius wheel, other attachments, etc., as funding allows. Any info is appreciated! -
Wow - I come back a week later and the whole gang has chimed in. ;-) Good info all around! I didn't mean to hijack this thread -- just looking to do the same thing and there's obviously tons of experience here. I'm wondering if my explanation was maybe causing some false alarms... The "roof jack" (flashing boot that holds the stack to the metal roof panel) I originally got is a Dektite #7 "Hi-Temp" unit. They state that the 'boot' part that you cut to size to fit the pipe is made of 'high temp' orange (rubber? ...silicone?), but it's clearly not rated for what I would consider anything close to truly high temps -- only for continuous contact with 392F, which is not high enough at all for single-wall -- maybe not even for double-wall, though I suspect that may be okay. I doubt an open-air super sucker off a coal forge firepot would cause the flu to exceed 392 six feet up. I know I can hold my bare hand against the 6" double wall stainless on my house wood stove flu when it's running hot and that pipe's outside is only warm -- doesn't burn the hand. The only reason I got that roof jack with the orange rubbery boot was because it had the bendable aluminum strip that would form to the wobbly ('corrugated?') galvy roof panels on my building and I'd seen some others had used them and liked them. I (thought?) I was having trouble finding 12" stainless double-wall/insulated pipe sections to go up and out, but have since found them online. It's still easily $300 for the top two sections I'd need to go up and out the roof, so it will be a lot cheaper and easier to just replace a section of plywood wall with hardiboard or some other 'cement' non-combustible and go out the side, then up with single-wall. Maybe sandwich in some rockwool or other fireproof insulation like leftover kaowool between the two layers of cement board wall inside the frame with an air gap around the metal and go out the side above the forge. I am indeed thinking of a Hofi-style side draft with a 13"x13" duct (fabricated out of 3/16" sheet about 4' to a box end that has a collar to seat the 12" round single-wall stove pipe going straight up from there. I'd plan to space it at least 19" off the side of the building so it's well clear of the 18" to combustibles code. I know the sulfurs and weather will eat up that pipe in a few years, but to get up and running on a budget, this is many hundred$ cheaper than doing double-wall. the black pipe sticking up off the back with woods behind it should also be less conspicuous than having that orange thing on the roof with stainless. Knock on wood! I noticed the Hofi side draft is 13" square opening at the fire. Would a 1" lip around it (to reduce it to 11"x11") create more of a super sucker effect? I'm personally REALLY paranoid about fire safety, and the new smithy is out by the woods, so I'll probably only run the coal forge when it's wet and/or snowy -- which is a fair amount of the year here in Maine. Gas forge the rest of the time. We'll see how that goes. ;-)
-
So what did you end up doing on this forge hood / flu thing? I'm installing one right now and keep going back and forth about whether to go out through the wall then up, or straight up. It's going to be a side-draft super-sucker, either way. I know straight up is the best draft, so I got a "High temp" Dektite #7 red silicone metal roof flashing / boot to put my 12" single-wall pipe straight up through the curvy/wobbly corrugated galvy metal roof panel, but then I realized my roof rafters are too close (24" total, so only like 6" either side) for code and I saw some guy's pics of one of those silicone boots in flames and realized I can't be sure it will definitely withstand the heat of a single-wall flu pipe coming up off the forge at full welding heats. I REALLY don't want to risk any kind of fire out there near the woods where I built the smithy. The Dektite red silicone is rated for 392F 'continuous' temp contact and I'm not sure the single-wall black flu pipe won't go higher than that ~7' above the fire. So yeah, I know -- "Use double wall insulated for the roof penetration", but that stuff is EX$PENSIVE! Like hundreds of dollars, at least. I've answered my own question: Much easier to just cut a big hole in the plywood side of the building, frame in sheet metal or hardiboard / cement board (some less costly non-combustible) then go out the side and up, keeping the standing stack 18" away from the side of the building, with some metal bracing to support it against the weather. That way, you don't xxxx with the roof and there's no sillycone risk. I've seen some designs for those that look good -- just have to fab up a 12.5" square 'duct' for the bottom to go out the wall. Angled face with a 10"x10" opening to create the 'suction' into the larger 12" pipe. Weld a collar on the outside hole for the round stove pipe to seat into, make sure it has a slight down-angle for rain to drain off to the outside -- good bracing to the side of the building, a custom rain cap a good 12" or higher above the top, a ~1/4" galvy critter screen / spark arrestor around the top -- "Bob's your uncle." (Maybe?) Anyone else done this? One example I saw in here had four of them coming out the back of his shop and said the draw was plenty strong.
-
The Absolute Last Final Word on Anhydrous Borax Flux
Yanni Rockitz replied to JHCC's topic in Fluxes used in blacksmithing
Dooodz - the Turbo Encabulator! HA-HAAAA! Haven't seen that one in years. I mostly agreed with what was stated, with the exception of the values he stated for the logarithmic bypass quotient. Clearly, his calculations failed to account for the encabulatory fibrillation caused by the fluxion generated when chrome plated knippling pins are incorporated into the design. A few tweaks to the inmolation intake settings on your defrundus valve will correct that. ;-)