Goods
-
Posts
1,174 -
Joined
-
Last visited
Content Type
Profiles
Forums
Articles
Gallery
Downloads
Events
Everything posted by Goods
-
Be cautious with the Kevlar gloves. At the temperatures we work at they won’t do much good, pulling burnt melted plastic from skin is not fun. I prefer not to use gloves at all while forging. The only time I use them is when hot punching with a hand help punch, and only on the left hand. I will also put them on while forge welding with a lot of flux. (That stuff just seem to find the most uncomfortable places to land.) The gloves I use at the forge are hot work glove that were gifted to me (very thick cotton). I leave the leather ones by the mig welder... If you do use gloves, make sure you can get them off fast. Often, by the time you can feel the heat through the glove, the glove itself will burn you and may have shrunk tighter (leather gloves). Forgive me if you are aware of these concerns. It’s hard to judge one’s experience on the web. Also, I am generally using charcoal in my Buffalo Forge. It’s not very fuel efficient, but I’m out of bituminous coal and it’s not readily available to me right now. I does work though! Enjoy the new addiction! David
-

What did you do in the shop today?
Goods replied to Mark Ling's topic in Blacksmithing, General Discussion
A month away from the forge and still beautiful clean work! Hang in there CGL, David -
What did you do in the shop today?
Goods replied to Mark Ling's topic in Blacksmithing, General Discussion
Long story short, one of the Japanese members at work is heading back in a couple weeks. This is the second time he’s been stationed here and I’ve always had a lot of respect for him. He asked me to forge something for him before he goes back (kind of a bummer, because I planned on surprising him with something), but it took me a while to come up with something. I’m made a set of siabashi for my older son out of 304 SS they turn pretty good, but seem a little heavy. My friend like to cook, so I decided I could make him a set, but to make the a little special, give him bragging rights, and keep them light, I decided to use titanium. First time working with it and it’s a little strange. It’s pretty weird having white dust on the anvil instead of gray/black scale. Started with 3/8” SQ x 6” of grade 2 titanium. These are a very good exercise in tapering, end up at 15” long. Still have some detail and finishing work to do... So far easier the the SS, but I’m worried about the cleanup. A file would barely touch them. Enjoy, David
-
What problems did you have with the chiseled points? When I have done it, I was going for four 1/2” points. There seemed to be a sweet spot on thickness of the points. If the were too thick, they seemed to just fall out of the wrought iron, and too thin would break or bend out of the way. Could all be in my head though... These are fun projects! David
-
They will not last as long out of mild steel, but hot steel is much softer the mild. They should last a good amount of time if you aren’t working tool steels and keeping the stock hot. The other thing to note in JLP’s Video, she goes into detail about how she is raising the carbon content and hardening the stages. David
-
I won’t fill it with sand, I’d use water to fill it. That way when you done with the job, you can drain it. You may have to move it around in the storage area and I really would not want to hook a yard tractor up every time I have to move it out of the way.
-
Rectangular holes in my anvil?
Goods replied to tom_ET's topic in Anvils, Swage Blocks, and Mandrels
Not sure how well that hold down will work. I have seen some big hold downs made to work in a hardy hole, but with you rectangular holes that would he some big stock to work. If you search around a bit there are a couple examples of hold downs that were made with pipe clamps that might work well in this case. Of course, you could always make a chain hold down. (I used mine a lot before a beginner destroyed the chain with a bad miss hit. Haven’t bothered to fix it yet.) Lots of options, David -
Little Giant Sow Block tooling
Goods replied to Adair's topic in Power Hammers, Treadle Hammers, Olivers
Adair, I cannot speak to technique, but have a recommendation for the dovetail. Bolting from above will limit problems if something goes wrong. (That way you always have access to them.) I would torque them tightly then put a small dot of mig or tig weld to be very sure they don’t back off. Much more secure under heavy vibration and can be visually inspected unlike locktite or lock washer. (“I” marks work for inspection purposes, but may not stay very visible in a blacksmith’s shop.) The other step I would take would be to either leave a tenon on the dovetail to key into the plate. This would make the machining more difficult, but at the least put a key grove in both the dovetail and plate and key the together also. That way you eliminate all side loading and shifting from the bolts. David -
Rectangular holes in my anvil?
Goods replied to tom_ET's topic in Anvils, Swage Blocks, and Mandrels
Chris, I like that. Simple elegant solution. All, sorry I didn’t catch the Autocorrect above. Should have read “Bigger shoulder on the tool,” David -
Rectangular holes in my anvil?
Goods replied to tom_ET's topic in Anvils, Swage Blocks, and Mandrels
Yep, that’s what I was thinking. (Bigger shoulder injury the tool, you will need to bridge the gap.) The bolster idea with a partial shank to make up the fill the rectangular space would work well also. Lots of ways to make it work. You just need to find what works for you. -
Rectangular holes in my anvil?
Goods replied to tom_ET's topic in Anvils, Swage Blocks, and Mandrels
If I were to may the hardy tools, I would try to make the square with 6mm holes offset vertically on opposite sides and large shoulders. Then you could make a shim block with a spring pin in the side. That way you can use the tool in both orientations by switching the shim around. Those are odd dimensions, it will make life interesting... David -
Looks like Steve beat me to it...
-
It won’t harden. Even the HC spikes are only higher carbon, maybe 0.3%C, but HC spike seem to be pretty rare. From the intended use the are designed to never have a brittle fracture. Would be pretty bad for the train:) You might gain a very little with a super quench, but spike knives are more novelty items than useful ones. I can’t really help with the grinding, not really a blade smith. Good job though! For constructive criticism only, I would recommend drawing the handle down more to give more mass for the blade, might give better form.
-
Sorry, but from above the “BSB” is band saw blades and the “PS” is pallet strapping. They’re generally pretty easy to find. The is an enormous amount of information in this site, but you may find members will push you to read through it. It’s a very good experience! I found myself reading posts for months before I ever signed up and posted. I can’t believe how much I learned. Don’t get frustrated, once you get a little more information ingested, you get answers that are more fulfilling. The guys just get tired answering the same question every couple days. David
-
What did you do in the shop today?
Goods replied to Mark Ling's topic in Blacksmithing, General Discussion
I like it! Quite the show case of technical skills. I have yet to try many of them myself... -
The repair shop we use is open. If your up for shipping, PM me and I’ll send you the contact info. David
-
Second forging in my life
Goods replied to Blacksmith village's topic in Blacksmithing, General Discussion
They look great! Nothing wrong with mild steel tongs, as long as they are sized to have the strength needed for the job. On another note, if those are basically made by stock removal, you should have a good idea of the “blank” shape needs. Take that knowledge and try forging out to that blank shape, you may be surprised by the savings (time, material, abrasives, etc.). Your work is very good, look forward to seeing more, David -
I know this is an old post, but for future readers, another word of caution. Keep concrete away for you forge. The heat of a forge will drive the water bonded in the concrete out in the form of superheated steam, sending concrete shards with it at high velocity. Forging is a fantastic hobby and a fun time with my boys, but I don’t want to have a session end abruptly with a trip to the ER.
-
Beautiful. Any thoughts about adding upsetting blocks on future designs?
-
RToon, I prefer using bituminous coal myself, but I have a very limited supply. I have access to anthracite coal, but given a choice I use the same lump charcoal you are buying over anthracite. The advice you’ve received on using the charcoal is dead on. Deep fire, with a low slow air supply, if you’re not getting enough heat (with you steel covered by coals) apply a little more air. That should help with the fireflies also. You may even want to setup a way to stop the air supply while you’re forging the steel, to save on fuel. Charcoal continues to burn for quite a while even without any air supplied, no need to worry about it going out on you. (You can’t do that with anthracite, it will go out without a constant air supply.) David
-
RToon, don’t be offended by anyone here. I’ve been following this thread myself and have been a bit confused myself. From the pictures you posted and some of the descriptions of you problems, it looks and sounds like lump charcoal in the brake drum forge you built. I don’t think anyone is giving bad advice or negative feedback, they are just trying to interpret what is going on and help based on that. Out of curiosity what type of coal are you using? Bituminous, Anthracite, sub bituminous, or lignite? They behave differently in the forge. Just my observations, David
-
What did you do in the shop today?
Goods replied to Mark Ling's topic in Blacksmithing, General Discussion
I guess I could have used the drift as the handle in this case, but it was absorbing heat fast, and I’m not sure my swing would be that “true”. -
I thought it was good practice to rinse with baking soda solution to prevent rusting issues before applying oil after an acid etch. Is that overkill?
-
What did you do in the shop today?
Goods replied to Mark Ling's topic in Blacksmithing, General Discussion
I really don’t see you taking a the easy way out. I figured you’d have started from scratch and just tossed the failure. You work and videos, are one of my inspirations. David -
What did you do in the shop today?
Goods replied to Mark Ling's topic in Blacksmithing, General Discussion
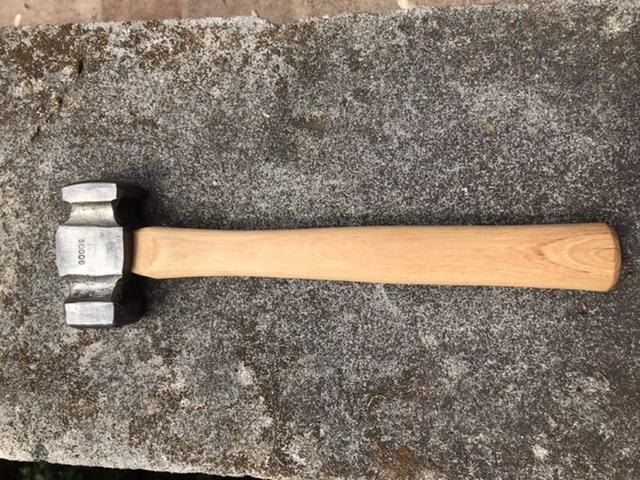
Well, I think I’ve salvaged it: Ended up grinding the partial hardened face off, and welding a new one on. Didn’t go to bad. I did have to reforge the fullers and eye a little, but I think it’s a little less wonky now. All I have to do now is polish the faces and put it to work. For anyone interested, to forge the new face on, I cut/forge the new face to size and ground it clean. As soon as I set the grinder down, I put beeswax on it then sprinkled anhydrous borax on it to keep the face clean. It feels like cheating, but then clamped it to the hammer and put couple MiG weld spots to hold it in place. From there, in to the forge and brought the heat up slow and fluxed heavily at a low red. Then, back for a high welding heat, tapped they eye drift in place before setting the weld. Repeated, twice and it held really well with minimal distortion to the eye, but the fuller on that side needed redone completely. All in all, a very interesting learning experience. David