Goods
-
Posts
1,169 -
Joined
-
Last visited
Content Type
Profiles
Forums
Articles
Gallery
Downloads
Events
Everything posted by Goods
-
The spring or medium carbon steel is left normalized, not hardened. This give a lot more strength and toughness to the tongs. David
-
There are differing options on material types for tongs. Smiths that I know, who do a lot of power hammer work, tend to stay with medium carbon or spring steal. Their main concern is strength while working steel under the power hammer. On the other hand, the smiths I know who do all hand hammering, almost always recommend mild steel. It’s a lot of work to forge spring steel tong by hand, and if you don’t need that level for strength, why put the extra effort in. Size of stock to make the tongs from varies a lot depending on what type of tongs you are making and what size stock they are meant to hold. (You wouldn’t have the same size tongs for 1/4” round as you would for 2” square!) The other factor is skill, not only for drawing out the reigns, but forge welding. If you’re good with forge welding, you can use heavier stock for the bit and weld on the reigns, savings time and effort. (I’m not there yet, but hopefully soon.) Best thing you could do it try to hook up with some other smiths and try out the equipment and see what you like and get pointers. A little hard with the current situation, so I would recommend researching different designs. There’s information on the web that will give both starting stock sizes and techniques. There is some here in the blue print section. Keep it fun, David
-

What did you do in the shop today?
Goods replied to Mark Ling's topic in Blacksmithing, General Discussion
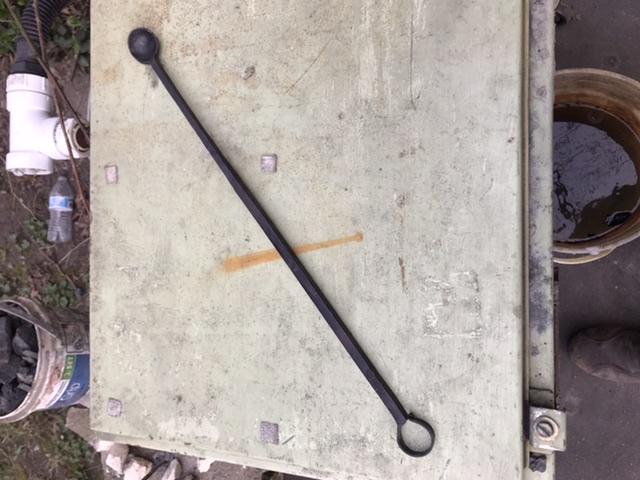
This evening, I cooked down some more borax, failed at several forge welds, then finished up a handled fuller. It’s about a 1/2” diameter. Not real happy with it, but I should do the job, after I get a handle on it. David
-
What’s the weight on that? Honestly, very impressed. All by hand, I assume? David
-
What did you do in the shop today?
Goods replied to Mark Ling's topic in Blacksmithing, General Discussion
What I was referring to as an “auto quench,” and the term may not be correct, is from the very localize heat of the weld being rapidly cooled by the conduction to the surrounding material. This is why it is recommended to preheat before welding higher carbon/tool steels. I’m not completely sure how hot you would want to heat the frame to overcome the HAZ issues, but you may want to think of it as over tempering a hardened tool. Hopefully, there are no issues with HAZ cracking, just hardness/brittleness that need reduced. I’m not an expert on this, but I’d hate for you to end up hurt if the HAZ area fails with a miss hit. If there’s someone with more experience, maybe they can give more accurate directions, or say I’m over concerned. David -
What did you do in the shop today?
Goods replied to Mark Ling's topic in Blacksmithing, General Discussion
Oh, don’t take me wrong, English is my native language, of course I could use an excuse. I was just not paying enough attention. I usually spend a lot of time reviewing before I post due to issues like this and the dreaded Autocorrect. My wife would be very upset if she saw this error. As a book reviewer and home school teacher, proper use of English is a big deal with her. Personally, I’ve been blessed with being deemed critical and I’m working from home. So far it’s working out pretty well. I don’t have the free time others have, but I’m not going to have to worry about paying the bills. David -
What did you do in the shop today?
Goods replied to Mark Ling's topic in Blacksmithing, General Discussion
Yeah, me and English don’t always get along, but I should have caught that! Thanks, David -
What did you do in the shop today?
Goods replied to Mark Ling's topic in Blacksmithing, General Discussion
Shabumi, if the frame of the guillotine was welded up from leaf spring, you may want to throw the whole thing in the forge to normalize it. Others correct me if I’m wrong, but the spring steel around the welds may have auto quenched and gotten brittle. Generally, the way to avoid HAZ problems is to preheat the material before welding. (HAZ, Heat Effected Zone, is the technical term you will heard used for this problem) David -
What did you do in the shop today?
Goods replied to Mark Ling's topic in Blacksmithing, General Discussion
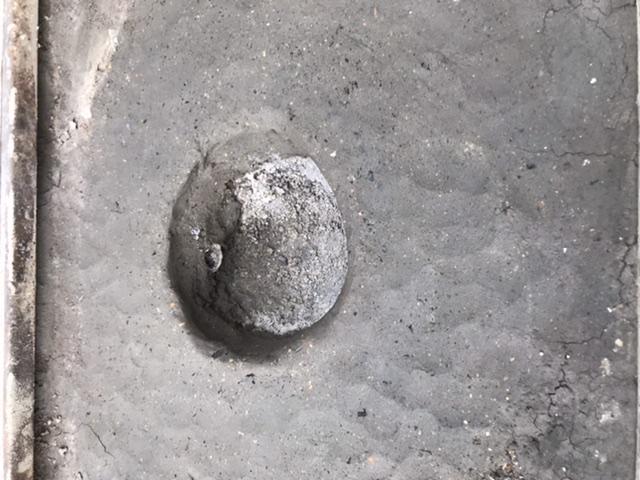
Well, started off a bit too chilly today for tuck pointing, so I worked some more on the buffalo forge. I forged a new ash dump for it. 1/4” plate cut/forged round, 3/8”x3/4” forged to shape, then MiG welded to the 1/4” plate. Finally, had to see if my rebuild JABOD would get up to welding heat again, so weld up a hook basket a w/1” ball bearing as the weight. Keep it fun, David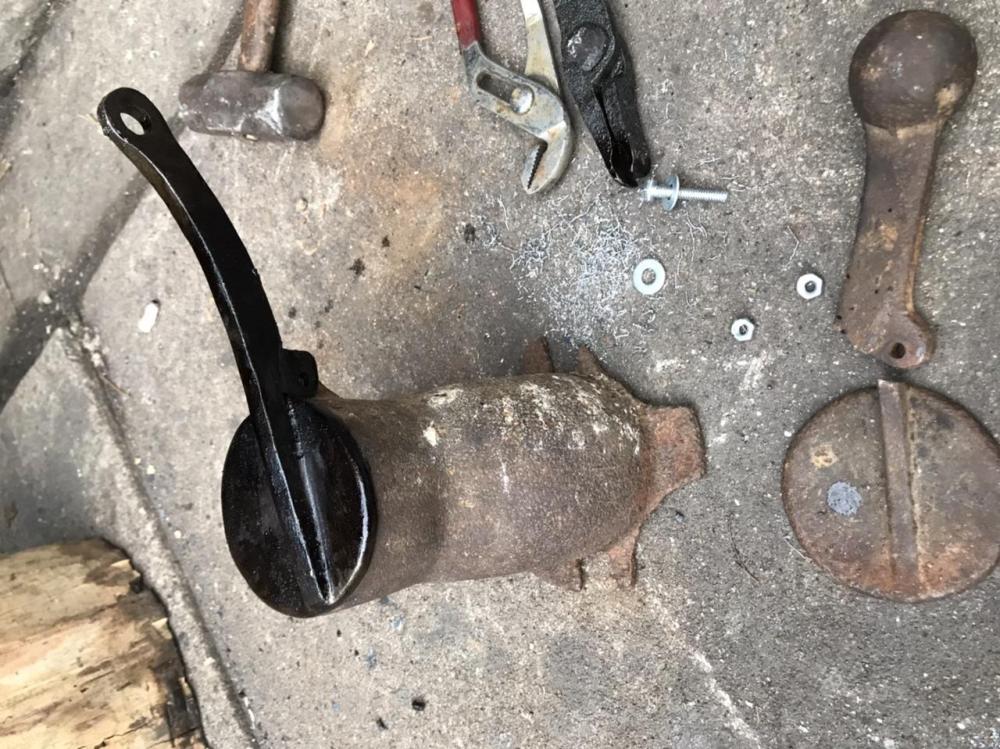
-
What did you do in the shop today?
Goods replied to Mark Ling's topic in Blacksmithing, General Discussion
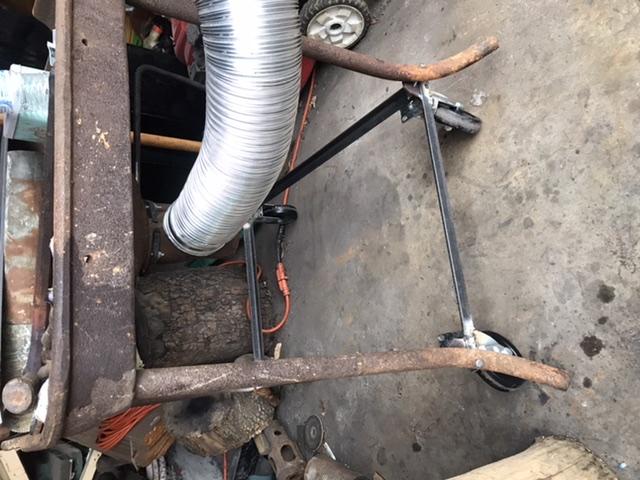
Well, no forging today, but reclayed my JABOD, helped my son with some chain mail, and welded a rolling frame for my buffalo forge. Had to repair the clinker breaker on it earlier in the week, and I still need to remake the ash dump (which I broke). Also showing my new flux spoon from a couple days ago. Photos a little out of order, but you get the idea. Now, if I want to keep my wife happy, tomorrow will probably all be tuck pointing... Enjoy you time at the forge! David
-
Please help identify this material
Goods replied to TruebloodLowery's topic in Blacksmithing, General Discussion
Before you make you axe out of that I would recommend making a test sample out of a small piece and see how it hardens. If it hardens with oil that could change how you heat treat and temper the final axe. Just my two cents:) David -
Wanting to start, came across this on craigslist
Goods replied to Nailsmith's topic in Introduce Yourself
With that TV show, price in the “open” market are pretty high. You really need to find the people out there that just want the tools put to good work and are willing to help someone get into blacksmithing. Maybe a bit hard with the current circumstances... David -
Most tools steels are sold in the annealed state. This allows for the machining operations needed to make the parts. After the basic machining operations are completed, the part would be hardened, possibly have EDM operations done. Then, the final sharpening/polishing. There could be many other steps, but almost always starts out soft(er). If I remember correctly, A2 may not be a very good home forge steel... David
-
Can you rig up a lever or something to make it convenient to turn the air blast down between heats. You’ll save a lot of fuel that way, and if it not convenient, it won’t get used. Your hook has a really smooth taper and nicely rounded out! I can’t even see hammer marks. Symmetry is hard and will come with time and patience, but I think you may have found your calling. David
-
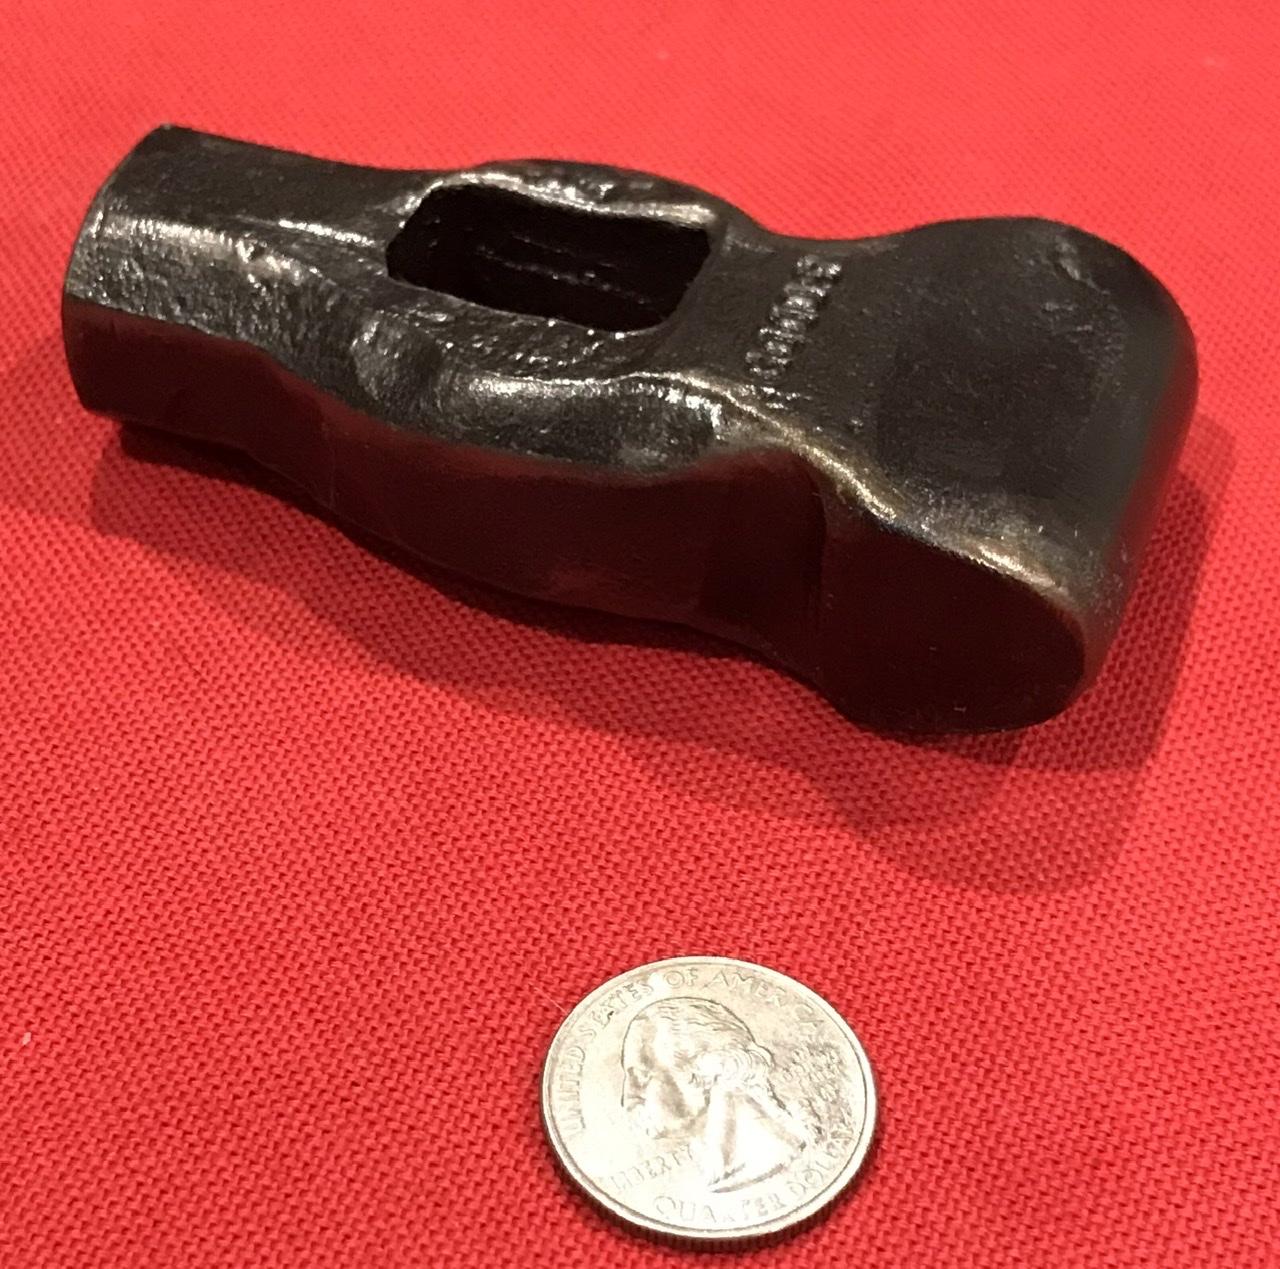
When I made my wrought hammer, I just etched it in vinegar for a couple hours and that turned out pretty nice. It was pretty course wrought iron, so it didn’t take much. They look great! David
-
What did you do in the shop today?
Goods replied to Mark Ling's topic in Blacksmithing, General Discussion
Gofishunt, the leaf looks great, but one very small critique. You may want to radius the edge of your texturing tool. That would lessen or eliminate the tool marks near the the center vein. As for the stem breaking, try to keep it hot, maybe. Honestly, I struggle with the same problem. David -
Not sure if you’ve watched many videos, but the YouTube channels linked from the references section here are really helpful and well vetted. David
-
Believe me, I’m not trying to be negative about you first hooks! I would love to say that you should look up local blacksmith group and spend sometime working with them. That’s usually on of my first recommendation, because it made such a big difference for me (and my sons). That’s not a option now, in the current situation, so I just wanted to give the same try of input I would give a new person visiting our groups hammer-in. Unfortunately, I can only really use the written word (not really my strength) here. No where near as good as watch you a giving pointers first hand. Keep it fun! David
-
For general purposes hot rolled will work just fine and is welded everyday in fab shops. David
-
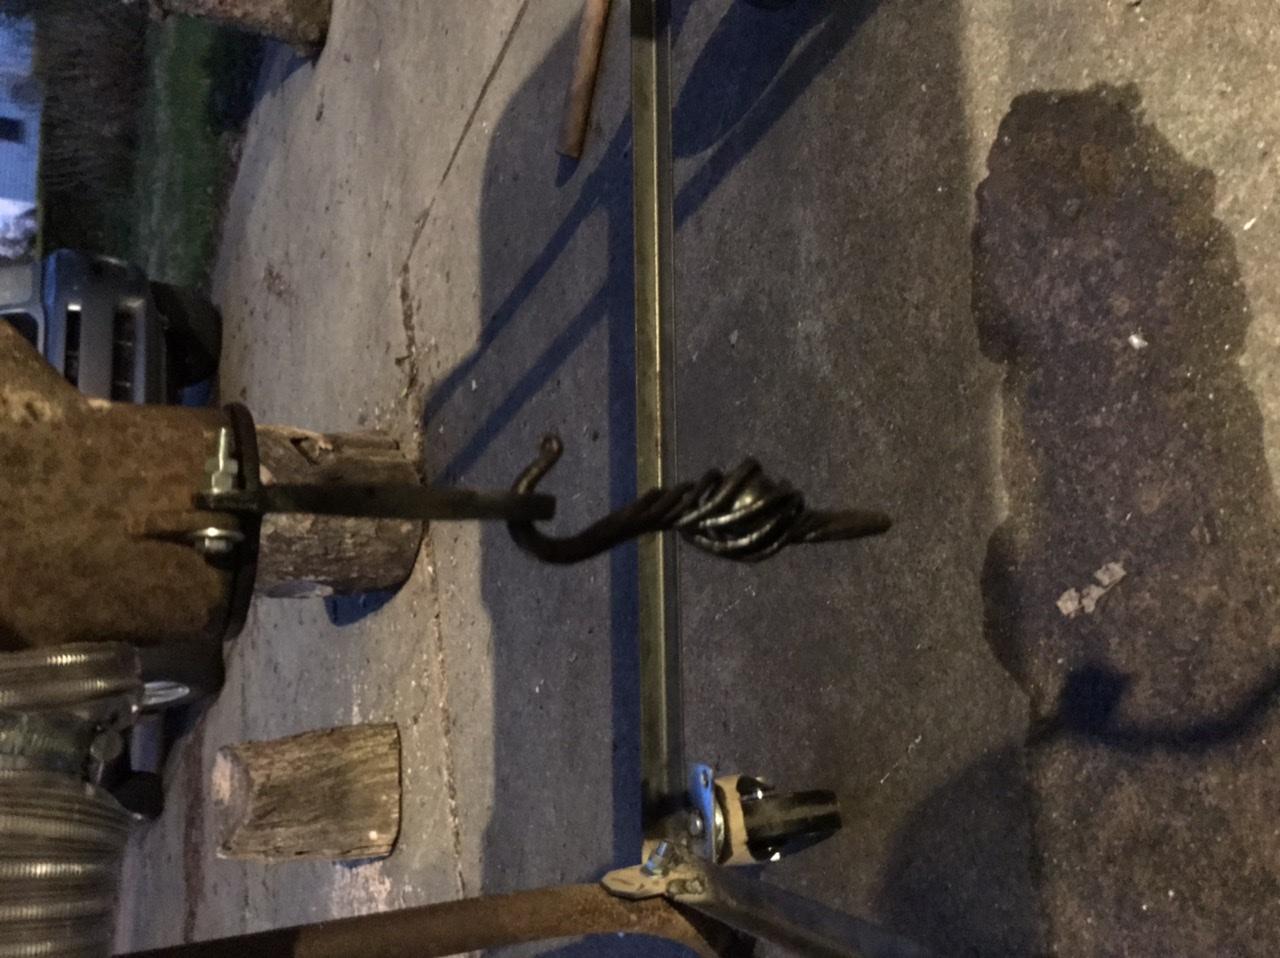
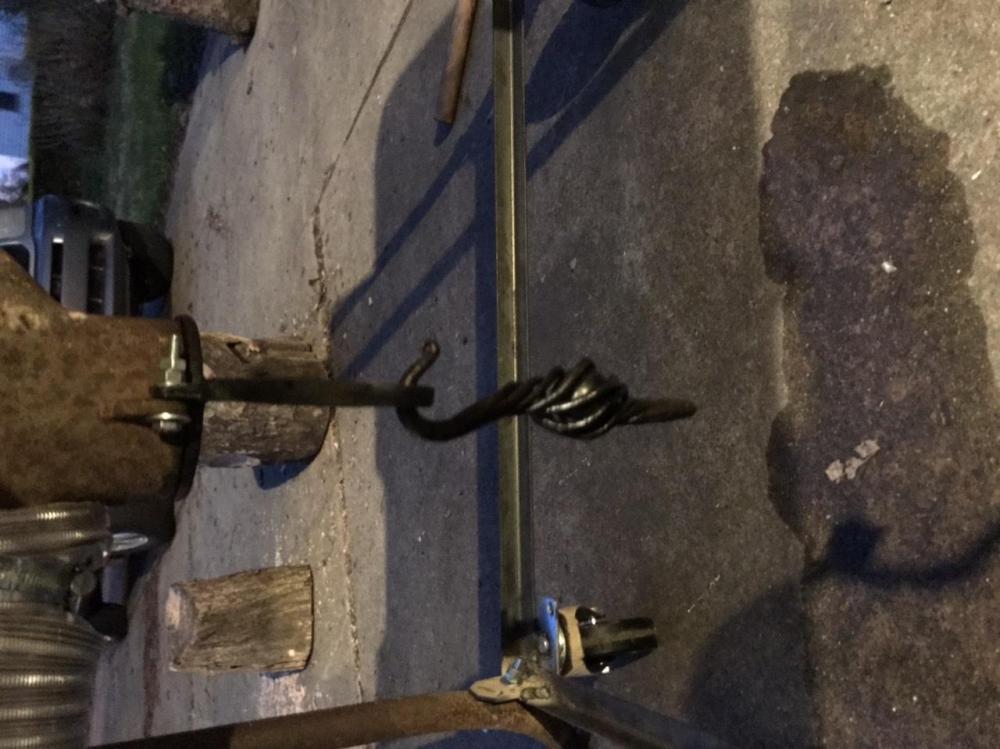
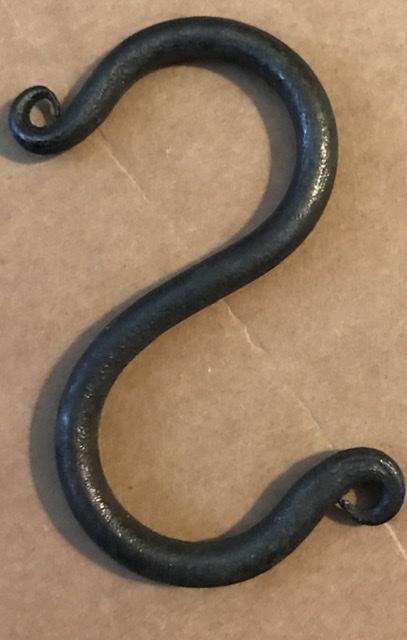
Molten, just a recommendation on you s-hooks: Start with the length of stock you need for the size hook you making (keep in mind that the section the will be tapered will approximately grow in length by about 2x). Then taper one end square. Once the square taper is drawn out, round it up. (Alway draw out in a square cross section, the go to octagon by hammering the corners in, the bring to round.) Then, start a small roll on the point. Just light taps off the side of the anvil, flip an knock the start of the curl back toward yourself to finish it up. Quench this small scroll, it will burn easily being thin, so starting colder that the rest of the stock when going back in the fire will help a little. When up to temperature, bring it back out quench just the scroll (to avoid deforming it), and hold the scroll up just of the anvil and tap it down to start this end of the hook. Keep feeding the material off the anvil to continue the bend. You’ need to flip it over and bend it back toward you after a little over 90degrees. Repeat with the other side, but trace the curve of the first on the anvil to match the second side. Doing hooks this way will really help develop several different skill sets: tapers, scrolls, bending, forging to specific dimension (match both sides in this case), fire control, hammer control, etc.). As you make a couple, compare the results as you go and try to make each one better than the last. They also make a pleasing, graceful hook, that will sell if is an option for you. I’m not trying to belittle what you have achieved (which is pretty cool), just trying to help you get to the next level...Picture below as an example. Keep it fun, David
-
Is the solid stock for the swing arm itself a big advantage? I’m a bit stingy with my limited heavy stock... David
-
Wanting to start, came across this on craigslist
Goods replied to Nailsmith's topic in Introduce Yourself
Sorry to hear that. It’s hard to substitute anything for a post vise, but check out the JABOD thread and improvised anvil thread. Could get you up and running quickly! David -
Wanting to start, came across this on craigslist
Goods replied to Nailsmith's topic in Introduce Yourself
John, that’s a good deal if the HB has good ring and bearing tests. Is the blacksmith getting out of it, or just culling the heard? You may want to ask if he has any tooling available. Misc tongs, hardy tools, punches, etc. will come in handy. Do you have any other metal working equipment (files, grinders, hammers, etc.) available? Don’t fret, once you have some basics you can build up skills making what you need. That’s half the fun! David -
Frosty, just so you know I didn’t take you post in any kind of negative way! I just had to comment in the post from Jennifer. I liked the sentiment. Is not about being perfect, it’s all about learning and getting better! Also, can you post or PM me more pics of the dachshund figure head. My wife would love that! Keep it fun, David
-
Very well said Jennifer! Personally, I’m always trying to do better, and can see all the flaws in what I have done. It doesn’t upset me, it just makes me think about what to do differently next time: a bit more with the butcher bush, a bit more planishing(sp?) to save time with the file or grinder. I read up on IFI and listen to what experienced smiths have to offer. I find it very rewarding. I’m in this as a hobby, money from sales is nice, but the compliment from a happy customer is better. Best of all is the focused-almost-meditation of swinging the hammer, making the material move the way I want. I usually leave the smithy a much happier person. Keep making beautiful things everyone! David