

Goods
-
Posts
1,159 -
Joined
-
Last visited
Content Type
Profiles
Forums
Articles
Gallery
Downloads
Events
Everything posted by Goods
-

What did you do in the shop today?
Goods replied to Mark Ling's topic in Blacksmithing, General Discussion
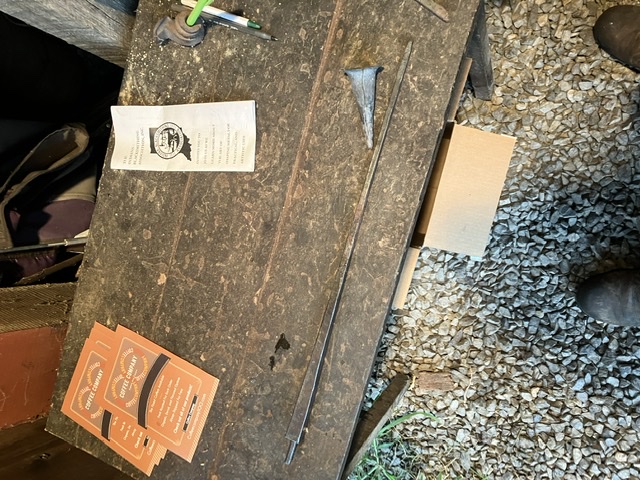
Well wasn’t much of a demo today. They changed the format and only a few artists showed up. Glad I wasn’t spending every moment building up inventory! Here’s today’s results: made a trammel hook for the tripod made earlier (sorry, not the best picture) and a failed candle holder It’s kind of funny. I isolated the mass for the cup and as I was finishing up drawing out the stem, the mass broke off. Probability a cold shunt from when I necked it down. So, I made a new end for it, and initially struggled with the forge weld. That weld finally took and blended beautifully, but the cup broke off at the base as I was smoothing out to tapper of the cup. (Mr. Hobart help me with that problem once I got home…) Keep it fun, David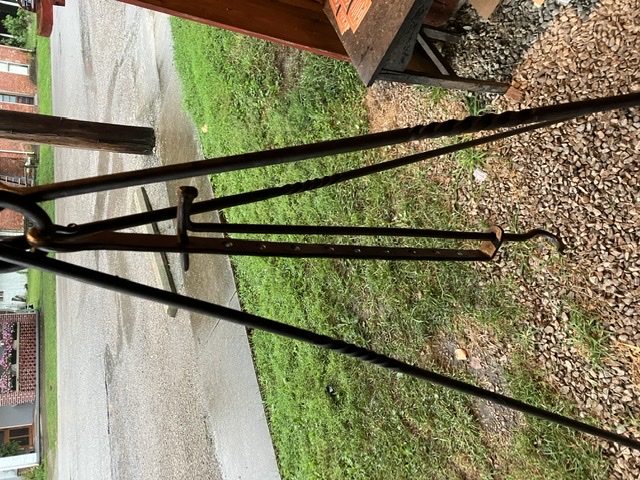
-
If there in decent shape, files are great to have in the shop! You can rehab them if there not too far gone also.
-
I actually like having cats around, but two big problems for us: our dogs really like cats to (hasn’t ended well for the few they caught…), and we discovered the hard way that my younger son is very allergic to cats. This summer did manage to rescue what survived out of a litter at our house. At least our dogs weren’t the culprits for the rest of the litter.
-
New shop flue - Sanity check required
Goods replied to Drunken Dwarf's topic in Chimneys, Hoods, and Stacks
Can you go with a side draft, kind of like what Joey van der Steeg has in his latest video, straight out of the lower portion of the window? Maybe a smaller diameter for the horizontal than the vertical section. If I understand right, the opening of the side draft should have lower cross sectional area than the vent pipe, for higher velocity at the entrance. I’m not sure if that would apply to the full horizontal run though. Maybe Mikey or Latticino would have more input there. (I think one of them maybe both have HVAC backgrounds.) -
Has anyone ever tried forge welding the craws, then drawing it into a punch? That thought always enters my mind whenever I see a cheap claw hammer. Keep it fun, David
-
How many pounds and how wide is your anvil?
Goods replied to Fly's topic in Anvils, Swage Blocks, and Mandrels
Both my 150# Columbian and 128# Peter Wright are 5” wide. (Useful reference dimensions all overall the anvil for quick eyeball measurements while forging.) -
What did you do in the shop today?
Goods replied to Mark Ling's topic in Blacksmithing, General Discussion
Thomas, I have yet to make that type of tripod myself, but that’s the style I helped my son with. It ended up a bit wonky, but I’m a bit of a perfectionist with my work. He just wanted functional and make by his own hands. Also, I just used the BLO, beeswax, and turpentine goop as a finish, and probably need to make more before my demo this weekend. (I can’t imagine using 5” tripod to do any stirring… If I left any excess goop, dripping down into a cook pot would be problematic!) Keep it fun, David -
What did you do in the shop today?
Goods replied to Mark Ling's topic in Blacksmithing, General Discussion
No, I did closed loops with a ring. Loops are about 2” diameter and the ring is about 3”. Sorry, the shop is a bit messy right not to see much detail. Organizing is on my to do list, but not at the top yet… Keep it fun, David -
What did you do in the shop today?
Goods replied to Mark Ling's topic in Blacksmithing, General Discussion
I got a tripod made up today: Was going to start a trammel hook also, but ended up helping my son with a small camp tripod. (Sorry, no pictures of his…) Keep it fun, David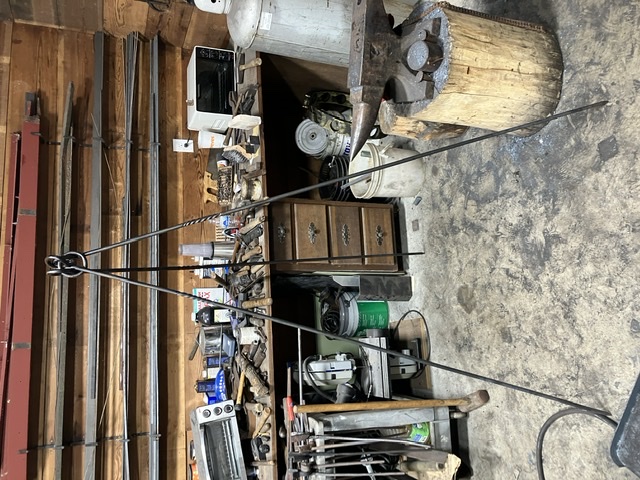
-
Billybones, I really like the lines of that piece, and the brass is a nice touch!
-
What did you do in the shop today?
Goods replied to Mark Ling's topic in Blacksmithing, General Discussion
Got the gantry setup tonight. Didn’t take too long. My older son was around to help, thankfully. I would not have gotten it up without out help! As we were getting ready to lift it upright, he look at me with a straight face and said “we could really use a gantry crane to get this up.” What was I supposed to follow that up with? (not sure why this posted landscape.) Now I have to clear up the shop so I can get it over there! Keep it fun, David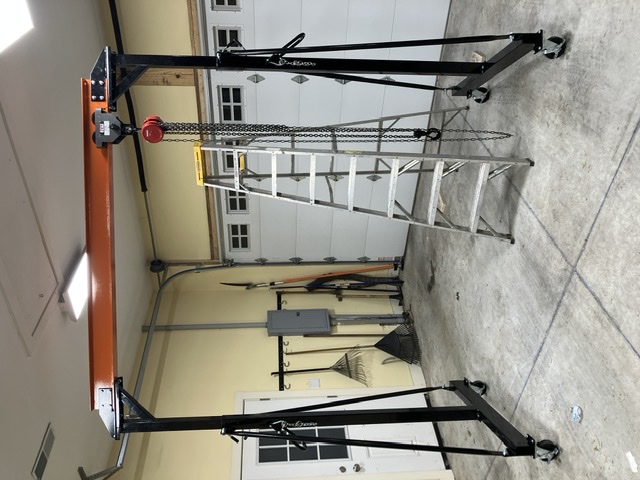
-
For final finishing use a lighter hammer at a low heat with over lapping blow. 2~3lb ranger is most common. I usually only use 4~6lb hammer for heavy forging, at high heats. I rarely even do that, it’s easier to hit hard with a lighter hammer than it is to control a heavy one. And a lot less tiring! There are those that regular use heavy hammers, but they are smiths who forge daily and have been doing it for years. Starting with a heavy hammer will lead to injury. Work you way up to it, your body will thank you! For plannishing (smoothing) red heat down into the black. When you want to MOVE material reheat when it drop to a red range. When you are wanting to smooth your finish out, you only want the high points to move and only very little. With a light hammer, the psi is very high on the high spots, but as soon as they level out the psi goes up fast and is less likely to leave additional depreciations the need cleaned up. See if you can track down a local blacksmith group near you. Your off to a great start, but working with a couple experienced smiths with really speed up the learning curve. Keep it fun, David Edit: I type all this then reread you post, and I missed something at first.
-
Suggestions for an anvil stand dimensions
Goods replied to Kelly R's topic in Stands for Anvils, Swage Blocks, etc
One recommendation, try not to have you stand’s surface extend past the hardy or prichnell(sp?) hole. It’s nice to have clearance to use long drifts, or even be able to sit a bucket of water on the floor to cool MILD steel drifts automatically as the drop through. Keep it fun, David -
Now be careful say the word grind and anvil face in the same sentence here. It’s you anvil, do as you please. Keep in mind that most anvils have a hard high carbon face plate with a wrought iron body. Grinding the face can dramatically reduce its useful life. (There are also cast steel anvils, but the hardness doesn’t go that deep. It’s kind of hard to rapidly cool that much mass.) Yes, the sharper the corner you are using to set down or draw material out on the high the change of getting cold shunts. If you have a small sharp step, when you forge the next section down the steel will want to move in all directions, including over top of the step. Having a radius in the step helps reinforce that area, stopping some of the spread back towards to step. (I hope that make sense to everyone else?) If you are going to dress the edges back. Do a little at a time, you can’t really add it back, if you take too much off. (Did I mention that welding on anvil is another general “no no?” The previous owner of my Colombian anvil “repaired” the edges of it. He used Std MiG wire. Some chipped away from HAZ cracks, some just work hardened and started to flake away… it is kind of funny that I can dress some of the flaking issues with a file pretty easily. It can be done right, but that take money, time, knowledge and skill!) (Not trying to be hard on you over the grinding, but others reading this may benefit from knowing.) Keep at it! With this being your first go, I can’t wait to see progress pictures! David
-
Honestly, pretty amazing for a first forging! Your off to a good start. The location of the crack is a very common location for a cold shunt when doing the set down behind the reigns. If you start to form the step, then offset the the step in the next heat an “over lap” can form. If you see this happen, file it out immediately. Continuing to forge out these “over laps,” or cold shunts, will usually end up in a crack or simply two separate pieces. Keep it fun, David
-
You’ll love having that sitting right by the forge. I have a piece of 3” round I sit on the forge when doing forge welds on small stock and it greatly increased my success rate. Keep it fun, David
-
These are usually made of coils spring, but what diameter? All the coil springs I have are 1/2” diameter or smaller. They always seem too small for most punches, tongs, etc. I’ve been keeping my eye open for large ones though. (Last weekend at our hammer in I made a hack out of the shop owner’s 1-1/2” coils spring. That might be a bit large for most things…) Keep it fun, David edit: I thought I posted this yesterday, something strange much have happened. (On my end that is.)
-
Good eye Daswulf. Gantry, trolley, and chain hoist all rates at 2tons. I have to move, disassemble my power hammer, fill the base with sand and actually anchor it down. (It bounces about quite a bit, and it’s kept from walking by a come-along in the gonitas. Just to make-shift to stay that way) After 800lbs of sand in the base it will be right at 2ton, if I need to move it again. Properly mounted and with the sand, it should be a bit quieter and be more efficient. Keep it fun, David
-
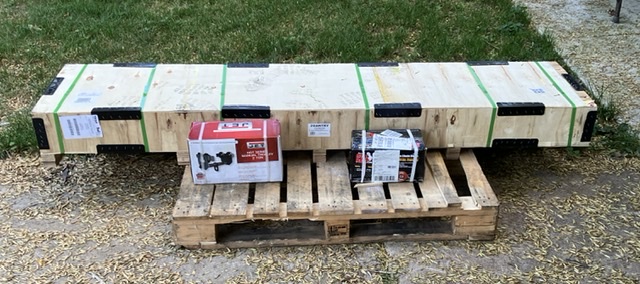
I was very surprised to see this waiting outside my shop when I got home. Ordered Saturday and was supposed to call for delivery… Just got to make some time to get it setup. Then, the real work will start. Keep it fun, David
-
Walmart usually has paraffin wax with the canning supplies, probably in most farm stores as well for the same purpose.
-
I don’t think that an upset corner. It’s a Habberman(sp?) bend, isn’t it?
-
I can’t wait to see the next round of pictures!
-
What did you do in the shop today?
Goods replied to Mark Ling's topic in Blacksmithing, General Discussion
Did you forge the mass down or fold and forge weld the end for the bowl? keep it fun, David -
You may want to check out the Mr volcano forges. There cost is pretty low and have received multiple good reviews. For what you’re wanting to forge, I’d stick with a smaller forge. You can only work so much steel in a single heat by hand anyway. Keep it fun, David Looks like TW and I were posting at the same time… and same advice. What’s the chances?
-
Welcome aboard! Careful, YouTube has some pretty bad and sometimes dangerous blacksmithing videos. There is a page on here with links to well vetted videos. The best course of action is to find a smith local to you that you can learn from. Putting your location in your profile will help us get you setup with someone. A good source is to look for is your local ABANA affiliate. I’m a member of the Indiana Blacksmith Association (IBA) and the local chapter meets monthly. I showed up a few years ago and the smiths there got me going in the right direction pretty quick! Keep it fun, David