

Goods
-
Posts
1,182 -
Joined
-
Last visited
Content Type
Profiles
Forums
Articles
Gallery
Downloads
Events
Everything posted by Goods
-
Can you make a pair of tong just to hold the tools? Maybe like pick-up tongs with a tong clip. You may feel feed back in you hand if the tong clip is slipping. The other thing that came to mind is to weld a piece of pipe to a handle (bar stock, round stock, fancy basket twist, whatever you like) the drill a hole in the pipe and weld a nut to it for a locking screw. Put the punch in the pipe, tighten the screw and off you go. Just ideas… Keep it fun, David
-

So I want to melt/smelt some brass...
Goods replied to Apocalypse's topic in Smelting, Melting, Foundry, and Casting
If you not attached to the vase itself and if it has a reasonable value, you may be better off selling it as it is to someone who would enjoy it for what it is. Then, use that cash to buy brass in the dimensions that you want to work with. I know that’s lots of “if’s” but that was my first thought when I saw this post. Keep it fun, David -
What did you do in the shop today?
Goods replied to Mark Ling's topic in Blacksmithing, General Discussion
Frosty, the stock used for the tongs was 2” conveyor shaft, good med carbon stock broken down for another project and this was the cutoff. Biggest problem was bending back and forth and the re-forging of the bits. I may just reinforce the bend with a big mig weld fillet. Not the typical thing I like, but functional. The reason I’m considering the ABANA curriculum is to force me to learn new techniques, not to mention forging to spec. I’ve always worked with a “to taste” approach myself, but I’m thinking if I ever want to get into larger projects, I would really benefit for those skill sets. Right now, I’m just in it for fun, but we’ll see where the future leads me… Keep it fun, David -
I’ve not heard of steal bar or round stock made any other way that rolling. Some thin bar stock I s sheared from larger rolls sheets, but drawing dies for high carbon/alloy steal wouldn’t last long. There are a couple guys here who have worked in a steal mill. There input would be interesting! Keep it fun, David
-
What did you do in the shop today?
Goods replied to Mark Ling's topic in Blacksmithing, General Discussion
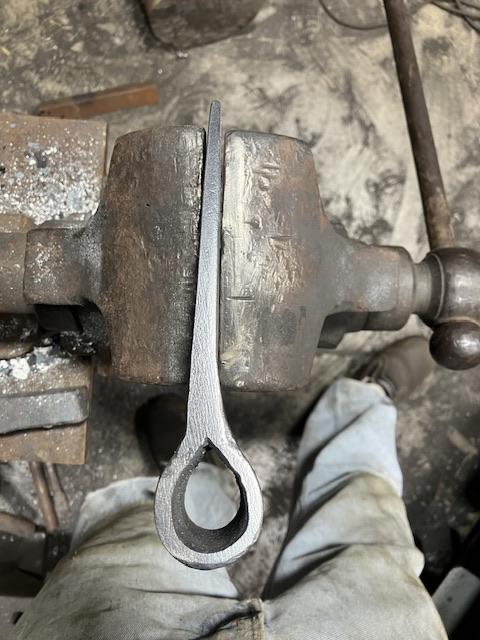
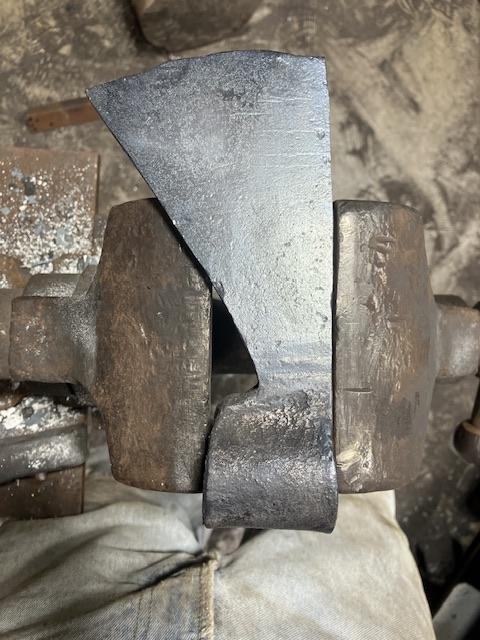
I got the first of the tomahawks welded up and the rough shaping done today: The eye looks awfully small. I may move the set downs on my others. Overall, getting closer to the eye transition I’ve been looking for. Also, I made the hoop tongs: They were much easier to work with. Thanks for the input Jenifer. The bits are fairly weak on these, so let’s just say these are just my practice set. The tongs took me forever. I was just about done with them and was in the process of fitting the bits on a small piece of 1/4” shaped the the radius of the eye when I realized I put the bit radii in backwards. Ended up grinding the rivet off, flattened the bit back out and started over. I got it right the second time! (That’s how the bits ended up wimpy…) Keep it fun, David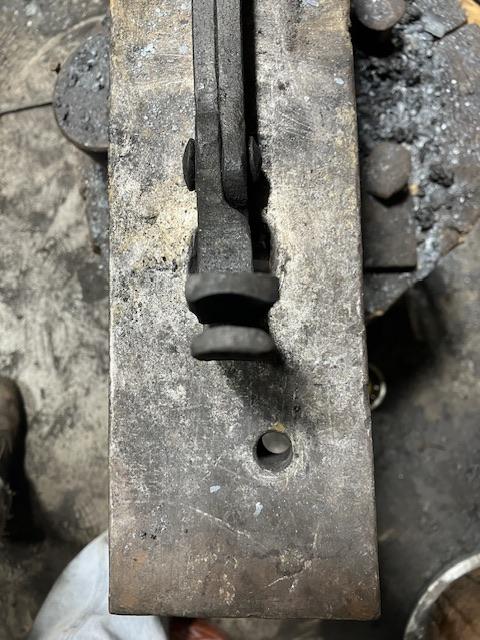
-
If those spots are from concentrations of chromium, I don’t think you could really do anything about it. Chromium atoms are very large compared to the iron and carbon atoms. They are not going to migrate much if at all out side of a molten state. Maybe one of the metallurgists one here will give better insight? Keep it fun, David
-
What did you do in the shop today?
Goods replied to Mark Ling's topic in Blacksmithing, General Discussion
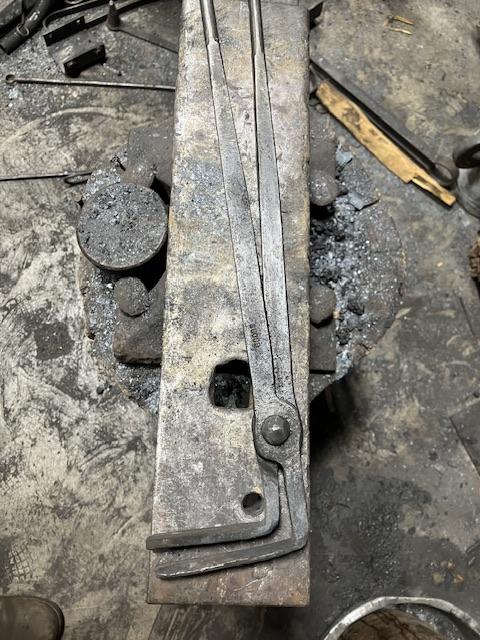
Chimaera, also don’t drift it like you would if you were sizing a hole. Hammer the drift tight, the use the drift as a mandrel to draw the sides of the eye out. This is more similar to opening up the diameter of a bottle opener one the horn, than drifting. If you were doing a slit and drift, that’s a pretty much the same depending how you want the lugs… One trick to use is to set the drift while you have the blade clamped on the weld in a post vise. It’s much harder to damage the weld that way. Are you pre-bending the transition from eye to blade? I typically bend the blade up 45degrees on both side leaving just shy of enough material for the eye. The I bend the eye around and weld. Once I’ve got the weld set I start working on the eye shape. Preform: After weld, before drifting: (Note, this is not the best example. A couple miss hits that thinned up the shape it was going for and the weld is not particularly good… As Jennifer said, this is much more like a Viking axe than a traditional hawk. I’m even pre-forming a little like a traditional axe, just w/I the pole step. I’m going for a thick wedge with a 1/2” radius from the blade to the eye one the outside. I haven’t got it exactly how it want it yet, but I’m stubborn. I’ll get there just for the aesthetic that I want… it makes for a sturdy, but heavy hawk/Viking axe.) Jennifer, I’ll go for the hoop tongs. I think I’ve got enough material in the bit of the blanks. Thanks for the input! Keep it fun, David Shainarue, not sure how I missed your post, but good work. It looks like the ABANA curriculum is serving you well. There is a lot I could learn from following the courses! Keep it fun, David That’s strange, it merged my posts, but wouldn’t let me edit to improve the flow, oh well.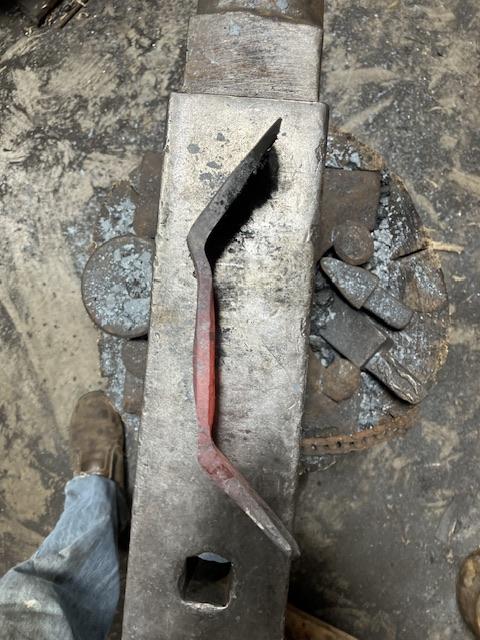

-
What did you do in the shop today?
Goods replied to Mark Ling's topic in Blacksmithing, General Discussion
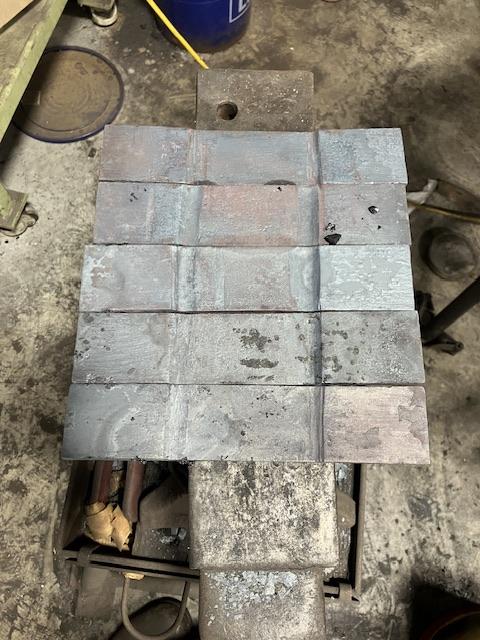
That is fantastic JLP! I wondered what you were doing with the strange scarf! I’m working on some tomahawks myself. Got five started: I let the last on get away from me and burn the pole a bit. Finished it out like the rest hoping to save it. In the end it probably going to get scrapped or repurposed… Body is cold rolled and I’m not sure what I’m going to use for the bits yet, but I’ve got plenty or choices. Next step is to wrap and weld them up. After cleaning them up really good to make sure my welds take. Of course I got some tong blanks made at our last hammer-in, so I make a set of tongs to hold the pole first. You guys think I should make a pick-up style sized to the pole or bent jaw? I’m kind of torn between the two. Bent jaws would probably work better, but the pick-up style could be more versatile. Right now, I still don’t have a very large selection. Keep it fun, David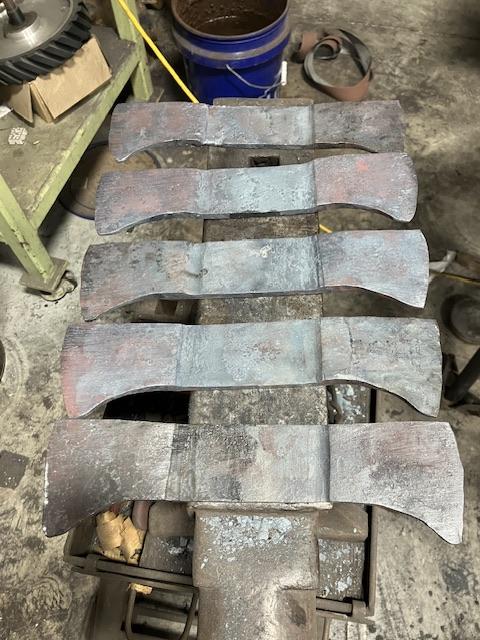
-
From the blacksmith standpoint. I’m not sure I would move to round stock for the chisels. As you’re drawing the tang, with solid blows and dressing, you should be able to gain most of the thickness you need. Obviously, it’s something you have to work out, but in the end it would be a lot less work. Of course, with some precise hammer work, from round stock you would be able to isolate mass for your bolster, and avoid the forge welding. You do seem to have a good handle on the forge welding though! By the way I’ve enjoyed your posts. I enjoy tool making and you making some really nice tools! Currently, all of my heat treatment is done by eye and testing, but I’m not getting results I could with some steels. For example, I’m just not real comfortable with the soaking time need with 52100 (which I have readily available). I’m always worried about overheating and grain growth. Seem like a petty fine line… Keep it fun, David
-
Another option is to check with a local HVAC contractor. They often change out home heating systems with good combustion air blowers for new systems. If you explain what you up to they may let you salvage one. Keep it fun, David
-
What did you do in the shop today?
Goods replied to Mark Ling's topic in Blacksmithing, General Discussion
Finished this last night for a door prize at our hammer-in tomorrow: 4140 head with a hickory handle. Around 1-1/2pounds. Keep it fun, David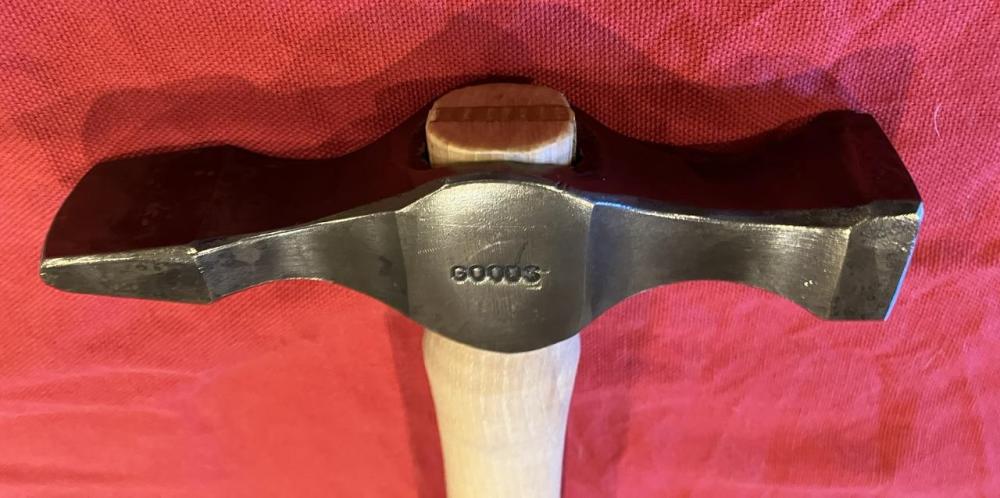
-
John, it there a max RPM shown on the paint stripper? My die grinder runs way faster than a drill, just don’t want you picking those spikes out of you hide. Keep it fun, David
-
Honestly, if you weld it all the way around, you could go pretty thin. The stress would be carried evenly across it. The big issue would be how easily it would dent. I would go over 1/8” thickness. Don’t over do it, the lighter it is the better. It will be similar to air craft construction, where the thin skin carries a significant portion of the load. Keep it fun, David
-
I don’t blame you. I have the advantage of having a power hammer! If I didn’t, I probably would have started with 1/2” square and upset the end for the finial. If you ever make it out my way, bring that stock along, stop by and we’ll break it down to a more usable size for you. Keep it fun, David
-
Stainless can be tough to forge. I’ve used it for items that I want to be dishwasher safe. I made my son a set of saibashi (18” long chopsticks for cooking) and some fancy steak flippers for family all of which I wanted to be easy just to throw into their dishwasher. The stainless needs to be forged pretty cleanly (no crevices to retain bacteria) then passivated in citric acid to remain rust free. 1”x8” is a lot of material! I used 3” of 1-1/16” round to make 15” long steak flippers with 1” ball finials on the end. Keep it fun, David
-
What did you do in the shop today?
Goods replied to Mark Ling's topic in Blacksmithing, General Discussion
That’s the best part of blacksmithing for me. I’m not happy with the pokey end. The shape is right, but the weld opened up while I was drawing it out for length. Of course, the way my day went, I burnt it some… All the harder weld worked out fine, but this simple one eluded me. (Everything else turned out bad. Two leaves and a bottle opener for the scrap pile!) The handle feels good, but I should heat it up and close the basket a bit, it’s a little big. Keep it fun, David -
What did you do in the shop today?
Goods replied to Mark Ling's topic in Blacksmithing, General Discussion
I’m with you. I like the look of it, but it wasn’t what I was going for, next time… but I think I’m done, not that I want to be! Keep it fun, David -
What did you do in the shop today?
Goods replied to Mark Ling's topic in Blacksmithing, General Discussion
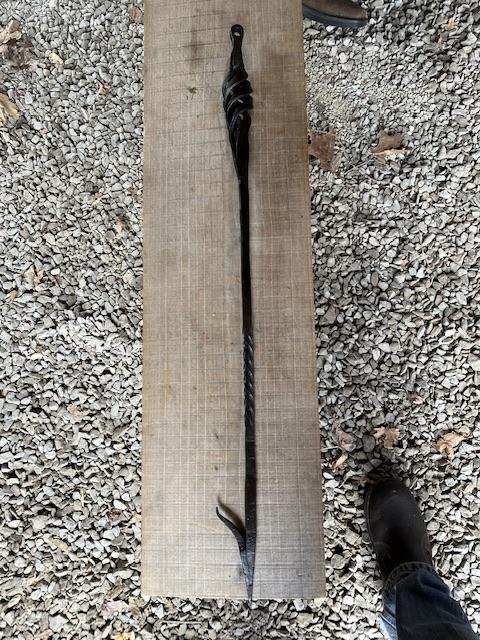
Challenge accepted? Demoing at a festival today and I tried the flat basket twist first: The basket turned out ok, next time should be better. Everything on the poker is rough. Just one of those days. This turned out better than everything else. My body just isn’t happy with me today… Keep it fun, David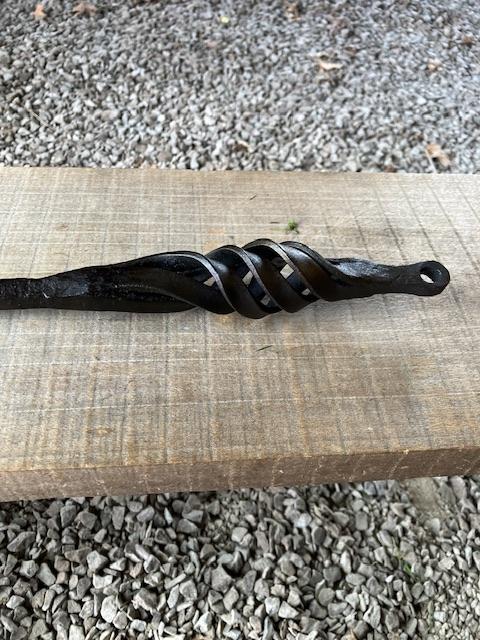
-
What did you do in the shop today?
Goods replied to Mark Ling's topic in Blacksmithing, General Discussion
That sounds like a challenge! I’ll see what I come up with… Keep it fun, David -
What did you do in the shop today?
Goods replied to Mark Ling's topic in Blacksmithing, General Discussion
I’m not sure if this would qualify as a flat twist. I left the handle portion at 1/2” octagon, the slit it with a thin cut-off disk and hacksaw two ways to make four sections to twist. The cuts weren’t perfect, so the four sections were all the same thickness. It made for really a really wonky basket and I fiddled with it till I was worried I’d destroy it. JLP, it about the same size ass the standard cheap spring handle chipping hammers, but it is heavier. Keep it fun, David -
What did you do in the shop today?
Goods replied to Mark Ling's topic in Blacksmithing, General Discussion
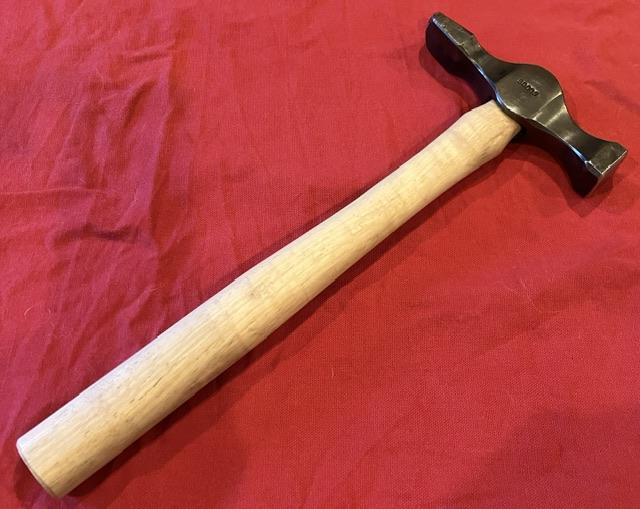
I have never gad any interest is shoeing horses… Today I finally finished the chipping hammer that I started a while ago: I’m not real happy with the basket twist or the very basic engraving. Overall, it turned out pretty good… and my nephew with be the only one at school with anything like it. The head is made from a large railroad clip, and the handle from a large conveyor drive shaft. (The first handle I made was out of mild steel with a neck similar to an east wing hammer. It didn’t turn out, which is good because it was pretty weak. There’s a long story with that failure…) Keep it fun, David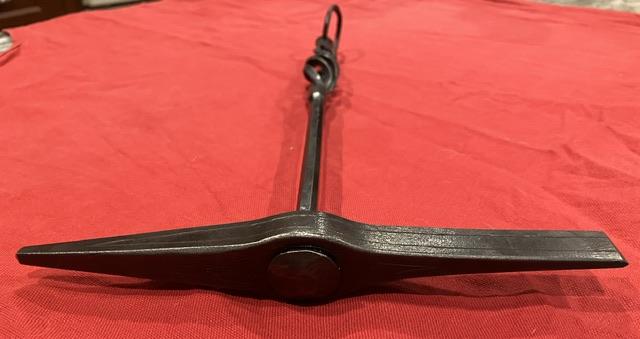

-
I really enjoyed this video myself! Will’s channel is kind of an off shoot from Alec Steel’s Channel, but so far I like his content a more. I just wish it was more forging than blade smithing. No offense intended to anyone, but while I’ve made blades, I’m much more into Blacksmithing. Keep it fun, David
-
What did you do in the shop today?
Goods replied to Mark Ling's topic in Blacksmithing, General Discussion
John, call someone in the official about the carpet scraps. Sometimes contractors work very fast… -
I’ve been having some issues with my power hammer starting up and was planning on purchasing a new contactor for it. I contacted James at AnyangUSA to make sure I was on the right path. Unexpectedly, after a short conversation and without question, he’s sending a new contactor my way. That level of service is not very common these days, and I cannot say how much I appreciate it! Keep it fun, David
-
What? No pictures? No really, it’s good to hear that you’re still at it. I personally haven’t been doing a much between the weather (and feeling under the weather…). Hardie tools are fun. Of course, I like forging large stock. Keep it fun, David
