MC Hammer
Members
-
Joined
-
Last visited
Everything posted by MC Hammer
-
-
Tangles - for sure man, there's 9 of them still there last I knew. With prices so high I'm almost tempted to buy a few more, clean them up and resell them for a profit. Stop.....anvil time Yup, here in NY our snakes are mostly safe, but he was a feisty bugger for not having fangs or a rattler. I took it as a hint to take the Trenton. He probably read "M-O-U-S-E" on the side and thought he'd found his honey hole for food.
-
I did some looking around and I have to agree that the knife I bought sure does look like a sticking knife to me too. Thanks all for the input!
-
TP, explain what you consider a sticking knife to be used for (obviously to stick into things, but thought you might have more info than that). Back on the farm, animals had their throats slit with a good knife more like the other one I picked up. Hammer Monkey. Yeah, I thought it was cool. It would make a great boot knife. I may make one like it someday out of 5160 and see if it throws and what it seems to be good for use wise. It sure looks like a lot of the throwing knife shapes I've looked at that were from the circus acts of the 19th century. I've even seen some with the dulled areas just like this one. The one thing against that theory is the thinness. It's not super thin because the very fine bevel leaves some thickness in the middle.
-
Everyone is right who has posted so far. It took me over a year to find a good anvil and it was a friend of a friend's nephew. He ended up having 10 of them to pick from. My German Trenton ended up following me home from a trailer out in back of his house. He lifted the tarp and there was a coiled up snake guarding one of the Mouse Hole's there so I decided on the Trenton. Make sure you read EVERYTHING on this forum about anvils. You'll get little tips and tid bits from all the threads that will help you not to overpay and not to come home with a crappy anvil. Really word of mouth is the best method. I struck-out for a long time and then bam! I get the tip that leads me to 10 anvils to pick from along with 2 buckets of tongs, a pile of hardy tools, and a bucket of hammers.
-
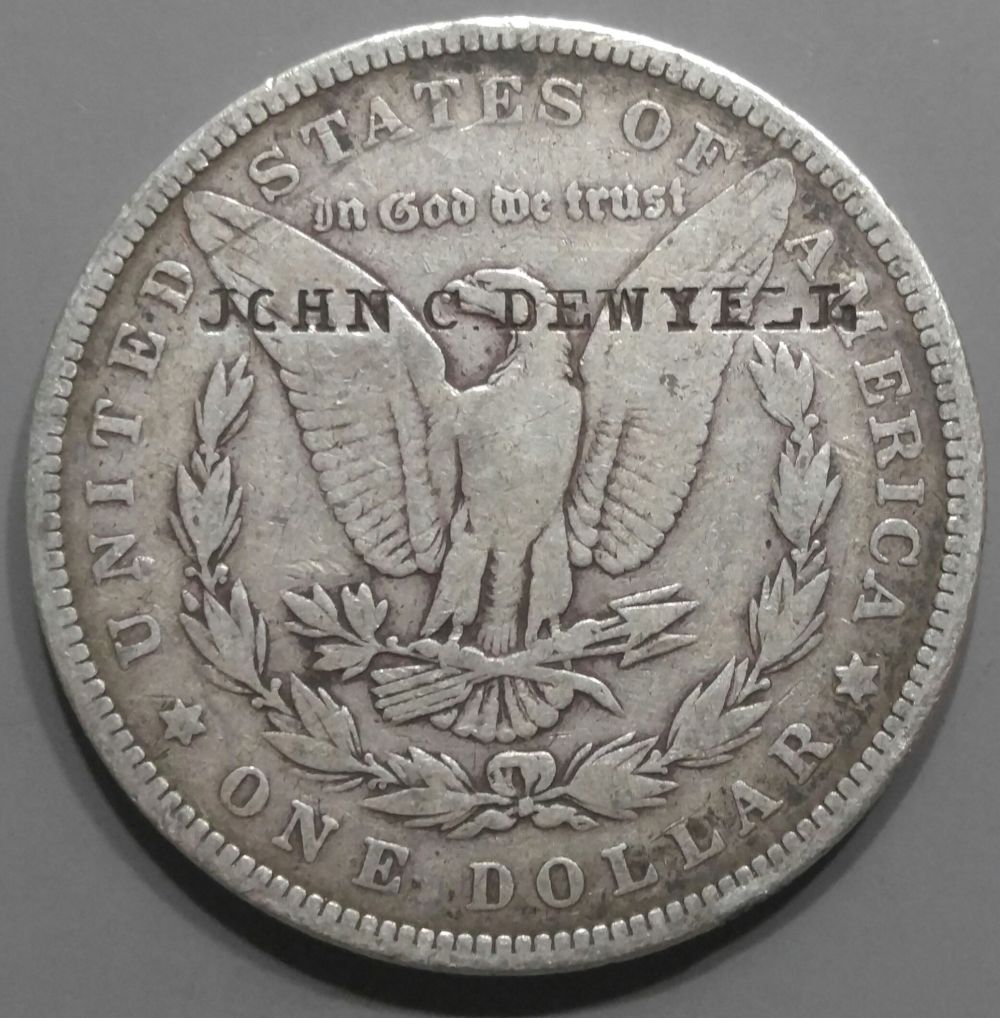
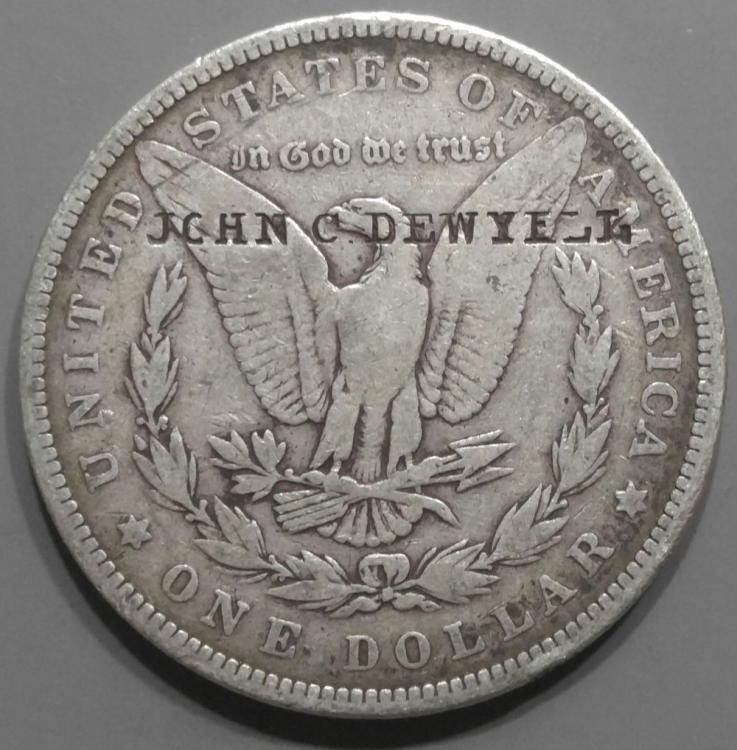
I too am sorry for your loss. While in my favorite junk shop last week I wasn't successful in finding any blacksmith tools so I was just pawing through a little box of knives and I found an interesting one that had a makers mark by the name of "John C. Dewyell" stamped on it. I found another knife that I liked the profile of and the shop owner said for me they'd be $5 each - not bad so they followed me home! I knew the marked knife was hand forged because of the careful slight bevels and because of the steel. Here's the maker's mark Given the profile I really feel this could be a throwing knife. A little research on our maker revealed he lived in Livonia, NY (not too far from where I found it in the junk shop) living from 1837 - 1917. Turns out he was a blacksmith who evolved with the times into a cutler then a machinist and finally a mechanic. He also invented a device for trimming horse hooves called the Circular Buttress which had a patent in Canada. The edges of the knife are dulled - filed from the base of the blade up to about the halfway point. Looking at the profile I am guessing the maker did not do this work as the symmetry is out of whack considerably. I thought the knife was interesting and wanted to show it around and get some opinions as to it's probable use. I haven't ruled out that it was a tool of some kind given the utilitarian handle typical of a lot of tools. Any thoughts anyone? For $5, I was happy to find this little gem. If I find in the end that it has little value in this condition, I may just correct the profile to make it symmetrical again and sharped just the edges. I think it's highly likely that it left John Dewyell's shop symmetrical and sharp and that he'd want it looking that way again if he were here to give his opinion. In my research I also found this Morgan Dollar struck with his name in the same font as my knife.
.thumb.JPG.849a80ceb06bd3ca41145879d294d3bf.JPG)
.thumb.JPG.54bc2ea190a0be52b8d36efd9558ddcd.JPG)
.thumb.JPG.b64fb7b7139d64457f8b095abe84b8b4.JPG)
.thumb.JPG.53539743e4c9fe644b07899edb17fec7.JPG)
-
I've often wondered about putting dimmers in the new shop build. The plans I have will have all the lights on the shop end and leave the forge end of things with no lights. I figure the window and open doors will have plenty of light while forging. Since I forge outside, I once had to do some touch-up work on a pair of lantern hooks so I left my vise in the basement garage. Wow, I couldn't believe how nice it was to actually see the metal's true color after heating! What looks dull red/black outside is actually a nice cherry red when inside the garage / basement. That sealed the deal for me on having a darker forge area.
-
Fuzzy don't consider the basement good option. Theoretically anything is possible and I think that's the point Latticino was making, but if you burn down your house accidentally with your forging activities it's highly likely....well...for sure likely that your insurance company will not cover the loss because you didn't tell them you had a forge in your basement. You also have to think of those that also live in your house. Hot air rises and so will the combustion gases. Maybe you have plenty of ventilation but the rest of your house could fill with Carbon Monoxide. I actually understand your temptation as I have a garage in the basement where the door could be opened and I have a chimney that a hood could be attached to in order to vent the combustion gases. To me the risks greatly outweigh the benefits so for now I have to wheel everything outside and wheel it back inside, but my family is safe and I have no risk of burning my house down. Depending on code in your area, you can build a lean-two type structure on a weekend with a few hundred dollars or with scrounged materials. Sure, that doesn't help in the winter, but hey I had a really cold and snowy winter this year and didn't forge anything from Dec - Mid March. Yeah, that sucks, but I used that time to get my tools in order and look for new tools at junk shops. Now I'm building a new shop addition away from the house that will have ample ventilation etc.
-
When I found my stump, I counted the rings and found it was a sapling the year Pearl Harbor got attacked. I counted it two more times just to be sure. I lovingly call her Pearl now and someday may chisel that name on the side of it. I thought about finishing mine, but the more I used it the more it got burned, etc. and I realized it won't matter what I do to the top because in 10 or 15 years it will have a character of its own. I kinda dig those old anvil stumps you see once in a while that are just about black on top from decades of forging scale & burns. That's the look I hope mine has in the years to come. Before clean-up at the end of forging, I rub the scale into the surface to help it get blacker sooner.
-
So far, when I mount a new handle I use Swel-lock on it and they stay nice & tight. The first couple of handles I wedged would always loosen up just a slight bit after using them for a while - not after applying some of this to the wedged end grain of the handle. It even worked for older hammers that I didn't put handles on. I thought maybe the heat of the forge and heat from using them would loosen them, but not so far. It sure beats hammering more metal wedges in. Anyone use this product and has a report on rather it works long term or not?
-
Boy is this topic flexible! I had to ratchet-down my laughter while leafing through all these replies.
-
I used one of the cut-out blanks to make a pair of scroll tongs. They look like any other set of tongs after I finished, just easier to create than the traditional method. I think there is value in learning the skills required to make tongs, and I hope to someday master that skill but for now the cut-out blanks are a way for me to make a good set of tongs which are a whole lot cheaper than buying new tongs and cost slightly more than buying used pairs for around $10 a pair.
-
Do you think that wood base will shrink anymore? I banded mine over a year ago and it's still shrinking. In fact I just had to cut my bands so that I had more room to tighten it up. I figure I'll wait until it stops shrinking in order to permanently affix it with nice lags or screws. My stand is made out of ash and I think it would have split nearly in half if I hadn't banded it up right after removing the bark. I'm just worried yours will shrink a bit and the bands will become loose making you have to take them off, resize, and screw everything together again. Otherwise, that's a first class anvil stand. I wish I'd put more silicone under mine as it still has a slight ring, but only about 20 % of what it was before.
-
-
Actually, the one blacksmith that got me interested in smithing used to come to my tent at the shows we both attended and watch saying "I think I'd like to learn that someday". Then I started doing the same thing at his portable forge. One of these days I'll get him to try knapping.
-
Frosty you noticed that those flakes wanted to hinge up in the middle for sure. That stuff was like chipping slate. I rubbed some dirt on it to give it that old-time look. Sorry everyone, looks like I got this off the topic of forging.
-
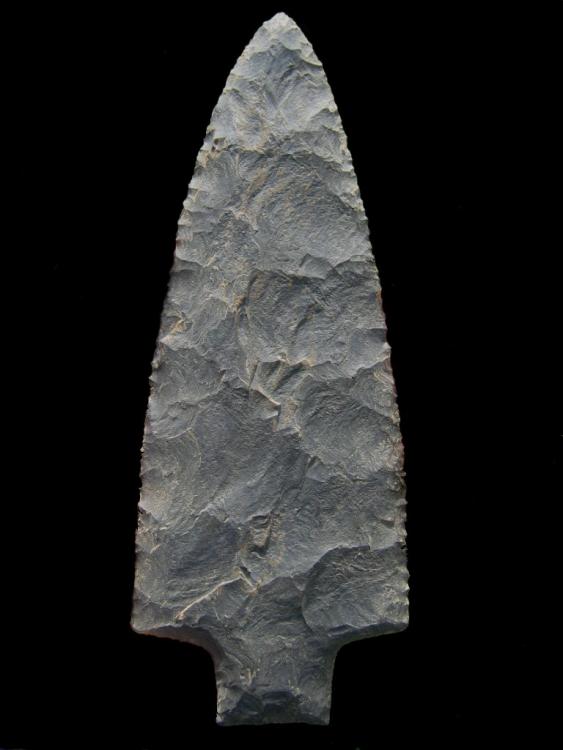
He, he, heeee you are not a man unless you've knapped NY chert We have some of the toughest around. I love it though as you have to hit it like you mean it. I once watched one of the top knappers in the US struggle through a piece of NY chert. He was so used to the finest available. Us knappers get babied with heat treated burlington, flint ridge, and obsidian. Below is a picture of one of the toughest pieces of NY chert I every had to knap. My students brought it as a joke and I was determined to show them I could get something out of it.
-
Holder - nice humor on my name I get that a lot and knew it would be an interesting screen name though I'm Irish and have never listened to rap music. You'll want to read up on some of the threads here about dressing hammers. Not really too bulbous, but what you are trying to avoid is leaving lots of deep scars on the metal that are caused by the often sharpish edges of new store hammers. When you leave marks like that it can lead to marks that you never get out of the finished piece or worse yet cold shuts that expand into cracks. Cold shuts are created when two parts of the metal are folded on each other and not forge welded properly into one solid piece of metal (at least that's how I would define it.) The object of a good hammer is to move the metal leaving a more diffused dent in the hot metal. Yup, bench grinders don't work. You'll need an angle grinder and a belt sander.
-
You won't find a pair of tongs at Harbor Freight, but their hammers are not too bad if you get the little 2 lb ones. Though I have many other hammers now, the two I bought at HF when starting out still work great. I just had to make the handles waaaaaay thinner. You'll get tired really fast gripping those fat handles. You'll also want to radius the business end of them buy grinding off the sharp edge and making it more round and bulbous. I still use my HF hammers every time I forge and see no difference in their performance when compared to my traditional blacksmithing hammers. My favorite hammer is a very nice cross peen that is not a HF. Look on ebay or craigslist for your tongs if you are in a hurry, or check out antique stores and flea markets if you want to take a little more time. You'll pay out the nose on ebay. Those of us here try to pick up tongs for $10 or less a pair (some say $5 or less). Do yourself a favor and get a good set of wolf jaw tongs that can handle square and round stock. Having poorly fitting tongs makes it hard to hold your hot metal. If the metal moved around when you hit it, you will not be concentrating the full energy of your hammer correctly into the piece which results in more hammer strikes and more time. But, the most important thing about tongs that fit is that they are much safer. There's nothing quite so frightening as a piece of hot metal coming loose and flipping thru the air.............oh and while at HF, get safety glasses unless you wear eye classes. A hot piece of metal scale can ruin your eye fast. Just get used to wearing eye protection.
-
I have knapped just about any material that can be knapped. I don't particularly like glass or obsidian because of the smaller shards that always seem to get everywhere. I've knapped Jonstone or as we call it Thunderchert (toilet tank lids) and even such odd things as flint from North Korea and TV glass! No doubt there are cheap alternatives in the form of free glass, but when you are a flintknapper for a long time the free glass jar bottoms etc are viewed a lot like rebar is viewed with blacksmithing. Believe me, I've got no shortage of knapping material having a rock room full of 5 gallon buckets of flint and chert. It's striking just how similar the two hobbies are (pun intended!) We even have knap-ins which are what we blacksmiths also call hammer-ins. The main difference between the two crafts is that once a chip of flint or chert is removed you own that whereas with forging you can always reheat and try again in most circumstances. The mental games are similar in the fact you must plan your moves out 2 or 3 actions ahead of time. The other difference is that the tools cost far less than blacksmithing. At my first knap-in I had $40 and came home with the tools I needed and some flint to work. Granted, today that figure is more like $100. I bet Thomas Powers or Charles Stevens could probably whip up a $100 starter kit, but it cost me a lot more. I'm just still tickled pink that for $5 I have all the material (and then some) to start building my own chisel and punch tool set. Can't wait to have the right sized punch or chisel for the job at hand. I have a small bunch of each I've picked up at junk shops & garage sales but it always seems like I'm using a tool too big or too short for the task at hand. I'm thinking someday I'd like to make a knife that is half flint and half forged steel to reflect on who I am as a craftsman
-
Was at the scrap yard this morning just in time to see them loading scrap into the truck with the magnet. Dang!!! I did mange to get 4 nice coil springs. I found a great pile of rake tines and started throwing them in the bin when the guy on the magnet crane yelled "Hey, those are mine!". He shut the crane down and came down to tell me he'd just purchased them to make flower hangers with. He's not a blacksmith at all, but hey, how was I supposed to know that this little pile on the big pile belonged to anyone We chatted up for a while and he helped me look around for bit before jumping back in the crane. I'm not posting pictures because, well, ya'll have seen coil springs before. A few dollars shelled out and I was on my way. This is one of the things I love about forging. $5 got me several large coil springs. In my other hobby of flintknapping, one piece of flint the size of your palm will cost your $5. Worse yet, some guys selling flint measure it now at a price per inch. $300 will get you MAYBE 3/4 of a bucket of high quality flint. I'm loving how cheap metal can be, even buying new is still much cheaper than flint.
-
Very nice! Your file work is super!
-
Holder, there are a TON of resources her at IFI. Pull a chair up to your computer and start jumping into reading the threads. When you've read everything that interests you as a beginner, then start asking questions. Folks here are really good about answering questions that reflect the fact you've already read much of the content. As you can imagine, we get a lot of questions posed here by people that sound a great deal like yours. With that said, Youtube is a great resource but you have to remember that they edit out the time spent waiting for a heat on the metal so if you watch a 20 minute video I would count on the real time be a couple of hours. I watched a video on making a lantern hanger. The video was 10 minutes long. I made two and it took me a couple of hours to get it right and then another day to go back and straighten things I didn't like. Don't start with knives, and that comes from someone whose first time hammering was on a piece of spring steel.......<sigh> in an effort to make a knife. Knives are hard to make because you need to apply skills learned in making much simpler things like hooks and other simple projects. The simple projects teach you how to draw out metal, and how to use a hammer efficiently. My second piece of advice is that to assemble the tools you need CAN be expensive. I stressed can because you easily can buy a cheap hammer at Harbor Frieght or even at a flea market, find a suitable piece of steel to use as an anvil (think square or round piece of thick metal to use as a striking surface), and build a cheap coffee can forge. Grab yourself a pair of pliers and you can start forging. Or, you can assemble a basic tool kit with a couple of decent hammers, some tongs, an anvil, and a real forge. This costs money and it's a lot to invest in something you may not be sure you want to commit to. How much you say? Well some have done it for much less, but after buying my forge, anvil & tools I spent over $1,000.00. Yes, you can make your own forge for less, but unless you are really handy and know something about propane it might not be as successful as you'd like. My last piece of advice is that I see guys (myself included) that get bitten by the blacksmith bug and want everything now. They want to get going tomorrow on making knives and swords. Slow it down some, think it through some. Take time to learn and get together with a blacksmith in your area. Take time and assemble the right tools. The tools don't make you a better smith, but they help you have the proper foundation to learn the right skills. Take time and slowly ease into things. I get a lot of satisfaction making the things at my skill level. I've not made a knife yet. Could I? Yeah, I think I could make a knife by now, but I"m having too much fun learning the other stuff. Don't rob yourself of the initial learning phases. There are guys out there making knives today that can't do a decent scroll because they never took the time to really learn.
-
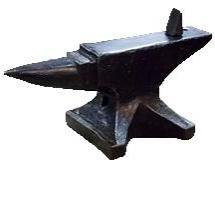
Are there any markings on the sides of the anvil? The raised letters on the base suggest that part was cast. It also is lacking the square handling holes that would be characteristic of a forged base. How is the rebound on the face? Does it ring or sound more like a thud? Maybe it's the pictures, but I'm not seeing any indication of a hard steel top either. My vote also is for a Vulcan or it could be completely cast steel. If it's a Vulcan, it's not a bad starter anvil.
-
Very true Thomas!
.JPG.3fae37a417f8408e50d254ec0b2ff40b.JPG)
.JPG.1858f62afd808e9770a0f1902c5a4687.JPG)
.JPG.624ae4316ff087f28ddeea11807f555e.JPG)
.JPG.84ccb262cd8d2f878f1c62a7a0f7bcd0.JPG)