

John in Oly, WA
-
Posts
932 -
Joined
-
Last visited
Content Type
Profiles
Forums
Articles
Gallery
Downloads
Events
Everything posted by John in Oly, WA
-
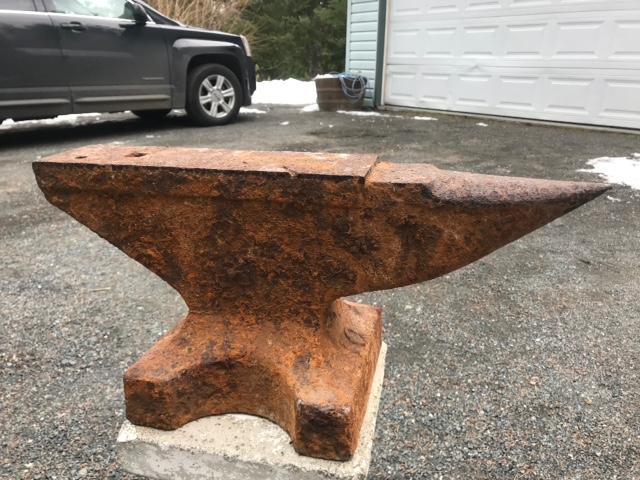
A friend of mine just bought an anvil and was wondering what kind it was. He said he was told it was pulled out of an excavation on the Alaska highway in Fort Nelson. It looks like it was pulled out of the ground, has some heavy pitting on it. Sure has a sharp point on the horn. He's up in Canada, Vancouver Island. Paid $150 Cdn for it. That's about $112US. He didn't say what the rebound on it was. Any ideas on it? Vulcan?
-
What did you do in the shop today?
John in Oly, WA replied to Mark Ling's topic in Blacksmithing, General Discussion
Very nice snail and mushroom Das! Jet engines - a racing snail, huh? Probably need a helmet too. -
Kast-o-lite in a square forge.
John in Oly, WA replied to Eventlessbox's topic in Insulation and Refractories
When I built my forge, I put the kastolite on the door, laid down a couple of sheets of saran wrap on it, closed the door and let it set. It formed a nice seal to the forge rim and saran peeled away easy later. -
Anvil weight?
John in Oly, WA replied to Timber Ridge Forge's topic in Anvils, Swage Blocks, and Mandrels
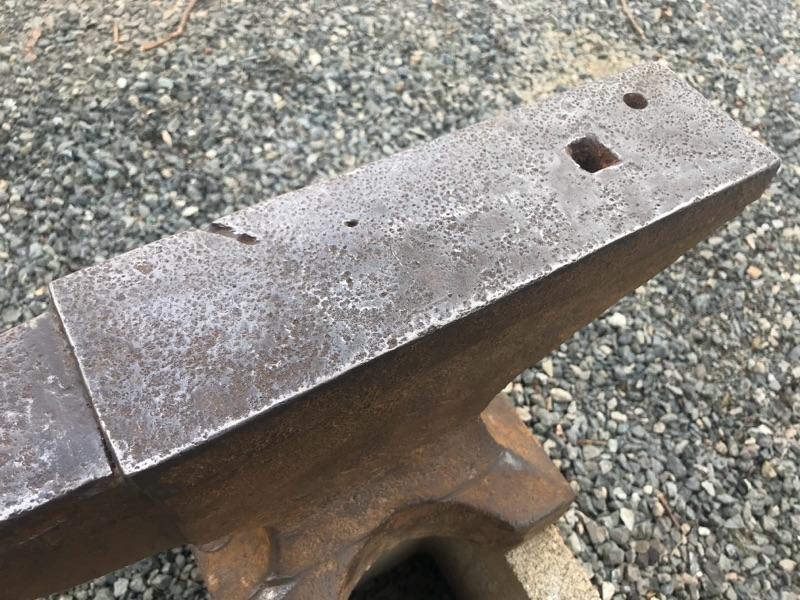
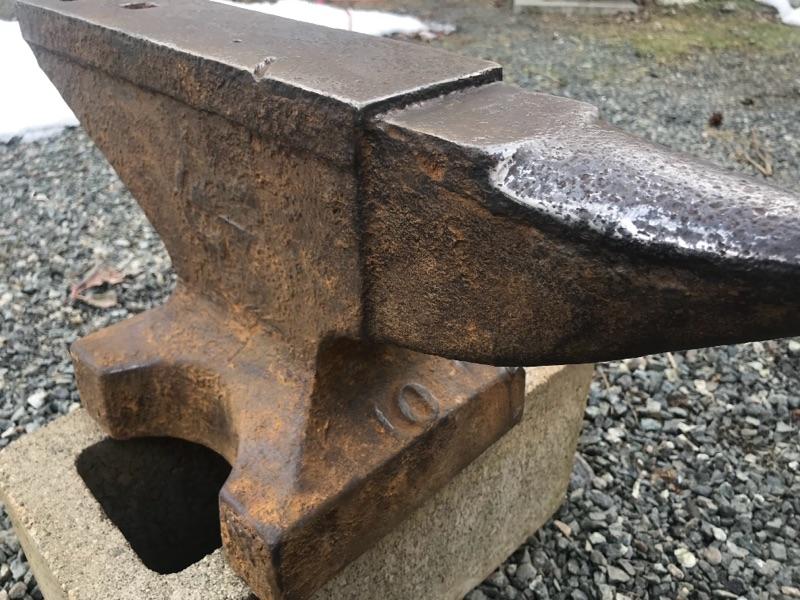
I understand the difference in hardness between the table and face, but edges of the face just have a look of been used and then milled, especially the front far corner. Could just be the lighting, but milled would bother me. -
Anvil weight?
John in Oly, WA replied to Timber Ridge Forge's topic in Anvils, Swage Blocks, and Mandrels
I'd say the face has been milled. You look at the table and it's saddled and mushroomed, but the face is flat with sharp edges. That doesn't add up to me. -
Nice work! Really like the pattern.
-
You'd make Red Green proud! The handyman's secret weapon: duct tape!
-
3D printed plastic burner experiments (photo heavy)
John in Oly, WA replied to Another FrankenBurner's topic in Gas Forges
I have some Kerr Satincast. I understand they are out of business now. And I have some Certus Prestige Optima, which is supposed to be designed for 3D printed resins (SLA), wax based polymers and wax/plastic hybrids. -
3D printed plastic burner experiments (photo heavy)
John in Oly, WA replied to Another FrankenBurner's topic in Gas Forges
I used plaster of paris when I started out. Read somewhere that adding sand to it made it durable enough for casting. It doesn't. Had one plaster of paris mold crack apart while pouring the metal. Good thing I had it all in a large tray of sand, otherwise it would've been hard to contain the disaster. After that, I did my homework and switched to real casting investment. -
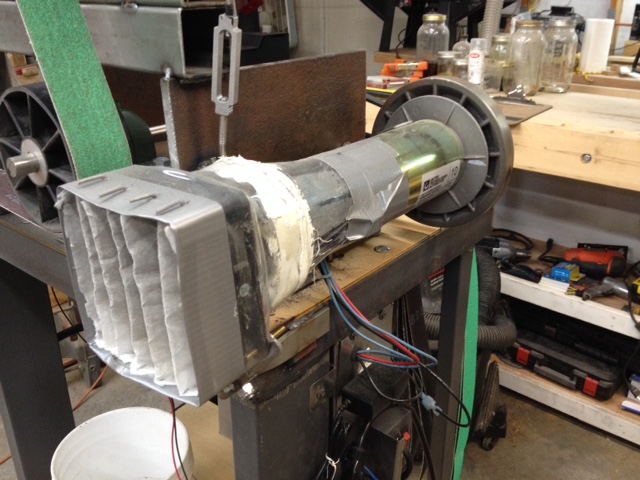
I second the grinder dust (swarf) problem. On the grinder I built from mostly treadmill parts, I made an intake duct with a filter for the motor. The motor from my treadmill has a flywheel/pulley that has molded in fan blades to pull air through it. I put the duct on the air intakes on the other side of the motor with a filter. Here's a pic of the filter duct. It's ugly, but it works. It's been working for over two years so far.
-
3D printed plastic burner experiments (photo heavy)
John in Oly, WA replied to Another FrankenBurner's topic in Gas Forges
Also with the molds, the plastic/wax/resin expands before it melts and eventually vaporizes. That can cause cracking as well. What are you using for investment? -
3D printed plastic burner experiments (photo heavy)
John in Oly, WA replied to Another FrankenBurner's topic in Gas Forges
Very cool AFB! Fun to experiment with the burners, but I got hypnotized by the flame vortex coming out of the nozzle. Don't know if it was an effective burner, but it looked great looking straight back down the center of the flame and watching the vortex swirl. I played with the wax filament on my 3D filament printer. I had to modify the filament feeder so the gear tension could be lightened up. The stock feeder gear spring was too much for the soft wax filament - would crush the filament and cause jamming. The other thing I had to modify was the firmware. It had a low temp limiter for the nozzle heater. The wax filament needs a nozzle temp of about 142C, IIRC, and the printer would only allow it to be set at a minimum of 175C. After those mods, it worked fine printing with the MachinableWax filament. On your molds cracking during cool down after burnout. How cool are you letting them get? As I've learned the lost wax(resin/plastic) process, which is just scratching the surface, you bring the mold down to about 900-1100F after the burnout, let it soak at that temp until uniform throughout the mold and then pour the metal with the mold at that temp (along with having a vacuum platform to pull the molten metal into the mold). It would be fun to print the blades of your vortex generator as separate pieces with pins down the center, so you could rotate them from lying on the diameter (don't know the proper terminology) to oriented radially(?) and everything in between. -
Very nice pattern. I like the "ruffled feather" effect.
-
Merry Christmas Thomas and safe traveling! Merry Christmas and safe traveling to all! And I'd guess Santa won't be putting propane in my stocking either, not that I'd want him to.
-
Nazz & Kirck Collaboration Chopper Series
John in Oly, WA replied to TheoRockNazz's topic in Knife Making
Nice collection of choppers Theo! -
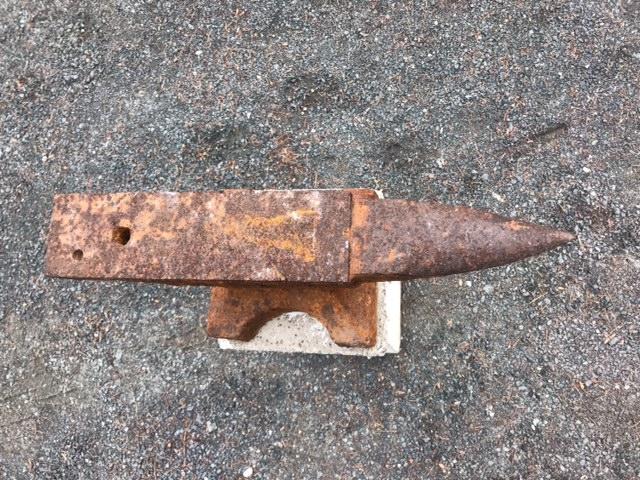
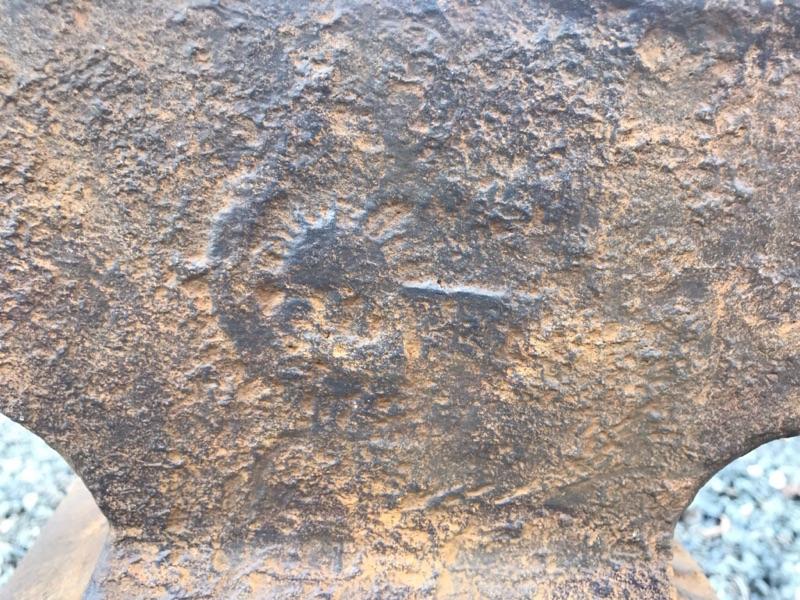
Clean up the side showing in your top pic and the front edge of the foot under the horn as Thomas recommends. Take close up pics of both of those areas and post them here. Those are the most likely areas to have any markings.
-
Thanks Brasso. It's been a steep learning curve. Not only the 3D printing, but the lost "resin" casting process as well. Still getting flaws in the cast - inclusions from small pieces of investment breaking off. But it's improving.
-
Definitely agree with HojPoj. It's NOT plug and play by any means.
-
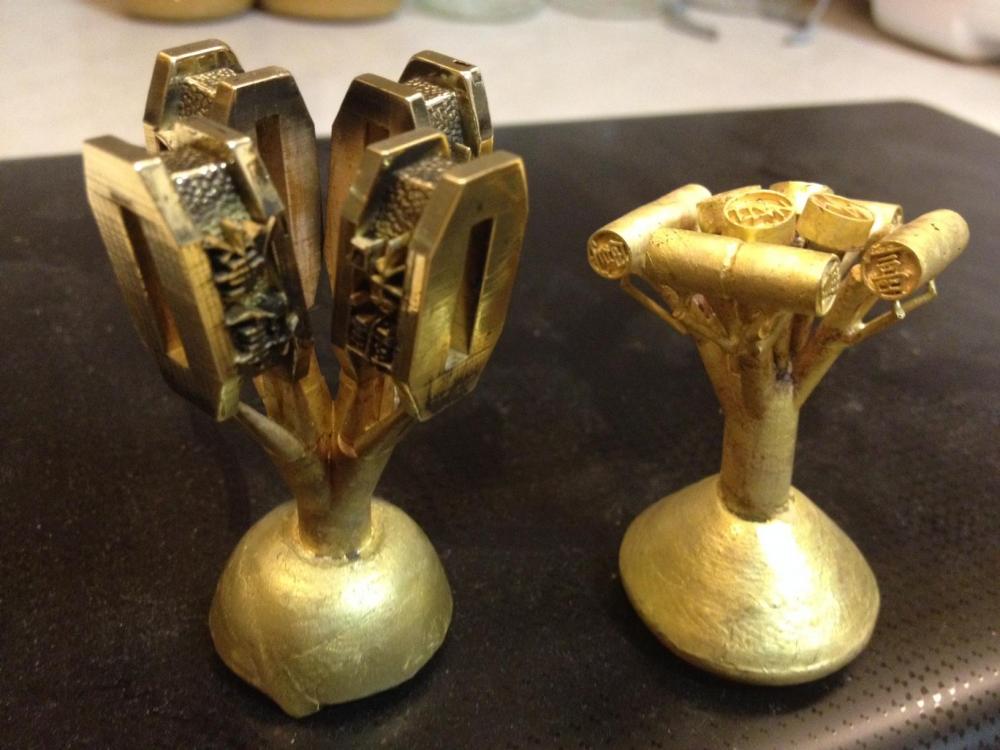
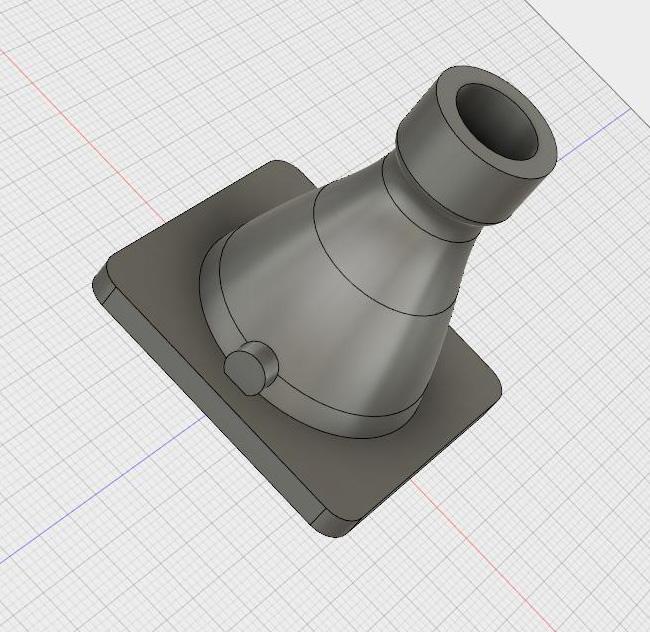
I've been doing the 3D printing thing. Printed up funnels and vortex generators for propane forge burners with my filament printer (just a pic of the 3D cad model). Printing knife hardware patterns with my resin printer for casting (blade guards and pins in brass).
-
Gorgeous work - every detail!
-
They may not have "worked", but they sure look good! Only a mistake in your eyes cuz you know what you were wanting to get out of them. The wavy feather pattern is especially beautiful!
-
Beautiful shots! In the Orion Nebula shot it looks like a large, light purple, planet-like sphere just above (about 11 o'clock) the bright white "center" of the nebula. Could be just my imagination running away.
-
I think I’m in love...
John in Oly, WA replied to FivePointsForge's topic in Axes, Hatchets, Hawks, Choppers, etc
Hey, I was only sympathizing with the man! Really! I mean it. That's all. LOL -
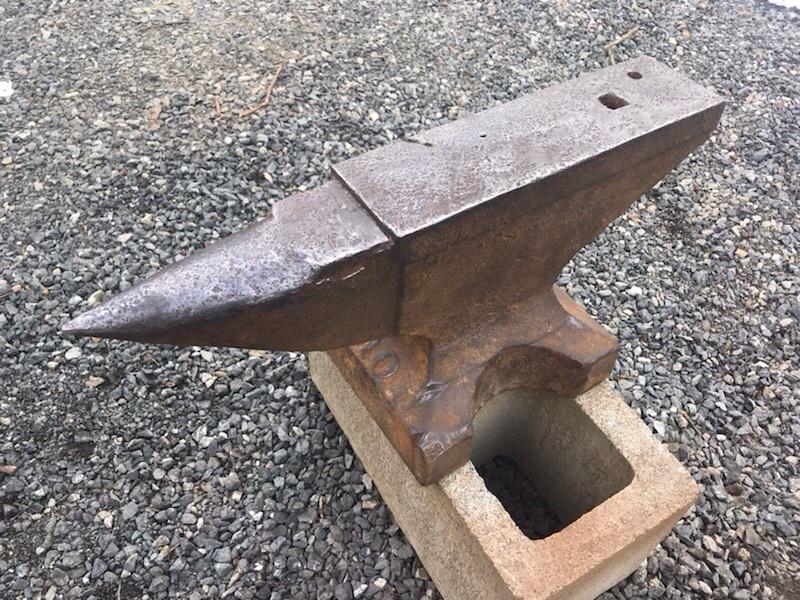
Looks like the top's had a bit of surfacing done to it. Depending on how much and how it was done, might not be a problem, but would definitely reduce the value to me.
-
Just for a laugh anvil
John in Oly, WA replied to Timber Ridge Forge's topic in Anvils, Swage Blocks, and Mandrels
Interesting look. I wouldn't imagine it hurt the usefulness of it except the chrome might flake off the face with use. Might start a trend of people chrome plating anvils. That would be one way of keeping it from rusting.
