arkie
-
Posts
2,679 -
Joined
-
Last visited
Content Type
Profiles
Forums
Articles
Gallery
Downloads
Events
Everything posted by arkie
-
I guess I thought that refreshing the solution would make it work better, or at least it seemed to. Next time I'll just leave it alone with just a scum removal. I do clean the electrodes, though. They do get a lot of krud on them. Dave, that's a SERIOUS electrolysis setup! You must do some big pieces.
-
I don't know what effect it would have on the battery for a electrolysis session of several hours. Some of the manual chargers drop back to a trickle charge if the battery becomes fully charged. That is not enough for electrolysis. An automatic one with a battery would do the same. Good point, Glenn. I just use rebar. I grind the wire-electrode to clean bare metal for good contact. With that much rust, you probably are looking at days, not hours. Over a day with very heavy rust, it might be good to change out your electrolyte solution.
-

Found an anvil in a scrap metal bin.
arkie replied to SamCar's topic in Anvils, Swage Blocks, and Mandrels
Scrounge up a copy of Postman's Anvils in America and read up on the Southern Crescent anvils. They had a steel face with cast iron (pig iron body). Very nice anvil...it's a keeper! -
Papy and Dave, Just a tip here regarding the electrolysis method. You need to use a manual battery charger for your setup. The newer battery chargers are usually automatic and have a sensing circuit that "looks" for a battery to set the charging. If none is found the charger won't perform properly. You can find the "old" style manuals at flea markets, garage sales, etc. If you decide to buy a new one, search the manufacturer's site for one that is manual, not automatic. I got a Schumacher for my setup because my old manual was only about 2 amps and was way too slow. I found a manual charger on their site that went up to about 6 or 12 amps (need to look again for rate) and ordered it online. Works like a charm.
-
Buy SEVERAL lottery tickets. Unbelievable deal on the HB. Congratulations. Take good care of the old girl.
-
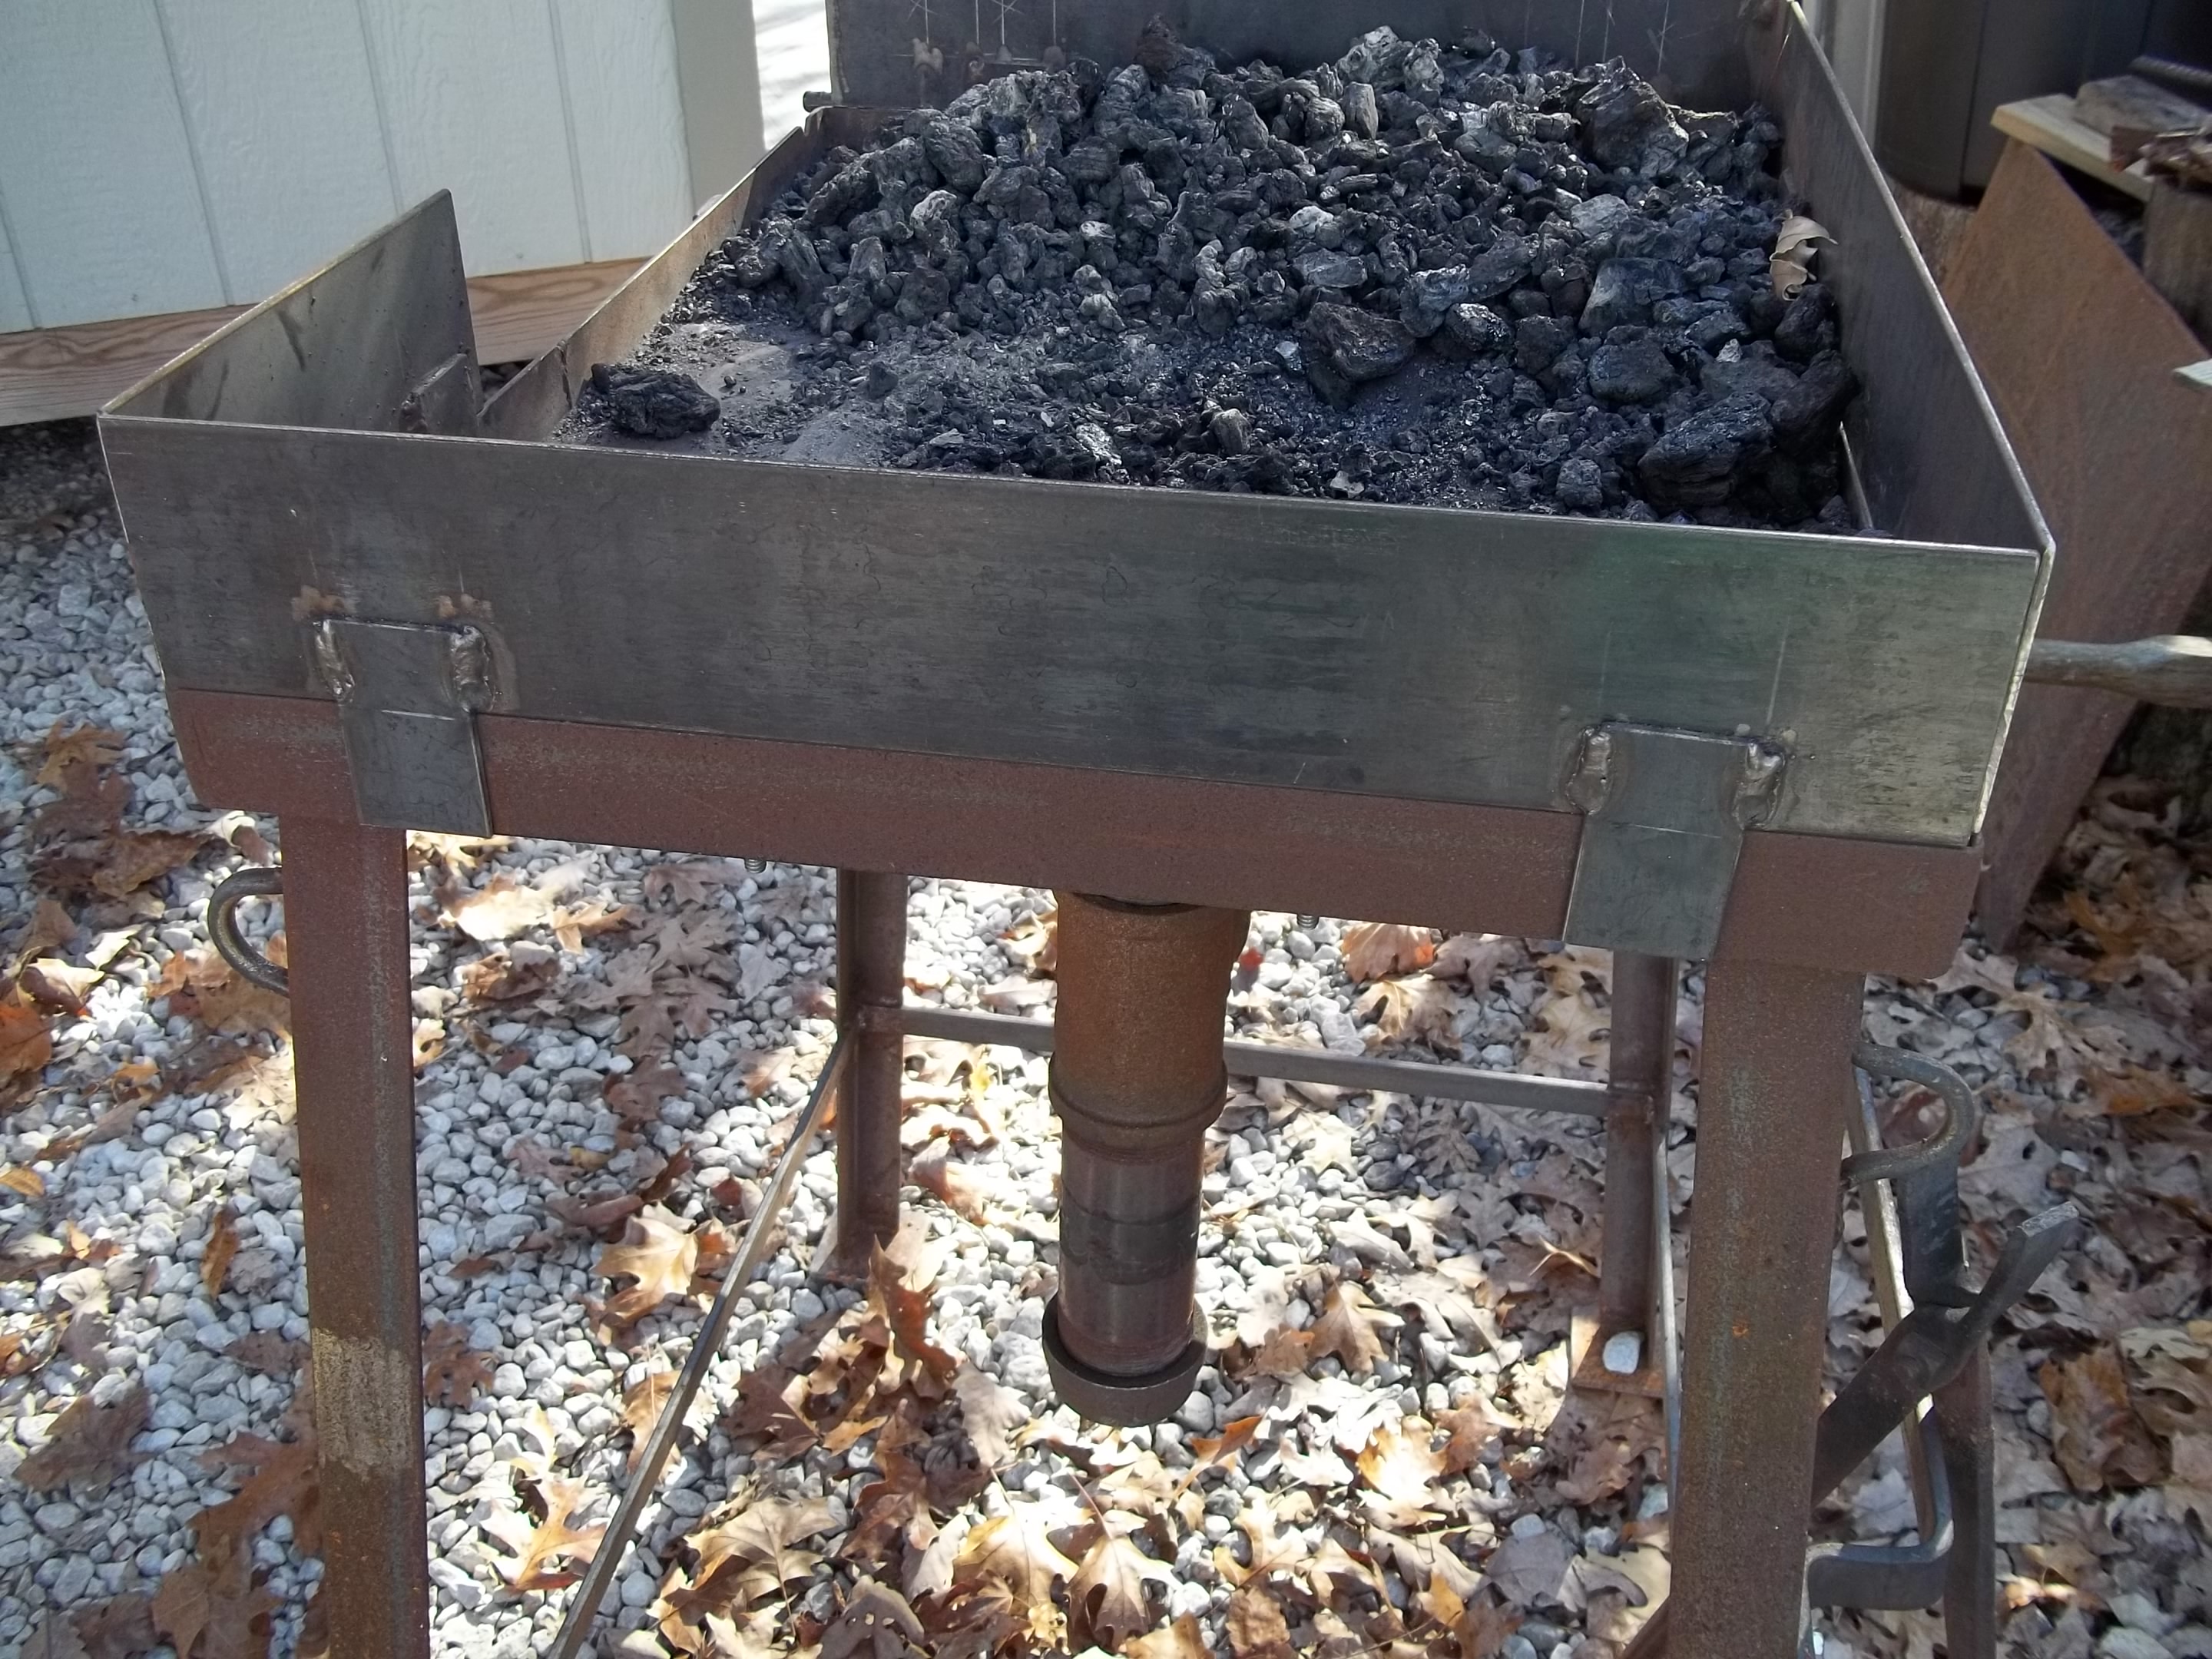
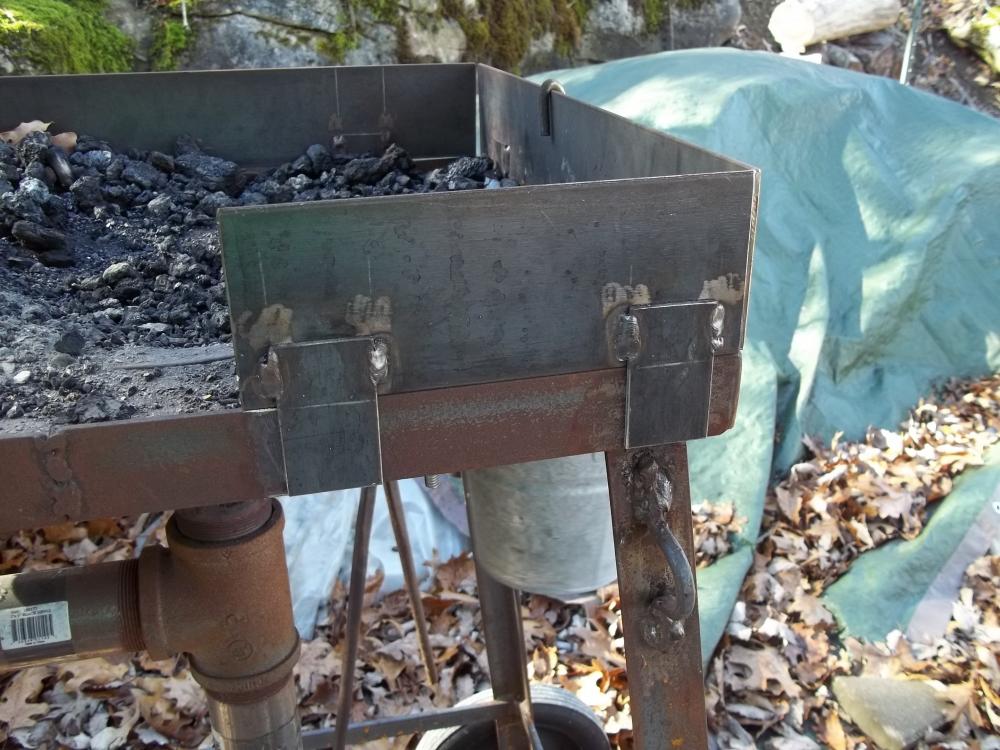
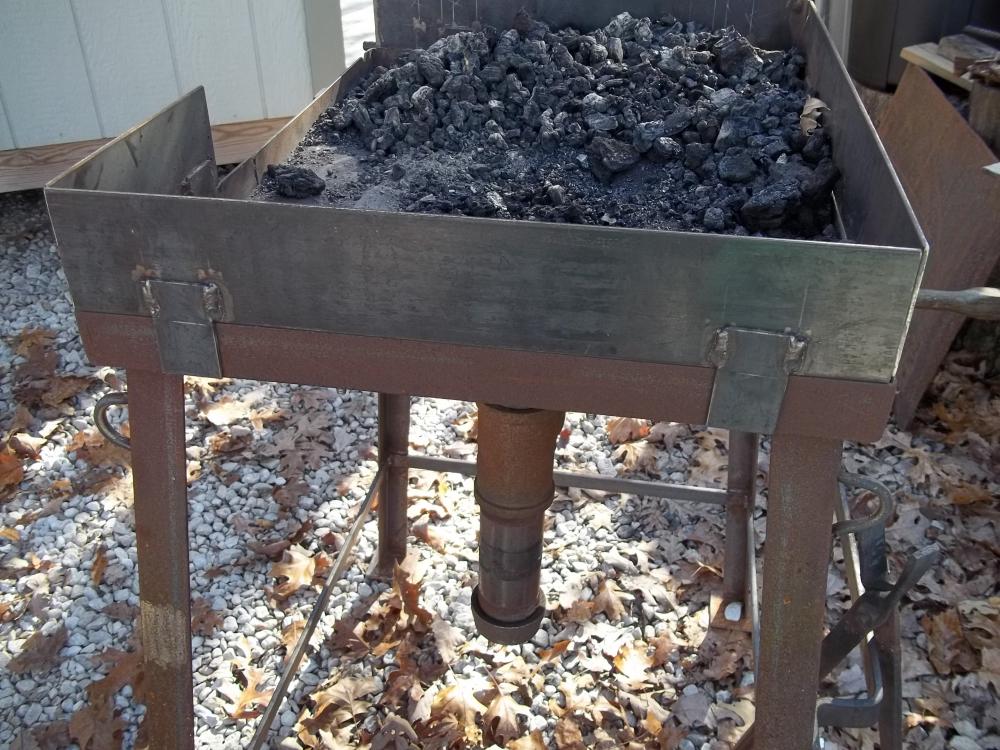
92, To attach your sideboards to the angle iron frame you can weld on some tabs to both sides of the sideboard and just slip it down onto the angle iron. You can make the sides with a small piece that you can remove for long pieces over the fire. I used pieces of 1/8" bar, about 1-2" wide on each side for the tabs. This was early on with mine.
-
New to me Trenton Anvil
arkie replied to EJRailRoadTrack's topic in Anvils, Swage Blocks, and Mandrels
Gary Huston has a video about making a clipping hammer. In that video, at about 13:30, he shows how to make a clip on a horseshoe. He doesn't use an anvil clip horn but rather makes it the old fashioned way on his regular anvil. I tried three times to post this, but the bugs in the software prevented it...ARGHHHH!!! Use the link without the quotes. "https://www.youtube.com/watch?v=jEOLR-j-ANA" -
EJ, congratulations on getting your anvil...now, rock and roll!!!!! :-) Very nice find!
-
Thanks. I am in agreement with you as well.
-
Twisted, would you be willing to share the initials of the name of the big box store with the case hardened Nicholson file (or maybe a PM)? I just picked up a couple of Nicholson large mill bastards at HD and am wondering if................
-
Jerry, interesting story about Postman's book. My son gave me a copy for Christmas one year. He overheard me say that "...all I wanted was to see when and how my Hay Budden anvil was made". Well, that turned out to be wrong. After going through Postman's book, I became immersed in it. I have read that book, front to back more than once, finding out things about anvils I missed the first time reading. It is fascinating reading, and it came with Postman's other book, Mousehole Forge. Now, there's another book I couldn't put down. I'm no history buff, but reading cover to cover about the history and manufacture of the old Mousehole anvils was very enlightening and entertaining. Making those old anvils was extremely hard and gruelling work. Makes one appreciate the older anvils we own these days.
-
Check the foot under the horn for a serial number. If it is indeed a Hay Budden, you can find the date of manufacture and type of manufacture by consulting Postman's Anvils in America.
-
Peening both sides of a plate or knife
arkie replied to Jonah k's topic in Blacksmithing, General Discussion
X2 on the wood block, that's what I use. Be sure to soak the wood in water before using...LOT's less smoke! -
Benjaman, you are one of the most fortunate persons I've heard of. At 19 years of age and have $4K burning a hole in your pocket, step back and think for a moment. I agree with some others in this thread on spreading your purchases. If you are starting out, you can't realistically forge more on a 490# anvil than you can on a 175# anvil. Get a good quality anvil in the 150-175-200# range, possibly a power hammer, some other smithing equipment. You'll have some money left over and a lot more to work with than one monster anvil. Stuart was alluding to a business perspective. I doubt that very many 19 year olds are in the position to blacksmith as a business and be successful. That requires a lot of experience.
-
Nice job, Das! X2 on the sawsall!!! First cross I made, I used a hacksaw. That was the last of those. After that, I used the sawsall. Gotta be careful though, they do cut faster than the hacksaw!! Wish I had a bandsaw.
-
Vinegar works great, is a lot quicker than 3 months, is cheaper and surely not as messy. I prefer molasses on my buttered biscuits or pancakes.
-
Annealing 5/8" Coil Springs on Struts
arkie replied to olfart's topic in Heat Treating, general discussion
BTW, I should have mentioned a caveat.....if you decide to use a spring on a strut assembly, DON'T, REPEAT DON'T cut the spring before having it removed from the strut!!!!! HAVE THE SPRING REMOVED FIRST!!! That would be an instant trip to the ER!! -
School me on Hardy hole size.
arkie replied to Thats Hot...'s topic in Anvils, Swage Blocks, and Mandrels
As a side note to making the hardy shank a bit larger...if using square tubing around square bar makes it too large, then consider angle iron. I had a hardy tool given me that had a 3/4" shank. My hardy hole, again, being 1" I had to thicken the shank. I welded a piece of 1/4" x 1" x 1" angle to the 3/4" shank on the gift tool. That increased the shank to 1" by adding 1/4" in both directions. -
Annealing 5/8" Coil Springs on Struts
arkie replied to olfart's topic in Heat Treating, general discussion
Or...you can measure around the coil to get the length of the piece you want, cut it off with a angle grinder, hack saw, etc. A short piece is easier to work with. That way you don't have to heat and uncoil the spring. -
School me on Hardy hole size.
arkie replied to Thats Hot...'s topic in Anvils, Swage Blocks, and Mandrels
Your shank should be fairly tight, but not so tight that you can't get it back out! Most use a tapered shank, but some are straight (mine is straight). If you need a snugger fit, you can run some welding stringers down one or two sides, then grind them down to a taper. That way you can custom fit your shank without having to forge anything. I have done the welding thing on several homemade shanks and it works well. My HB has a 1" hardie hole, but it's about 1/16" over, so the welding approach works well when making hardy shanks out of 1" square bar. -
Annealing 5/8" Coil Springs on Struts
arkie replied to olfart's topic in Heat Treating, general discussion
The only way the springs would be annealed would be if they (1) reached critical temperature and (2) cooled slowly in the coals. How are you going to check to see if critical temp was reached? -
For first tongs, the twist tongs are fine. That was my first tong(s) and still use them after all these years. One hint, when you heat the stock to make your twist, do it yellow to orange, and make your twist rather quickly (not jerky, though). Twisting cooler can result in cracks.
-
Specific question about shovels
arkie replied to Thedillestpickle's topic in Blacksmithing, General Discussion
Frosty, I just posted a different video in the other thread, looks like the same company. -
Specific question about shovels
arkie replied to Thedillestpickle's topic in Blacksmithing, General Discussion
Frosty, don't feel bad. I tried two posts in a row, both disappeared. I tried to post this about forged shovels which were water quenched, but no info regarding tempering. https://youtu.be/B_xxi2TSdTQ -
You're gonna love fooling around with that old lathe. It's got "character".