

HWooldridge
-
Posts
3,308 -
Joined
-
Last visited
Content Type
Profiles
Forums
Articles
Gallery
Downloads
Events
Everything posted by HWooldridge
-
It's best to experiment with your own fuel but for comparison, I put about 3 gallons of coal in a five gal bucket with a 2-3'quarts of water. I let that presoak for a few minutes while the fire is getting underway with dry fuel. When the blast is healthy and going, the wet coal is packed on each side of the fire so the flames can continue up thru the center. The coal will coke and eventually burn hollow with each heat so the fresh coal is regularly fed in as necessary.
-
Completed, English Scalping Knife Replica 1750-1790
HWooldridge replied to DRoberts's topic in Historical Blades
DR, I like your rendition and wouldn't mind dressing out a deer with it...but like Thomas, I think the brass tube is not accurate from a period perspective. The finish could be argued either way - forged, filed, stoned, etc. all could have been viable. Many of these trade knives were sharpened on one side only. I've read that was the practice because the blades were often case hardened so a single bevel was the only way to keep them sharp. I like to see those types of details that are not apparent to the average person. -
Pony block - or pony die...another method is to use a clamp frame around the lower main die, a la Clifton Ralph.
-
Is it worth a try?
HWooldridge replied to CleetisMorgan's topic in Power Hammers, Treadle Hammers, Olivers
Maybe a planishing or veining hammer...then you don't need to abandon that treasure <wink>. -
From Central Texas - Un Prospero Nuevo Ano a todos mis amigos en I Forge Iron!
-
Fire screen attachment
HWooldridge replied to Blackwaterforge's topic in Blacksmithing, General Discussion
I've built in excess of 50 firescreens over the years so the following tips may be helpful. It's very important to get the screen as flat as possible before installation. The best way I have found is to run it through a slip roll to purposely curl it back against the original coil set then adjust the rolls outward and flip the screen back and forth until it comes out flat. This is a much better method than trying to iron it smooth on a table - which always seems to leave a few dimples. The repeated rolling also cold works the wire a bit and you won't have to do much stretching - just lay it on the frame and go to riveting. I clamp the backer strips to the frame and drill through both pieces so the rivet holes line up - make sure you mark each backer bar so you'll know both sequence and orientation (I use a combination of alpha and punch marks to guard against mixing). I also have some custom tongs I made which have pivoting jaws that are forged to match my normal screen patterns. These will reach over most frames and allow me to easily stretch some areas if necessary. Finally, I use a zip wheel to trim screen edges next to the frame - it's fast and leaves a nice cut. Contoured screens present additional challenges but the basics still apply. Good luck and have fun... -
Case hardening (case coloring) wrought iron?
HWooldridge replied to Black Frog's topic in Heat Treating, general discussion
Brilliant colors can be attained with cyanide salts - it won't provide a deep hardness but is pretty to look at. Care must be used with these chemicals as they are dangerous to handle by the untrained. Check out Doug Turnbull's custom guns for some really gorgeous pictures. WI should color just fine - although packing in straight bone black may not provide bright colors. Obviously, it will need to be polished beforehand. BTW, many gun parts are still case hardened for performance. It's an easy way to machine parts from soft steel and still get a hard surface to endure wear. -
I met him at a demo years ago - what a great loss! RIP and prayers to his family...
-
Minimum steel for cutting?
HWooldridge replied to Wildernessmedic's topic in Axes, Hatchets, Hawks, Choppers, etc
I work with a couple of guys from Jalisco - I'll ask them if they have ever paid any attention to these tools. -
Household "GOOP" found at hardware stores works exceedingly well to bond wood handles to metal heads if a conventional wooden wedge is used at time of installation. You slather the GOOP on both handle where it mates to the head and on the wedge (which then stays glued in place). I have a 3lb head on a hickory handle that has been in regular use for well over 15 years and not loosened.
-
Minimum steel for cutting?
HWooldridge replied to Wildernessmedic's topic in Axes, Hatchets, Hawks, Choppers, etc
I've seen the round ones made from push scrapers, like you would use to lift linoleum tile - and some of the Mexican smiths will use car/truck springs because they are plentiful. My father brought home a couple of the J-shaped versions from Mexico when I was a kid and we used them to cut brush. Those had two bands wrapped around an ax handle and riveted to the blade. -
Merry Christmas and best wishes for Peace on Earth to all people of all nations - and especially to our IFI family! Best of luck in 2014...Hollis Wooldridge
-
The other previous comments are valid and all I would add is - do not use PVC under any circumstances. Not only is it not suitable from a thermal deflection perspective, but it will deteriorate with the heat and emit chlorine gas (the same stuff they fired into the trenches during WWI).
-
Show me your Hand Forged Holiday Presents
HWooldridge replied to Jim Coke's topic in Member Projects
Here is a stocking hanger I knocked out on Saturday as gift for a family friend. All elements forged from bar stock (except the pieces of pipe on the feet) and I did fasten all the pieces with MIG. Sandblasted and painted flat black. -
If your coal is small in size (1/2" down to fines), you might try presoaking it in water. I also use a very hot, but dirty coal, and building a fire with wet coal tends to increase my work time until the clinkers eventually clog the tuyere.
-
Fancy forge welded three-piece fire steel
HWooldridge replied to Nick's topic in Blacksmithing, General Discussion
Another perfect example of a smith turning a utilitarian tool into a work of art to be appreciated for both form and usefulness. Great work! -
Chatter happens when your tool isn't rigid enough and starts bouncing (grin).
-
My grandfather ran a cotton gin from a big steam tractor in the 1920's (this was near Blanco, Texas). He said it had a gear he called "compound low" that was a slow crawl. He could run one of the rear wheels up against a tree, lock the offside wheel with the mechanical brake, engage low gear and walk the tree over so it would either uproot or snap off. He claimed they could break down blackjack oak up to 6" or so in diameter. Those tractors could weigh more than 20,000 lbs, which is about the same as some bulldozers.
-
100# Beaudry Rebuild
HWooldridge replied to shanevrr's topic in Power Hammers, Treadle Hammers, Olivers
That's a Utility hammer - you will certainly enjoy using it after the rebuild is complete. -
Anvil face surface hardness- Lost
HWooldridge replied to Fatfudd's topic in Anvils, Swage Blocks, and Mandrels
John, you are absolutely correct - welding the edges alone won't work. I once saw an anvil repaired that way - not only was the rebound dead, but the welds kept popping loose when hammered on. What I was trying to convey in my post was that an anvil (or pretty much any block of steel) can be faced to produce satisfactory results if done properly. -
Anvil face surface hardness- Lost
HWooldridge replied to Fatfudd's topic in Anvils, Swage Blocks, and Mandrels
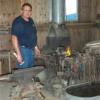
Actually, I did something similar to a 250 lb PW about 30 years ago and it's been in regular use since then. However, as John noted, it has to be a good weld or you'll get a dead spot. In my case, I took an old trackloader flat spring, cut out the hardy and pritchel holes ahead of time, then tacked the plate to some pieces of 3/8" rod running down the middle of the face and around the holes. I used 1/8" 6011 rod to reach down inside the groove and slowly built up beads until the plate was welded all the way to the edges. After the welding and preliminary grinding were finished, I built a temporary coal forge with a long slit for the blast. A friend of mine helped me with the heavy lifting and we slung the anvil upside down so that it was suspended over the forge. I built up a fire around the anvil and heated it slowly with a Champion 400 blower. IIRC, it took more than an hour to get it to cherry red and we kept checking the face with a small magnet to verify proper temp. We had previously filled several 55 gal drums with water and had two garden hoses ready to keep it cool after the initial quench. We brought the anvil out of the forge, flipped it right side up and commenced pouring water. About the only area that didn't get really hard was a small spot near the hardy, which has proven not to be a problem in use. The rest of the face will slide a file and has held up well since then My avatar pic shows the anvil; you can see the unusual height between face and horn; the original face was 3/8" and the new plate was 3/4". This was a great deal of work but nobody was around to tell me it was a stupid idea so I went ahead and it turned out well in the end. So it can be done, but you need to be really committed to the task... -
waste oil forge on alcohol?
HWooldridge replied to sing_j_'s topic in Induction Heating, Oil forges, etc
You need to know the BTU content - listed below are a few examples. Natural Gas 1,030 Btu/cu ft Propane 2,500 Btu/cu ft or 92,500 Btu/gal Methane 1,000 Btu/cu ft Landfill gas 500 Btu/cu ft Butane 3,200 Btu/cu ft or 130,000 Btu/gal Methanol 57,000 Btu/gal Ethanol 76,000 Btu/gal Fuel Oil Kerosene 135,000 Btu/gal #2 138,500 Btu/gal #4 145,000 Btu/gal #6 153,000 Btu/gal Waste oil 125,000 Btu/gal Biodiesel – Waste vegetable oil 120,000 Btu/gal Gasoline 125,000 Btu/gal -
Stourbridge is a famous iron making area in England. There were multiple foundries in the area.
-
They might be welded at the waist. Otherwise, it would be tough to get in there for a forging (although it could also be cast).
-
Anvil face surface hardness- Lost
HWooldridge replied to Fatfudd's topic in Anvils, Swage Blocks, and Mandrels
I've seen more than a few Peter Wrights with relatively thin faces for the size of the anvil. It's interesting to compare a 250 PW with a 3/8" face to a 1/2" plate on a 150 Hay Budden. Fishers typically have even thicker faces (and IIRC, they used photos of swaybacked English anvils as marketing literature).