Steven NY
-
Posts
114 -
Joined
-
Last visited
Content Type
Profiles
Forums
Articles
Gallery
Downloads
Events
Everything posted by Steven NY
-
Well then. In some cases when using the butt of the antler, where it attached to the animals skull it may be very porous to combat this and add stability when inserting tangs it can be beneficial to drill a very over sized hole to remove most of the core porosity. Then insert a sleeve of either metal or hardwood to fill the gap between the tang and the antler. This helps to prevent the lamellar bone and marrow space from collapsing. I usually use Devcon 5 minute epoxy for this. Give the sleeve some tooth with course sandpaper to help it hold. This technique also works for horns which are hollow. Do not bleach animal bones to whiten them, bleach breaks down the bone and makes it brittle. Instead use peroxide. I use water filtration system peroxide as it is stronger. It whitens them without the damage. Make sure to apply some sort of oil back to the bone to help prevent it drying out as it will have a tenancy to crack as it shrinks. I generally use a few coats of mineral oil though it tends to make the bones look a little yellow instead of bright white. If you are using the bone for handle material wait to oil it until after it has been glue on as it oil penetration can effect the strength of the epoxy bond. Have a good one, W
-
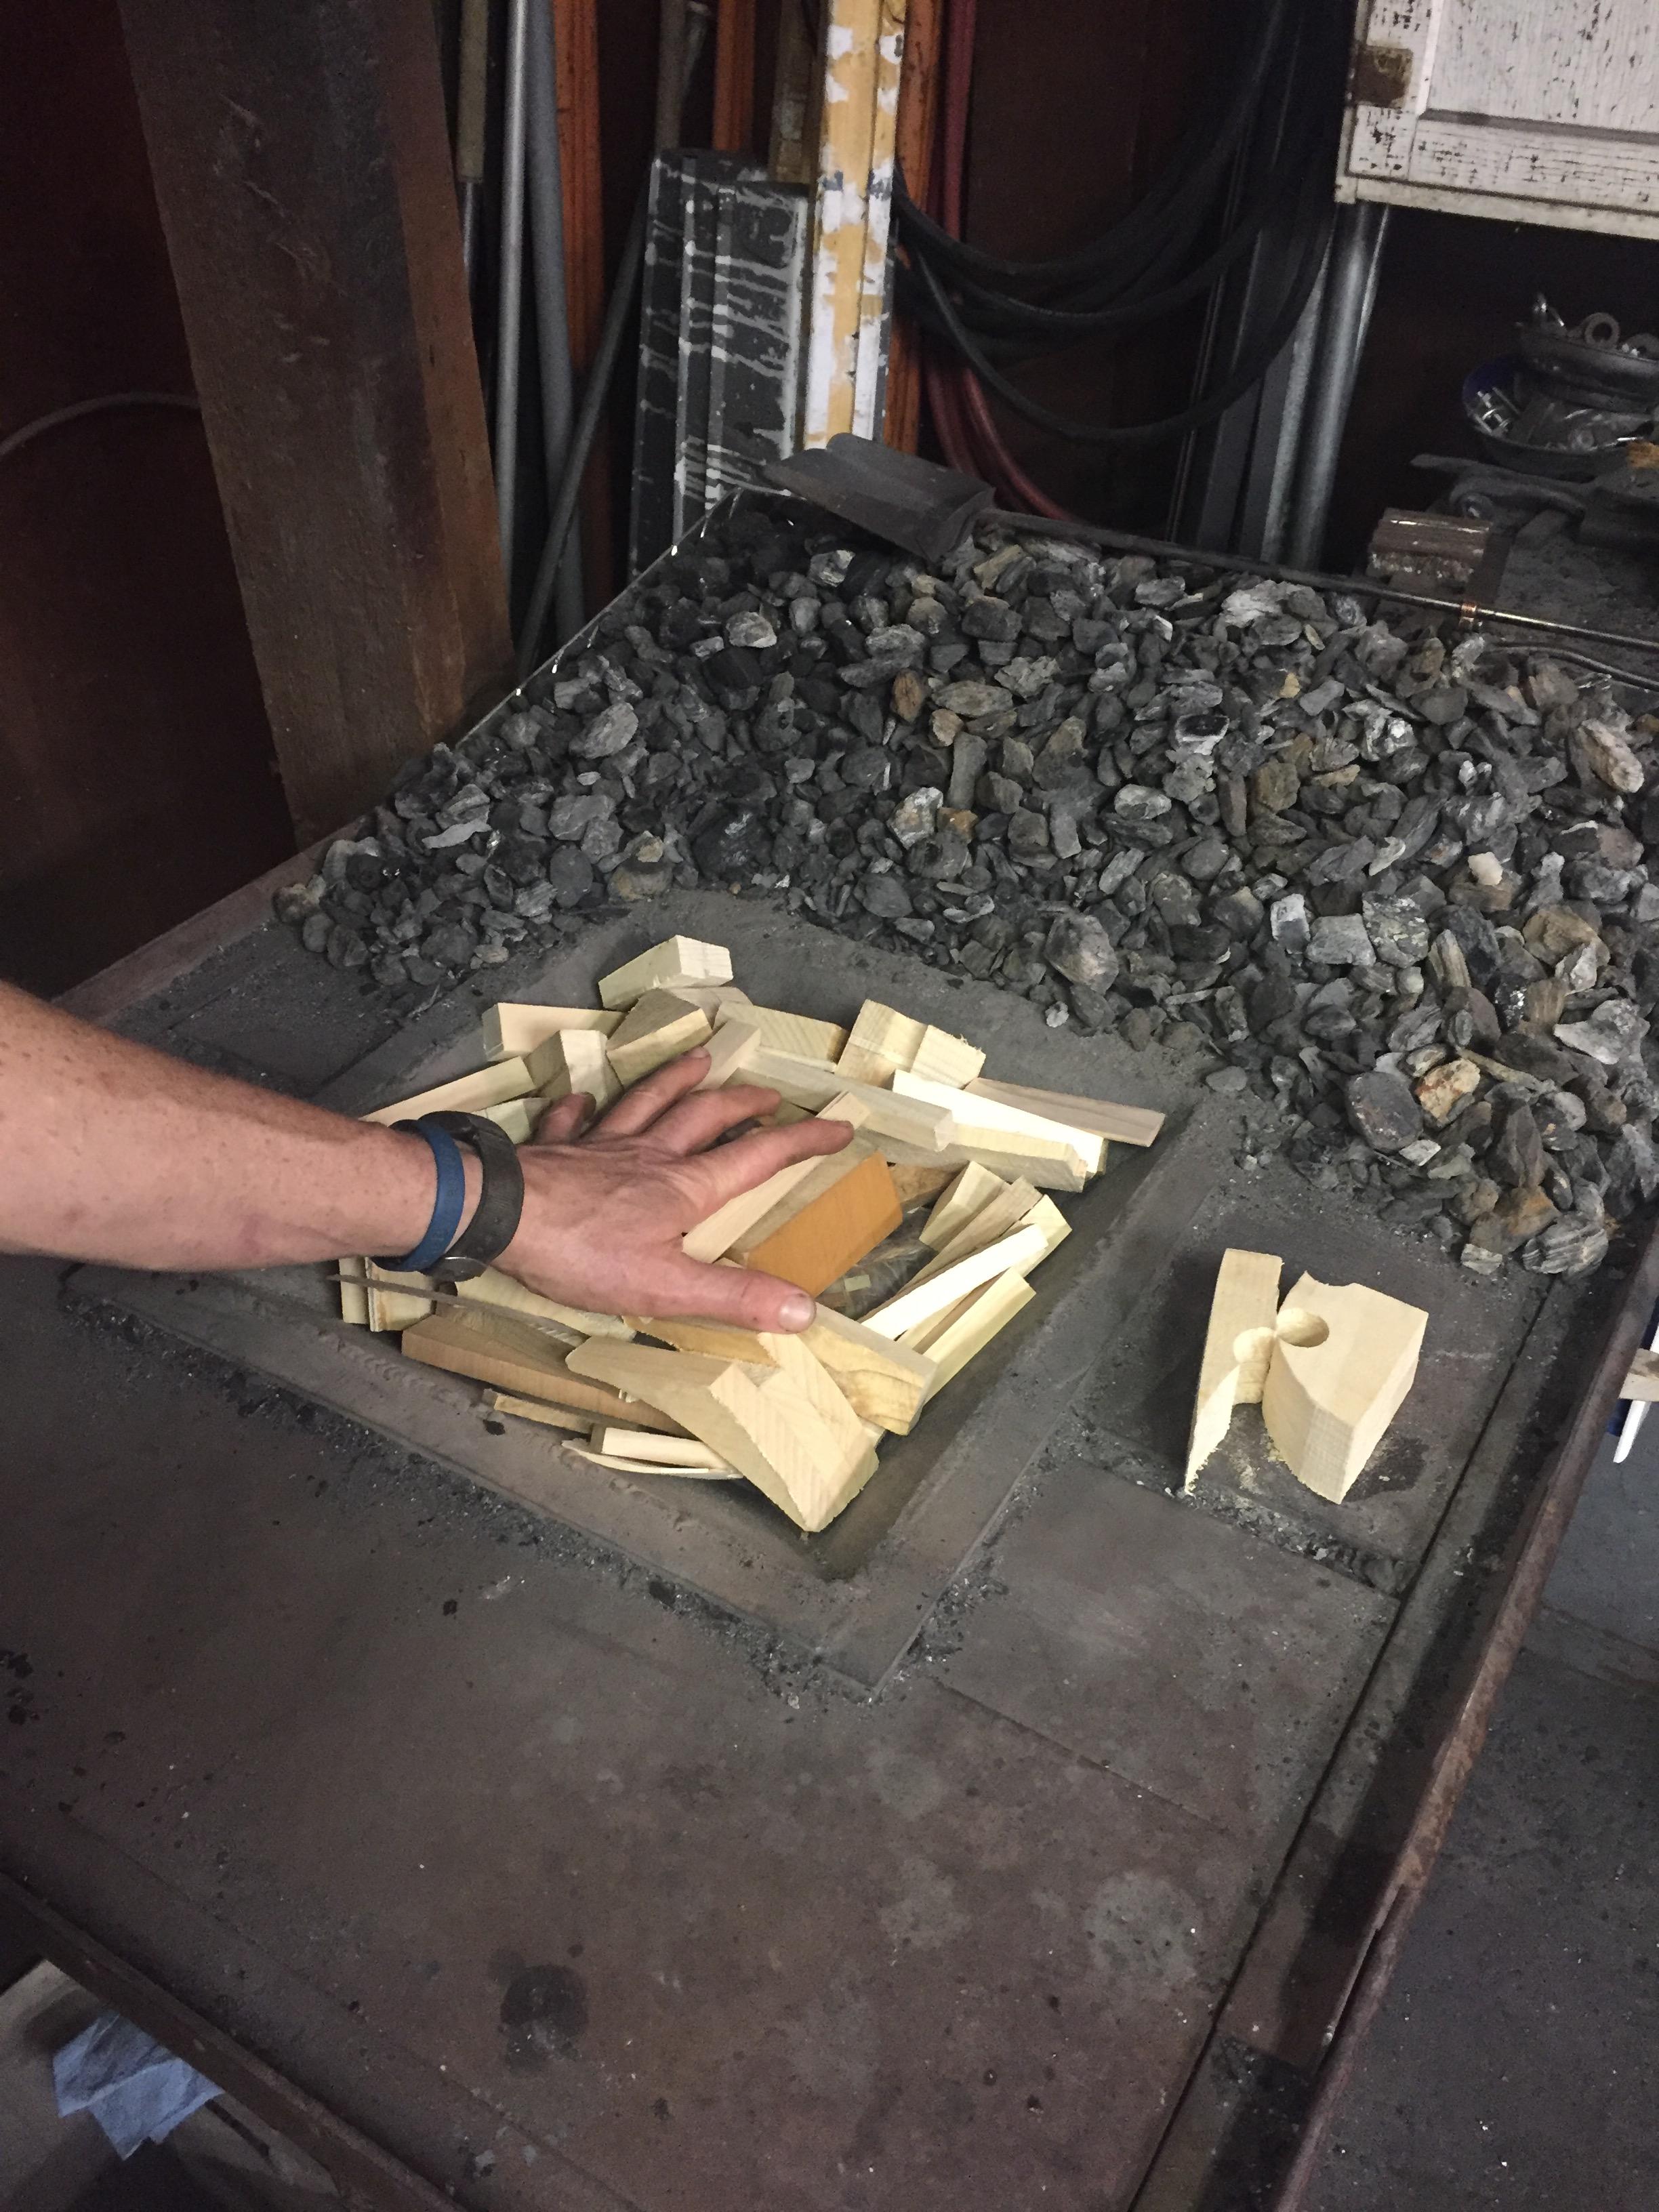
Looking great!!! You may want to raise the rim from the edge of the fire pot in the back down one side maybe 1/2 to 3/4 of its length to give yourself a place to pile your coal during clean out without the risk of it falling off the table. But then again I am very fussy about my shop, maybe to fussy at times. I do sweep up every night before I leave lol. Have a good one, W
-
LOL Nice! well when I get that time machine built I will keep this thread in mind!
-
I have use a lot of deer antler/bone, knobs, knife scales, pen blanks at school for antler pens, and handles of all sorts. Devcon 2 part epoxy works very well. If I were going to use them for fire place tool handles I would also pin them or make it a through tang with a cap. The thicker the antler section the more porous the inside will be, I normally try to remove most of the porous materiel or stabilize it as mentioned above. Have a great night, W
-
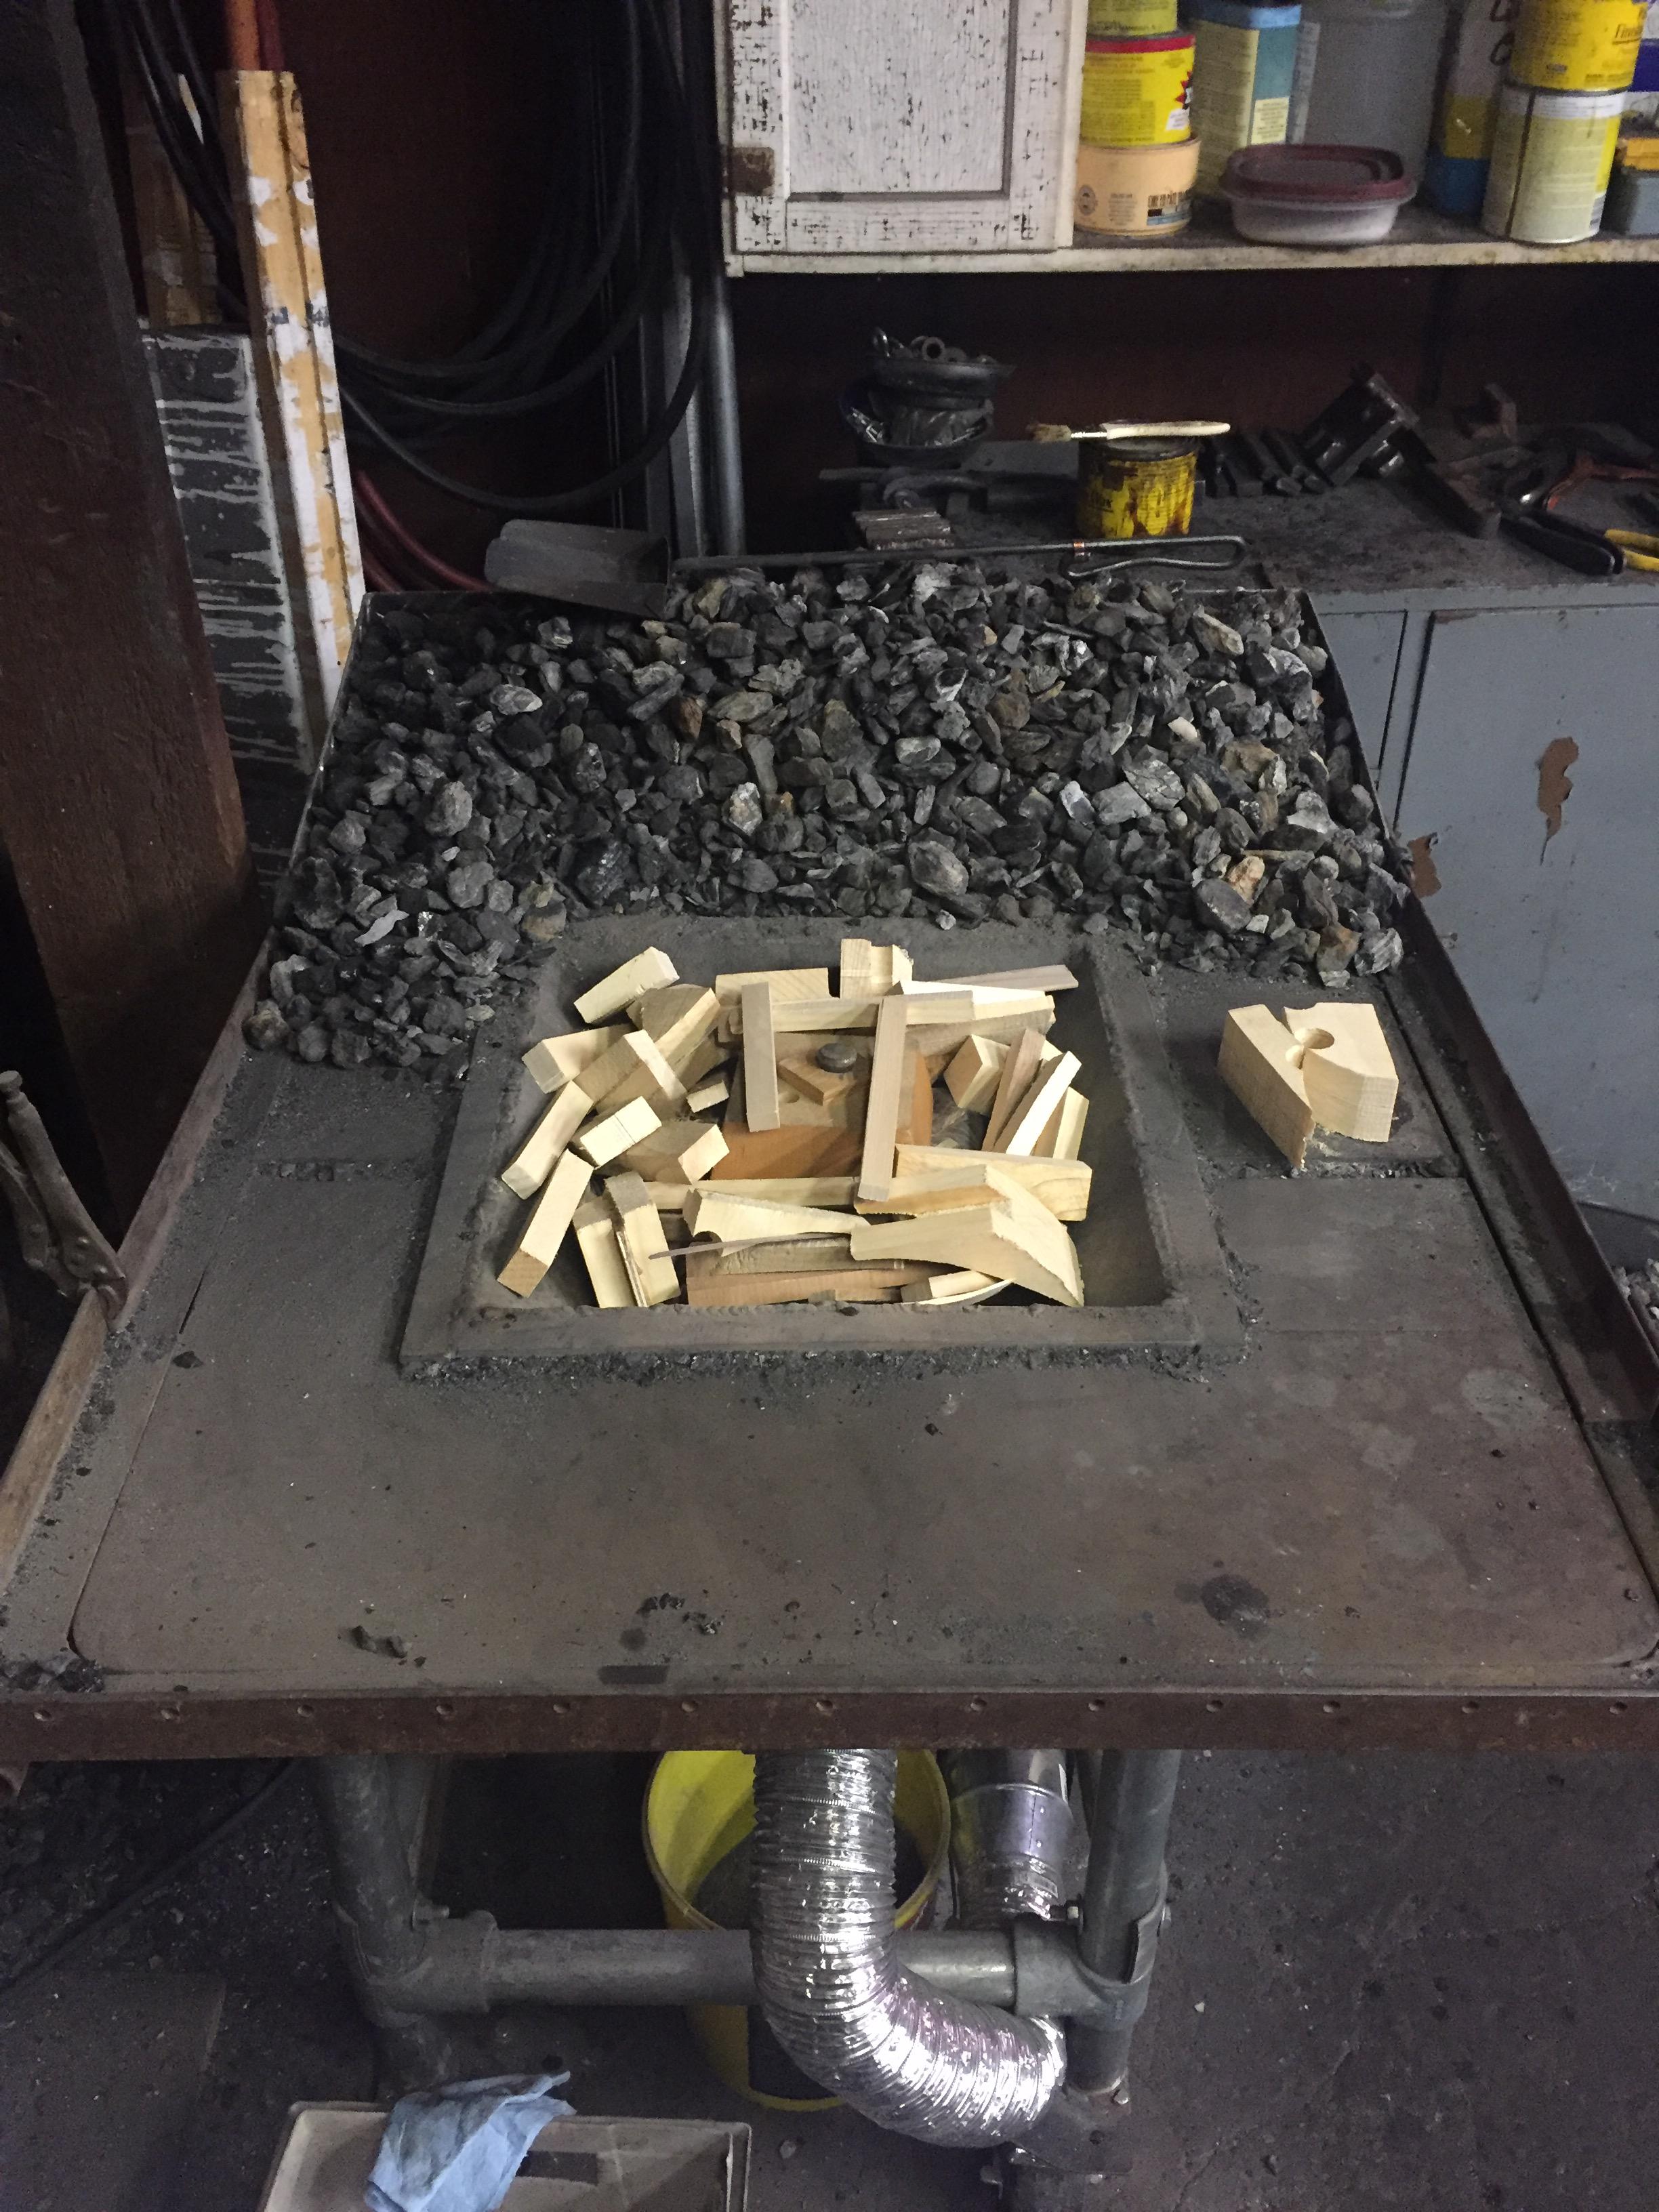
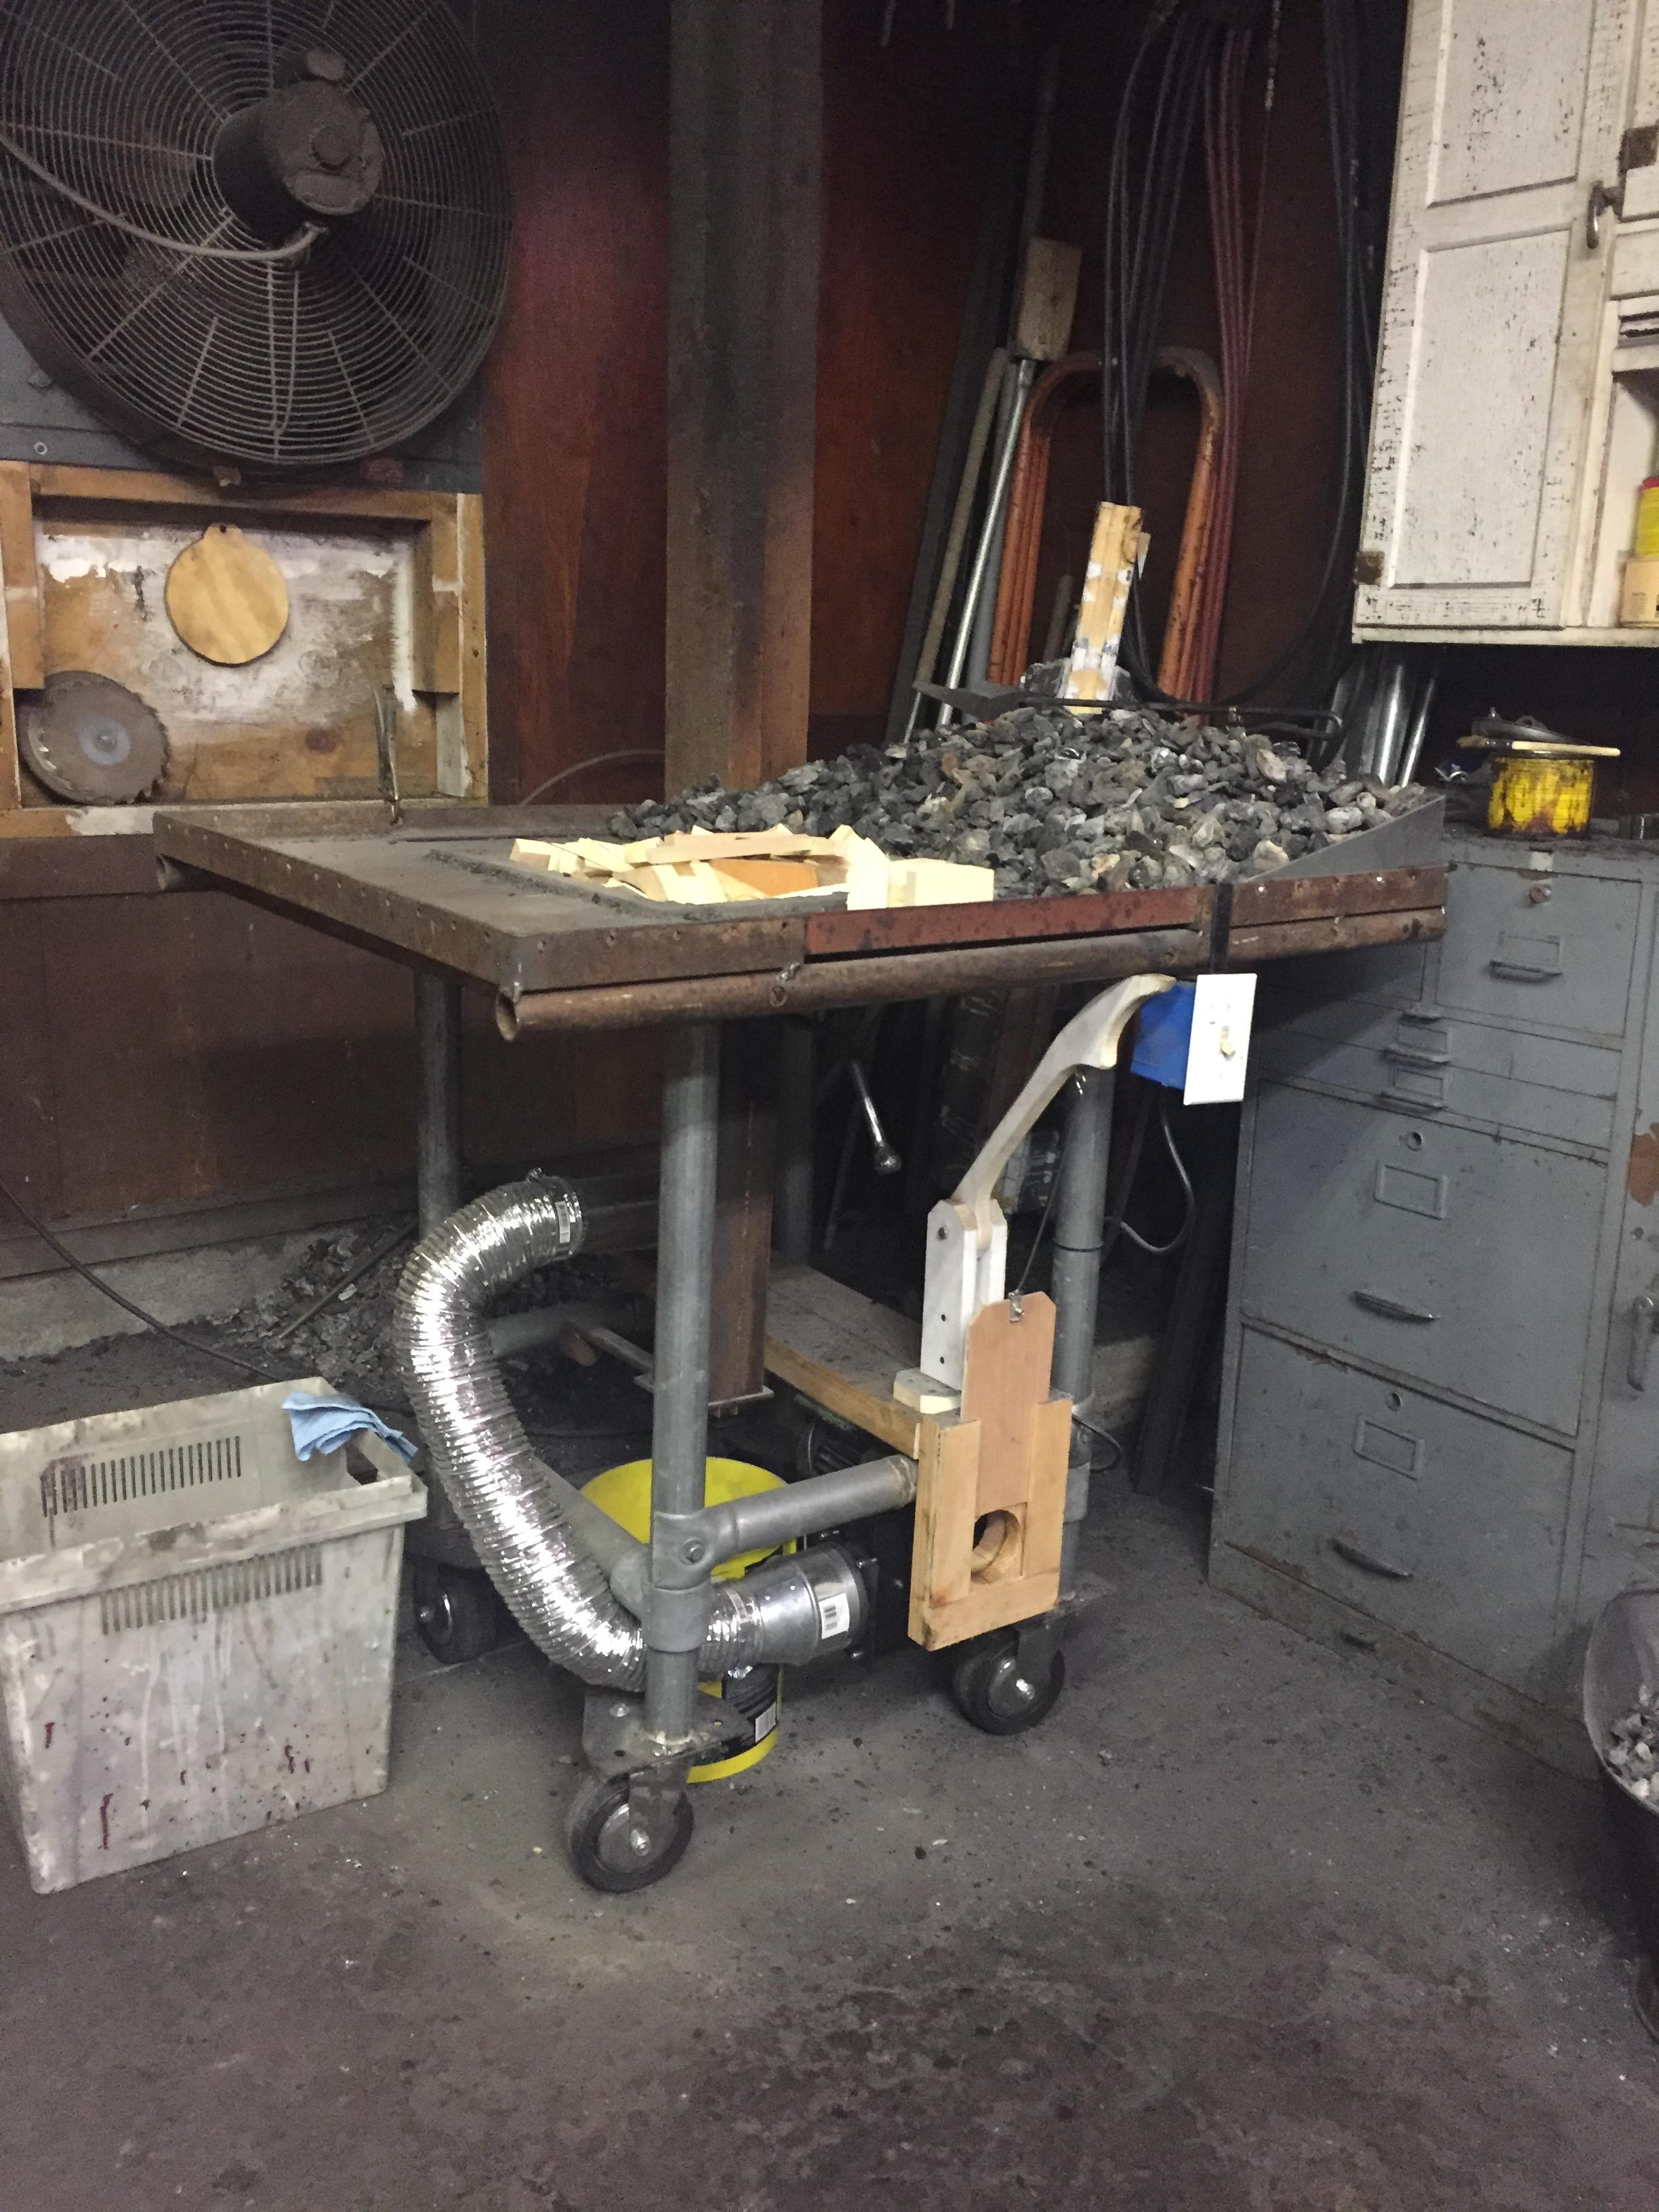
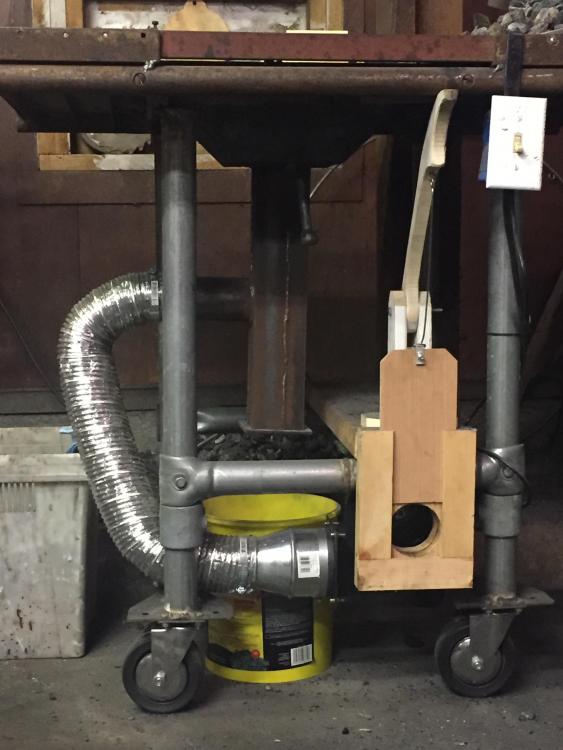
Mine is just sitting in the hole in the table on a 1/4" x 1" rim welded to the fire pot. With the weight of the fire pot, tuyere, and ash dump it probably weighs about 40-50 pounds. It does not move. I left a 1/4" of space between the table top and the drop in fire pot for thermal expansion and compliance. My table is an old cast iron table saw table so I did not weld any part of the fire pot or rim to it, it just free floats in the hole on the rim. Thank you IFC, it was a bit of a head scratcher on how to mount and control the air flow with the new blower, and I wanted to have the ability to hook up my Champion 400 at some point to this new system also. It works well for being made out of scrap from a shed I built this summer. The blower I was using for this forge was off my old forge which is now at school, I am using it in my metal working course with my students. So I had to make the new system work or go with out forging. Necessity is the mother of getting it done. Have a good one, W
-
I use mostly anthracite coal, takes a little more startup to get it going quickly. A few sheets of newspaper will not touch anthracite. To be honest the base of that fire is crumpled newspaper, so it is probably not as much wood as you may think. But from experience I can tell you it works. have a good one, W
-
I welded up my new fire pot out of 1/2" mild steel last year. I am glad I did. During normal operation it is black to dull red, when working it hard, it will glow medium to bright red and has formed scale on the outside. I am hoping the extra thickness will help it last longer. I used an old table saw table for the table, the fire pot drops into that. One of the largest reasons I made my new forge setup was the size of the table on my old forge. It was to small, no place to store my coal/coke while cleaning out the fire pot. I like the size you are going with should work well.


-
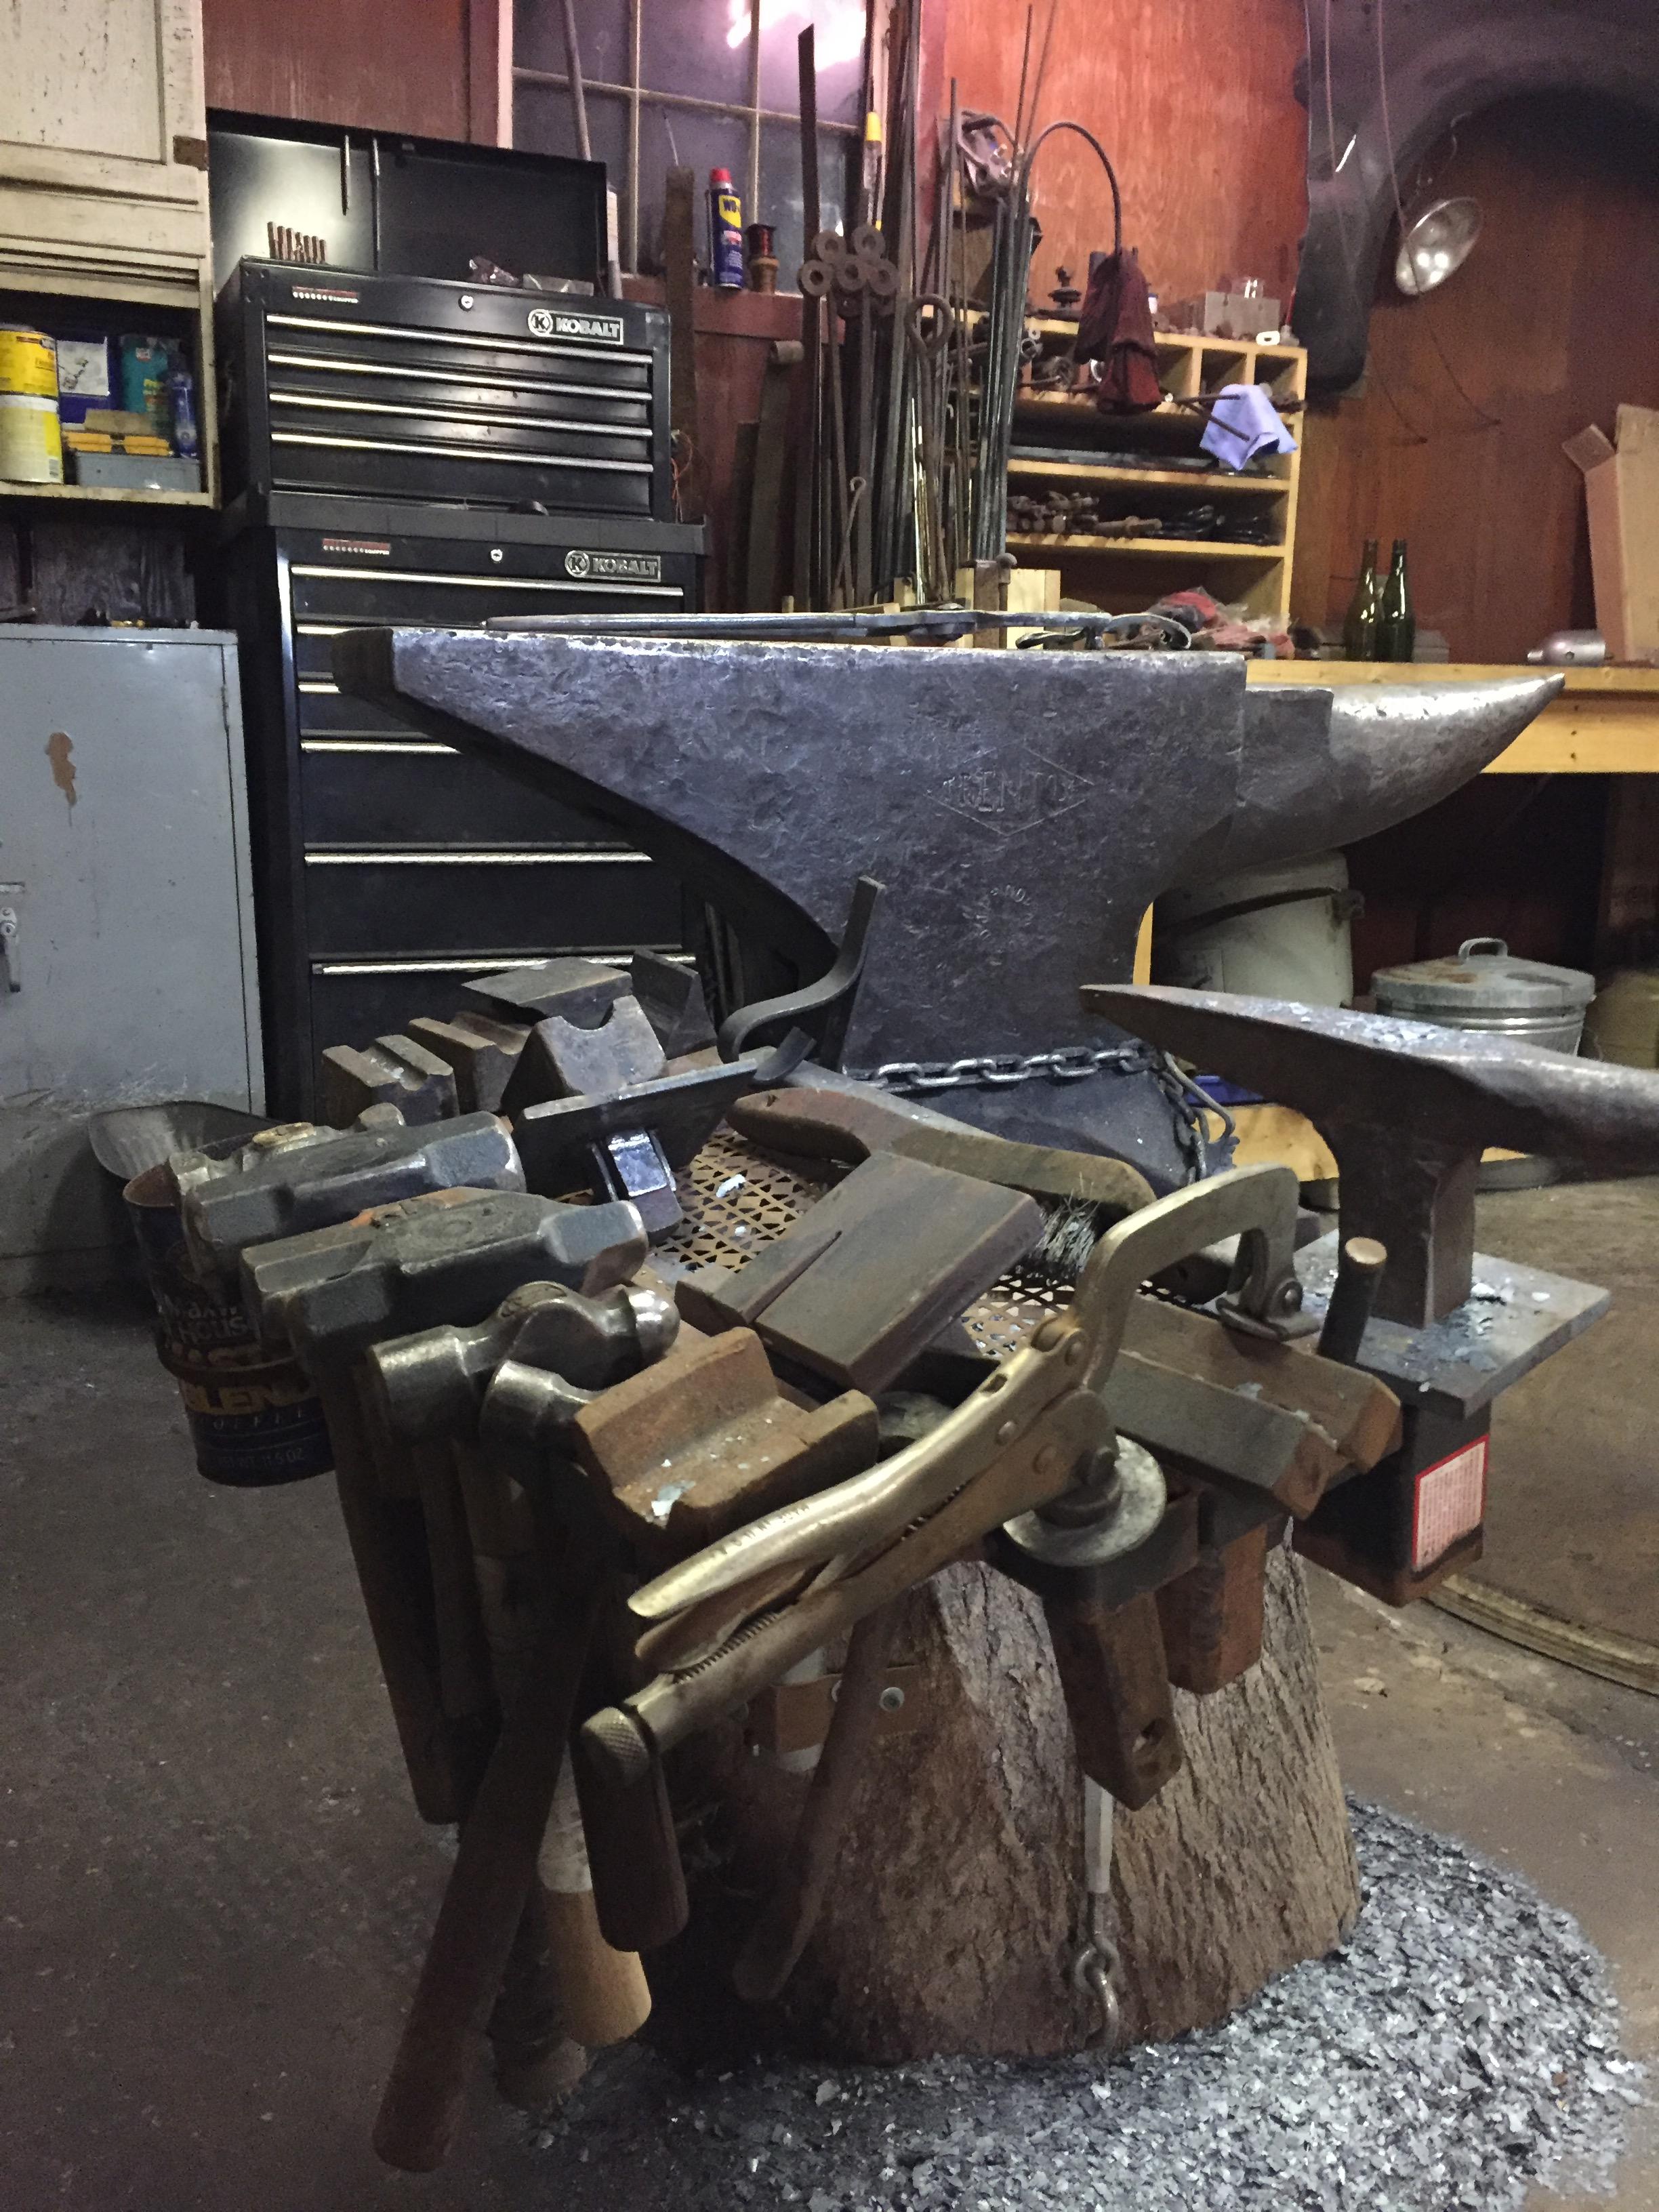
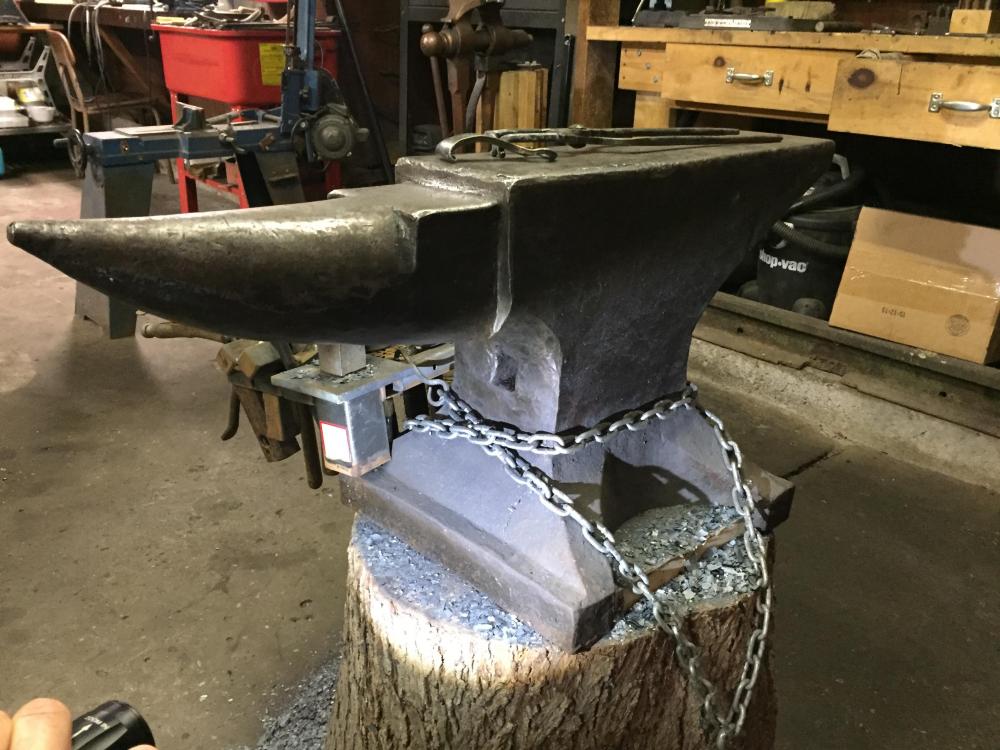
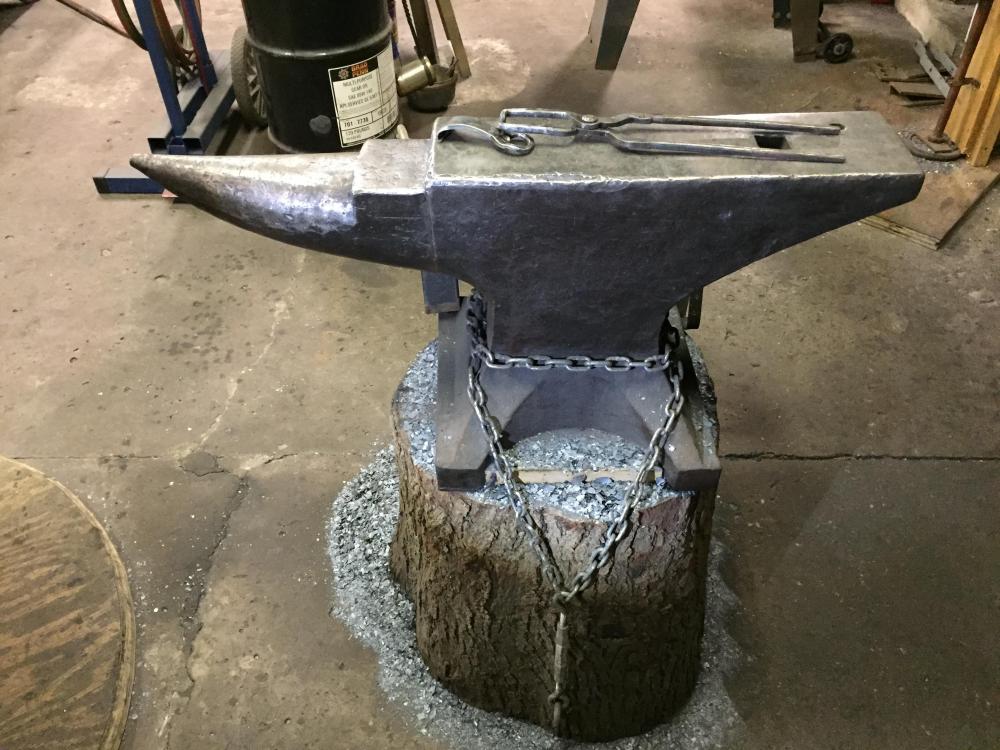
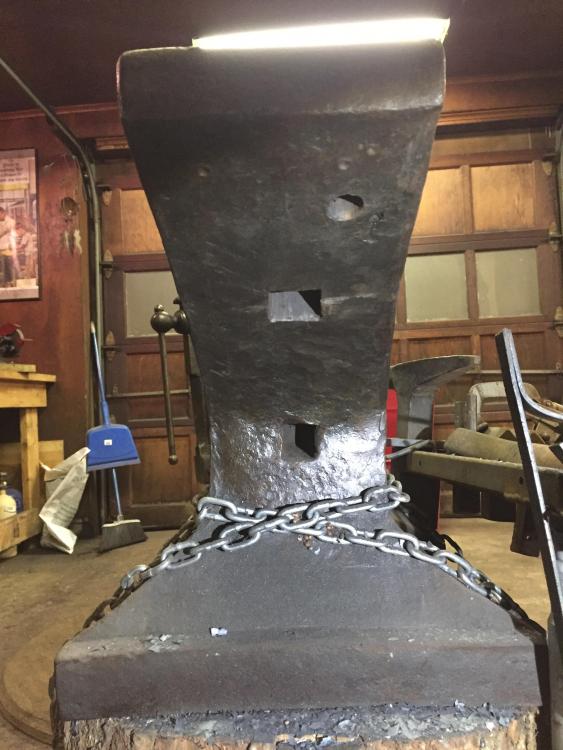
I do love my anvil!!! Also I must say I am very glad I found this site as I was getting ready to setup my smithy. I had originally thought to repair the "Damage" to my anvil. God knows what would of come from the ideas banging around in my head at that time. After reading many posts on this site one really stuck with me, "forge on it for a year then make decisions about repairing it" I am very glad I waited to repair my anvil. I have done nothing to it but clean it up and use it for the past many years, and as it turns out that is all it needed. Have a great day, W
-
Thanks Chris, Not sure I would take you up on that any more, back when I weighed 375 pounds and could bench press over 500, dead lift in the 800 for sets maybe. But not any more lol. I am a third the man I once was. Have a good one, W Then again I would have to see what you where putting up on your side of the bargain .
-
20 mm is in the sweet zone for large amounts of wear. Most vises see regular use in that zero to 1-1/2" zone. Is the screw more worn in that area our are any of the threads missing in the screw box? That would allowing it to slip in that area. If the threads are in good shape, and fully engaged they would not be able to slip. A few pictures of the screw box threads and male threads on the handle may help with diagnosis. Have a good night, W
-
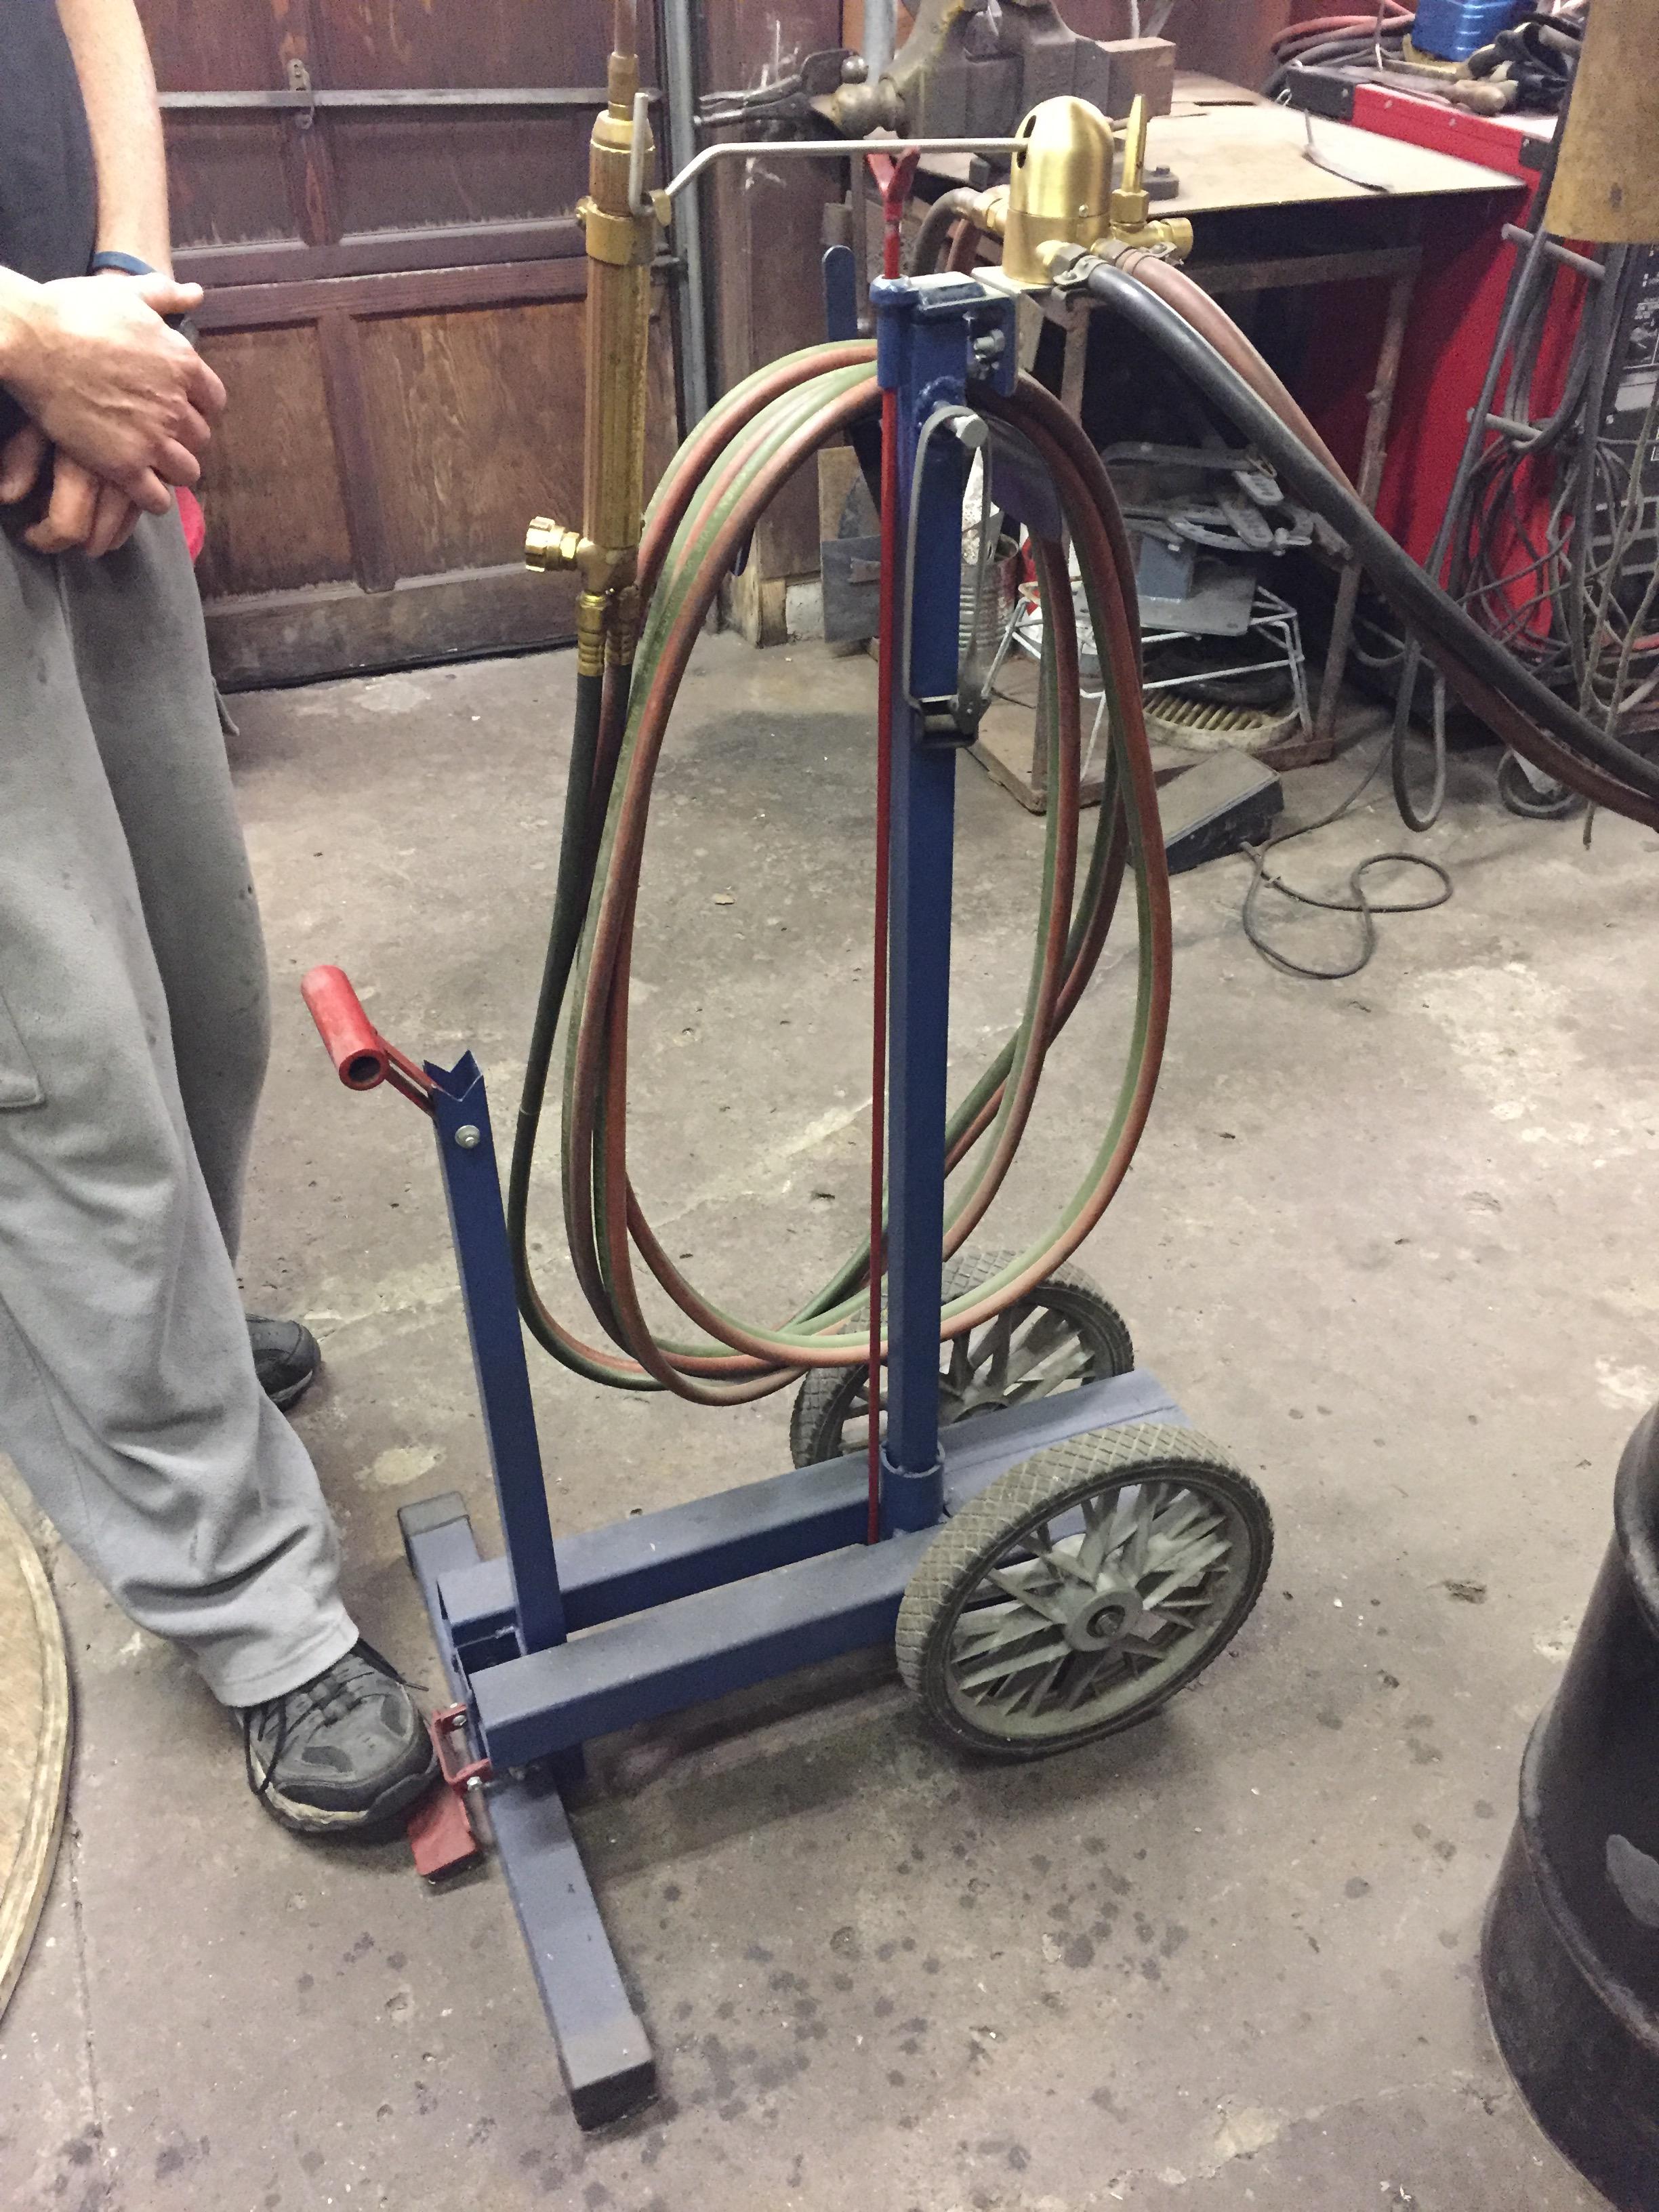
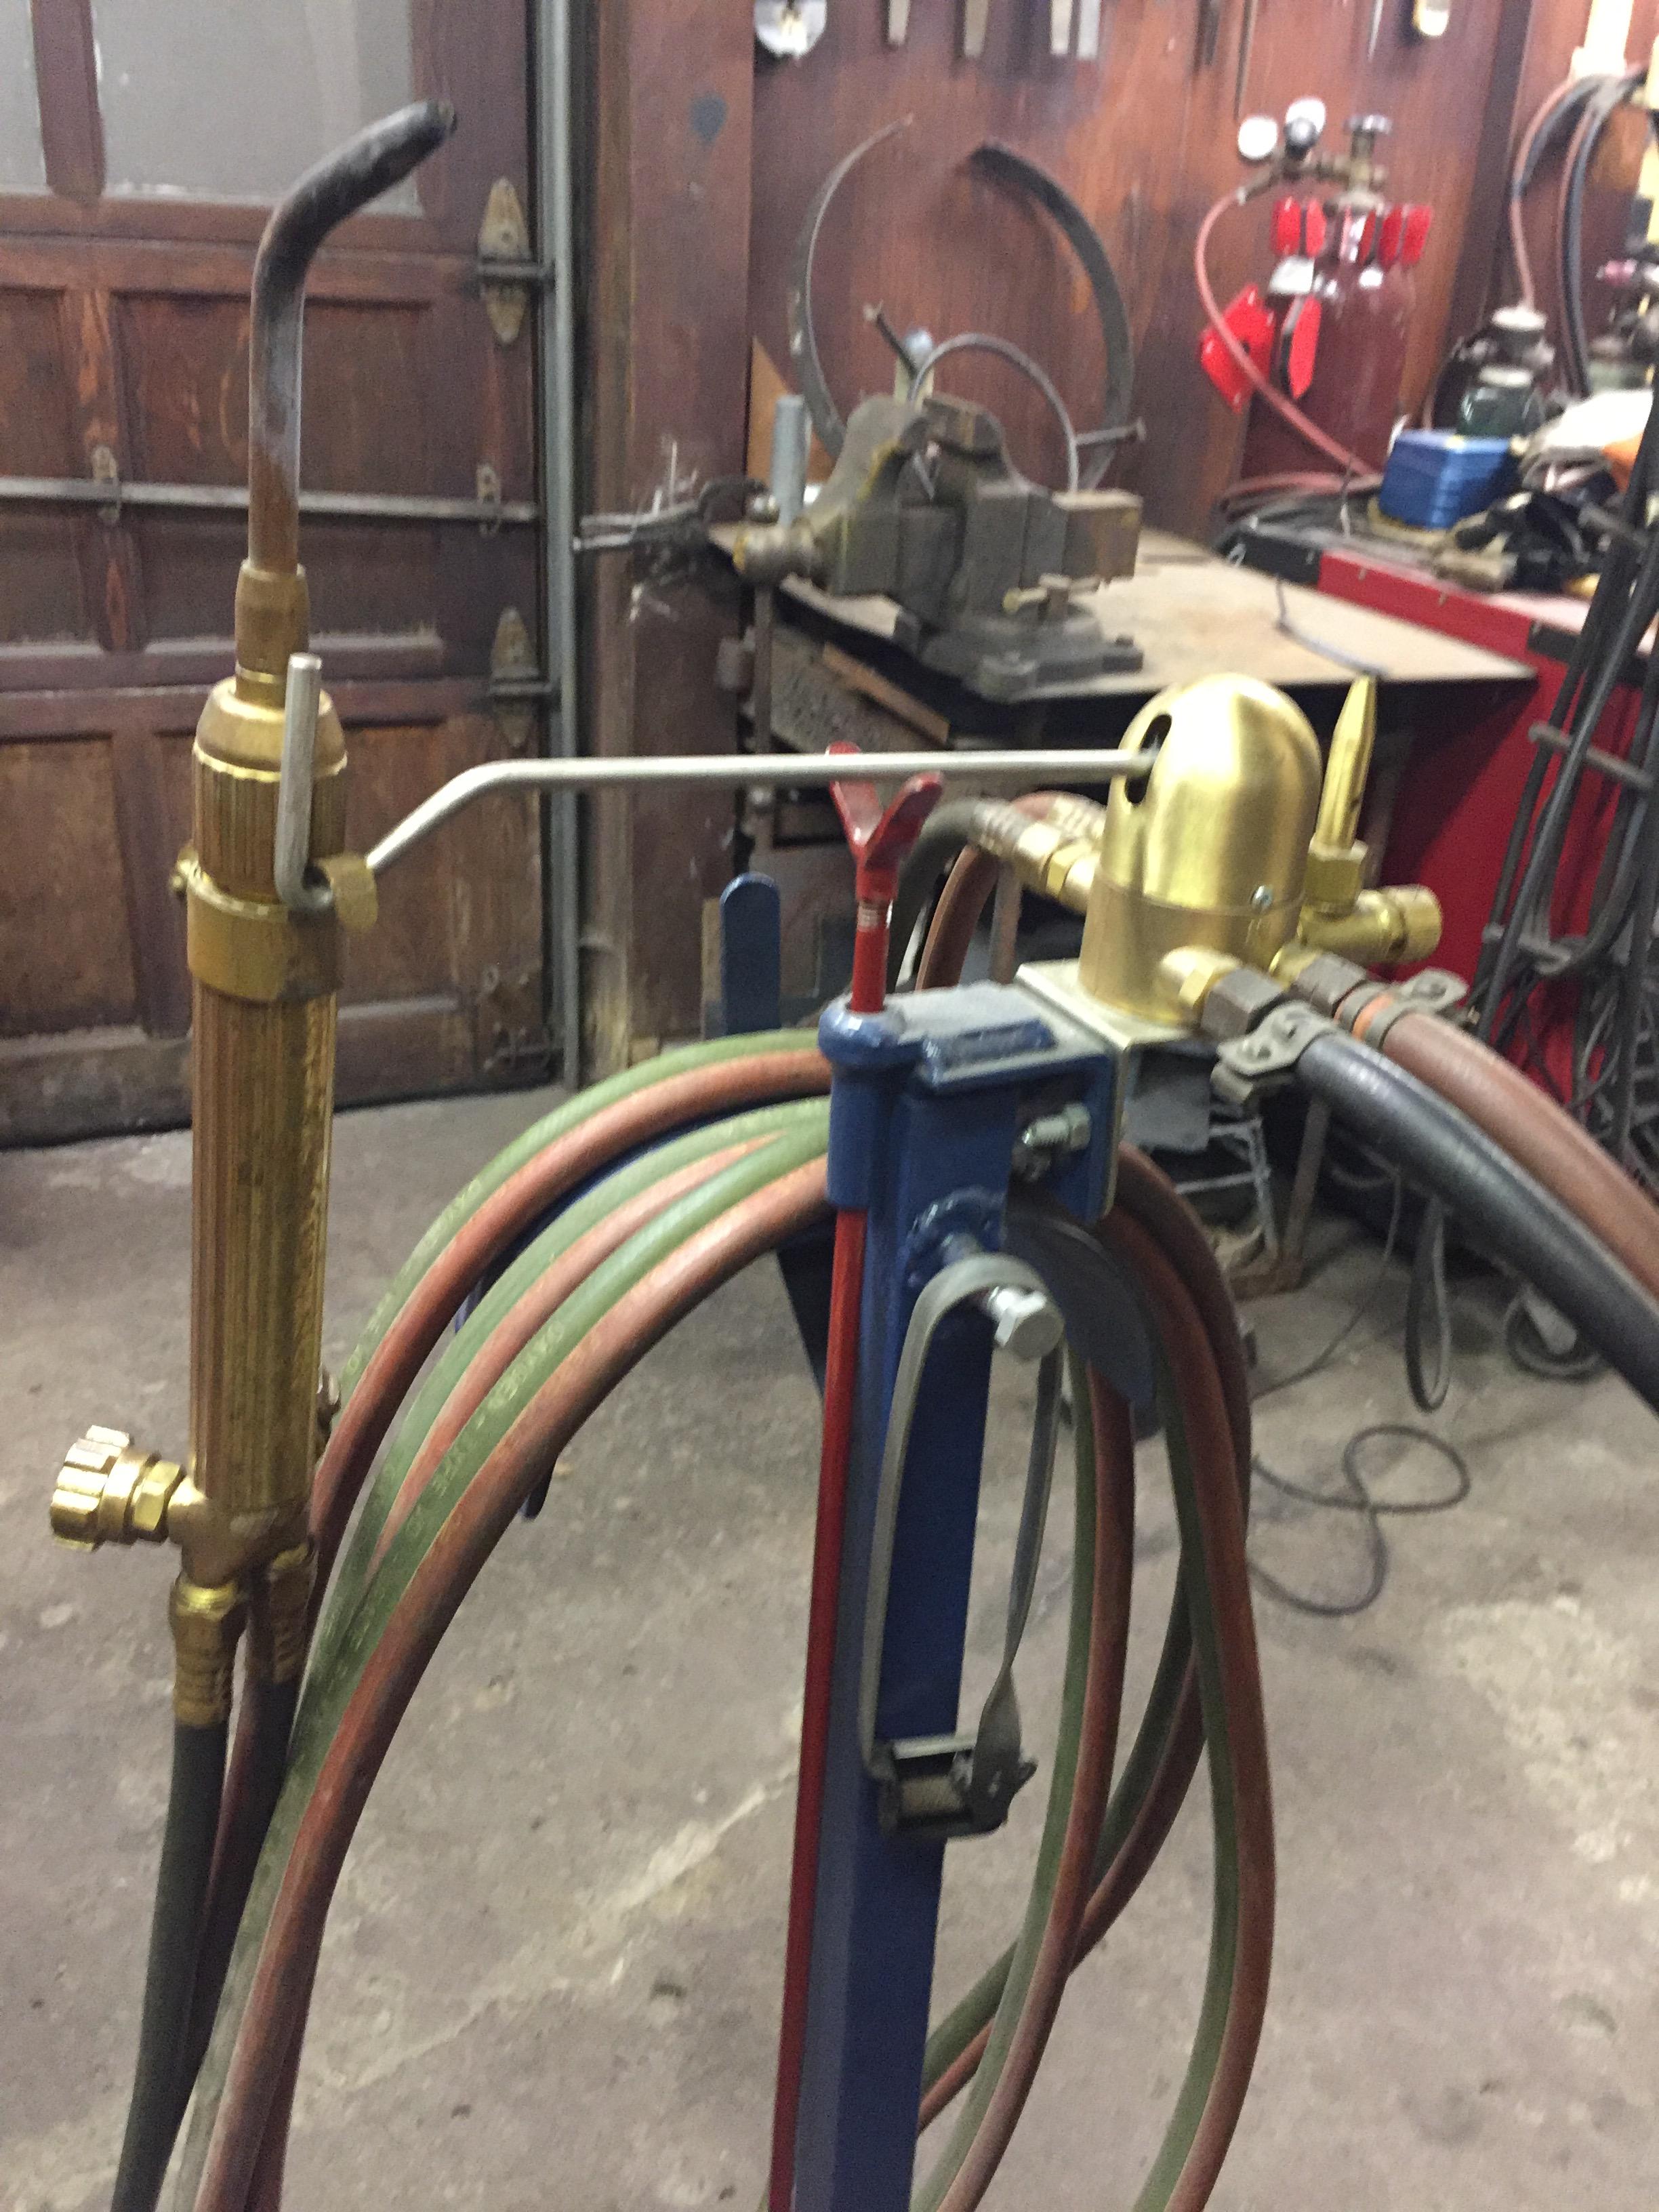
Oxy Acetylene Torch Holder/Gas Saver Stands
Steven NY replied to Whiskeymike's topic in Welding Equipment
Abana's Hammer Blow had a plan in the "Fall 2010 Volume 18 #4" I built mine before I found their plan. If you are a member check it out for more ideas. It is a free pdf. Have a great night, W -
Oxy Acetylene Torch Holder/Gas Saver Stands
Steven NY replied to Whiskeymike's topic in Welding Equipment
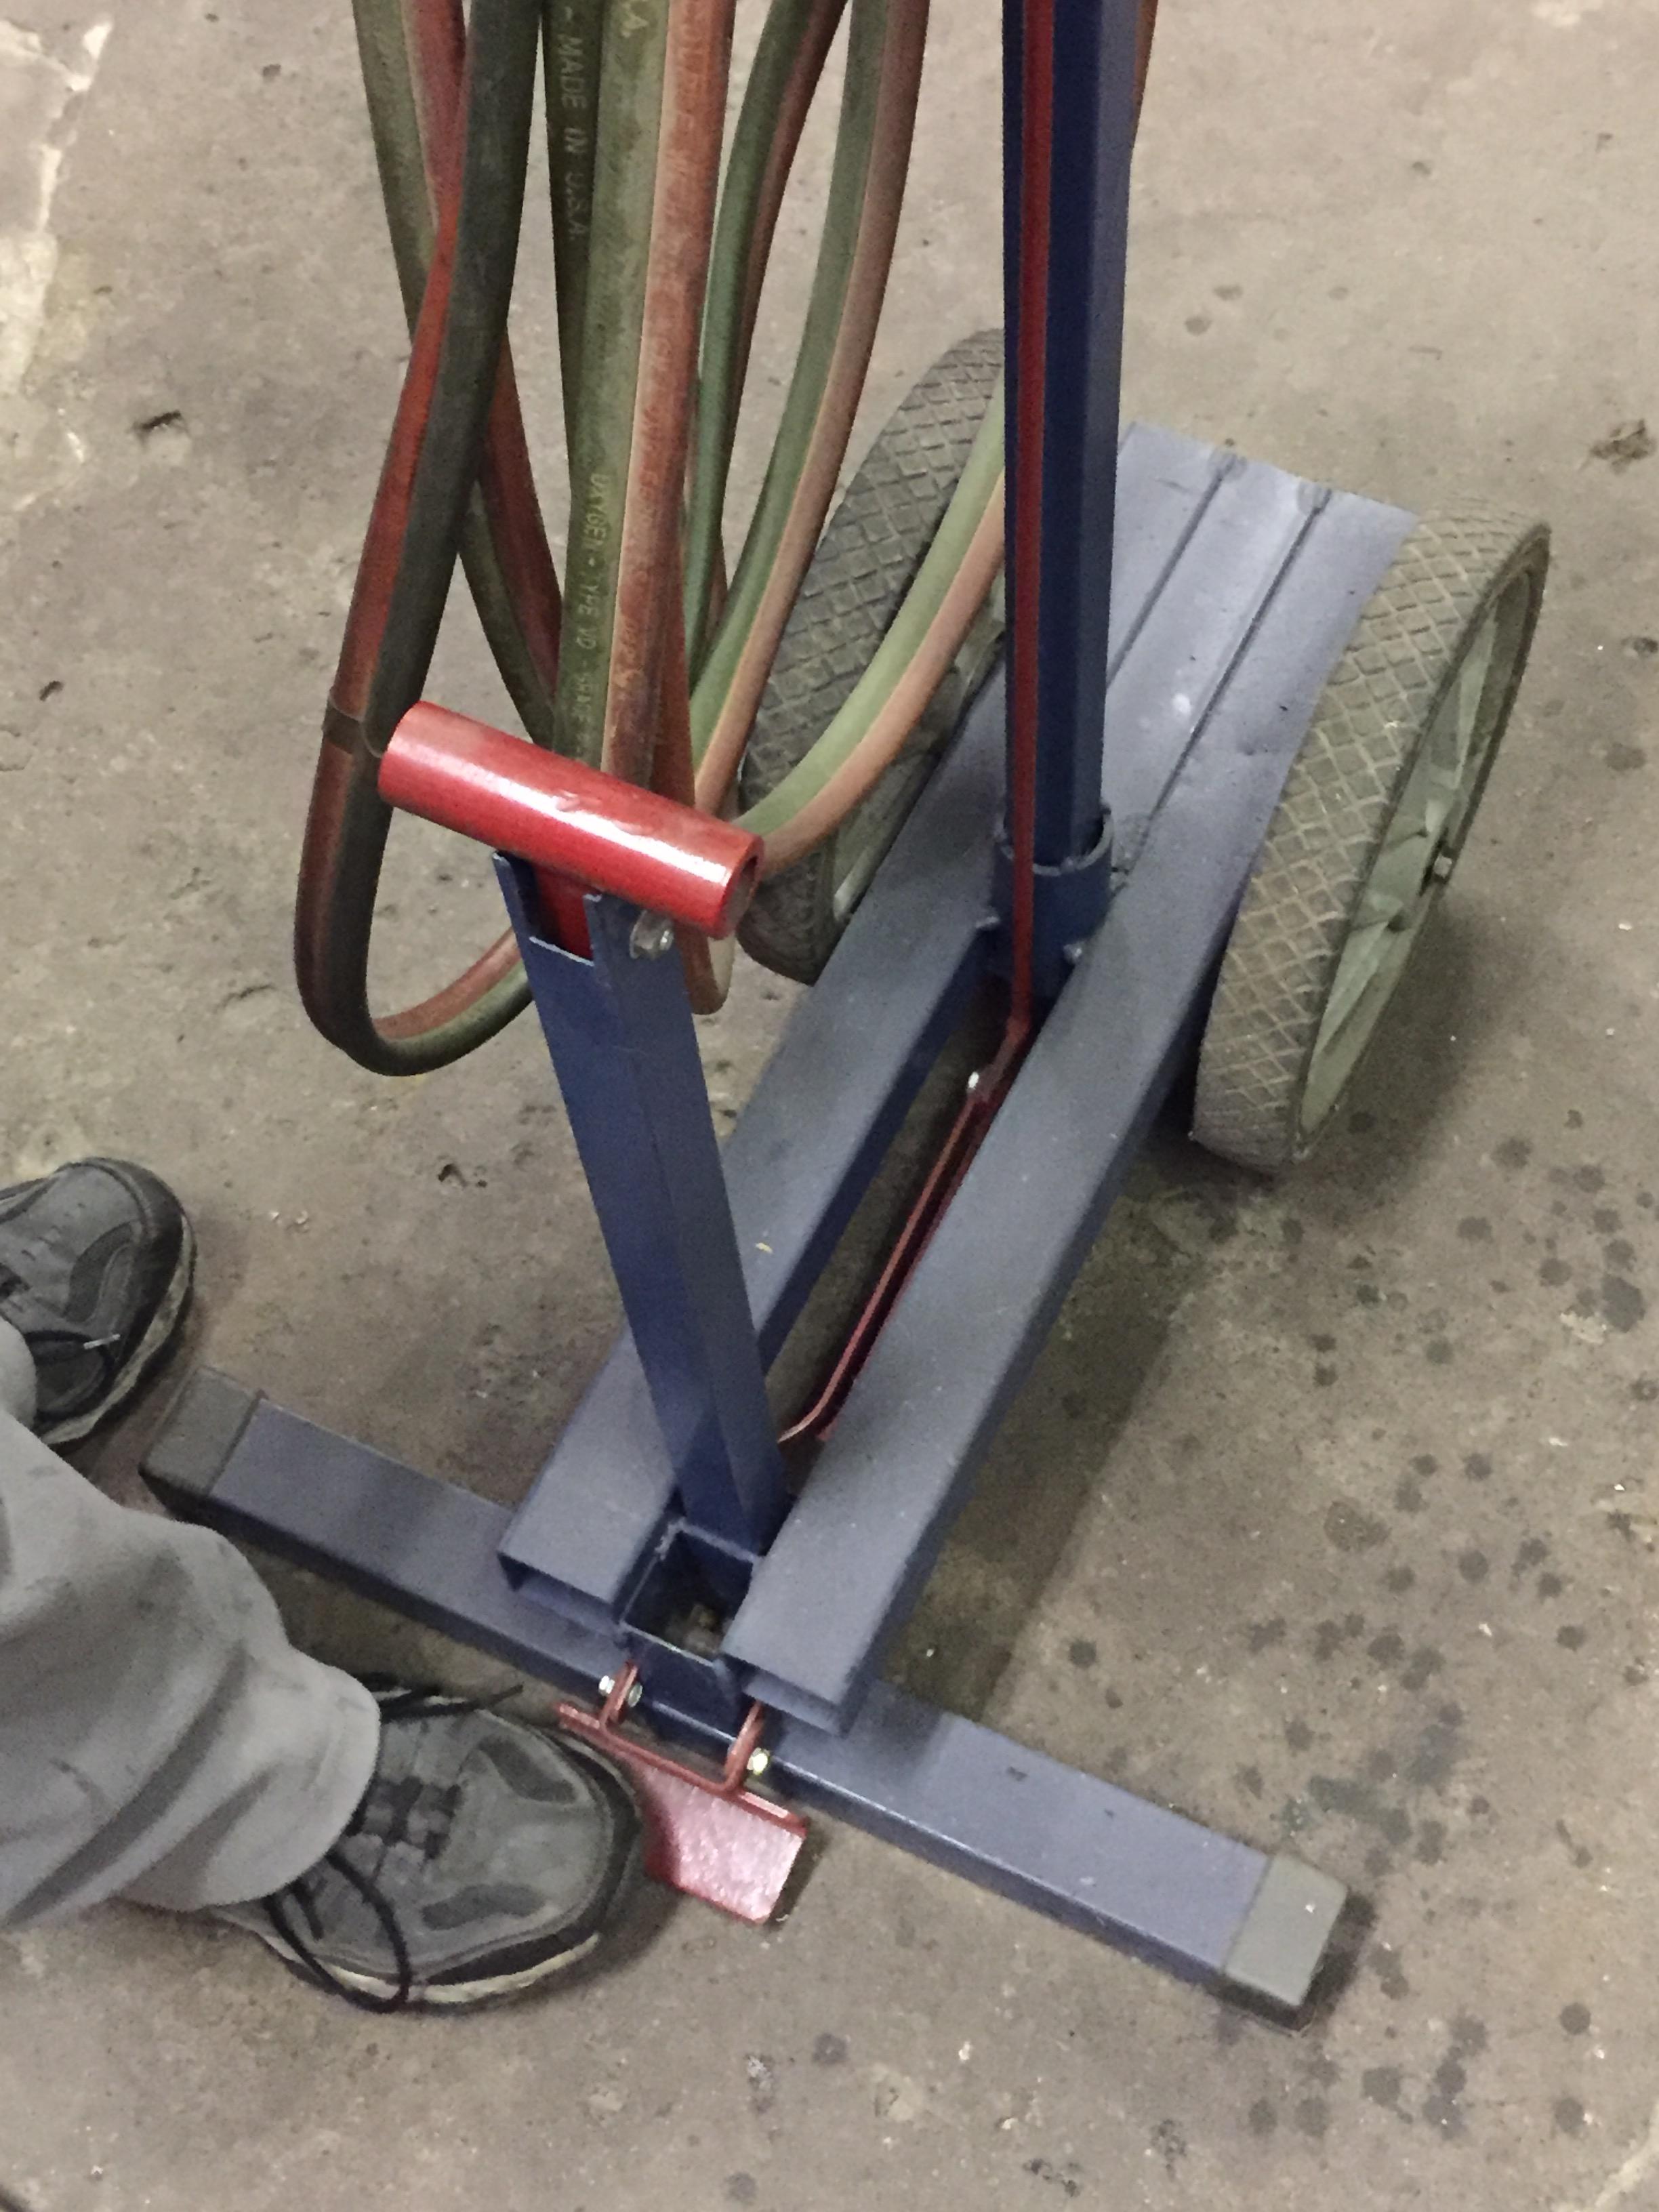
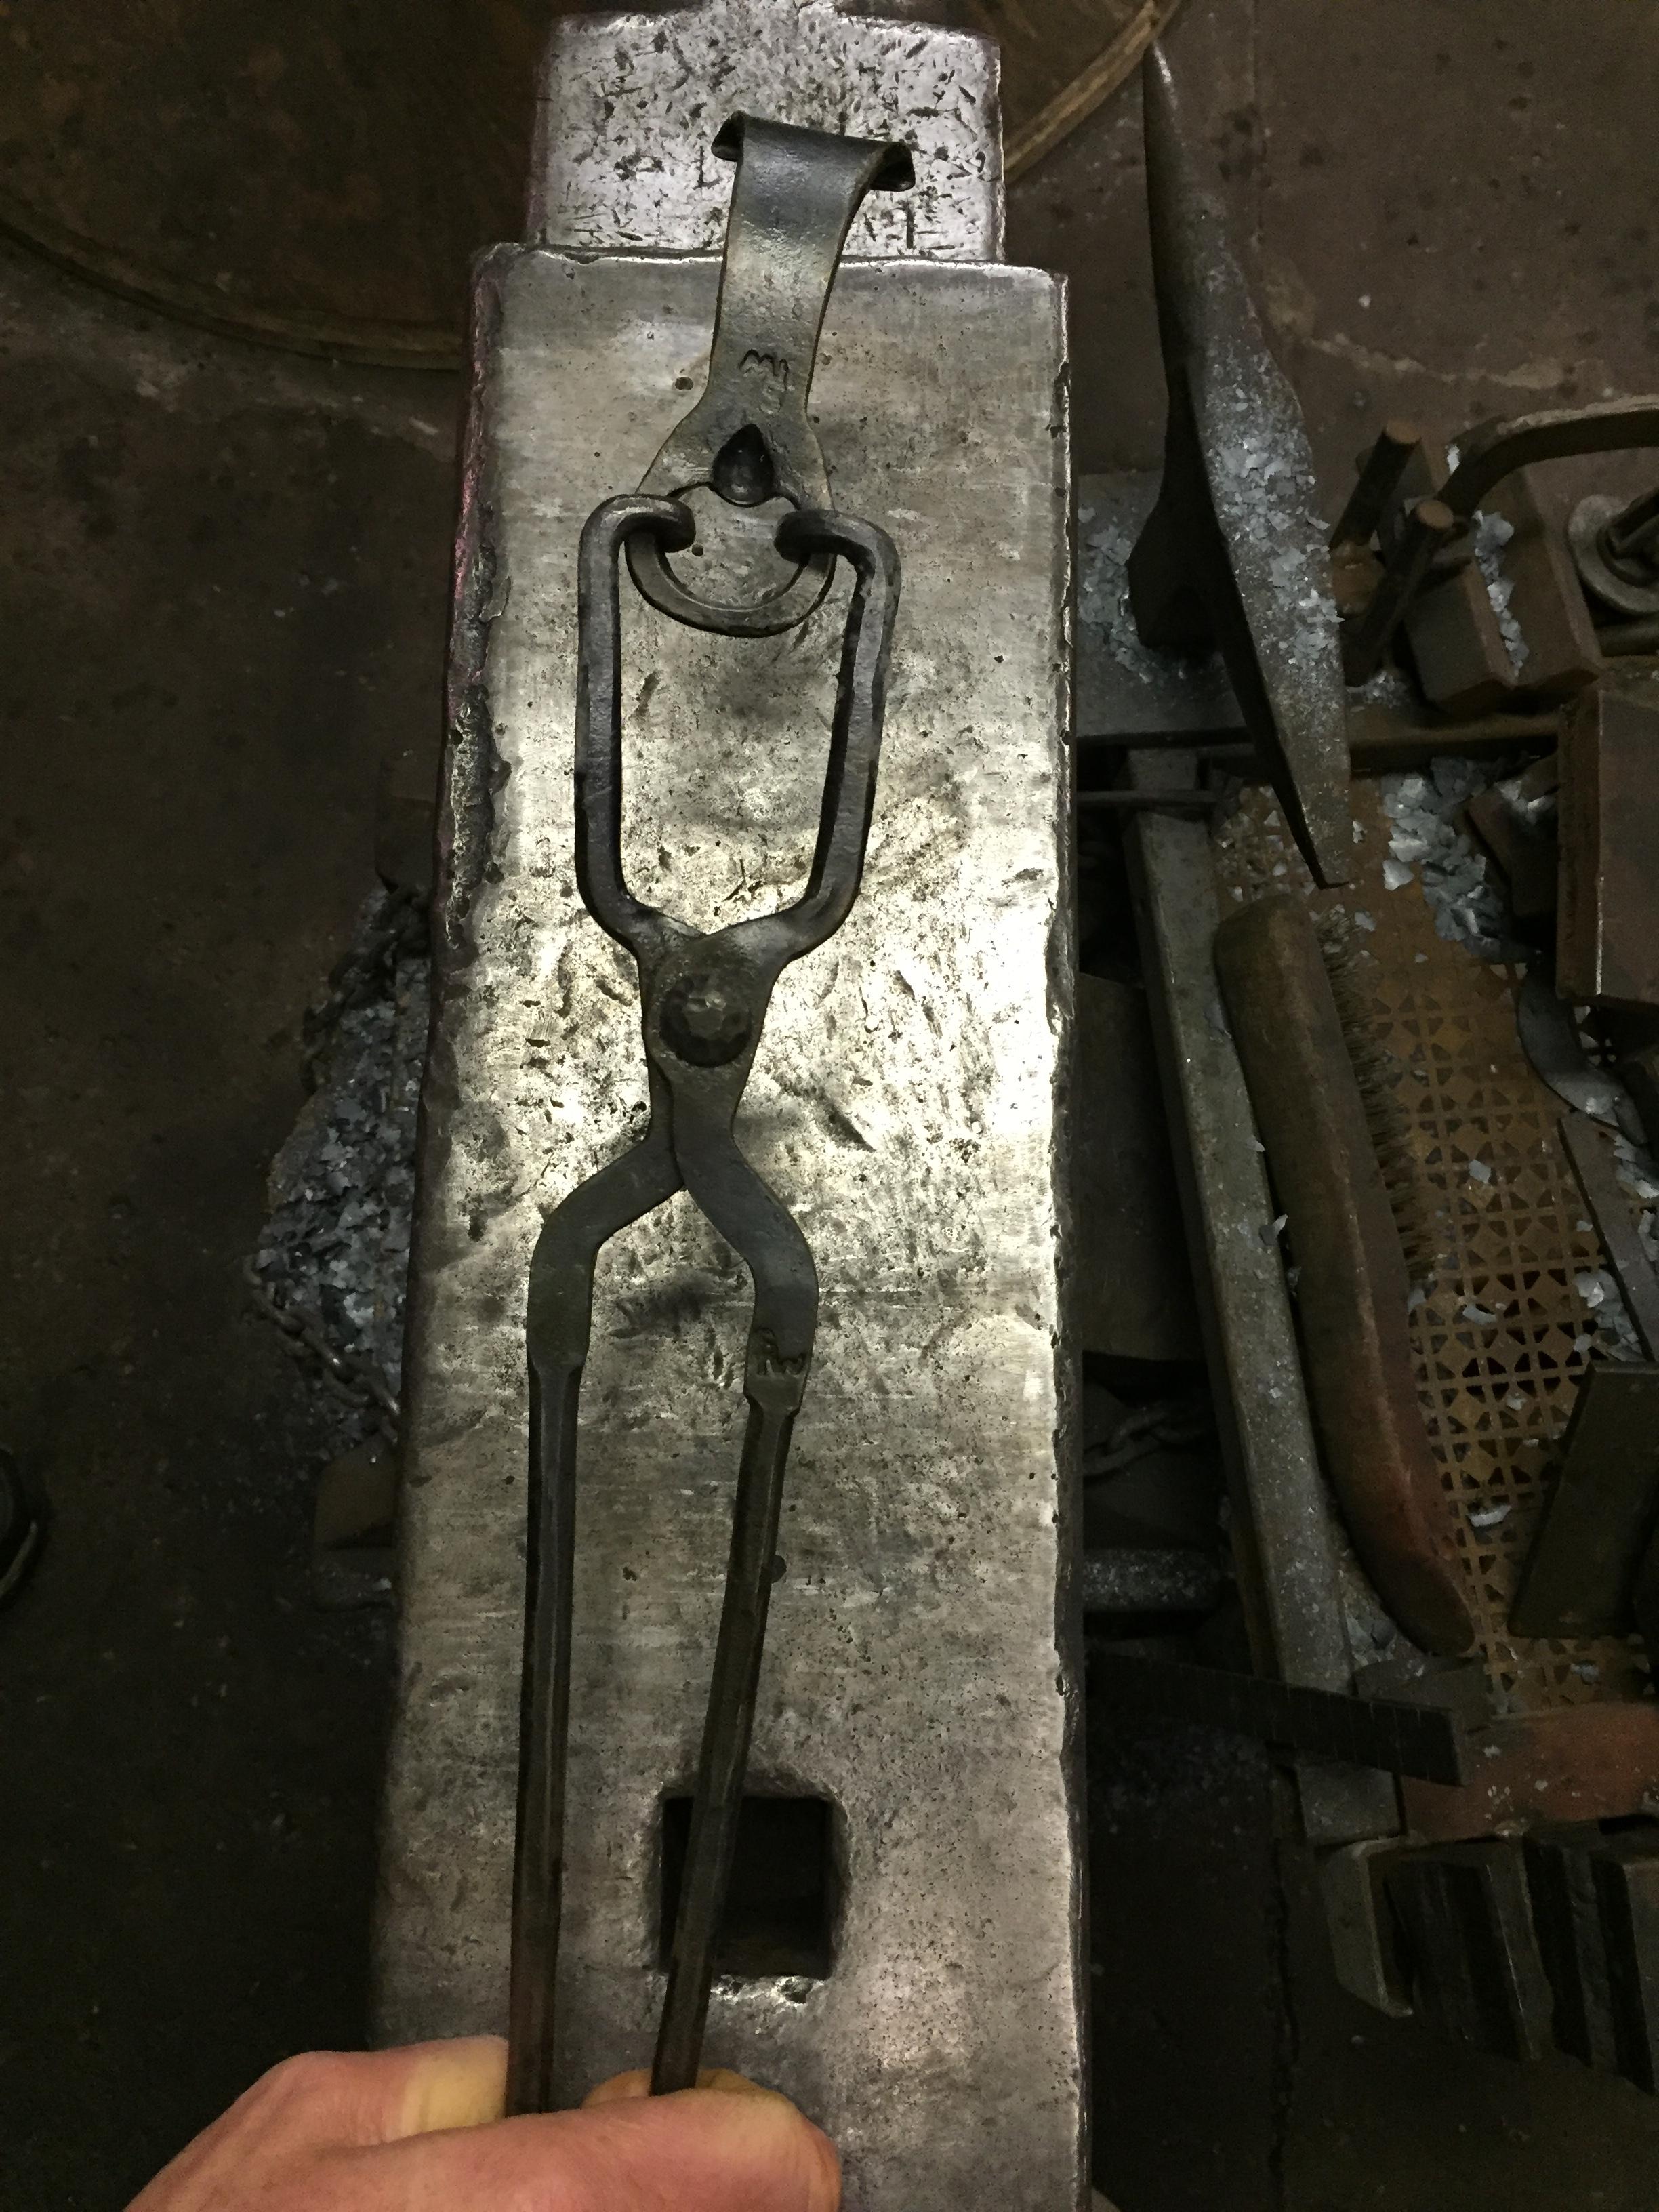
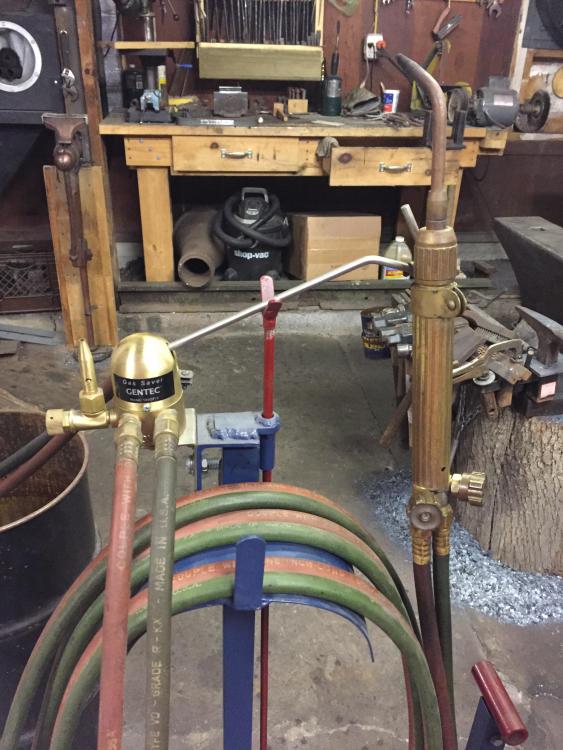
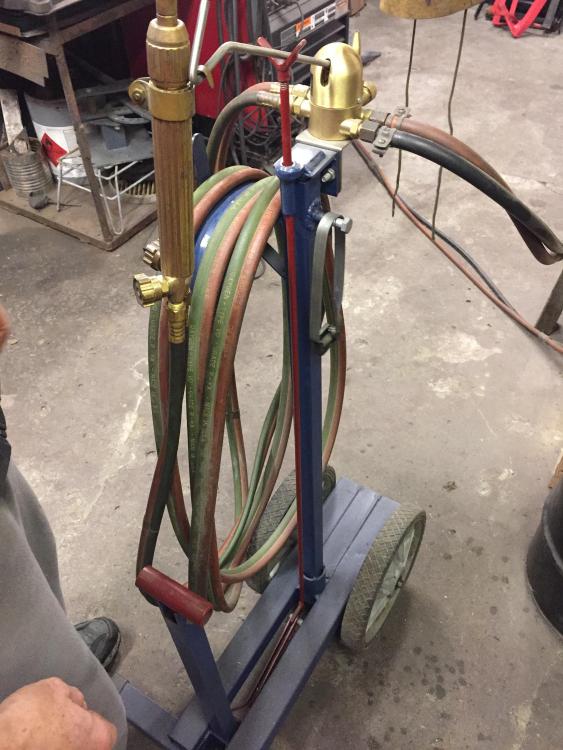
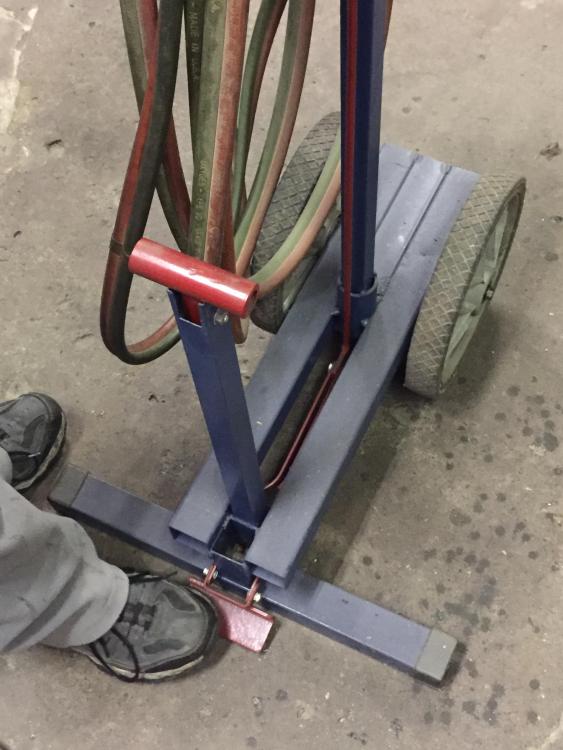
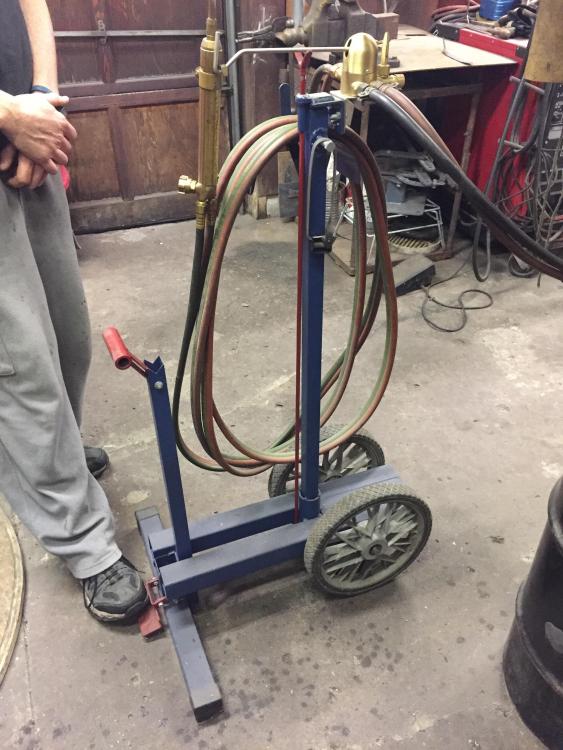
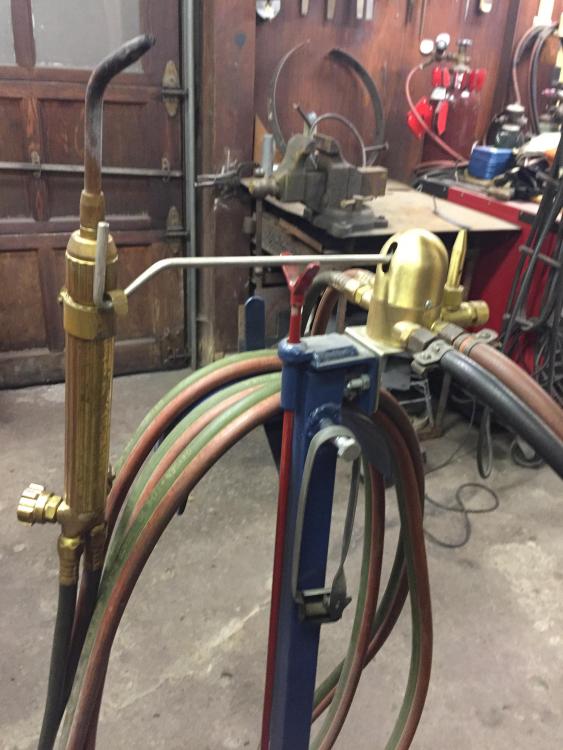
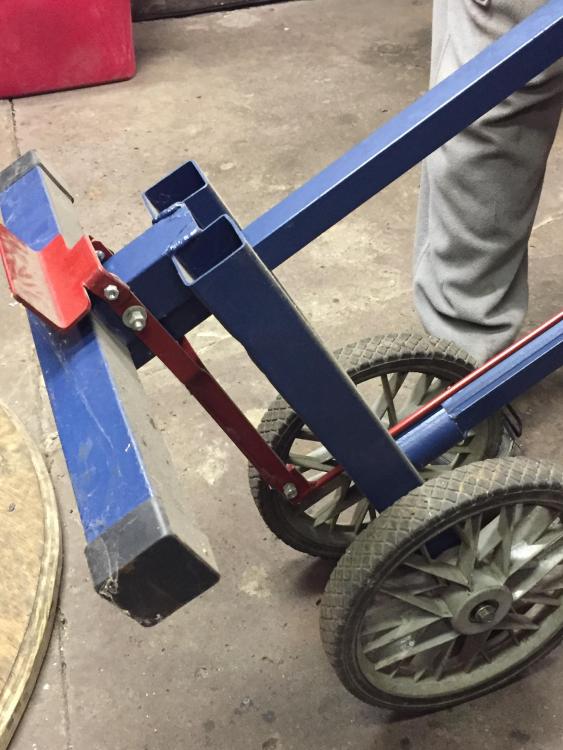
This is my design for a gas saver/mobile torch stand. When you step on the red pedal, it raises the yoke to keep the torch lite for hands free operation. It was made completely out of scrap which influenced some of my design choice but to be honest it works a treat. I added the brass hook to the torch body so it will work with all my torch heads. Hope this helps have a great night, W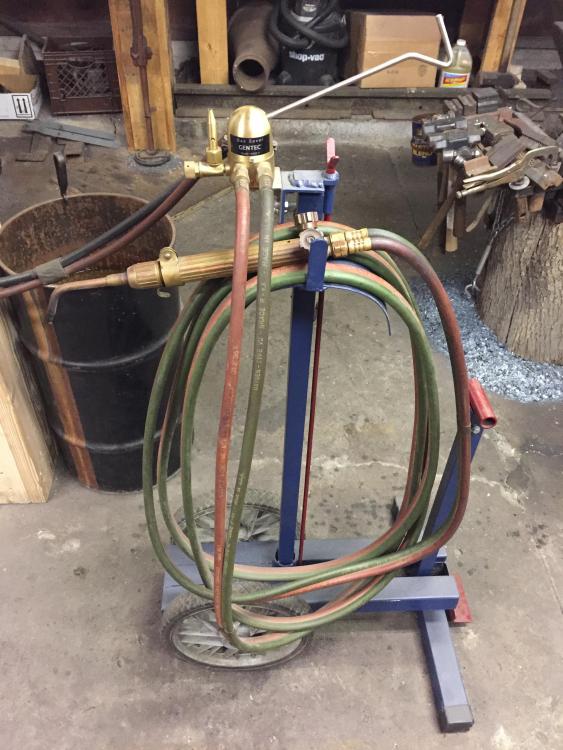
-
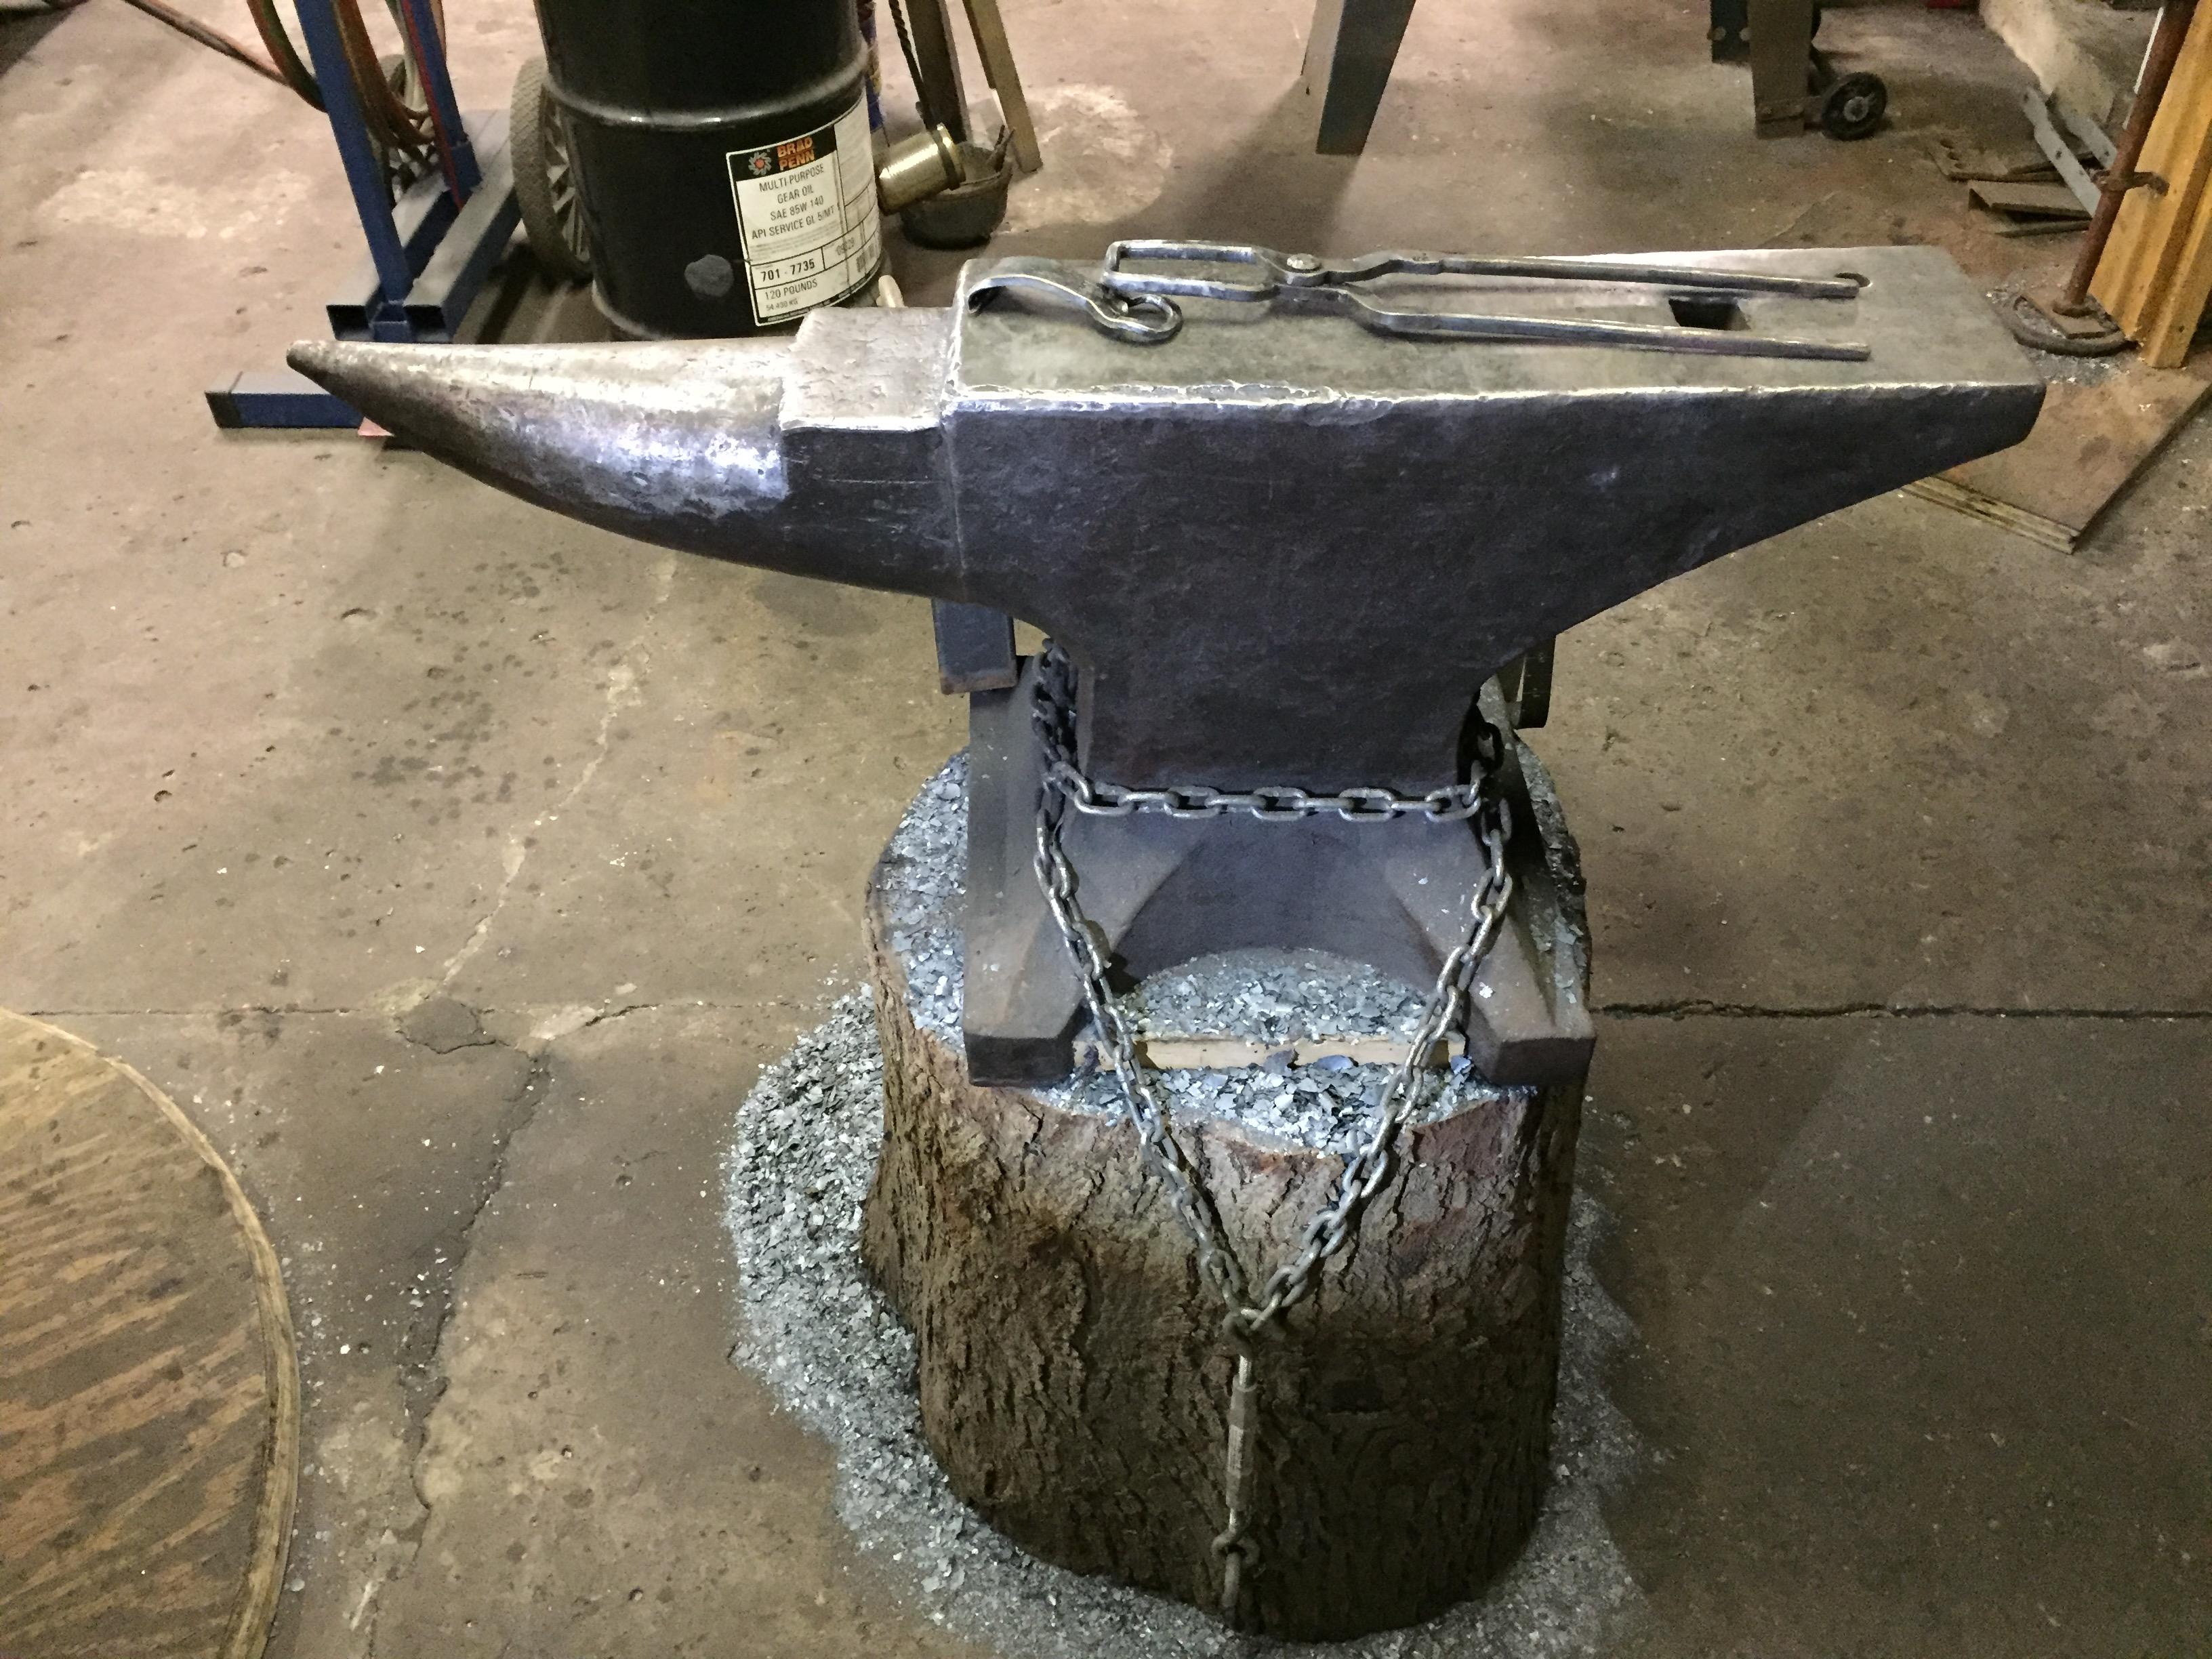
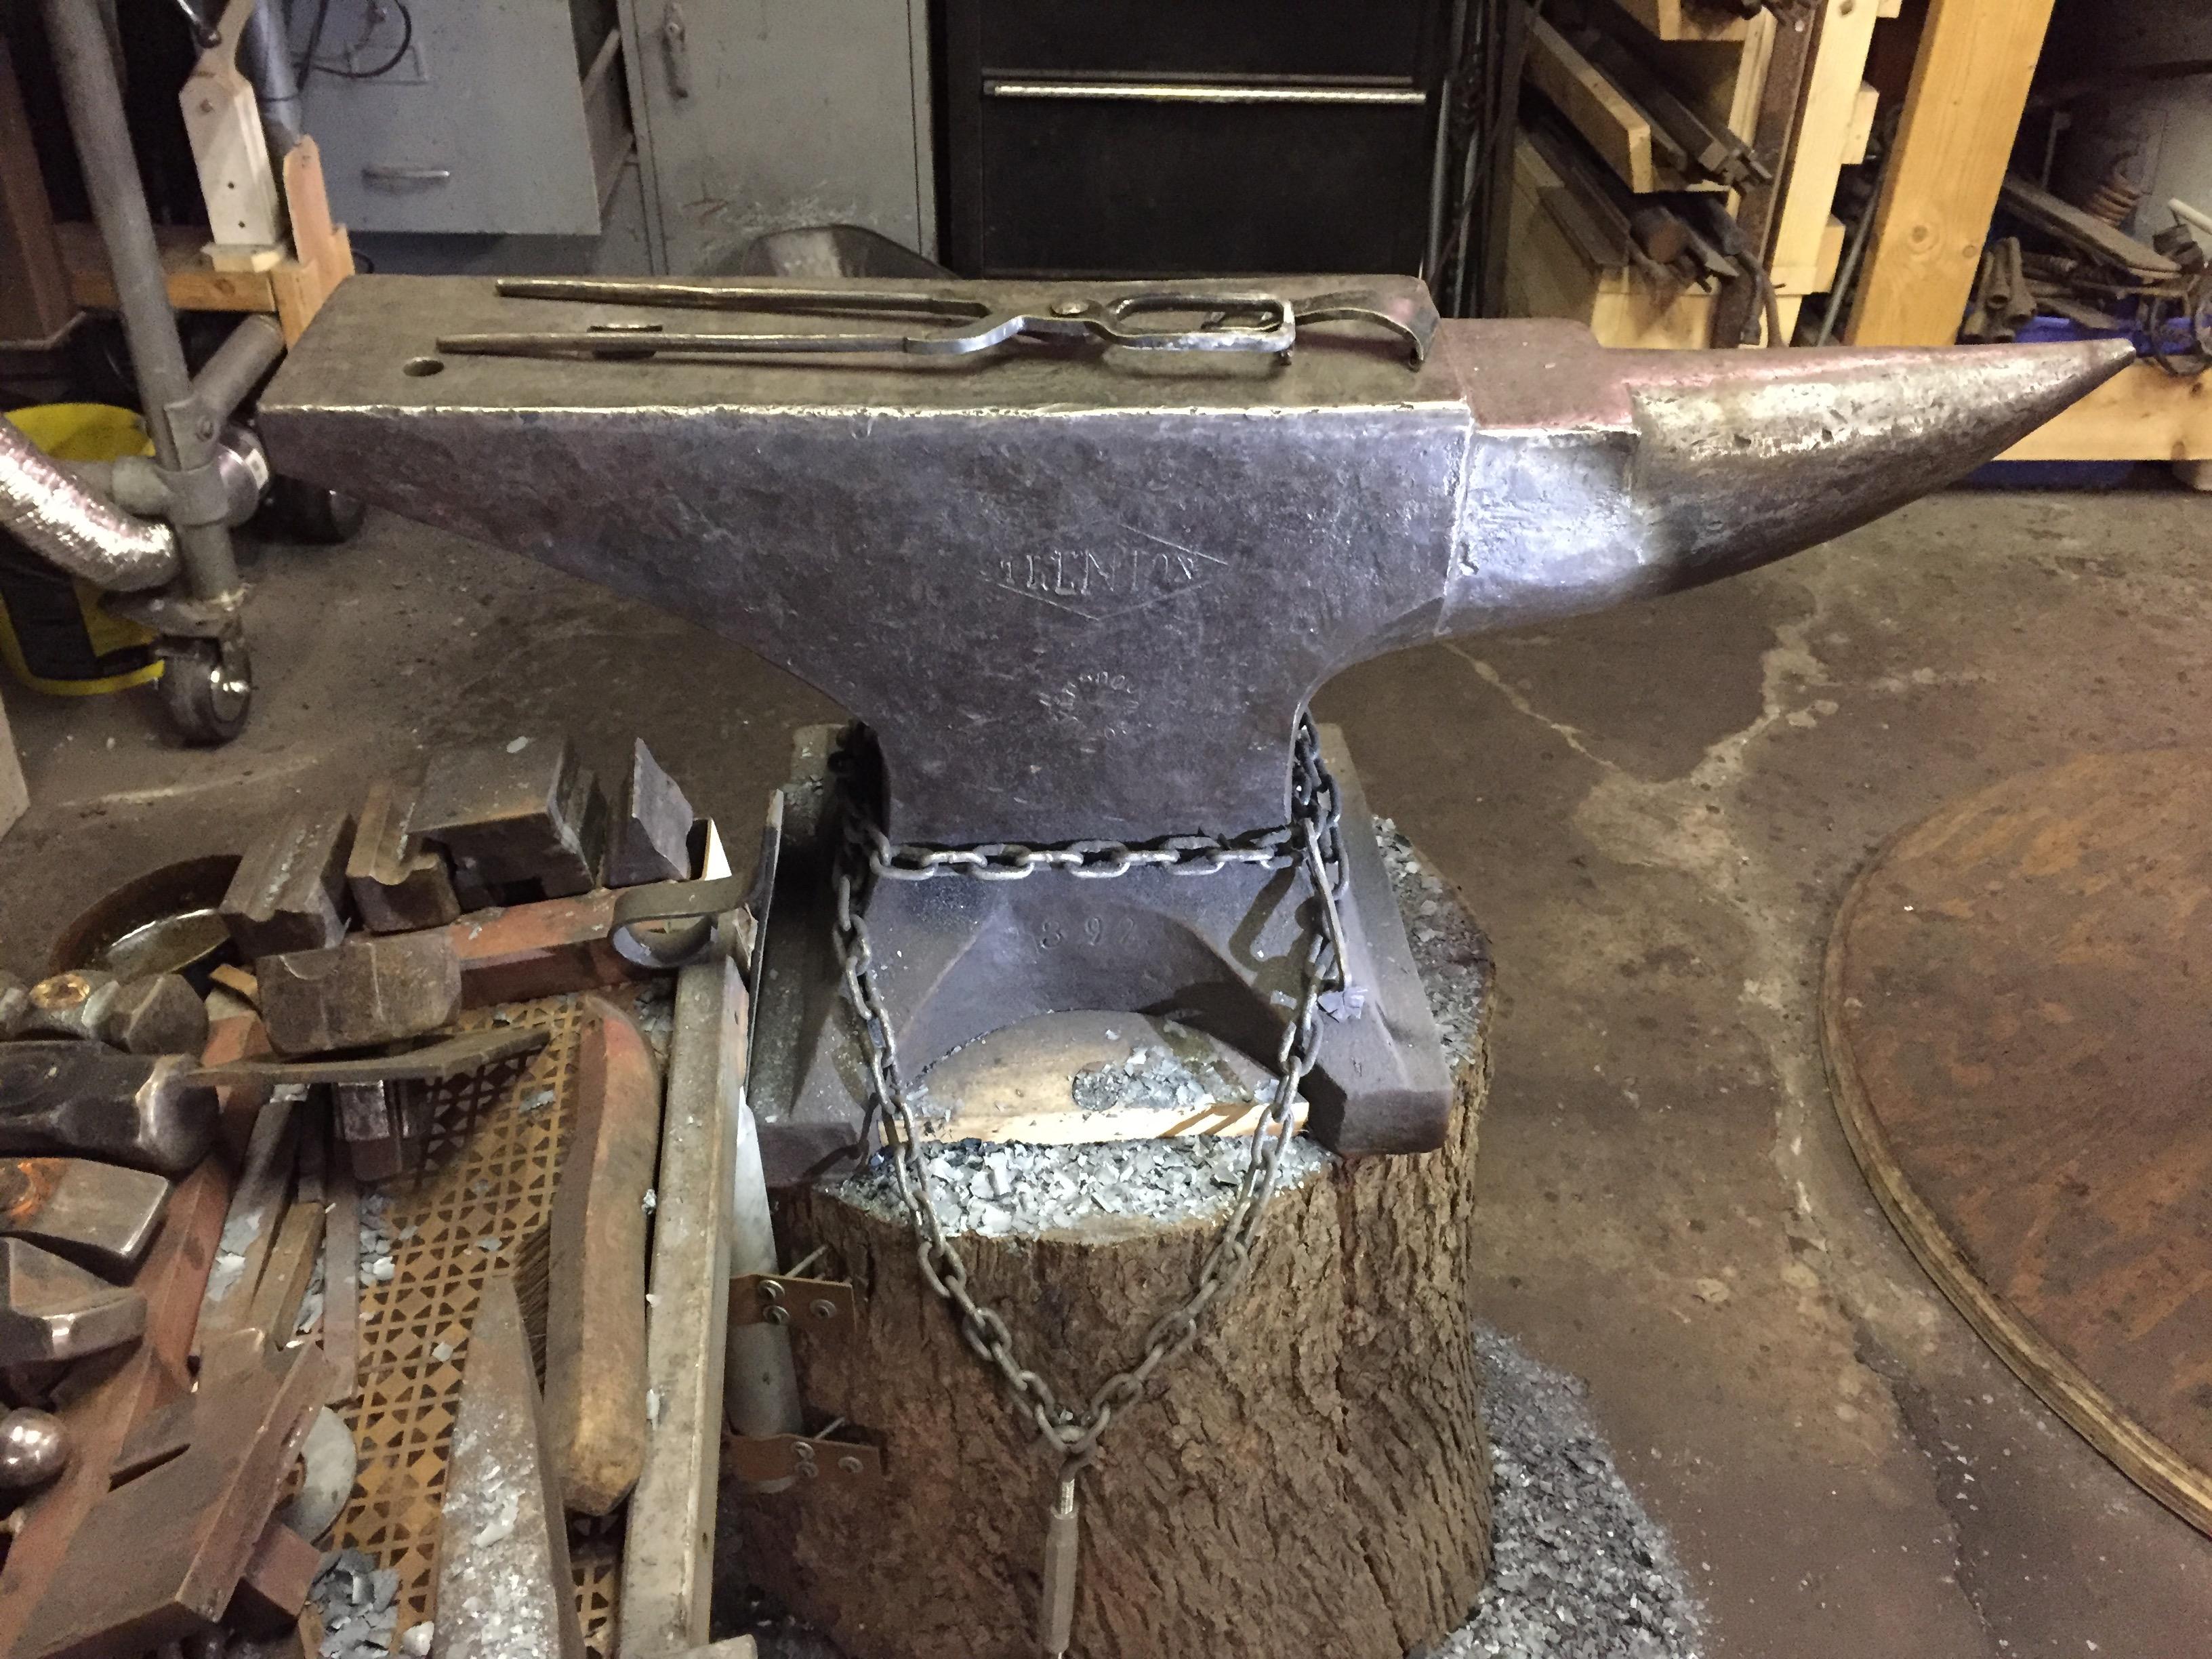
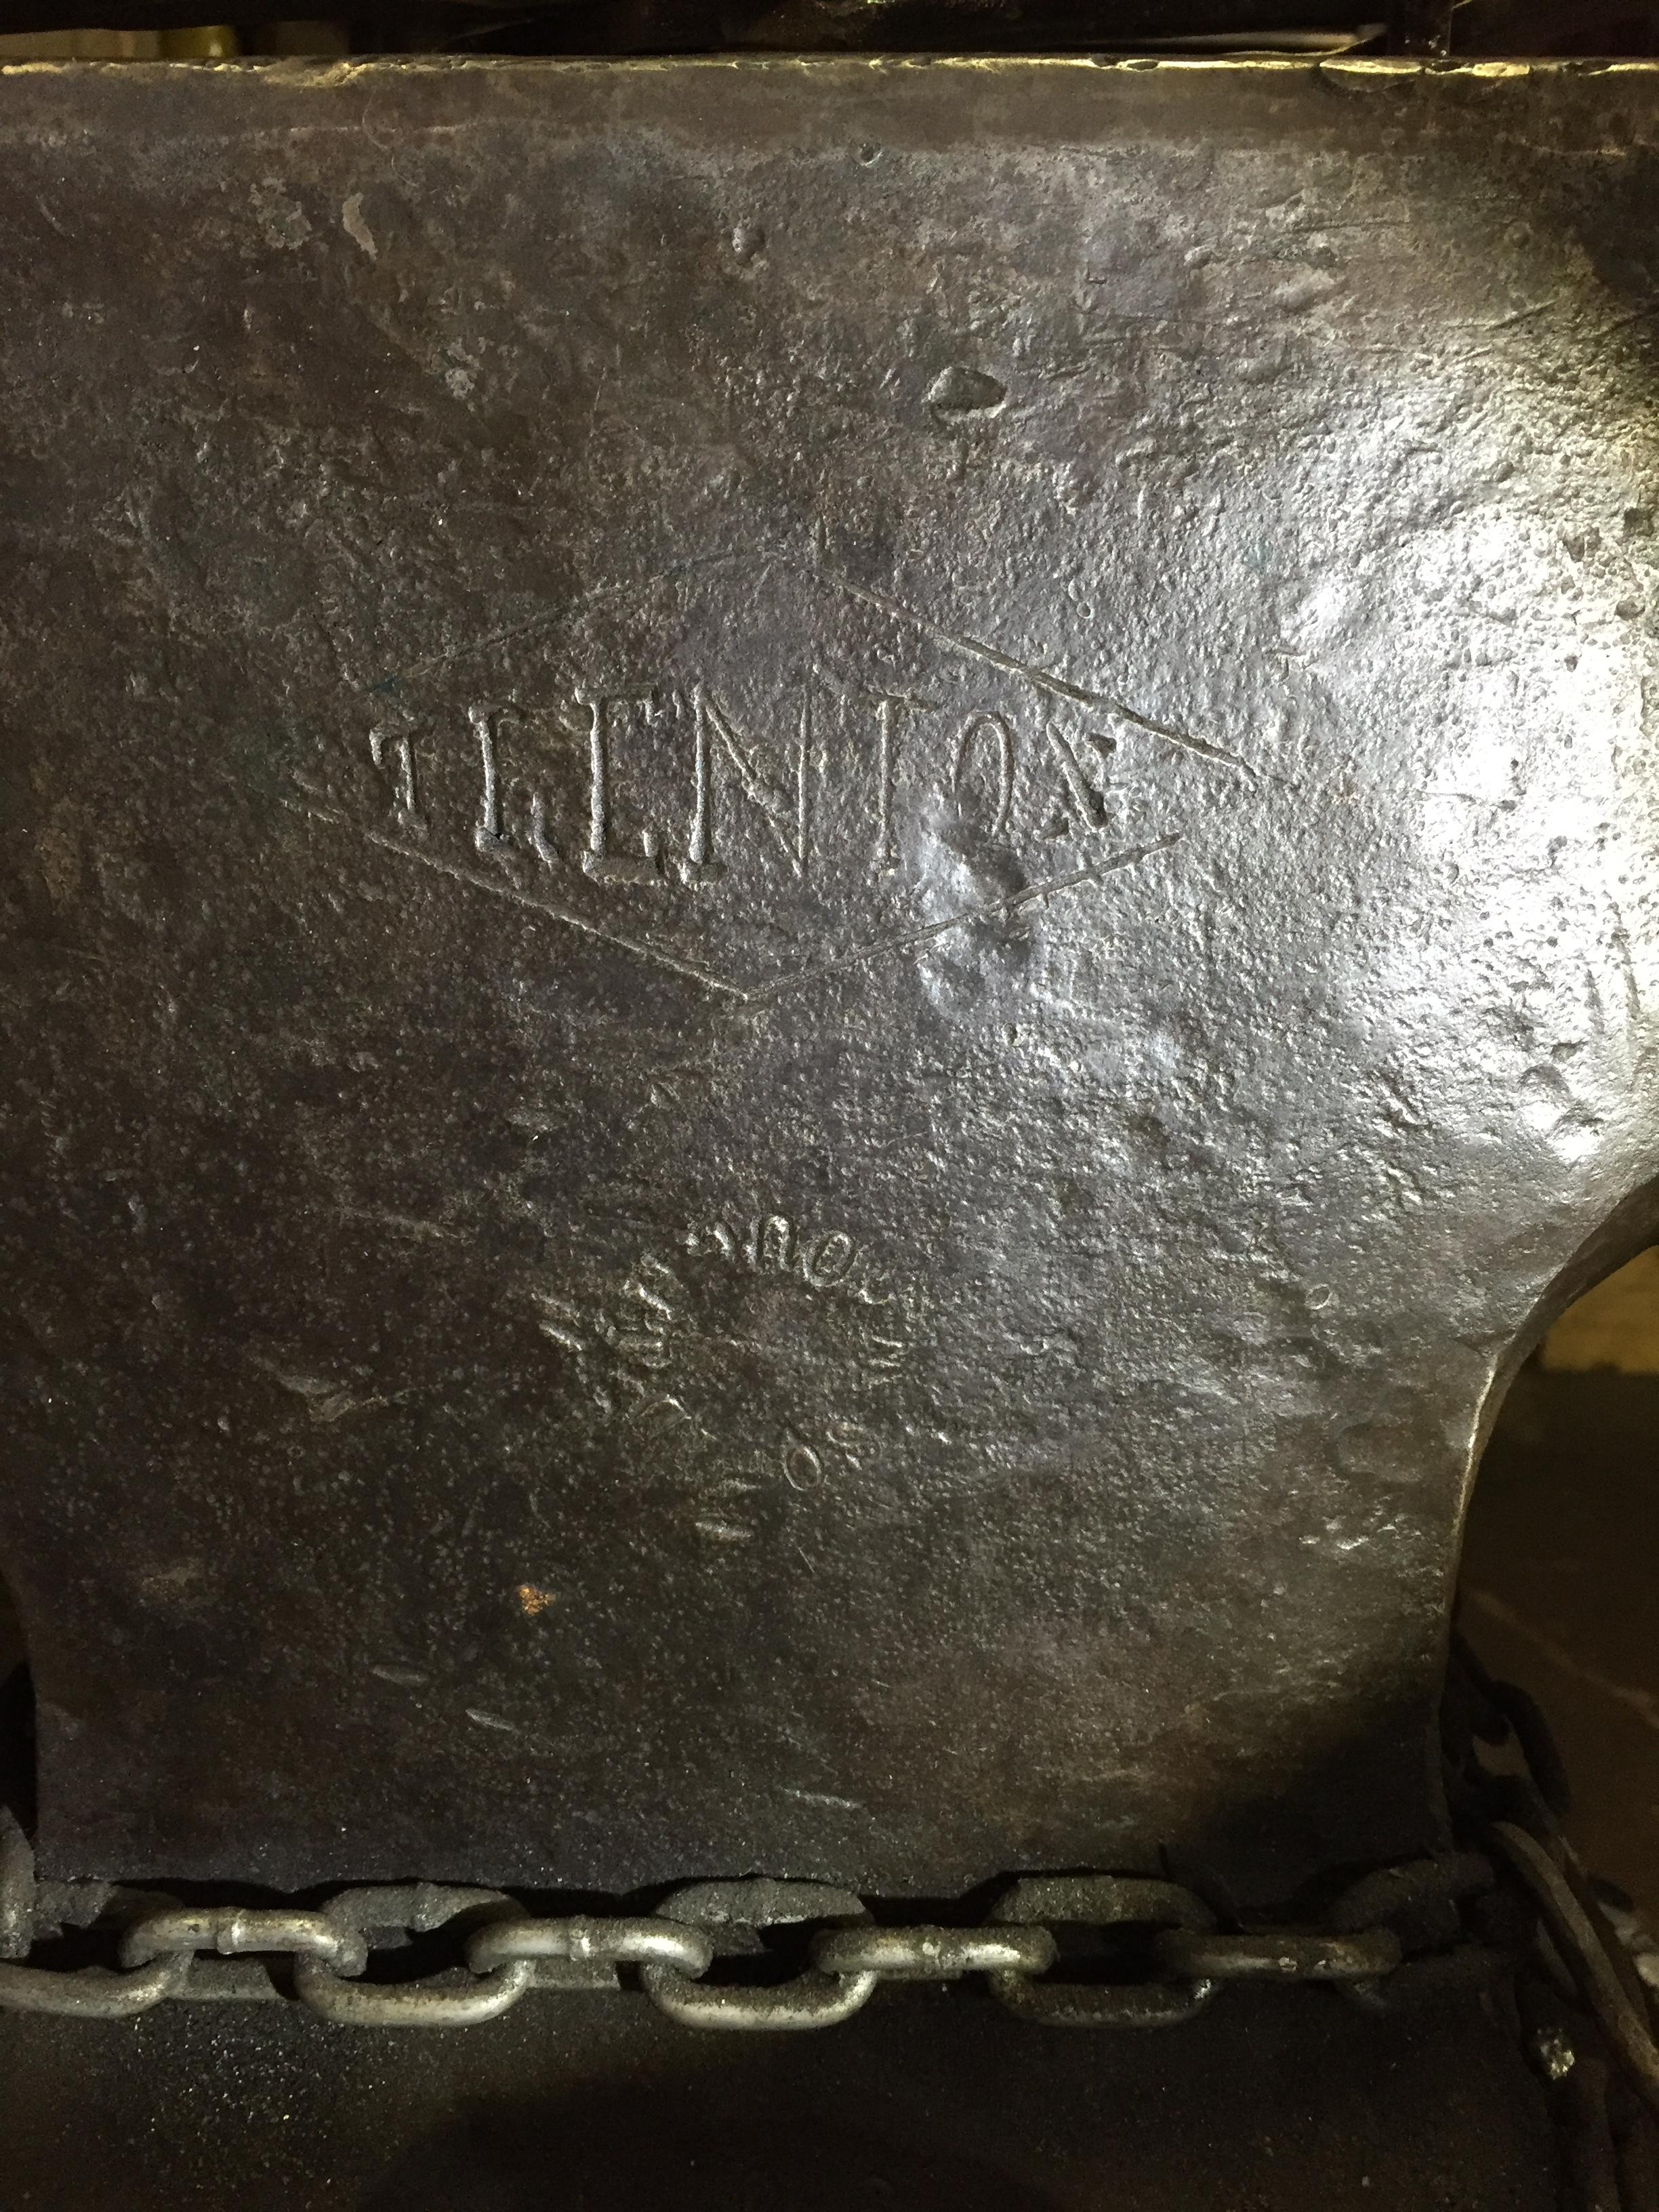
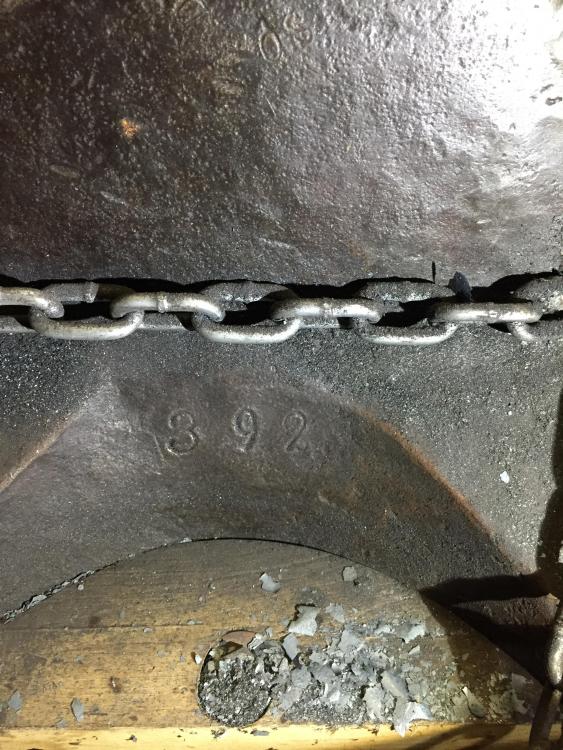
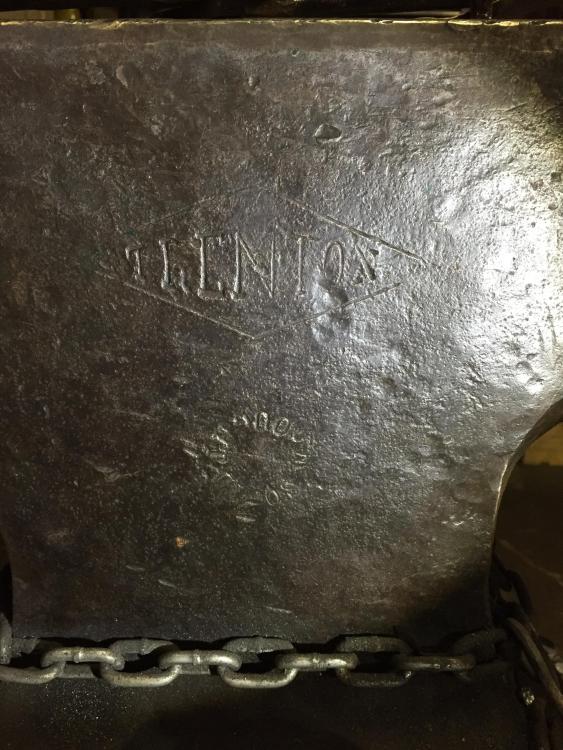
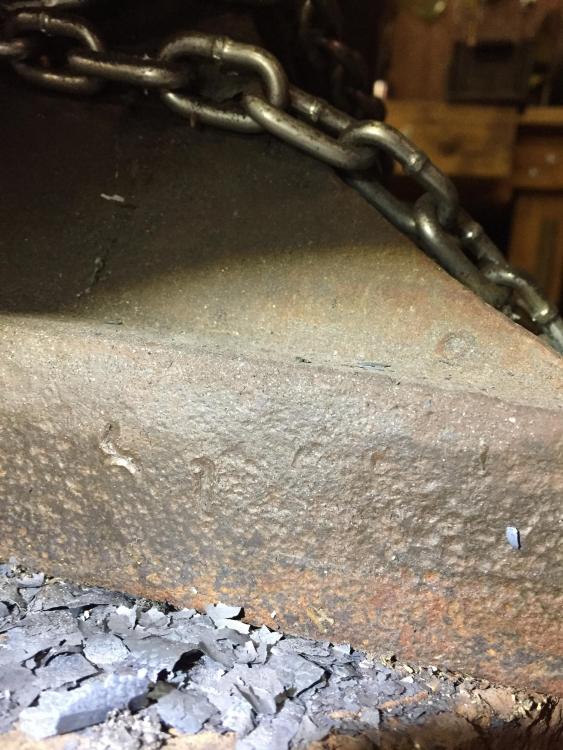
Hello all, Well I have been thinking about it for awhile now, and I am finally going to ask if anyone can give me any idea of the production year for me anvil. I bought is about 20 years ago while I was still in school, at the time it cost me all I had. It is one of the best investments I ever made. It came out of a local factory that made shoe. My father worked there and let me know they where sell off equipment. I got lucky and brought this anvil home. It has been stored in several different locations throughout the years that I owned it. About 12 years ago I finally had my life setup and built my forge it has been in my shop ever since. The serial number is obliterated for whatever reason, I believe there is an 8 1 in it. It is a Trenton with Solid Wrought stamped under the logo the 392 is further down on the same side. It has an 1 1/4" hardy. Have a great night, W

-
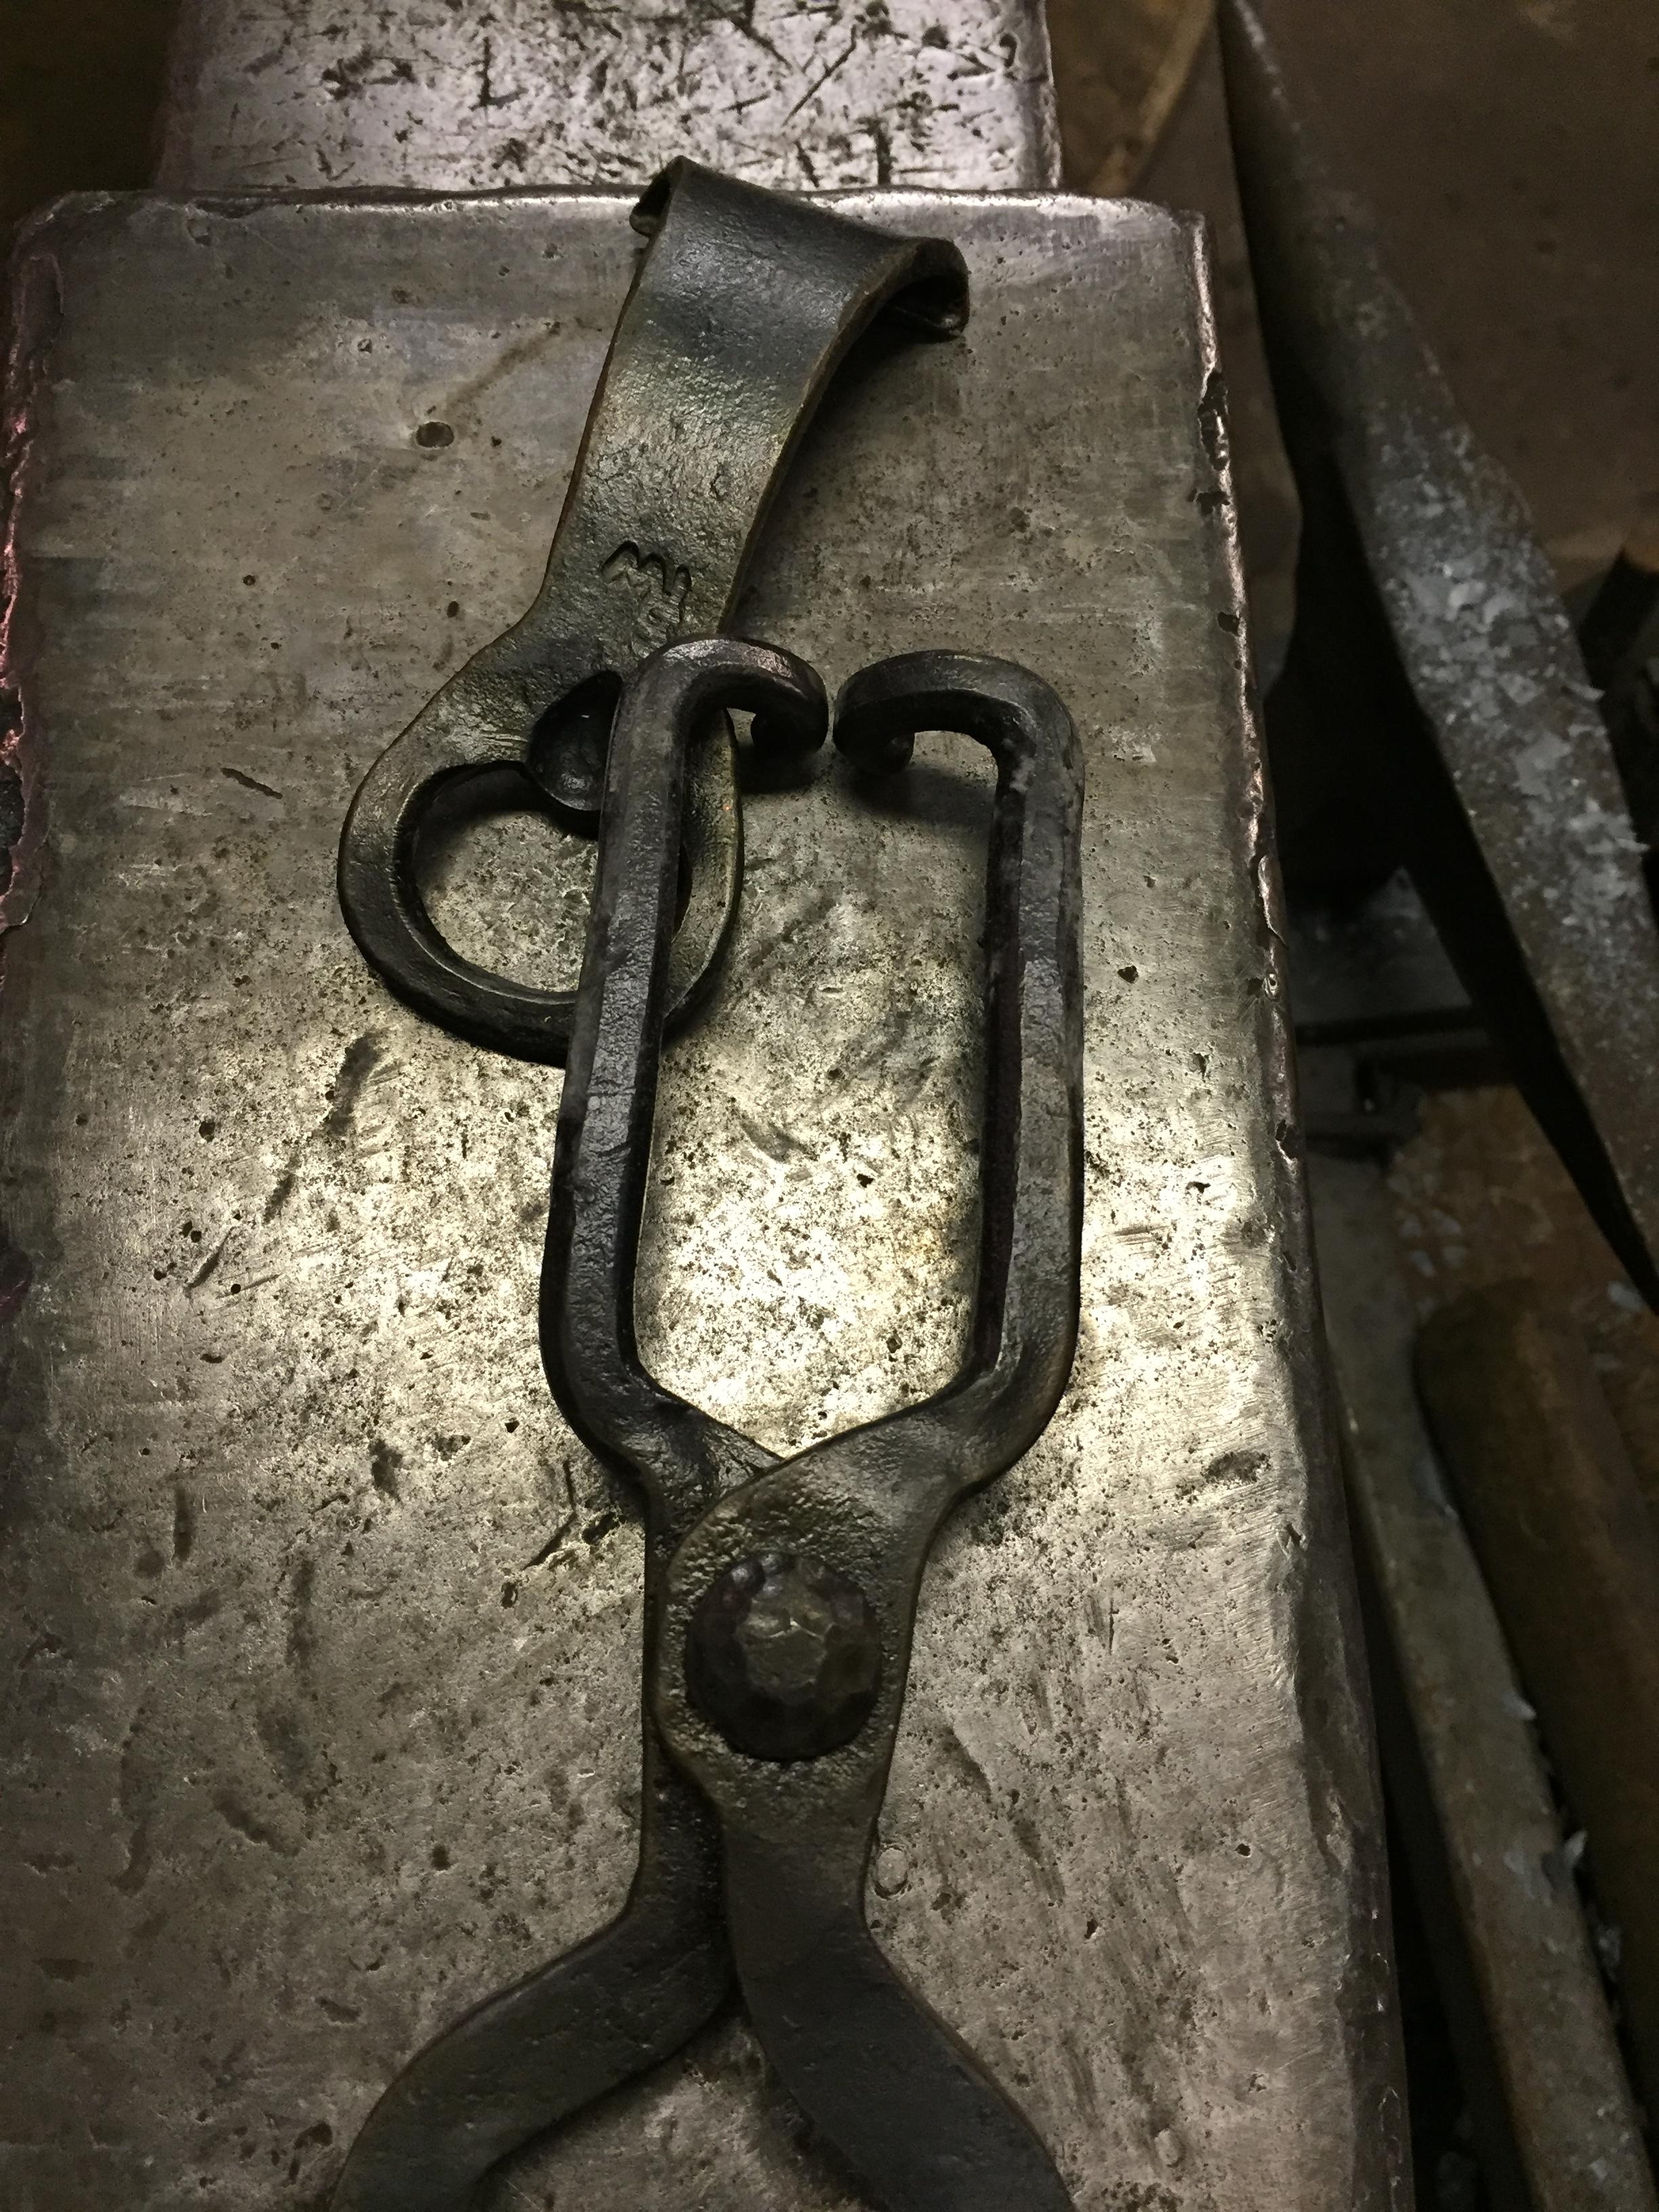
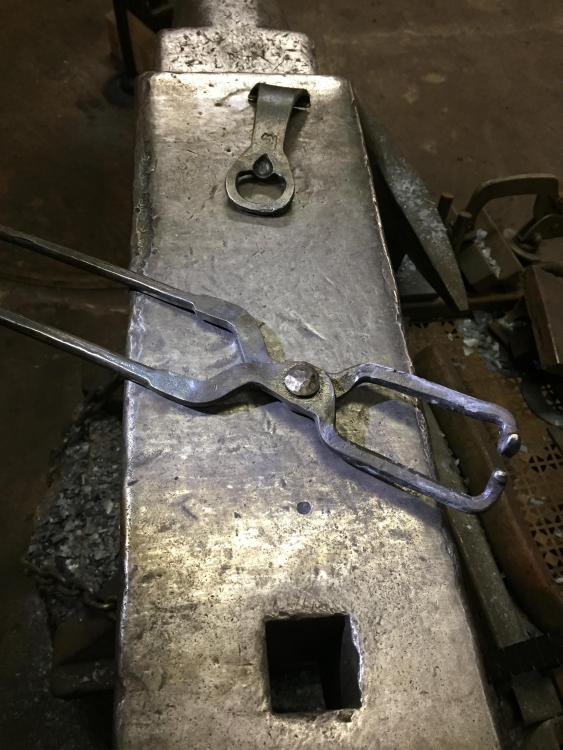
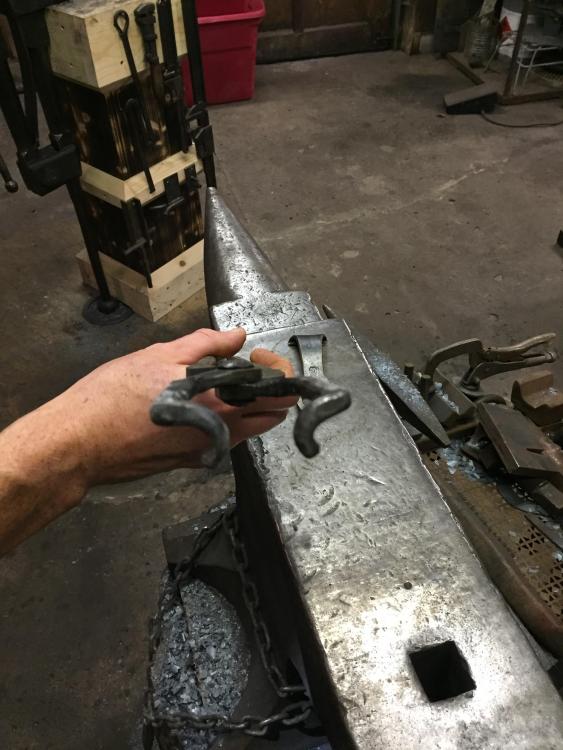
Thank you for the inspiration John. I made this pair a few days after your post, I love your idea. They work great. Have a great night, W


-
Proper height for a post drill
Steven NY replied to George N. M.'s topic in Drills, Post drills, Mag drills, etc
Hello, Shoulder height to crank handle shaft is how I have mine setup. It works great. I only use mine for countersinking holes, but that does keep it in regular use. I too have an electric drill press for making holes. I often found myself switching from the twist drill to the countersinking bit to clean up holes. I now just leave the countersinking bit setup in the post drill. Have a great day, W -
Very nice tongs/bottle opener. That is a problem I have solved in the past with a convenience bend but your idea is much cleaner. I will need to make a pair of these. Thank you. have a great day, W
-
Punt, I have never seen that part two, I would love to, I will have to try and check that out. He was an incredible man. W
-
I show this movie every year to my shop classes, the idea being hard work can take you where you want to go. He was 83 when he left Twin Lakes in Alaska, and the park services took charge of his cabin as a historical site. The book "One Mans Wilderness" is a great read. It is his journal entries from that year in his own words. It gives more detail than the documentary. What always seems interesting to me is the fact that when ever you see him hiking to the camera he already had gone there to set the camera up. He is an amazing craftsman. Great story for all to enjoy. Have a great day, W
-
Very cool, loved it, very well done. W
-
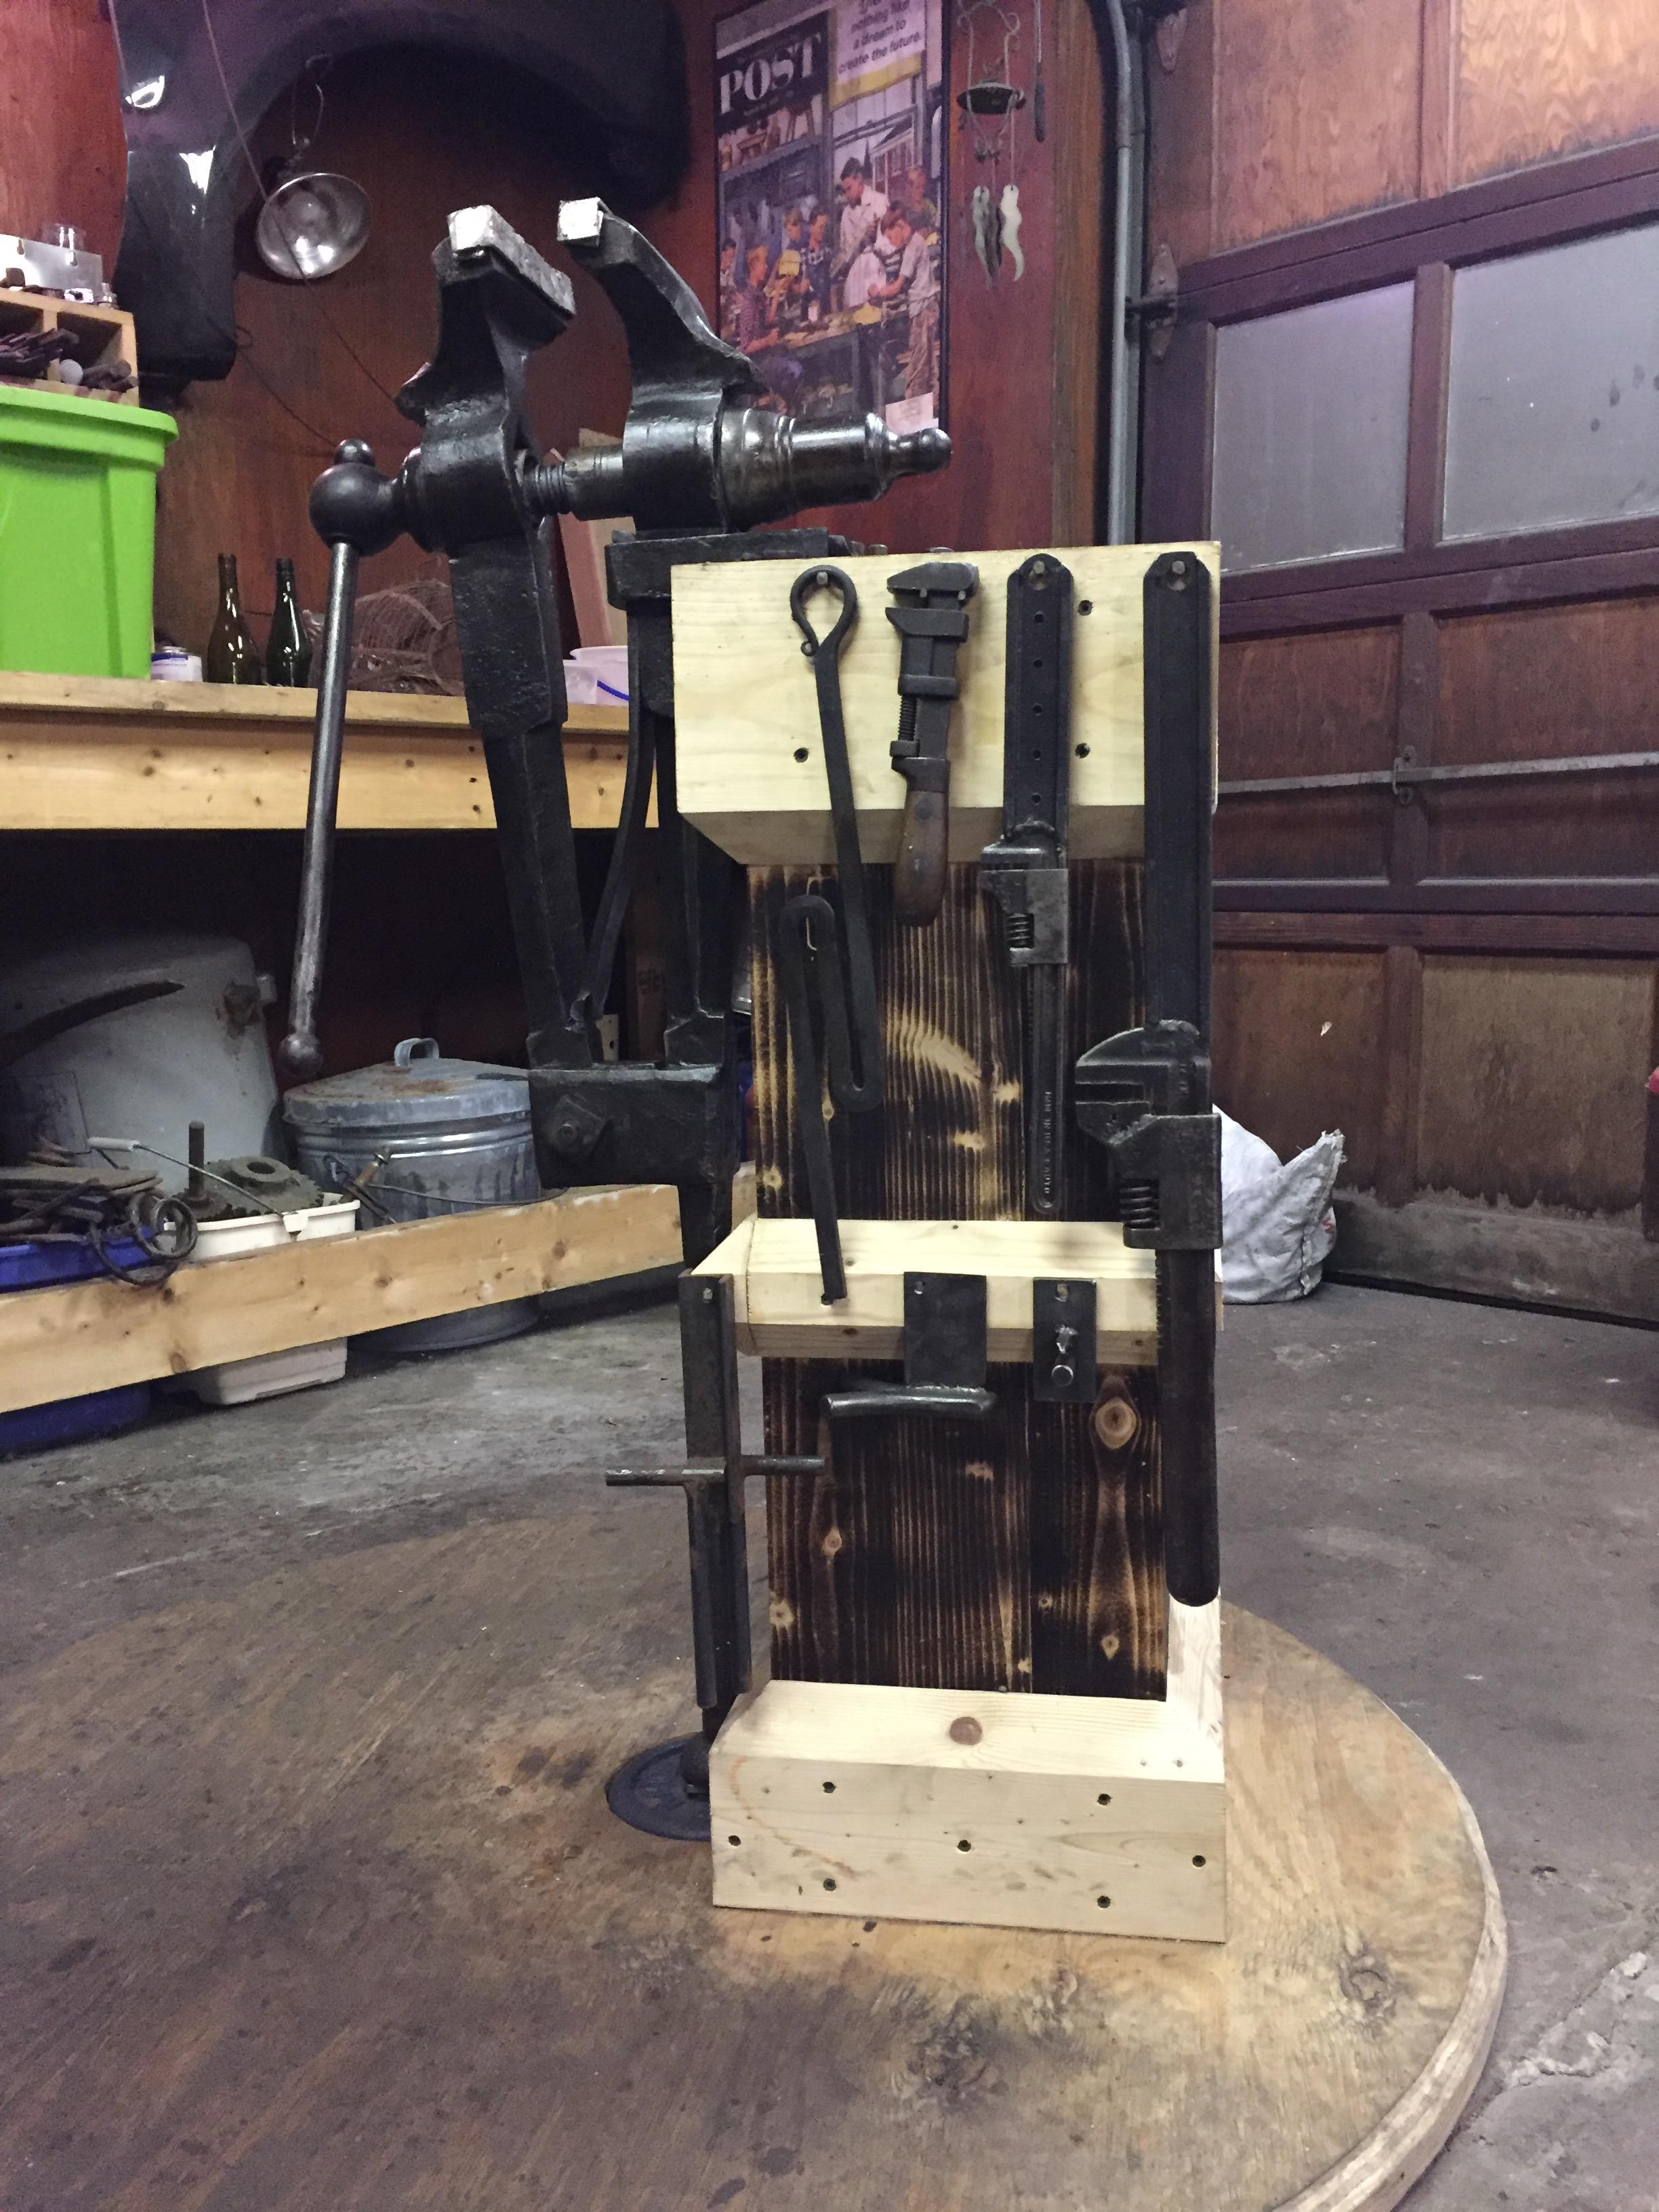
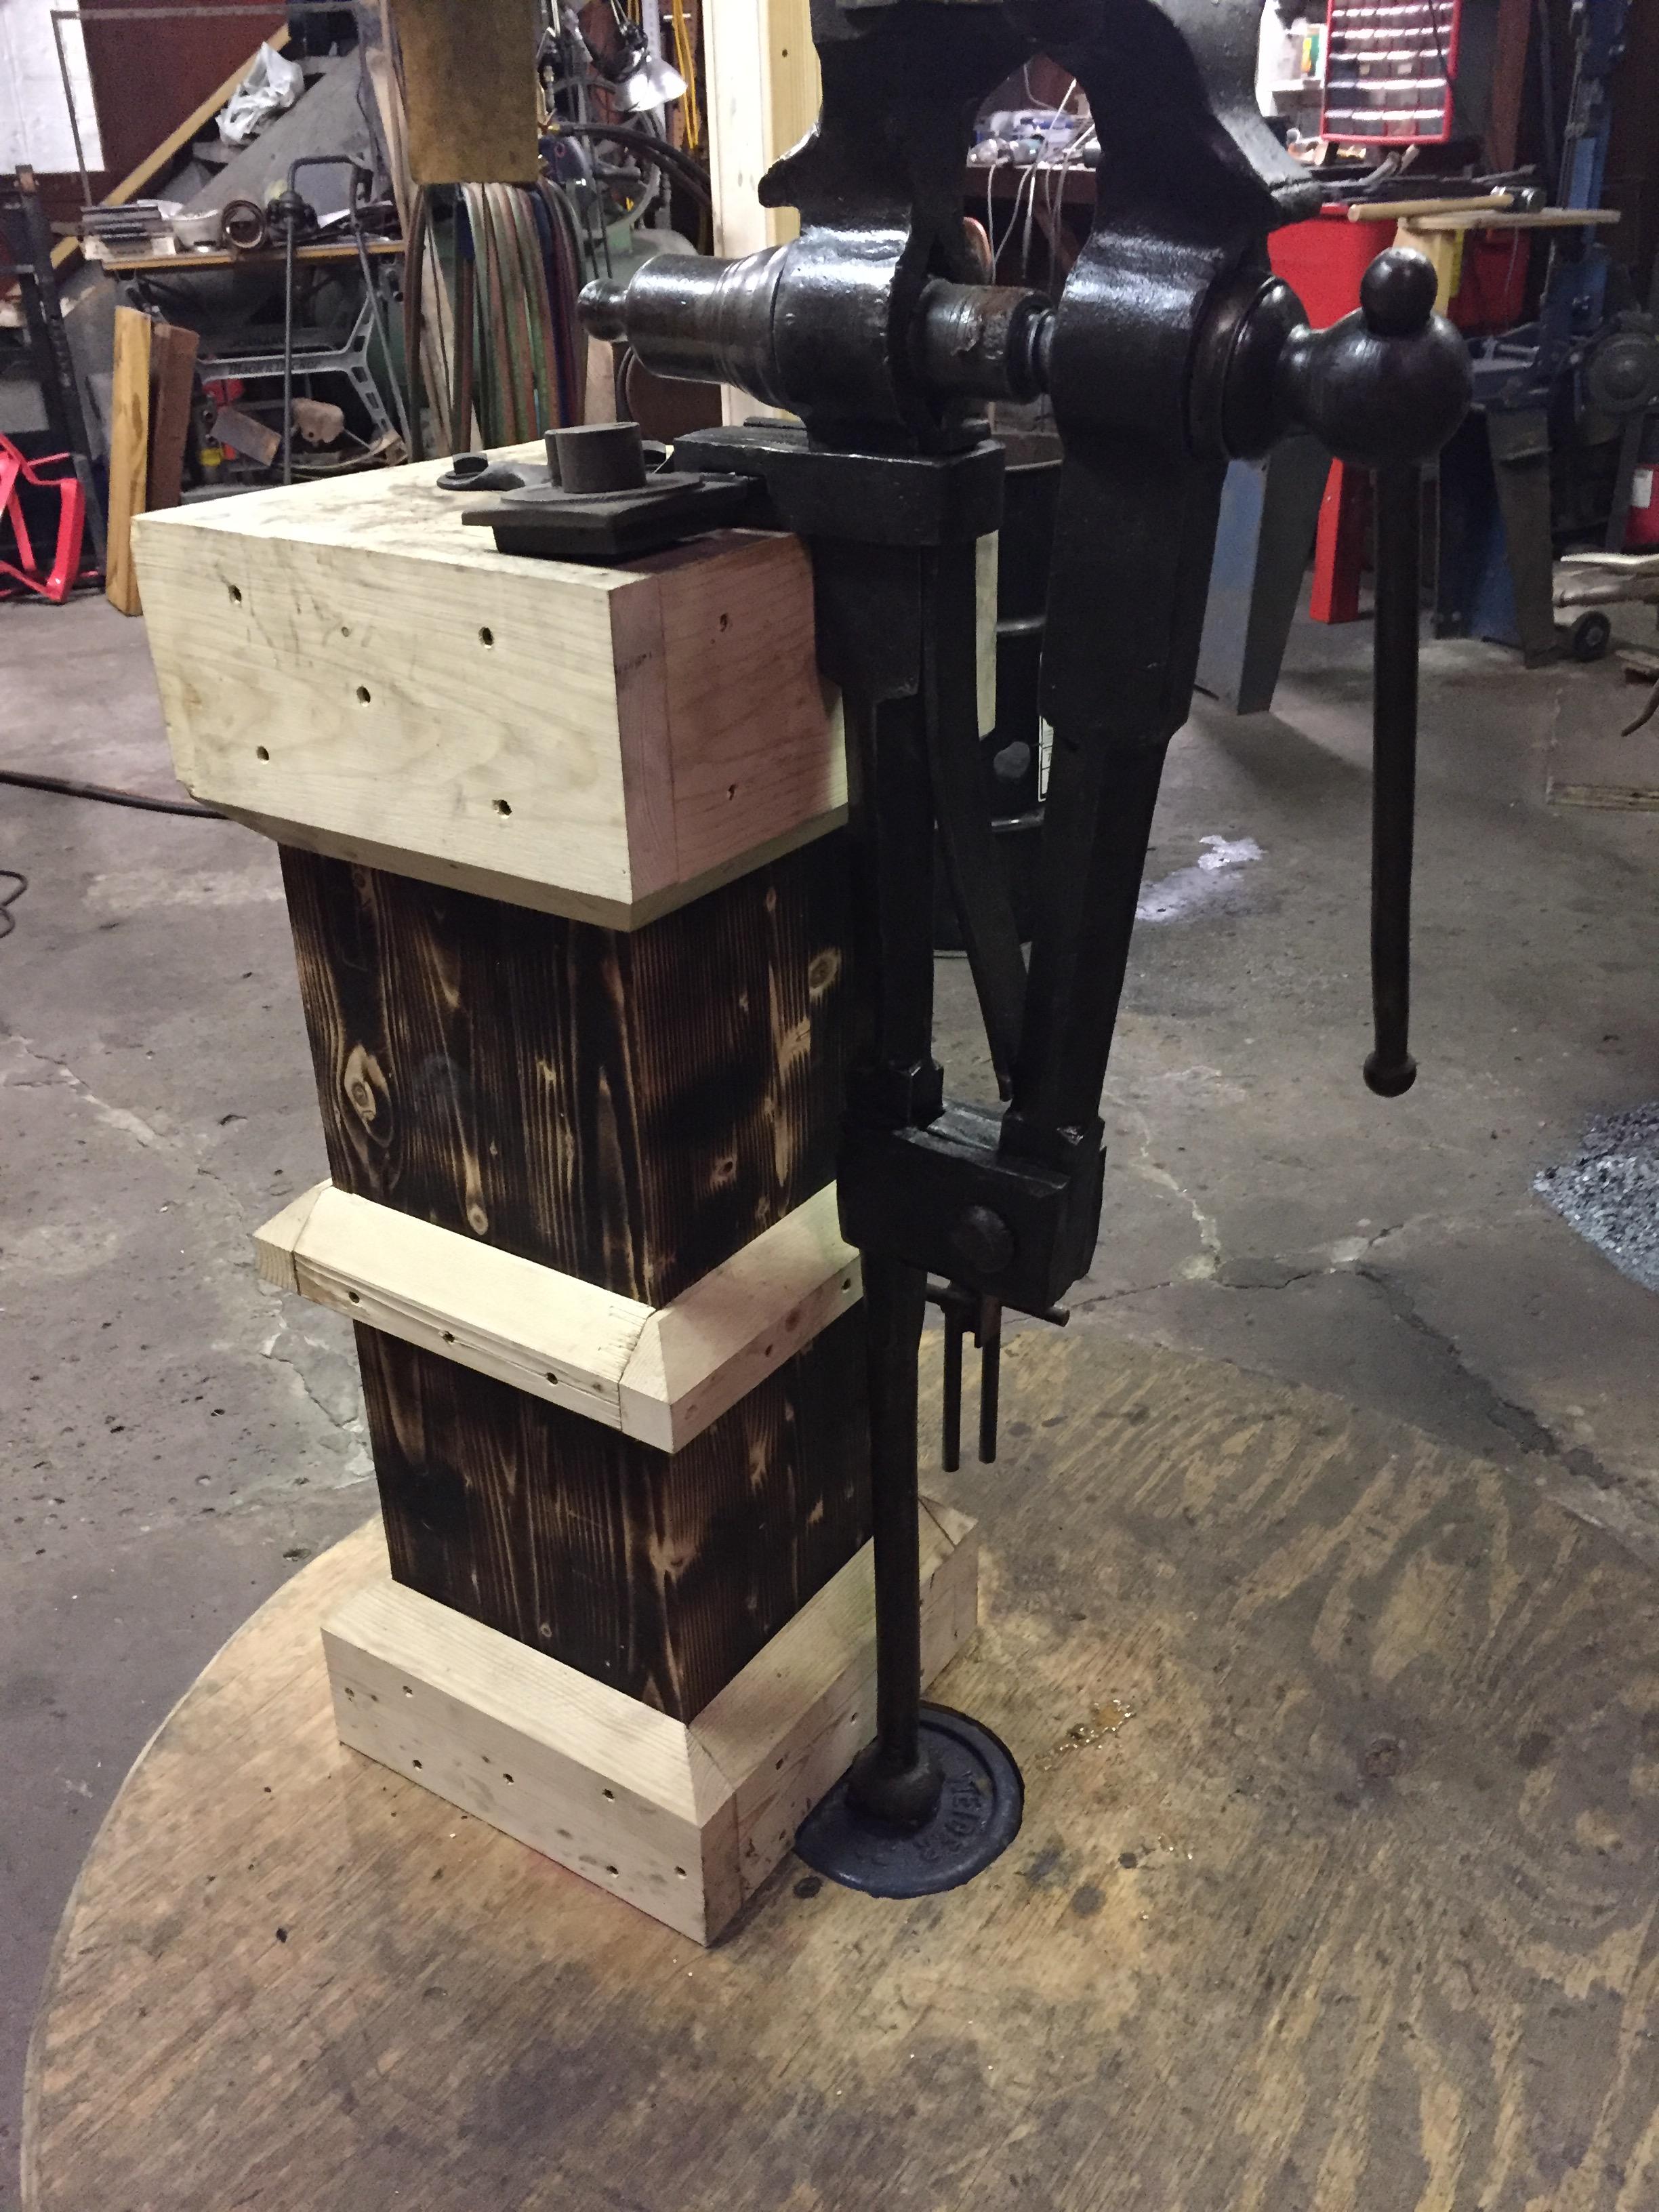
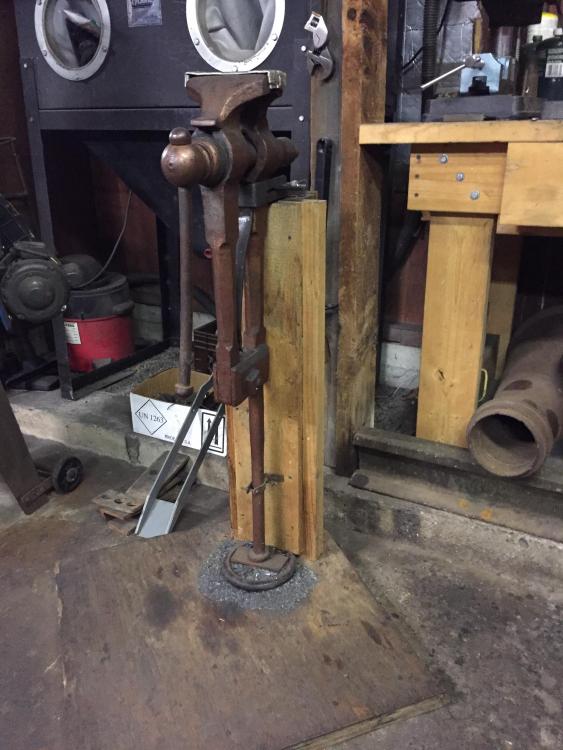
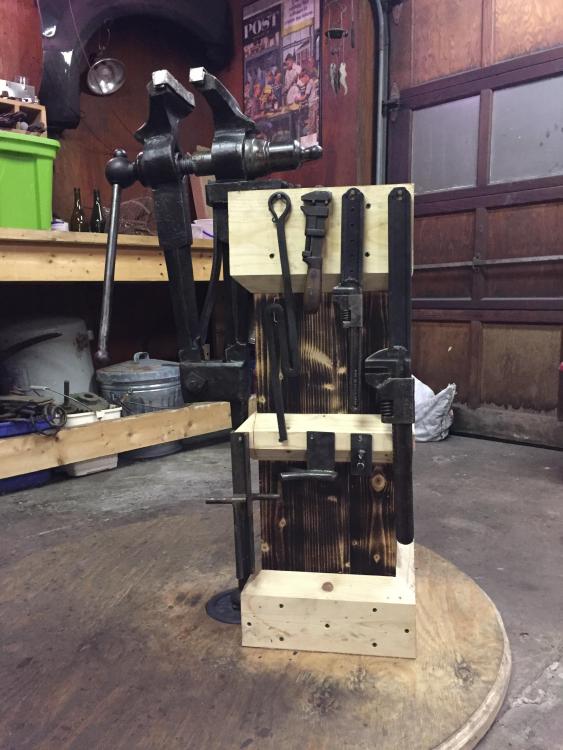
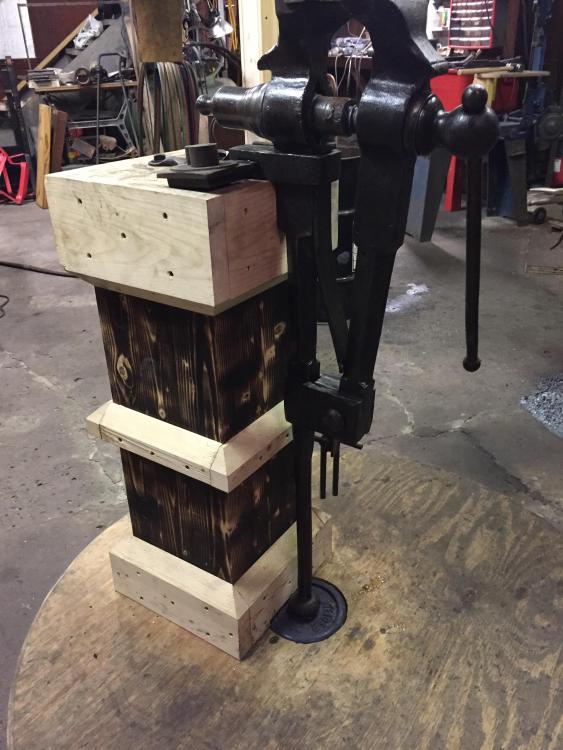
This is the first vise stand I built, the base is about 24" square double layer of 1/2" plywood. The post is is made out of laminated 2x4's. I also made all the mounting brackets and the spring for this vise. This is my second stand and post vise. The base is a 48" circle of 2 pieces of 3/4" plywood laminated. The center post is made out of solid laminated 2x4's. The post is log screwed to the base. It is rock solid. As you work you stand on the circle or square to help hold them down. Both vise leg collars are sitting on top of a 5 lbs. weight lifting plate. The second stand is much more stable. Have a good one, W
-
Very clean pattern, looks sharp, pun intended lol. Great looking knife! W
-
Awesome! They look great love the pattern. W
-
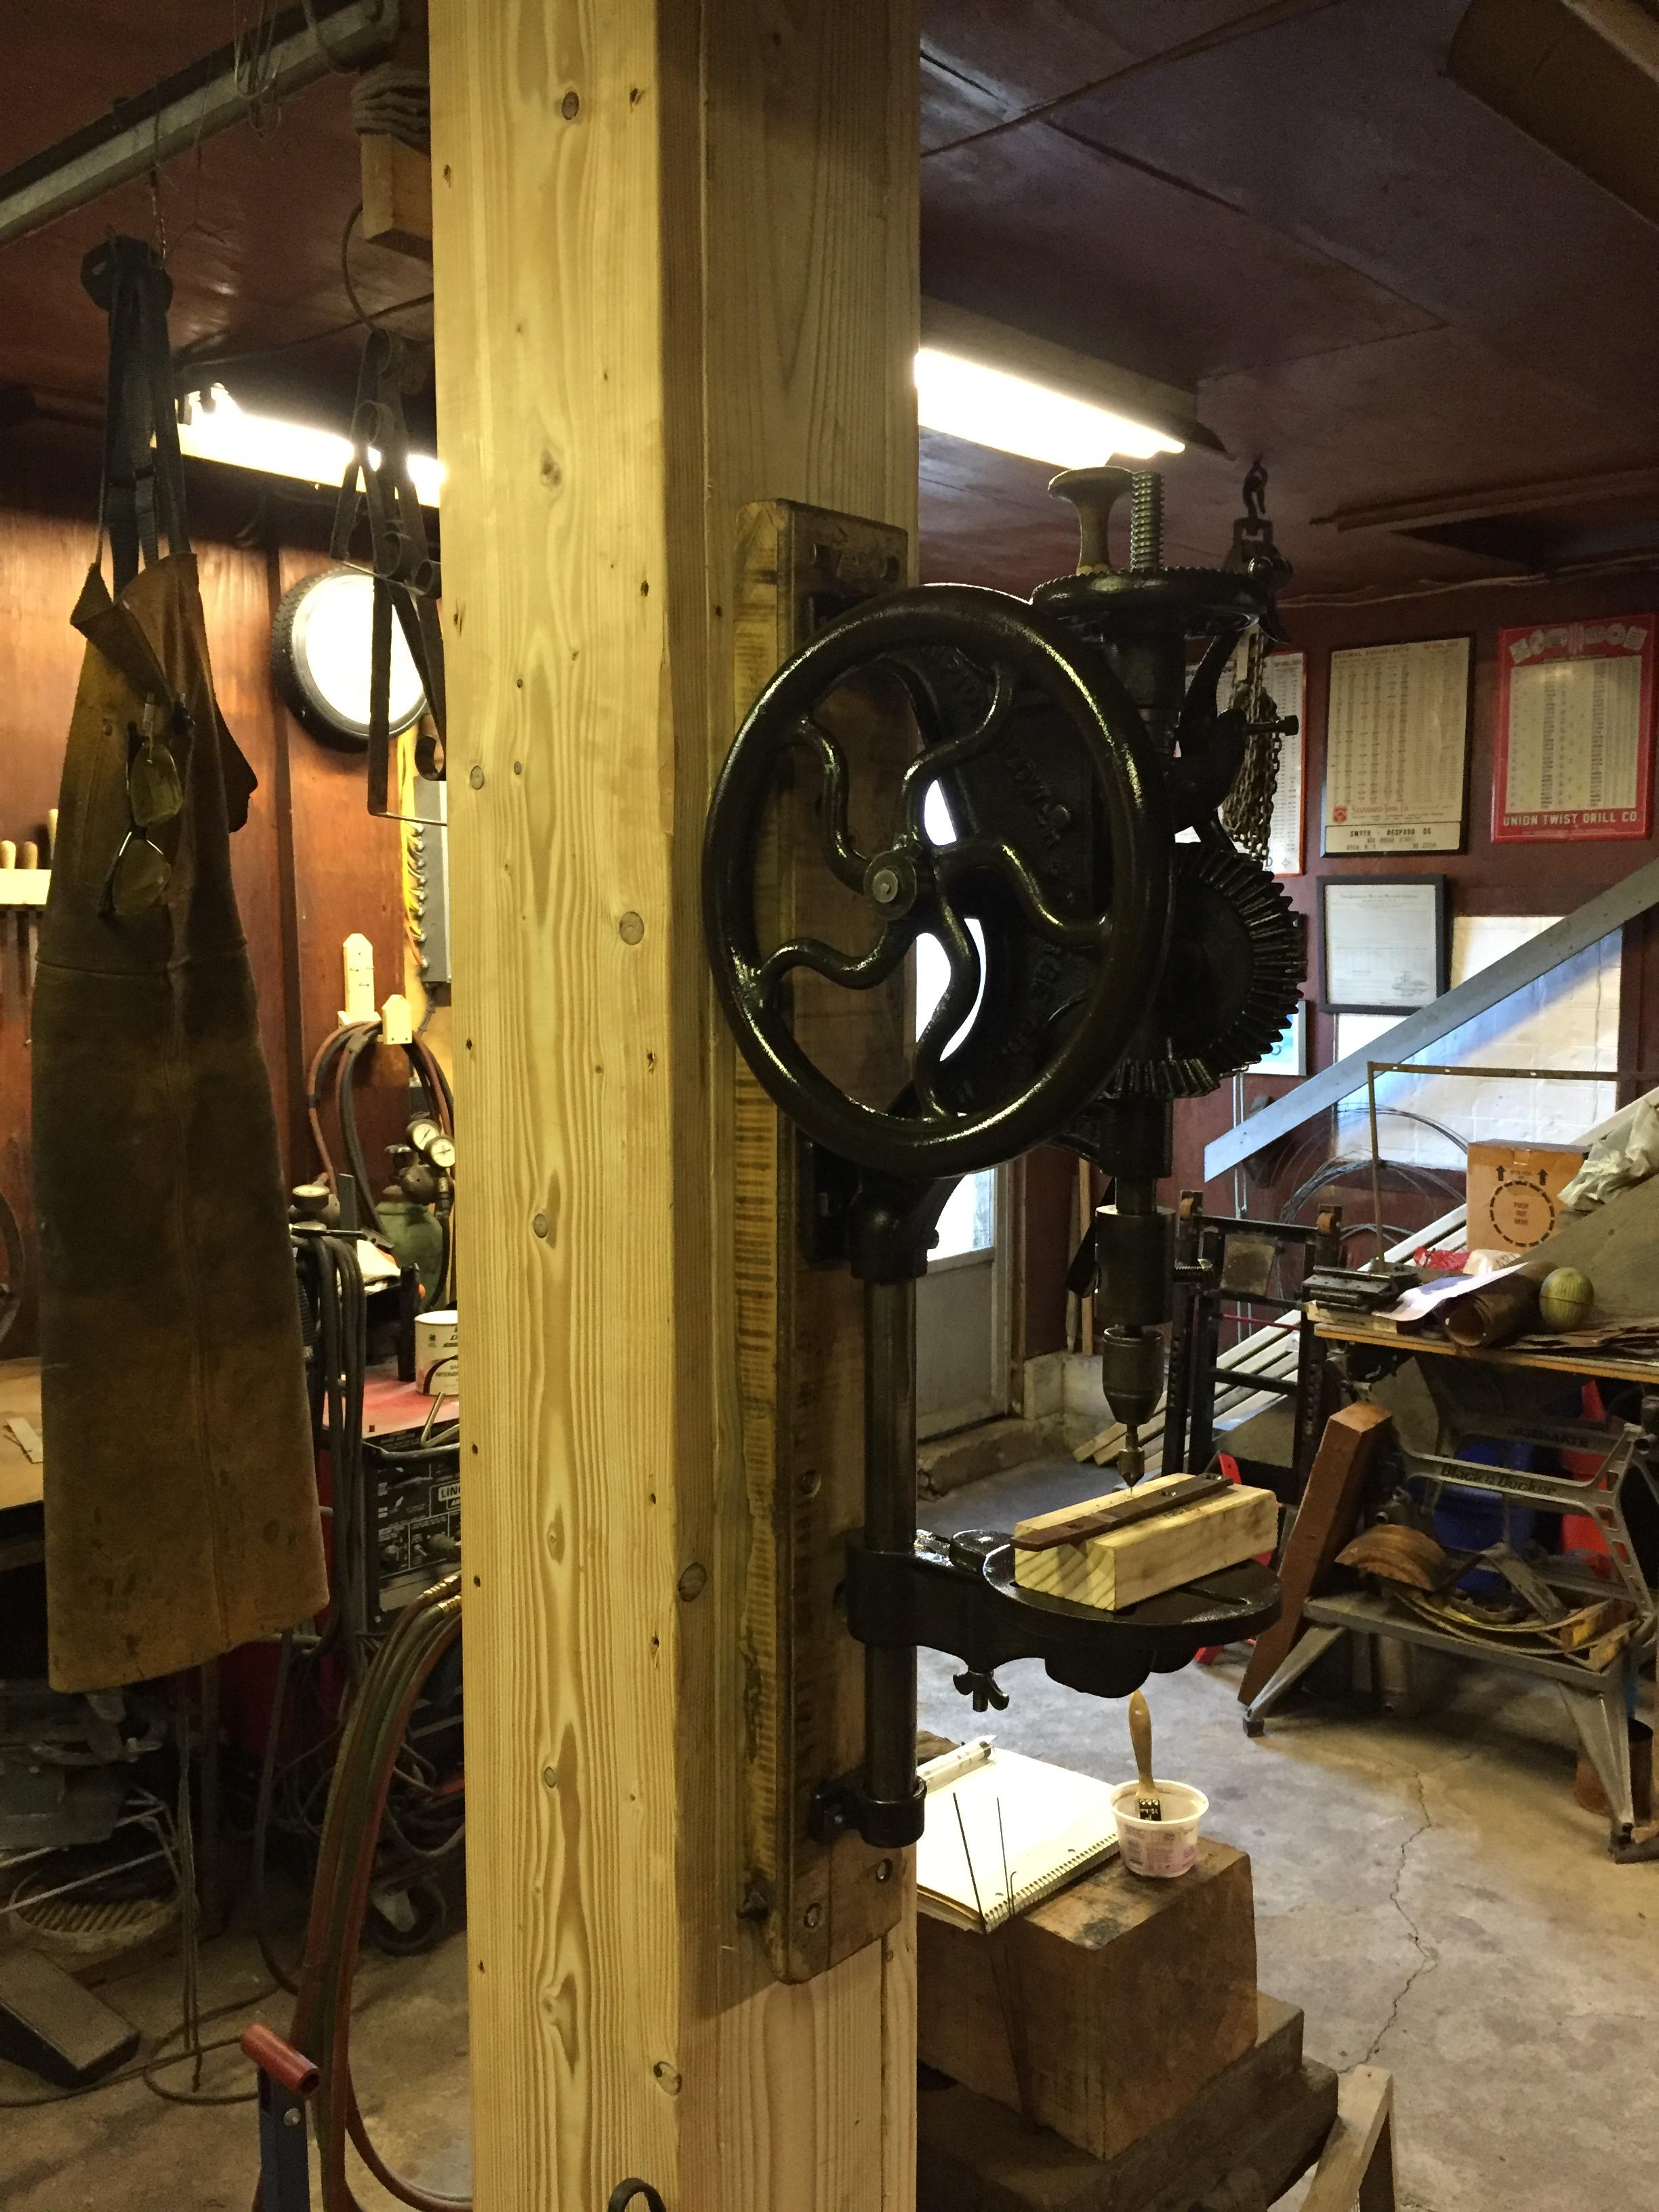
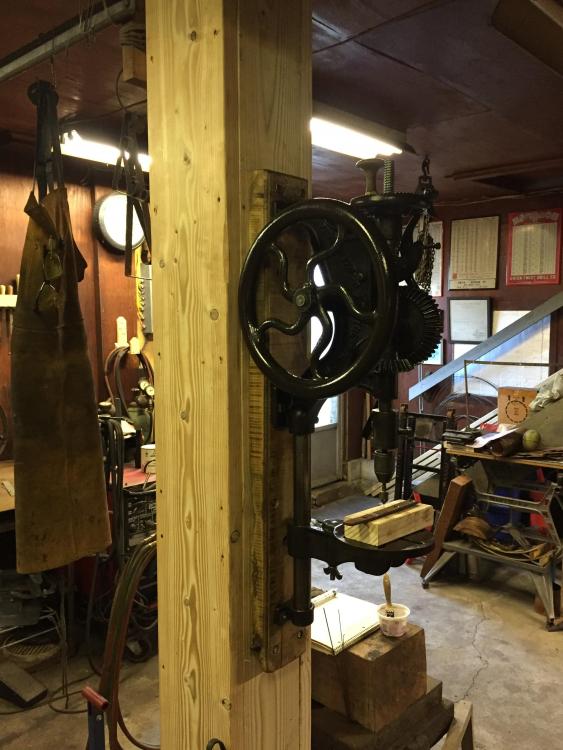
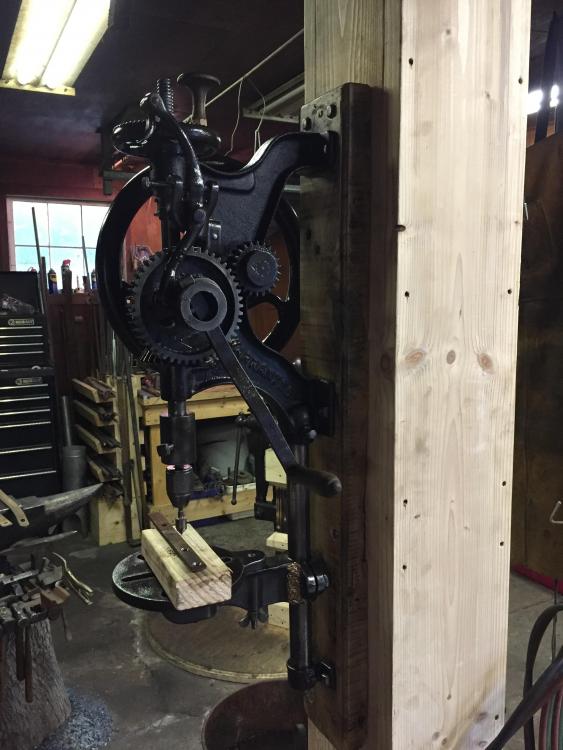
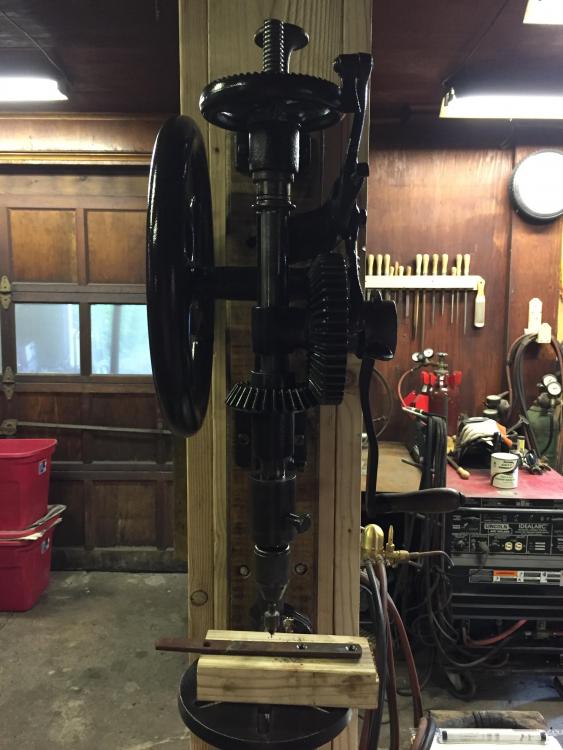
Hello all, On a recent picking adventure to a friends house I was gifted this post drill. At the time it was not functional as the guide pin for the spindle and retraction knob were missing. I spent a few days braking it down and cleaning it up. It is now back to full functionality. I love it, single speed, variable rate of feed, works quite well on metal. It does not generate the heat you can develop with electric drills. The table support clamp bracket was broken, which seems to have been a common problem. Someone had tried to weld it many years ago but it did not take. I ground all the welding mess off and brazed it which seems to be holding. I am going to use it for countersinking mostly, so I do not think I will be adjusting the table much. It was a fun project and has been a useful tool already. Heck I reworked the post in the center of my shop so I could have a good place to mount it. Have a great day, W
-
Beginning of a Guillotine Tool
Steven NY replied to Donal Harris's topic in Tools, general discussion
Wrap the dies in a single sheet of paper, then clamp everything the way you want it and weld away. The paper will give you the clearance you need to remove the dies after welding. hope this helps, W -
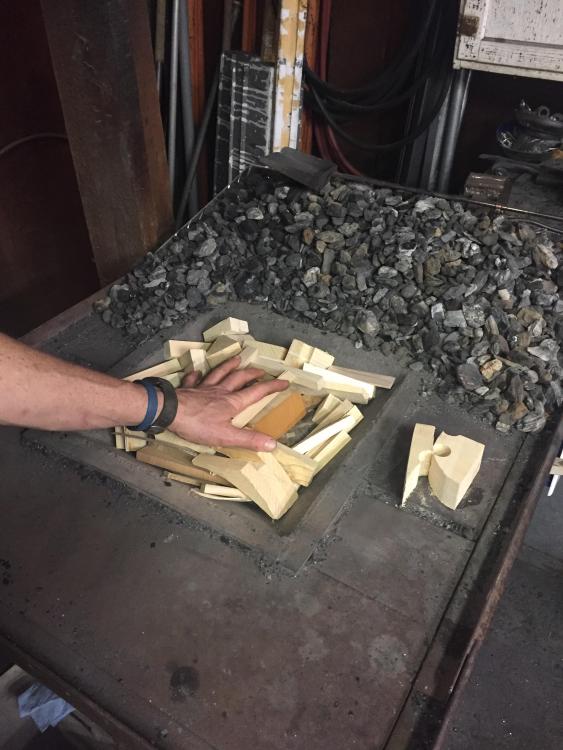
Looks like a European (German I think) style fire pot, they do not have a clinker breaker, the have a drop out plate or plunger the sits in the round hole. The trapezoidal hole is the ash dump. The rod for the drop down plunger would go in the round hole up into the hole in the bottom of the fire pot. The brackets are for the two levers, 1 for the ash dump, the other connects to the plunger. Thats my guess, W Like this one.