
VaughnT
Members
-
Joined
-
Last visited
Everything posted by VaughnT
-
-
It's always better to keep the forge covered when not in use. I used to stick a 5g bucket on top, upside down, and then cover the whole thing with a tarp that I cinched to the legs. Waterproof and windproof, but still easy to get off. I'd venture to say that most folks on IFI have their kit out in the weather, so you're not alone.
-
Tongs, punches, chisels, drifts.... Then you need to make a hold down. I'm a firm believer in starting out by making the tools, even if you don't have a need for said tool right now. Make those tools to the very best of your ability, including sanding and filing them until they look almost store-bought. These are the same skills that you'll be using on the "cool" projects, so ya might as well get used to doing them now! That anvil will give you good service for decades to come. Enjoy it!
-
"How does it hold up to bending forks?" To be honest, Nank, that's one I haven't tried. With the quality of my welding, I opted to make an adjustable bending fork for my vise instead. This way the jaws of the vise support my welds, and I can adjust the gap for different sizes of stock. I don't think a loop stem on a hardy-mounted fork would be a problem, though, as long as the metal being worked is hot and your welds are good. Basically, the face of the anvil and the base of the swage will act as the jaws of a pair of scissors: the base of the swage/forks will want to twist on the face of the anvil. If your welds are good, the shear force applied to the weld won't have a chance! Looking at your guillotine tool, I can see a lot of modifications you can do to it to make it more functional for you. The upper arm can be swapped for other arms that have a different profile. The upright portion needs to be drilled to allow for variations in the thickness of the stock being worked. And the lower arm could have a saddle built for it so that you can change the function. Easy for me to have ideas when someone else is doing all the work! :D
-
Using searchtempest.com to look through craigslist, I can usually find 5-10 anvils in a 200mi radius of my place. The size and condition might be a bit below my standards, but still okay for a beginner. Fisher anvils are exceedingly rare, hence why I bought mine from 1200mi away, but PW, Trenton and others aren't. What is scarce are big cast iron forges. You'd think with all of the rail heads and cotton mills in the region that I'd be able to find an industrial-sized forge.... but, nope. Very aggravating when that's what I'm looking for. So, when I get back to work, I'm going to build one. With wheels!
-
-
Very good work. I sure wish I could weld so nicely! A lot of my hardy stems are made without a forge because I can't justify the time and fuel used to draw down stock that doesn't really need to be worked so much. With few exceptions, hardy tools are subject to compression, not shear or torque, so a stem made from heavy stock isn't really needed. I take a length of 1/4" round stock and bend it into a U shape - the width of the U is such that is slips snugly into the opposing corners of the hardy hole and prevents twisting. Weld the ends of the legs to the underside of the swage to form a loop and you're golden. Also makes it nice if I want to hang the tool on a peg. No heat needed at all and plenty strong enough.
-
Thank you both for the timely and detailed explanations. I wasn't aware that I was using a rod that I was supposed to be dragging towards me and that would explain why several times I got the feeling of snagging on something as I was pushing the rod away from me. I guess that fingernail of flux was grabbing on something and throwing off my fung schway. I'll try dragging the rod tomorrow and see if that goes a bit smoother.
-
Attaching wheels to a Buffalo forge that uses pipe for legs would be rather easy. 01Tundra, a member here, used pneumatic wheels for his home-built forge and it looks mighty sexy. A quick search through the forge section of IFI shows several forges that have wheels attached for the same reason you're facing. I'd be partial to using old cast iron wheels like you see on hit-or-miss engines and the like. They have class and fit the look of an old forge. I definitely wouldn't go with anything less than 10" in diameter so you have easy rolling. The biggest caution, though, is to make sure you brace the legs so that undo stress isn't transfered to the cast-iron pan. It wouldn't take much to pop the area around the where the legs go into the pan.
-
"too deep and the rod flux contacted the block and square stock" Yup, I definitely noticed that happening. I didn't think it was a big deal in this application because there's minimal shear force on the weld. How much does the weld bead penetrate into the stock being welded? I was hoping to get full penetration by attacking from all four sides (just because), but is that possible on inch-thick stock without beveling the stock to a point? What does the angle of your rod have to do with anything? Also noted that after stopping to chip the slag off, the end of my rod was countersunk leaving a sixteenth or so of flux protruding like a rim. Is this a result of the long-arcing or something else? Oh, and how in the world am I going to get those *#&^! corners to stop melting? It's supposed to have a nice smooth radius from the stem to the block! I'll run some longer beads tomorrow...... or go shopping for a new welding machine!
-
Well, if that ain't the neatest thing I've heard of! I would never have guessed that. For it to have migrated so far from the rail line and ended up in exactly the spot the construction people decided to cut in an access road, and then be uncovered enough for me to catch a toe on it...... Amazing! Now I just need to figure out a use for it. Thanks, FM.
-
An anvil that old and in that good a condition would do well on the collector market. It has just enough wear to be "interesting" but not so much that it's views as junky. The lack of a pritchell hole dates it to prior to 1820 as NJAnvilman noted. Any other info you can come up with will only add to the value. Because it's so small, relatively, it would make a great addition for collectors that don't want a real hog taking up space. Considering the great deal you got it for, I wouldn't hesitate to put it out there for collectors to look at. I could easily see it fetching $3/lb, and possibly more. I've seen a few collectors that would happily trade a newer anvil in better condition for an older anvil like that. It's a good piece and I'd been curious to see what's under the paint. A good excuse to use electrolysis to remove the paint and rust.
-
That's a beautiful piece!
-
I'm always looking for a welding project and the other day I got the idea to make a square-edged block for my anvil. I have plenty of good edges on my Fisher, but I saw one of these blocks being used in a few internet videos and thought I'd better make one for myself so I don't get picked on by the other blacksmiths out there. Peer pressure is an awful thing! My first thought was to build something up from the 1" solid stock I have left over from building my anvil stand. Then my dad pointed out these contraptions we picked up from an auction several years ago. We never did figure out what they were used for, but the 90º angles made them great for doing lay-ups. Having plenty of lay-up stuff, Pops thought my project would be a great way use some of the excess laying around. So, first thing I did was to cut off the top 2" of the gadget. I'm very thankful to have a portable bandsaw! Then it's off to my 2x72 belt grinder to true up the cut face. Pretty, huh??? Now it's time to ugly it up with some of my trademark welding..... 1/8" 7018 rod on cleaned metal, no paint or rust. The 1" stem was ground to a semi-point so I could get deep with the rod. One root pass and one cap. Ugh! Splatter splatter everywhere, and not a stack of dimes to be seen! Still, not too bad considering what I've done in the past. I'm trying to figure out the balance between Amps, Volts, Rod, Material and all that other stuff that welders deal with, but it's a very slow go. Try as I might, I can't see a pattern to it all. Still, the stem is firmly attached and I might do another pass or two tomorrow just because I can. It sits flat on the anvil and gives me three 90º angles and one face that's slightly less than 90º. I might dress that face up so the groove is more of a radius. The other three faces will have the corners dressed to varying radii. The finished face measures 2 1/8" x 2 3/8" and sits 2" tall. Next.... get the forge up and running so I can start making stuff on my new anvil block!
-
I found this several years ago when I was working at the site of a condo complex being built. I literally stumbled over it as I was climbing back into my truck. At the time, there was a lot of heavy earth-moving equipment being used at the site for preliminary grading, but I couldn't find anyone that was missing a part and this contraption was buried up to pad part on the entry road. About 400yd east of the site there was an old rail bed that had been turned into a pedestrian trail, but the last train came through some 20 years prior. As hefty as this thing is, it could have been off of a train, but what part? The black plastic part gives me the impression that this is some kind of pedal, but why so stoutly built? Approximately 16" long and 4" in diameter at the collar. Thoughts? The tapered section would be nice as a bick if it wasn't faceted, but the other half would make a nice hardy-mounted cone. That might be a project for tomorrow!
-
Oddly enough, I just came in from the shop where I was doing a bit of stick welding to make a project. All types of welding have a place in the blacksmith shop. The piece I was just working on would have been an absolute bear of a job if I had tried welding in the forge. Less than an hour with power tools and a welder, though, and it's done and ready to put to work. And, to support DSW's point, I've been trying to learn welding on my own for several months, and I suck at it. My stuff sticks together, but if I want it to look decent I break out the grinder. I really need to go to school!!
-
Amazing how short blacksmiths of old must have been if that forge was a comfortable working height for them. Have you figured out the hood, yet? How long til you have a fire in her? Any thoughts on what will be her inaugural project?
-
Beautiful anvil and a great story! Congratulations.
-
Beautiful!
-
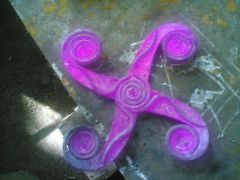 Very beautiful work. How'd you get the wire scroll in place without burning it up?
 -
"I already have 2 anvils..." That's not a valid excuse.
-
While there's no doubt that the Nimba line is quality through and through, the Gladiator's wide face really throws me off. My Fisher has a 5.25" wide face and it can be a bear to work around some times. My Wilkinson anvil is less than 4" wide and I've never had an issue with working on it, and it's 200lb lighter. Going for that once-in-a-lifetime purchase.... go for it. Just understand what you're getting.
-
Asking how to break the law on an open forum probably isn't the best idea.
-
Look at clay under a microscope and you'll see what looks like a deck of cards. The individual platelets don't have any real surface texture so they can't bond with each other. This means dust will be kicked up. Add some pea gravel and cement powder to that mix and you get a solid floor. Cementation of dirt floors has been done for years and is proven. If you don't have money to rent a tamper, that's fine. Just use a rake to stir the top inch or so and then apply the gravel/cement mix. Spray it with some water if you can. If you can't get a hose there, ambient humidity will get to the cement and get it going, too. It just takes longer.
-
Barrels on their side..... perfect solution. I often used 10 gallon drums from the oil/lube joints. Not too big and not too small. Another thing..... organize by type rather than just throwing everything in a puddle. Springs here. Tubing there. Circular thingamabobs yonder. It makes each pile far smaller and easier to access.
