Urthman Posted October 15, 2016 Share Posted October 15, 2016 I scored a nice old 250 pound anvil at auction today. Based on the hole in the feet, I'm guessing its a Peter Wright (or Henry Wright?) Any thoughts on manufacture? Any marks have long since rusted away. Thanks for your thoughts! Here it is pictured under my 85 pound ACME/Trenton: Quote Link to comment Share on other sites More sharing options...
Anachronist58 Posted October 16, 2016 Share Posted October 16, 2016 Wow. So nice. Must be nice to have Iron in Hand. . Looks to be in mighty fine condition. Those in the know will be along shortly...... Robert Taylor Quote Link to comment Share on other sites More sharing options...
tonyw Posted October 16, 2016 Share Posted October 16, 2016 Nice anvil! But PLEASE don't let that angle grinder get any closer to the anvil!!! Quote Link to comment Share on other sites More sharing options...
Urthman Posted October 16, 2016 Author Share Posted October 16, 2016 Lol! This anvil *will* have a clean face. Tool to make it happen will be determined. I like to planish my work without adding pock marks. Quote Link to comment Share on other sites More sharing options...
Daswulf Posted October 16, 2016 Share Posted October 16, 2016 you can make tools for planishing. Quote Link to comment Share on other sites More sharing options...
Lionel h Posted October 16, 2016 Share Posted October 16, 2016 Hot iron will polish it just give a good beating ,it will get it done in a little time. Quote Link to comment Share on other sites More sharing options...
Frosty Posted October 16, 2016 Share Posted October 16, 2016 It's a LOT easier and less destructive to make a bottom tool if you need a smooth or whatever face to finish work on. Grinding the face plate on an anvil is removing steel that can't be replaced. A shot of electrolysis and THEN wire brushing makes a huge difference. Please don't grind that fine old lady's face she doesn't deserve it. Hot steel and a hammer will shine her up nicely and a bottom tool for fine plannishing will protect you from an angry Hephaestus. Frosty The Lucky. Quote Link to comment Share on other sites More sharing options...
Urthman Posted October 16, 2016 Author Share Posted October 16, 2016 OK - message recieved. I'll go easy on her. Any thoughts on where she may have originated? Quote Link to comment Share on other sites More sharing options...
Everything Mac Posted October 16, 2016 Share Posted October 16, 2016 Wire cup wheel on the angle grinder will clean it up perfectly well. All the best Andy Quote Link to comment Share on other sites More sharing options...
Glenn Posted October 16, 2016 Share Posted October 16, 2016 14 hours ago, Urthman said: This anvil *will* have a clean face. Tool to make it happen will be determined. Hammering HOT iron will clean up the face with NO damage or stock removal done to the anvil. DO NOT do anything that will damage the anvil for the first year or so you own it. After that, well it is YOUR anvil and you can do anything you want. My bet is that you will grow fond of the anvil and will become an over protective guardian. Quote Link to comment Share on other sites More sharing options...
Daswulf Posted October 16, 2016 Share Posted October 16, 2016 Wire wheel it and look closer at the side with the horn to your right and at the feet under the horn. Also a picture of the bottom of the anvil could be helpful. Some times you think the stamping is gone but hints remain. My Trenton only had the upper part of the diamond left that the name is stamped in. Its neat to know what you have, but it's a tool. A good tool isn't always about a name but how it functions. If it's got good rebound it's good because cosmetically it's in good shape. Quote Link to comment Share on other sites More sharing options...
Urthman Posted October 17, 2016 Author Share Posted October 17, 2016 Good advice all. Thanks. Yeah, Glenn- I'm pretty fond of this thing already. Acquiring it was a bit of an adventure, so I've already developed an attachment. As far as cleaning goes, I briefly started cleaning things up with a 150 grit sander, but switched over to a wire cup after comments here. I spent a couple fun hours forging today, and I'm quite happy so far. I'll try to resist further urges to make it shiny. It's a great anvil. Lots of mass, good rebound, and plenty of good edges. The hardie hole is not quite square with the face, but I won't know whether that's bothersome until I get some hardie tools that actually fit the massive hole. Also: I think I want to build a steel stand for it, so I can get closer to the thing while working. The bottom has a square hole much like the handling holes in the waist. I know I've got a good anvil, and don't really 'care' who made it- but curious nontheless. Quote Link to comment Share on other sites More sharing options...
Lou L Posted October 17, 2016 Share Posted October 17, 2016 I've recently learned the glory of having a sand base for an anvil. Do yourself a favor and create a steel box filled with sand as your base. It is easily adjustable for height and provides the perfect support. I'm already planning to scrap my tree stump and build one. concerning your hardy hole: Just make your own tools or adjust found tools to fit. The only people with perfect hardy holes are those who've purchased new anvils. Old anvils have "character" and require slightly customized hardy tools. I just made a hot cut that will likely only work as designed in my anvil. It is not symmetrical because my hardy hole is almost 200 years old. That's why I like it best! Everyone who has posted here prior to me knows more than I do so trust them, use the anvil and it will serve you well. It looks like the edges are rounded nicely so you may want to create a broad hardy tool with a very smooth surface and slightly more defined corners just to provide more options for you. Either way, adding through hardy too,a makes way more sense than taking away material through grinding. As to your anvil's origin...sorry, I don't have the knowledge to help. If you hit it on the side with the grinding wheel and then do a pencil etching you may find some markings. Quote Link to comment Share on other sites More sharing options...
ThomasPowers Posted October 17, 2016 Share Posted October 17, 2016 As I recall the handling hole in the feet and the one in the bottom help narrow down the possibilities; but I'm across an international border from my copy of AinA right now. Can you list exactly how many and their location for the handling holes? Lou, out here you could just get a container and hold the anvil over it and wait for the wind to fill it with sand to where you want it! (Walking across the border during the windy season you can get an "ear full" as well as the free dermabrasion) Quote Link to comment Share on other sites More sharing options...
Black Frog Posted October 17, 2016 Share Posted October 17, 2016 Urthman, PM sent... Quote Link to comment Share on other sites More sharing options...
Lou L Posted October 18, 2016 Share Posted October 18, 2016 9 hours ago, ThomasPowers said: Lou, out here you could just get a container and hold the anvil over it and wait for the wind to fill it with sand to where you want it! (Walking across the border during the windy season you can get an "ear full" as well as the free dermabrasion) Fool that I am I would likely get lazy and run out to the landscaping company and buy a load to be dumped in my truck. Though, I do have a seemingly endless supply of clay 2"+ under my entire back yard. Quote Link to comment Share on other sites More sharing options...
Urthman Posted October 18, 2016 Author Share Posted October 18, 2016 Hi Thomas, Thanks for chiming in. I count (4) handling holes: two in the waist (nose/tail), one in the foot (nose) and one underneath. Quote Link to comment Share on other sites More sharing options...
ThomasPowers Posted October 18, 2016 Share Posted October 18, 2016 Yes it always surprised me when folks were getting fussy about finding and buying clay; seems like most places I've lived it was free for the taking. Even out here I can go "mine" it in the local arroyo in the large pools that dry out leaving the clay nicely layered in thick plates---got to have a clay rich soil for good adobe! Urthman; be tonight before I'm collocated with my copy of Anvils in America. Quote Link to comment Share on other sites More sharing options...
SReynolds Posted October 20, 2016 Share Posted October 20, 2016 The best thing for my anvil wad a grinder. I didn't have a 4" angle to use but a 2" pneumatic did wonders. Imagine an old anvil with corners so sharp they cut you. Yea, I had to grind that thing. It literally cut the stock with a half on/off hammer blow. No good. I even nicely rounded the face plate near the end of the heel to 1/4" radius. Real sweet for small scrolls. You can BUY anvils with rounded heel corners ! Quote Link to comment Share on other sites More sharing options...
ThomasPowers Posted October 20, 2016 Share Posted October 20, 2016 4 handling holes turns out to not be very specific. Postman mentions Mousehole (after 1900 4 holes); Peter Wright (after 1852 4 Holes, flats along the top of the feet); Wilkinson (Toward the end of the 19th century 4 handling holes), Henry Wright (looks like PW); American (4HH); Arm and Hammer the first models had 4 HH by about 1910 *no* HH, hammer marks under heel is distinctive---this is from Postman's "Quick Identification of Major Anvil Groups and Makes" pg 448. Strongly suggest an in depth perusal of the book to read up on the various details covered in the prior 447 pages! Quote Link to comment Share on other sites More sharing options...
Urthman Posted October 20, 2016 Author Share Posted October 20, 2016 Well, that narrows it down! ;-) Thanks Thomas- I certainly appreciate your looking it up for me. Some mysteries are not meant to be solved. . . and I'm ok with that. Quote Link to comment Share on other sites More sharing options...
Nobody Special Posted October 20, 2016 Share Posted October 20, 2016 I've got it's smaller twin, including the tiny hole in the feet, and the only stamping I can read on it is ENGLAND. Quote Link to comment Share on other sites More sharing options...
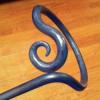
Urthman Posted November 2, 2016 Author Share Posted November 2, 2016 Well folks, I've been using this anvil a LOT lately, and really enjoying it. But as the face shines up, I've noticed quite a few hairline cracks along the edge. One edge of the anvil is fairly sharp- and this is where all the cracks are. The other edge is pretty rounded, and I haven't noticed any cracking on that side. Here's a pic. Should I do anything to keep these cracks from getting worse? Would it help if I eased this sharp edge a bit? If any of you have had an anvil in similar condition, please let me know what you'd do. Your advice is most welcome: especially you've been through this scenario... THANKS! -Jeremy Quote Link to comment Share on other sites More sharing options...
ThomasPowers Posted November 2, 2016 Share Posted November 2, 2016 Sharp and cracked often means someone repaired it and did it WRONG! (Arc welding without proper pre/post heat, wrong rod, etc) Is it impacting your work? Doing a full fix is expensive in time and materials. Basically you have to remove the bad repair and redo it correctly. Easing the edge should help some. I would use it until it was a major issue---who knows the horse may sing! Quote Link to comment Share on other sites More sharing options...
forgedinfire123 Posted November 2, 2016 Share Posted November 2, 2016 she looks like a peter wright.... Quote Link to comment Share on other sites More sharing options...
Recommended Posts
Join the conversation
You can post now and register later. If you have an account, sign in now to post with your account.