Urthman
-
Posts
107 -
Joined
-
Last visited
Content Type
Profiles
Forums
Articles
Gallery
Downloads
Events
Everything posted by Urthman
-

Champion 101 post drill repair
Urthman replied to Urthman's topic in Drills, Post drills, Mag drills, etc
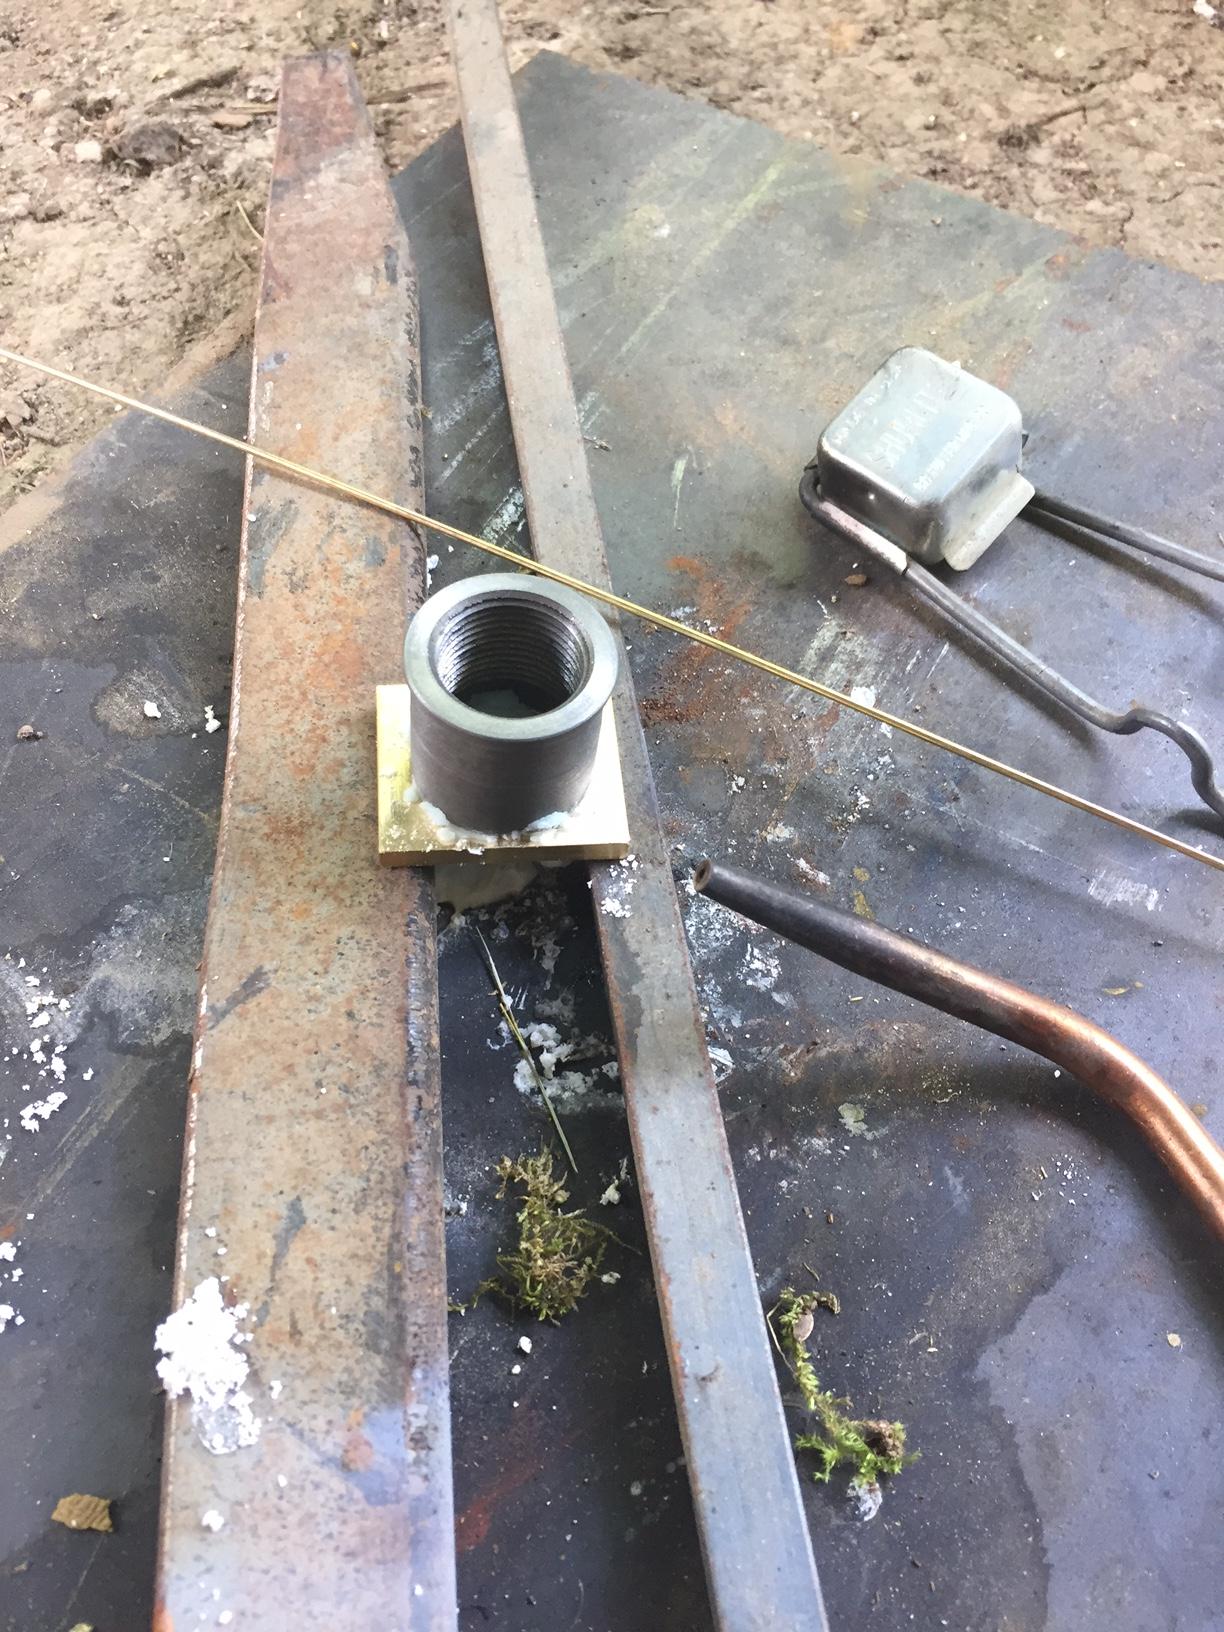
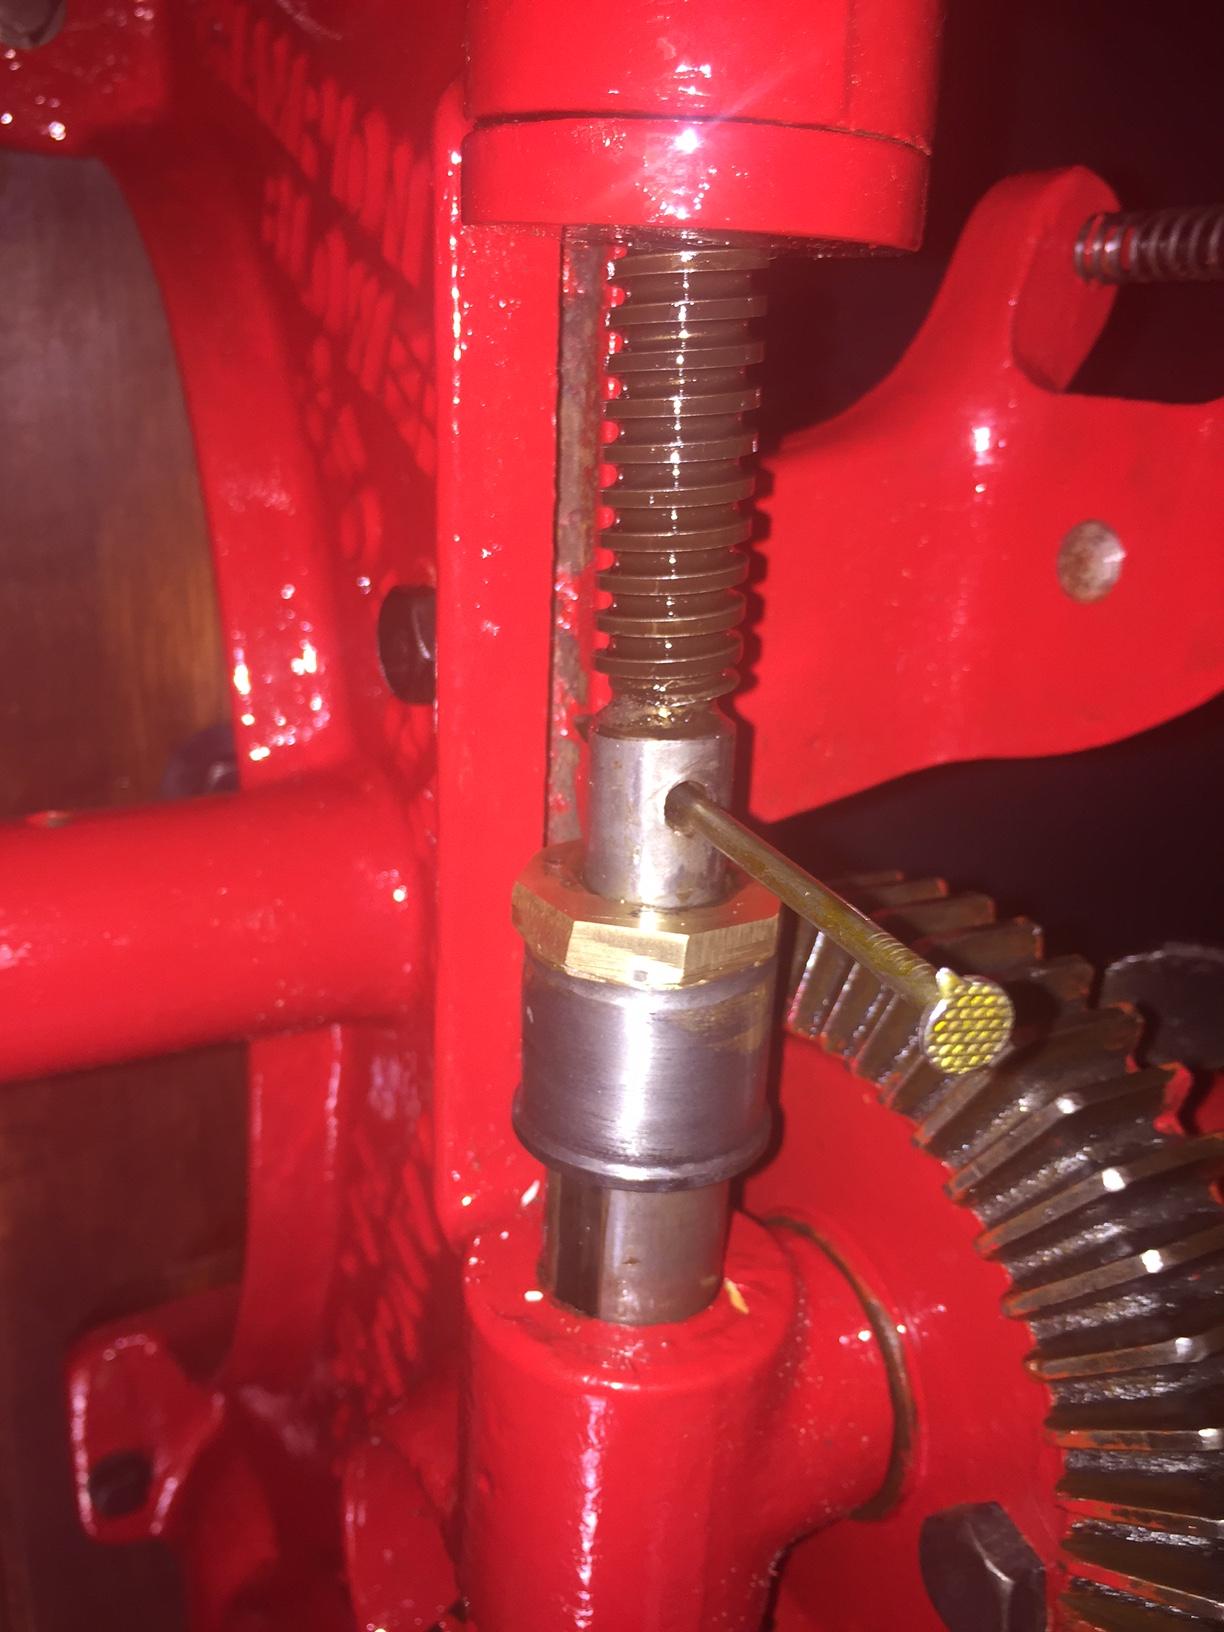
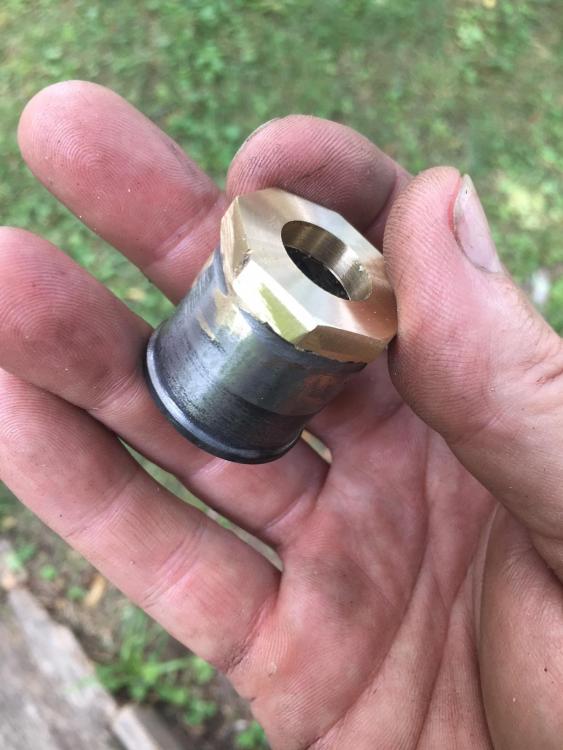
Well, I bought a lathe. I've been wanting one for years, and this project finally spurred me on to get one. I've been having a blast learning how to work the thing. I ended up using the part above to make the 'nut'. I machined it down to round, brazed a plate to the top, and drilled a hole in it. It seems to do the job. Now that I own a lathe, I may try making this part again from a solid piece of brass hex stock. I also fabricated a new cam follower wheel (and added a bushing) since the original was totally out of round and wouldn't spin any more. A few more parts to tweak, and I'll be ready to put this drill into action...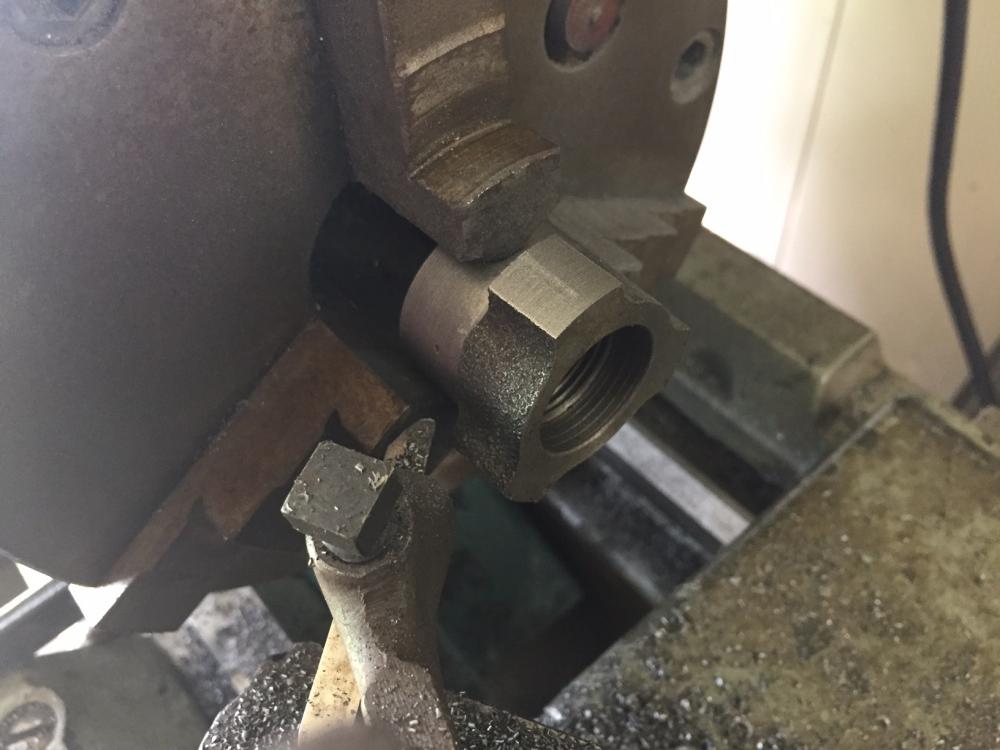


-
Champion 101 post drill repair
Urthman replied to Urthman's topic in Drills, Post drills, Mag drills, etc
Yeah, the threads are completely stripped. I can slip the nut practically all the way on without turning it. I got the drill all painted up and reassembled. Not the original color I'm sure, but it will look good on the wall. The original wood plank had a cool "1914" date stamp on the back, so I saved it- just sanded it down and threw some linseed oil on it. I'll probably put a modern chuck on it. Last bit of work is a metal pin to go where this 'skewer' is stuck now, and then fabricate the nut to join the two shafts. I'm talking myself into acquiring a lathe, which would certainly help on projects like this. Been browsing Northern Virginia Craigslist lately. . .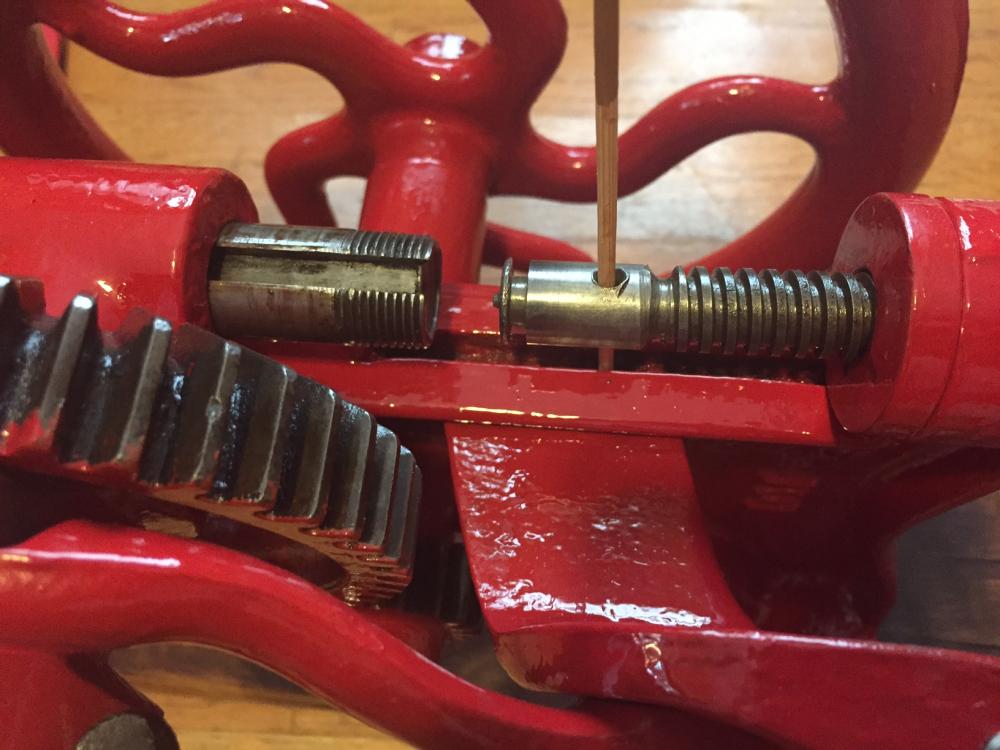
-
Champion 101 post drill repair
Urthman replied to Urthman's topic in Drills, Post drills, Mag drills, etc
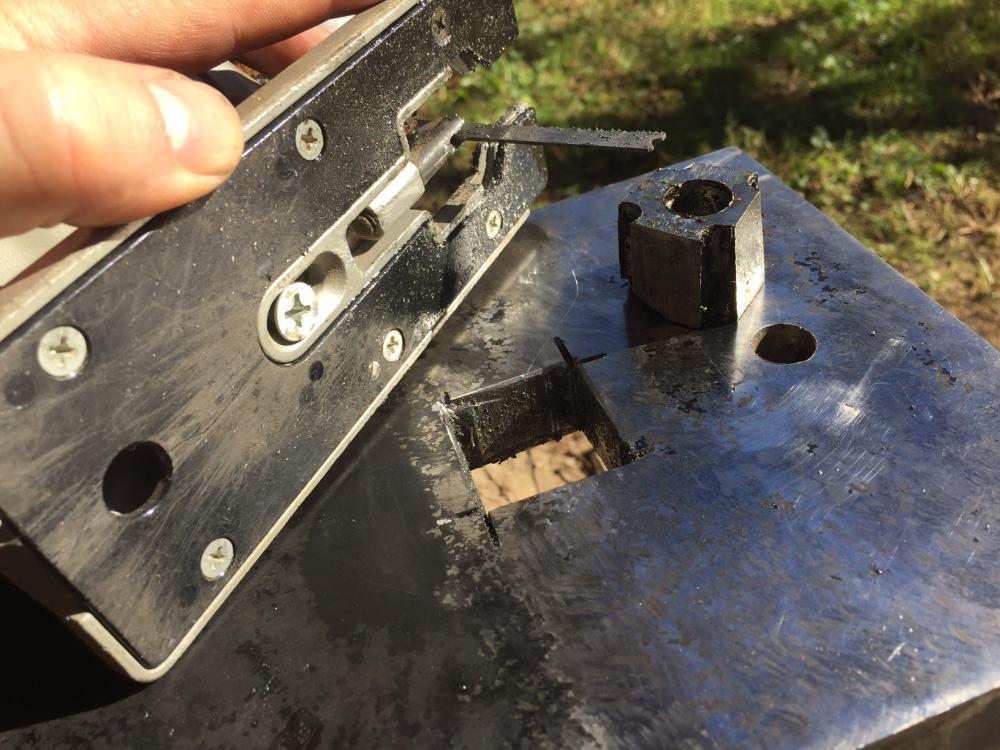
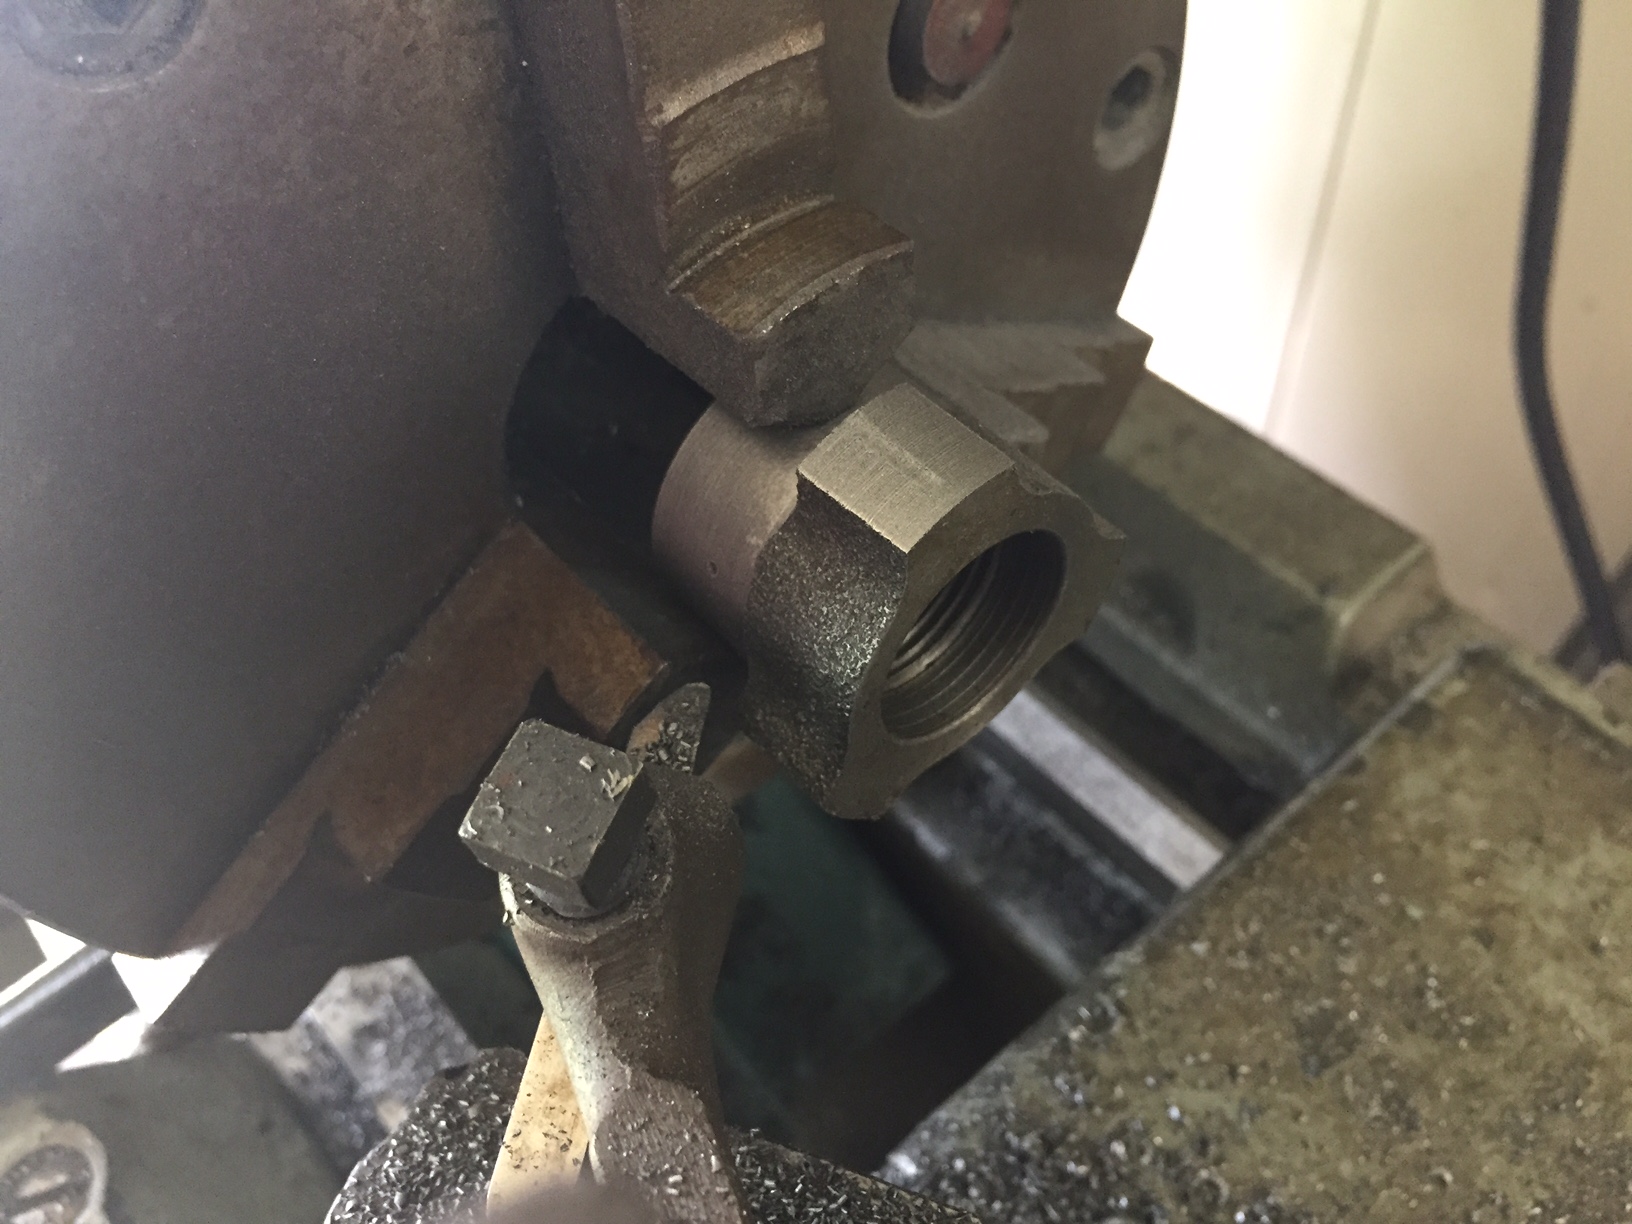
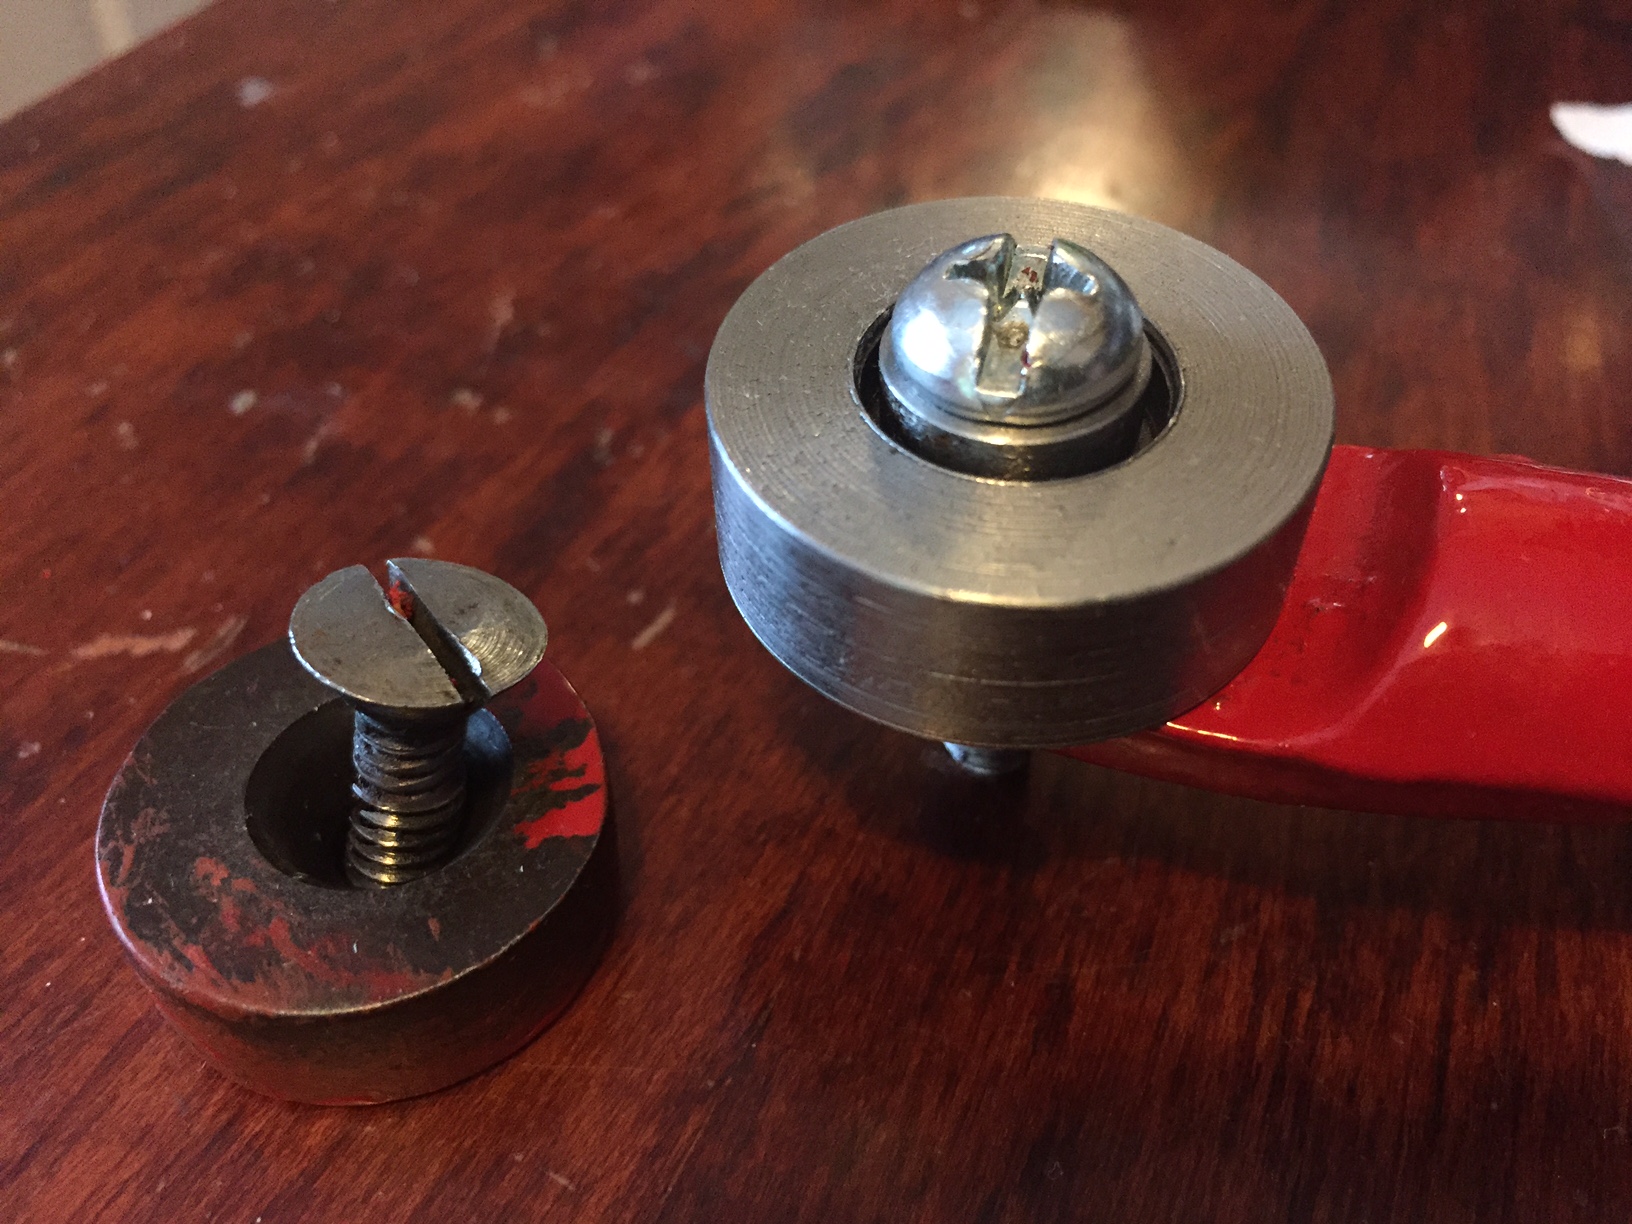
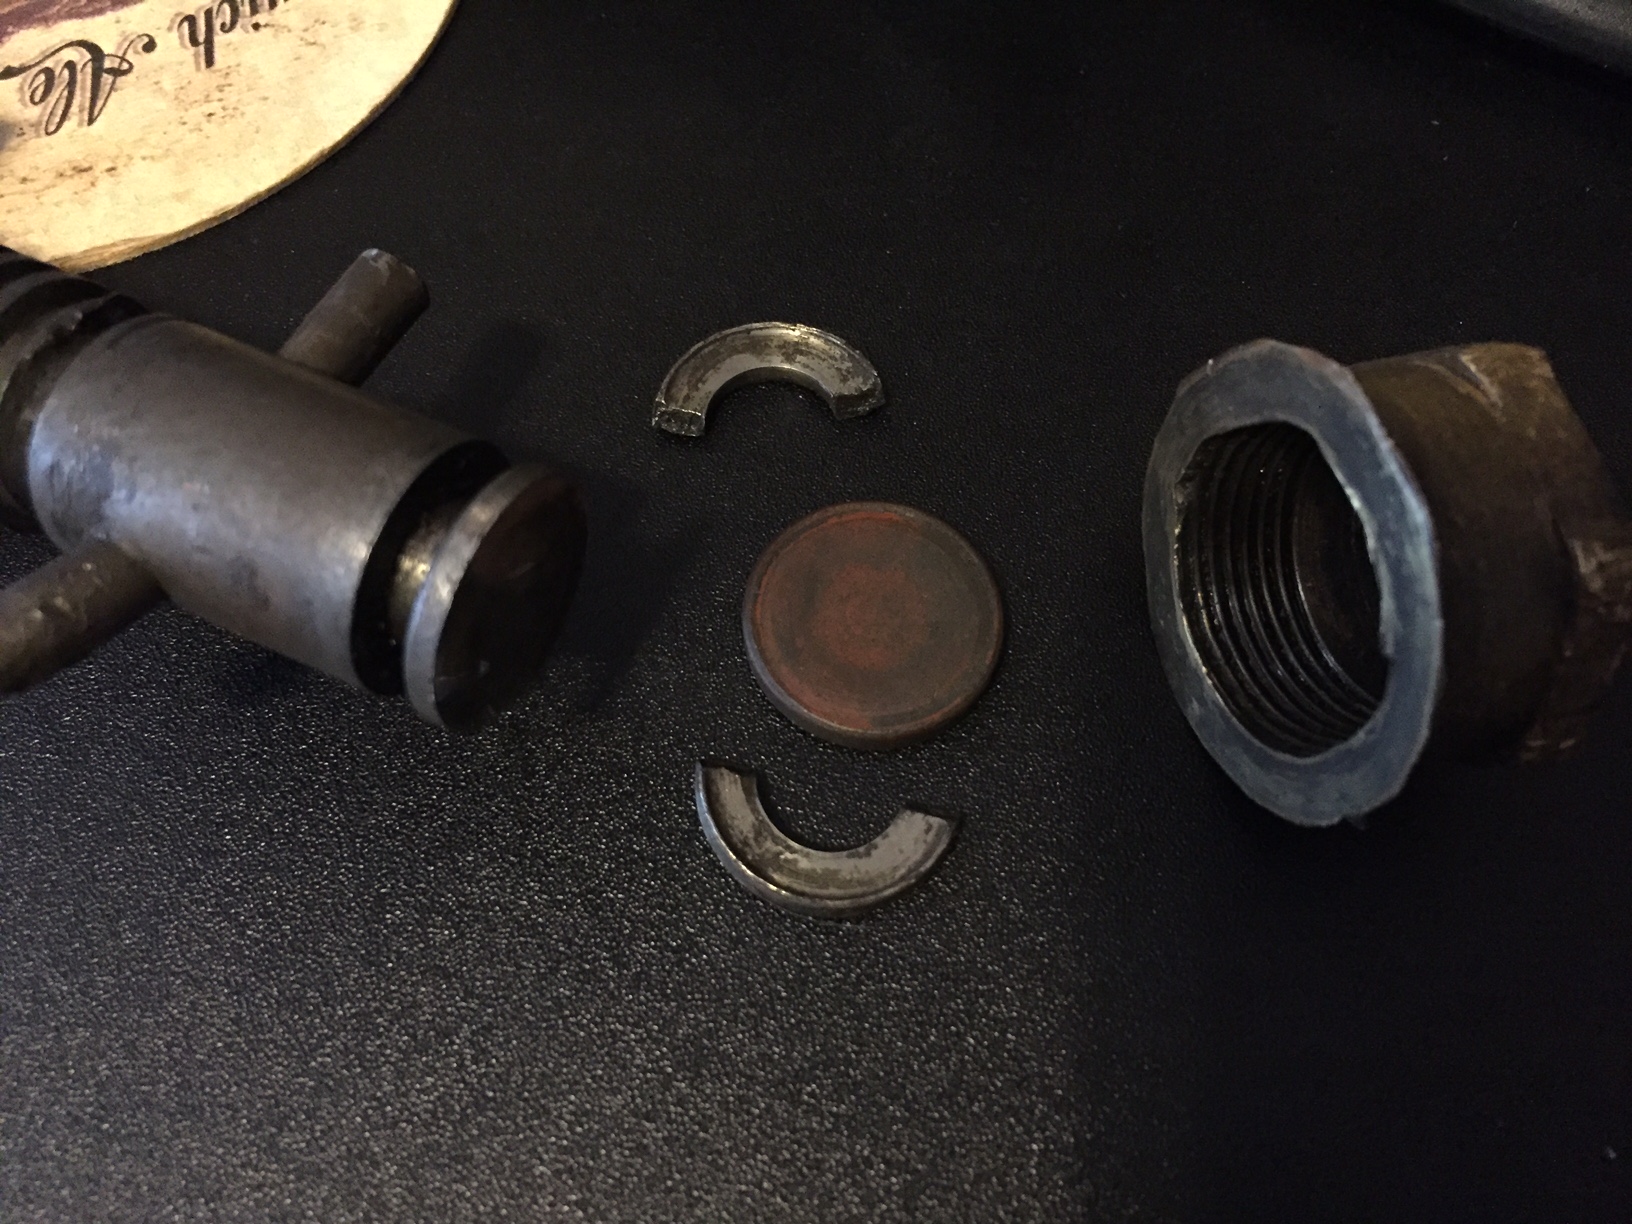
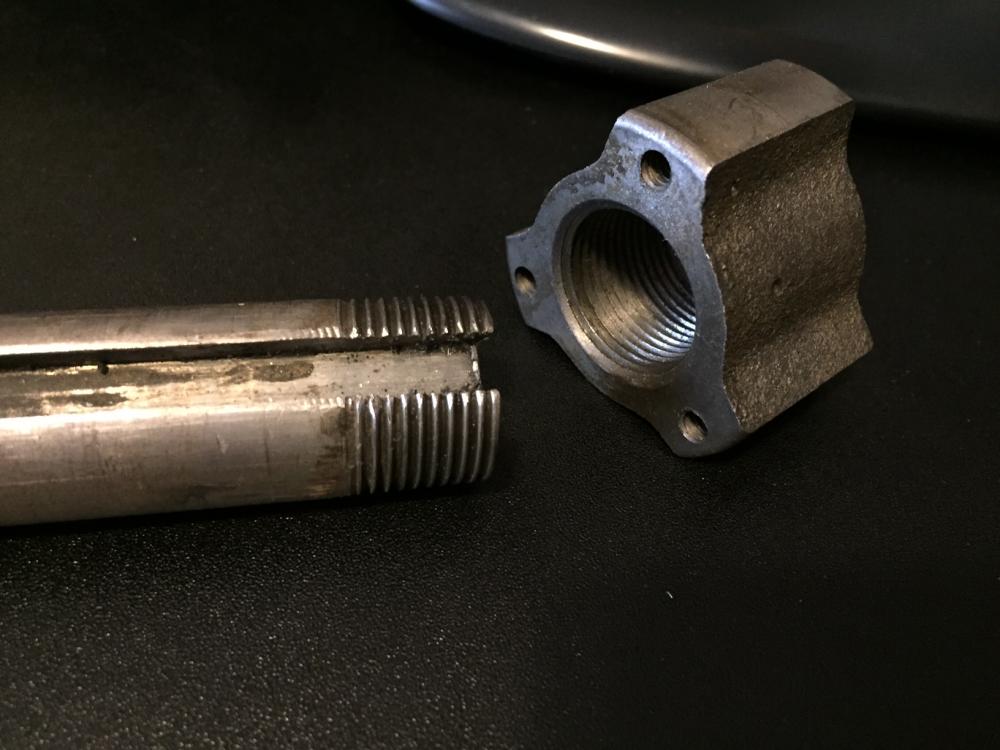
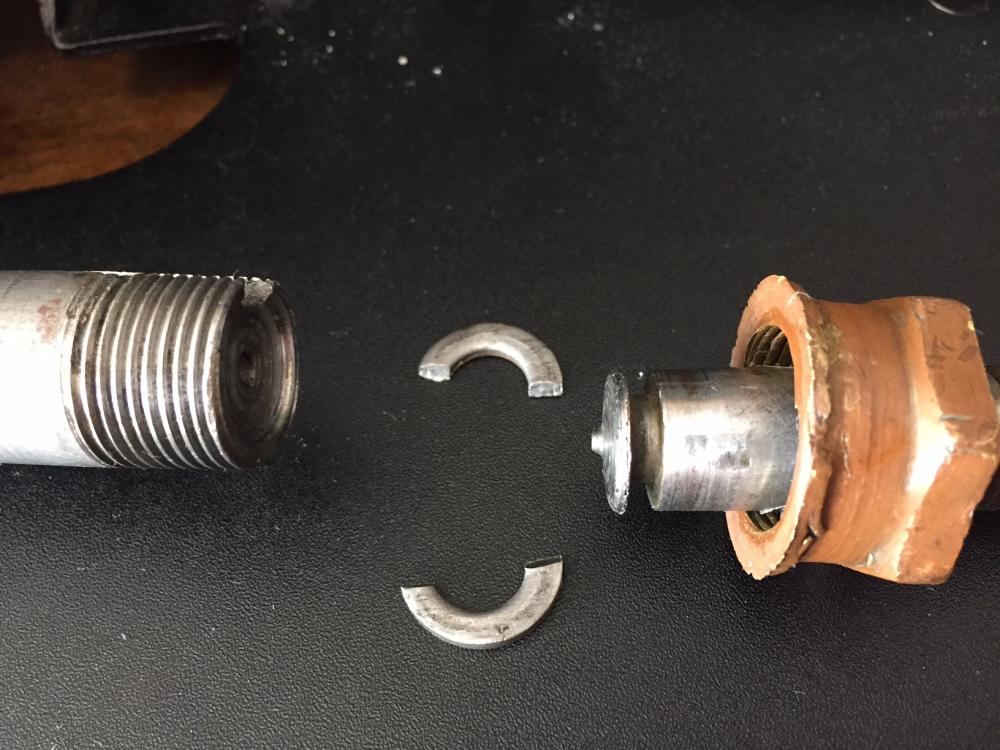
Thanks for the replies guys. Great ideas. I measured the original threads, and they are pretty wacky. 7/8-16 LeftHand. I couldn't find anything 'off the shelf' that had the same threads. Definitely not a plumbing part. I took a chance on some Ebay parts that looked like they'd work: nut, spindle, keepers, and some sort of non-metalic disk that rode between the two shafts. The parts looked correct, but unfortunately are made for a beefier drill (1" diameter, not 7/8") Oh well. I'll put the parts back on Ebay. . . I *did* find a part that looks promising with some modification. It's some sort of lathe insert I bought from Grizzly. The threads are a match. Picture of the part is below. My current plan is drill a hole in some brass plate and braze it to the end of the insert to re-create this part. (I don't own a lathe) Here's a picture of that lathe part- oh, and a picture of the parts that will go on Ebay, in case anyone here is interested in them.
-
Champion 101 post drill repair
Urthman replied to Urthman's topic in Drills, Post drills, Mag drills, etc
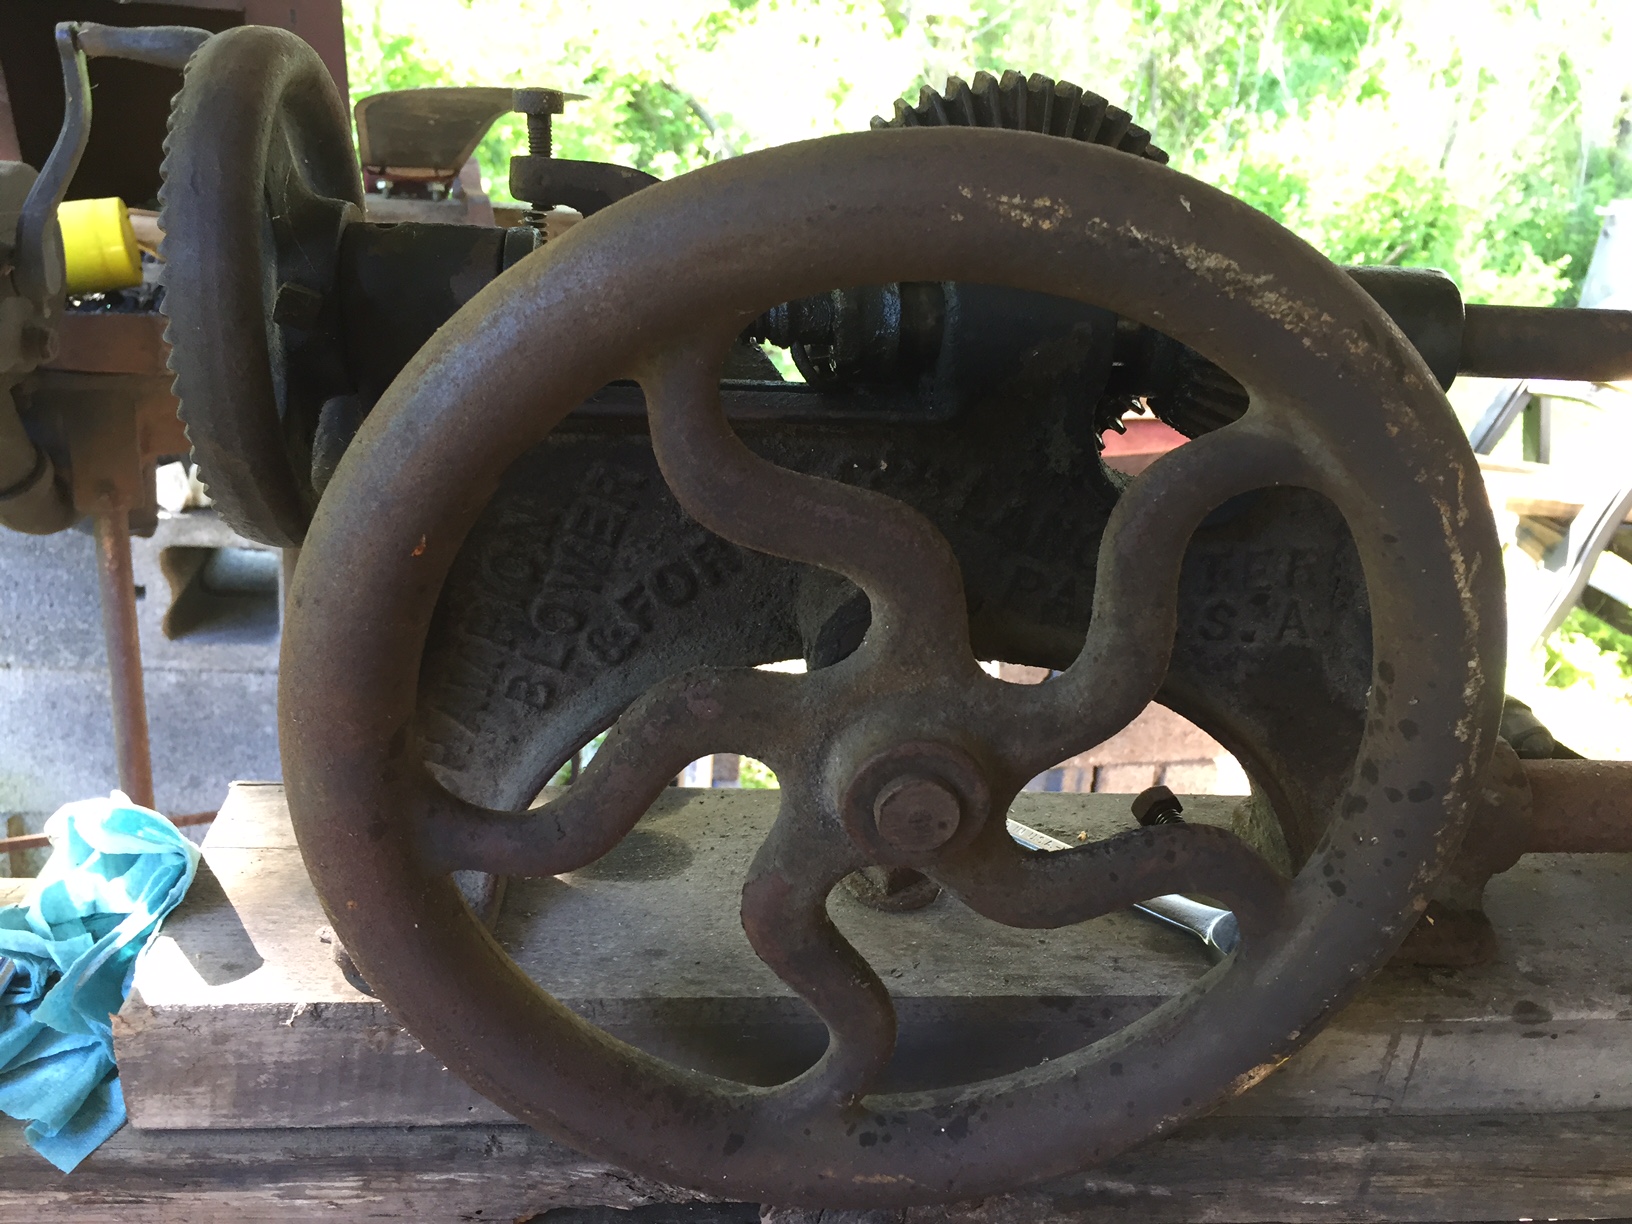
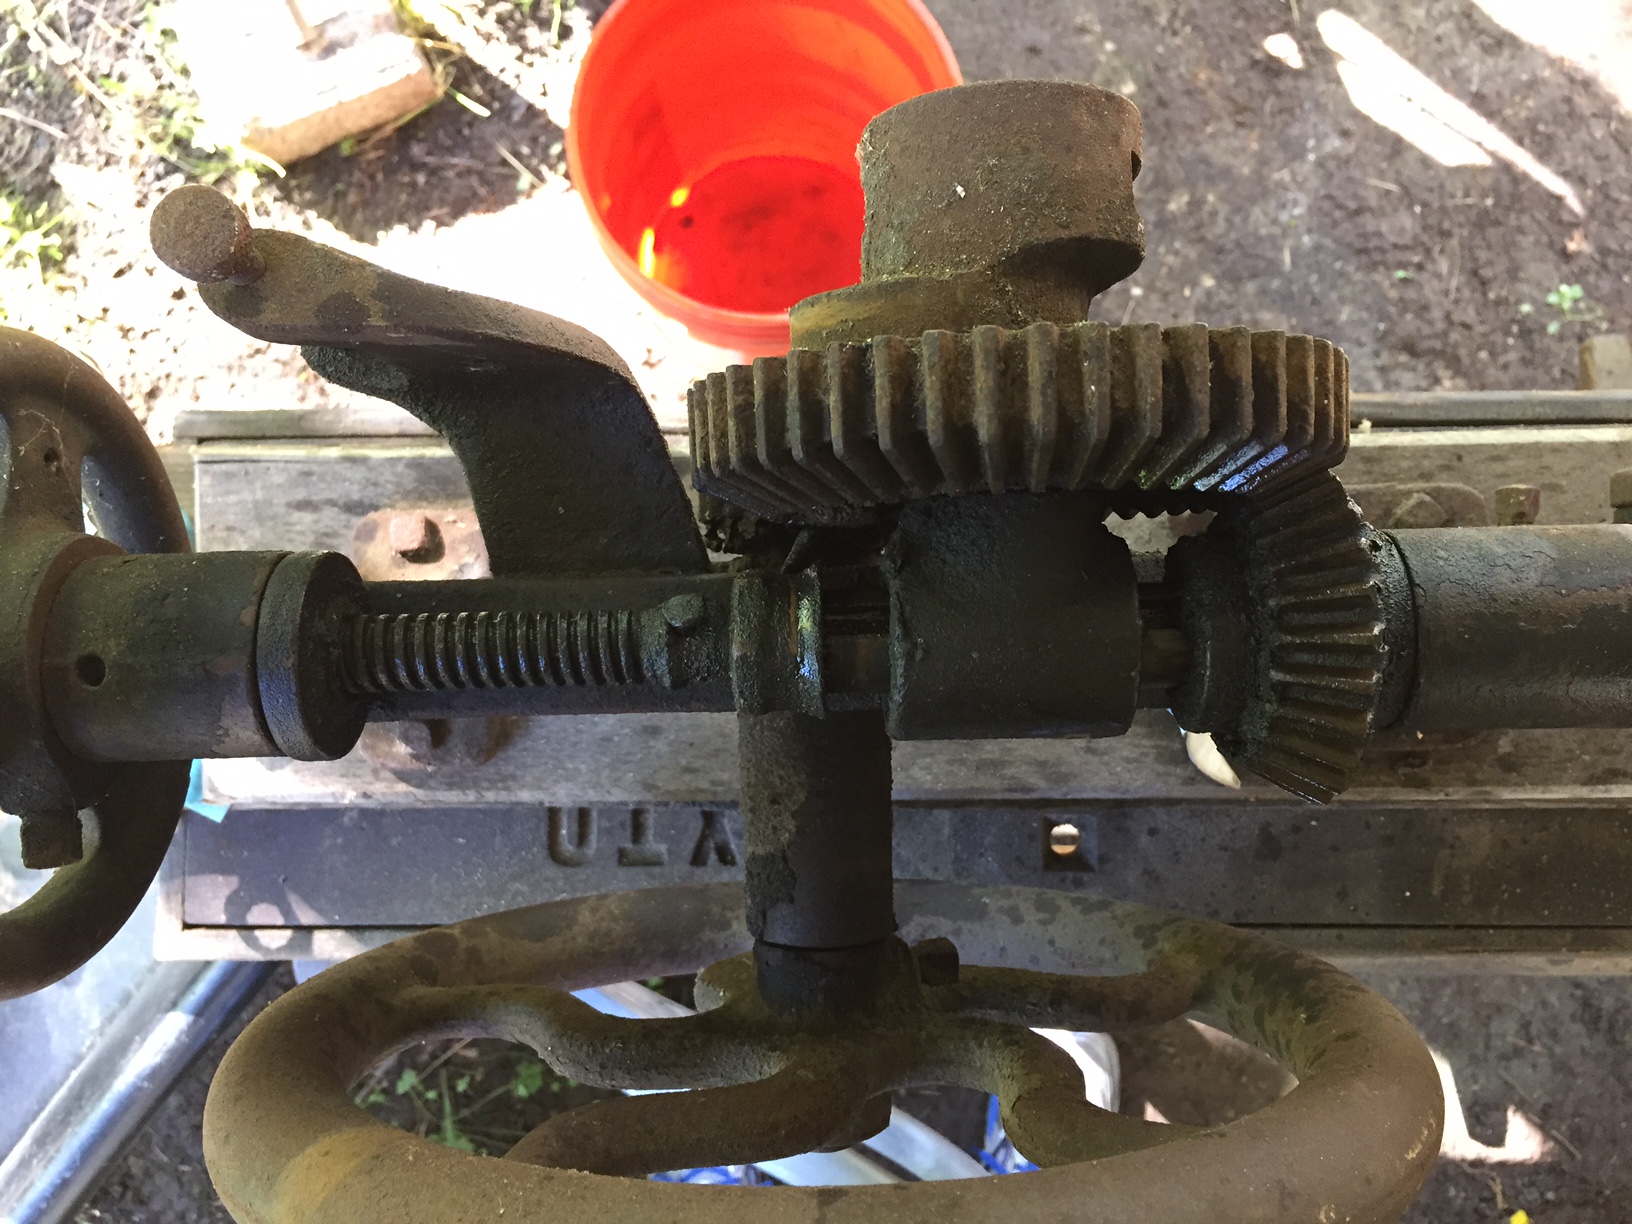
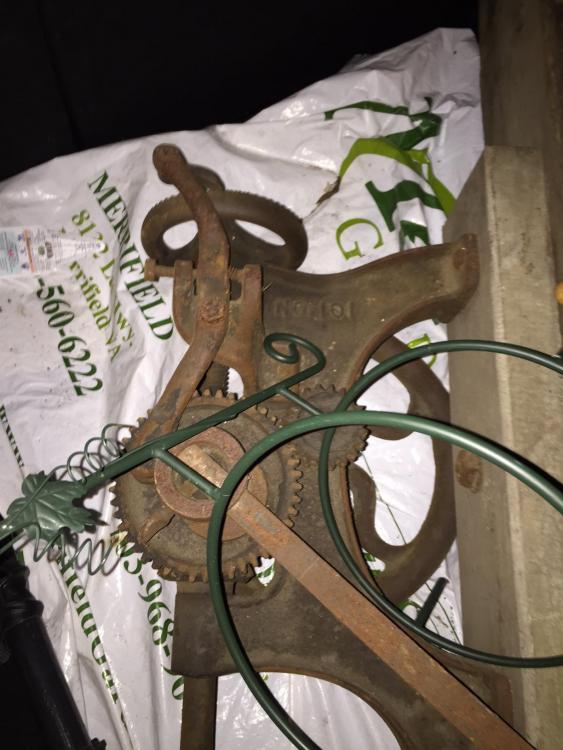
I'm adding a couple pics of the degreasing progress, just because I find bare iron to be quite pretty.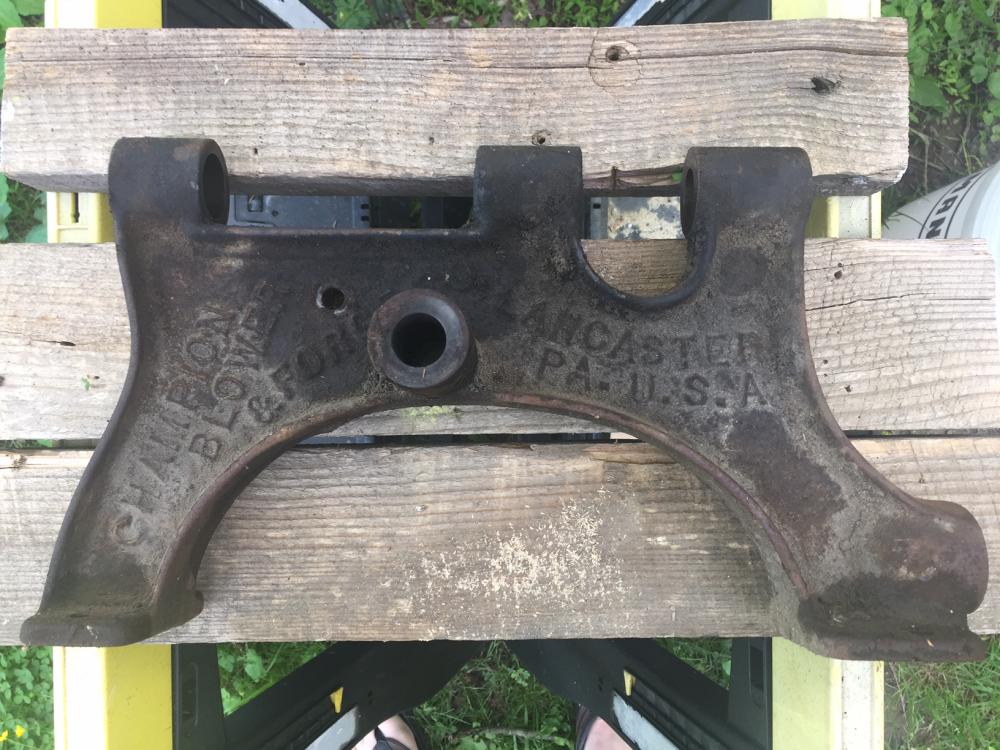
-
Champion 101 post drill repair
Urthman replied to Urthman's topic in Drills, Post drills, Mag drills, etc
Sorry, I didn't take a good 'complete' shot before disassembly, but here are some detail pics...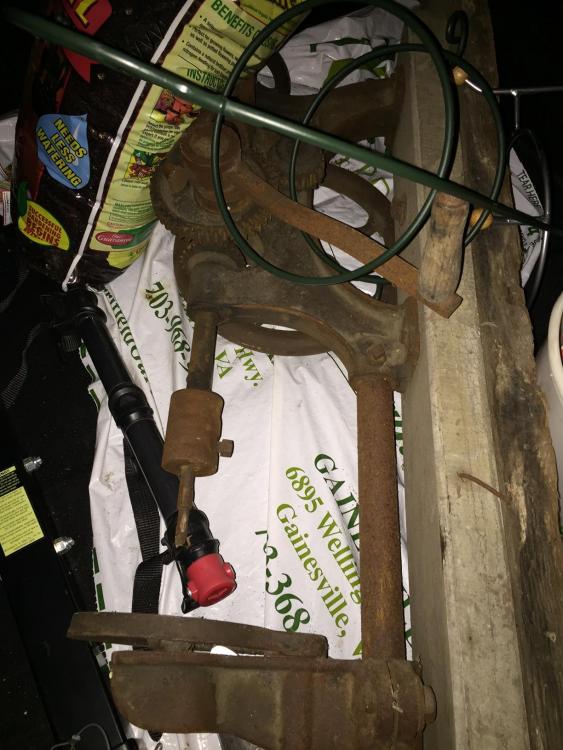


-
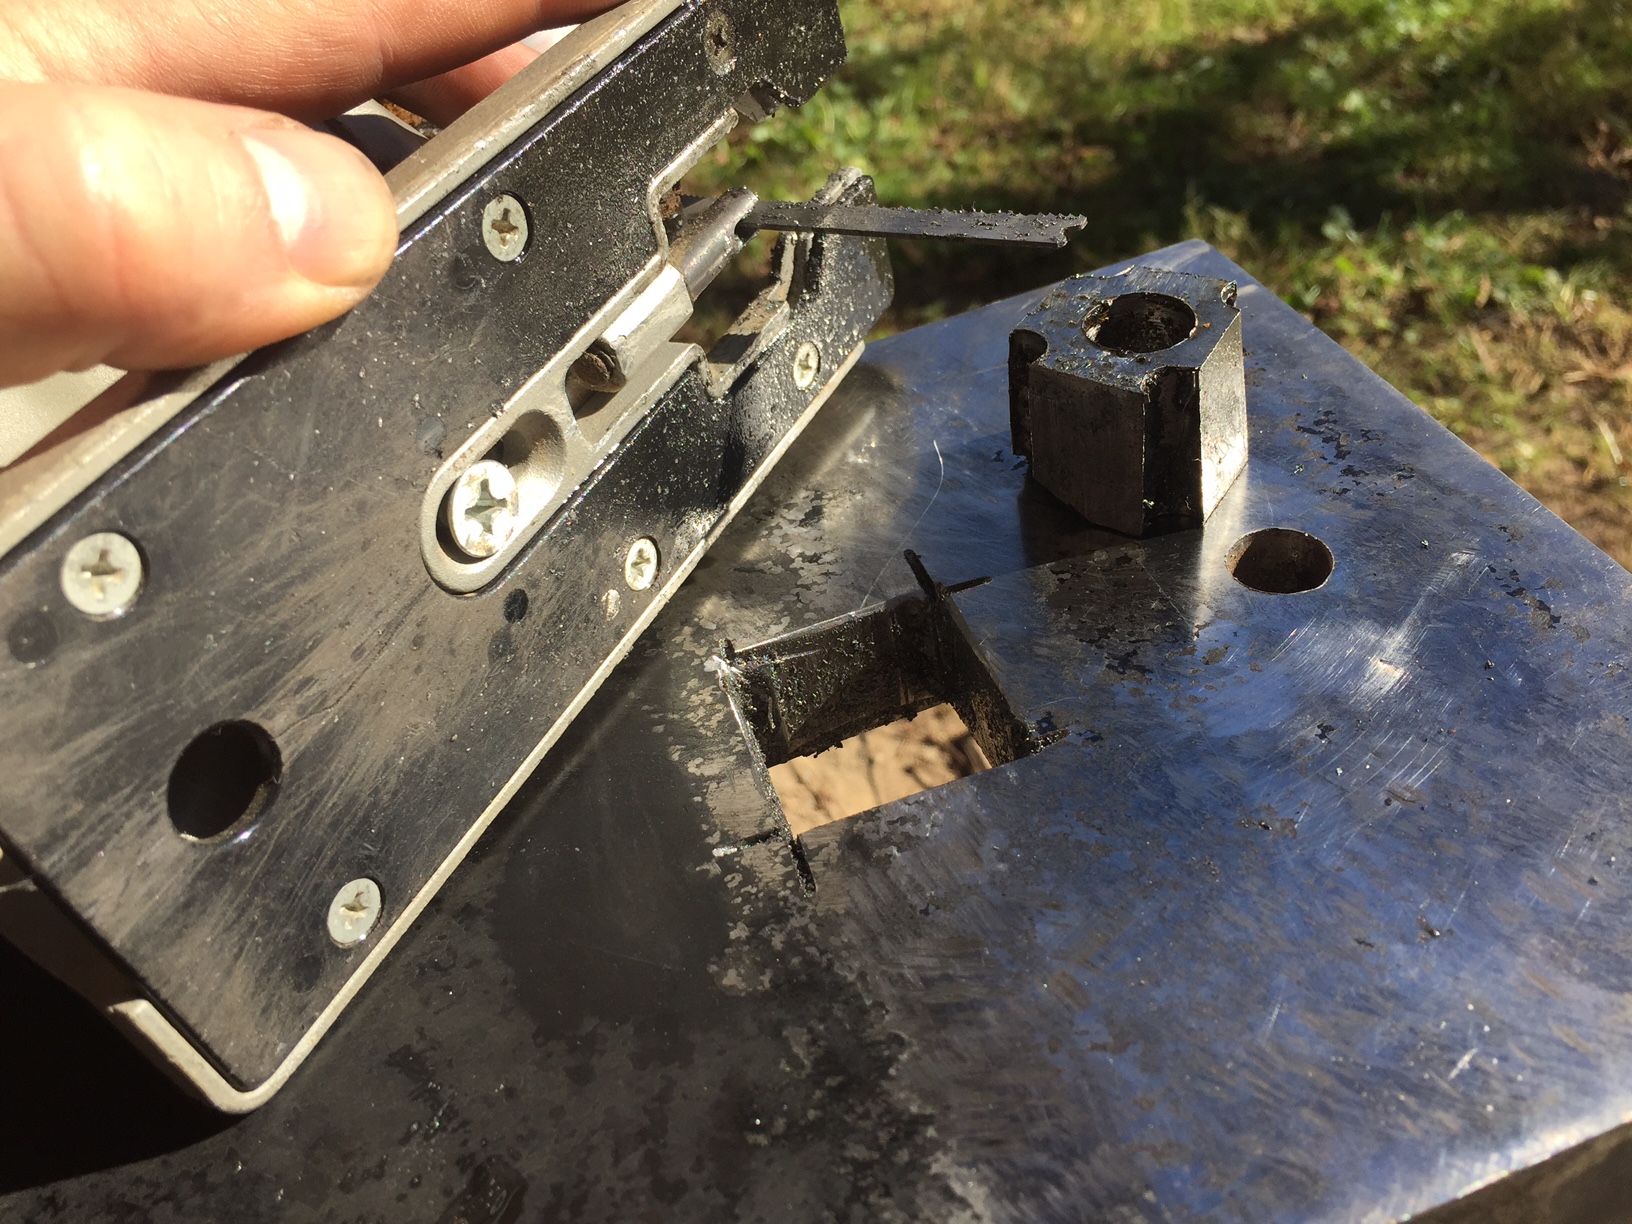
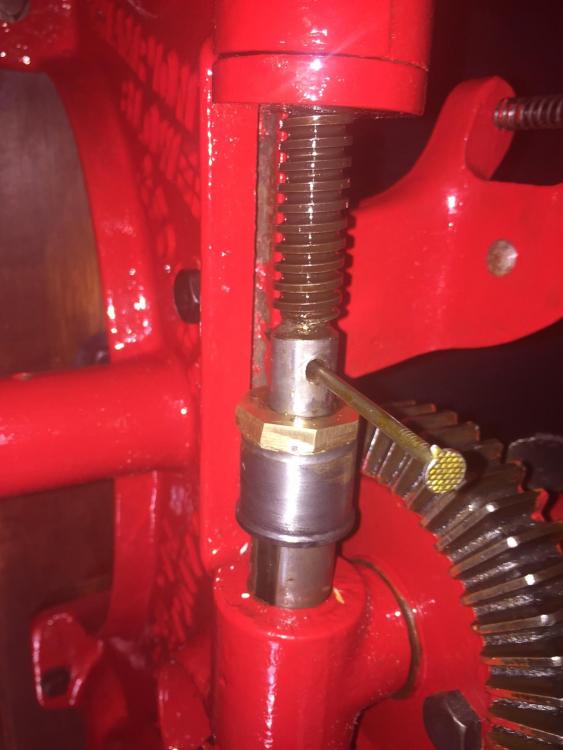
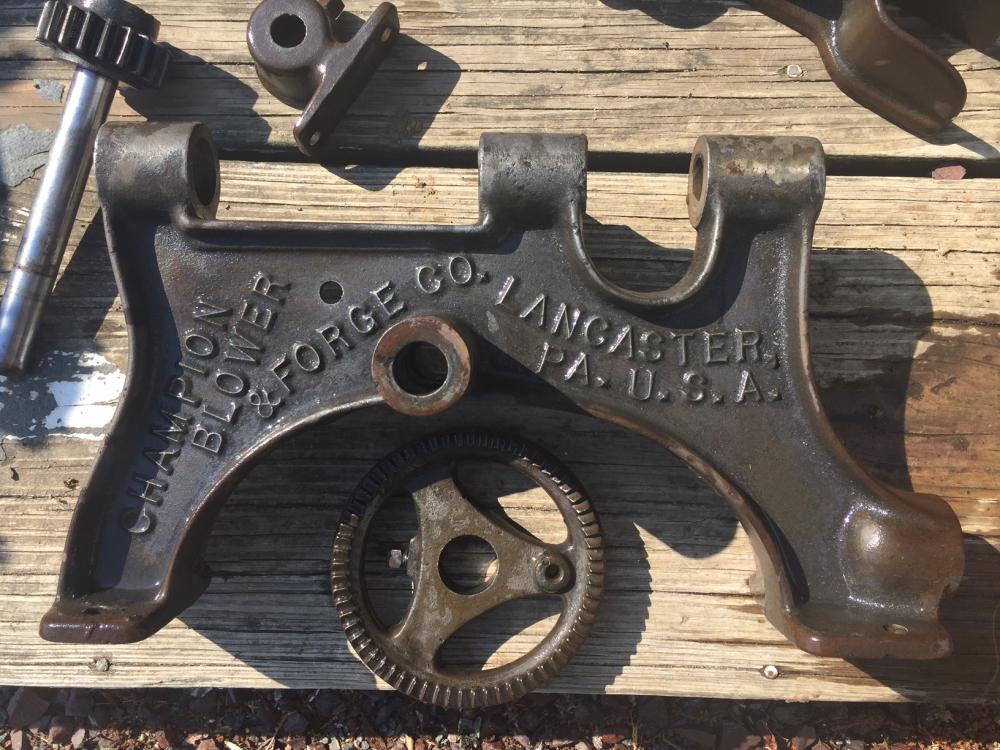
Is there a Post Drill Doctor in the house? My father in law was cleaning out one of his sheds, and gave me an old Champion 101 post drill (score!) It's in pretty good shape, other than the part I'm picturing below. This is the connection where the downward thrust is provided, pushing the drill through the material. The threads on the brass are really chewed up, (but I'm hoping to make it work without machining a new part for that) It looks to me like parts are missing, and someone clipped a washer in half to make a 'keeper'. Questions: 1) "Washer halves" look wrong. Should I make a U-shaped part to fit this slot? 2) Shouldn't there be some sort of bearing here? Something between the two steel shafts? Does anyone have a similar drill, and could possible post pictures of what parts SHOULD be at this connection? Thanks all! -Jeremy
-
Thanks for chiming in guys. Wayne- Interesting design! The split feature allowing you to raise the roof is particularly clever.
-
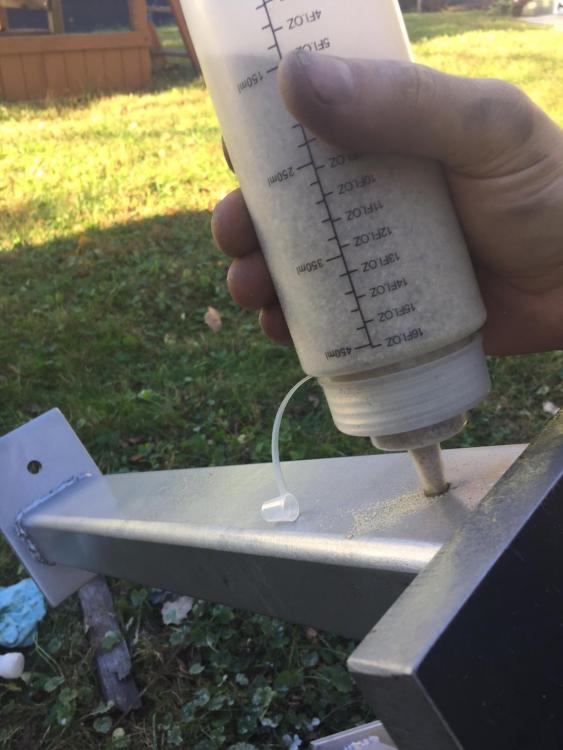
Hey folks. My propane forge has served me well, but two years of hard use have beat up the interior (kaowool with satanite coating) I'm getting ready to cast new solid interior walls (using Kast-O-lite 30). I'll still use kaowool to surround the Kast-O-lite casting. My initial plan is to cast the interior all in one piece- but I'm a bit worried about how prone to cracks a 1-piece design would be. Have any of you cast a forge interior in one piece using Kast-O-lite? How did it hold up? Should I cast the interior in several pieces, and/or add some metal mesh to bind things together? I'm very interested to hear from folks that have actually done this. Thanks!
-
My striking anvil coming together
Urthman replied to Urthman's topic in Anvils, Swage Blocks, and Mandrels
Good guess! 1-1/4" 4140. -
My striking anvil coming together
Urthman replied to Urthman's topic in Anvils, Swage Blocks, and Mandrels
We made tool #2 today...
-
My striking anvil coming together
Urthman replied to Urthman's topic in Anvils, Swage Blocks, and Mandrels
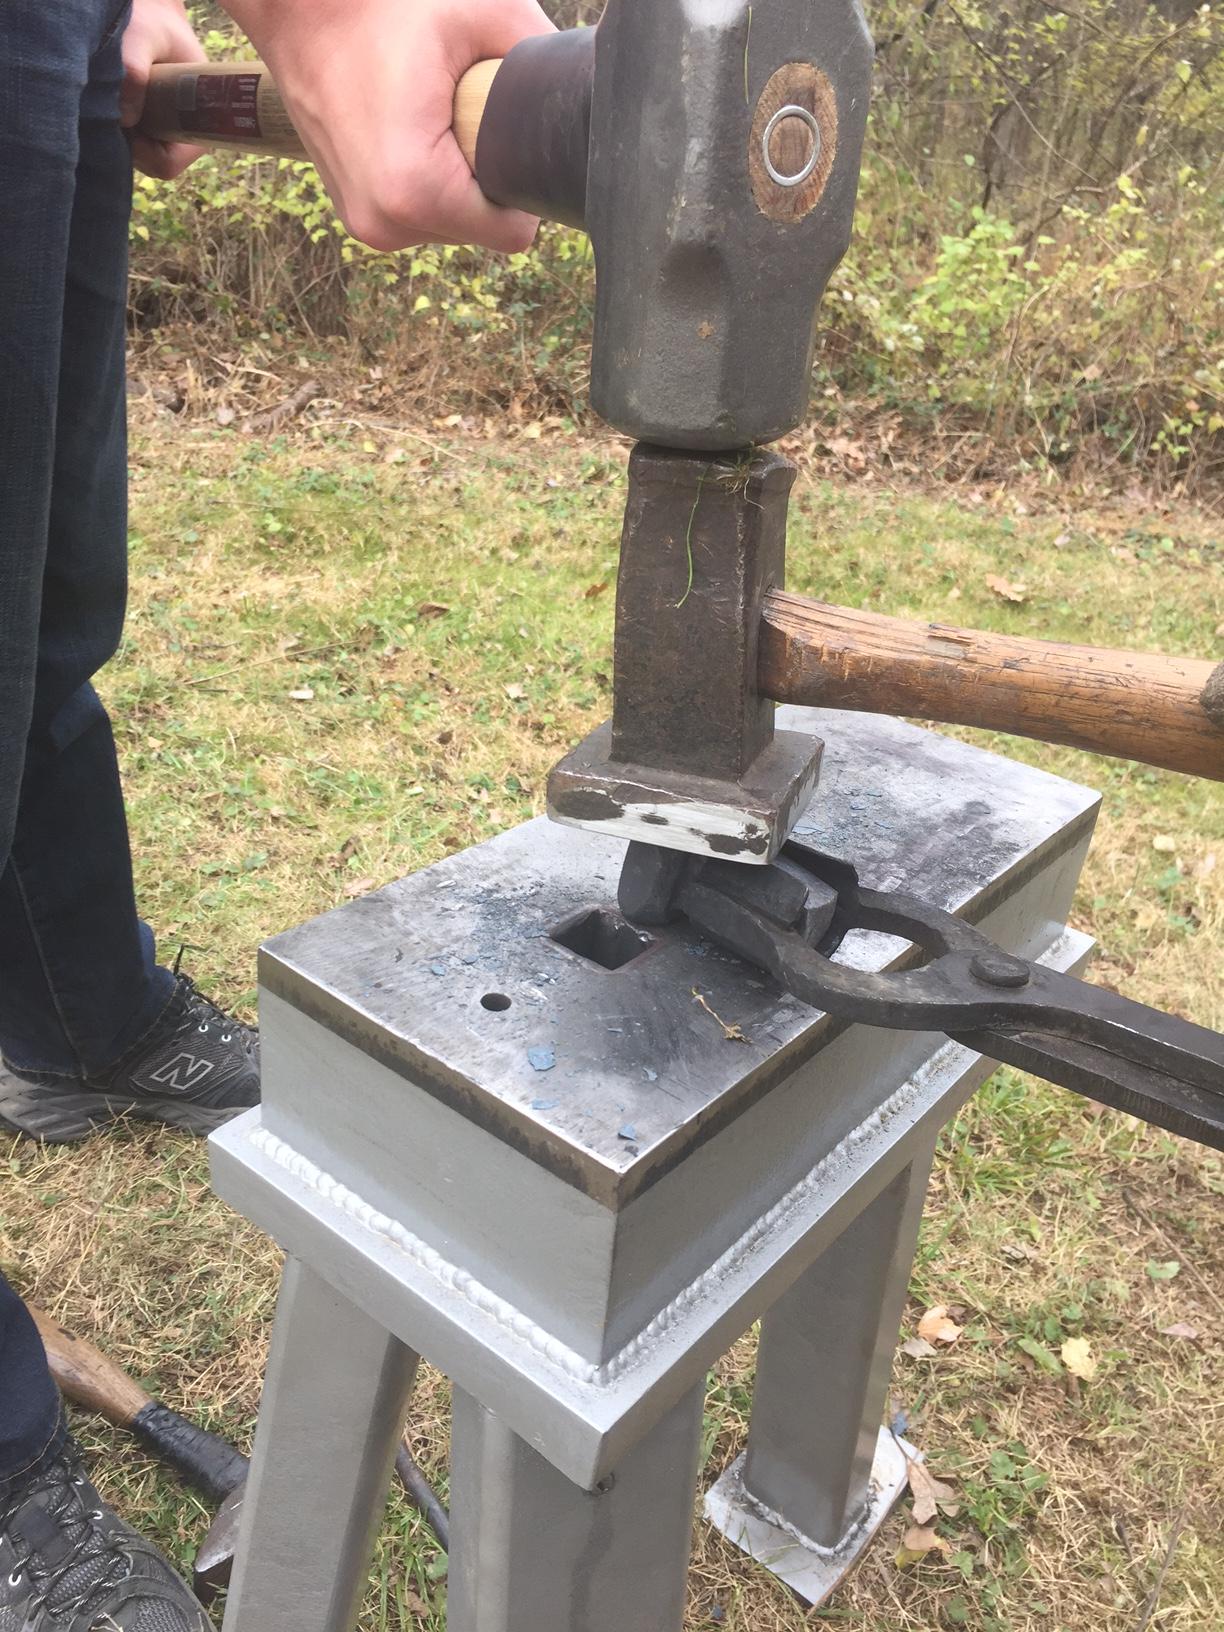
We broke in our anvil (and a new flatter) today, and made our first hardie tool. Just a simple square hardie- which came out pretty nice. 1-1/4" round 4140, forged to 1-5/8" square on the top face. Next, a cutoff tool and perhaps some round fullers...

-
My striking anvil coming together
Urthman replied to Urthman's topic in Anvils, Swage Blocks, and Mandrels
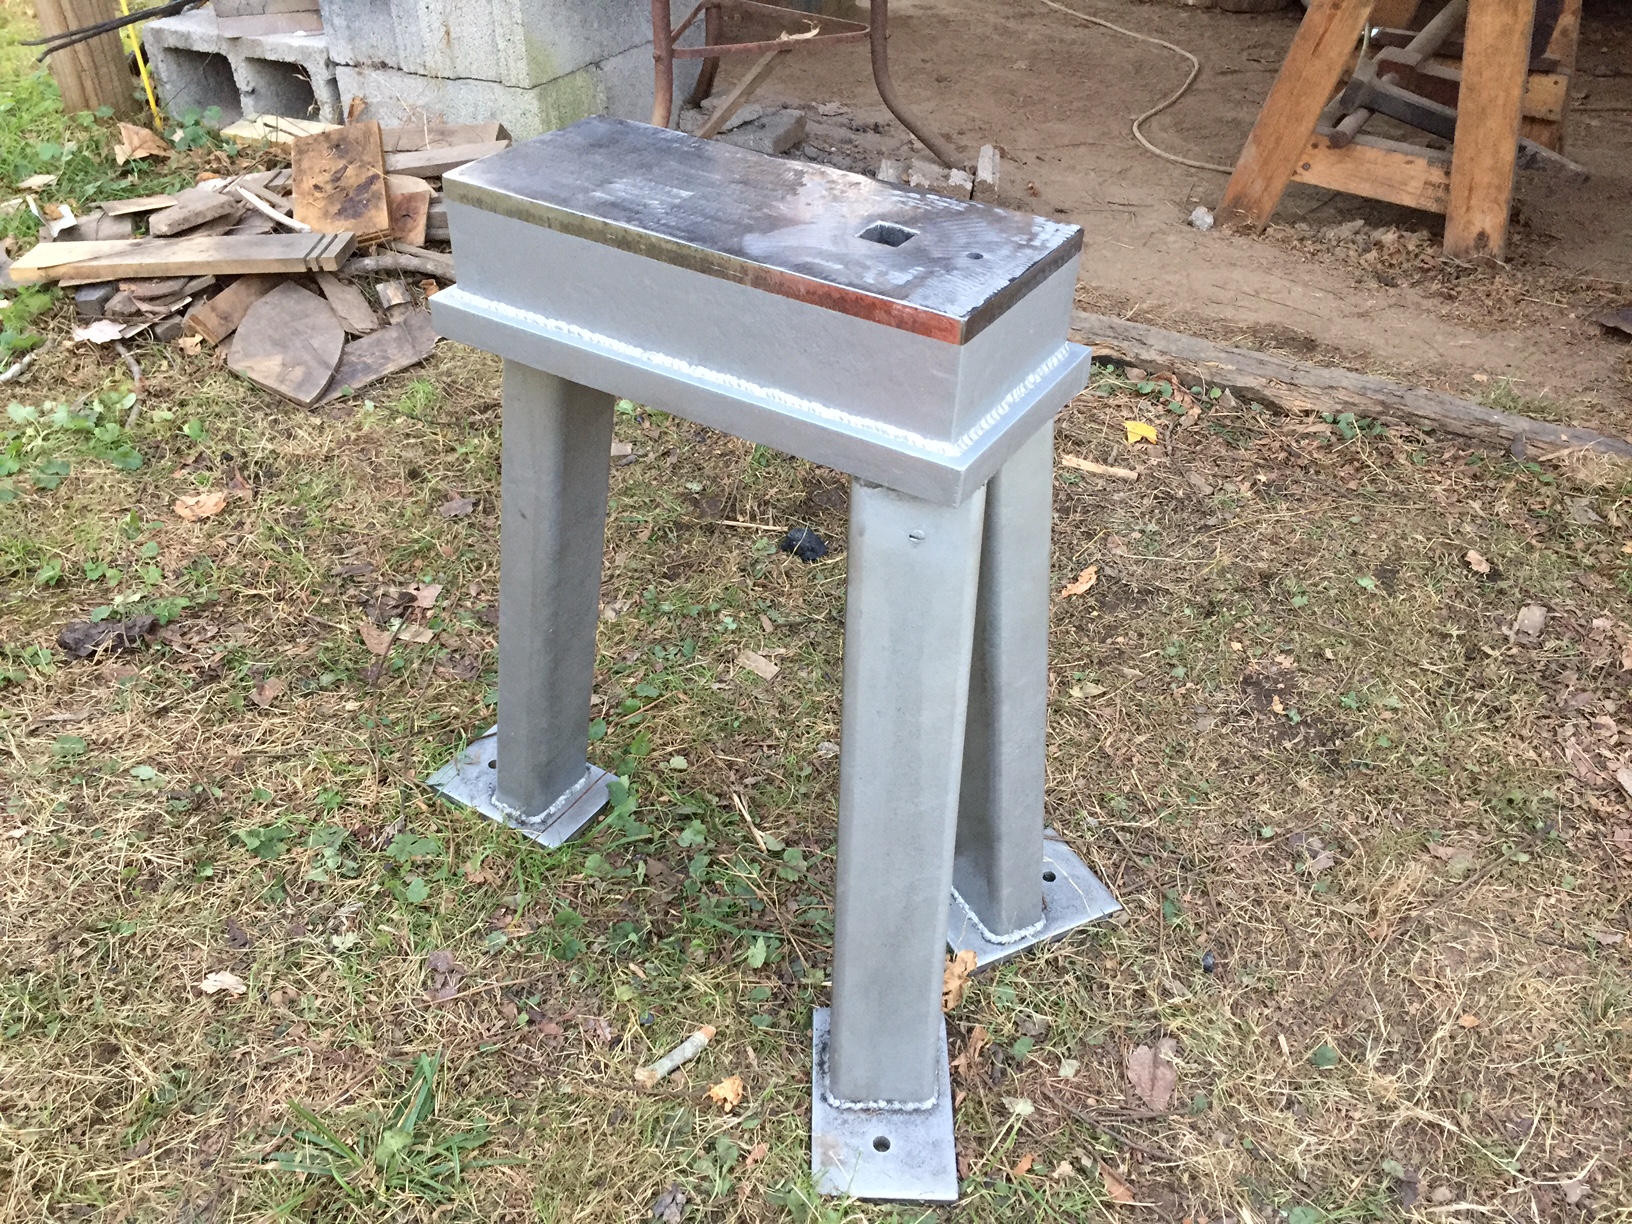
It's done! Time to put it to work...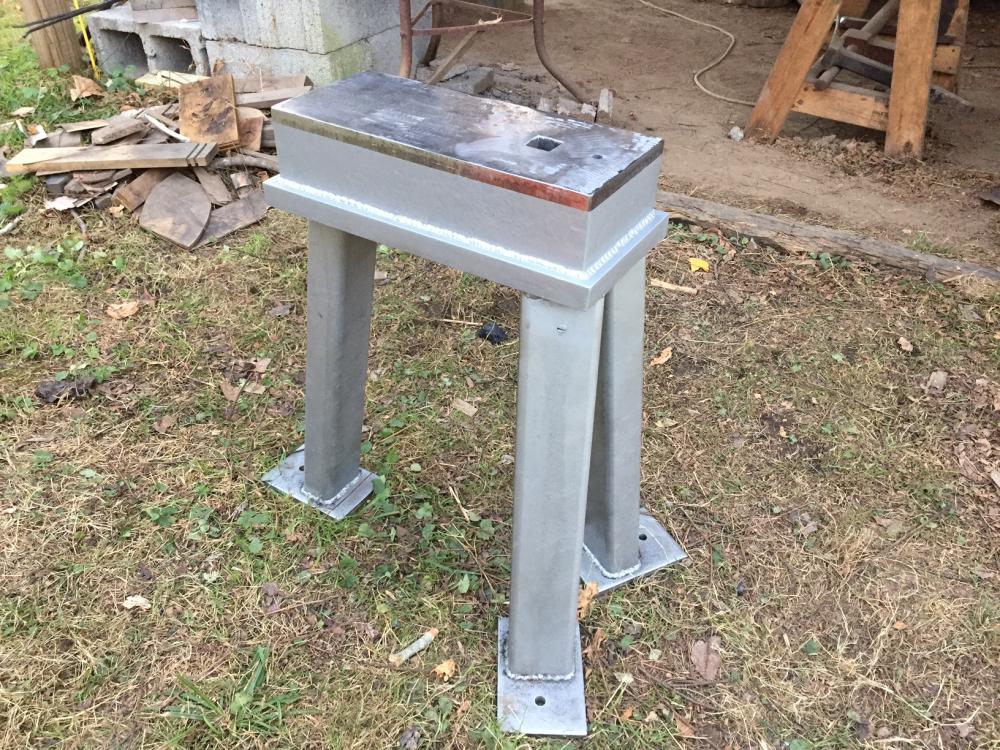
-
My striking anvil coming together
Urthman replied to Urthman's topic in Anvils, Swage Blocks, and Mandrels
Thanks guys! Yeah, the pit worked like a charm, and it was a lot of fun. Goro- I've been following Alec's videos- the Australian crew looked like a good time and awesome venue. The anvil is mild, and I won't be hardening it. The hardie started as a 1" drilled hole- the video shows the effort involved to drift it. Probably only 5 minutes of actual hammer time, and my heaviest sledge was only 8 lbs... -
My striking anvil coming together
Urthman replied to Urthman's topic in Anvils, Swage Blocks, and Mandrels
LOL! yep. That's what gloves are for... Yeah, it's been a nice Friday. Time for a tasty celebratory beverage... -
My striking anvil coming together
Urthman replied to Urthman's topic in Anvils, Swage Blocks, and Mandrels
It was pretty epic. Success is always most enjoyable when you're *really* not sure of the outcome. Oh, here's a goofy horribly-unedited video of the process if anyone is interested. -
My striking anvil coming together
Urthman replied to Urthman's topic in Anvils, Swage Blocks, and Mandrels
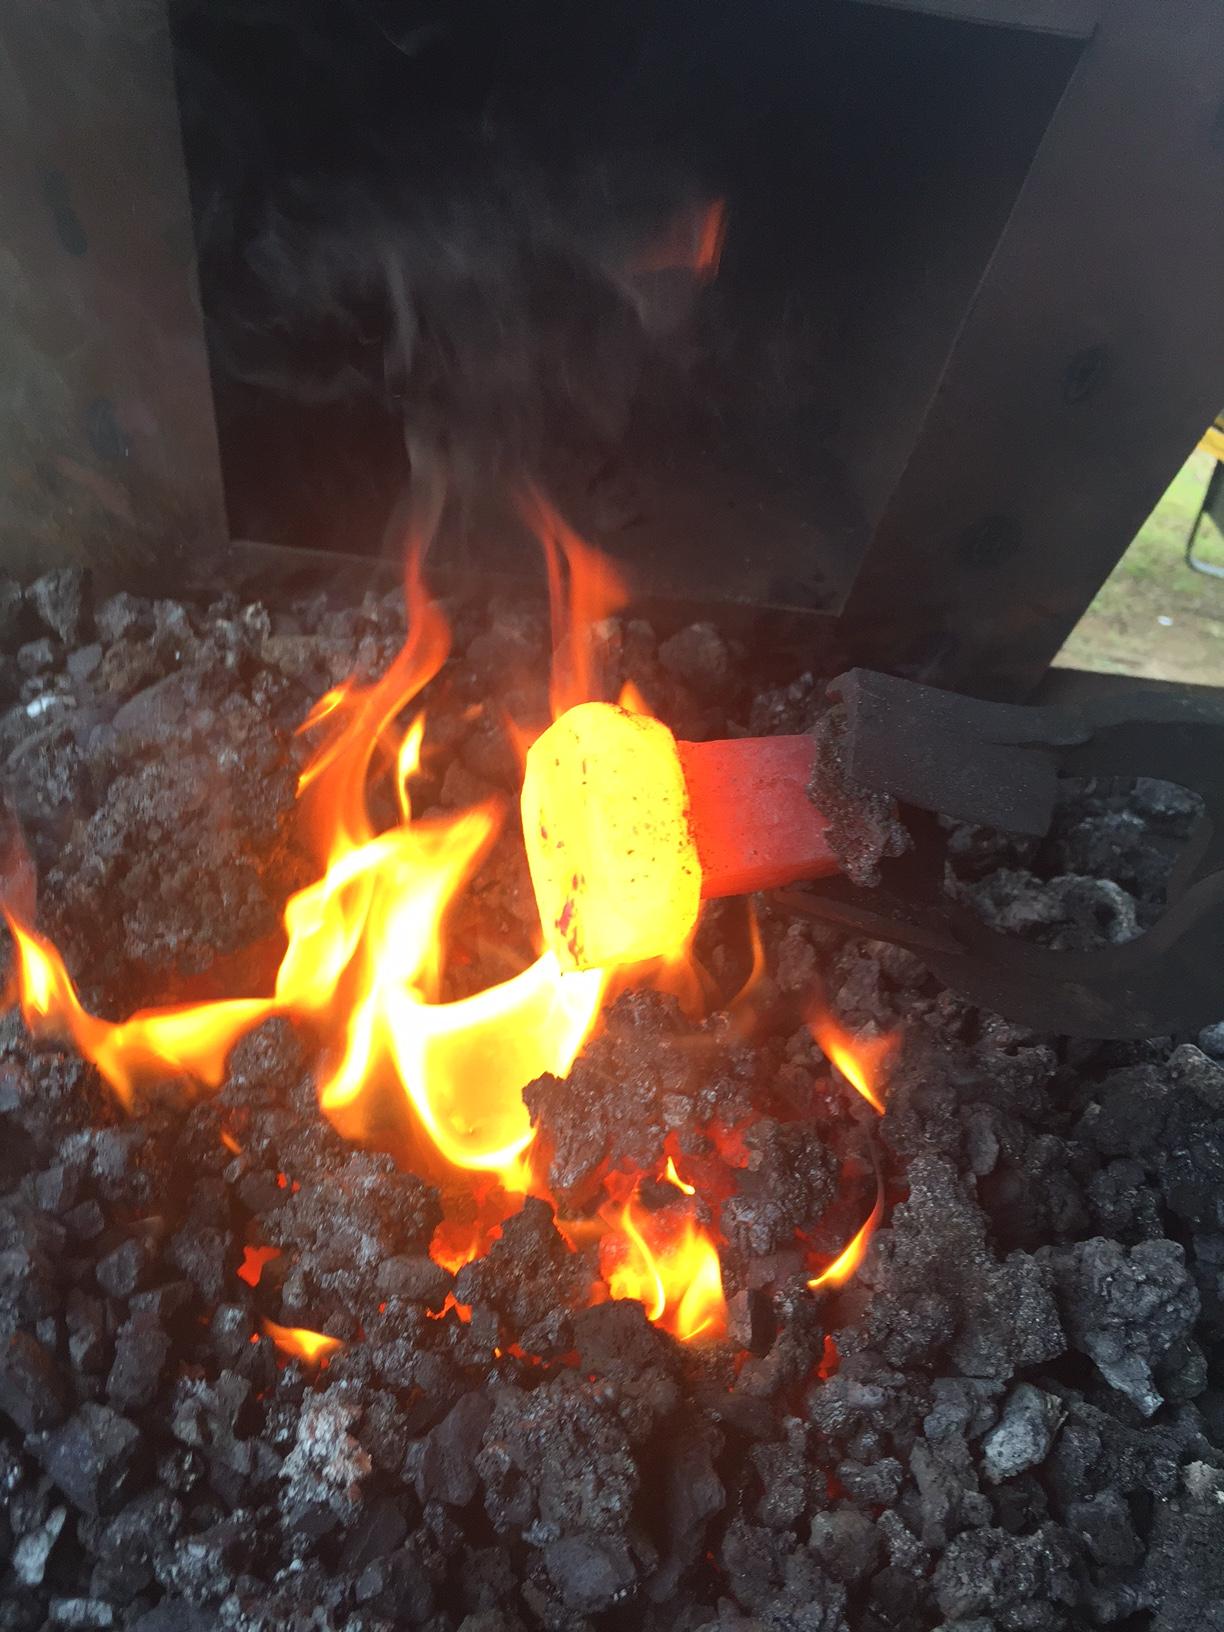
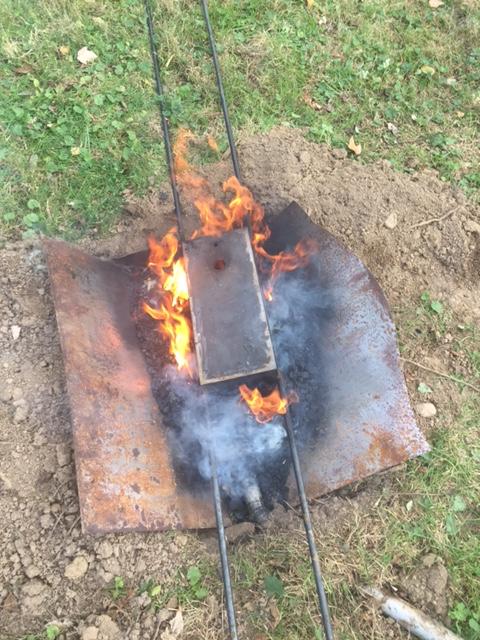
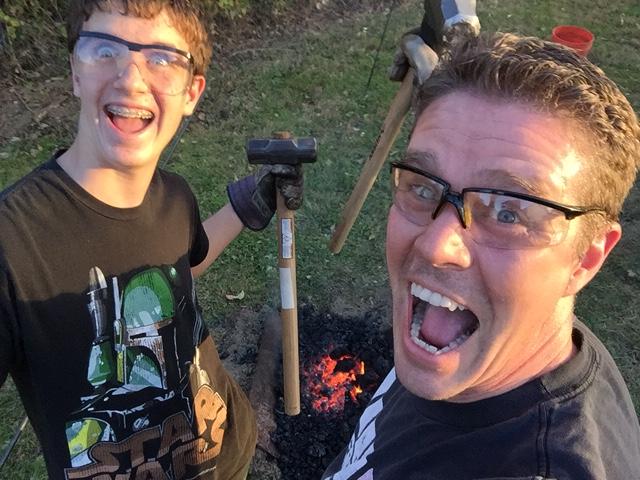
Success! Wow. I can hardly believe that worked. From stone cold to done in 1 hour, 45 minutes. I preheated with an oak fire, then slowly added coal. I used a bath exhaust fan at first, but it didn't move enough air. Switching to my shop vac did the trick. The handling rods turned into hot noodles, so I doused them with water to firm them up before handling. If I could have gotten it hotter (and I was more in practice with the sledge), I believe this could have been done with 1 heat. But I took it slow and careful- let's call it 'two and a half' heats. I'm pleased. Thanks for the advice folks... -Jeremy
-
My striking anvil coming together
Urthman replied to Urthman's topic in Anvils, Swage Blocks, and Mandrels
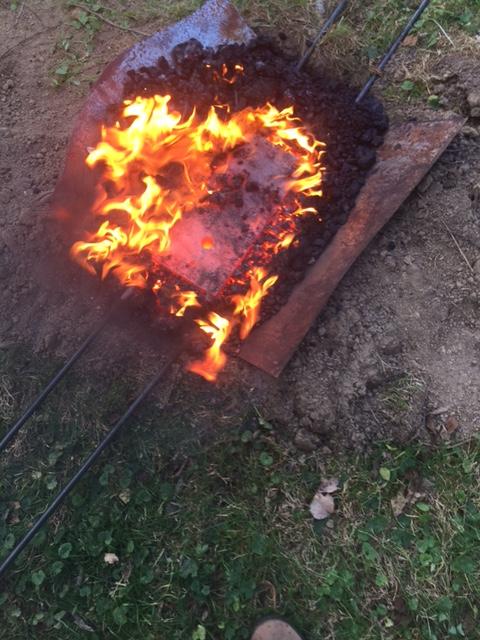
Hey Thomas- I'm going to take your advice on the pit forge. You guys think this will suffice? Should I make the sides steeper? I think if I start with wood, and then load it up with enough coal, it should do the job...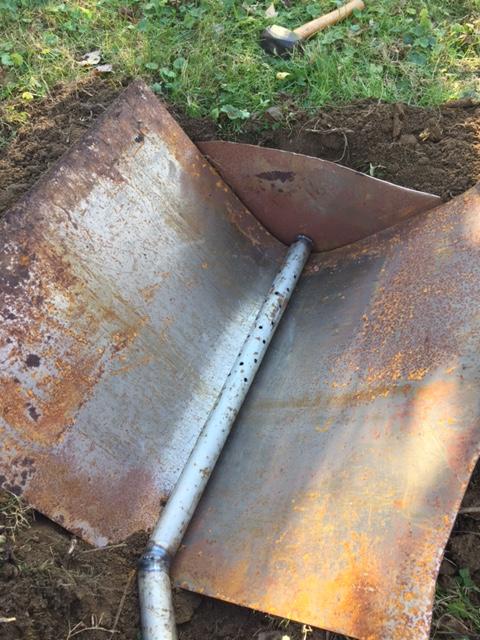

-
My striking anvil coming together
Urthman replied to Urthman's topic in Anvils, Swage Blocks, and Mandrels
Thanks for the links LBS. Those two videos are actually what prompted me to start this project. Hope to finish it this week. (fingers crossed...) for the record: I cut the angle of my legs at 6 degrees, which seems pretty good. I'll let ya know how the drifting goes! -Jeremy -
My striking anvil coming together
Urthman replied to Urthman's topic in Anvils, Swage Blocks, and Mandrels
LOL! Just slower, and more oil, right? -
My striking anvil coming together
Urthman replied to Urthman's topic in Anvils, Swage Blocks, and Mandrels
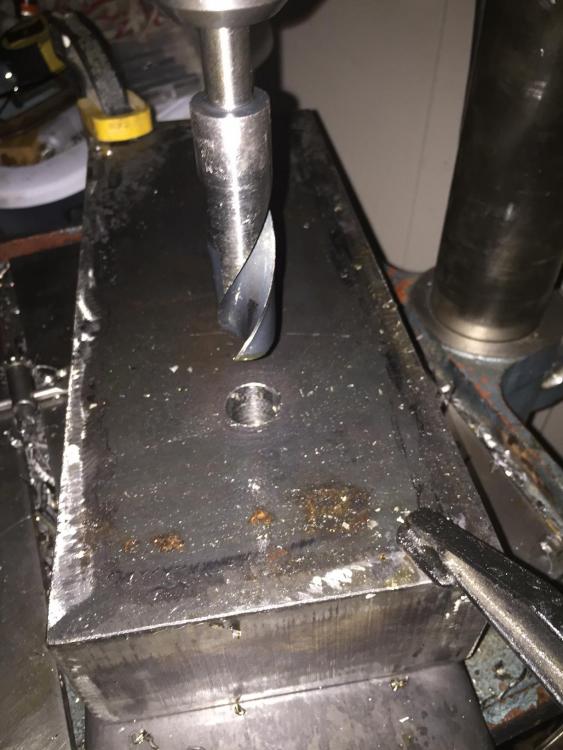
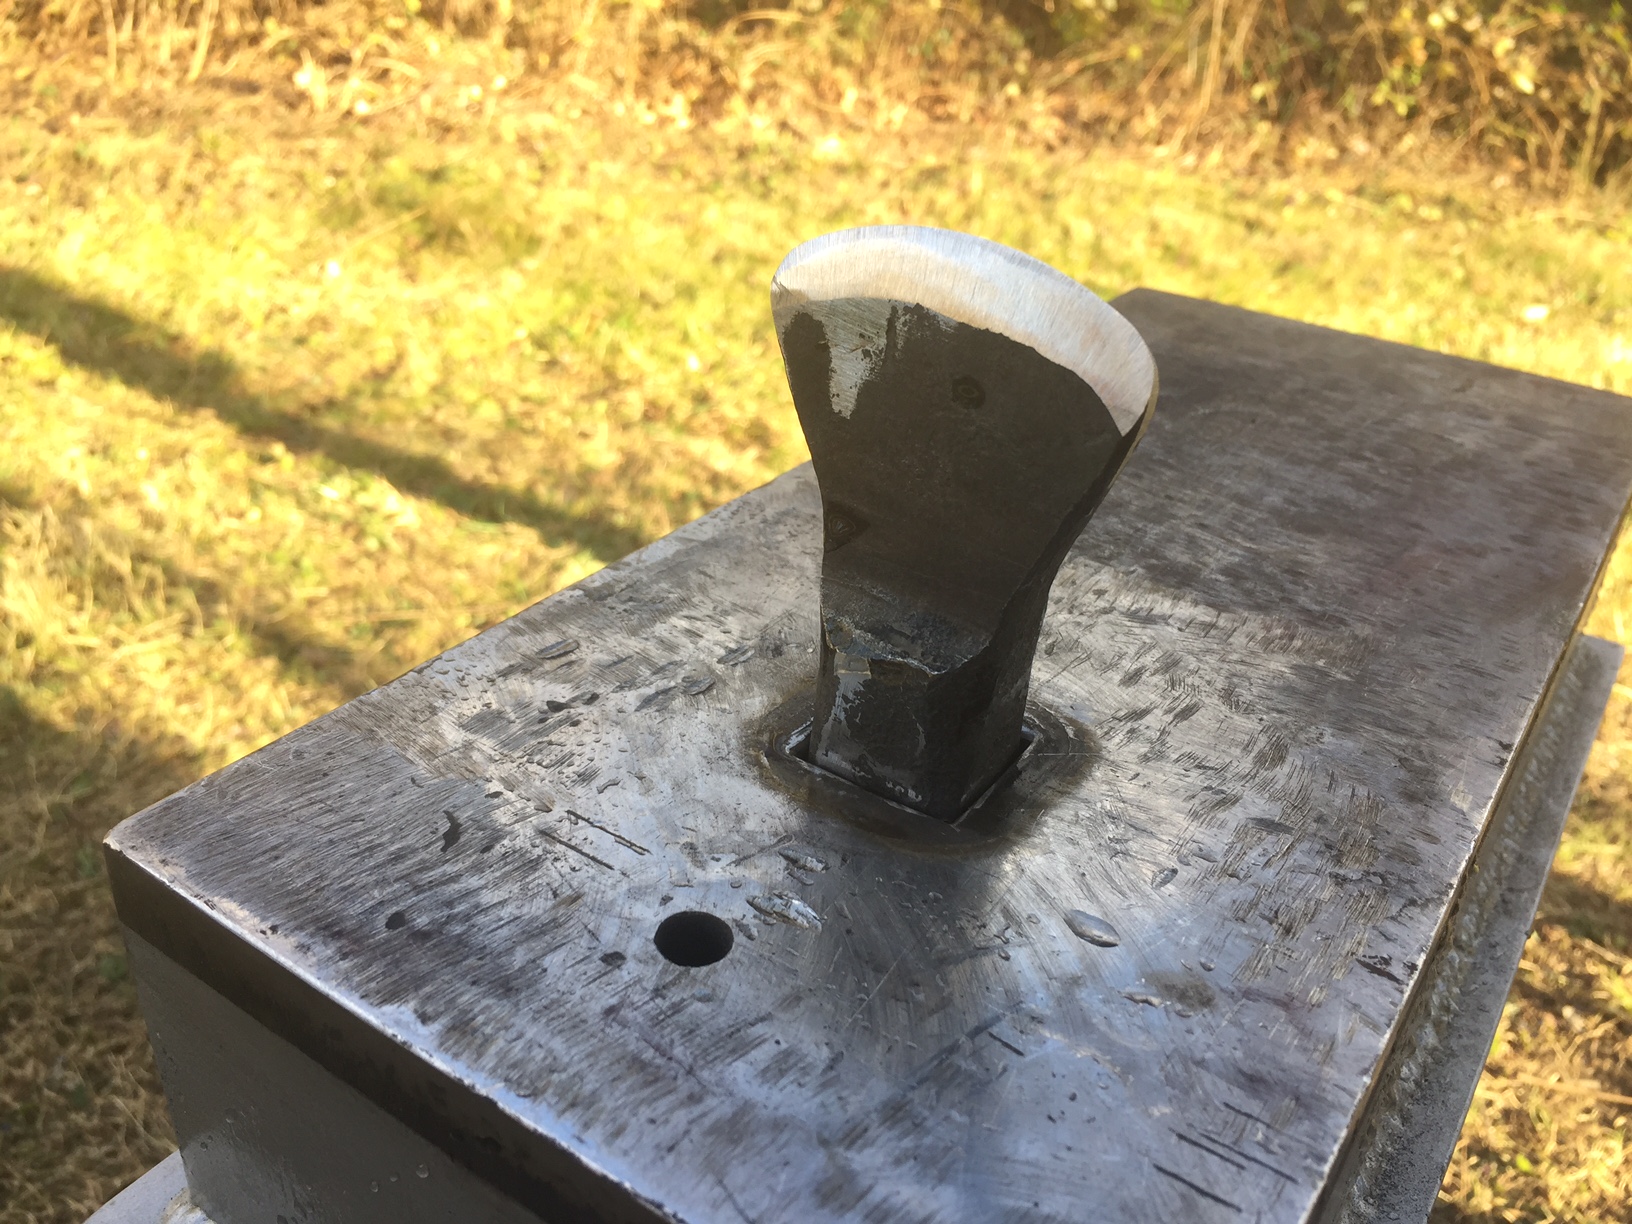
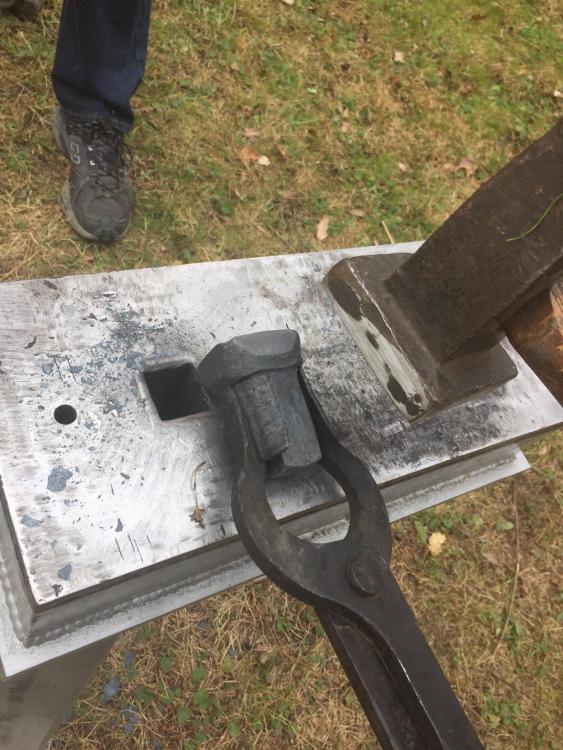
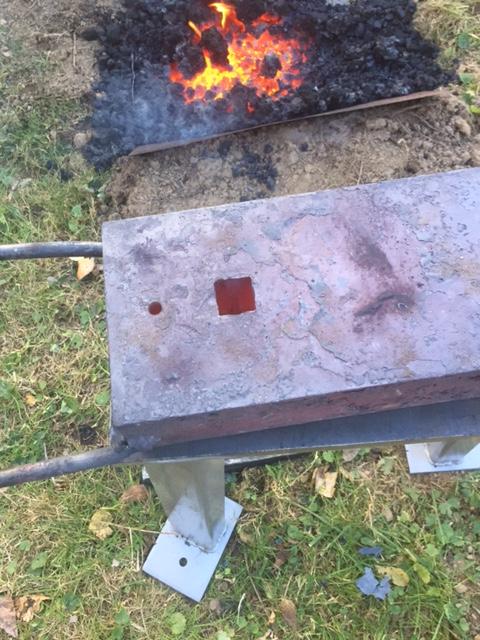
I need to heat it to complete the hardie hole in the 3" thick plate. Right now it is a 1" drilled hole. I want to drift it to 1" square. -
My striking anvil coming together
Urthman replied to Urthman's topic in Anvils, Swage Blocks, and Mandrels
An old tired blade (missing a few teeth) got me about 3/4 of the way done before snapping. A new fresh blade finished the job. Oh, and I used a good dose of cutting oil. Also: as you can probably tell, I drilled the corners first, and used a cut-off wheel in a grinder from both sides to get me started. So the jigsaw didin't have to work through the entire 1" of thickness for much of the cutting. -
My striking anvil coming together
Urthman replied to Urthman's topic in Anvils, Swage Blocks, and Mandrels
I used the same Bosch T118A's (HSS) that I use for sheet metal. Looks like they are rated for steel up to 1/8" thick. I may have been pushing the boundaries a bit with 1" plate... But hey- they got the job done!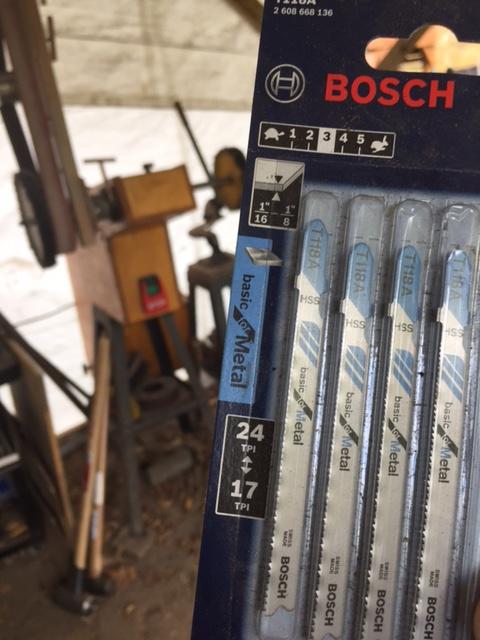
-
My striking anvil coming together
Urthman replied to Urthman's topic in Anvils, Swage Blocks, and Mandrels
HAHAH! That's.... well, actually not a bad idea... -
My striking anvil coming together
Urthman replied to Urthman's topic in Anvils, Swage Blocks, and Mandrels
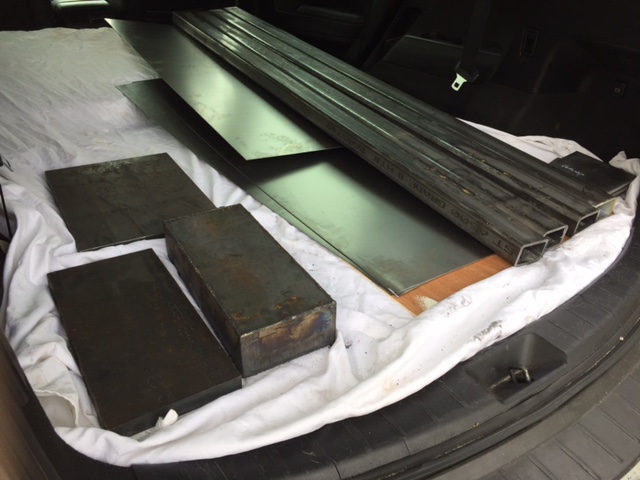
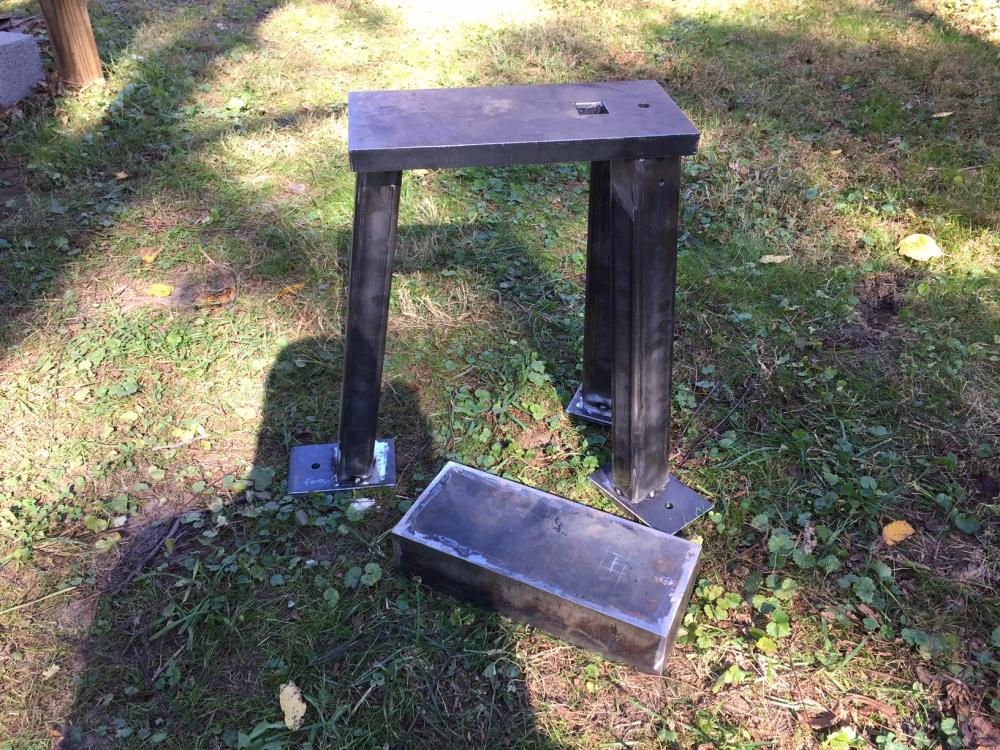
It's all mild. Top plate is 6"x14", 3" thick. Hope my coal forge is up to the challenge of heating it. -
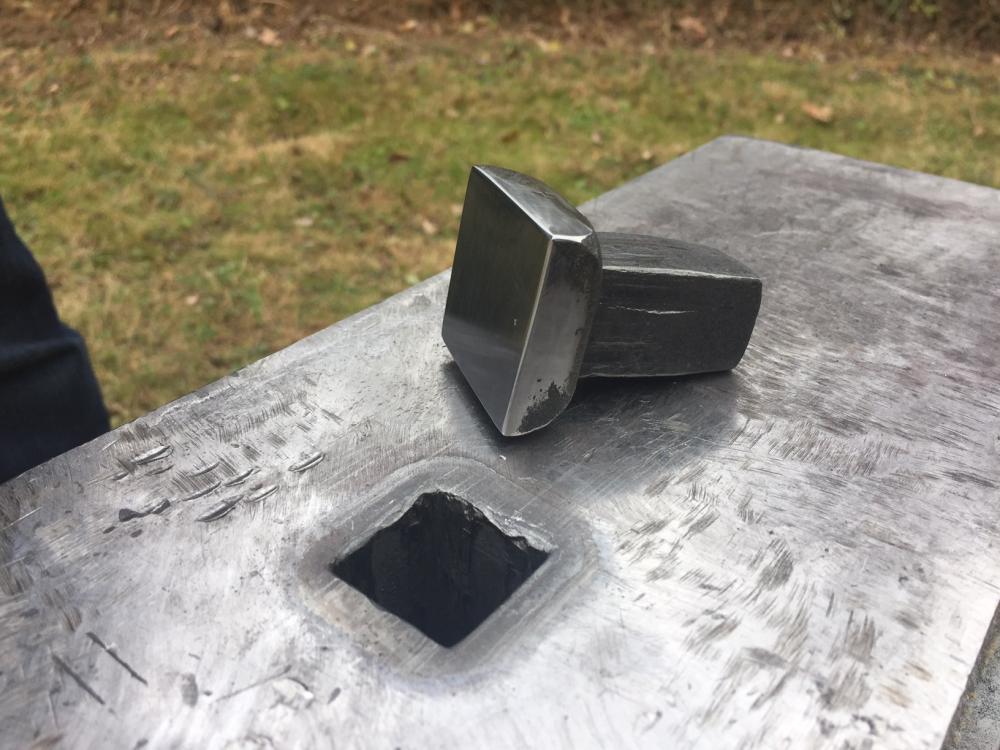
Progress! Now the fun part: driving a square peg into a round hole...