Nobody Special
Members
-
Joined
-
Last visited
-
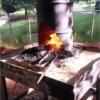
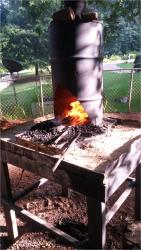
I've found that like pottery, if you don't mix in around 10 percent or so of sand, the clay is prone to cracking during the process. I have done it with straight clay dug out of the Georgia ground and was moderately successful. Unlike pottery, it doesn't have to be particularly fine sand and I didn't process the clay through settling, making a slip, and then letting it dry slowly. You will want to dry it by firing it slowly prior to using it, and may want to do a short test run at temp - not all clays work as well at high heat as others, largely depending on the alumina content of the clay. Some also don't handle expansion or contraction as well - the sand and straw tend to help with this. Haven't tried different ores - I used goethite from Red Top Mountain in GA. Different ores have varying levels; some work better than others, and larger ores have to be roasted then crushed before smelting. Generally speaking if you're using a bloomery process, you don't have a lot of control over the carbon content of the steel, unless you're using the tamahagane process. You'll end up with almost completely wrought iron, some steel, some cast iron, and a bunch of slag. Aside from spark testing it, you can learn to recognize the various content in the unrefined iron - I never have, but the Japanese experts that made tamahagane were able to do it. Refining is done by cutting, folding, and forge welding bits of consolidated bloom, then ingots. You also tend to lose material in the process, just like when making damascus. Regarding the large blast furnaces - I think you're describing the cast iron process - they were making cast iron ingots that were later run through other processes to reduce the carbon content to a desirable level. That's very impractical to do at home, much less safely. The small ones used in making a bloom are clay and temporary because the clay insulates and acts as a refractory, is more durable when fired for extended periods, and comes apart easily, making it easy to drain slag and to get at the bloom at the crucial time.
-
The original post said where he got it; he bought it from an elderly man, who got it at an auction selling off items from a closed lumber company. I tend to agree with JHCC, and would also ask, what kind of workout? If you're moving it like a hammer is meant to be used in your workout it's risky - you'll get strong if you don't get hurt, but there's a good chance you'll get hurt. Swinging that kind of weight for long, especially if you haven't done that kind of motion a lot is tough on muscles and joints. Heck, my back hurts just thinking about the last time I swung a splitting maul not quite half that size on a regular basis.
-
Yah, seem to be under siege by AI bots a lot more so than normal recently. Someone must have figured a new way around the algorithms and filters. Saw a legal firm from Mumbai, a rubber recycling plant somewhere else in India, a "contract management college", a moving company, an African Safari group, a stock company, and while who doesn't like shoes, the one about Punjabi juttis seems to have it backwards. Juttis are accessories for festive dresses; festive dresses aren't accents for sandals or pumps and I don't think either would be appropriate while forge welding or around punch biscuits.
-
First, knowledge is essential. Books are very good, videos are hit and miss, but a good teacher and/or support group can be priceless. After that: A hammer, about two pounds, one with a face and a fullering peen, and or maybe a similar size ball peen. Any block of steel that can be used as an anvil. Or you know, an anvil. A forge, probably would recommend a JBOD for a beginner At least one good set of tongs - probably a pair that is more universal but not quite as good at any one task. Eventually you'll need files, grinders, vises, drills, and the like. Punches, chisels, and a great many other tools are easily made and good practice. Considering the handle, blacksmitsdepot, are you considering forging, or trying to sell tools to would-be beginners?
-
It's gorgeous but if you keep it up you may need to reinforce the foundation and possibly the bedrock. Did you dress that spalled one on the top, two from the left in the first pic? That looks like one I would know better and still be using anyways and then be cussing when I got a chip in me.
-
Apologies for missing this post until now - I think it very likely that you would have trouble getting your forge to an appropriate heat and holding it there. Forges generally make poor furnaces, and furnaces generally make poor forges; the designs require fundamentally different approaches. Most of the time, a coal or charcoal set up is easier, certainly going to be less damaging to your refractory or meant to be expendable. I would also advise you to be highly considerate of the crucibles that you used - what works for casting won't work for aluminum, and some crucibles react poorly to some fuel choices. They also may require pre-heating of the stock to be used and the crucible to avoid breaks and steam explosions. Depending on the type of crucible steel you were considering, they often require long soak times, whether you're talking about something approaching wootz, or the soaks involving blister steel originally used for watch springs and the like. I would also recommend letting it cool in place if possible. Aside from the extreme heat and risk of breaking a crucible, a lot of the traditional processes call for letting the steel harden in the crucible, then breaking it and working the steel afterwards.
-
As far as getting lag screws out, the usual tried and true methods are the way to go, square broach in a round hole, easy outs, put a slot in it, etc. For the instillation, there's not much provided about the size of the railing, what it's being used for, etc. For a standard stair railing, that might be thick enough, but I would wonder if 2" would put you through the subflooring and into the framing. If it's something heavier, dunno. Longer screws can be shortened though and I tend to go with overkill - put a nut on the screw, make your cut, take the nut off. and clean threads further if needed. Either use a bigger pilot hole with no point, or file a point back on it if needed.
-
Aside from the very tip being knocked downwards very slightly, that looks highly usable. A good rule of thumb is use an anvil for a long time before making changes to it, so you can know what you like and don't. If, eventually you find a lot of situations in which you need a perfectly conical cone tip, maybe adjust the tip with a flap disc a little, but otherwise I concur with the gentleman above completely. Congratulations. That's a nice, and valuable gift, especially in California.
-
It was not only one of the most common imports, during some periods, it wasn't unheard of them being included in ballast if you can believe that. A removable cover plate works well for protecting the anvil during chisel work; my experiences been they don't have great rebound, especially in an anvil that has an uneven surface. I'm one of the ones that prefers a bit of sway in mine. That said... You absolutely can build one up with welding rod, although it's an expensive labor of love, not efficiency. It takes pre-heating and then layering it on, chipping it down, and I don't know what all, I'm not an arc welder. I believe some people also use different rods for the surface than the initial layers. There are several posts on the subject here, but they're more easily searched from google by including iforgeiron.com than with the native search tool. One guy I know of in AK, did it with garage door springs.
-
There's a couple of pages on social media suggesting that it is a scam and that the page posts pictures of other people's work and steals your personal information for profit. I haven't experienced them directly. You may want to consider joining a smithing group, which can add considerably to your resources and knowledge base. Plus it's fun to hang out and do demos and hammer-ins and the like on the weekend. Sometimes they will sell or help you find tools. If you add your general location to your user profile, we also might be able to tell you if there's a group nearby.
-
Didn't know you kept bees. The weather is messing with ours, we just had what I hope is the last snow for the spring up here.
-
Given the area and the general condition, a few years ago, the going price would have been about $3 or $4 dollars a lb. It looks to be in moderately good shape, some light wallowing of the hardy hole and the kind of mild edge damage I normally associate with cold horse shoeing. I don't know the going price that way right now, but given inflation and everything else, I would probably try for about $5 or maybe, maybe $6 a lb, but be willing to reduce it some if it doesn't move or I got a decent offer. I like mouseholes.
-
Roundabouts Douglasville or Marietta then. Grew up in Garland (near the Brahms and the Whataburger) and have/had kin all over that neck of the woods.
-
Might be lipstick on a pig instead of gilding the lily, but it's a cute pig. How extreme NE Texas btw? Like, last booth in the Waffle House on Stateline Ave northeast? Dangling your toes in the Red River north of the Dairy Queen in Nash? A lot of my directional references in the vicinity are going to be fast food related...
-
When it's that close, it's not so much the weight as the quality. Stay away from the Vevor cast iron, although I believe Vevor sells cast steel too, which should be fine. Regular cast iron does not hold up under use at all and tends to break. Many "cast iron" anvils are now made from ductile iron, a special form of cast iron that doesn't break under impact easily but doesn't tend to have a lot of rebound either. I started on one of those about 20 years ago and almost broke my nose on the return from a missed hammer strike the first time I used a "real" anvil. Not having bought one in forever, I don't know which of the current cheapies are ductile, and which are cast iron, but you're still better off with steel. Acciaio's are supposed to hold up okay, and have okayish rebound, but the finish is supposed to be kind of funky and it may need dressing (shaping and cleaning up). An alternative if you really want to do it on the cheap is either go with a old used anvil (all of mine), or even to find something to serve as an anvil that's not an anvil. A big hunk of scrap steel with one flat surface usually will work well - seriously, just a big flat hunk, if it's mounted properly. Horns and tails and hardy holes are all nice to have, but not remotely essential for 4/5ths of what you'll do, especially if it's got at least one somewhat straight edge that you can put a mild radius on. Make sure that it's steel, and not a cast iron tractor weight or something like. I would also consider joining a blacksmithing group; they will often help give you tips or advice, and may be able to help you acquire tools. Best of luck and look forward to seeing what you make.