Frazer
2021 Donor
-
Joined
-
Last visited
Everything posted by Frazer
-
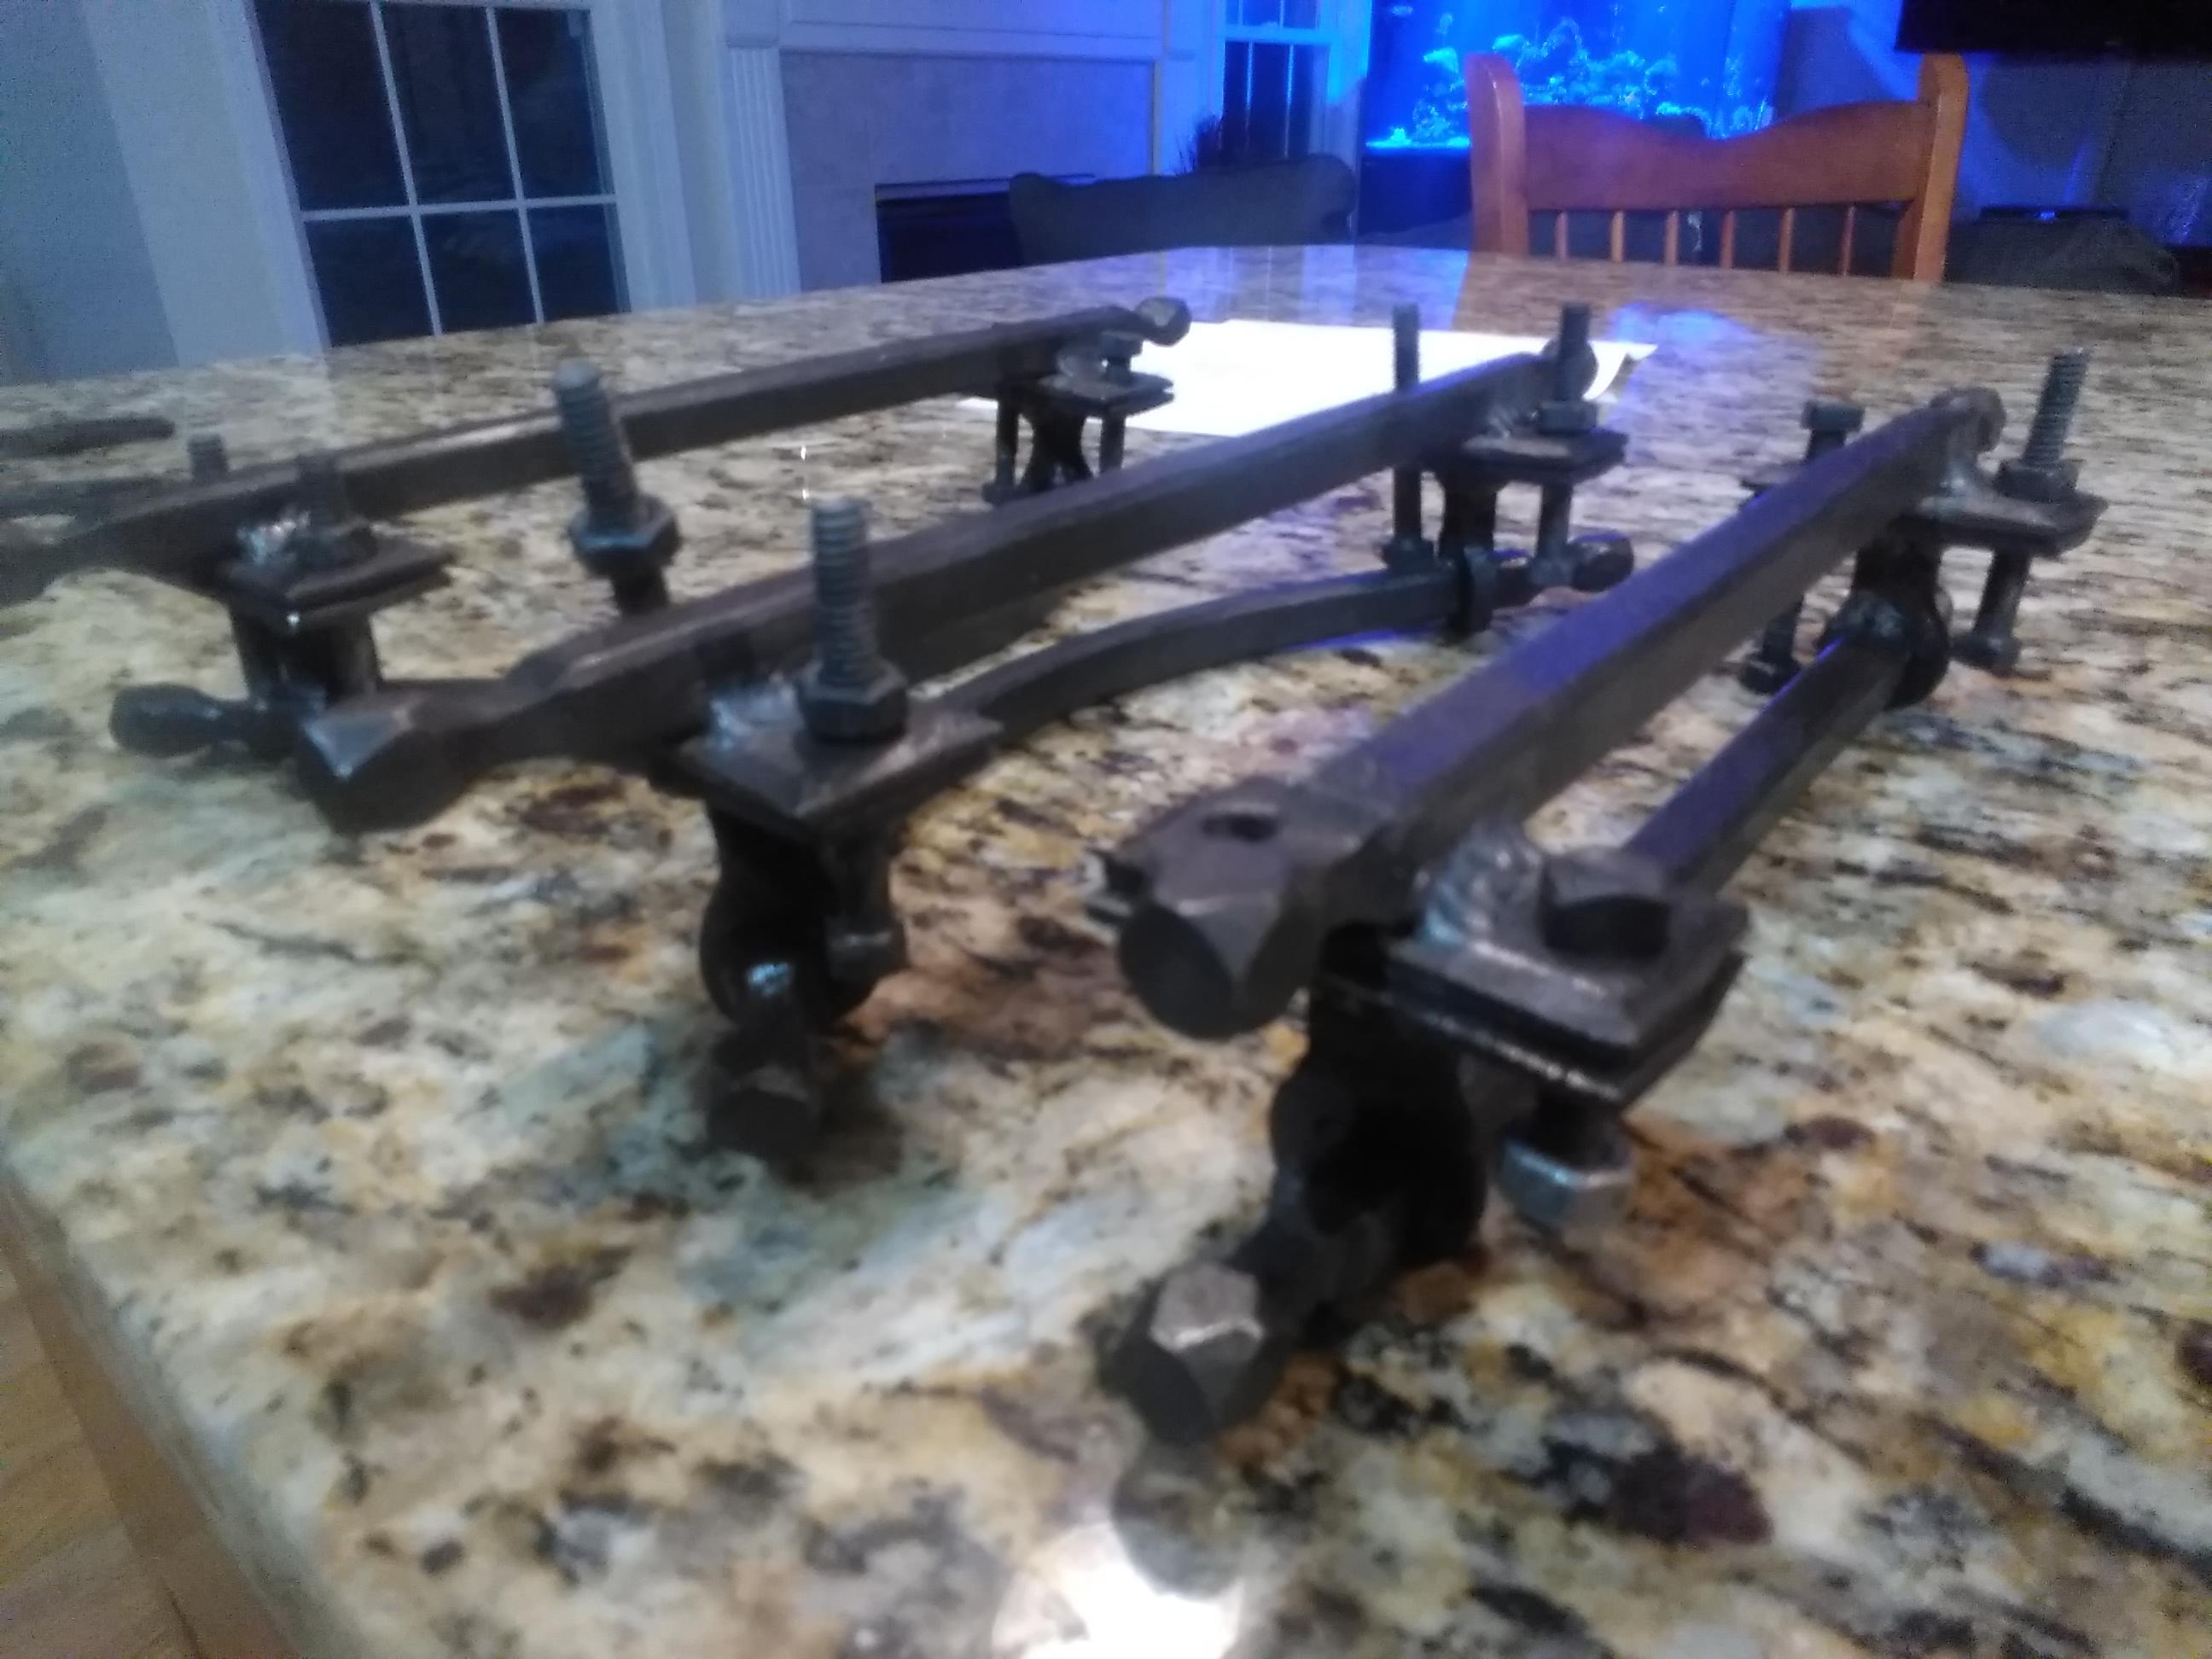
Talk about a conversation piece too, very cool
-
Another thing I will add is buying bar/round stock in small sections online is generally the most expensive option out there. Before you go filling up your shopping cart with different materials, stop by a scrapyard or pick up some railroad spikes or see what old metal objects you/your family has that they are willing to donate to be made into something new. Sure, it may be mystery steel (although with a quick google search you can generally determine what that object is potentially made of and by extension if it's forge-able) but it will serve your needs while you're starting out and learning some of the basic processes. This of course comes with an important disclaimer, do not put any galvanized or plated steel in the forge. Zinc oxides are extremely poisonous. A good rule of thumb is if it's rusty, you should be okay, but be smart. I'll also note that vinegar will dissolve the galvanized surface. Just submerge it for a couple of days (or less, just wait for the bubbles to stop). I only go into saying this because sometimes one comes across large bolts and such and decide to forge them, but these are commonly galvanized to avoid corrosion. If you're really set on knowing what material it is that you're forging, see if there is a steel supplier within driving distance from you, I don't know what pricing is like in the UK, but you will pay a fifth of what you'll spend buying little pieces online if you just buy a 20 foot length (I'm sure they do it in meters, but you get the idea) of mild steel to hammer on. If you're looking to make knives, coil springs are generally 5160 or something similar, and they make good knives. And you can get them for cheap/free. I guess what I'm saying is get started for as cheap as possible. You don't need to buy everything all at once, you'll go broke before you ever swing a hammer. It takes most people years to build up their shop, which usually grows in parallel with their experience. You already have the anvil, which is a lot more than a lot of people start with. It sounds like you just need a forge, which can be built for very little money, a workspace and some time spent making your way up the the learning curve. Its hard to know exactly what to buy until you know how to make the things you need a specific steels for and you're better off learning on salvaged materials rather than the expensive stuff. If you're going to spend money on things, spend it on all the critical PPE first, sure you cant be a blacksmith without steel, but you also can't be a blacksmith without functional eyes/lungs/fingers etc. Research is good, but if you spend too much time doing it and not trying out your plans, then you're no closer to making the things you picture yourself making. Oh and to answer your actual question, here is a random site I found that provides some information on different steels. https://www.isibang.ac.in/~library/onlinerz/resources/Enghandbook.pdf I apologize it uses the AISI numbering system, but when you ask what is this or that steel good for, understand it's a very complicated question.
-
Ha no worries, I would just be remiss if I didn't ask
-
Very cool! Any pictures of the flame vortex?
-
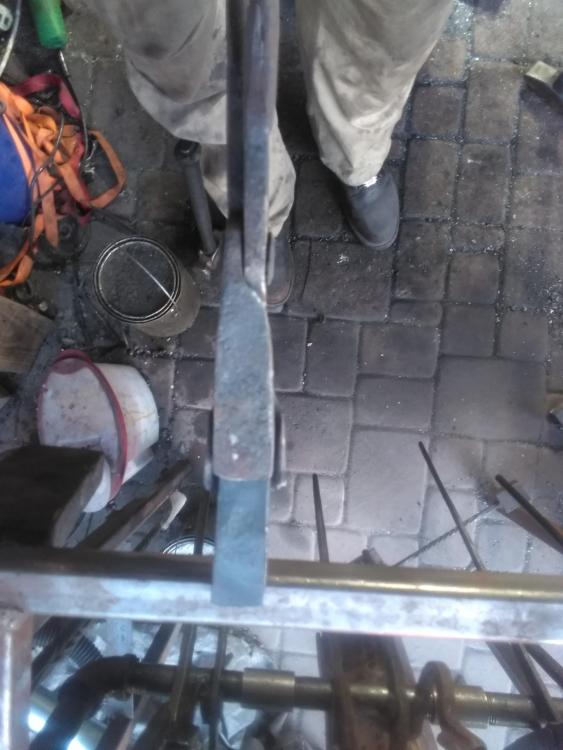
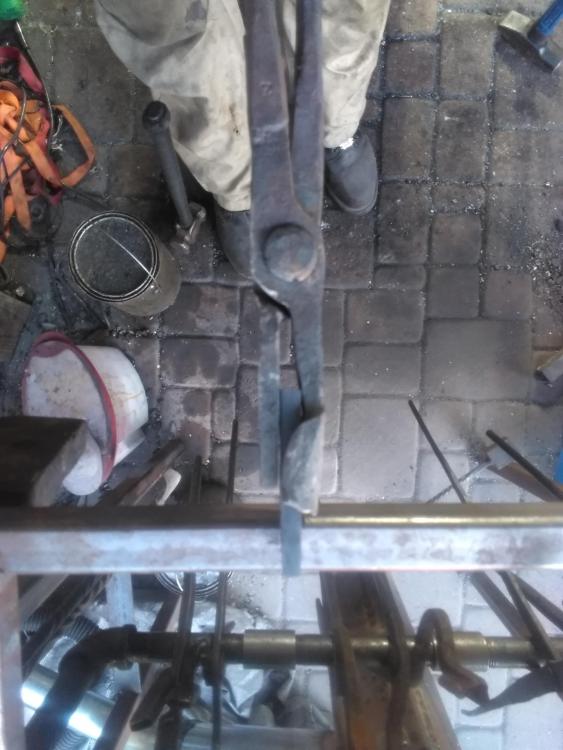
Yesterday was pretty productive, more or less finished 6 barn door handles (these I started a while ago, but only received height requirements on Monday). All i have to do now is finish grinding out my ugly welds and finish while hot with wax. I also made myself my first pair of box jaw tongs that hold the size of material I use for my bottle openers. Then, naturally, I used them to make 2 more bottle openers. This was also my first time welding on the reins rather than drawing them out. Welds are strong, but pretty ugly. I have to get better at my scarfs. I think I may have misunderstood which pair of tongs you're supposed to drop during that weld.... Ha. No matter how many times I practiced the motion, when the time came I was all thumbs. Like all things it'll get easier with practice. And I added a tong rack under the firepot on the forge so now I keep the tongs I am using on the upper level and the ones I'm not down below.


-
I also bought my anvil off Ebay from a seller that was about 5 hours away from me. I called him and ended up making the drive over so I could see it in person. He was a farrier that was retiring and selling off his (really cool) shop. When I got there he ended up having like 30+ anvils, countless vises, and various tools that he had collected over the years and he let me look around. It was really cool to see and he ended up being a really cool guy to talk to. That's where I found my 150lb Soderfors. Not only did I talk him down on his asking price, but he threw in a bench vise, a post vise, and several other tools. Even if this particular seller is too far away from you for this to be feasible, maybe narrow your search? A 10 hour drive was worth the peace of mind of getting to see and touch the anvil prior to shelling out a couple few hundred bucks on it. Especially since it's something that I'm going to own and enjoy for a long time to come. However, if you like that anvil and you want it, then go for it, this is just my opinion.
-
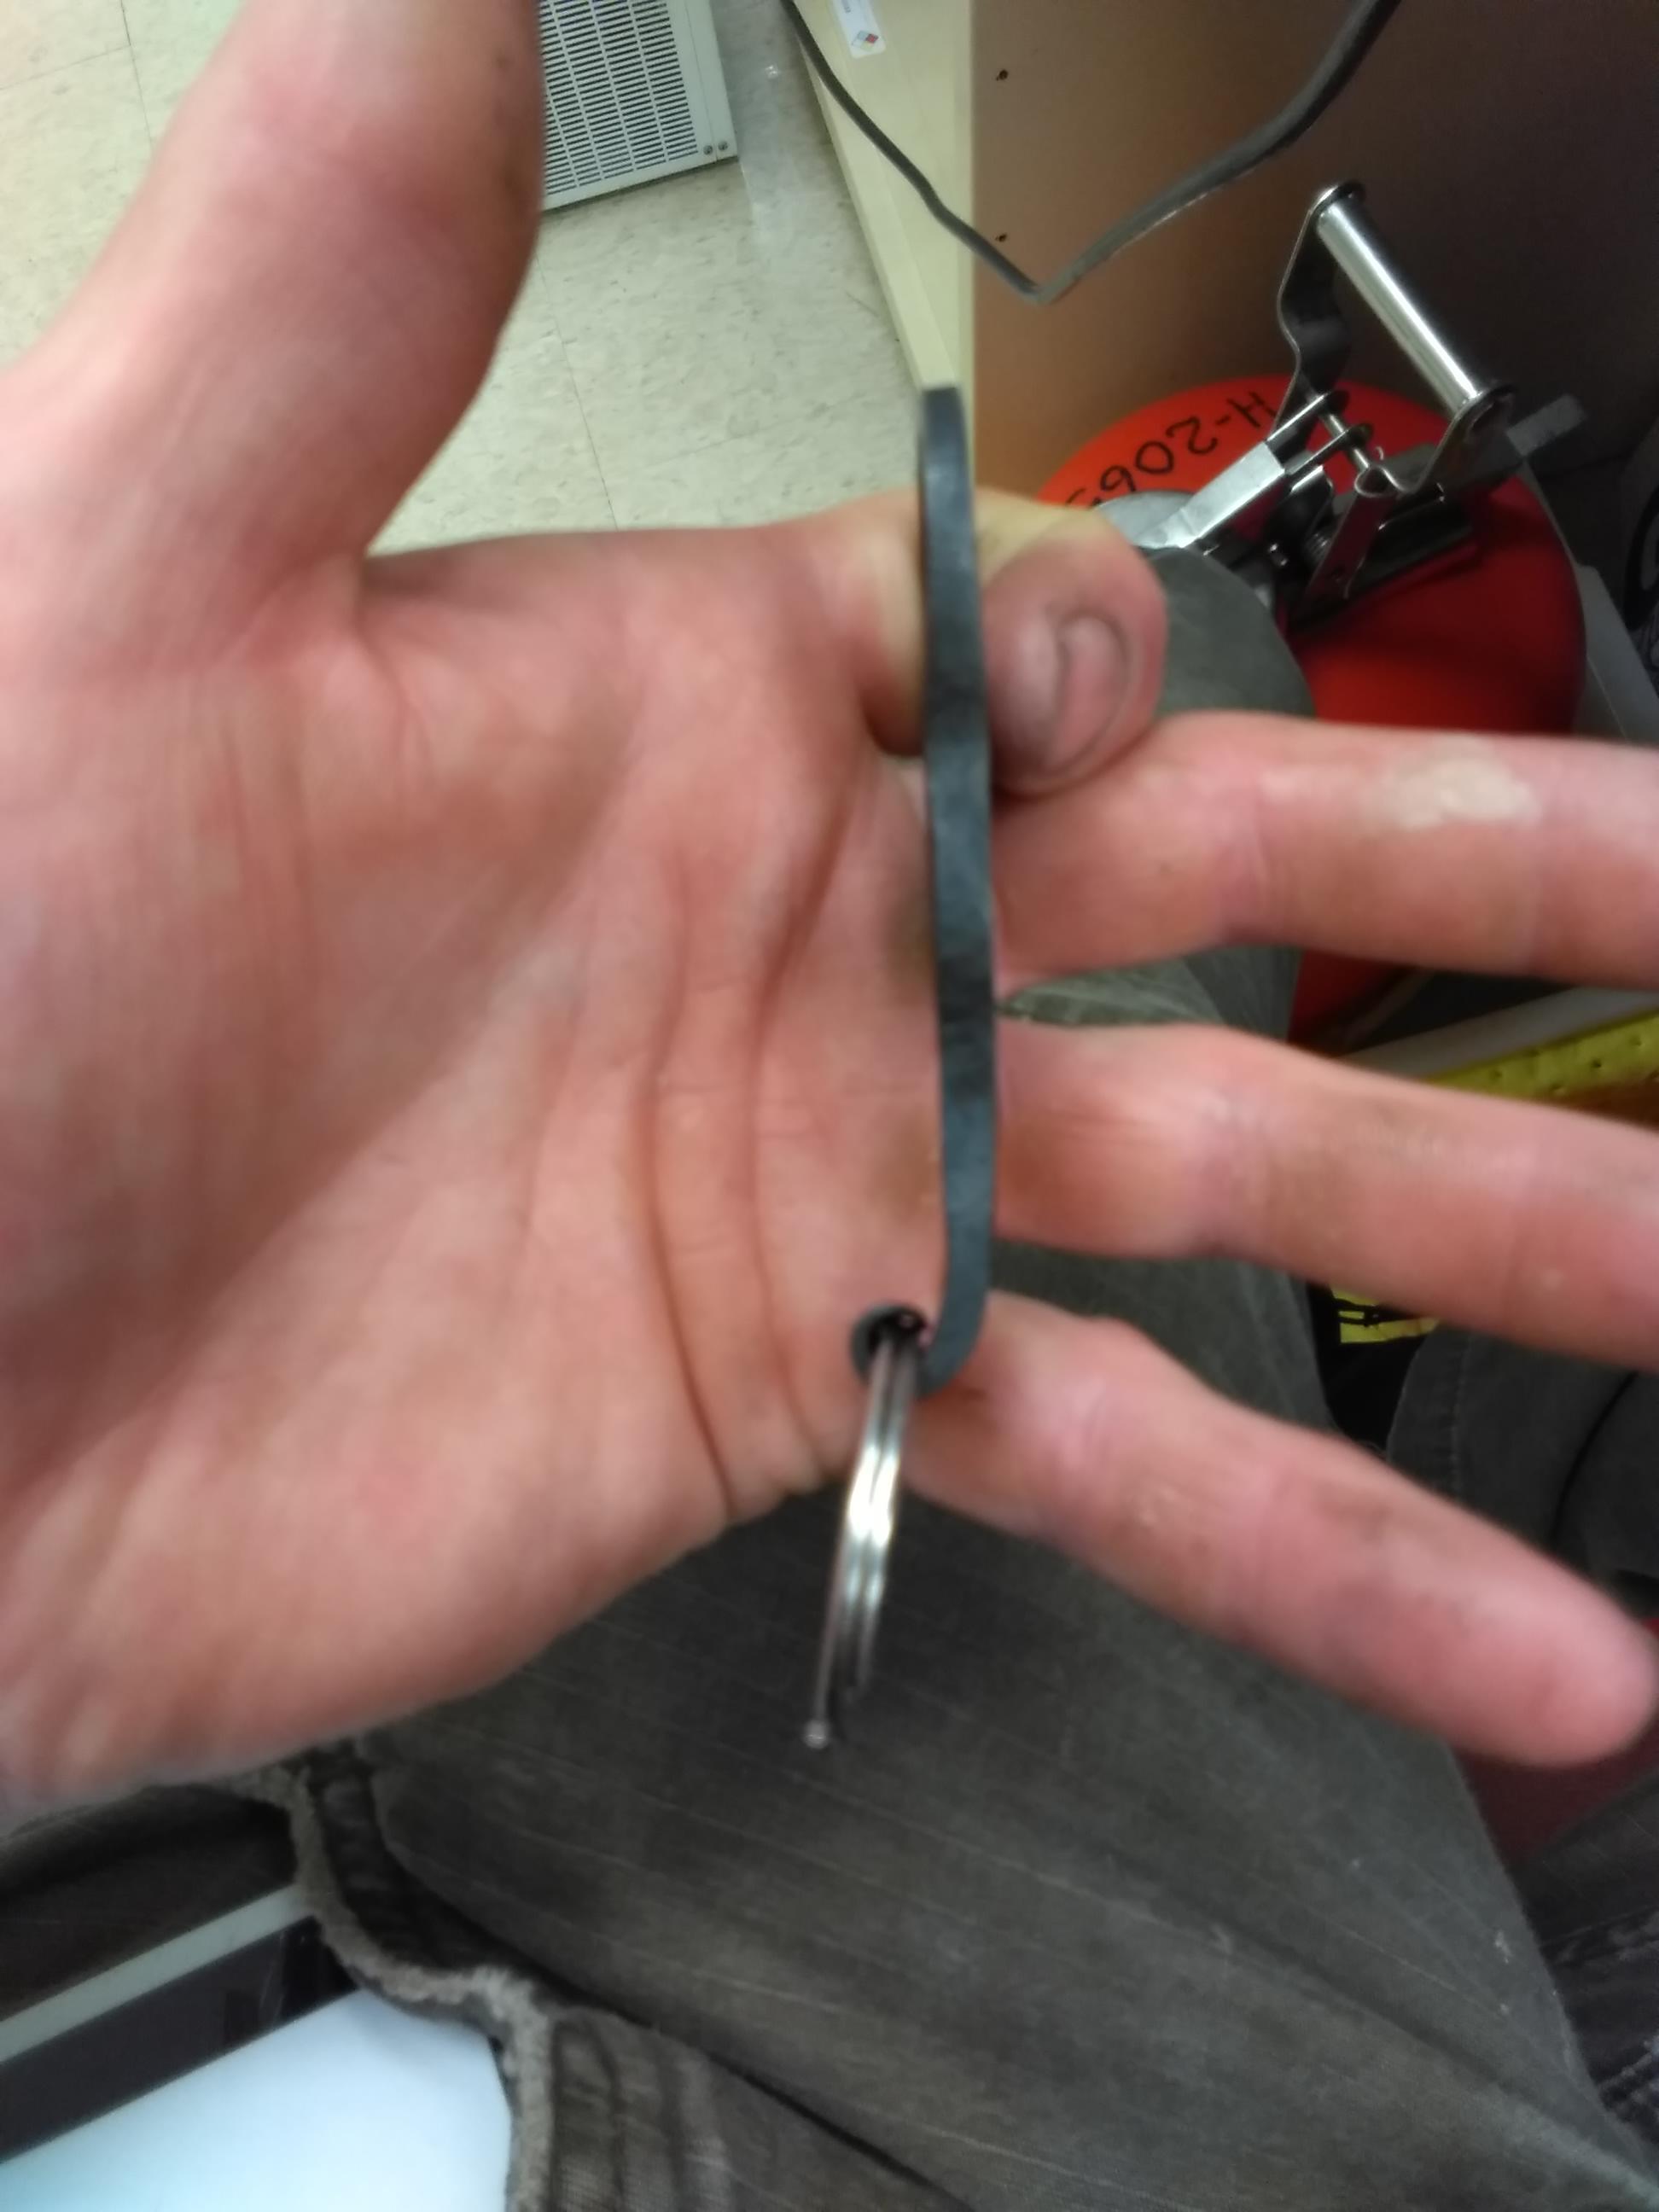
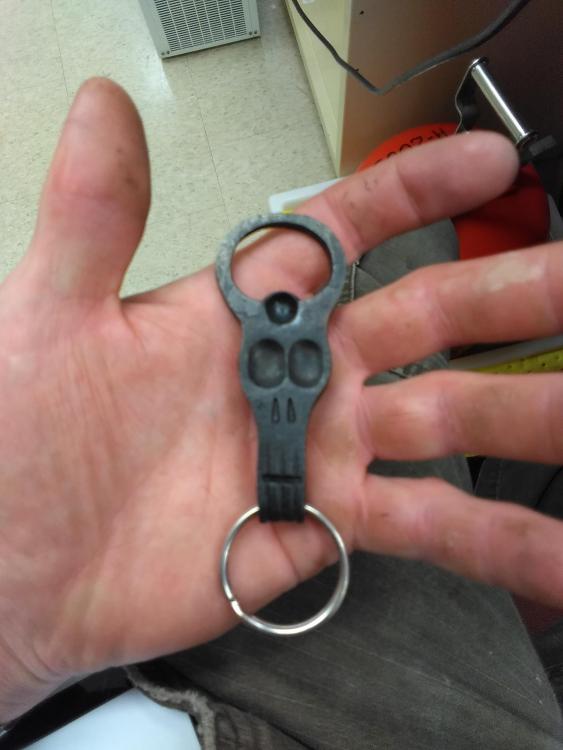
Someone liked my bottle opener, but wanted it as a keychain. I make try making one where the mouth is open and that is where the key ring goes, but I like this for now.

-
Looks like you made out like a bandit! Some good looking tools there! Looking forward to seeing your shop all set up. While one edge of the anvil has... some signs of use haha, it looks like the other one is in pretty good shape, but maybe that's just the picture. Either way, she still has a lot of life life in her! I am also a little jealous of the flatter, put a handle on that bad boy!
-
Latticino, that axe is awesome! I'd like to try something like that someday. Really cool stuff. Thanks for sharing.
-
Green flame usually indicates copper. White smoke and yellow coals makes me think zinc oxide.... careful with that stuff. Brass=copper+zinc so that makes sense to me. Welshj, I like the profile on that blade, nice and clean.
-
There are certain aspects of your question that I can't offer much insight on since I have never heat treated D2. However, to maintain a more constant temperature while heat treating in my coal forge, I have a piece of square tube (it's actually welded angle iron since I had that in a thicker walled section) that I half bury in the coals and I place the blade in there. The walls of the tube will conduct the heat more evenly and hold the heat if I need to move it around in the coals or remove clinker or whatever while it soaks. If the forge gets too hot, you can turn off the air and that heat will remain in that steel for a while until you turn it back on. You may still have hot spots, but they will diminish substantially after being conducted through the tube, the thicker the walls the better (up to a point). Still an hour is a long time to try to maintain an even temperature no matter what, but this will help you maybe hit that half hour mark. I think to get the most out of your D2, you'll need an oven that can hold the proper temperature for the proper duration, but you will still be able to harden it if you deviate from the manufacturers suggestions. How much will the performance be impacted? I don't know. As for the carbon loss, the smaller the tube (closer to size of the blade) the less air will get to it. The creation of excess scale will increase carbon losses, but as long as you don't significantly overheat the blade for a long time, I don't imagine the losses will be noticeable. I'm just thinking of something like damascus, where you're forge welding repeatedly at high temperatures, after all is said and done, I haven't noticed an appreciable drop in harden-ability. When heat treating in an oven I have seen people wrap the blade in steel foil with some sort of combustible inside to remove the air that comes into contact with the blade while soaking, but in a coal forge that isn't really an option since you cant easily tell the temperature of the blade once you've wrapped it up. However, that has just been my experience, if someone else has more experience with D2 I would defer to their opinion on the matter.
-
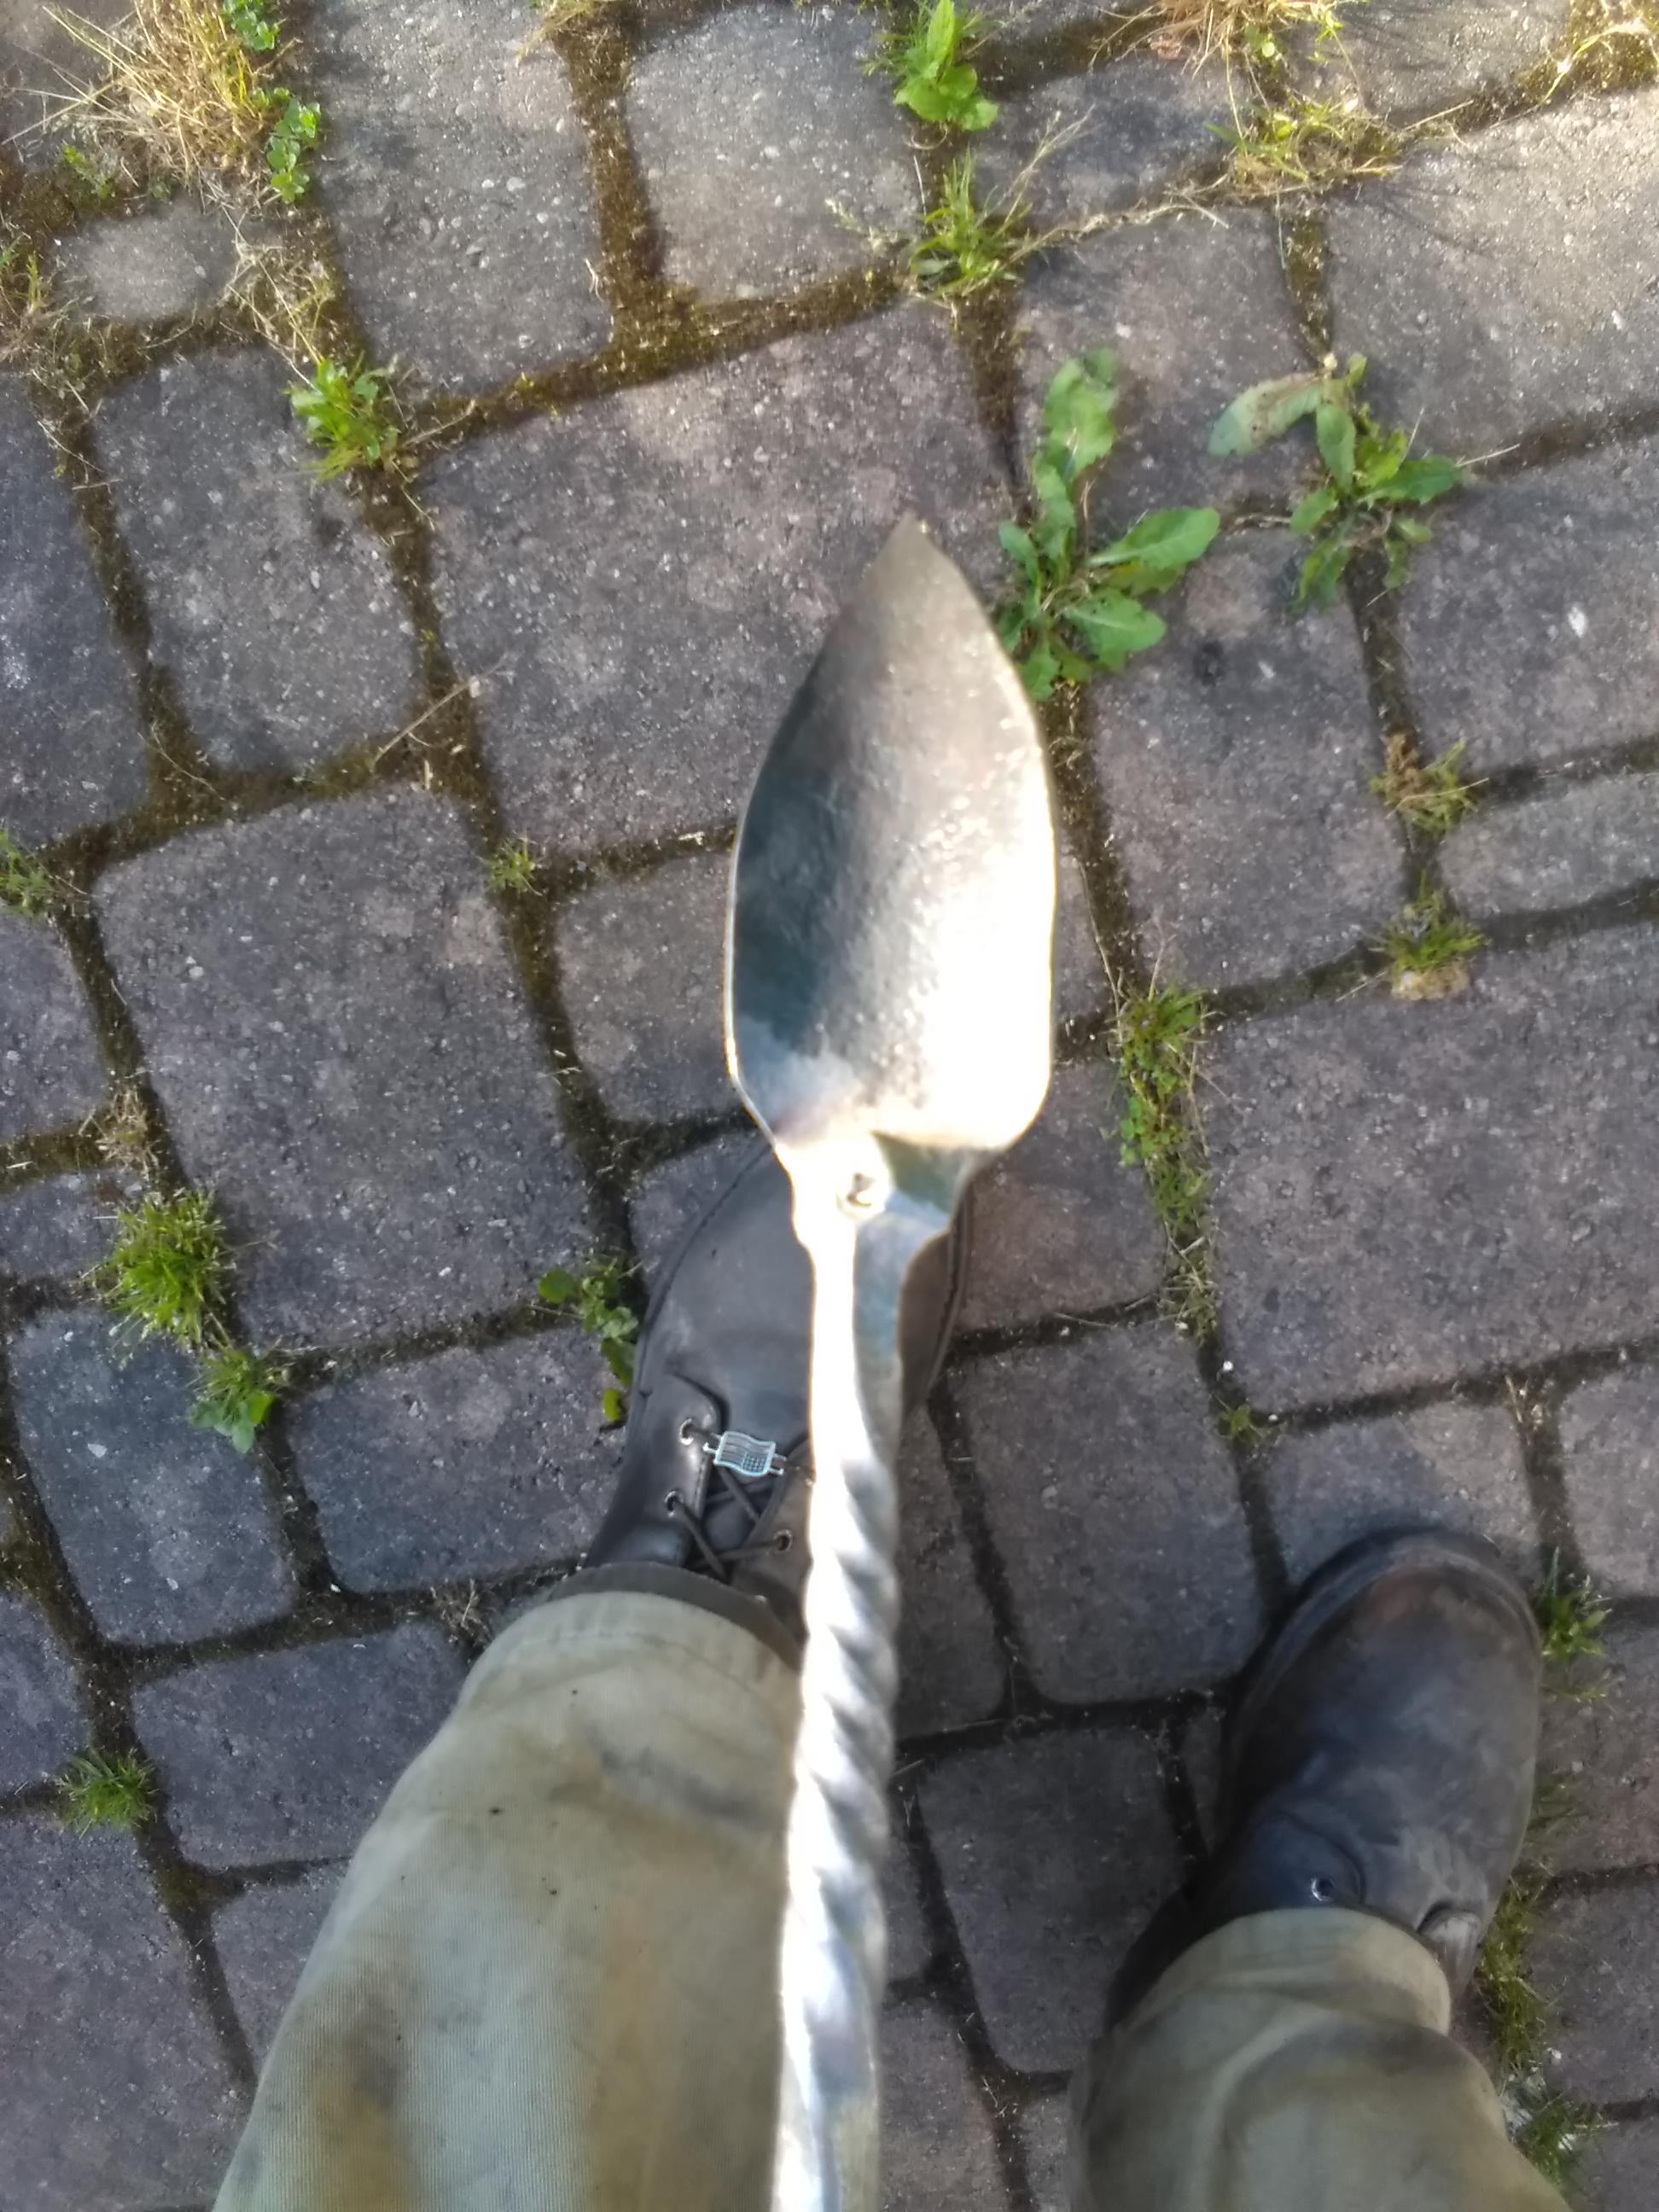
Agreed. That's why I disabled the heating element and make sure the air intake is clear, but eventually it'll give itself up to the tough living conditions. It runs about four hours straight Monday-Friday and I have had it running during the weekend for 8+ hours at a time so it's definitely a viable option as an entry level air source, as long as you keep it away from the heat. Just don't expect to hand it down to your children or anything. I've definitely gotten my ~$20 back out of it at this point. I'd like to get a proper blower with a VFD so I have better control over the air flow. I used some ball valves with my last forge, but with this one I don't have as much control. I don't really mind at this point, i just end up burning through a lot more fuel than I used to. It's just something I'll add over time. I like being able to fine tune the temperature according to what I'm working on at any given moment. I made myself another forge shovel today. It's longer and wider than my other one to keep my hand further from the coals and to scoop/push more at a time. I also forged a little hook and welded it to the bottom of the table frame (not really worth showing), so my two coal shovels have a convenient place to hang.

-
natkova, so far that hairdryer has been blowing away steadily for almost a year now, I'm not sure exactly how long to be perfectly honest.. It lives outside (I do cover it up when it rains/overnight). I just have to brush out the air intake every once in a while since it likes to suck up dust and scale and flux and whatever else makes it's way near it. I have to say I'm pretty impressed. Of course I say that and it'll die tomorrow haha, but still. JHCC, have to love duct tape. Also.... Air curtain.... Smart. Thanks for sharing! Hondo, looks good! Keep at it! I've never used antler, but it seems like a somewhat difficult material compared to wood. Also, out of curiosity, when you say you made the brass from scratch what do you mean by that?
-
Looks good, I'd like to move the shop inside soon too, but I'll have to find a new place first.. I'll get there.
-
Jaegers, geez that's no good.. I'm sorry to hear that.
-
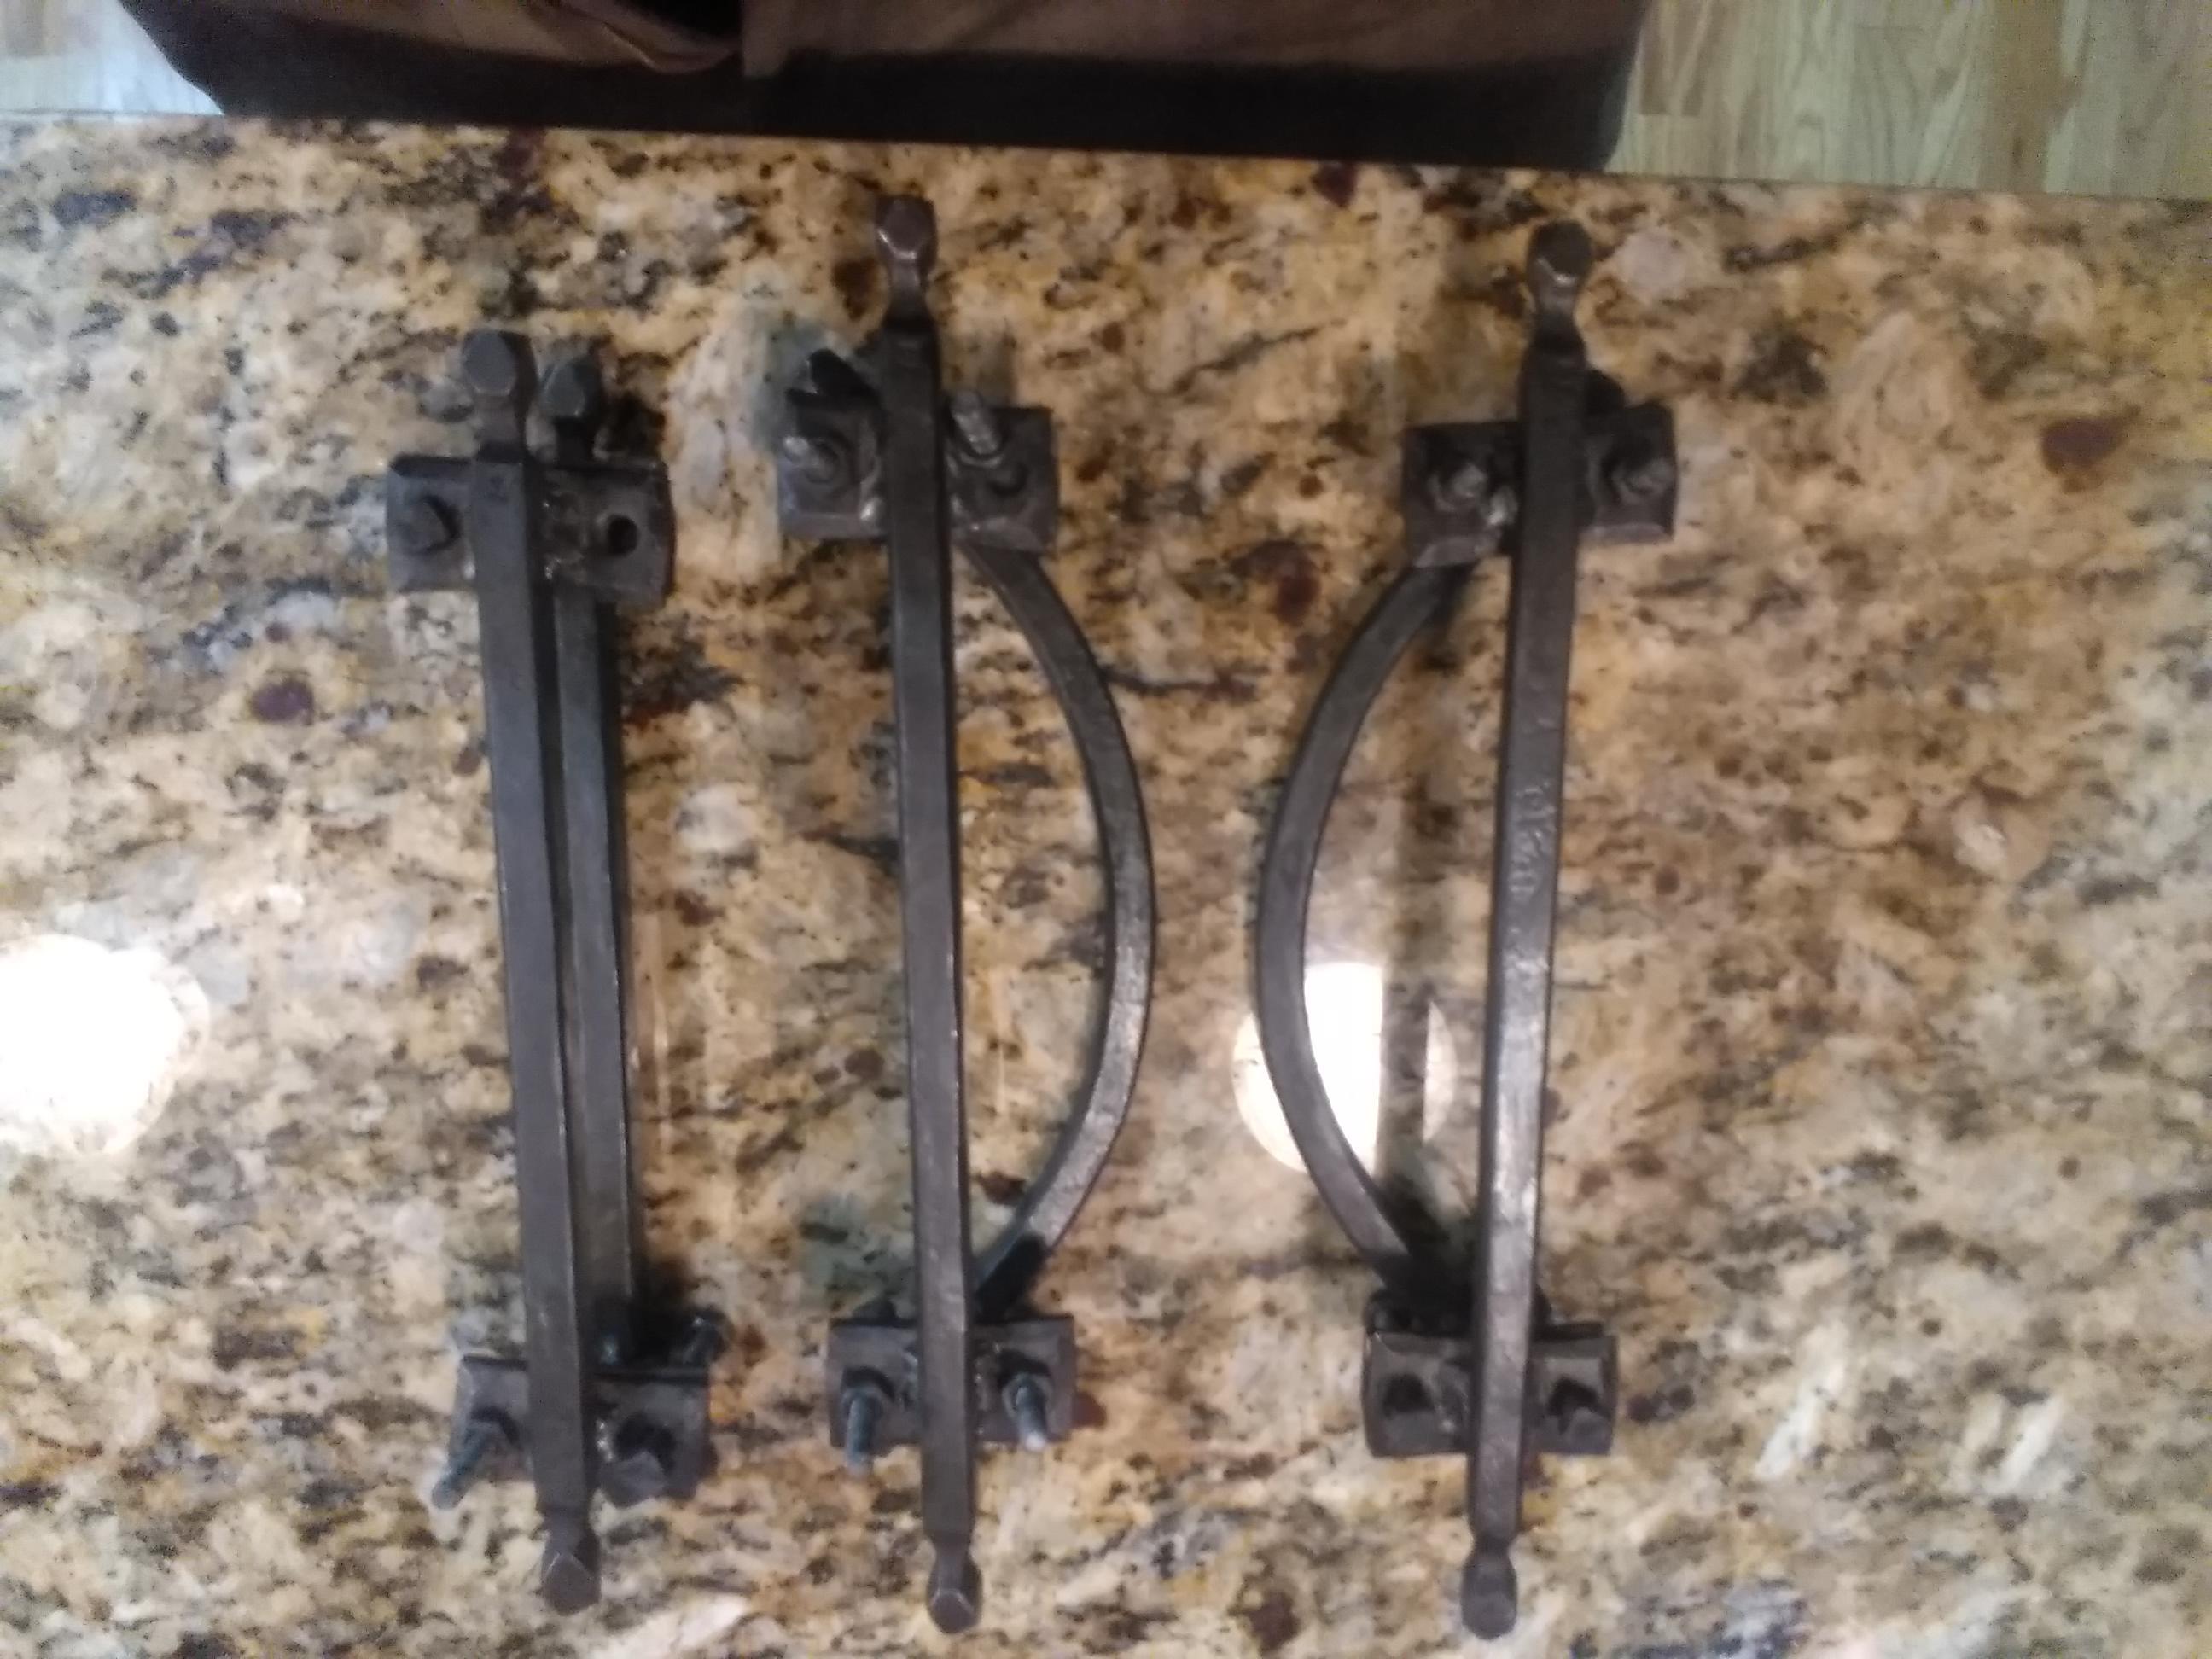
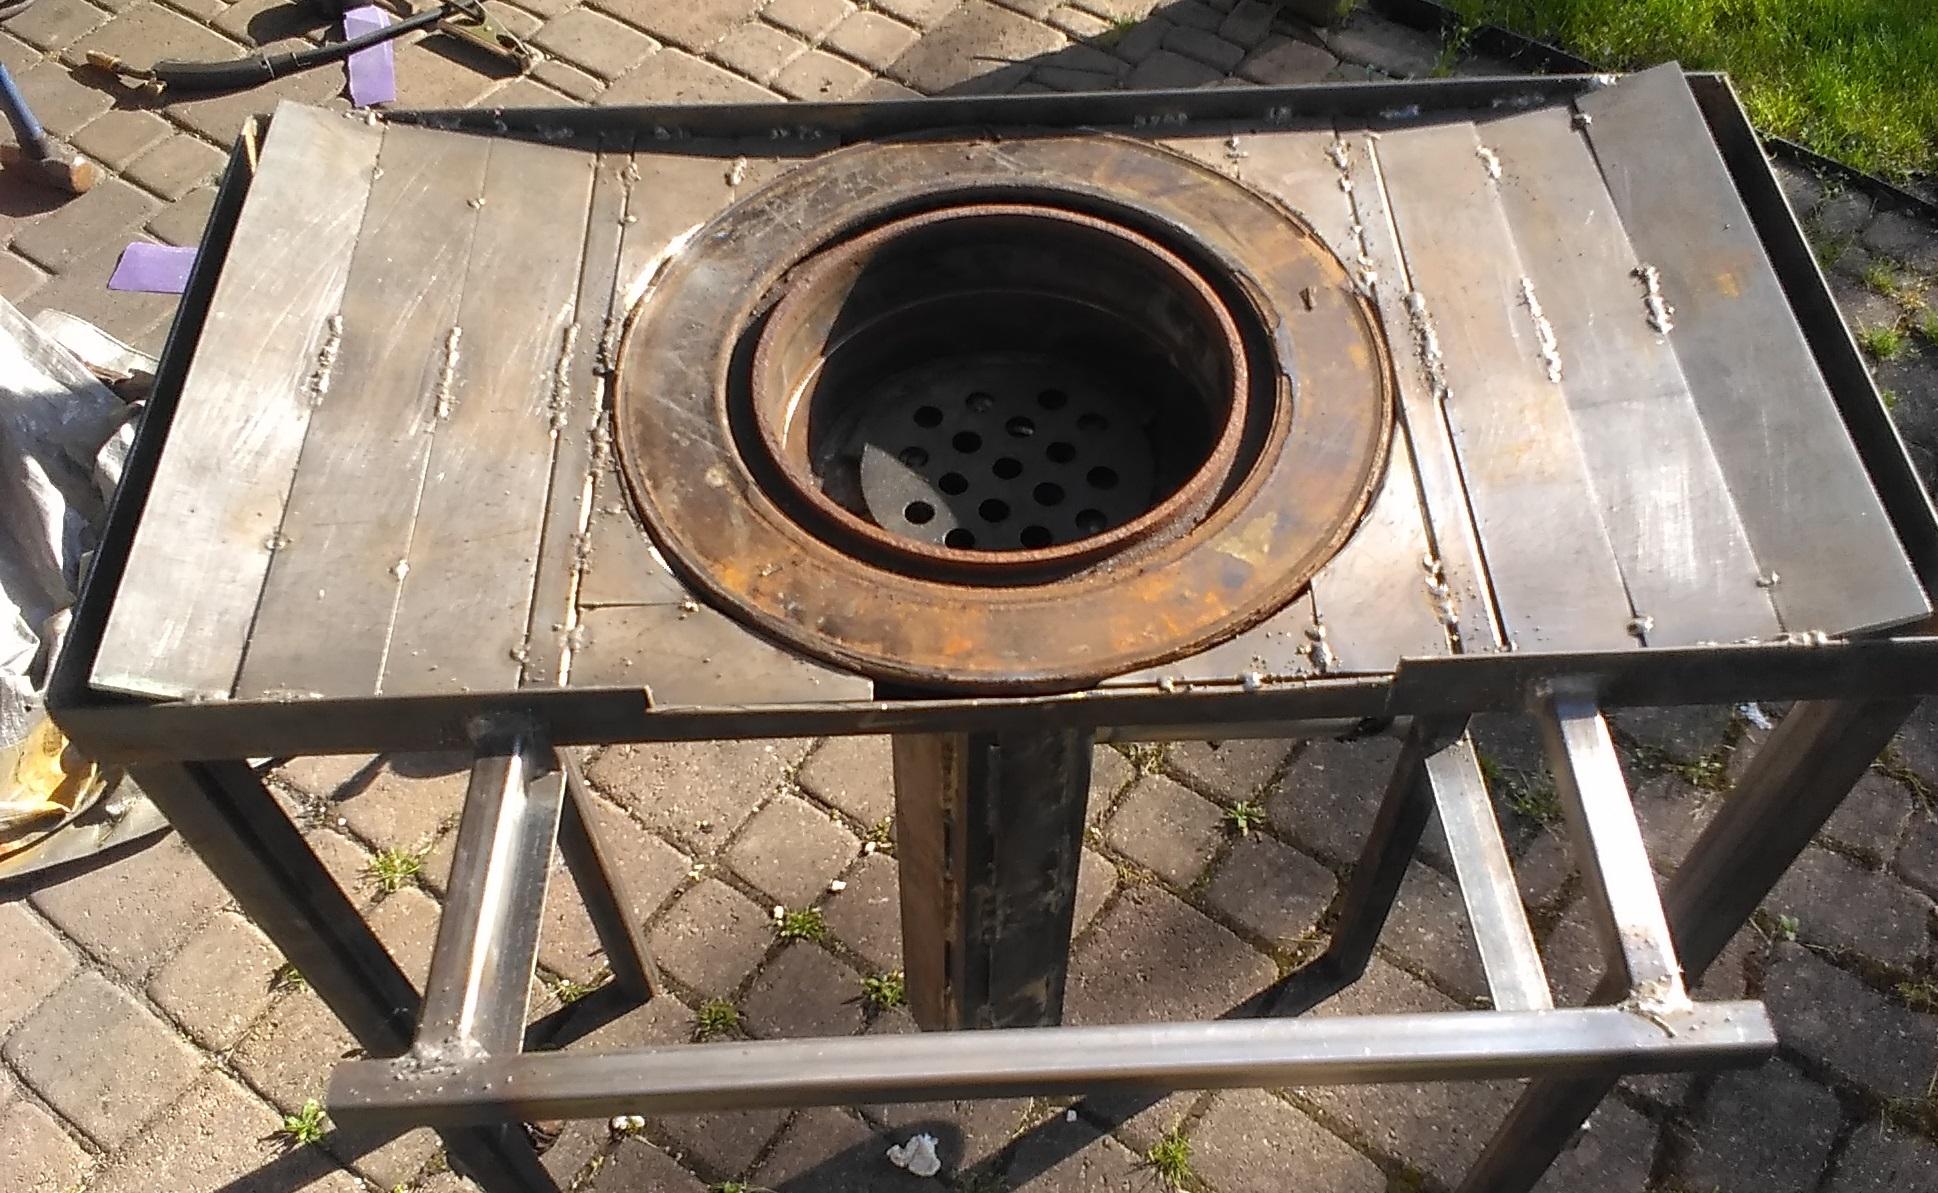
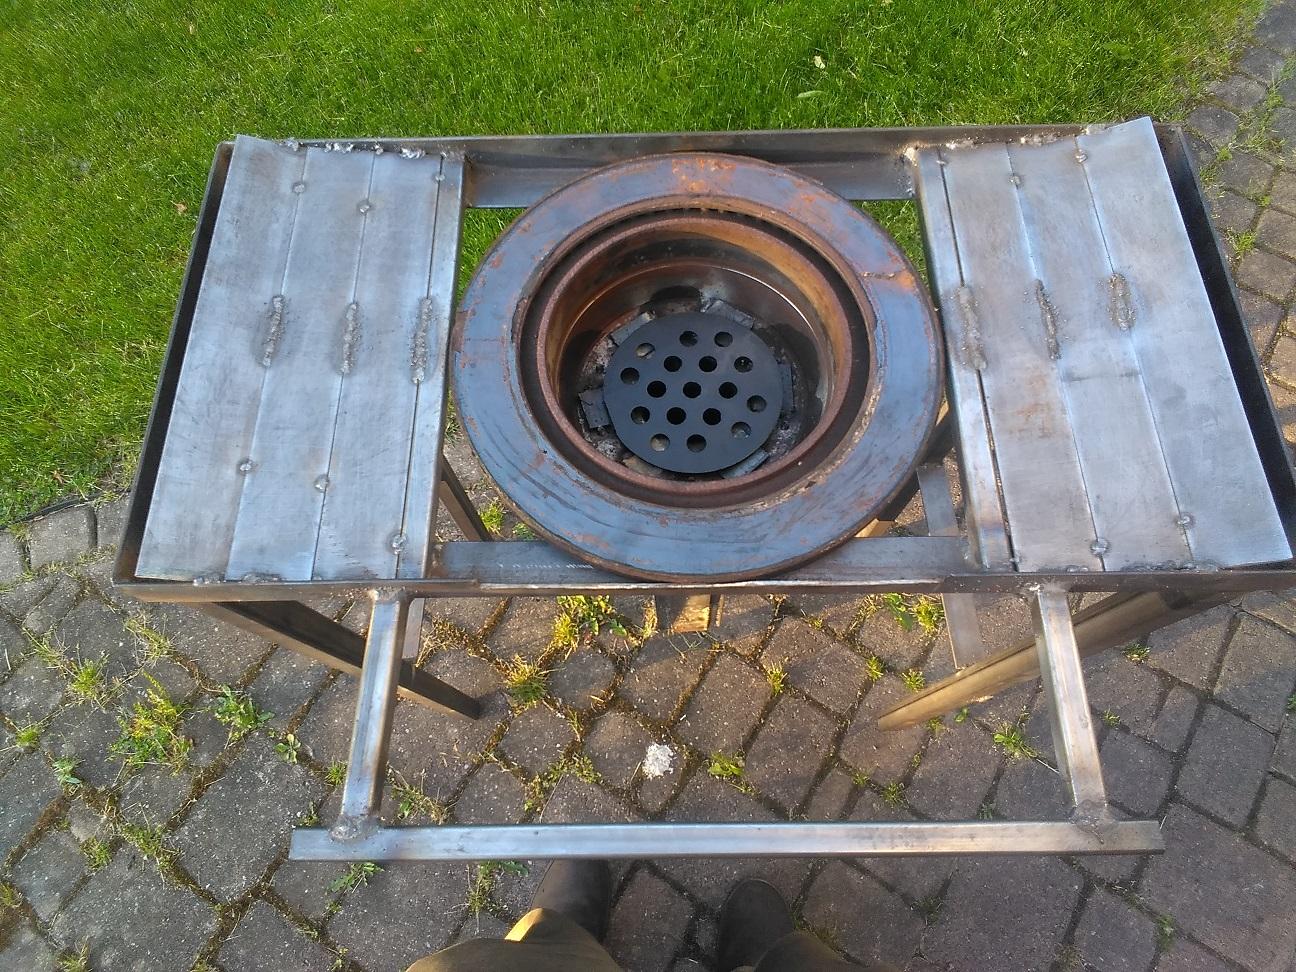
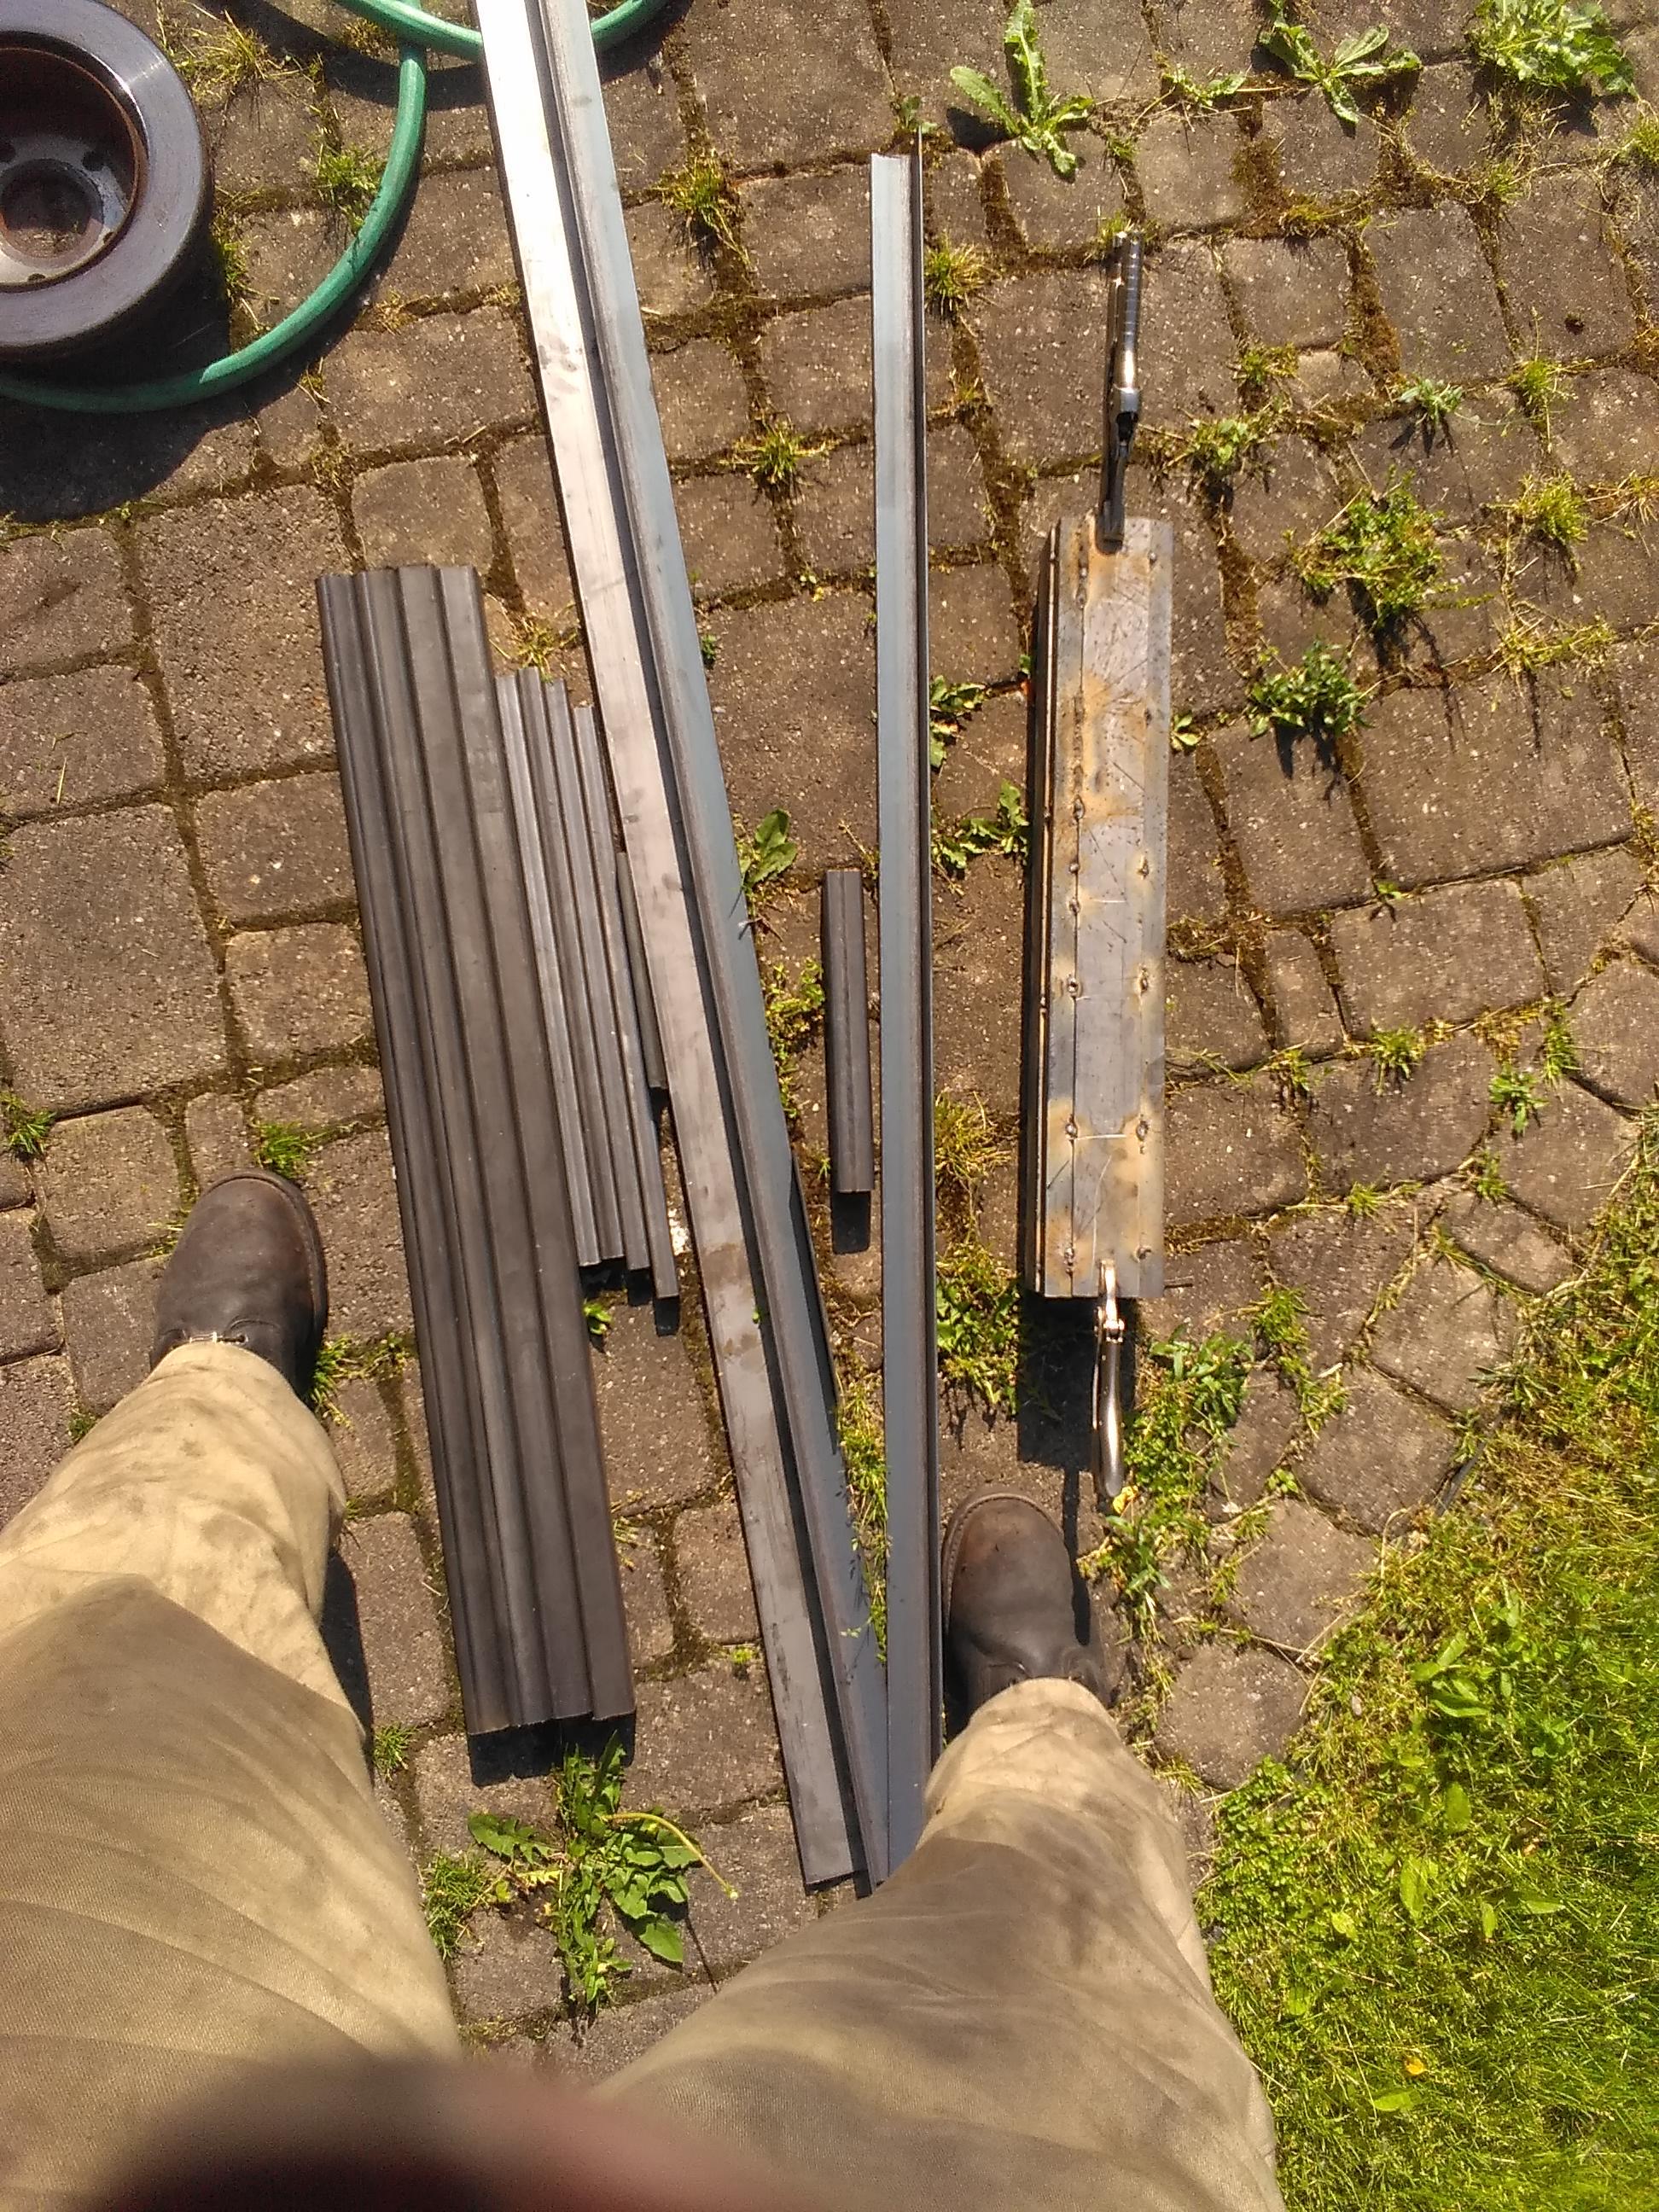
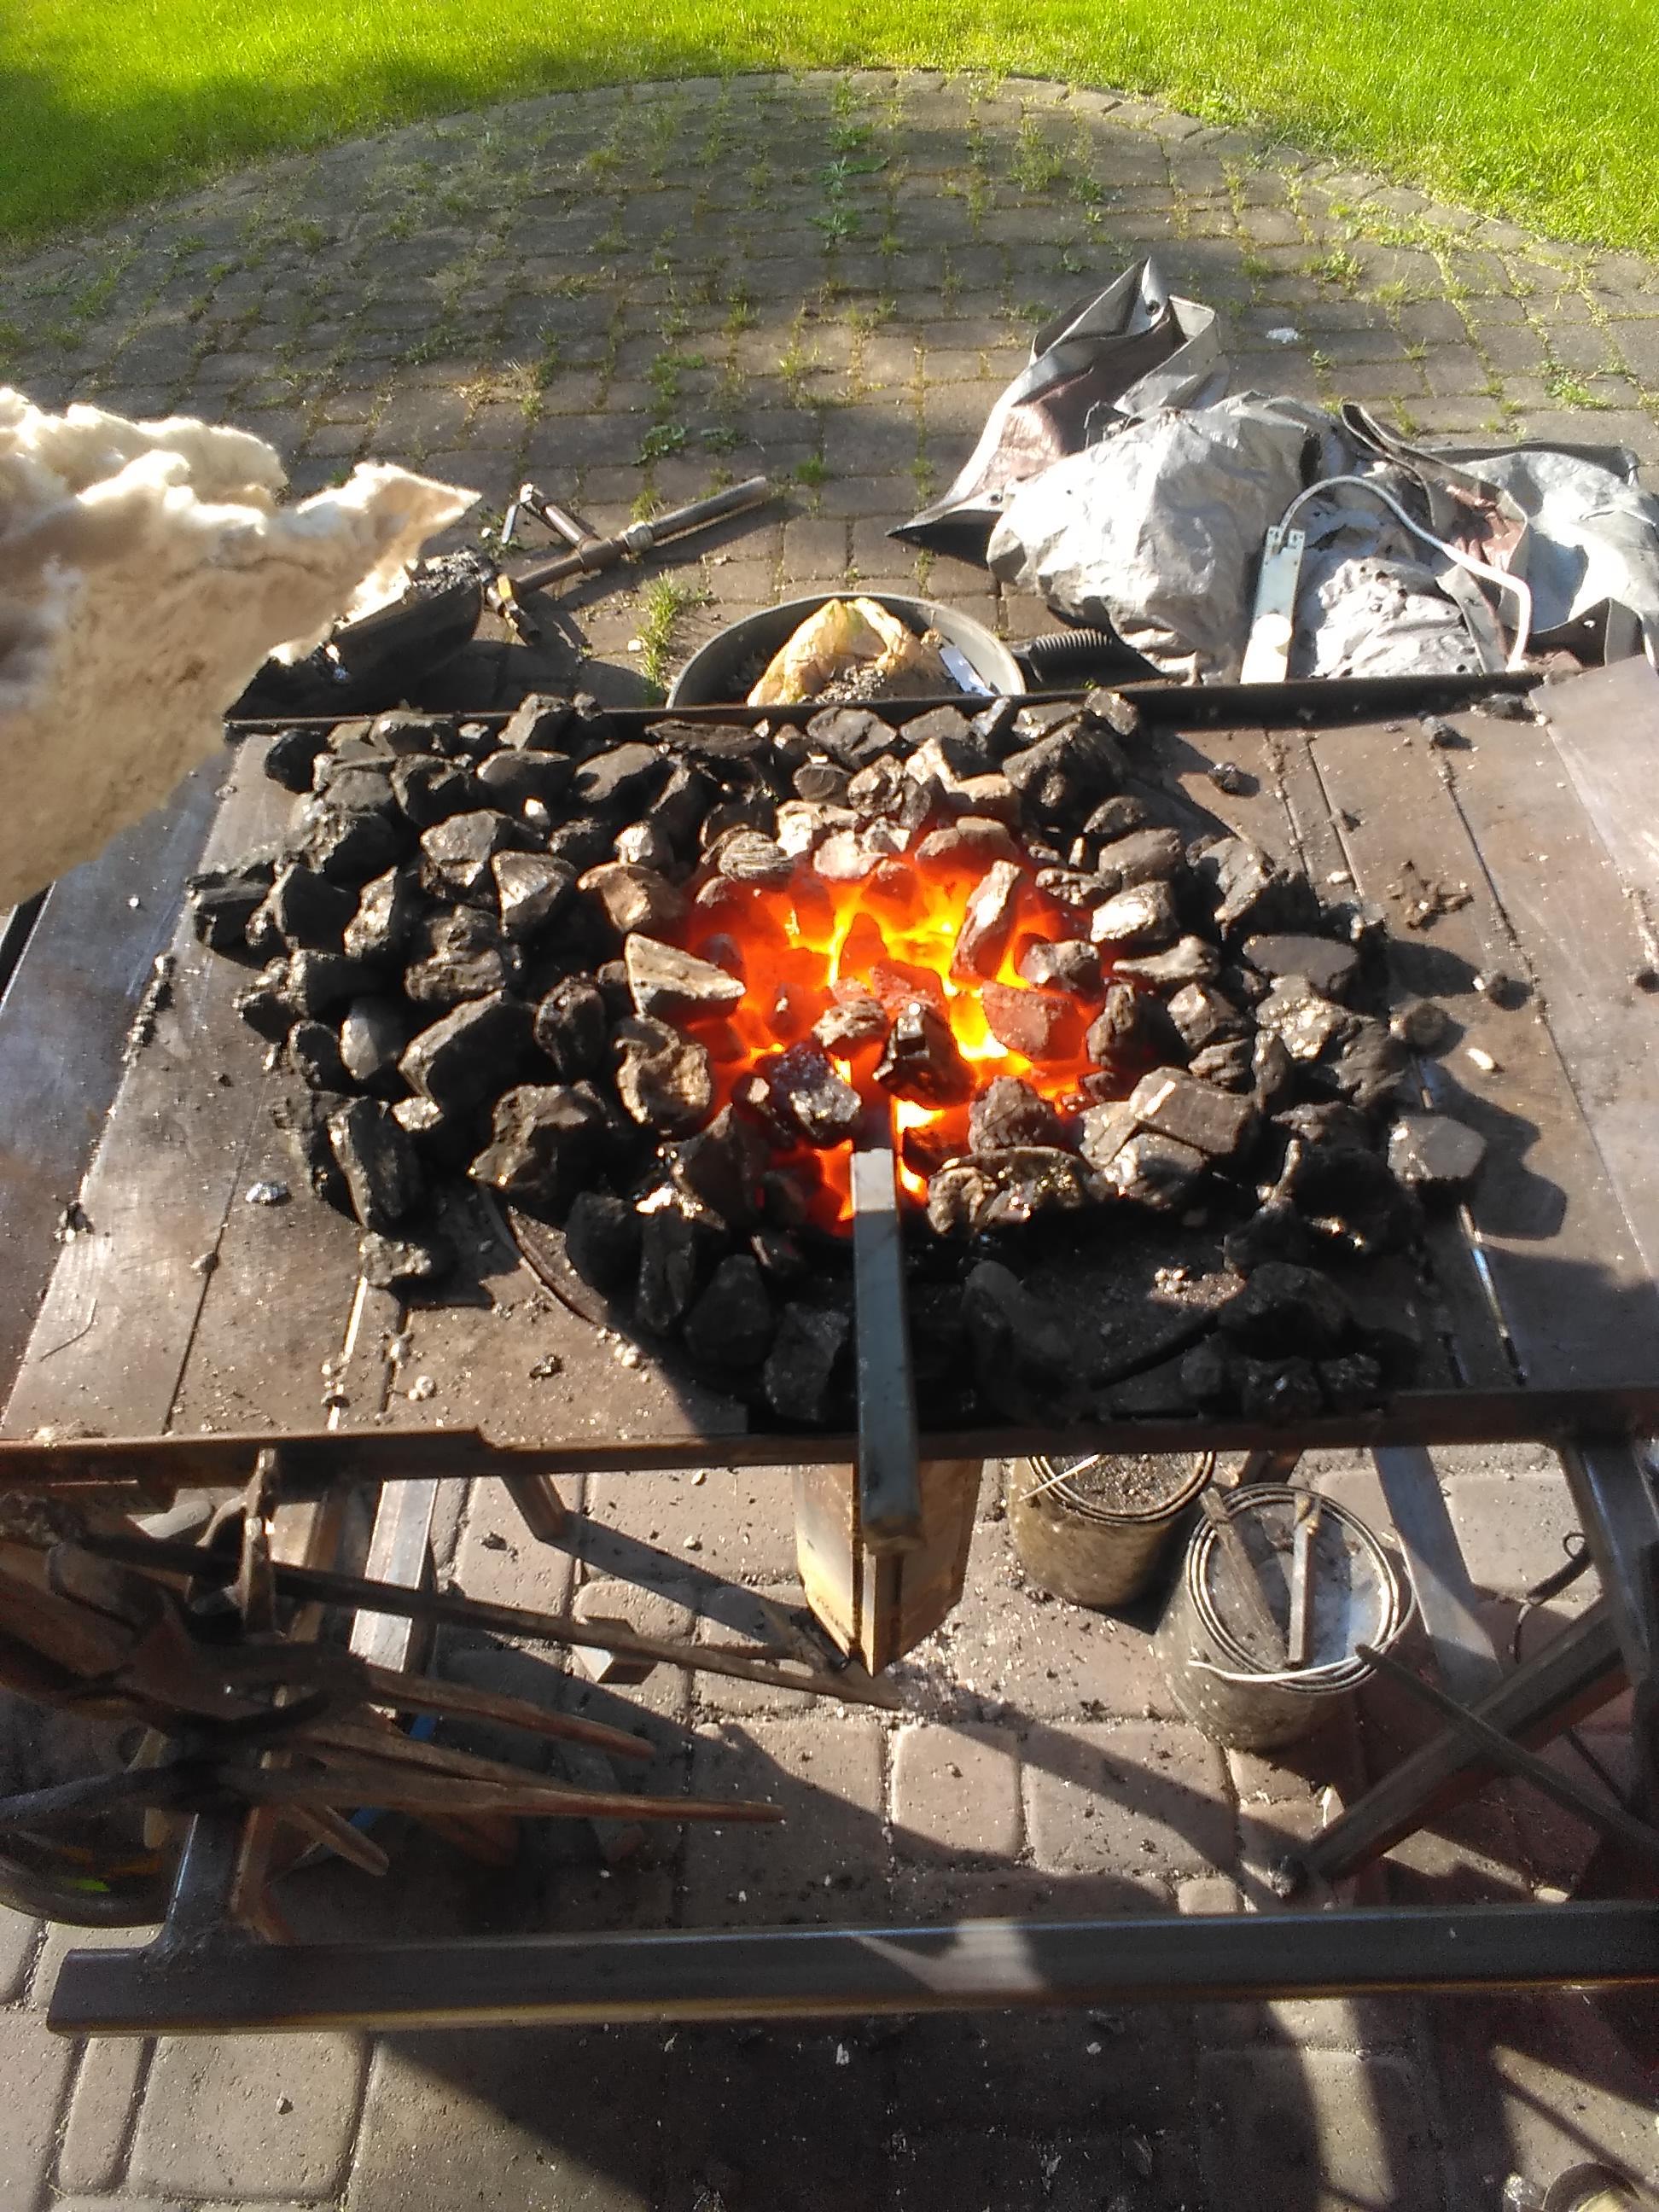
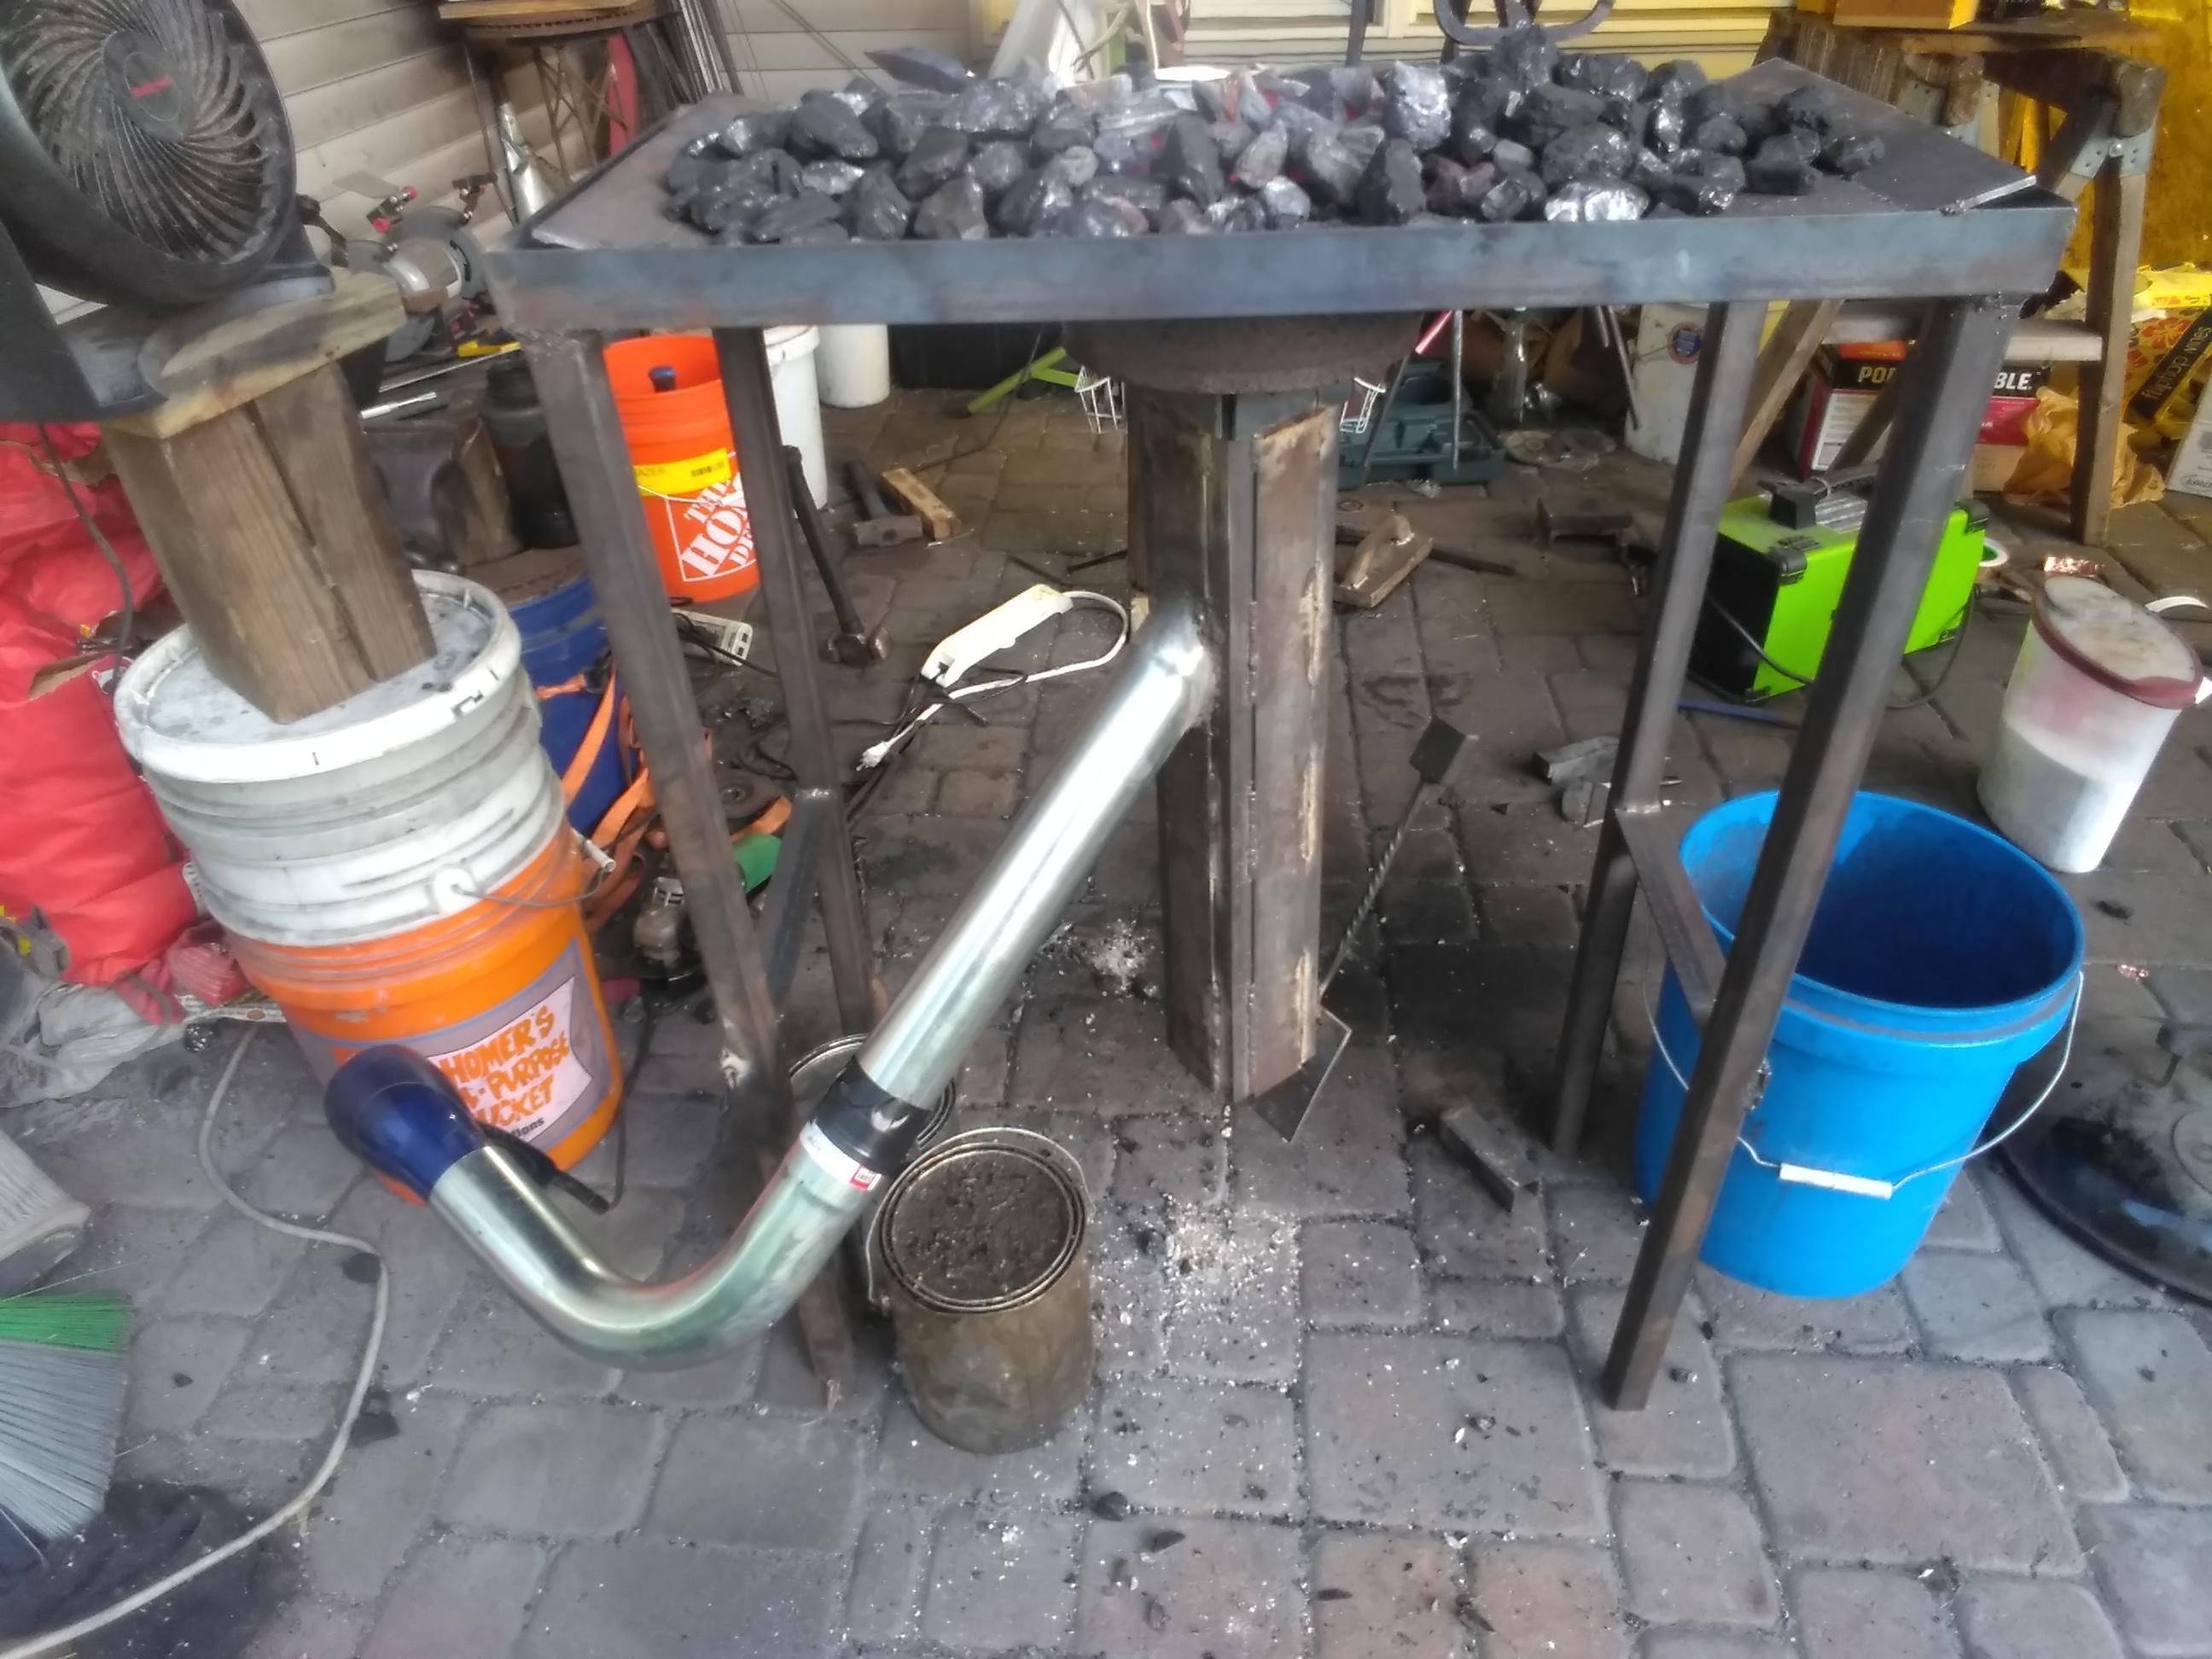
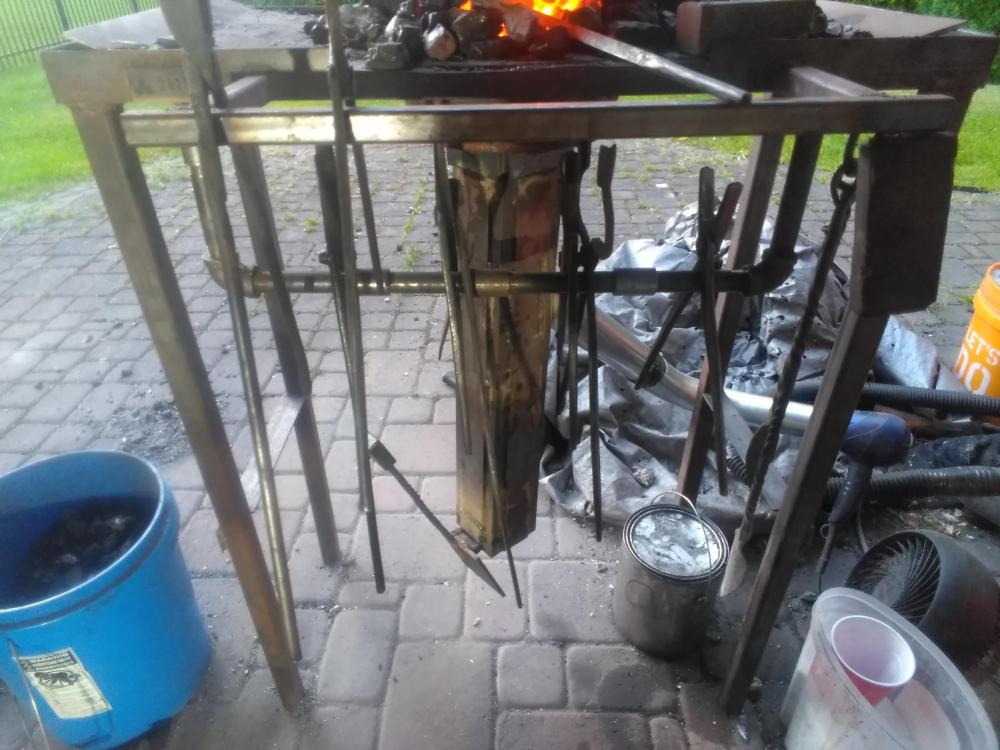
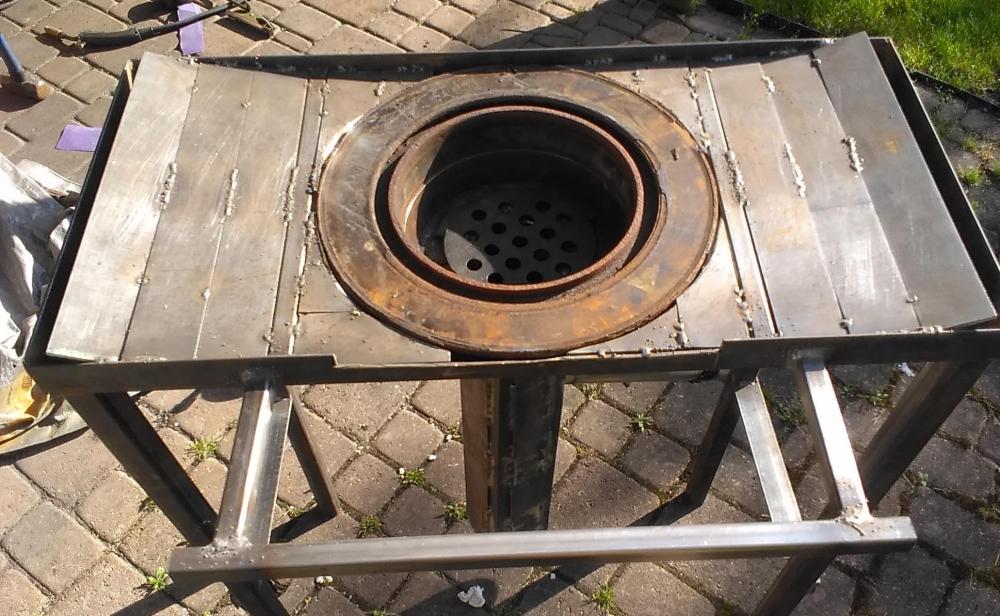
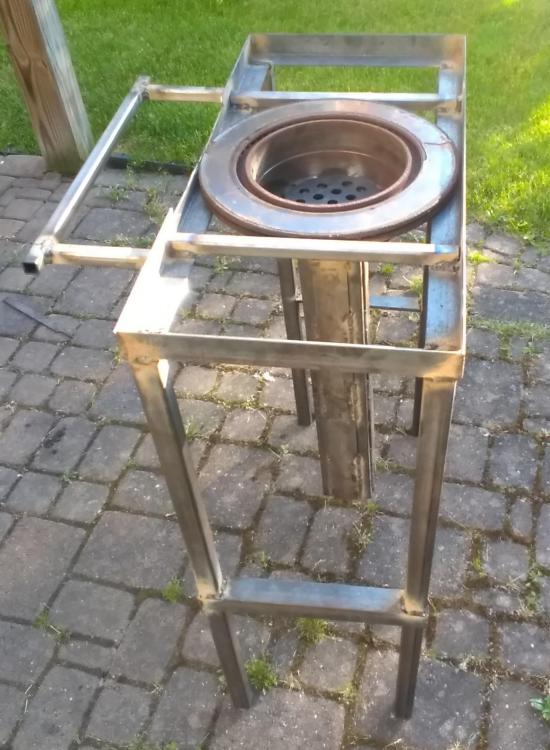
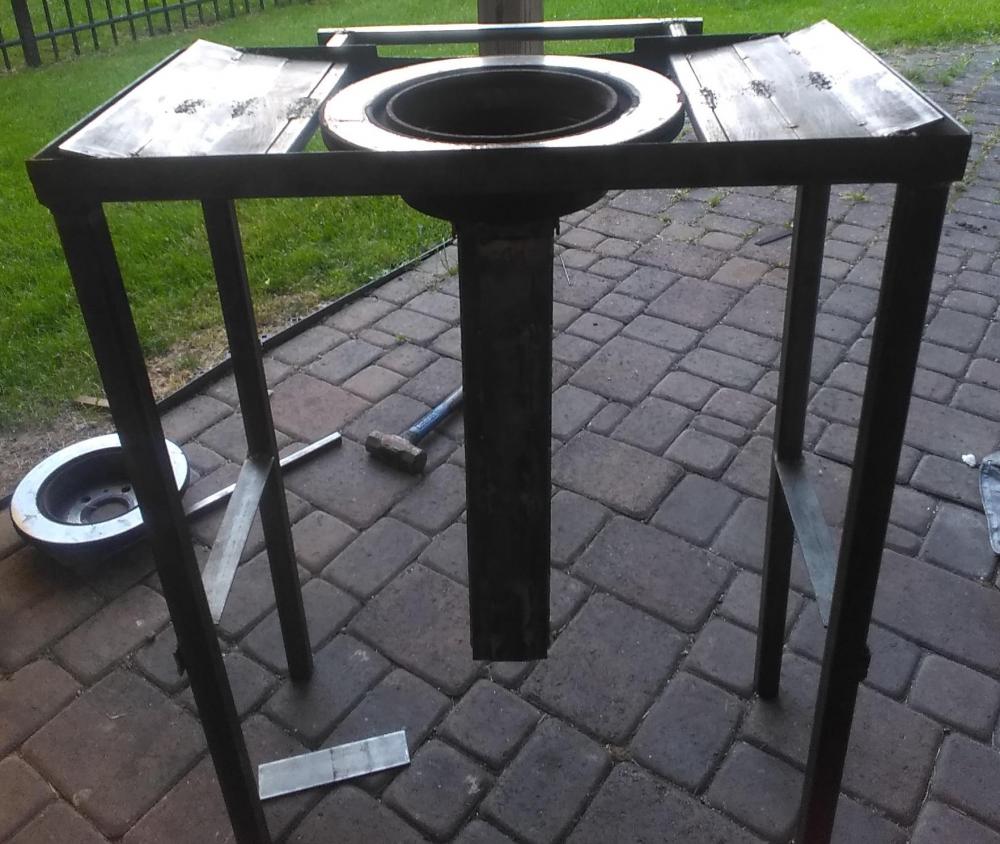
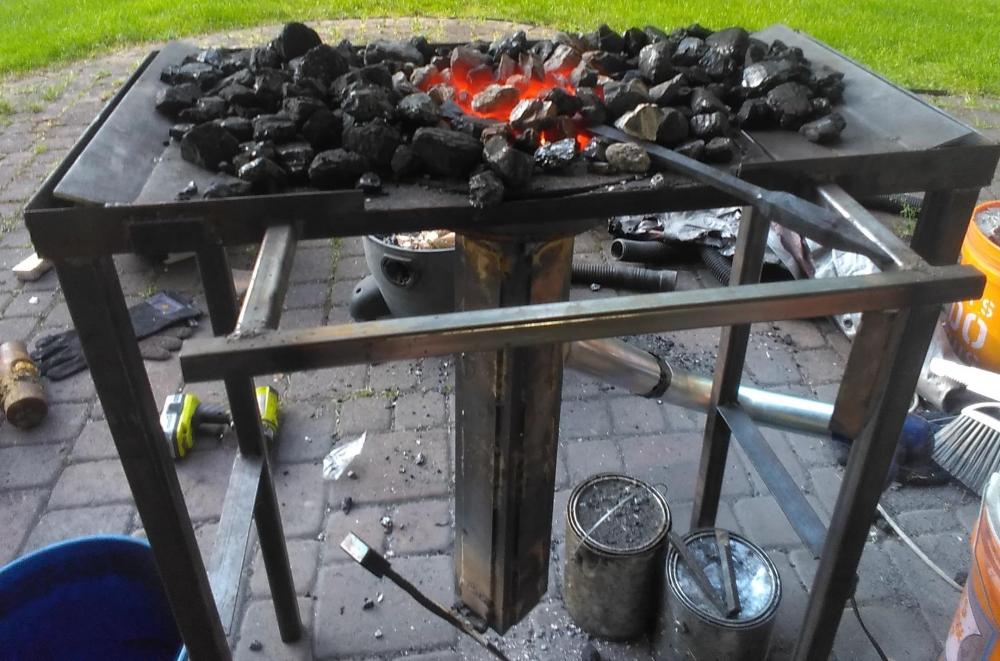
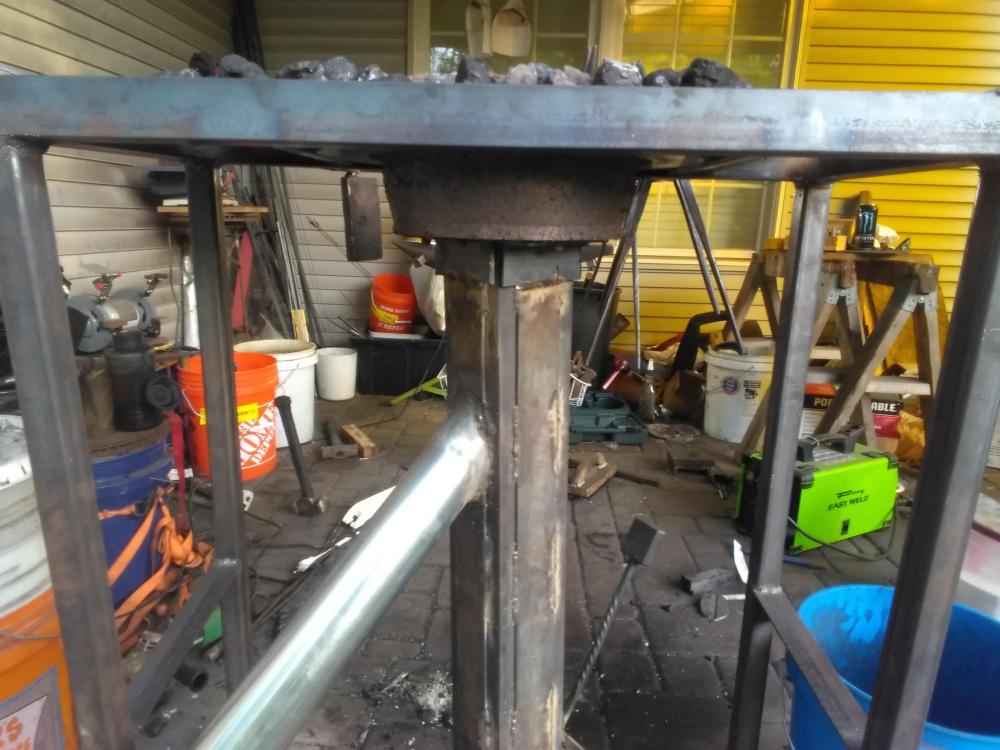
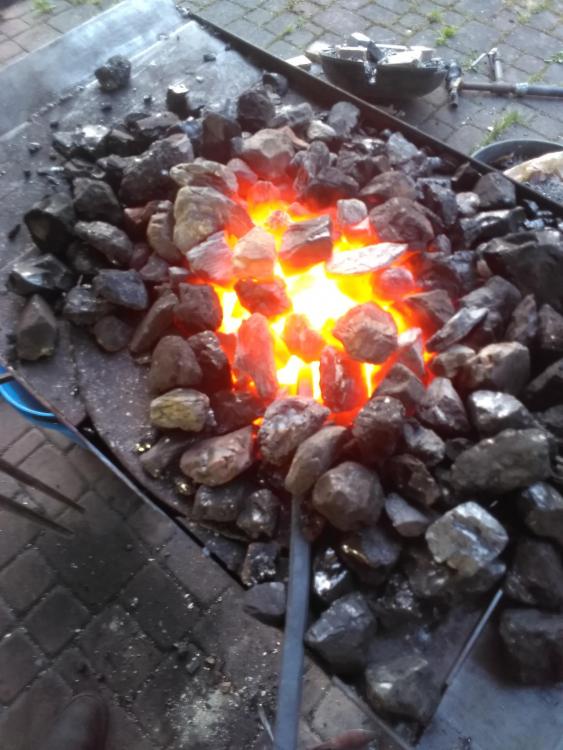
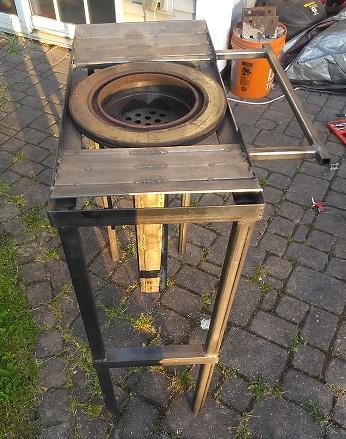
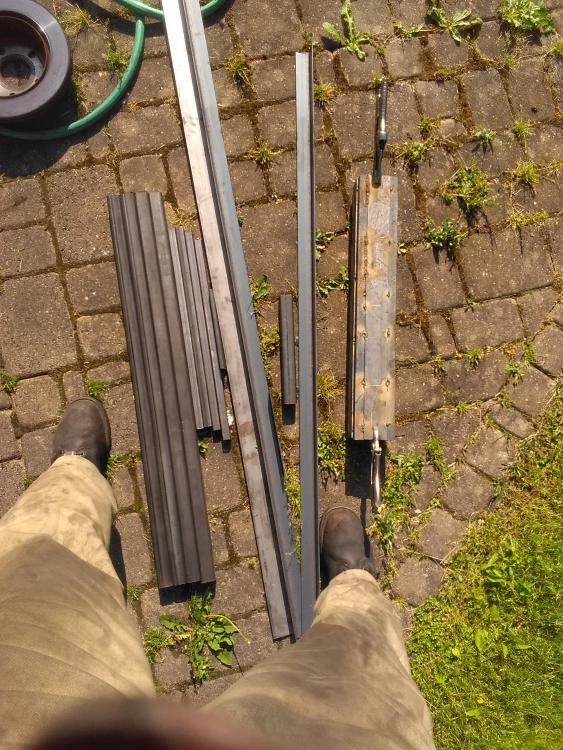
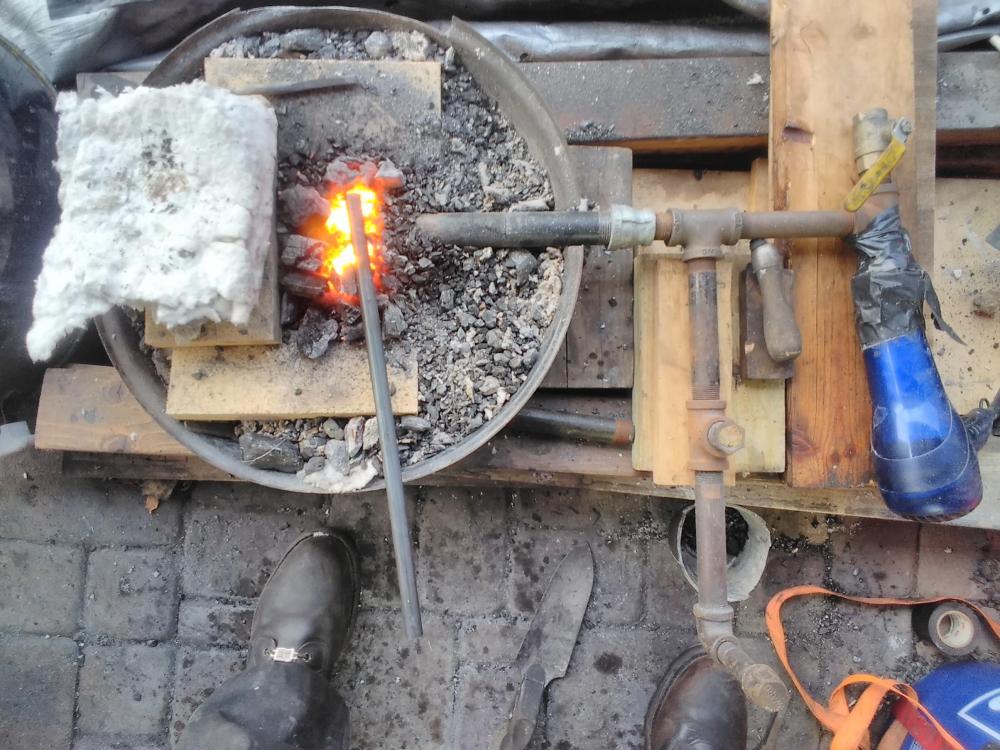
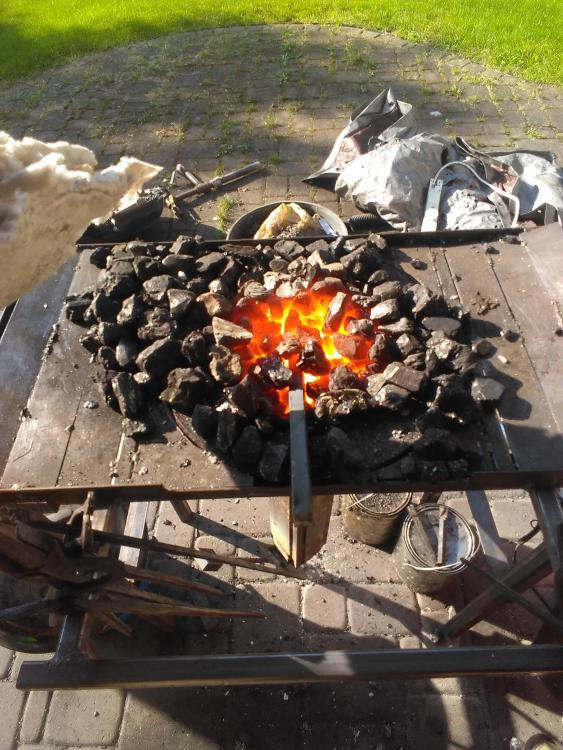
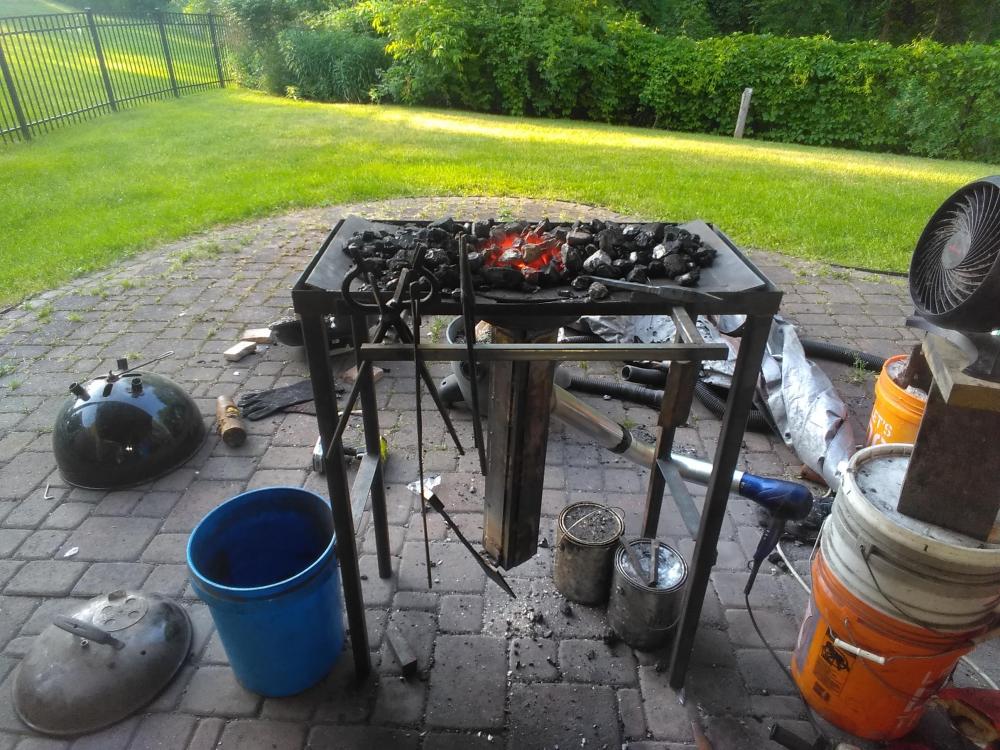
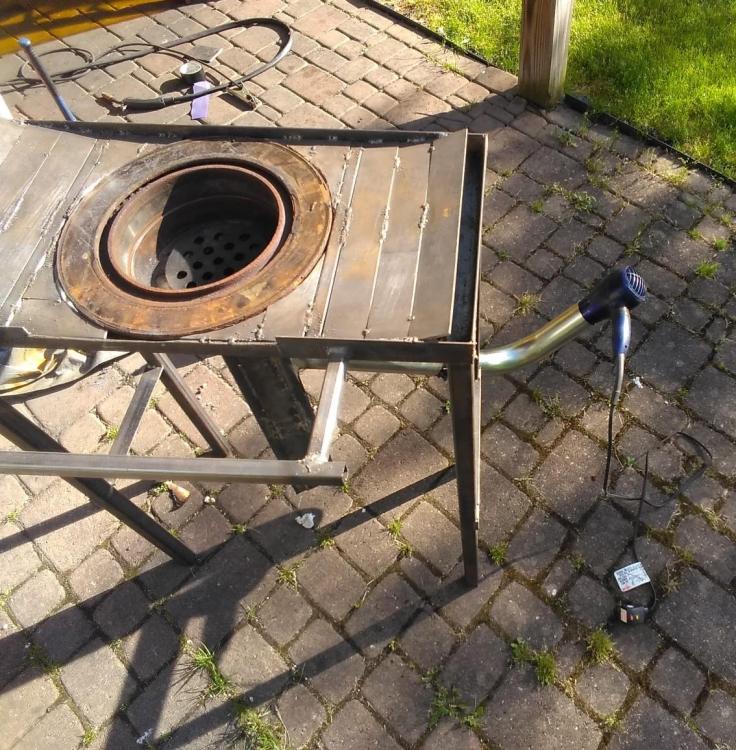
Finally built myself what I would consider a proper coal forge. Quite the upgrade from my little sideblast that has served me well enough for over a year now. Here's a before and after. For anyone interested, here is everything I purchased for the build. Total on everything was ~$75-$80. 20', 1.25" sq. tube [legs] 20', 1.5" x 1.5" x 0.125" angle iron (all was not used) [chimney/table/leg crossbeams] 20', 2" x 0.125" flat stock (all was not used) [chimney/table/hinge] ~ 6', 0.75" square tube (not sure if it was 0.75", they were just picked from the surplus section where my steel supply sells their drops by weight) [tong rack/table cross beams] 3.75": x 5" x 0.25" plate [bottom chimney cover] 8" x 3/8" sq. stock [lever arm] 0.75" x 1.5" x 2" bar stock [counterweight] 5.5" cast iron grate The chimney was welded with 4, 2' lengths of both the angle iron and 1/8th inch flat stock, lap welded with 0.75" of overlap for a total chimney size of 3.5" sq. 4 beads about 4" long at each seam rather than up the whole length (mainly to conserve wire). Four pieces of angle iron were cut and welded around the edges of one end of the chimney. Then the table frame was tacked together and the crossbeams/front rack were added. Followed by the legs. With everything tacked, final welds were made so things didn't get all twisted on me. I didn't take many pictures other than milestones, so here're a few. Holes were drilled in the angle iron on the chimney edges and threads for 3/8-16 cap head screws were drilled and tapped in the bottom face of the brake rotor hat (avoiding the lug holes). I used 6 cap screws. Lug holes were covered with some small scrap pieces I had laying around from previous steps, welded in place. I decided to bolt in the rotor rather than weld it so it can be replaced by either a new rotor or a different firepot in general down the line. Also, so I can take the whole thing apart if need be for transportation. Tabletop was filled in with the flat stock, flush with rotor face. A slight inward curve was added. One end of 18", 2.5" diameter exhaust pipe was cut at ~45 degrees and used to trace the outline for the hole to be cut in the chimney. Hole was hacked out with an angle grinder so the exhaust pipe could be welded in place with the end of the pipe flush with the inside surface of the chimney. Made the counter-weighted lever cover for the bottom face of the chimney, then forged out the hinge (my first to date). Welded all that in place. Somewhat by accident, but in the words of Mr Ross, "We don't make mistakes, we have happy accidents" the hinge is nice and smooth up until about 60 degrees, then it sticks. Which is nice because I can leave it open if I want a reduced airflow to coals, but if I tap it with my foot, it drops shut thanks to the counterweight. Added an elbow to gain easier access to the hairdryer, some coal and we were good to go! After getting to use it for a few hours yesterday there are a few adjustments I'd like to make, mostly firepot geometry/volume and possibly the addition of another tong rack that drops down in a long U below the edge of the table (so everything stored there is further from the heat), so it will be an ongoing project. However, I am very happy with how it turned out. It took 4-5 days, a bunch of cutoff wheels and some thinking, but considering what I spent and how much better this forge is than my last ones, it's not even in the same ballpark. Almost feels like the real deal. I'm interested to hear your thoughts/suggestions/critiques on the design. I know the (rear) brake rotor has some downsides, and I may have gone a little steep with the angle on the air inlet, but so far (one day haha) so good. P.S. Sorry about the messy shop, in my excitement to get it going i didn't really clean up behind me. We've all been there. P.P.S. If you're a new guy or looking to get started and all this seems overkill, my previous forge was an upside down Weber grill lid, with a slot cut out for 1" black steel pipe, a couple valves to regulate the air, some fittings, and some firebrick. All that stuff is either free or pretty cheap (except the pipe and fittings, but ask around. Some people have those sitting somewhere in a dusty box, I got mine for free). I got this far with just that and decided it was time or an upgrade. Remember, a forge is just a thing that holds fuel and blows air (and preferably doesn't burn itself up in the process). A pretty forge wont make you a better smith, but time at the anvil, improvised or otherwise, problem solving along the way certainly will. If you made it this far, thanks for reading haha VID_2020-06-10_19-23-09.3gp


-
Sorry, that should be 0.75" of overlap on the lap welds, not 0.25".
-
Jennifer, thanks! Doesn't hold a candle to your trailer build! But it was still a fun, and long overdue, project. I'm sure I will make improvements over time as I use it more. I tried to design it as disassemble-able as possible to accommodate for that. I definitely hear you on the dust/ash/etc collecting at the elbow, I ended up putting it at that angle since I was worried about not having enough airflow to accommodate the much larger firepot. That chimney isn't welded all the way down the seams, just 4-5" beads spaced out. I decided it wasn't worth the wire since it was already a pretty good fit between the flat surfaces (there's 0.25" of overlap on all the lap welds). Also, since everything is attached to the bottom of the rotor with 6 cap screws there are some gaps at that joint, mostly at the corners. All that is to say I expected that the longer air remained in the chimney, the more would escape. So I wanted to direct it, more or less, right at its target. Admittedly maybe a little too much so. I did cut the end of the pipe at a ~45° angle so it sits flush with the inside surface of the chimney to hopefully limit the amount of ash that falls straight down into it when the "blower" is turned off (that hairdryer is a champ, it's been running several hours a day almost daily for about a year in less than ideal conditions). I ended up adding the elbow to put the hairdryer closer to me and the power strip so I can switch it on and off easier. Fortunately I can always pop off the elbow and clear out anything that collects at that low point over time. Which I agree is inevitable.
-
Finally built myself a proper forge. My last one worked I suppose, but was on the ground. Which led to long days hunched over and was really hard to get to welding temperatures. Here's a before and after. It only ended up being about $75 to put together, and I am very pleased with results. The brake rotor is only dropped in place and bolted to the tuyere, so eventually it can be replaced with something else, it's not a perfect firepot, but it's a heck of a lot better than I had before. Today was the first day I got to fire it up, so there are a few adjustments I want to make tomorrow (mostly with the volume/sharp edges of the rotor hat), but still. I'm happy. I even made my first hinge, which works as intended. I don't know how to resize the video.... which is obnoxiously large.. Sorry Glenn/everyone, I'll try again after posting. I'll also throw in a couple of things I made last week. VID_2020-06-10_19-23-09.3gp


-
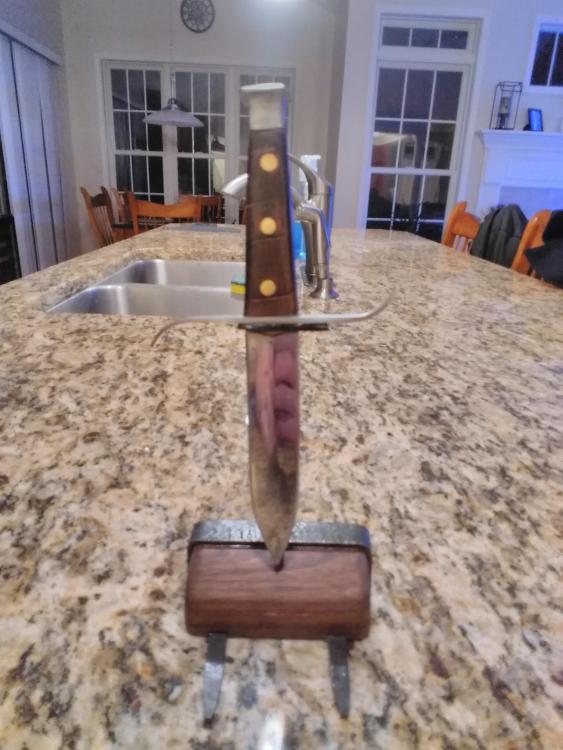
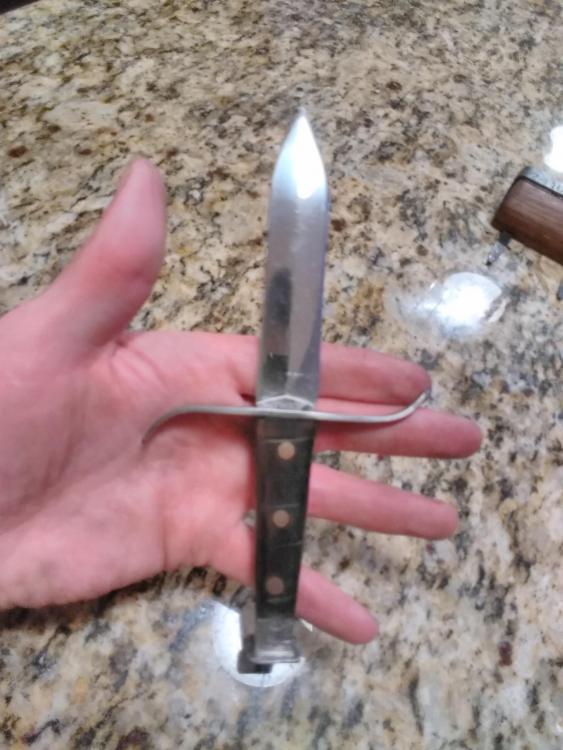
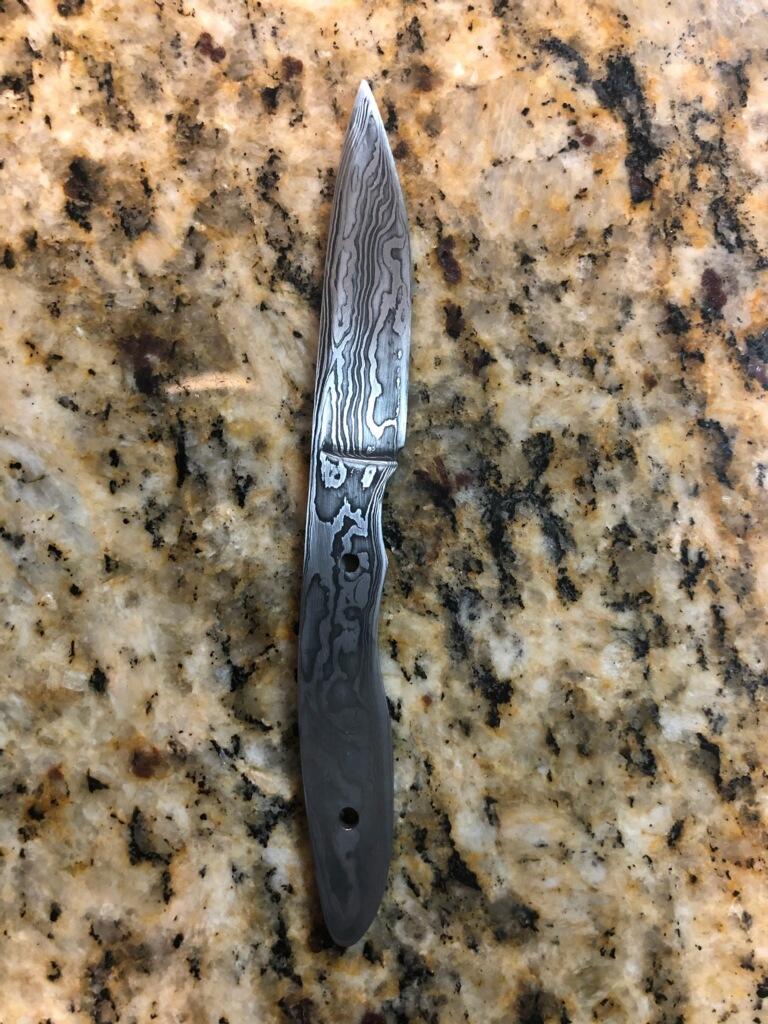
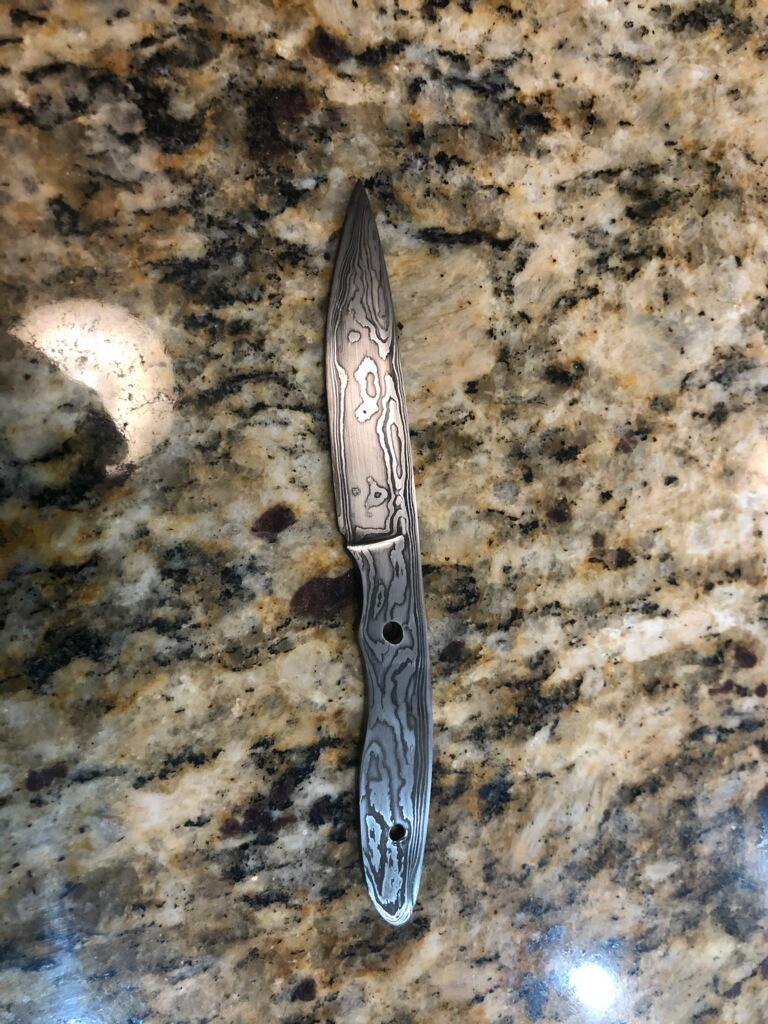
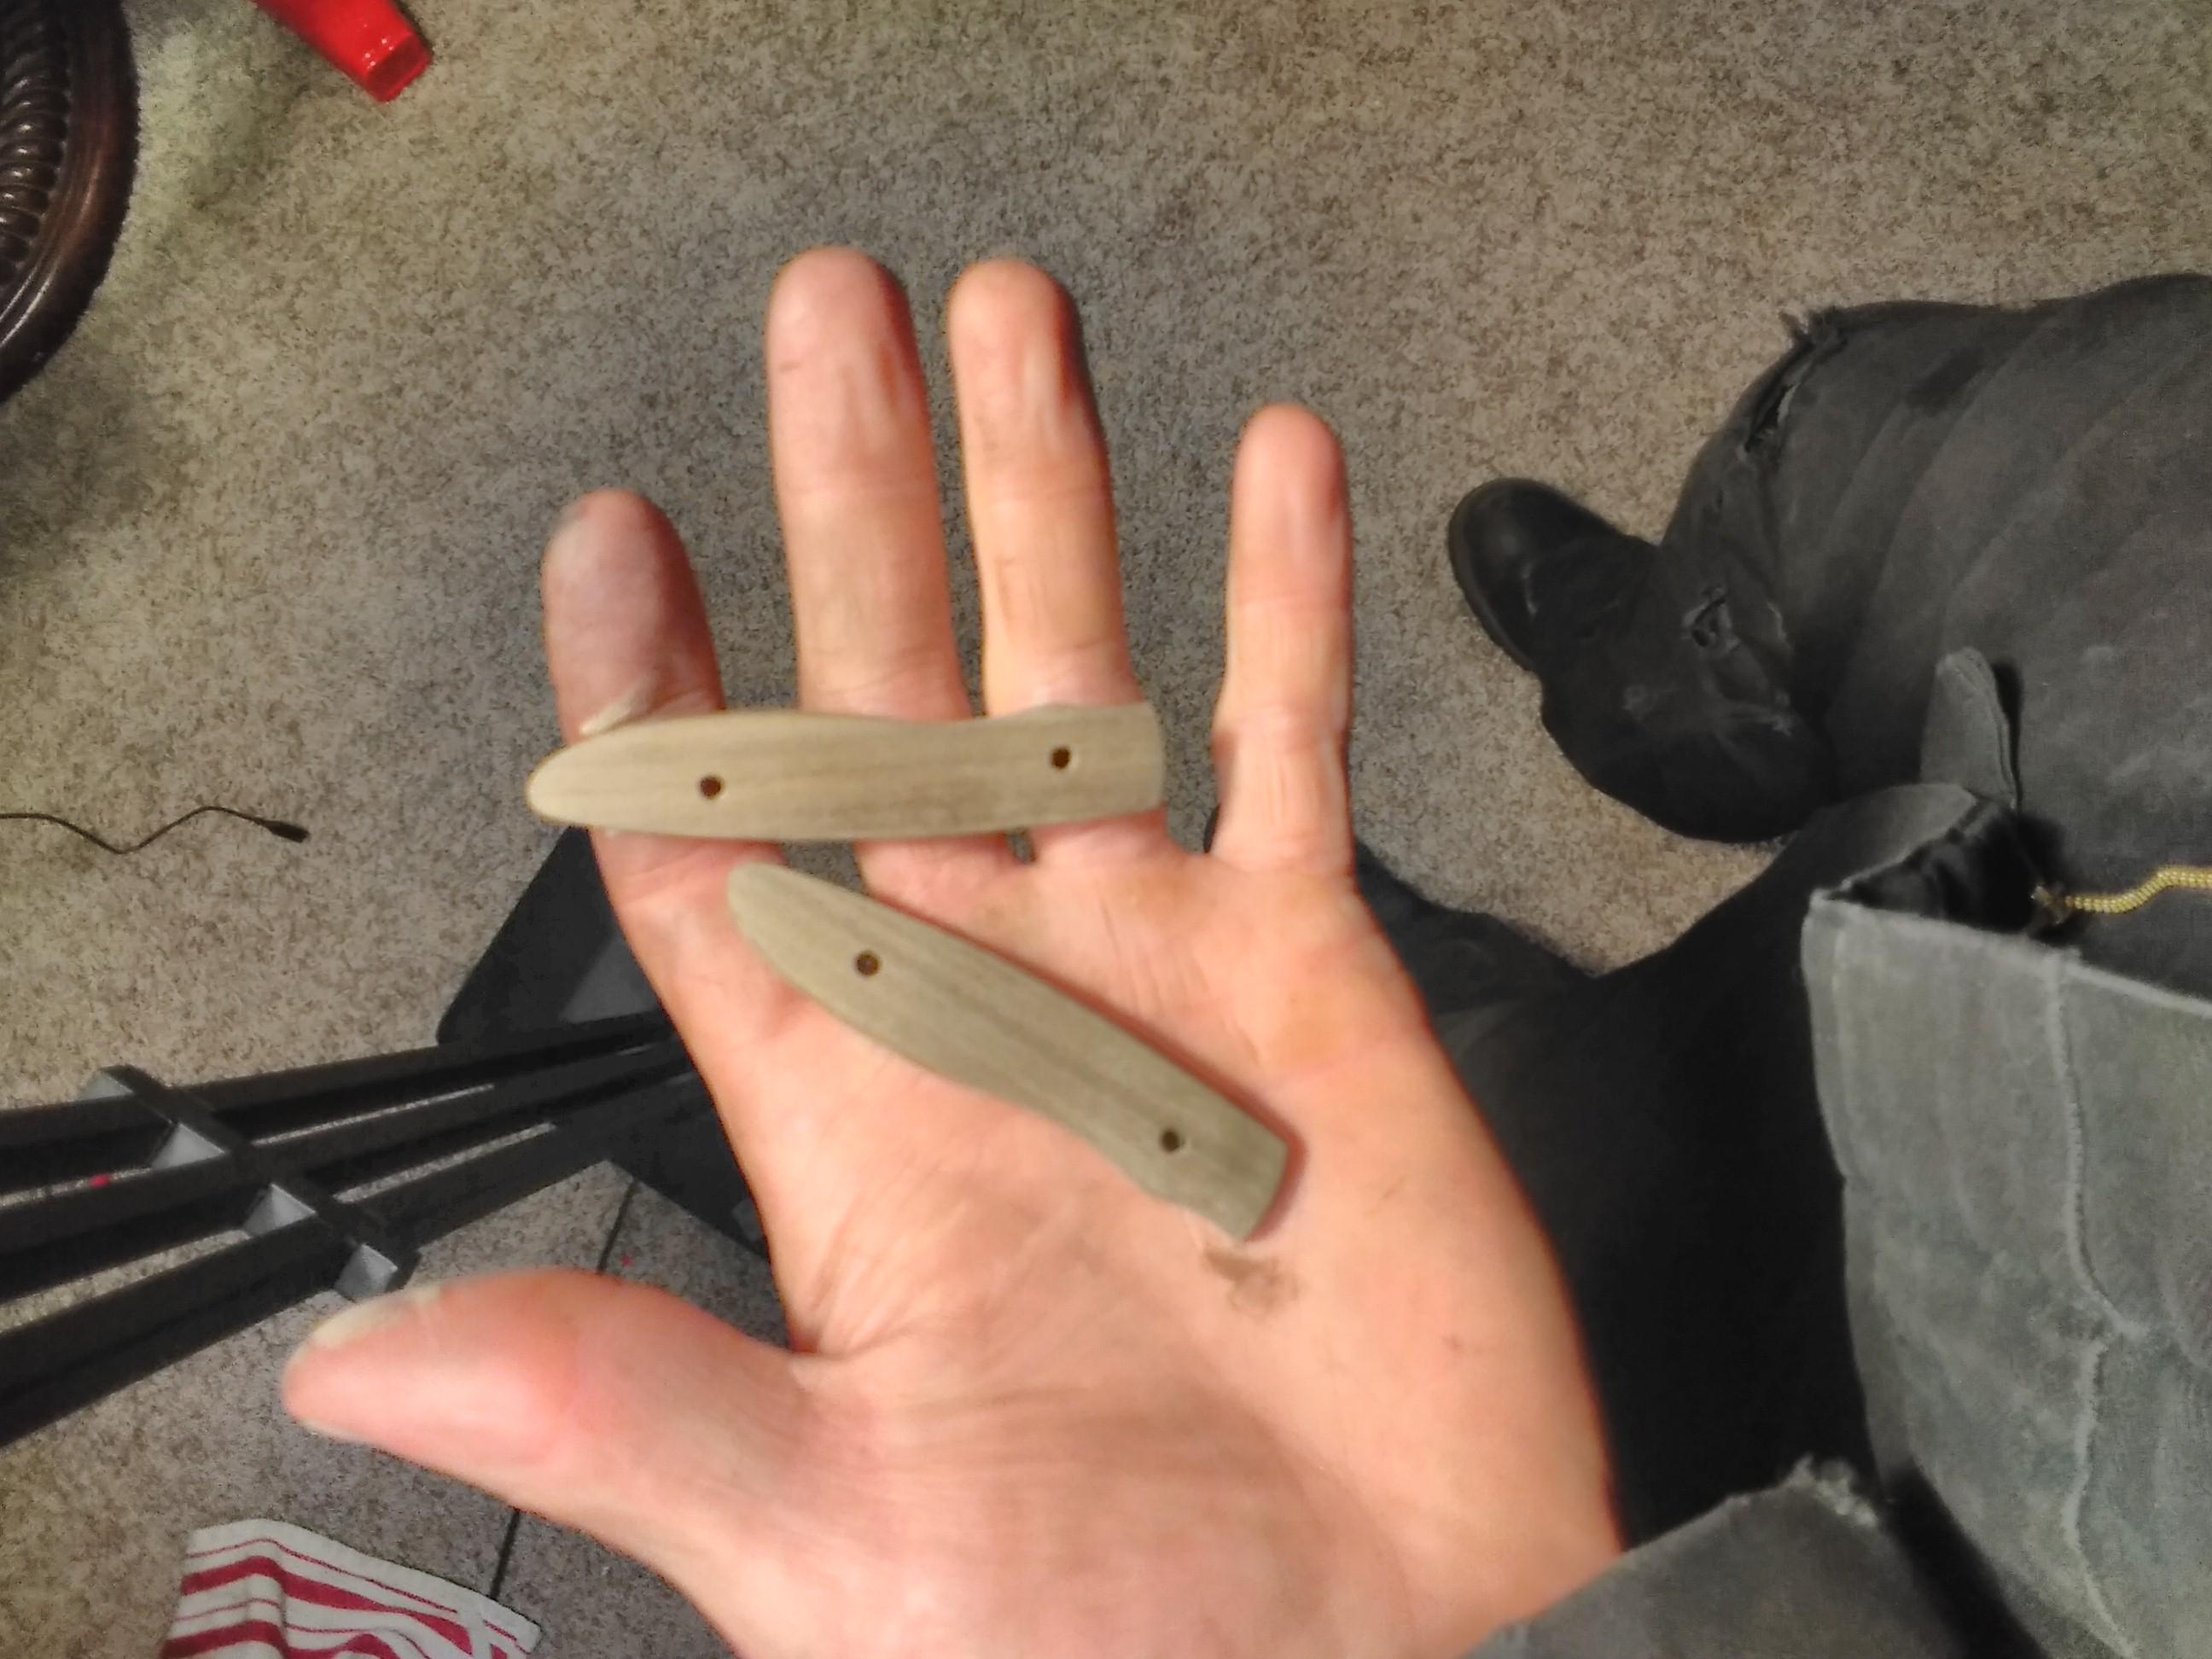
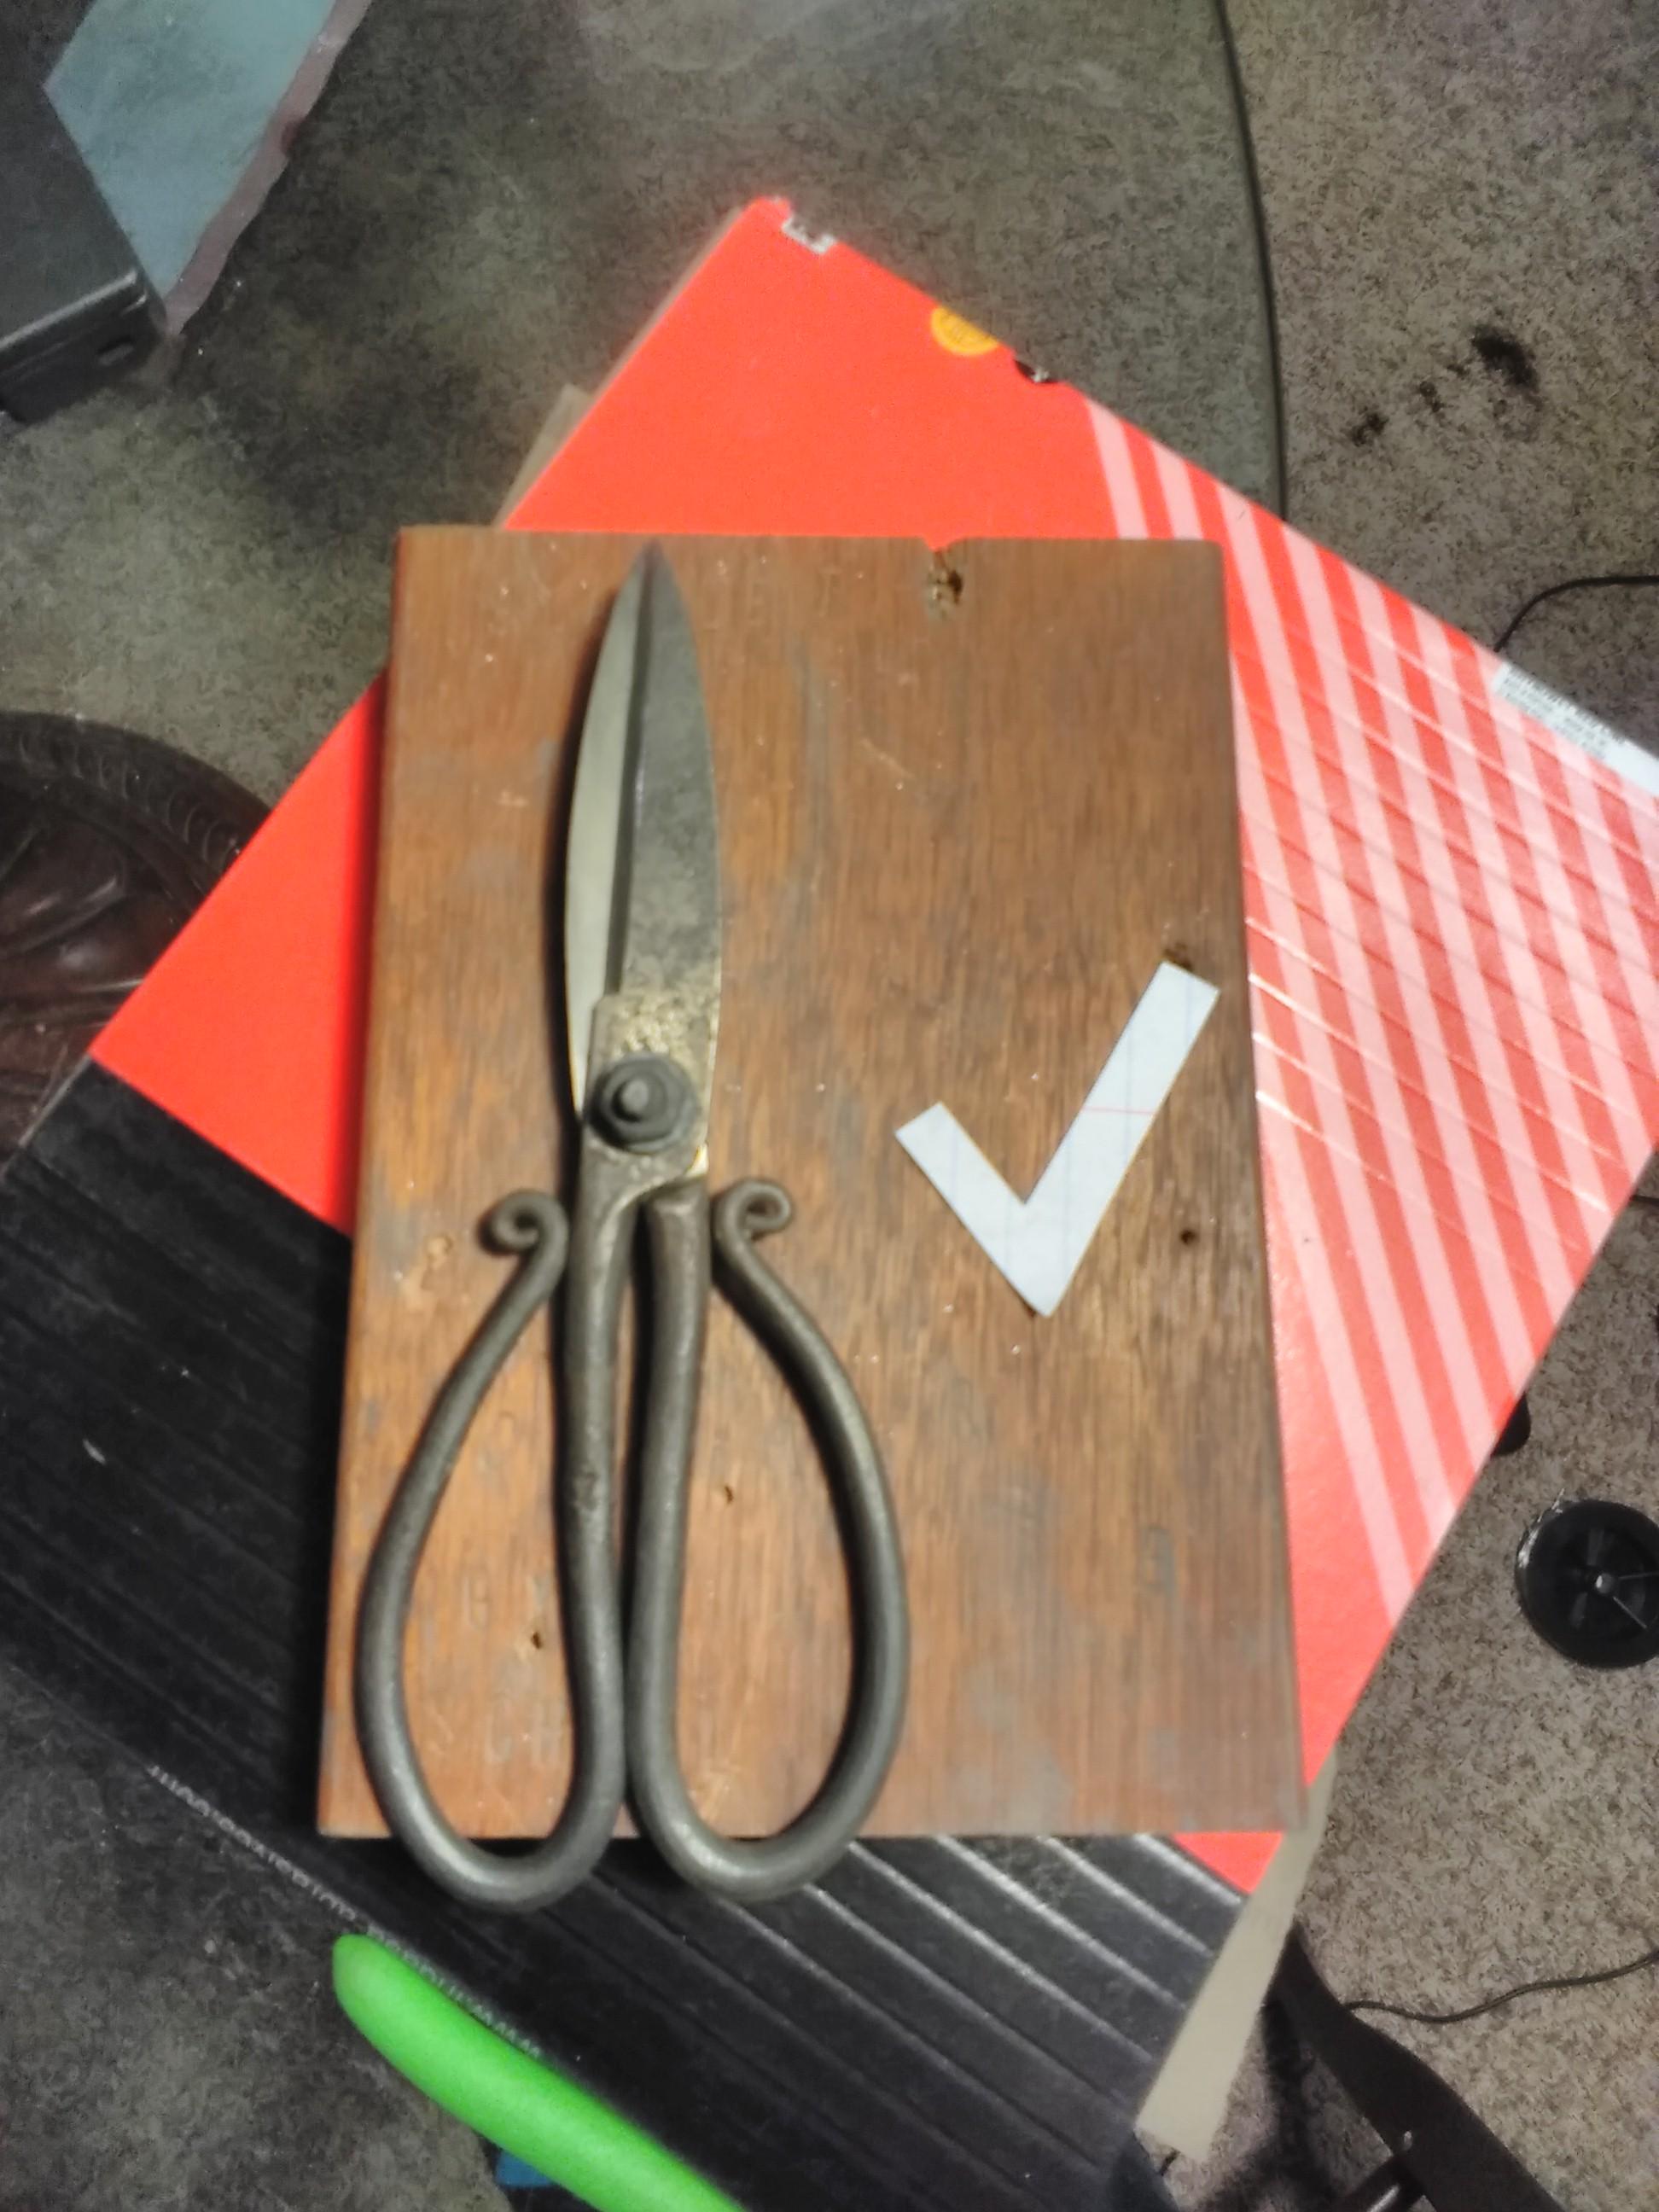
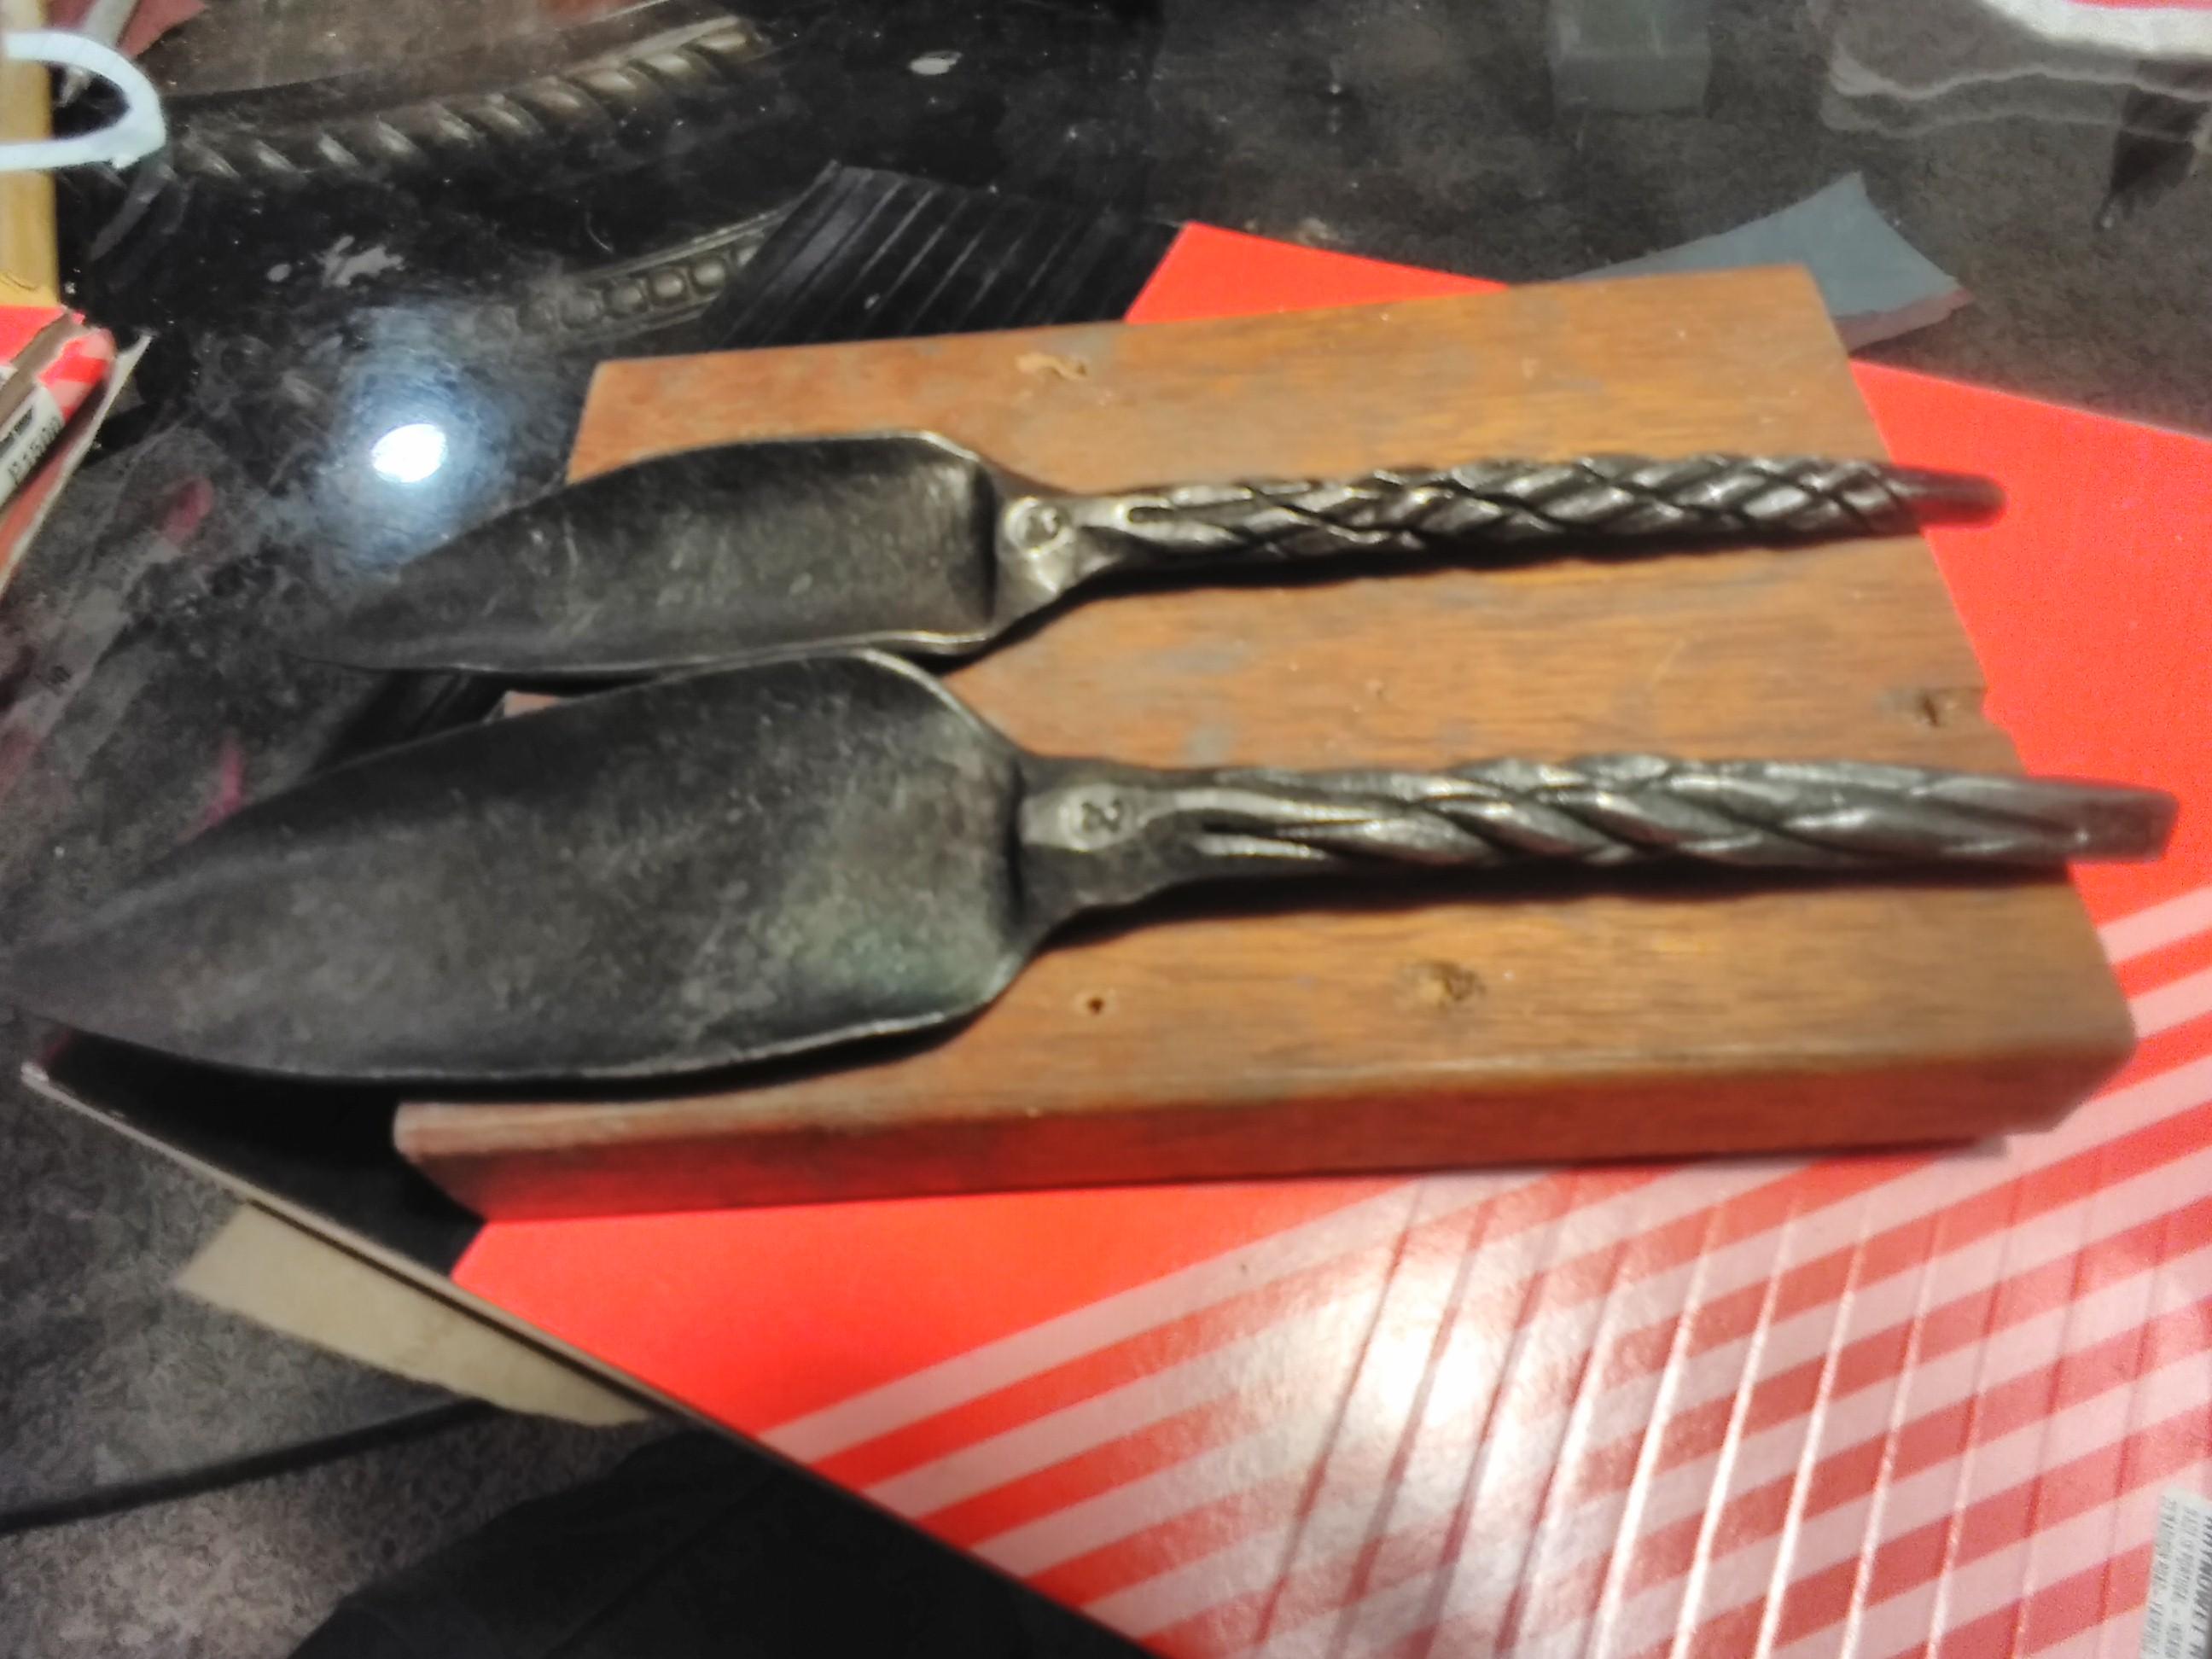
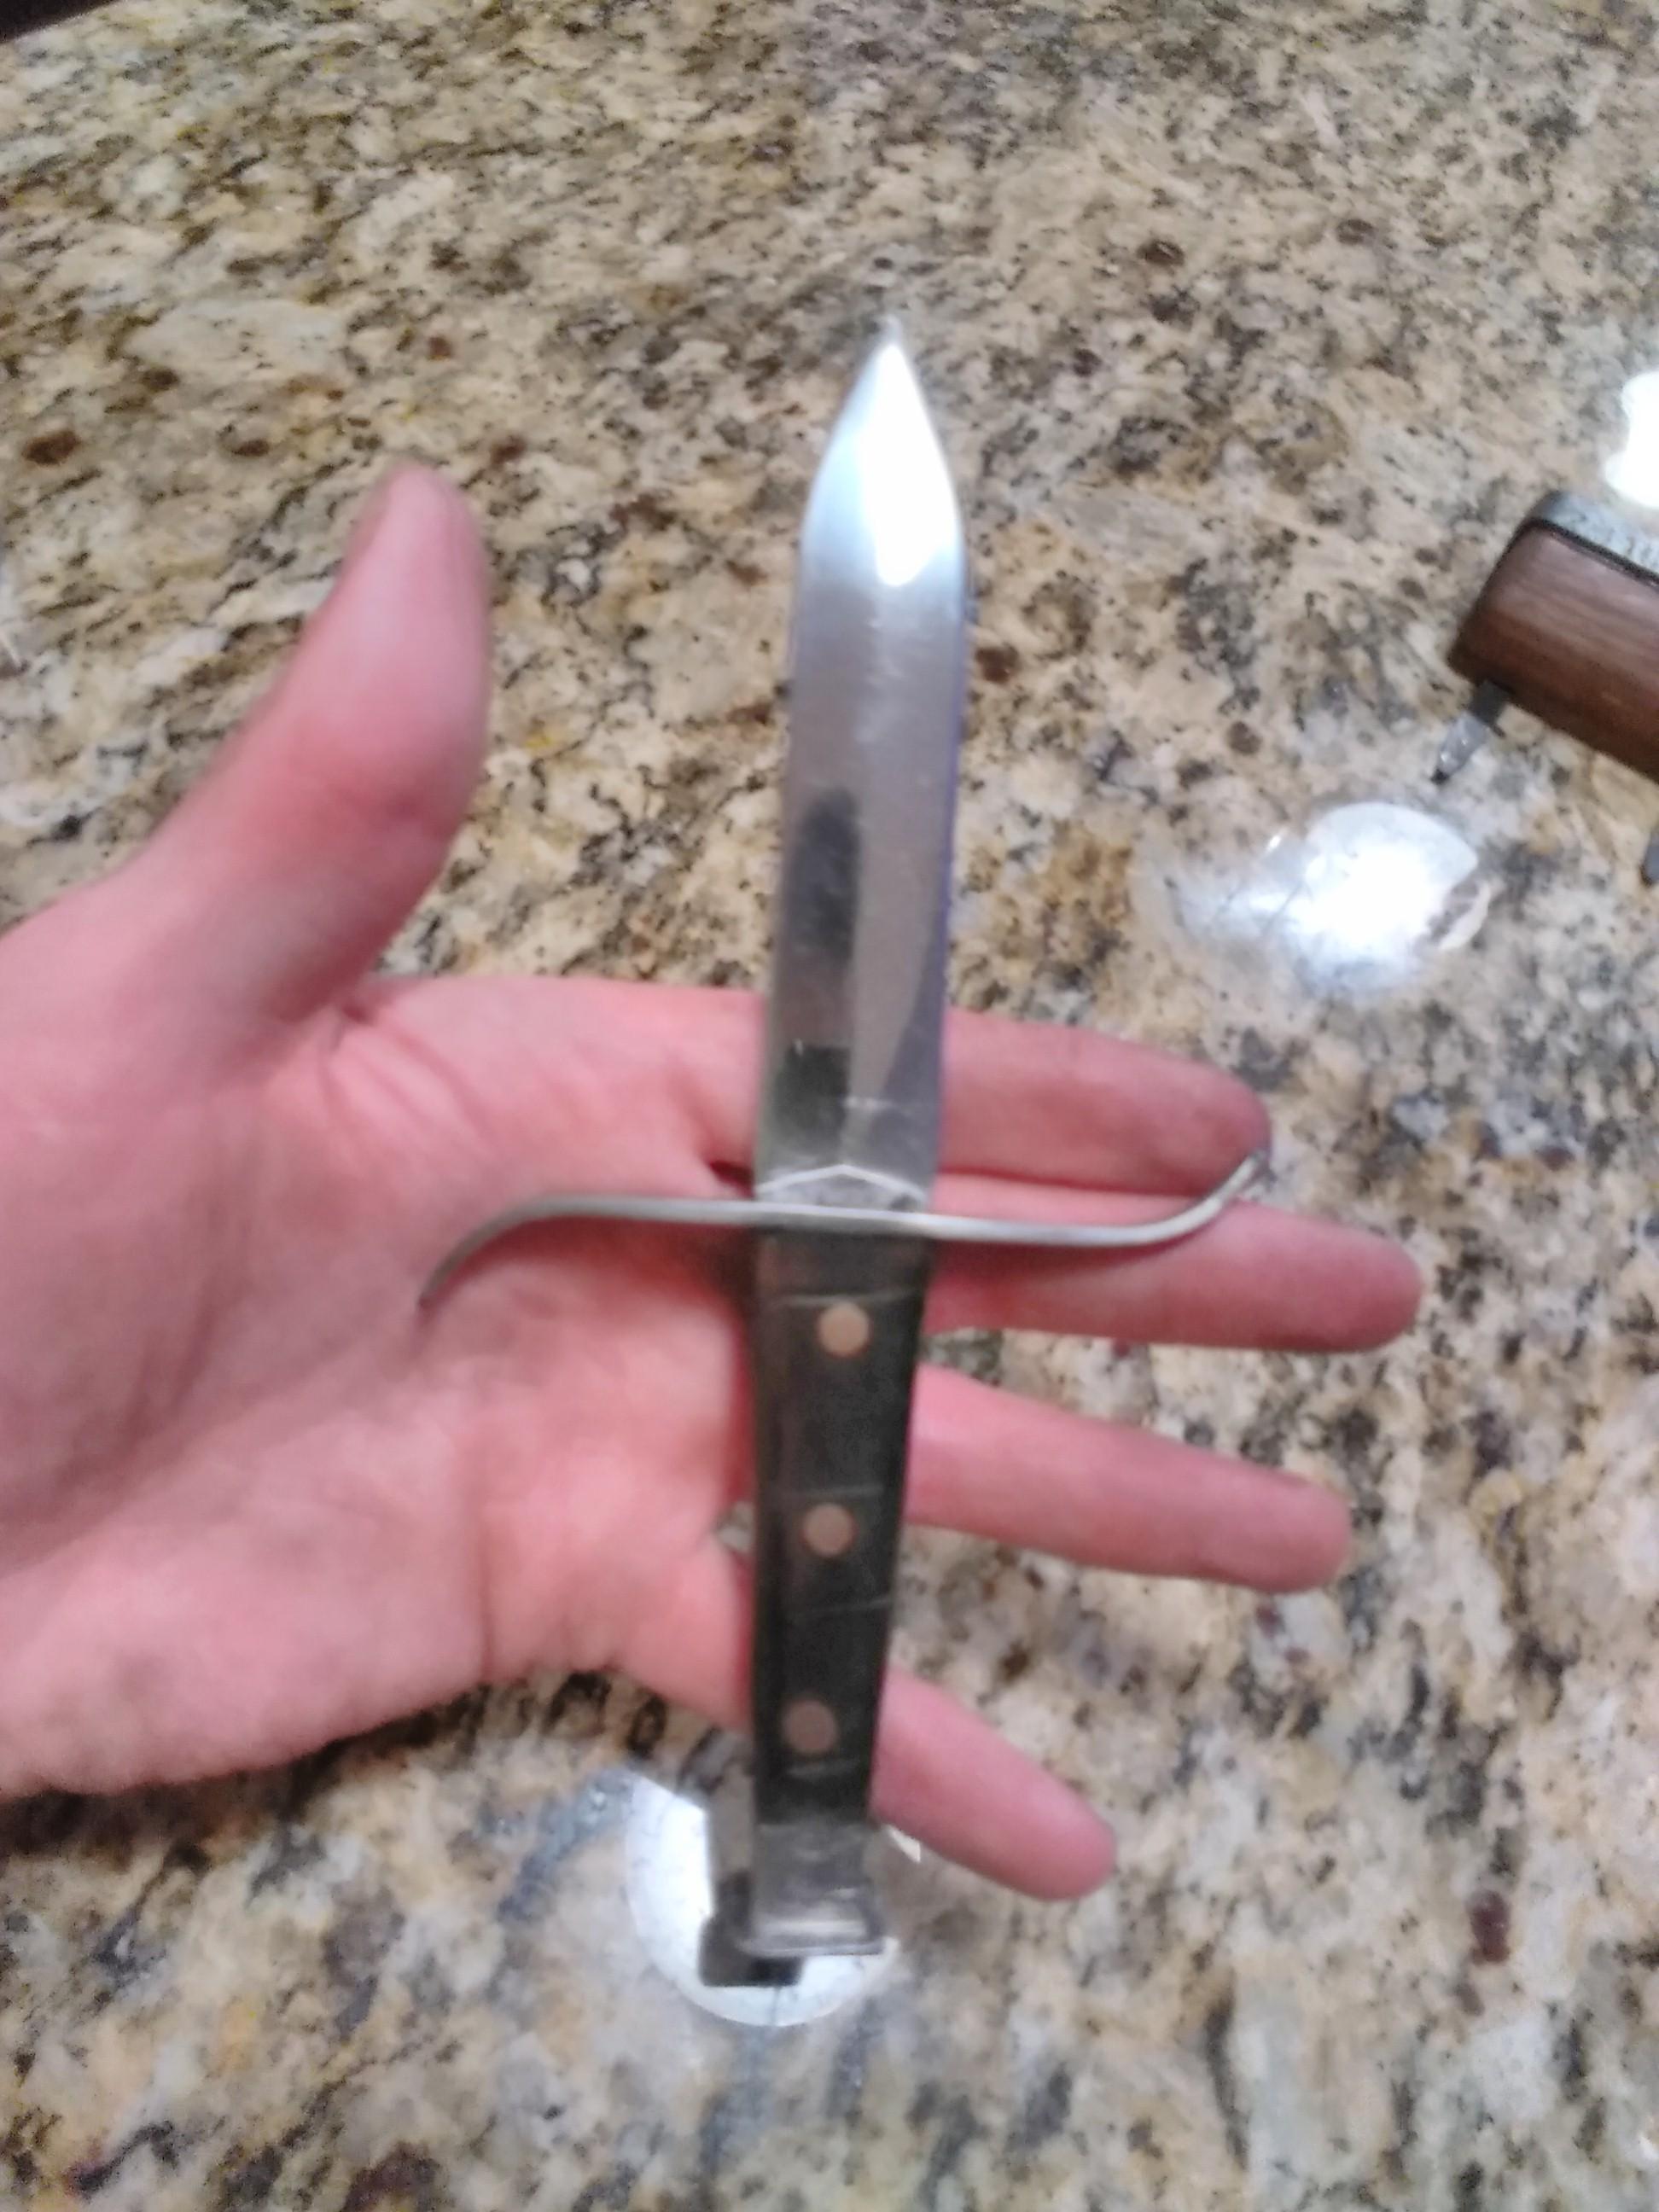
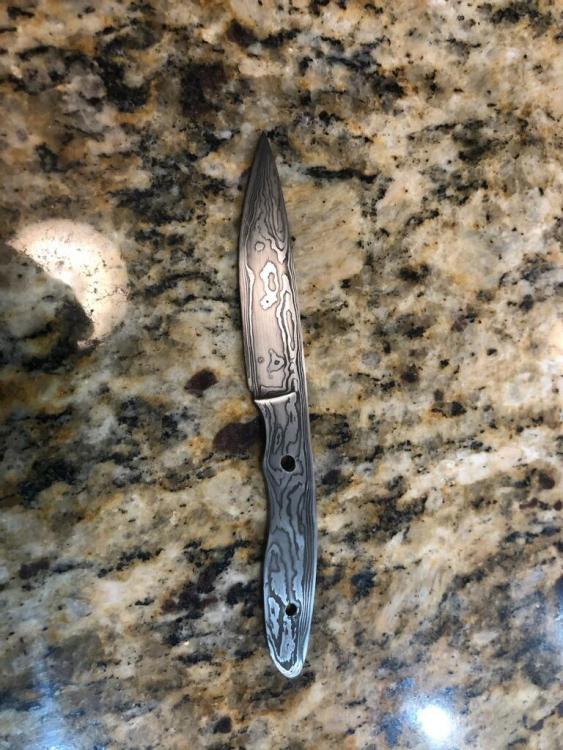
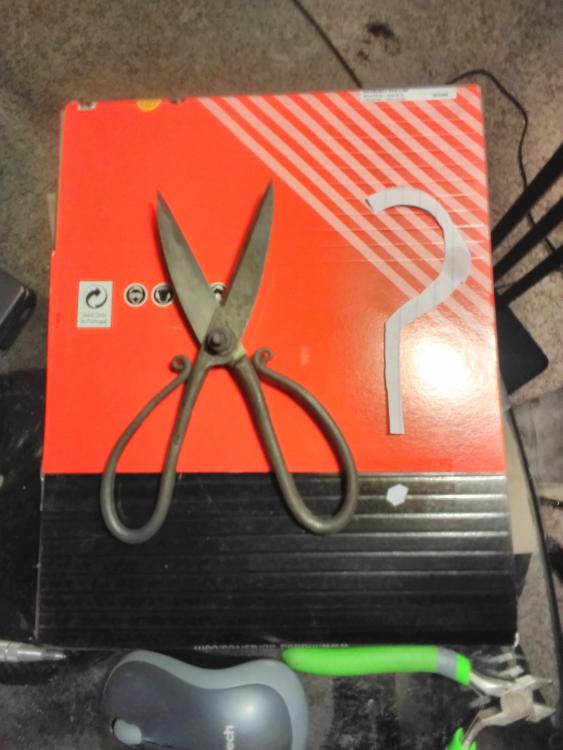
JLP, looks pretty darn good to me. I wish I could do so well. Perhaps someday. I think we are all the greatest critics of our own work since we are the most familiar with all the little mistakes/imperfections made along the way. But of course you already know that I'm sure haha. I finally finished my scissors. Sorry for the potato-vision. I have also made steady progress on the knife for my brother.


-
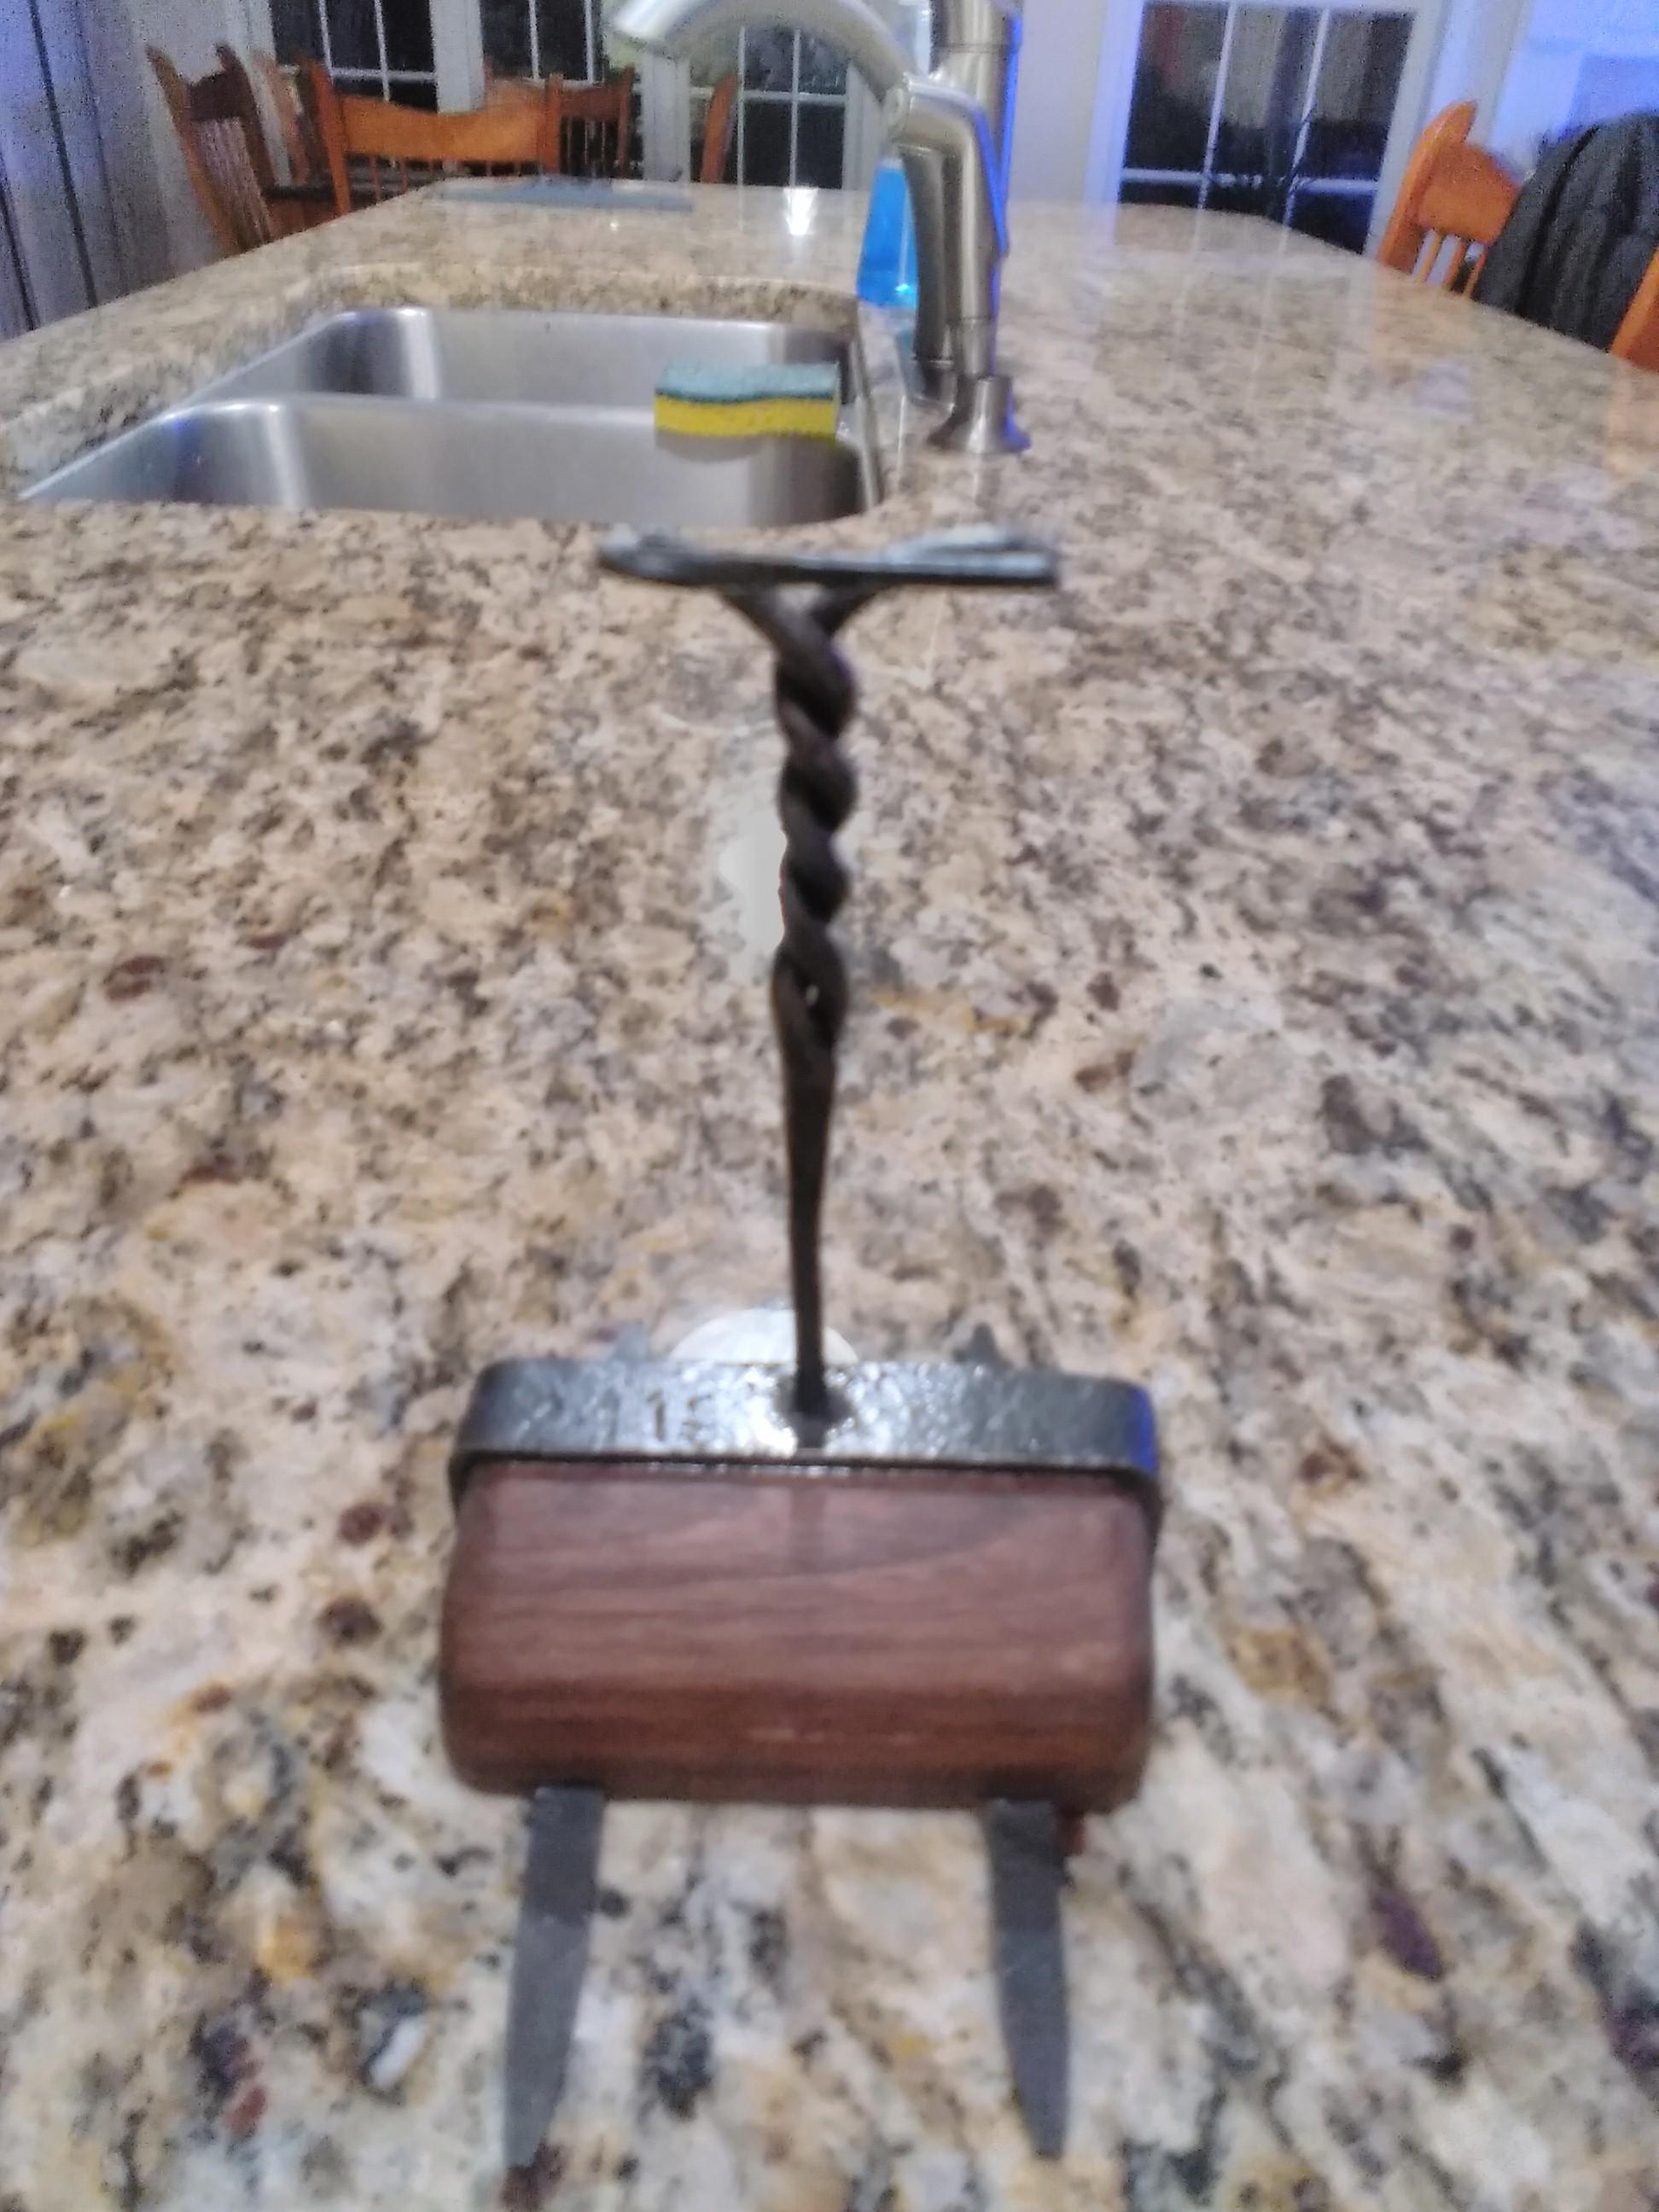
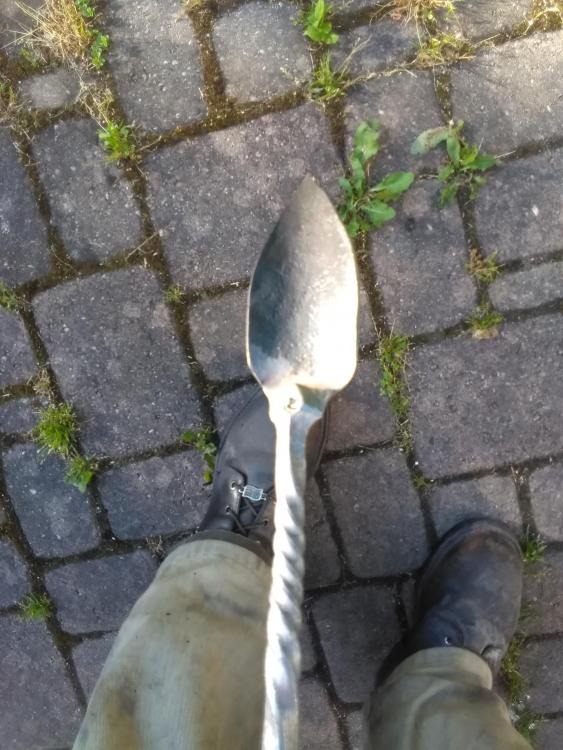
After quite a lot of tweaking I finally got the scissors to where they cut paper/cardboard very nicely. They are still just bolted together, last thing to do is hit the parts with a wire wheel to brighten them up a little and rivet them together. I will say scissors are a pain in the butt to get flat then curved in the way I wanted. I also made a larger and less curved shovel for my Ma. This one is better for scooping.


-
I actually just watched your second basket twist video where you add the plate in the middle of the twist, that was very cool! I think ill need a little more practice before trying that extra complication, but it did give me some things to think about. I was following the method in your video entitled ""How To" Forge a Blacksmith Twist Handle (Basket) for those Who have not Mastered forge welding." I wont embed the video itself, since it is long and I'm not sure how that would affect the loading speed of the page for other users. Only was scarfing and welding in both sides instead of just one (with very limited success). I do like the lap weld method for adding additional length at the other end of the twist. Its like welding on the reins for tongs, but I didn't think to do that here.. I'm going to try some of the things you have suggested and see how it goes, and if things still don't improve I'll draw up some things and share them with you outside of this thread. Thank you very much for your help and for sharing some of your knowledge with people like myself. Sorry everyone for getting a little off topic here.
-
I am using the method showed in one of your videos where you had used a mandrel, but instead of a filler piece, I am doing a scarfed piece at both ends. I need the extra length at both ends since it's not being used as a handle. I do have some trouble keeping an eye on the end of the scarf for the the second weld sometimes, so I think I am missing the spot I should be hitting and just squishing the rods, then they end up burning away while I am trying to fix the bad weld. At a certain point, once it gets all covered with ash, they just wont stick. My forge isn't very big or deep so it doesn't keep a clean fire for welding for long.
-
Yea, I'm probably using the wrong term there, but I'm talking about that piece of round stock that you wrap the bundle around to make the first weld, then remove for the second. You'e probably right, I'll try using my little 1lb-er on the next one. As for the heat, Maybe I'm fooling myself into thinking that I'm at a welding temp when really its only the strands, and not quite all the way through. Ill give it a shot, thank you.
-
Should have refreshed the page. Chris, nice rack! I'm quite jealous! All my hammers and tongs go in a 5 gal bucket, which is filling up too fast.... as I imagine your 3 rows will as well. Virusds, that's a cool design, very unique. How did you do the castle-like pattern on the pommel? And do you mean to file the blade fit up to the guard? Or the pommel to fit up with the handle? Also 425F is a lot higher than I tend to temper my coil springs for a knife (300-400F depending on what the edge will be doing [even higher for top tools]) . Have you done any edge retention/toughness testing at lower temperatures? I've never made a knife like that so maybe having a less brittle edge will be helpful for a harder use knife like that. I'm not saying that my way is right, I'm just curious. Also, for your serrations, those are usually done like a chisel grind, only sharpened one side. A chainsaw file can be used on hardened & tempered spring steel (usually). Even if the file teeth don't survive as long, chainsaw files are usually harder than others. This is the only dagger I've ever made, back in September for my dad's birthday. It took a month and a half to finish with what I had at the time (both in tools and experience haha). Tempered for an hour two times, first at 350 then 325.