

Hammerfall
-
Posts
145 -
Joined
-
Last visited
Content Type
Profiles
Forums
Articles
Gallery
Downloads
Events
Everything posted by Hammerfall
-
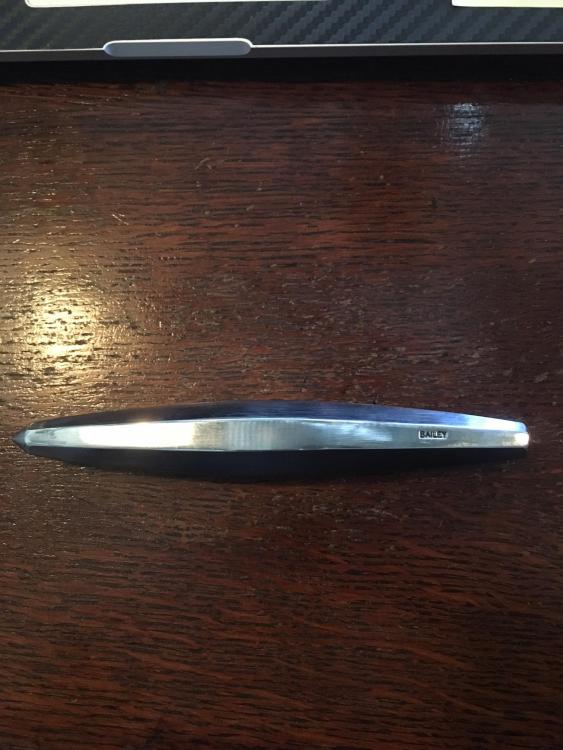
I just thought I'd share this work of art that just came in the mail from Brent Bailey. Its almost too nice to use. Kudos Brent!
-
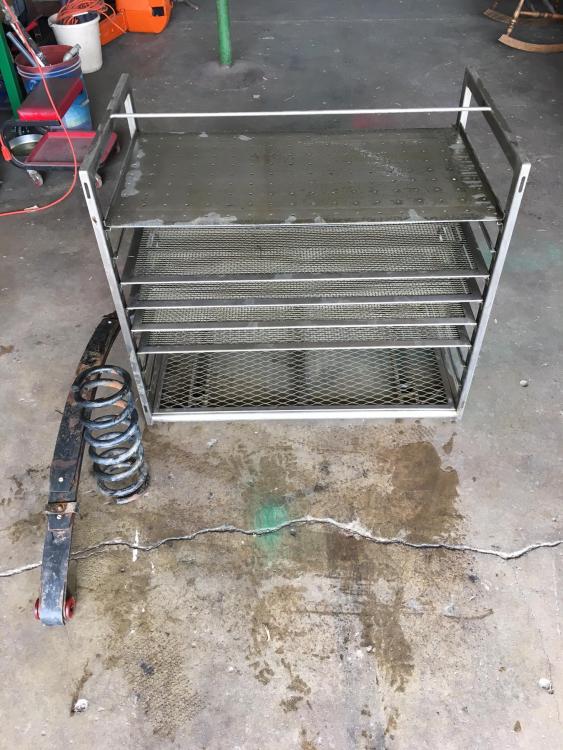
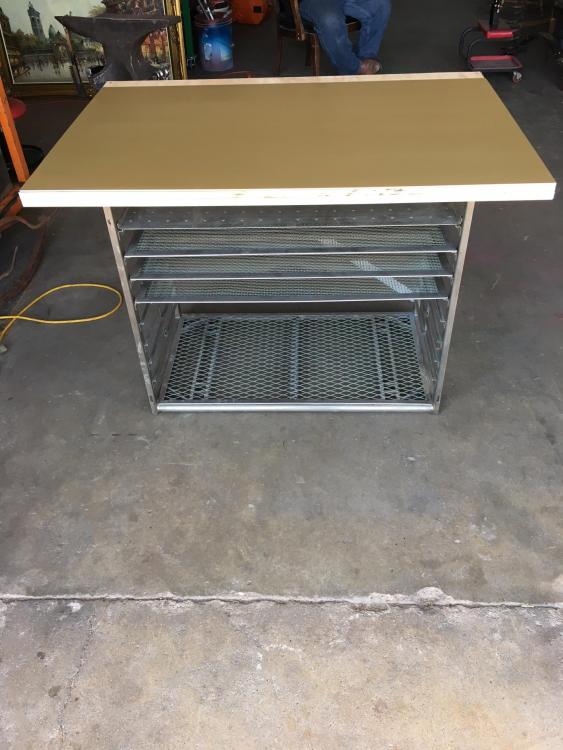
Went to the scrap yard and found a nice stainless table for my new 2x72 with removable shelves and some nice clean springs. $30 all in. I added an 1 1/2" wood top that I had leftover from another project and then capped it with a steel plate that I had leftover as well. Now I just need to sand the edges of the wood and trim down the back and I'm in business.
-
Nice pickin
-
Did you get her pulled out yet? She's a biggie.
-

Do I NEED rigidizer for Kaowool?
Hammerfall replied to redbate's topic in Insulation and Refractories
I used Mizzou and it was relatively inexpensive, easy to apply and cure, and has held up great. Once it gets hot, which takes about 10 minutes my forge runs at 5 psi and will get steel glowing in a short amount of time. -
I bought the same burner off of EBay. Adjust your slip collar. I had the same issues. Now it works fine. It does take some play to figure out.
-
Chambersburg utility hammer
Hammerfall replied to upsetter's topic in Power Hammers, Treadle Hammers, Olivers
I like your lowered treadle set up. -
Is that a cast anvil?
-
Ball Peen Hammer Hawk
Hammerfall replied to rifleshooter2's topic in Axes, Hatchets, Hawks, Choppers, etc
Beautiful hawk! -
Probably a 125 lb Trenton
-
I fired it up tonight. Once it was hot it worked really well. It took a while to get to temperature, but after that is was amazing. I only did two heat cycles. I'll keep everyone posted on how it lasts. I'm starting to think everyone makes building and lining a forge much more complex and technical than it really is to accomplish.
-
Large Anvil Identification
Hammerfall replied to marrt's topic in Anvils, Swage Blocks, and Mandrels
It looks like a Trenton, but the holes in the feet are suspect. -
That is what it is Irondragon. Thanks for the heads up on hardy tools. I plan on making quite a few things out of this steel. My understanding is that it is very forgiving to quench. I ordered 5 gallons of Parks 50 today, but plan on trying to water quench this in the beginning.
-
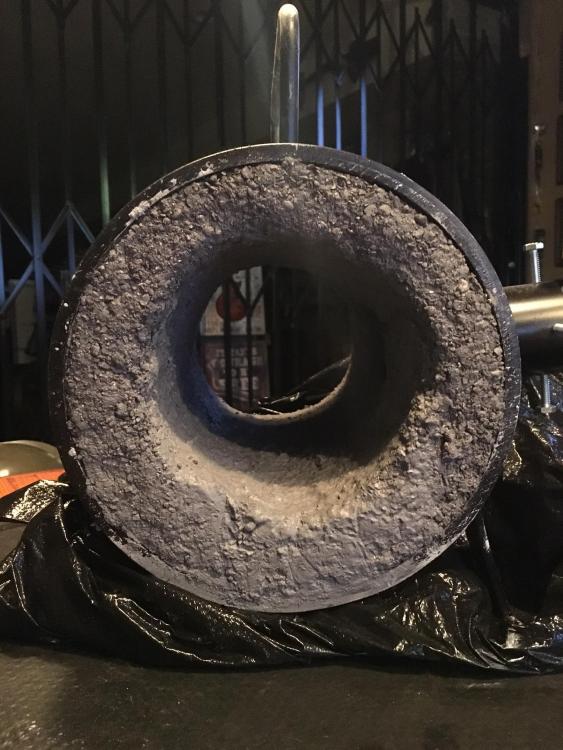
Halphwit the forge chamber is 10x5, meaning the open part. I wanted a good size interior for general forging. The overall dimensions are larger. I fired it tonight for a bit over an hour and put firebricks over the ends to let I'd cool down very slowly. Tomorrow I will fire it again at around 500 and repeat the process if I think it's necessary. It is holding up well and seems to be really solid.
-
5" interior diameter 10" overall length
-
Keep on forging. You have a very good start. Smiths a hundred and twenty years ago would have killed for your electric sander.
-
This should be tagged as a must see topic at the top of the page as show me your forge, or how to apply a coating to the interior of your forge. i started with 1" of kaowool. There were a lot of people talking about the wool falling and becoming deformed. Maybe a fair amount of people will search forge coatings and not be as intimidated as I was after googling and reading as much as I did. This was really easy. I laid out cardboard and plastic where I thought I might make a mess. It took about 20 seconds. I mixed up mizzou refractory coating until I liked the consistency. I laid my precut prewetted kaowool out flat. I wet it slightly so the adhesion between the mizzou and wool would be better and the wool was more malleable. I coated the wool and even hit the edges lightly to reduce loose fibers and to promote later adhesion. Once a nice coat was evenly spread I folded it up and slapped it in the forge. EZ peezy. I then set the forge on its end for 15 or 20 minutes. It firmed up enough that I set the forge as it will be used and started filling the seam where the wool came together. I built this up at the bottom, as I had initially planned on putting a firebrick in the bottom of the forge. After some reading I'm going to forge as is for now, without a firebrick as a floor. Mizzou is supposed to be very flux resistant. We will see. I'm open to criticism so please chim in any time. I was worried about uneven heating because the bottom will be thicker, it decided to roll the dice. It's curing right now and maybe tomorrow I will get to fore it up a few times. I just thought I'd share. Let the hammer fall.
-
That sounds like a good set up Frosty.
-
Yea the lag if you're not doing more than one blade is kind of a downer.
-
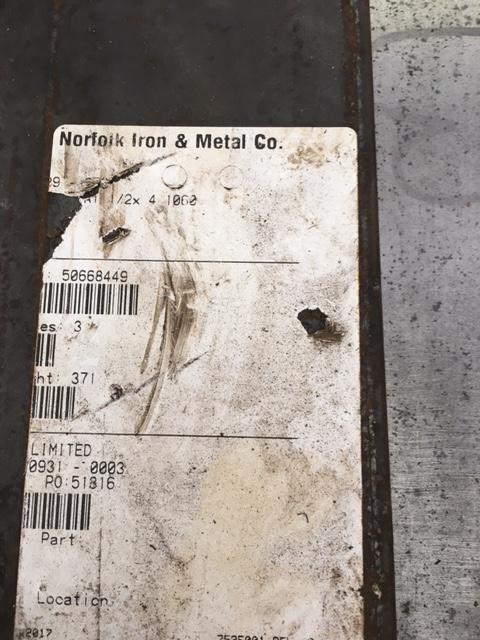
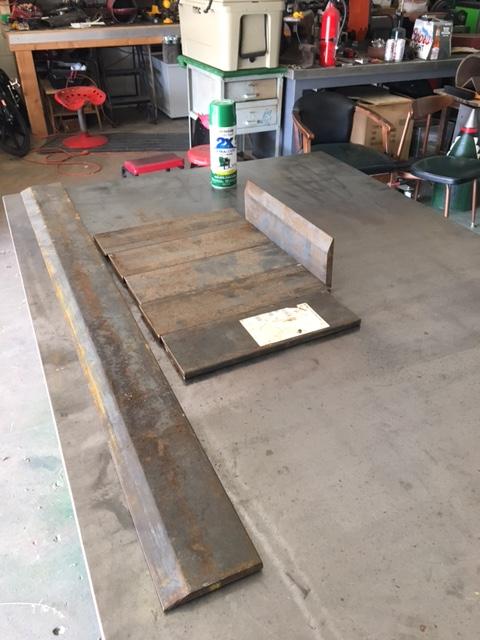
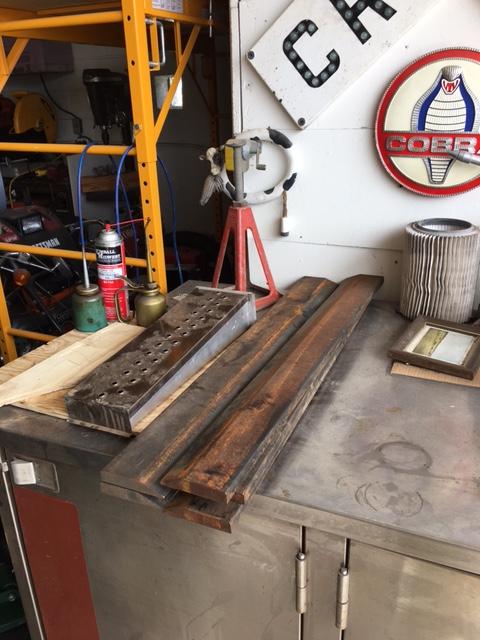
I needed a walk, so I went to the scrapyard to poke about. I found 190 lbs of 1060 that had the manufacturers tag on one piece. It's 4"X 1/2" and many of the blanks are long enough to get into swordplay. If you've been keeping up with me I just got a 25lb Little Giant. This is the perfect material for me to learn to draw out and grind on. I know this isn't the best steel for knives, but have read it will be good for swords, choppers, and hawks. Anyone have any advice on tempering and quenching 1060?
-
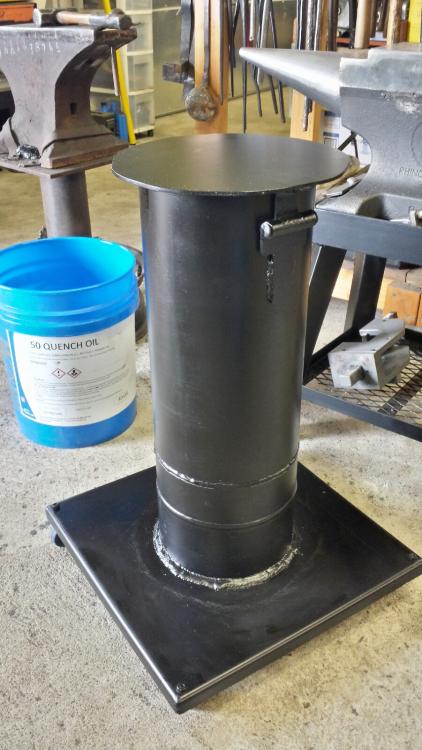
So I've read that some people use a torch, some use a heated chunk of metal they dip in the tank, and some use electric heaters for the quench tank. I'm looking for the easiest best technique. Any ideas would be helpful. I think I'm going to build a tank like the one below. It was posted here and I think it is a great design.
-
Northridge Tool 2x72
-
Forge Welding Face Plate (pic heavy)
Hammerfall replied to MarcyOHH's topic in Anvils, Swage Blocks, and Mandrels
Very cool we need more info on how it turned out. -
That look like you did an excellent job.
-
Little Giant 25lb hammer
Hammerfall replied to Hammerfall's topic in Power Hammers, Treadle Hammers, Olivers
Here she is. I finished the base last week and did all of the hole drilling today, but the concrete. That will be the easiest part, but I have to borrow a longer bit from a friend. Tomorrow she will be all bolted down.


