stockmaker
-
Posts
140 -
Joined
-
Last visited
Content Type
Profiles
Forums
Articles
Gallery
Downloads
Events
Everything posted by stockmaker
-
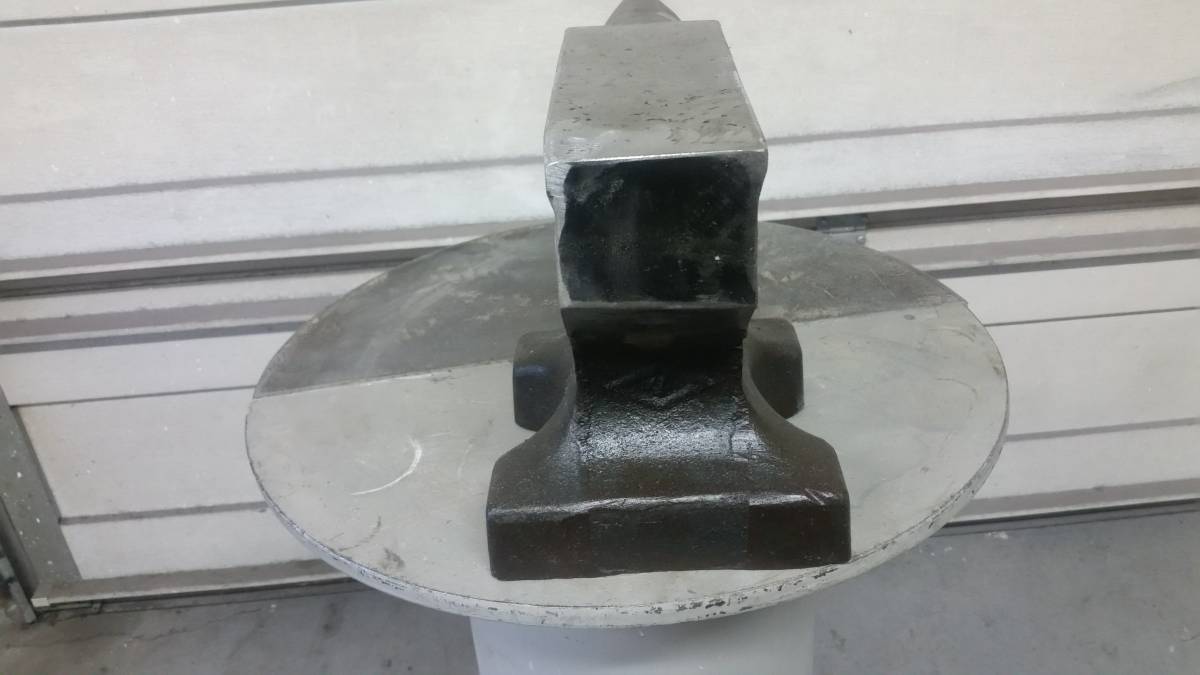
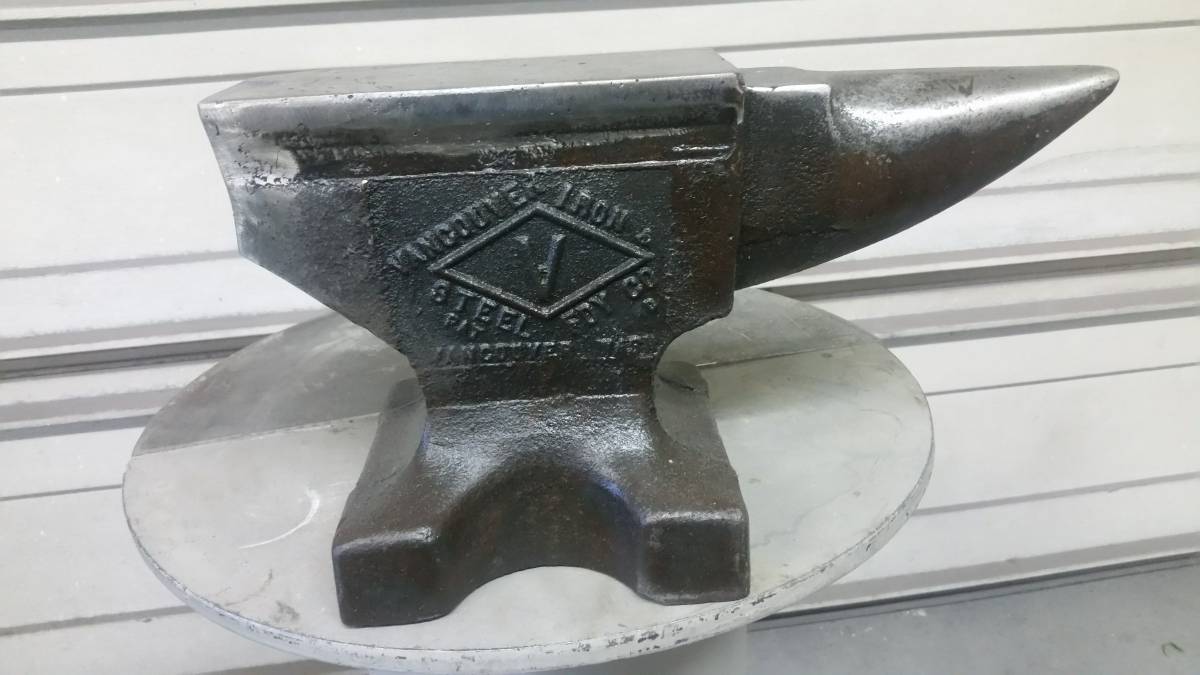
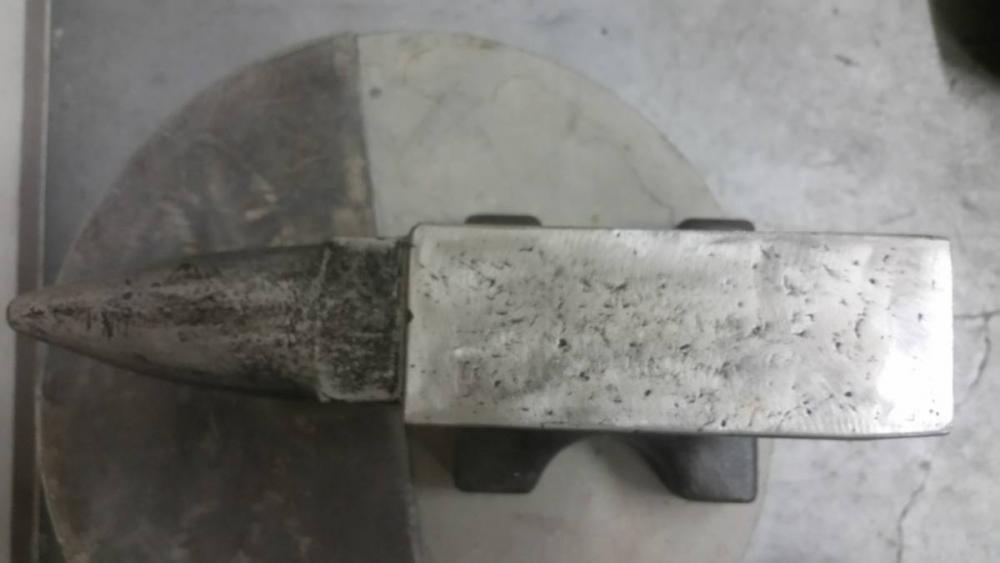
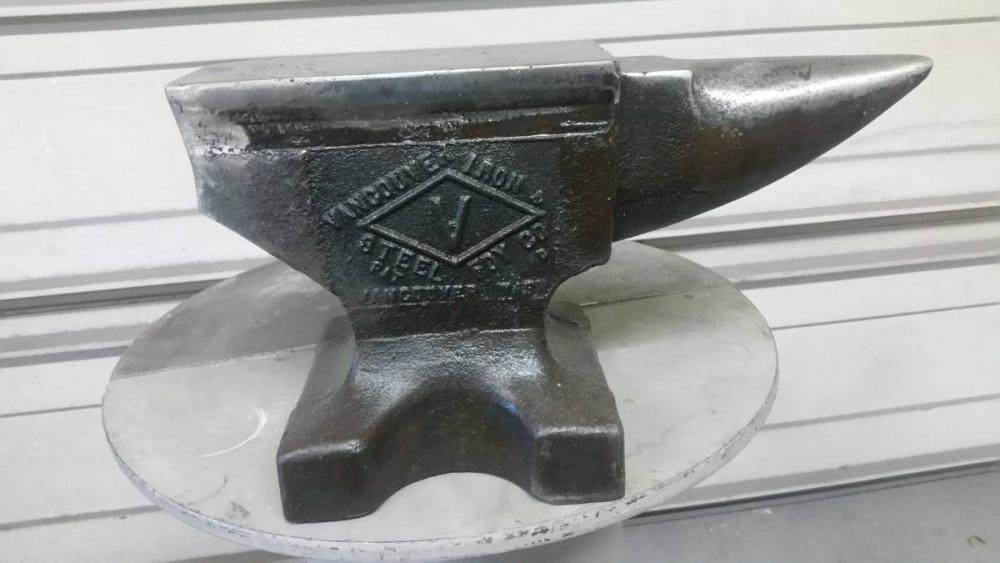
This came out today in the local craigslist, Vancouver Iron and Steel. It is stamp 70lbs and advertised as such. It looks like it may have lost some weight to me.

-
Thanks for sharing this link, I had missed it. He really did some good work on that chunk of steel and the lift. But for the life of me I can not understand all the sharp edges, I could see one sharp edge and the rest at different angles or radius's. I don't know what the use of even one sharp edge would be, but maybe a quick way to mark a line in metal?
-
Hi Frosty. In the post above mine Matthew states that he has never got the burn to light up. I thought that he was saying never ever did it ignite. Sorry for jumping in.
-
Hi Mathew, I don't want to jump in between Frosty and Mikey as they are the experts here, but I think I can save you some time as they seem to be busy today. I can't get you running perfectly, but I think I can get you started. Your burner should at least ignite no matter how long or short your tip is, or how your flare is made. You are not getting gas to the burner IMO. Do you have a high pressure regulator? I see you have a pressure gauge, what does it say? I looks like you have a needle valve, is that true? Do you know if it works correctly? Are you sure that the safety shutoff within your propane tank is not activating? Make sure you do not have a piece of tape or joint paste in the path of the gas. If you have compressed air, use it to test, remove the propane hose and shoot some air into the brass T, you should be able to feel the air come out of your MIG Tip. If you have another propane tank try it, I have hit the tank valve lightly on the screw valve handle with a hammer at times, not sure if this is recommended, but it has worked at times on a balking BBQ. Hope this helps, at least it will keep you busy until the real help arrives.
-
Great idea on the anvil stump, I assume you used a chainsaw to do that. If you have been looking around the forum you probably have seen the recommendation to mount your railroad track avail vertically as you get a much more rigid surface, all be it a much smaller surface. If you could find another piece of track and another stump you could improve your anvil situation a lot.
-
Me too! Very disappointing.
-
So now you are a blacksmith! ..... what are you going to make?
-
What consistency for rigidizer ?
stockmaker replied to Cyrilak's topic in Insulation and Refractories
This has been discuss before on the forum, but may be hard to find so let me give you what I remember. I have used fumed silica on two forges, so I have some experience, but not much. The bottom line is there is a wide range of mixture you can work with from thin to thick. If it is thin put on a lot, if thick use less. You want the rigidizer to soak into the ceramic blank through capillary action so thin may be better at least for the first coat. I found that putting it on with a brush was better/faster, I took more than I expected. If you have time you might want to do a 2" square piece of blanket and see how rigid it is after a day or two. For me I found that one coat was enough, but I put on several coats all at one time. The wetter you make it the longer it takes to dry, mine took a couple days, don't top coat with refractory until it drys, you will just slow down the entire drying cycle, and loose track of how dry your rigidizer is, don't ask me how I know that. Hopefully others here on the forum will have more on this subject for you. -
Heat treatment problems on punch head
stockmaker replied to blackleafforge's topic in Tools, general discussion
I have to agree with jackdawg, what color did you let the color run to in the very end of the punch? I would think blue would be what to use, but others may have more experience than I on O1. I think if I was doing it I would not heat treat it at all I see how it holds up to use. Only treat after I saw too much mushrooming to live with. -
I had to tape my mig tip threads as they were leaking badly (compressed air test). It made a big difference for me when tuning the burners. Actually it was not the mig tip that was the problem it was the brass fitting that I had taped. It was either too loose to begin with or had warn down with all the testing I was doing.
-
SLAG comments on Heavy Scale! How did you avoid this topic until now?
-
Johnnyreb338 from what you say it sounds like you have a neutral flame which could be slightly oxidizing (lean) this could cause a little scale in the forge. I have to assume that the vast majority of your scale comes when your hot iron is outside the forge which is unavoidable. Denis Frechette, DF In the Shop recently did an 11 minute video on dealing with scale on the anvil. The link is below, I enjoyed Mr. Frechette's thoughts on this matter. I believe he heats with coal, but in this case the source of the heat was not a factor as red hot metal in contact with air is going to scale. Thanks for sharing your way of making a propane forge. Link removed dur to advertising.
-
Now I have to figure out how to grind it flat and weld the edges straight Very funny !! Got me for a second.
-
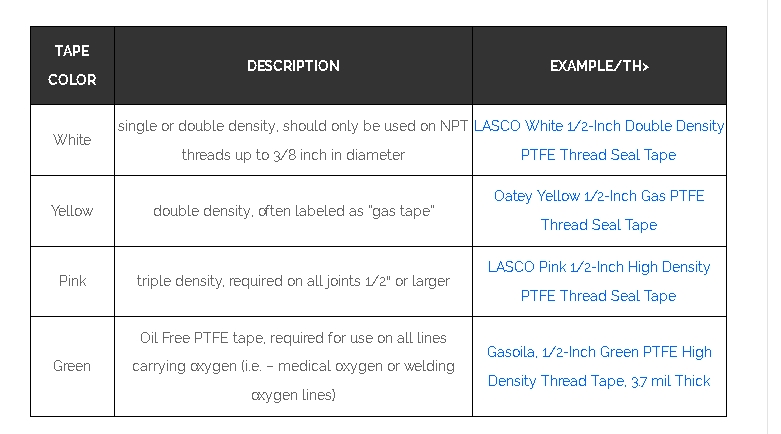
Your question got me thinking, I believed that the yellow gas tape was a different composition than the white tape, but an on line search came up this link http://allthumbsdiy.com/plumbing/when-to-use-ptfe-teflon-yellow-or-white-tapes-or-pipe-dope which says it is twice as thick as the white tape and that seems to be the only difference. I don't know what to say about using it on gas and diesel lines, the only thing I found for sure was that it is suggested you only use tape on NPT male threads.
-
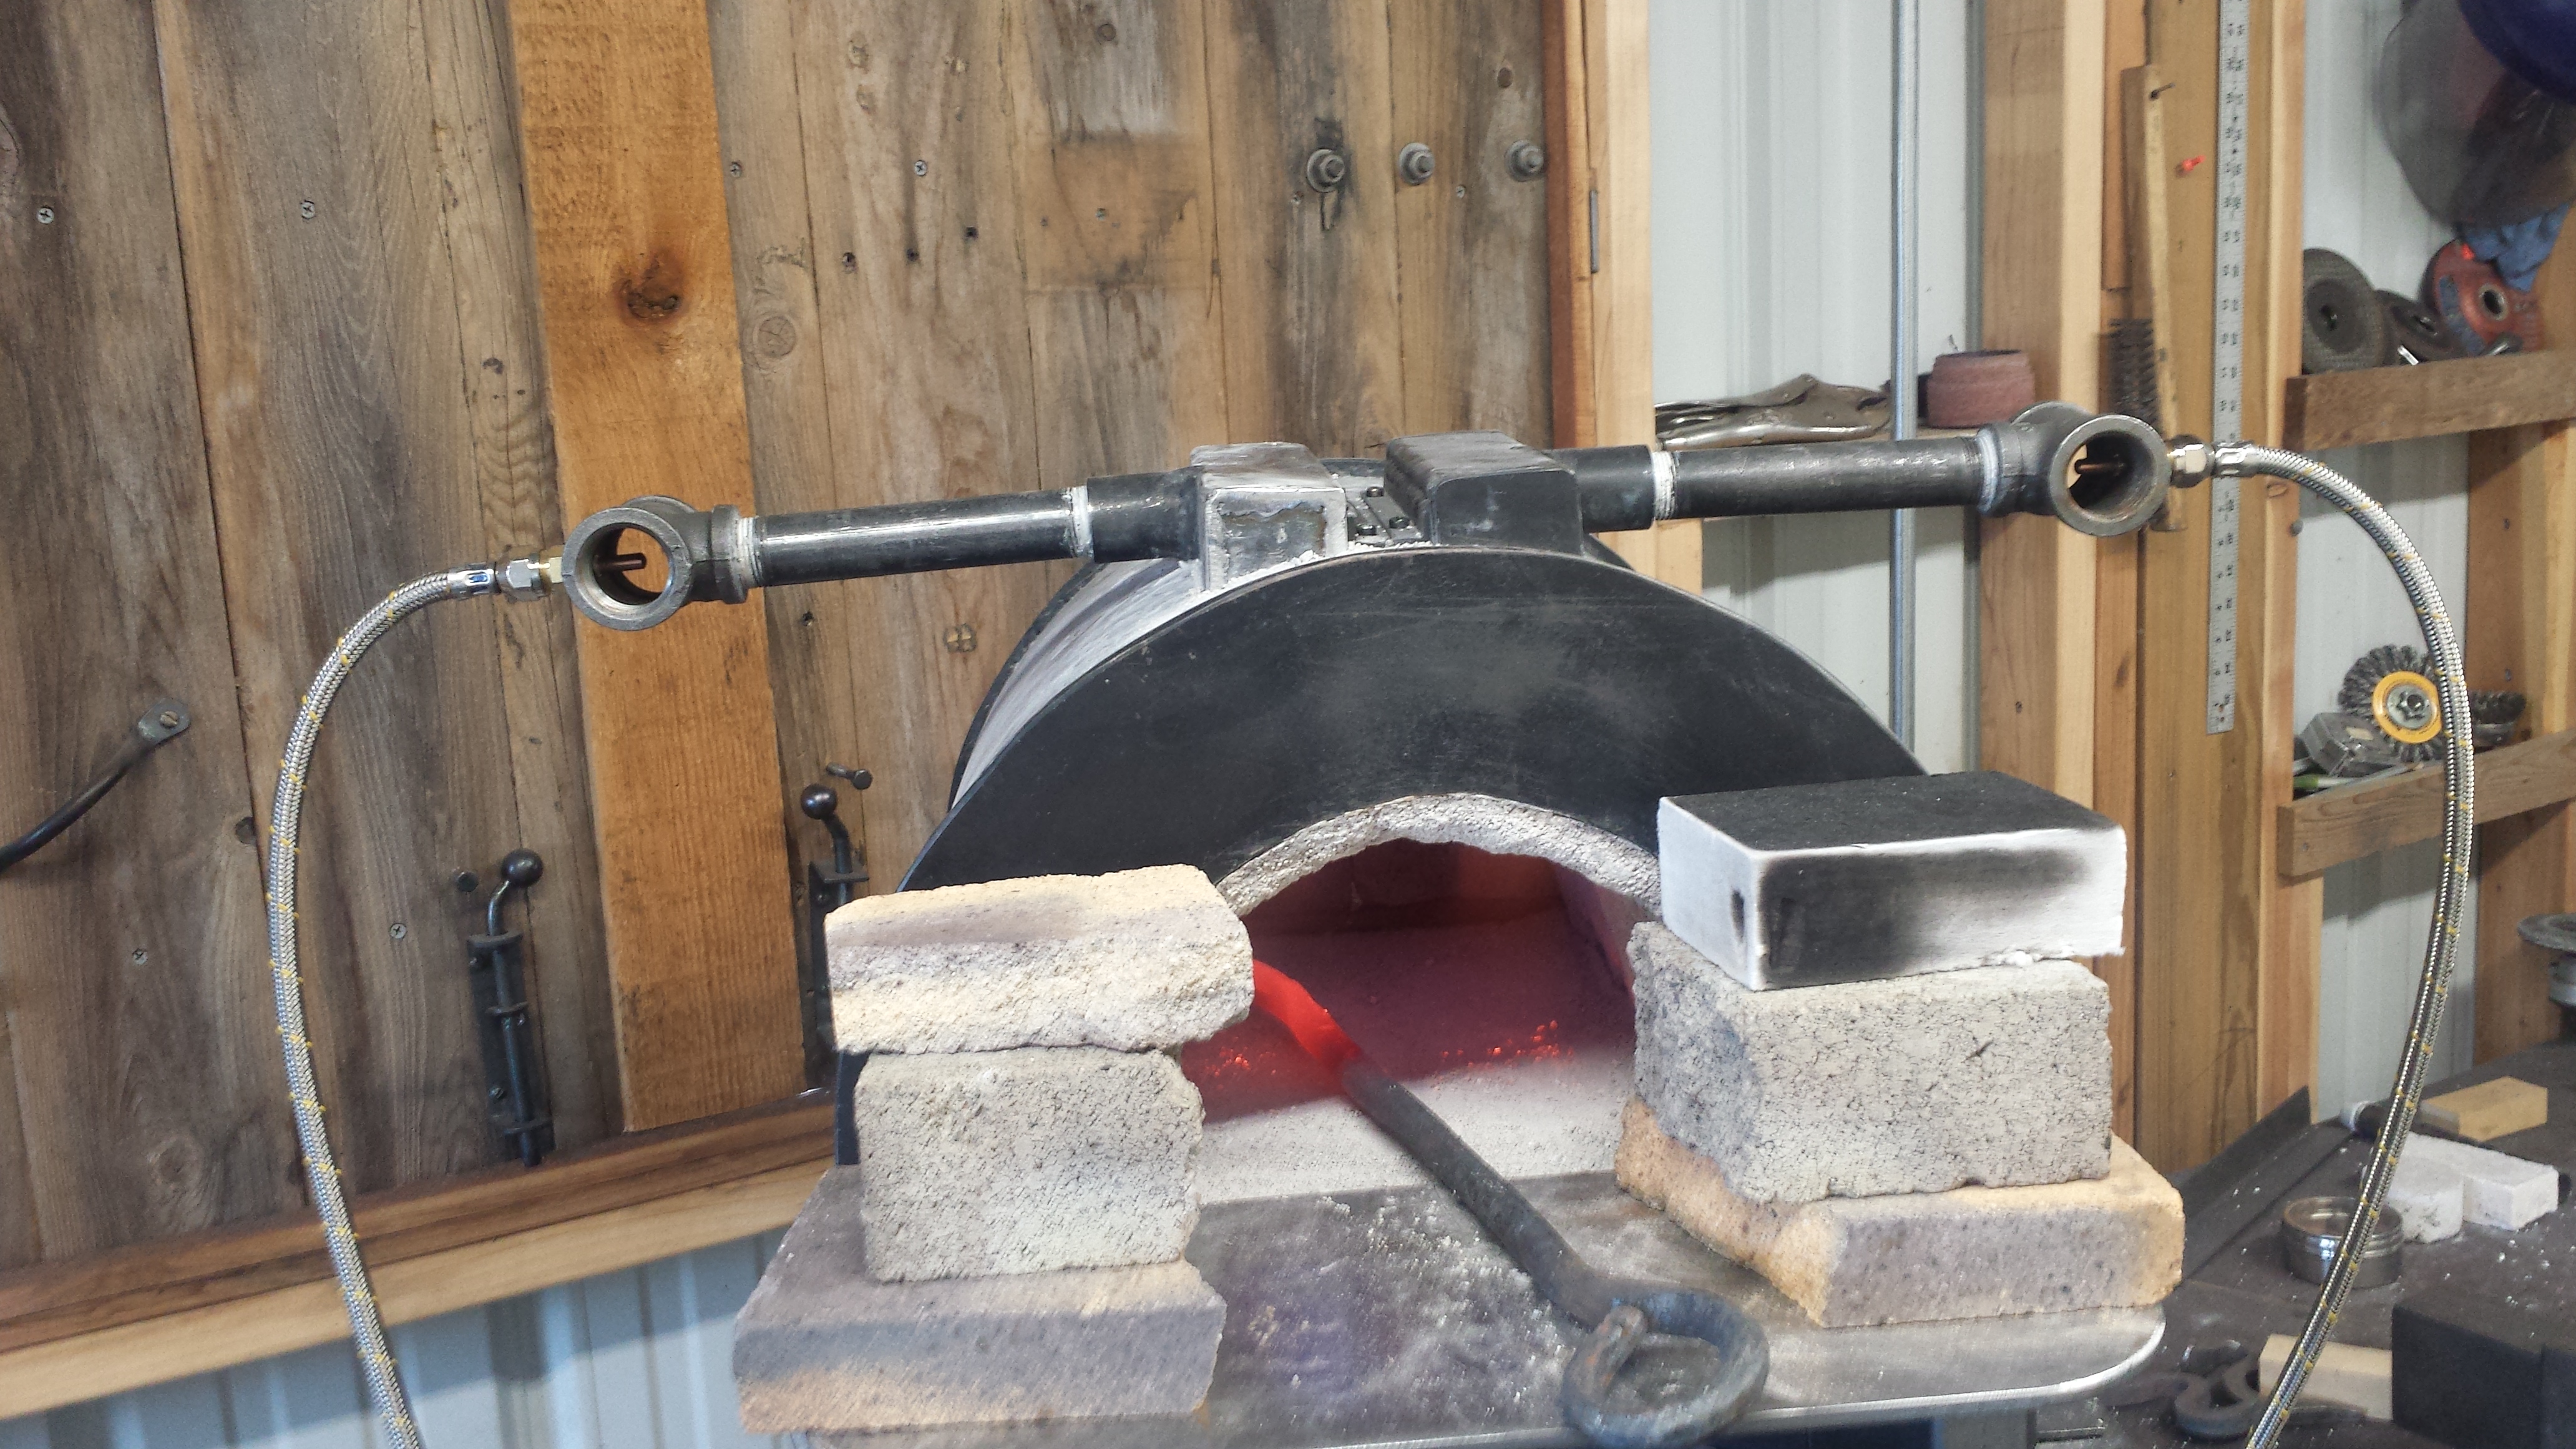
Wow Brickman, I was surprised to see your forge, very similar to mine. You did a good job on it. Did you buy your kaowool bricks off craigslist, I did, bought one case. I suggest you do as Frosty recommends, Get some Kast O Lite it provides a little insulation and protects the blocks, as you know they are very soft. Mine also turned black in the flame, was not expecting that. A couple pictures of my build.


-
Brazer your post made my heart jump into my throat. I am near your age I have one and a half good arms and can not forge worth a darn, but I am not giving up my tools, and I don't want you to either. For one, I think you are going to get better and make some wonderful things.
-
What Frosty said.... plus... I used a polyurethane spray on the wood, let that dry a day than coated it in a paste wax. Just don't let the refractory soak into the wood. Wayne may tell you that I am the one that when fitting the burner into the forge I fumble fingered it and dropped it onto a concrete floor. That broke it very nice so don't do that either.
-
A couple thoughts. It looks a little lite, but I would wait until you have the vise clamped properly to a post so that the post mount and the wedges are very tight. This will sometimes rotate the spring a few degrees moving the bottom of the spring towards the movable part of the vise. In the second picture IMO the spring should just barley touch, but if you find that opening and closing the vise is hard due to spring tension just leave it as is. If all else fails these springs do not have to be heat treated, just heat it in your forge and bend it ever so slightly.
-
OH My. It is going to be hard not to copy that. Thanks for sharing.
-
I'd say you learned something by reading this forum. I hope you are going to insulate, without it you will only heat to a dull orange at best. Looks good, let us know how the burners perform. You may need to rotate your burners slightly to allow each T to gets it's own air. I would have them facing across the forge to avoid gas's from the doors.
-
Mikey, loved your explanation! Wow. I have a question for you. Shouldn't the adjustments you suggest be performed when the burner is insides the forge? Maybe a better question is what do you suggest be done prior to mounting in the forge and what adjustments be done after. Thanks
-
Dave, I like reading what professional blacksmiths encounter and how they react to the needs of their work. It helps me with my understanding of my needs which are for the most part on a much different scale, but the bottom line still being the same.... economy and performance. thank you for sharing your thoughts on this subject. I have to agree with everything you have said except the cost of switching to a blown burner for my 500ci forge. I calculate the cost at $360 to modify my forge, that includes the blower, pipe/fittings, more refractory, more IR coating, and the burner refractory as well. After reading your posts I have decided to spend the money and make the switch. I don't know how long it will take me to recover the costs of the switch, but I know I want more performance and easy of adjustments.
-
What did you do in the shop today?
stockmaker replied to Mark Ling's topic in Blacksmithing, General Discussion
I say YES to the dog head how to, I was going to ask how you did it but did not want to bother you. Your roofing hammer picture reminded me I use to have a roofing hammer, have not seen it in years. -
Single phase motor wiring help
stockmaker replied to gary huston's topic in Machinery General Discussions
Sorry about that, I forgot about the labels you had put on the drawing while I was on line looking for information on the starter circuit. There is a way to find the starter circuit without the internal labels in place but it takes an ohm meter and some disassemble of the motor (I think). If you know anyone that does Heating/Air-conditioning repair they may be able to give you some pointers. Although mounting on the other side of the grinder works for me too. -
Single phase motor wiring help
stockmaker replied to gary huston's topic in Machinery General Discussions
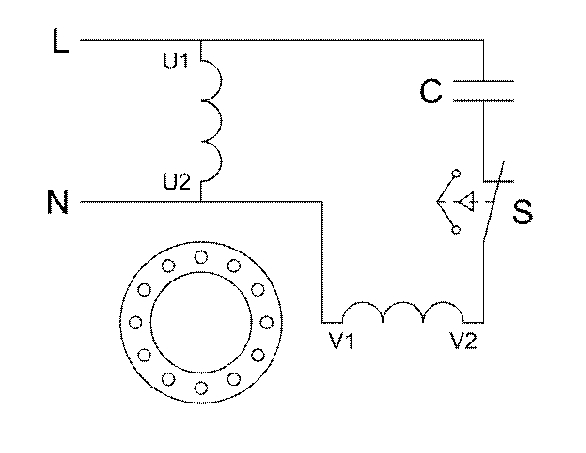
You did not say what kind of a starter circuit this motor employ's, but I am going to assume it is capacitor start. What you need to do is reverse the wires that go to the auxiliary circuit. The Aux. circuit is the starter winding circuit, once the motor is kick started the primary winding's do not care which way the motor rotates. I have copied a drawing which I hope transfers when I post this. The problem you have is finding the Aux circuit wiring. This drawing for a capacitor start motor says that V1 & V2 are the terminals you need to reverse. Don't change the metal links from vertical to horizontal you will short out the primary line and get to see a nice bright light for a short time.