Mikey98118
Members-
Posts
7,085 -
Joined
-
Last visited
-
It is wise to buy your hose from a local supplier, rather than on line. It is even wiser to avoid Amazon ‘deals’ on hose and regulator combinations; many of those regulators have built in constrictors, to reduce gas flow to barbecue grill volumes. A 0-30 PSI Fisher regulator only costs about five dollars more than the so-called bargains, and will run trouble free for decades.
-
I agree with Buzzkill. Also, while larger is generally not better, a little larger to ensure enough room to do your work is a good idea. Furthermore, I believe that ribbon burners heat larger equipment interiors better than highly restricted ones, so a little more interior room is offset by that tendency too. Finally, the inner shape of your forge need not be determined by its exterior. Some guys are building "D" shaped forges in cylindrical shells; just a thought.
-
Avoiding flow limiters Bureaucrats being what they are, some states took federally mandated over-fill valves as an opportunity to quietly add an internal flow limiting device to the OPD valve, on five-gallon and other small propane cylinders; when used on a barbecue grill, flow-limiters should not create problems; when used on other heating equipment (which all demand much higher flow rates), they cause major problems. Check with your local propane dealer to see if you live in one of these states, and avoid fuel cylinder sizes with internal flow limiters. Instead, keep your equipment and hose in good condition, to avoid leaks. Be careful not to crimp or accidentally cut a fuel hose, by positioning it out of harm’s way; running the hose through hooks along walls or from the ceiling is a simple way to keep it from damage. Stainless steel braided hose is armored against such damage.
-
The Mr. Heater fuel filter came today, and proved quite a surprise; in the advertertisement photo, it looks small; its body measures 2-1/8” diameter by 1-3/4” long. This leaves plenty of room to hold tars and waxes from propane fuel, before needing discarding. This is important, because once filled, a filter becomes worse than useless; it becomes a clog. Caution: Newly constructed burners must have their gas systems thoroughly cleaned from all construction debris, dust, etc. Otherwise, it will inevitably end up plugging the gas orifice. Once, propane has been run through gas hoses, and regulators, they should be kept on the heating equipment, or have their ends capped. Insects and spiders are attracted by the methyl mercaptan odorant in propane.
-
A Mr. Heater #F276163 Fuel Filter can be screwed into any burner system between a 16 oz. fuel canister and a fuel hose, eliminating the problem of tiny gas orifices being plugged up from fuel tar and wax. However, with screw in gas orifices, such as MIG contact tips, or all but the smallest 3D printer nozzles, they are an unnecessary expense. But, with gas orifices that are so tiny that torch tip cleaners, or even piano wire is not small enough to work, such filters seem to be the logical solution. However, Frosty and I missed these filters in the for place, and I don't want to try for a twofer. So, if anyone has something else to say on the subject, please speak right up
-
Oh come now; surely you at least have a speck of embarrassment left, right? I have enough left to serve as a fig leaf; even if there is no where near enough remaining to scrounge up a blush
-
How embarrassing Good thing we never claimed to know everything, huh? On the other hand, if there was nothing left to learn...what a bore.
-
You can buy Chile Forge burners, and while expensive, they are worth every dollar. However, I think they only market 1" size burners; that is very large for the average forge. A 1" burner is the equivalent of two 3/4" burners.
-
I ordered one through Amazon.com, yesterday. There is quite a range of prices for the same item.
-
Oh, goody! Thanks, Jeff. I had no idea the problem had such a simple solution. Will look into the Mr. Heater filter
-
Plugs and inclusions: Propane comes in widely varying quality from different sources, but even the best of it is not perfectly clean (we aren’t talking about triple refined butane lighter fuel here). The waxes and tars that all commercial propane contains, can plug small orifices on MIG contact tips, and the even the smaller orifices of 3D printer nozzles; ruining burner performance, while rapidly increasing pressures on gas hose and gas fittings to full cylinder pressure, unless a proper regulator—not just a needle valve—is employed. Poor quality “bargain” propane can form tar balls quite rapidly. It then becomes necessary to shut down and clean the burner by poking the tar ball out of its gas jet with a set of torch tip cleaners (or piano wire for very small orifices), and blowing it back out through the larger diameter gas tube with air pressure; canned air is fine for this, if you do not own a compressor. How likely is this problem to happen? The answer has more to do with your burner's gas orifice diameter than to propane quality. I only know of one instance of low-quality propane plugging a MIG tip orifice (with a 0.031" through hole. On the other hand, small commercial propane torch-heads, which depend on tiny gas orifices to work (0.004" and less), are commonly plugged shut by as little as two or three 16 oz. canisters of propane. Newly constructed burners must have their gas systems thoroughly cleaned from all construction debris, dust, etc. Otherwise, it will inevitably end up plugging the gas orifice. Once, propane has been run through gas hoses, and regulators, they should be kept on the heating equipment, or have their ends should be capped. Insects and spiders are attracted by its odorant.
-
Yes. You got the idea I was trying to get across, just fine however, considering what you described as the work you want to do with your forge...you may want to just run their forge as is
-
Why small, why stainless steel, & why linear burners? Why small burners? Combustion gases begin to slow, as soon as they leave the flame envelope. The flames of two 1/2" burners will use the same amount of fuel to produce an equal amount of heat as a single 3/4” burner; but they will drop velocity much faster in a five-gallon forge or casting furnace, increasing efficiency, because their flames can burn faster/hotter without creating a wasteful tongue of fire out the equipment’s exhaust opening. Ditto for two 3/8” burners versus a single ½” burner in a two-gallon combination forge/furnace, or two ¼” versus a single 3/8” burner in a one/gallon forge/furnace. Because the parts and tubing these burners are built from, cost less as their sizes reduce; it costs little or no more to make two smaller burners than a single larger burner; only the price of an additional funnel shaped air entrance is added on smaller burners, along with the cost of a second mixing tube on larger burners. When buying from online sources, it is usual to find two or three small tubes offered for very little more than a single part of the same size. Why stainless steel? Once again, the sellers are determined to make a certain amount out of each sale, so you will find stainless costs little or nothing more than mild steel, but is of far better quality. Several years down the road, your stainless steel burner will still be in fine shape; not necessarily so, with a mild steel burner. Why linear? My reasons for choosing linear burners are complicated, but the bottom line for you is simple; as burner sizes decrease, linear burners run more smoothly than any other design. Considering who just made this statement, maybe it deserves some consideration...
-
The problem is that good burners come and go in the market. Right now, they have mostly gone. You can still buy a Mister Volcano burner, by purchasing the forge it's in. Considering how low the price of their forges are, and how good their burners are, that is still a great deal. I believe you can still buy "Z" burners from Zoeller Forge, which are good enough. For any other burners presently being marketed...its a crap shoot.
-
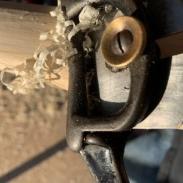
All miniature pipe cutters aren't created equal The Saillong Mini Steel Tube Cutter (No. 174-F), with two spare cutter wheels and “E” spring retaining clips, are recommended for tube diameters from 1/8” to 1-1/8” (3-28mm); it is used for parting copper, brass, aluminum, and thin stainless steel tube (up to1/16” thick); $10 from Amazon.com. This cutter is not a necessity, but is quite handy, both for parting tubing, and for scribing perpendicular lines, (for cutoff discs) in the larger tubes or pipes chosen for flame retention nozzles in 1/4”, 3/8”, and ½” burners. This is the best quality I have found in a miniature pipe cutter, and yet it is offered at a low price. The cutter wheel on my 174-F, tracks perfectly (no wobble), and so it takes no special care to maintain a single cut line in the material, rather than fighting a tendency for its wheel to leave a spiral score on the material, instead of immediately starting a proper cutting path.


