stockmaker
-
Posts
140 -
Joined
-
Last visited
Content Type
Profiles
Forums
Articles
Gallery
Downloads
Events
Everything posted by stockmaker
-
Thanks for the heads up, and best of luck, your work is awesome.
-
I say it anvul, but most everyone around me says it as option 1 Anvill, so I have been trying to change but not making any progress.
-
I am pretty tech'y, but try as I might I can't find a way to set up Craigslist alerts! I just check the tool list twice a day. And my wife gets all twitchy when see sees emails from Craigslist people come in.
-
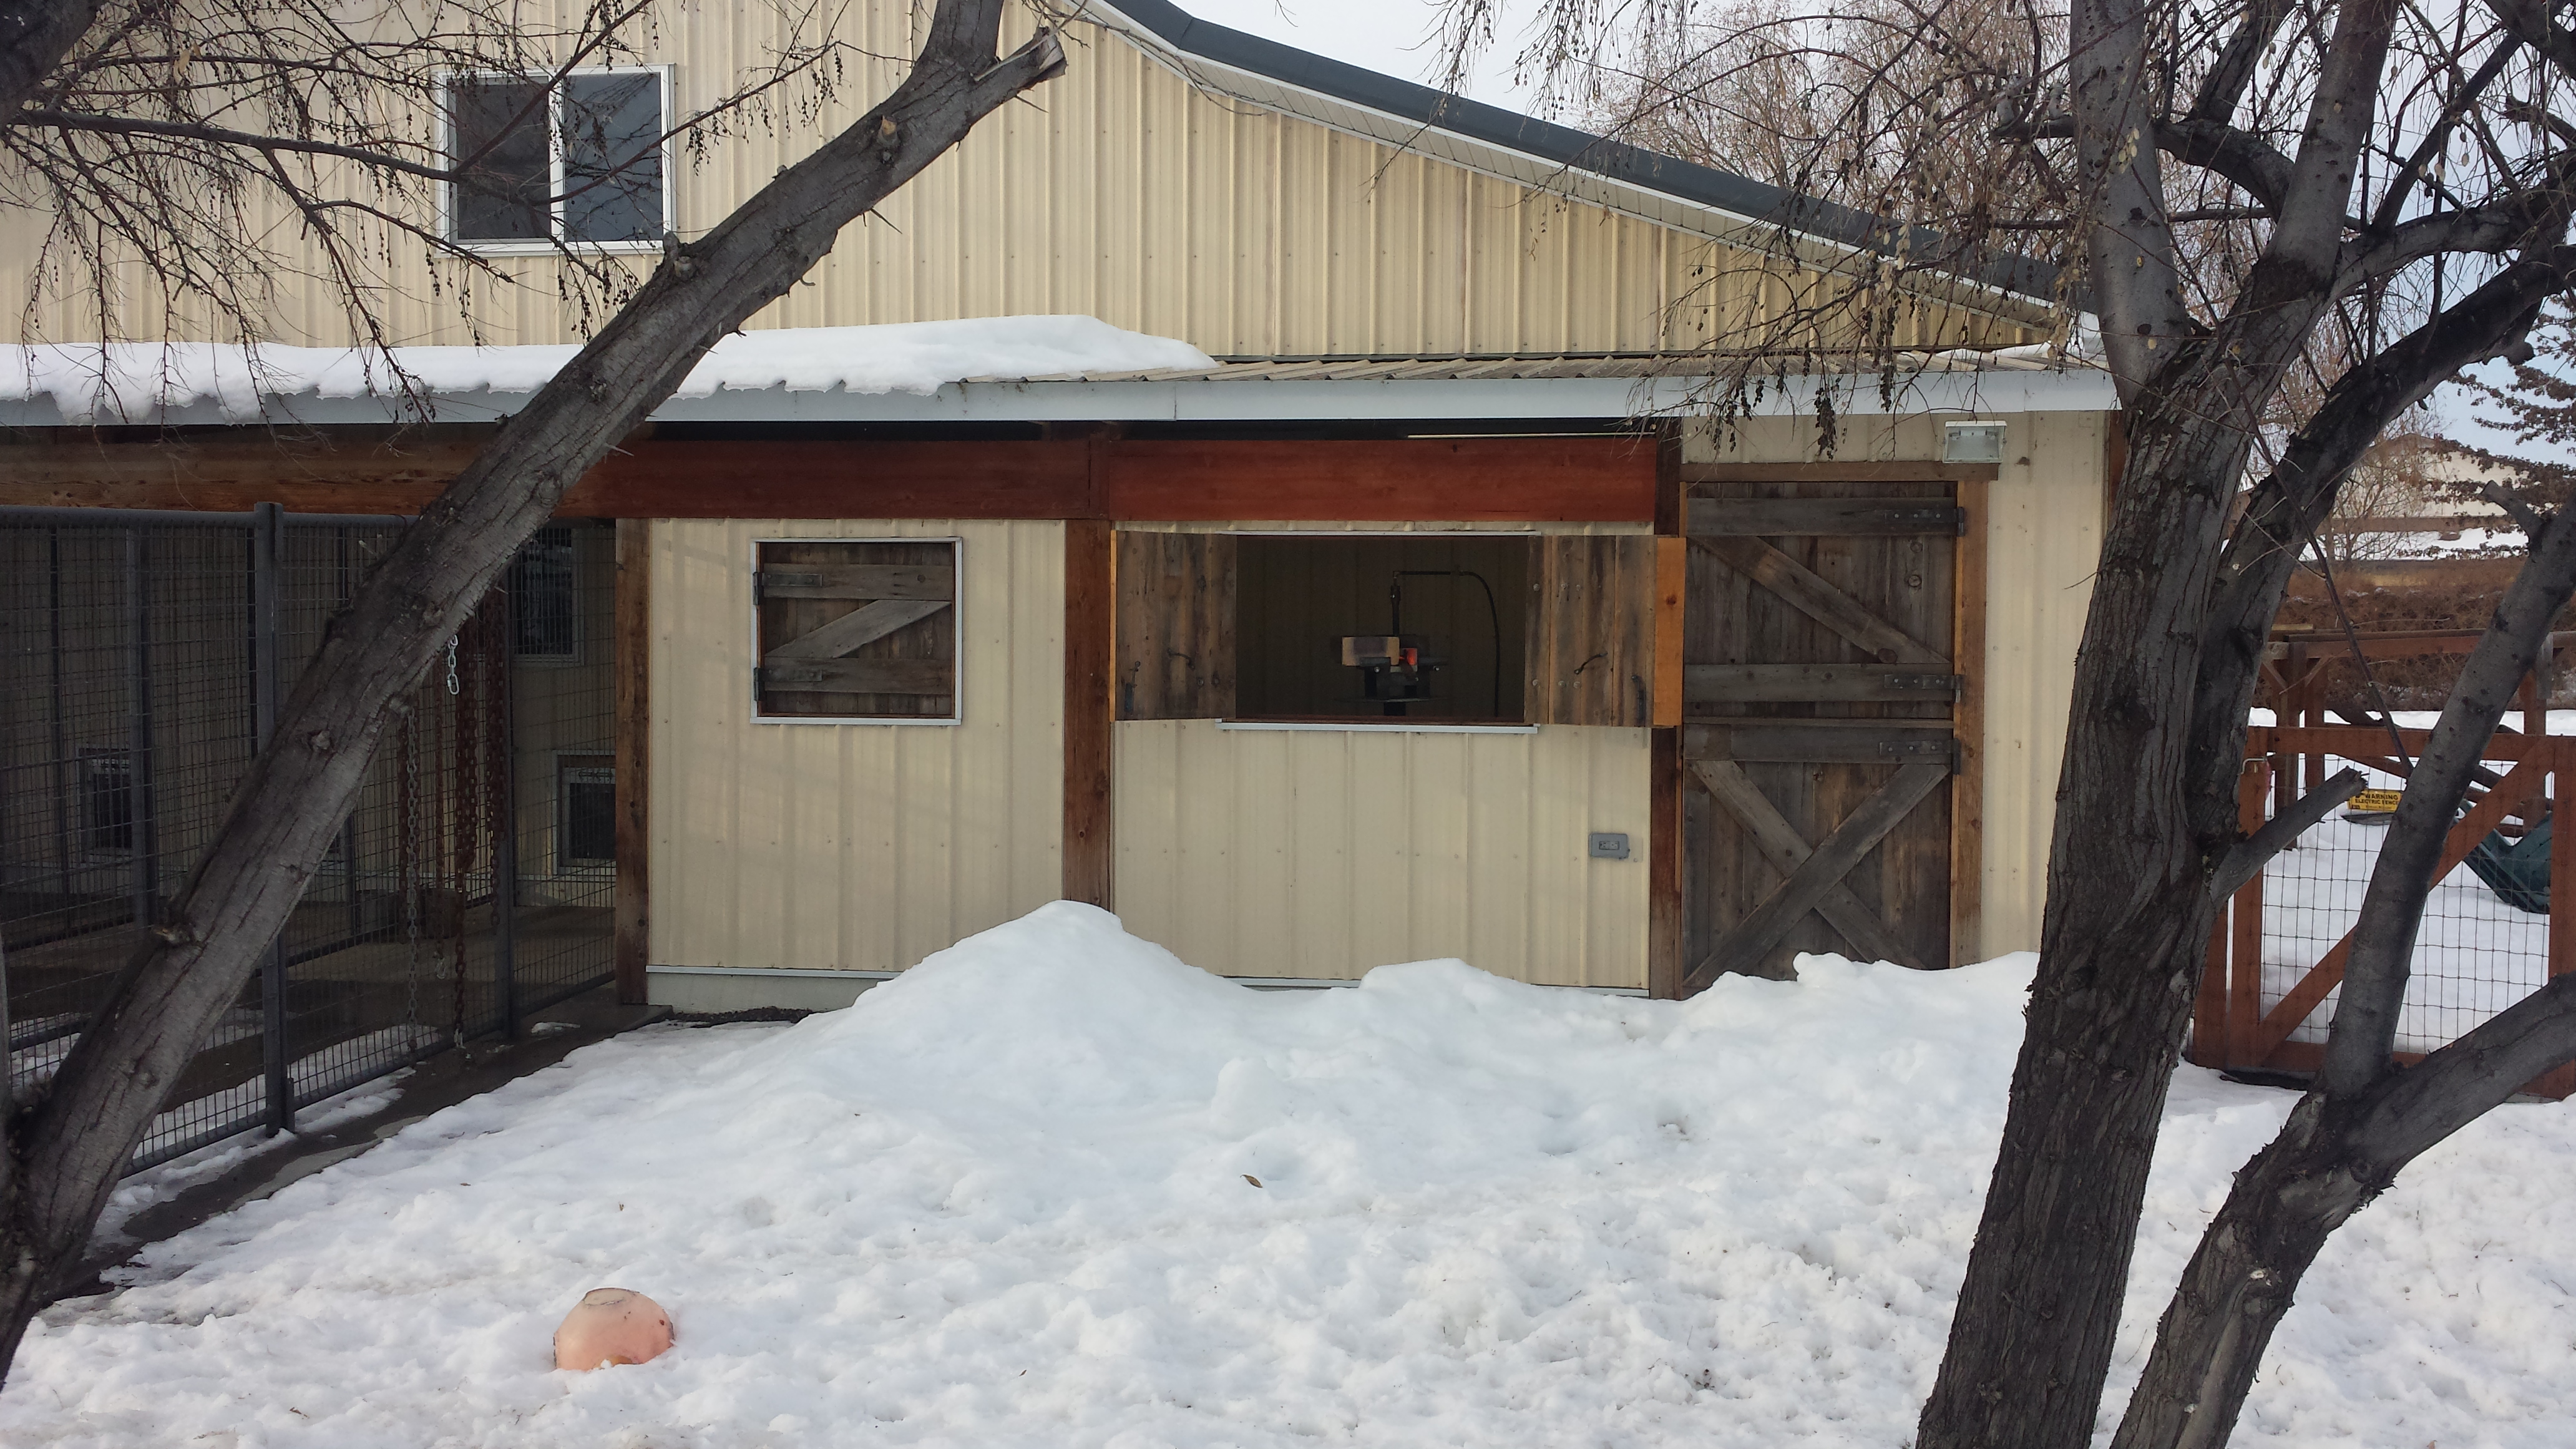
Winter ... around the shed..... hahaha ...
stockmaker replied to Ibor's topic in Building, Designing a Shop
Finally warming up here, we hit 41F today, I fired up the forge and started making a spring swage for rounding out tenons.
-
Steel for Mechanics Wrenches
stockmaker replied to Steven Lancaster's topic in Blacksmithing, General Discussion
Steven if you have a smart phone get the Heat Treating Society App. It is free and goes into detail on heat treating dozens if not hundreds of alloys. It is titled the "HTS Heat Treating Society ASM International Heat Treater's Guide Companion. Or if you just look around on this forum 5160 can be found. Best of luck on making wrenches, I hope you post the finished product, we would like to see what is possible. -
How to form a 'cone'
stockmaker replied to Jonathan Snell's topic in Spears, Arrows, Pole arms, Mace/hammer etc.
I assume the cone you are asking about is the one at the end of the iron shaft, the cone accepts the wooden harpoon handle? If so this is the same as making a socket chisel the socket being the cone you require. The two sides of the socket are forge welded once hammered to the correct shape. Glen and other here on the forum can do a much better job of explaining what to do or where to reference information, I know I once saw a video on You Tube on this. Good luck. -
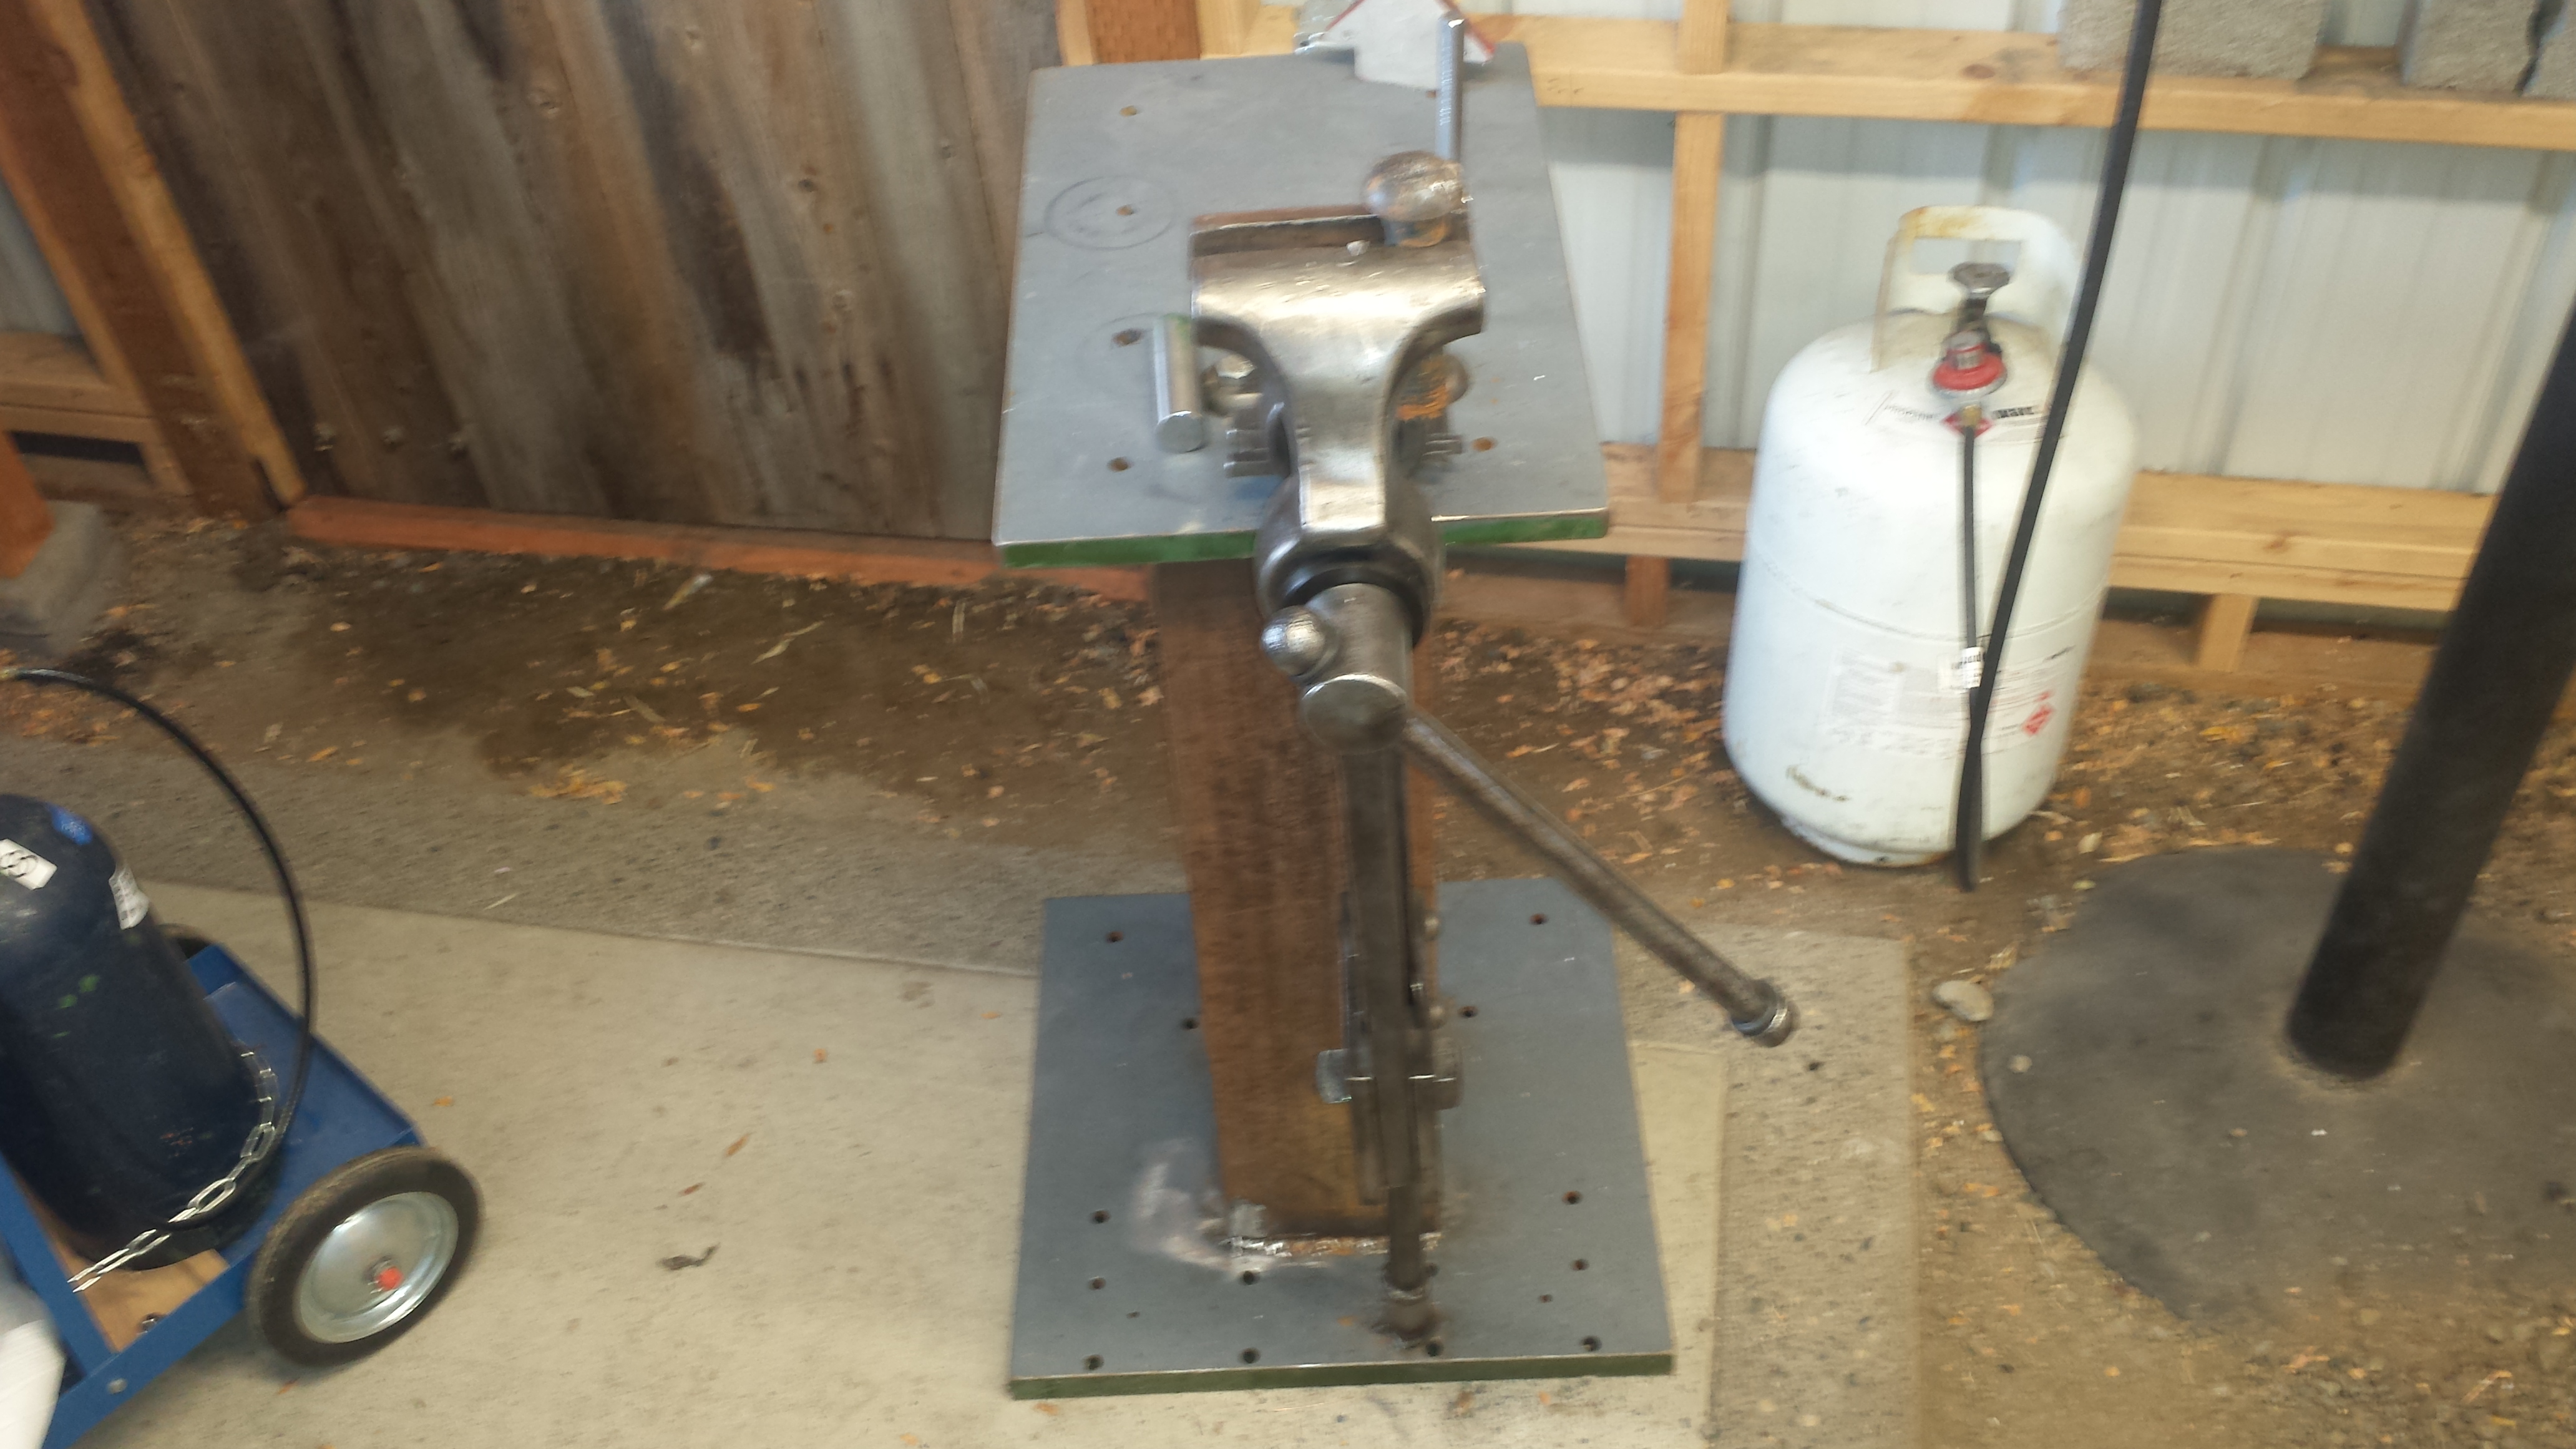
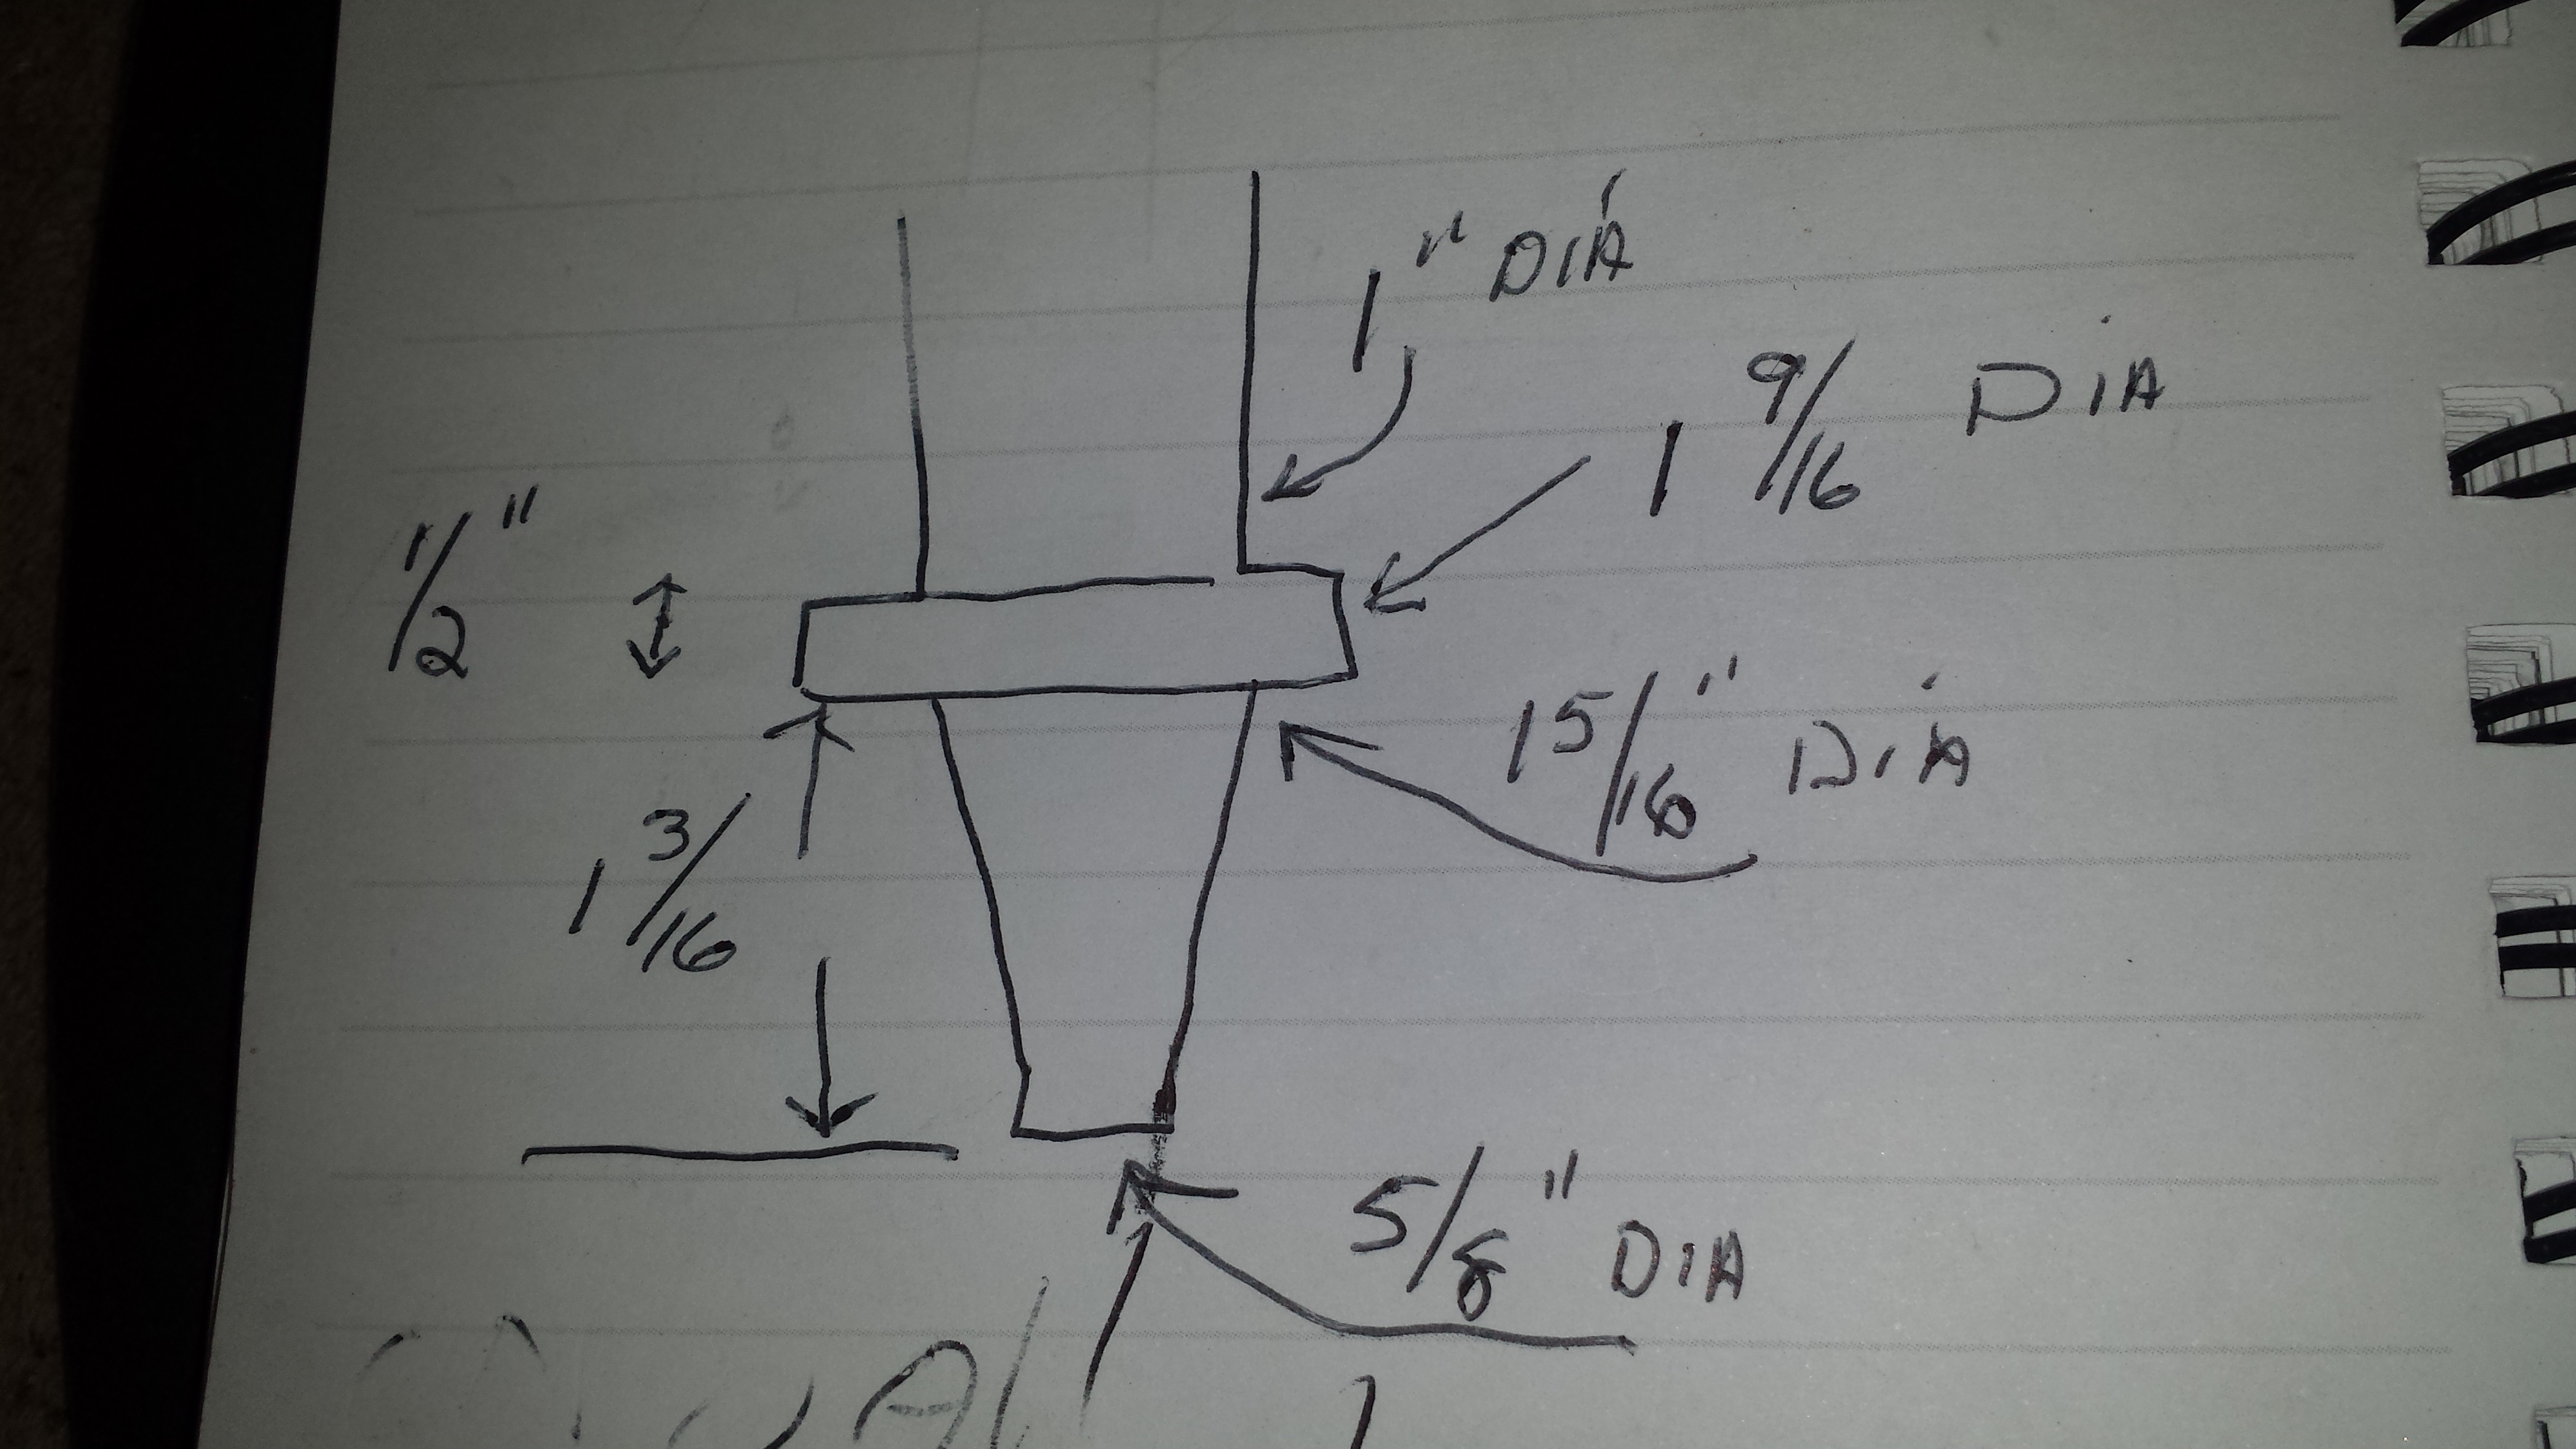
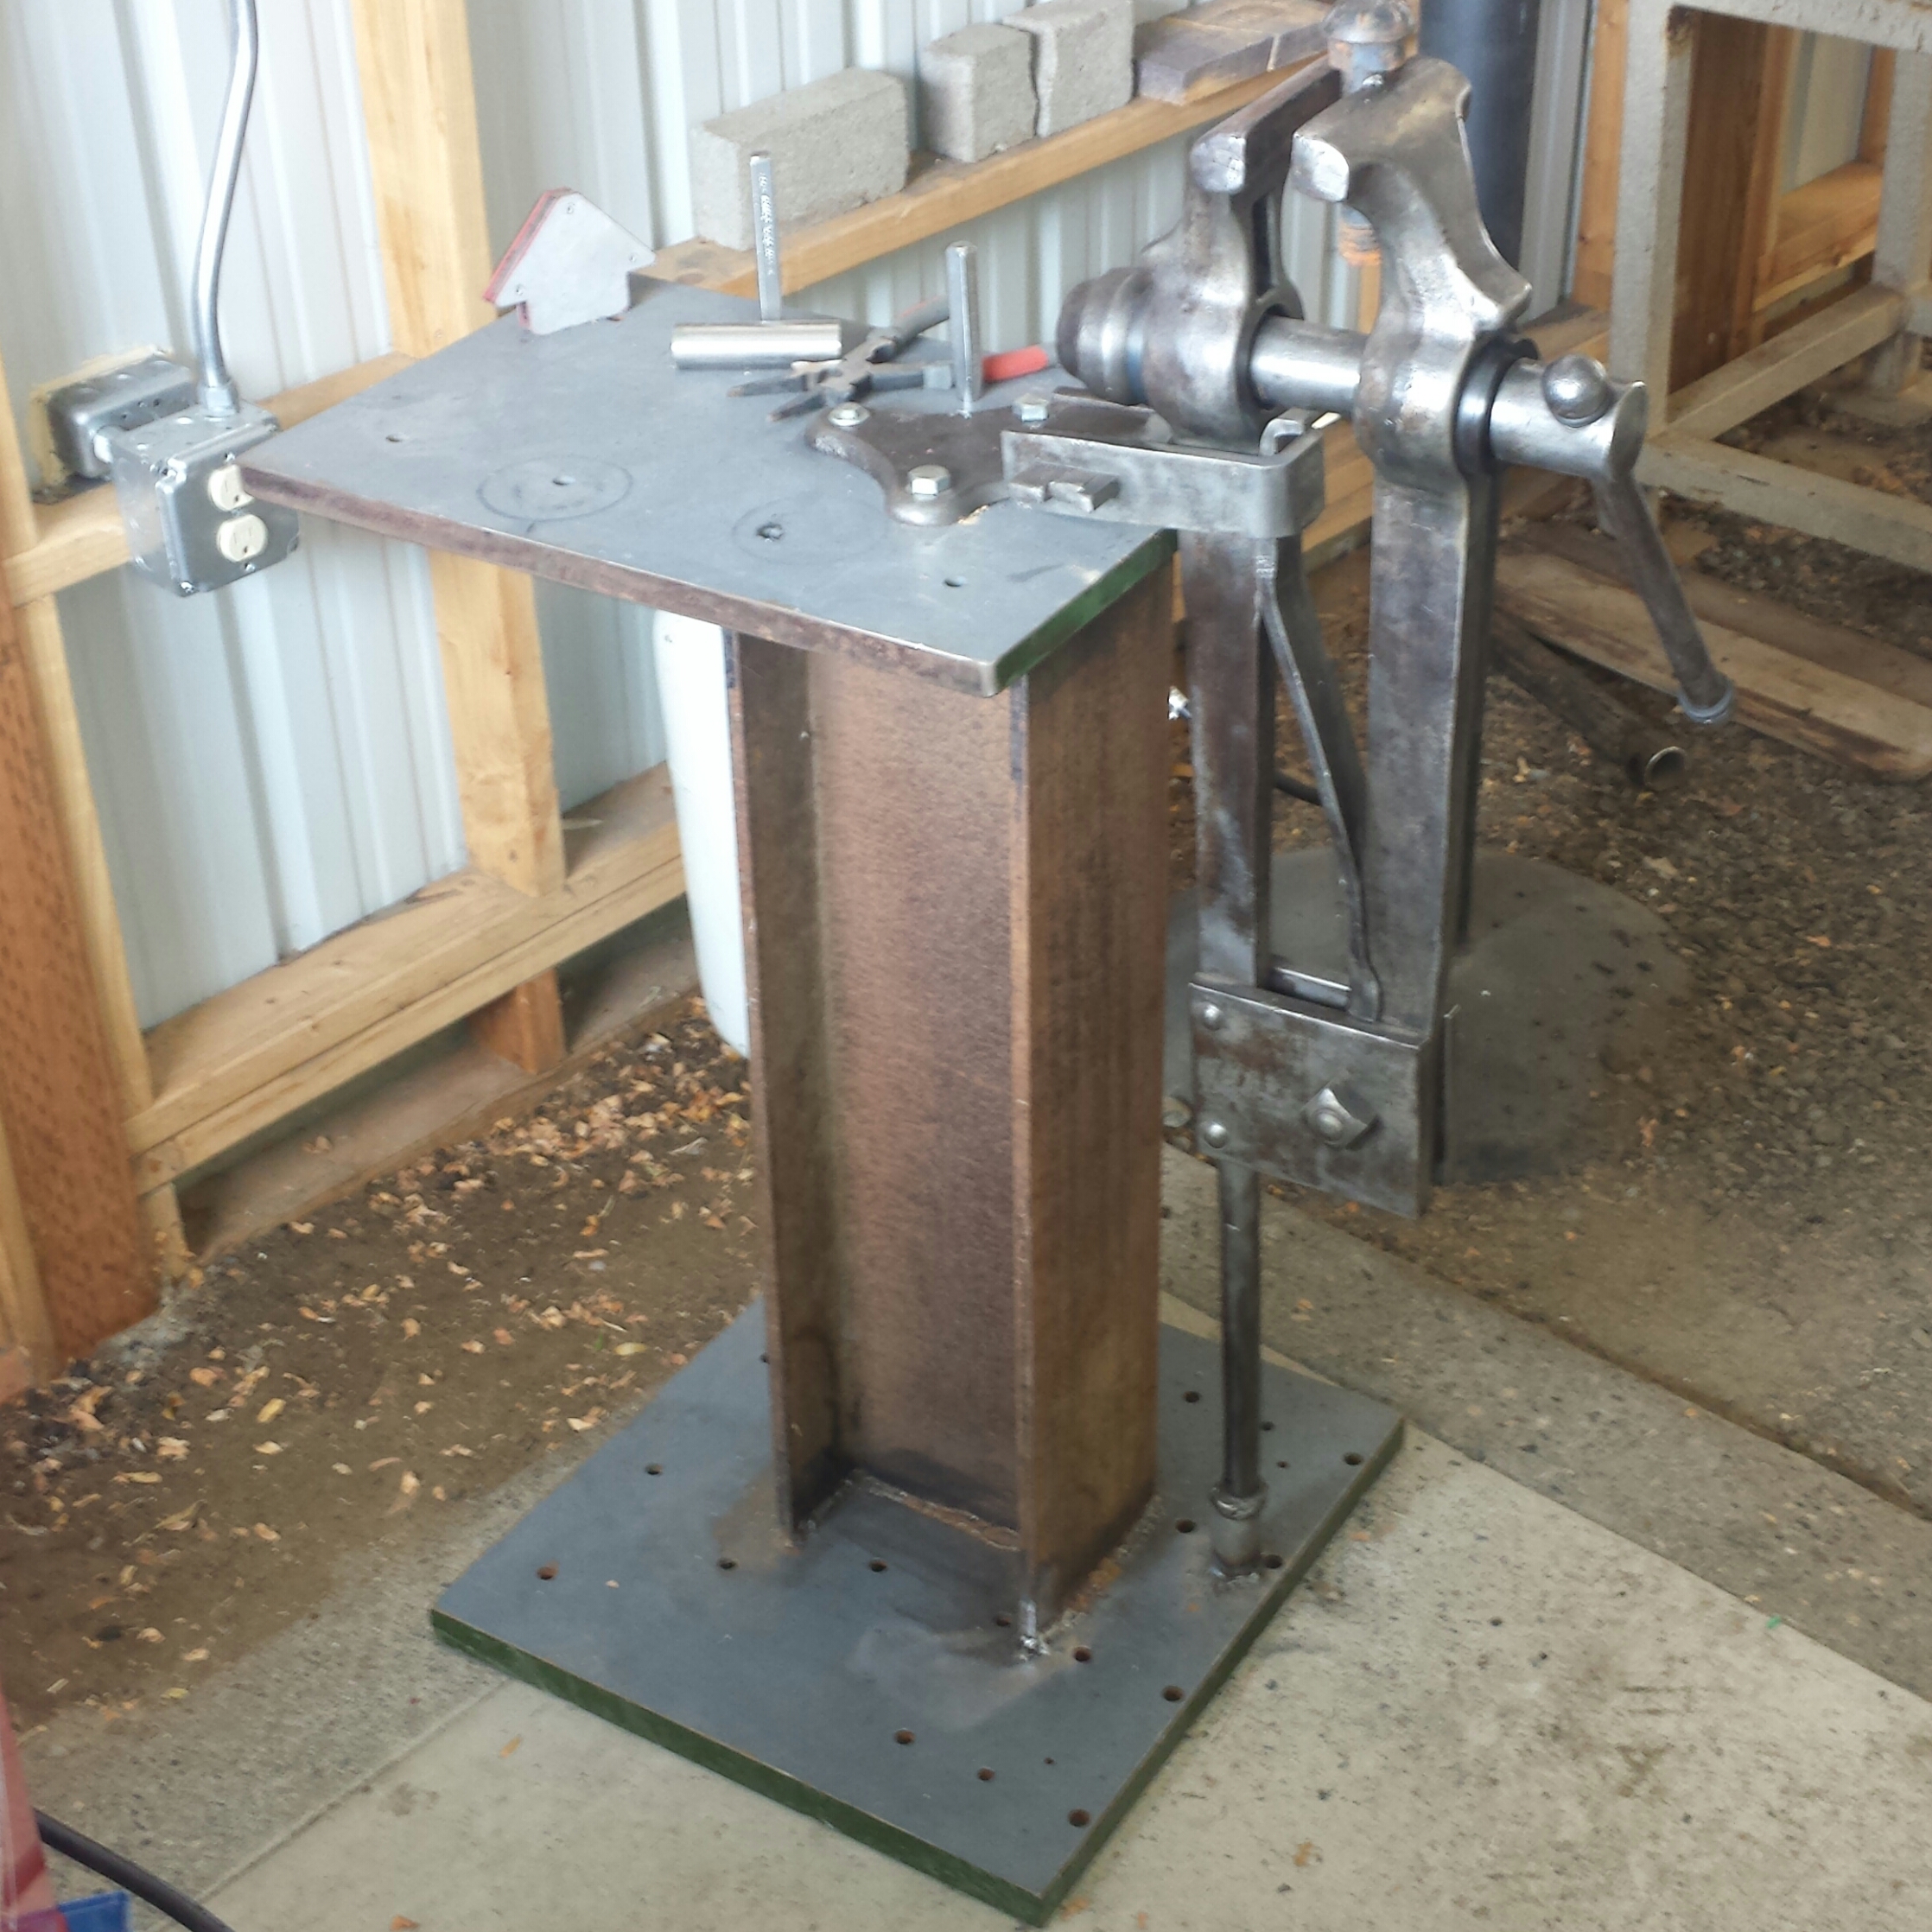
Hi Tommy Tap Tap, great name! Another picture of the stand from the front. I had to mount the vise to the side so the vise mounting bolts would clear the Center I-Beam bar. I know I spent more time on the leg anchor than any other aspect of this post/stand. At first I was going to forge it so the leg final fit perfectly into anchor, but decided that was beyond my present tooling, I ended up using a 1.5" dia. steel pipe (I think). Than finding the perfect place to position the pipe under the vise was perplexing, the leg would move, left/right/up/down/in/out, depending on how tight the leg clamp was. I wanted the clamp to be very tight, but I also wanted the leg to come straight down. I went with a slight compromise, but mostly in the straight down config. The leg just sets on top of the steel pipe. I did debur the pipe edges in the hope it would not cut into the leg. Good luck with yours.

-
My 5" Vise is mounted to an 8" I-beam with 1.25" plate on the bottom and 1" plate on top. Bought all at the scrap yard. Vise and mount weigh just over 300 lbs which is good until it's time to move the square bottom stand, then not so good, but it works well for me.

-
Hello Mr. Joey Civ and welcome to Blacksmithing. A year ago I was a rank beginner, now you can take the rank off my name. I too recommend "The Backyard Blacksmith" by Lorelei Sims, and I recommend bookmarking this forum, it is rich with information. The book will help you outline and prioritize what tools and appliances you need, it did for me. It does focus on coal forges which may not be practical for your situation. If you decide propane is for you spend some time (a lot) reading this forum, You Tube is informational, but as a newbie it can be full of junk as well. I took a beginners two day class, I and highly recommend some formal training, but not until she has done some hammering on hot metal. Others may disagree about that prereq, but for one, two days of hammering takes a little pre conditioning (exercise). And I hope you look into blacksmithing clubs in Ohio, I hope there is one close to you. I do not have any experience with youngsters starting out, I wish I could help you on that aspect of this undertaking, the best I can do is suggest she and you look at the Alex Steele video's on You Tube and read his resume on his web site, at the least he will provide inspiration.
-
I worked as a telecommunication engineer in primarily radio systems for companies such as Motorola, Rockwell, Boeing, Cisco and Lockheed. During those times my primary hobby was woodworking and gunsmithing as I also love to hunt. Two years ago I retired from the IT world but still do the gun work and now find blacksmithing as a hobby a great joy.
-
I have been watching Hoenirson's forge build with great interest, as I am about to embark down this same path. His very well made forge is at the point of tweaking the door design. Doors on gas forges bring up so many questions in my mind, I have noted that designing a forge is a little like designing an airplane everything you do is a compromise, you can make the airplane very fast, or you can make it capable of lifting heavy weights, but you cannot make one that does both. Same with forges, you have to sometimes give up something if you want something else. I am thinking that my new forge is just going to have sliding fire bricks for doors. Here are the problems I see with metal doors: Besides structural design complications, When shut. You cannot see the work piece to determine its temperature. The back pressure on the burners changes considerably, possibly effecting combustion? Many work pieces are longer than the forge which restricts closing of the door/s anyway. It seems to me that the only time I would want to shut the doors is when bring metal up to forge welding temperatures, and then I would be reluctant to do it because I was taught to watch for sparklers before the metal starts to burn, I need to see the metal to do that! And this thought assumes my new forge will get that hot, and I don't know that it will. I hope to hear from those of you who deal with gas forges everyday and who have opinions about doors. Why would I need a good closing door on my gas forge? Thank you.
-
I too use the 2X72 belt grinder for sharpening knives and woodworking tools and find it superb for the purpose. I have belts that go to 800 grit, but typically I only go to 400 grit. I was going to make a holder so I could regulate the bevel to the exact degree I wanted, but find that free handing works so well I did not need to. If I were grinding a bevel for the first time on a piece of steel I would want a jig. I can use a belt grinder on many of my gouges as well. For those of you who don't have or can't afford a large belt grinder, I used a 1X30 Harbor Freight $30 belt grinder for years and was very happy with it and an assortment of belts. I should point out that sometimes with belts the convex bevel can get away from you which basically means you have rounded over your edge ever so slightly. When this happens on knives I just start over on the belt grinder, when it happens with a chisel which requires a straight flat back I have a set of diamond plates I use to reestablish the correct surfaces.
-
Also crappiew if you would, tells us about the propane interface to the air line. Thanks, and nice looking work you did.
-
any new year traditions in blacksmithing
stockmaker replied to the iron dwarf's topic in Blacksmithing, General Discussion
ID, who is the striking individual holding/testing the bottle opener? -
7am here, just finishing my second cup of coffee, Merry Christmas to all you Blacksmiths out there, you are special people.
-
Evann, not all of us have two shops and a house to work out of, lol, Welcome to the forum.
-
Good Deal. Don't forget to lube it, don't use grease it will gather dirt and filings, I used 20 wgt motor oil, but any light oil will do.
-
Well this is as interesting as can be. Thank you for sharing.
-
How do I proceed with a wounded anvil
stockmaker replied to stockmaker's topic in Anvils, Swage Blocks, and Mandrels
All, thanks for commenting on my post, I appreciate it. I have been using the anvil for two months now and love having it, I am now a Peter Wright fan. I have not yet addressed the crack but plan to "someday" soon . The crack has not changed as far as I can see, I have only used 2lb-3lb hammers on 3/4" or less stock. Although I have forged two hardy hole shanks which is 1 1/4" stock, that was the hardest work the anvil had to endure. I do go lightly when pounding on the horn. The reason I want to fix the crack now is almost purely aesthetics, having an anvil with an ugly weld and a crack all the way around it bugs the heck out of me. Anyway that is where I am on this family member. -
I had the same problem when I put mine back together. Like Jim Coke says, tighten the pivot bolt, and make sure that part of the vise is as tight as it can be without binding. Hopefully that is all that is needed.
-
1st-Timer Forge Build Fun ( or 'Hey look, still not blowed up')
stockmaker replied to Hoenirson's topic in Gas Forges
Thanks for the reply, the soldering option is entreating, I will keep that in mind. I once installed a deep double sink in my shop that was given to me, by the time I installed the drain pipe, faucet, sink drains, and spray hose I had made 9 trips into town, I kept the receipts! And I have box's of spare plumbing parts before and after. I hate plumbing and this looks like plumbing to me, lol. Merry Christmas and a speedy recovering on the knee, go slow. -
1st-Timer Forge Build Fun ( or 'Hey look, still not blowed up')
stockmaker replied to Hoenirson's topic in Gas Forges
Hello Hoenirson. I don't have any words of wisdom for you on the liner but I do have a question about your gas manifold. You have an interesting coupling of copper and steel pipe. I have been planing to change mine and make it more functional and easy to use. All the little parts and pieces needed have me worried about several trips into town. Did you have any problems getting everything to mate up? Thanks -
The most used tool you made for your shop.
stockmaker replied to Glenn's topic in Tools, general discussion
Thomas, when you have time I would love see a picture of your fuller. As a newbie I am always looking at hardy tools and fullers, will it ever end? -
Naturally Aspirated Ribbon Burner. Photo heavy.
stockmaker replied to Frosty's topic in Ribbon Burners
Hello Frosty, I too am reading this thread with great interest. I have another question or two about the Plenum/Burner build for your NARB. I am doing some preliminary planning to build one by re-reading your post's and realized that I don't know how much air plenum is left in the plenum after the burner (refractory with holes) is installed. It looks like the 2" thick burner block goes about 3/4" to 1" into the steel plenum box. Is that true? In your opinion is this measurement critical to the tuning of the NARB? Is this fun or what! -
Ok thanks Wayne, I will do that shortly.