Matthew D
-
Posts
68 -
Joined
-
Last visited
Content Type
Profiles
Forums
Articles
Gallery
Downloads
Events
Everything posted by Matthew D
-
It isn't D2, but it is similar. It is called Chipper. The blades are about 1/4 inch thick and 2x10 inches. They have a cross section that looks like a zigzag and they are sharp on both edges. They have to be forged flat to do anything with. I'll post a picture later.
-
Amen to that. It is dang tough. My best experience is to heat it up to a bright red and let it soak in the fire for 15 minutes or more. Then heat it up to yellow and start smashing. This Chipper steel I have was all free and makes a great knife, so I have used it quite a bit. I reclaimed the steel from a logging outfit in Anchor Point, Alaska. below are some links about Chipper. Although I don't have the ability to heat treat and temper it according to the data sheet, I have found that for a knife, the steel is pretty forgiving for a steel smasher like me. My father and I have made many many hunting knives from it just forging it on a coal fire. The new owners love them and the knives have skinned all sorts of Alaskan beasts over the last 15 years.. http://uddeholm.com/products/cold-work-tool-steel/uddeholm-chipper http://www.bucanada.ca/viking_chipper_c.htm this has a data sheet on it. This one says Viking/Chipper so I assume the data sheet is for both? Anyhow, if you live in an area where there are logging operations, they have lots of chipper blades which are just discarded. Just ask. Make something for them and ask for more. That usually does the trick and its always great to return the favor. I made a knife for a friend who was the supply manager and he loved the knife. He gave me all the old chipper blades I could haul off. He told me he used it for two hunting seasons in a row and skinned his moose and friends. He never sharpened it for two seasons or more. He actually complained it was TOO sharp. Kept cutting holes in the hide. Oh well. Wish I would have hauled it all off.
-
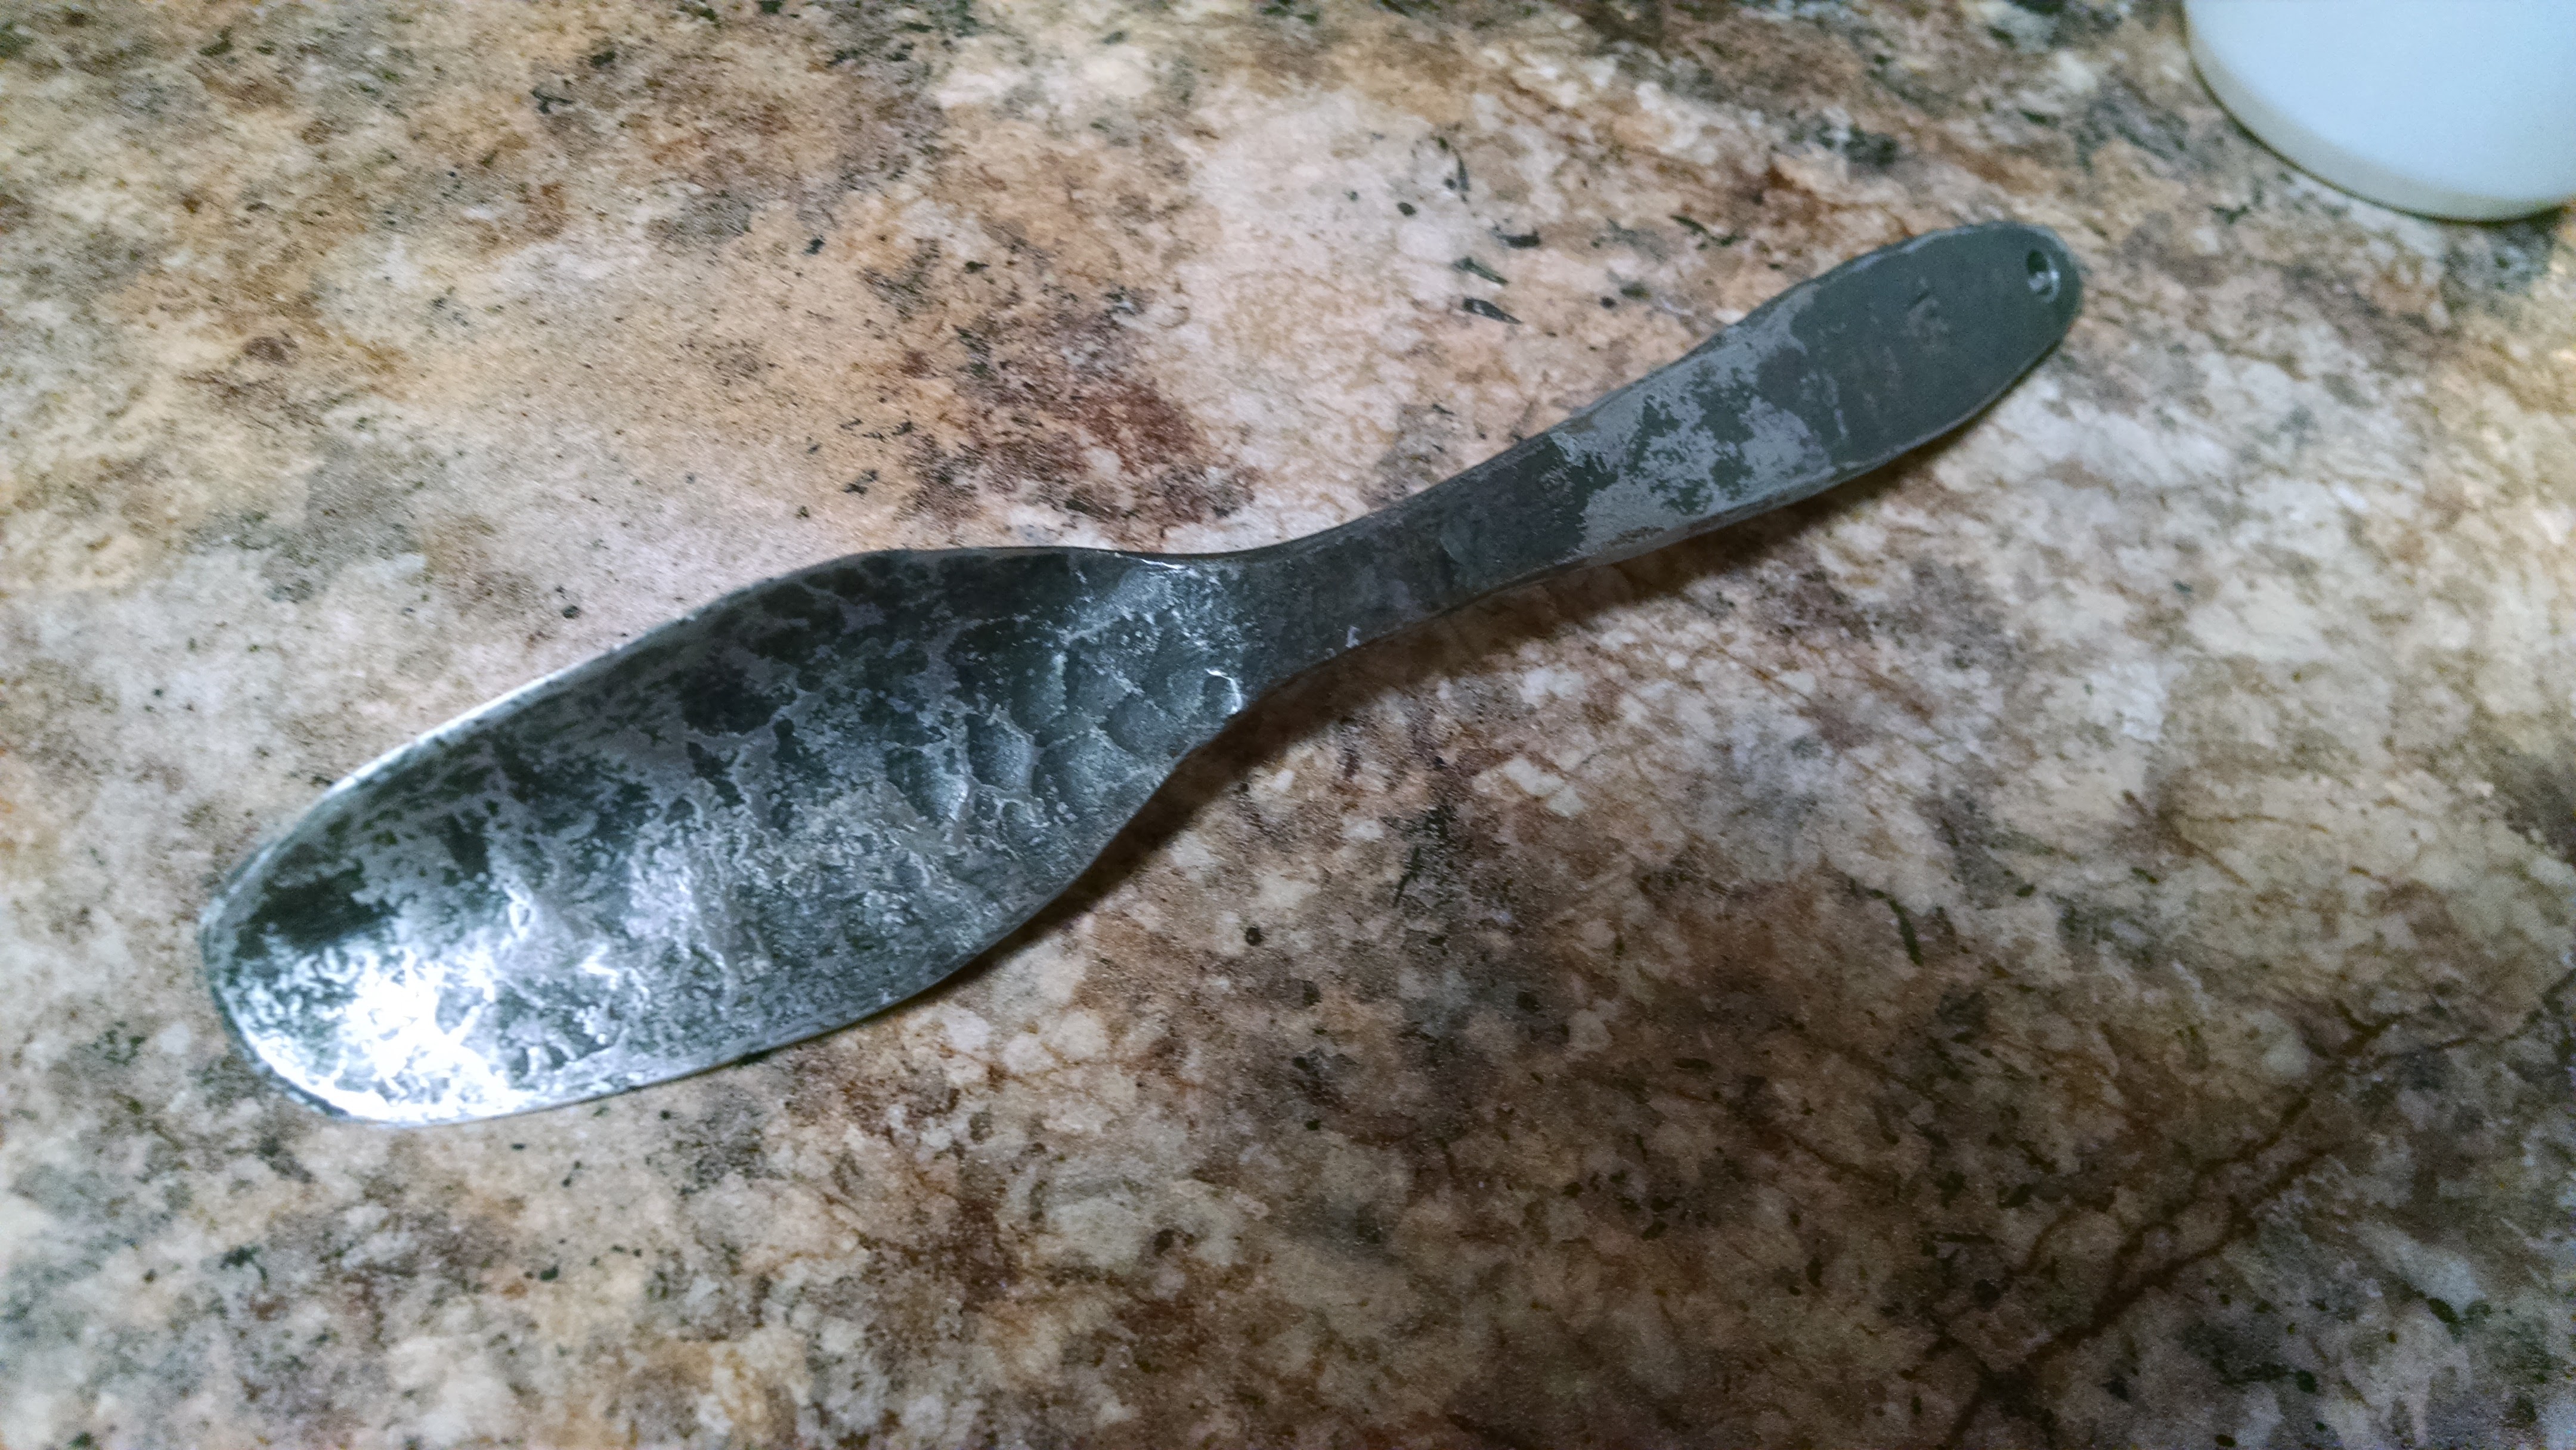
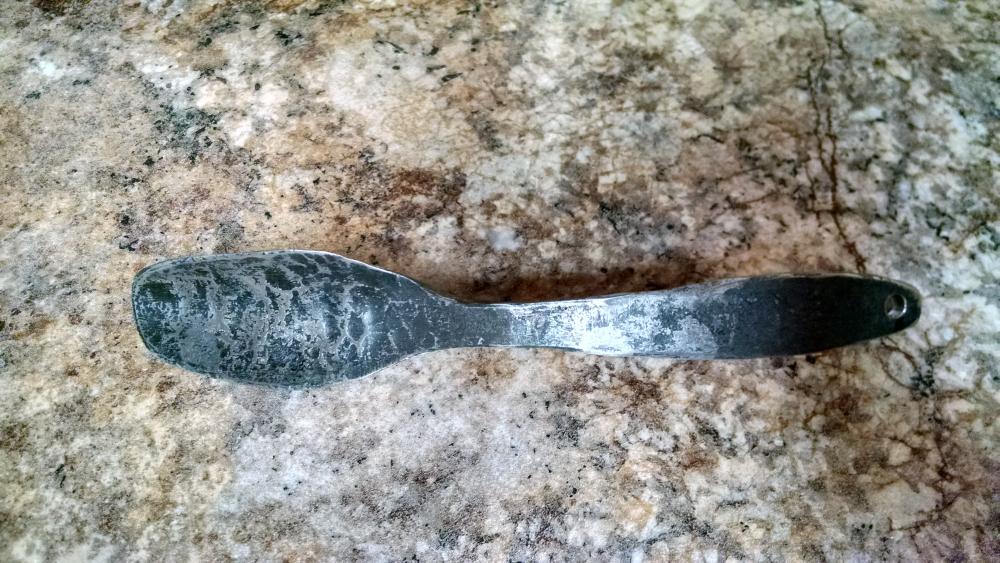
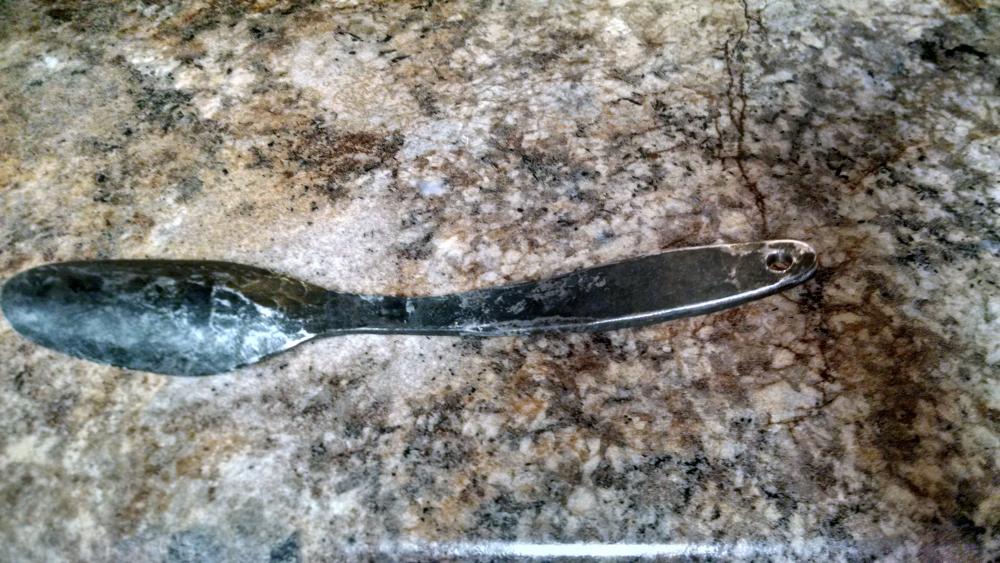
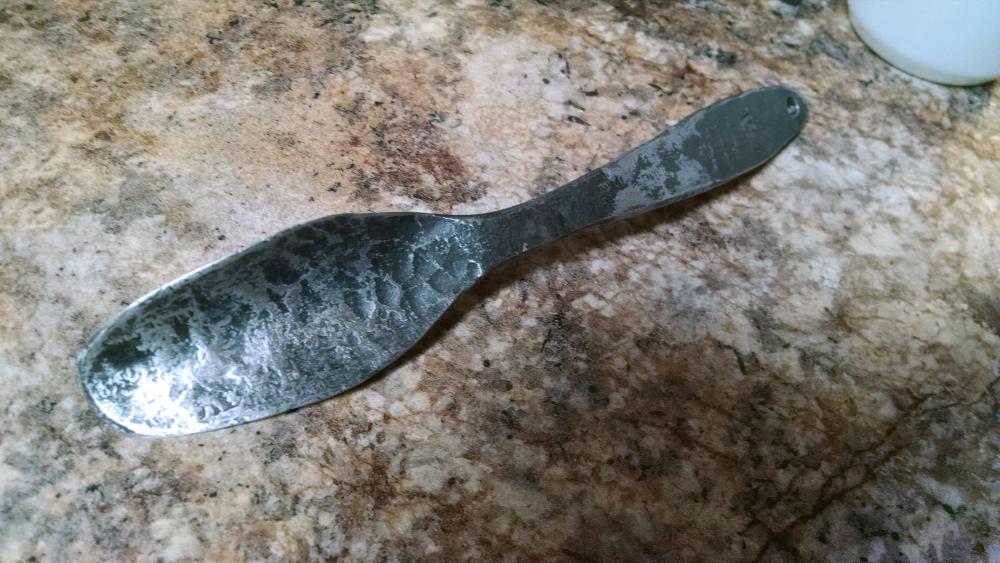
Made a shoe horn from a railroad spike. It works really great. I was going for a forged-to-finish look. On my last heat I brushed it really well to remove scale and quenched it to toughen it some. Only grinding I did was around the edges to shape it a little better and drilled a hole to put a leather thong in. Then I sanded it with some fine sandpaper to finish it up. First attempt with improvements to come. Fun project and something that will get used every day and last a lifetime.
-
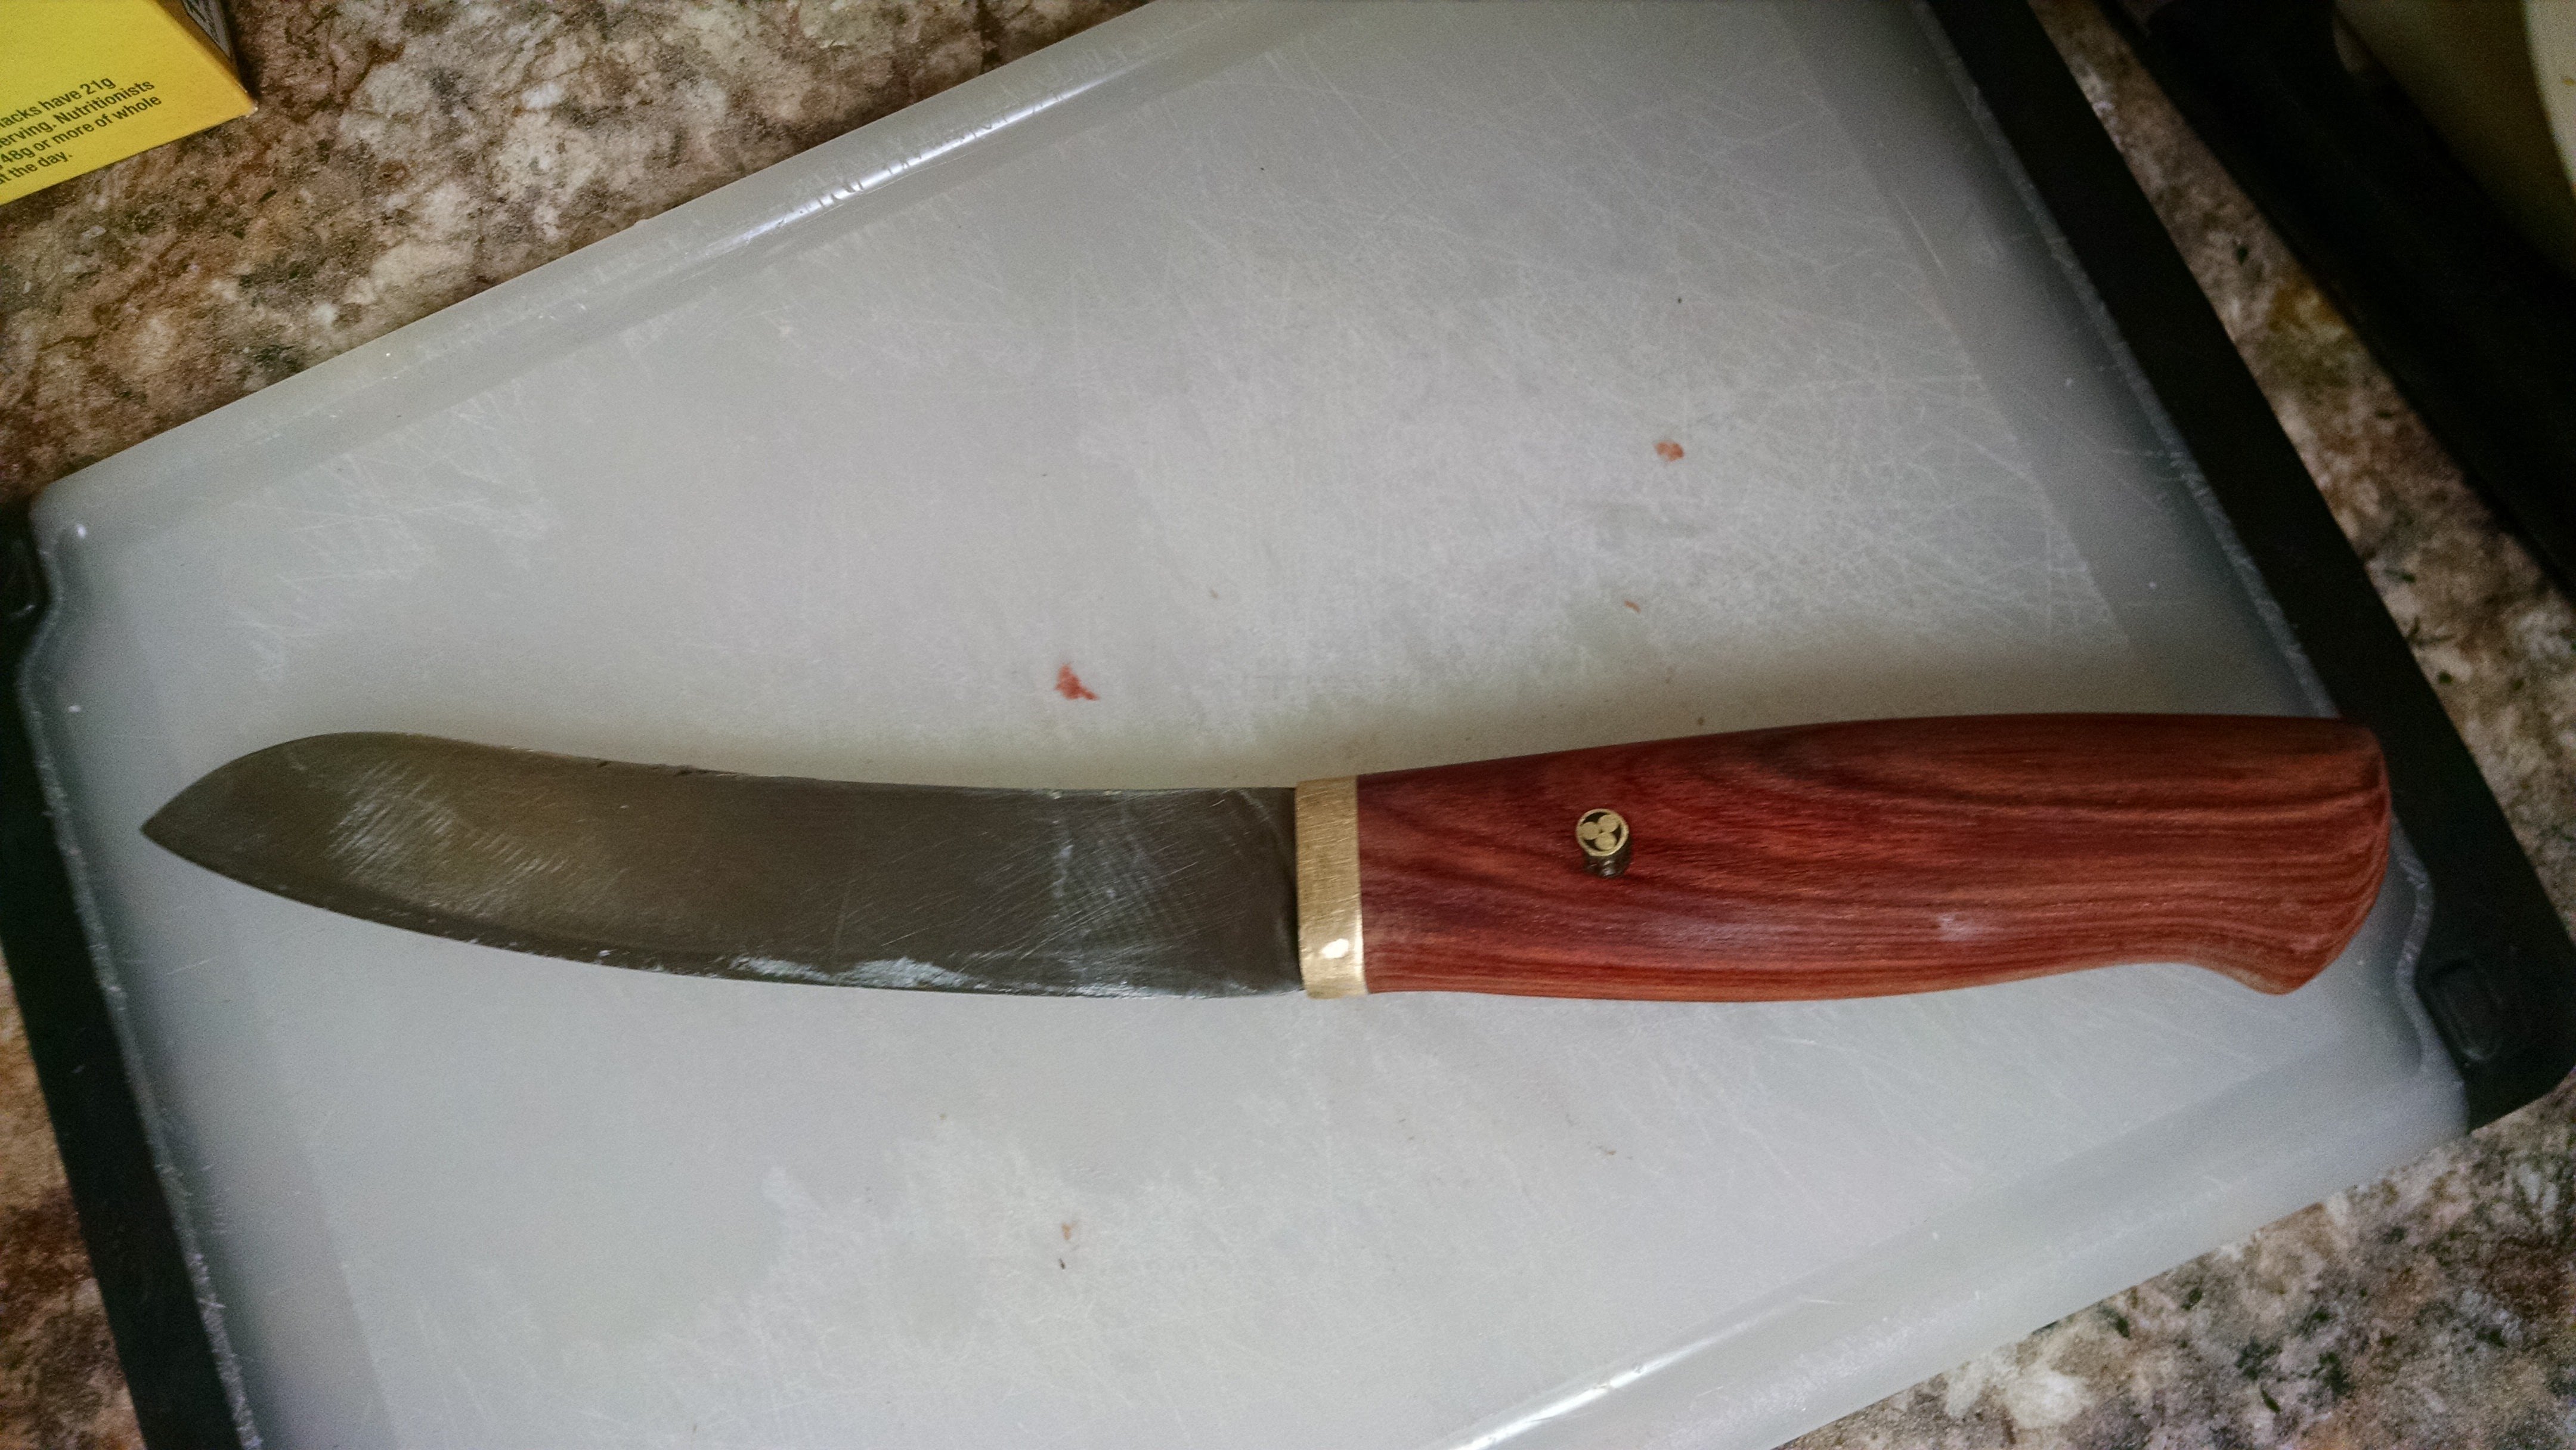
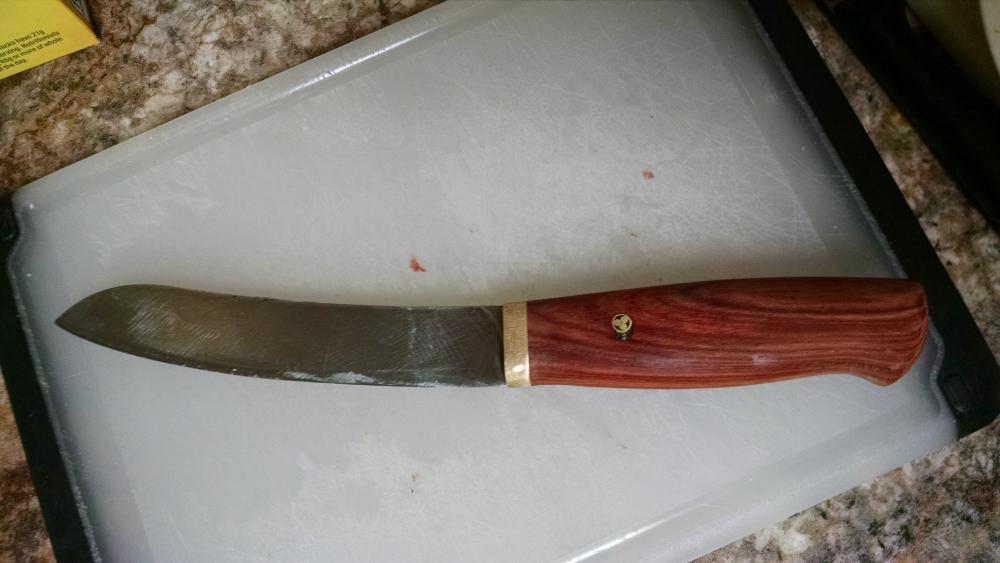
My son helped on this kitchen knife project. He is pretty proud of it. Hand Forged Hidden tang Steel: Chipper (like D2) reclaimed from industrial wood chipper machine Handle: rose wood Keeps an edge: You bet!
-
Restoring a Trenton Anvil
Matthew D replied to Matt Tenson's topic in Anvils, Swage Blocks, and Mandrels
I thought we all wanted our anvils to sing.. er is that ring? -
That will be a nice anvil when you are done. It probably won't have the rebound of a hardened tool steel face, but it will work.
-
Restoring a Trenton Anvil
Matthew D replied to Matt Tenson's topic in Anvils, Swage Blocks, and Mandrels
Max, I have a Trenton anvil very similar to yours, only it is about 120 pounds. When I bought it, the edges were very similar to yours. Although there is controversy with repairing an anvil, it has been done very successfully by lots of blacksmiths. However, I agree with Mr Powers, if you must repair it, use the Gunter Schuler method. I used the Robb Gunter and Karl Schuler method to repair the edges and bad arc welding divots in the face of my anvil. After building up the edges, I put a radius on them to suit my needs. I am very pleased with the way the repair turned out. I used an angle grinder with an abrasive sanding disk to clean up the face, fix the horn and put a radius the edges. Don't mill it. The carbon steel plate on a Trenton is not that thick to begin with. Just clean it up a little and don't worry about any sway in the face of the anvil. Little divots and pock marks will not hurt your forgings at all. Anvil Restoration © Robb Gunther and Karl Schuler The Forgery School of Blacksmithing published in ANVIL Magazine, April 1998 http://www.anvilmag.com/smith/anvilres.htm -
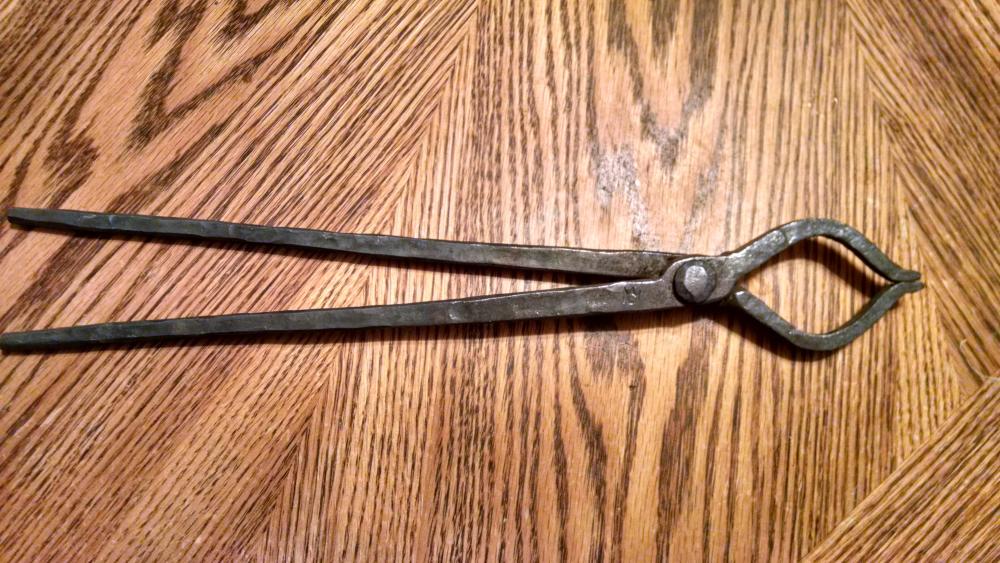
Thanks for the compliments. They are pretty cool tongs. Overall they took me about 4 hours to make. I can't even imagine how long it would have taken an ancient blacksmith to make a pair, if he was starting from ore!. Making his own charcoal, etc. A pair of tongs like this would have been a very valuable tool. It would be cool to use an ancient pair like that. I am sure they could still be use. I would like to get in touch with the museum who has them to get accurate measurements. A photo or something like that. Frosty, So far I really haven't had a chance to use them. However, they are to date the best functioning tongs I have made. I really took my time making them. I think my drawing out, tapering and barring skills grew by 300%. Going from 7/8 to 3/8 was moving a whole lot of iron. But it was all good experience. I believe there will be a learning curve to using tongs like this to do flat work with; knives, hoes, spatulas, etc.. There must be all sort of techniques to skillfully using them. But I will start learning. I tried them out on a chef blade I recently forged. They do grip flat material very well. Plus you can do some neat things with them. Like hold a blade on the spine and use the tips on the tongs as a stop and put the edge of the blade on the edge of the anvil for tapering the blade. By grabbing the blade the middle with the tang going past the boss you can work the edge of the knife without it getting loose. What I would like to do is get skilled at using them and then do an informative video. I still need to make a better pair of African style tongs. I will post an improved pair in my other thread. Matthew
-
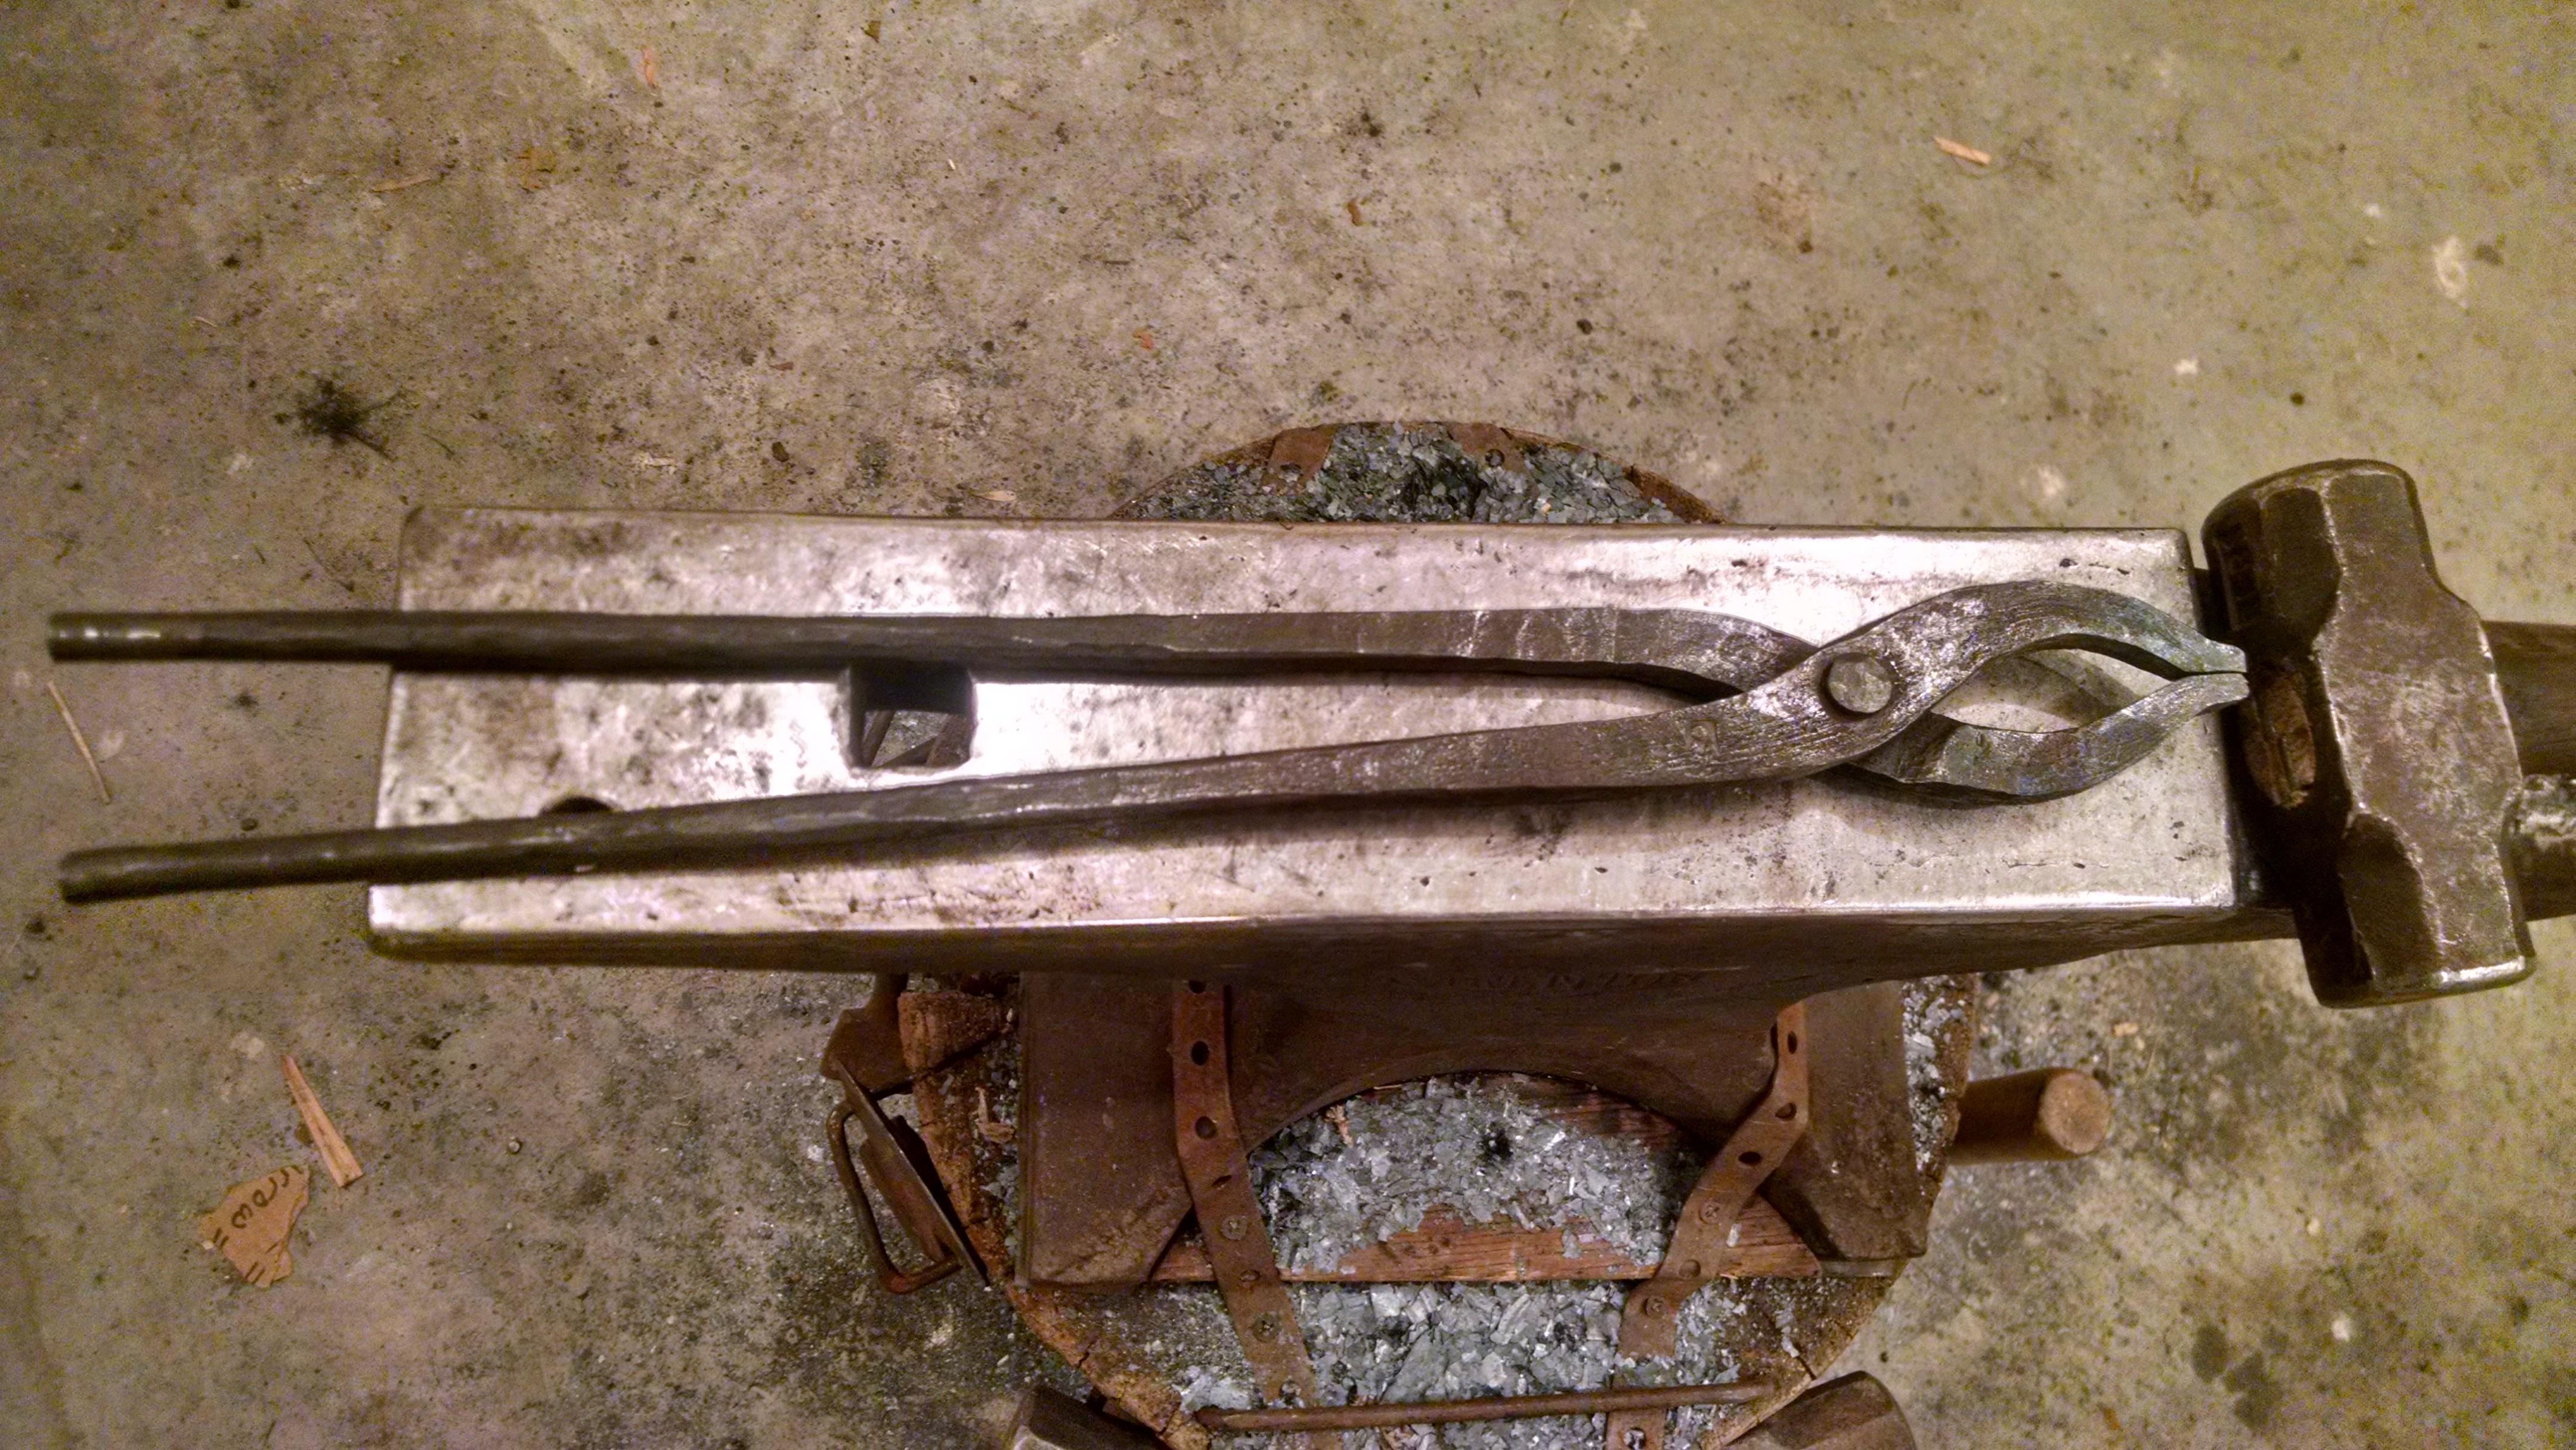
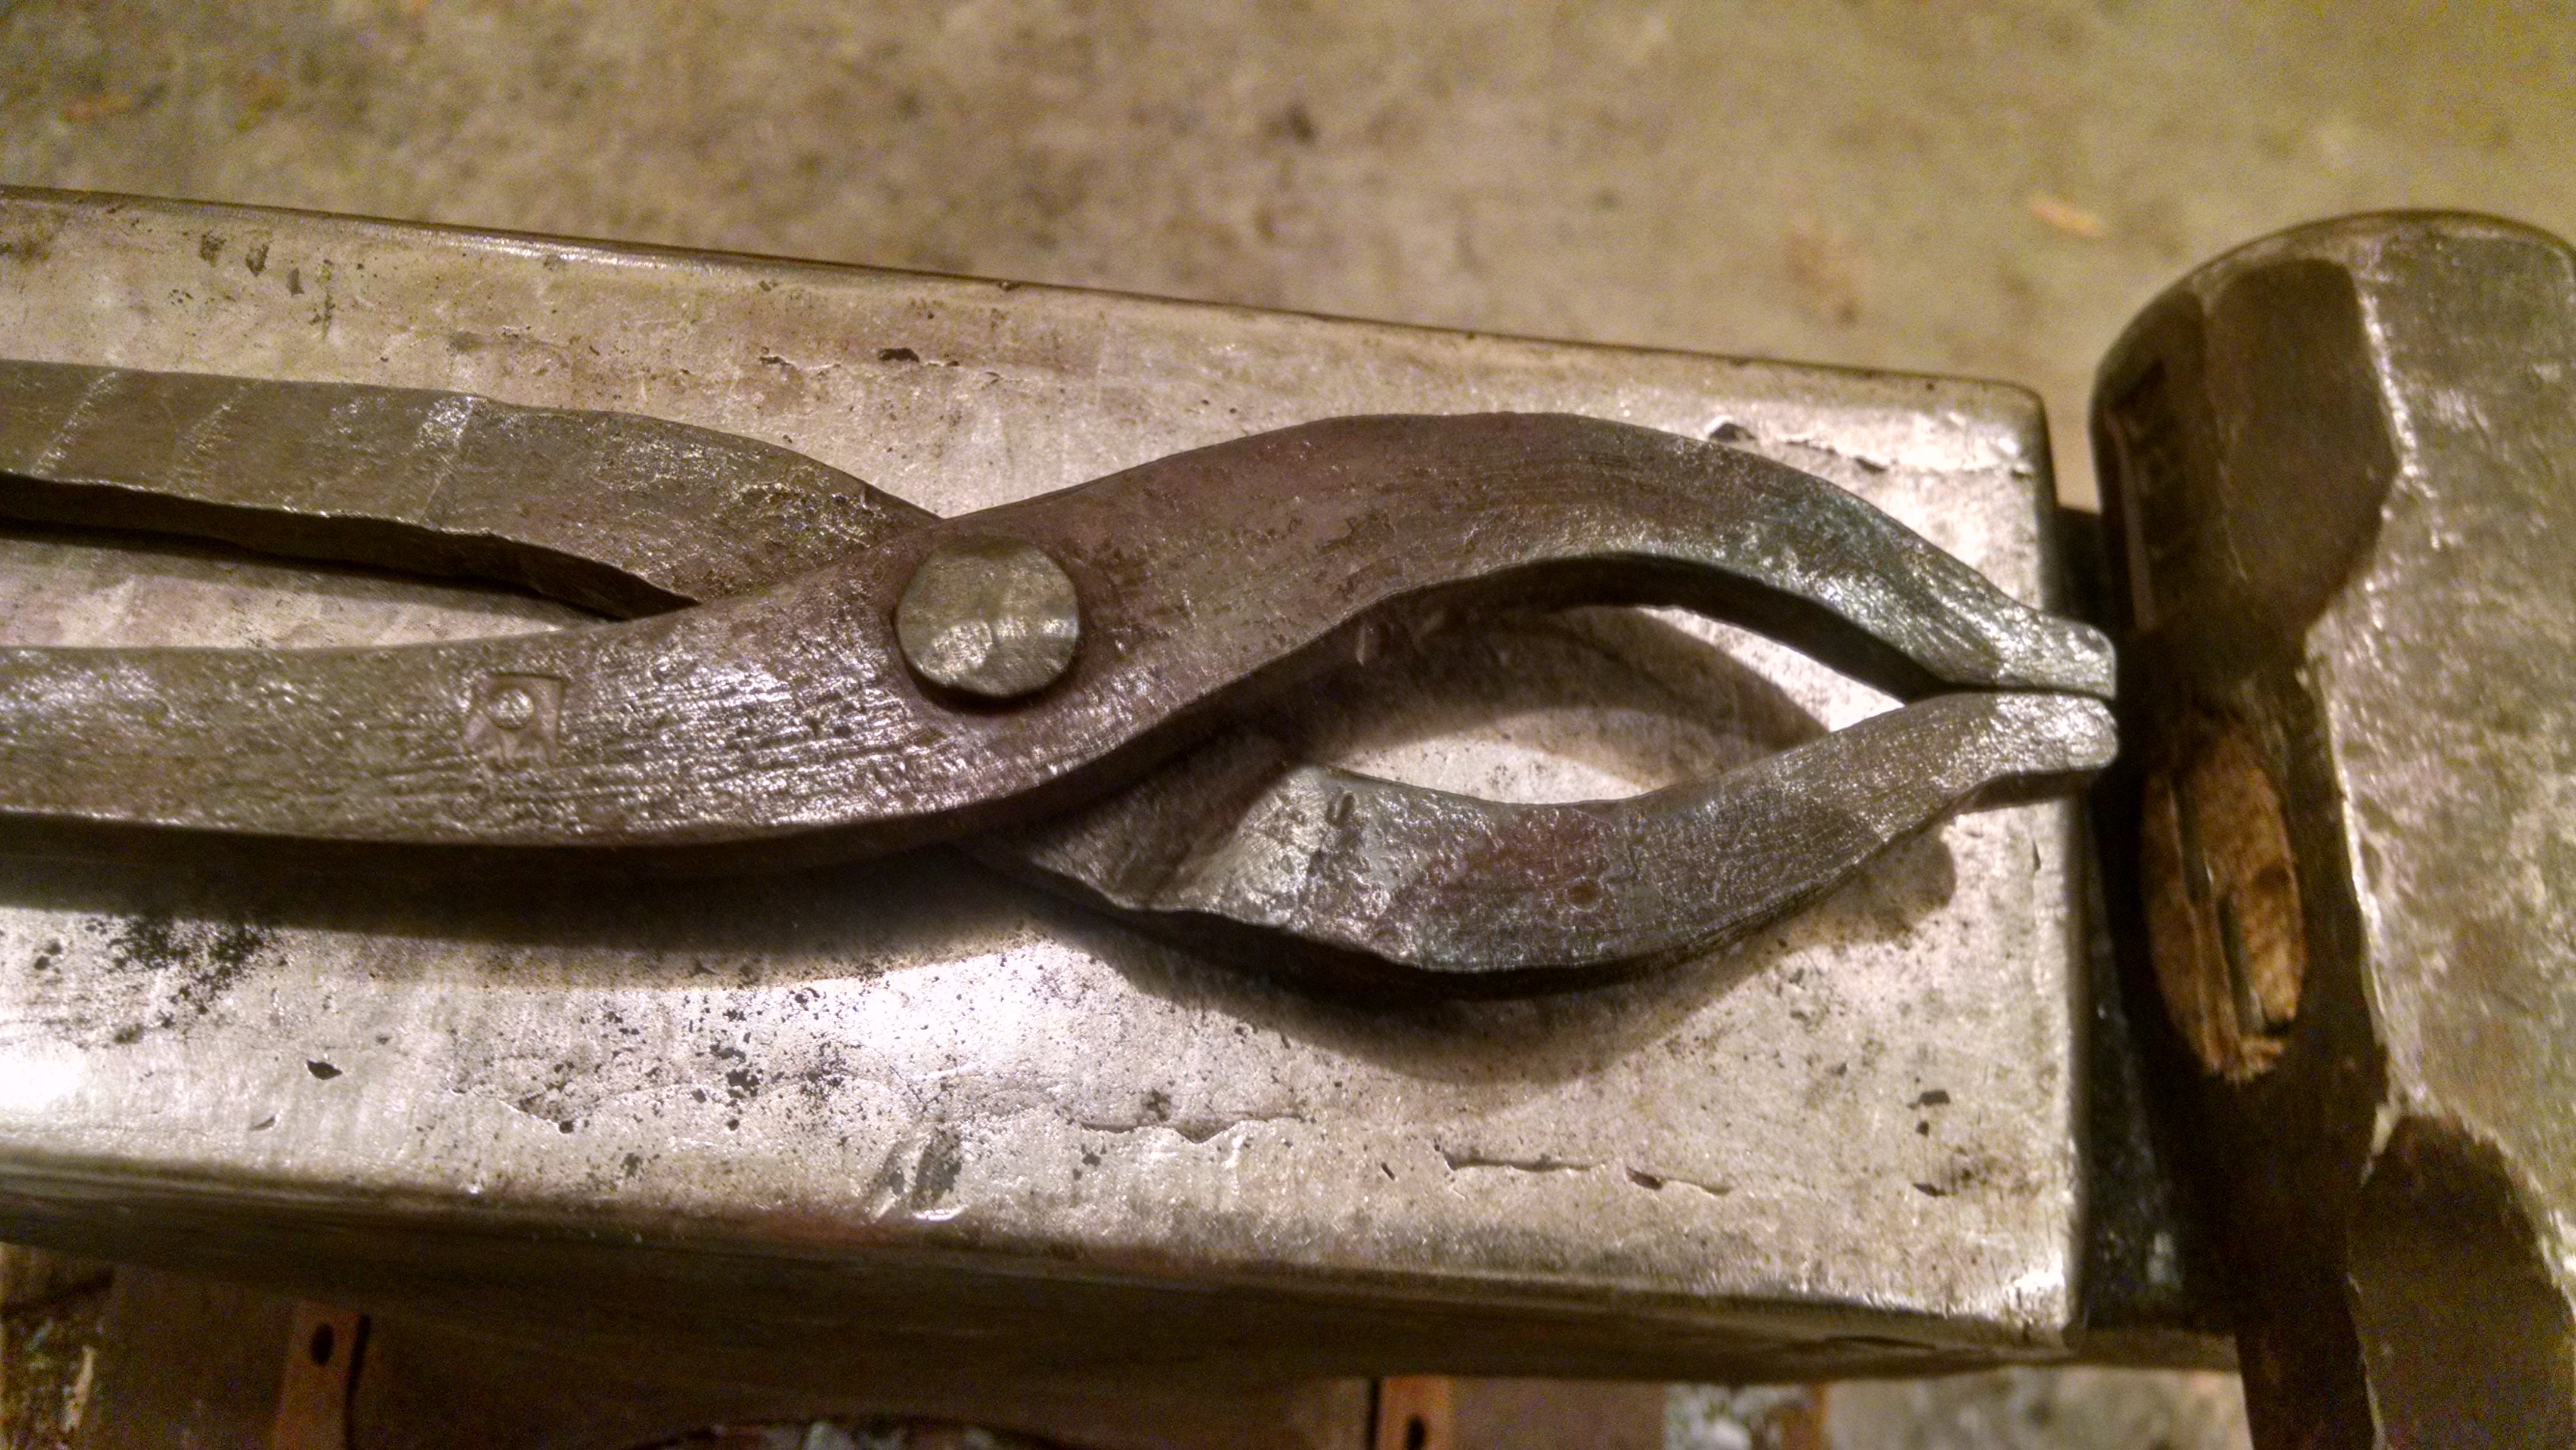
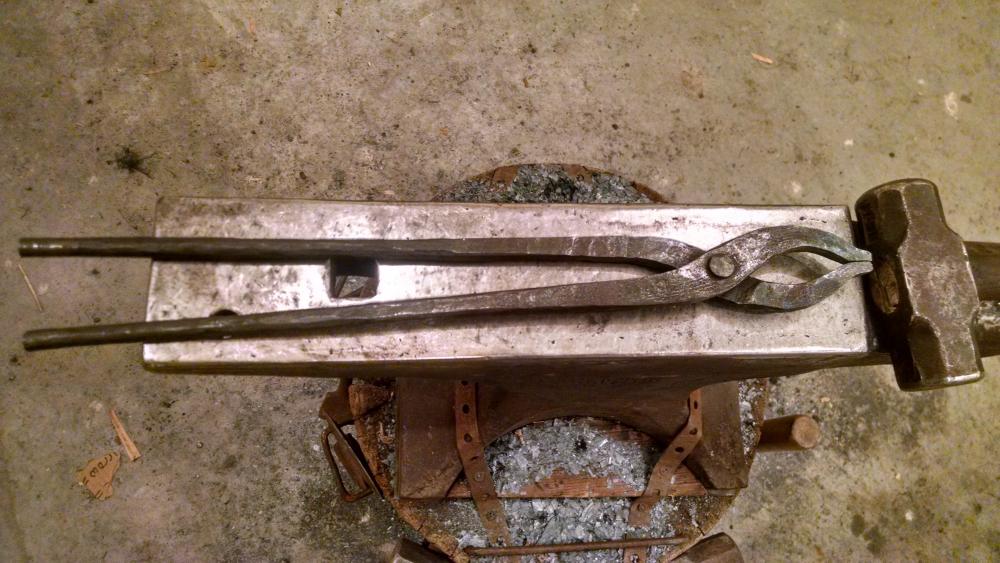
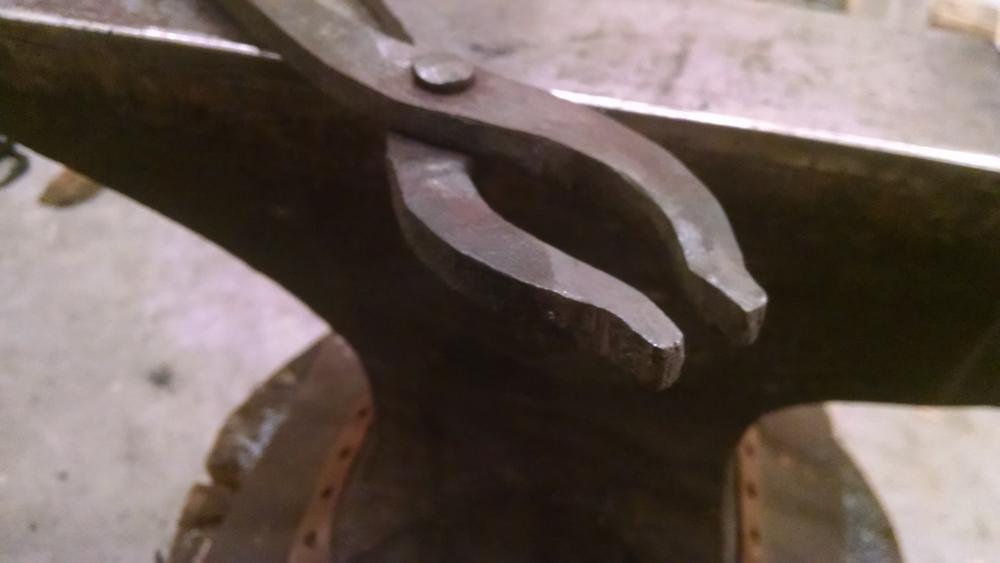
I finished my replica Viking Tongs tonight. These are made from 7/8 inch wrought iron square bar which I picked up from an old cattle ranch bone yard. Overall length is 17 inches with 12 inch reins. The reins have plenty of flex and they are comfortable in the hand. See this link for a picture of the Viking era tongs I use used to make the replica. http://sciencenordic.com/viking-blacksmith-buried-his-tools I didn't really have any sort of scale to go by, so I printed the photo a couple times until I got a scale that seemed about right. The challenge was getting the two sides equal, but I got them pretty close. I can see from the original tongs that the two halves are not entirely equal either. The tongs work really well gripping flat stock, like a knife. I may adjust the reins or the jaws a little more so the reins are not so far open when holding something about 1/4 thick. Overall it was a fun project. I'll definitely use them around the shop and they will be an interesting piece to talk about with other blacksmiths. See my two other topics on old world (African) pattern tongs and wrought iron: There are some photos in there of forging the viking tongs and a pair of African style tongs. http://www.iforgeiron.com/topic/48679-african-style-tongs/ http://www.iforgeiron.com/topic/48828-wrought-iron-bar/

-
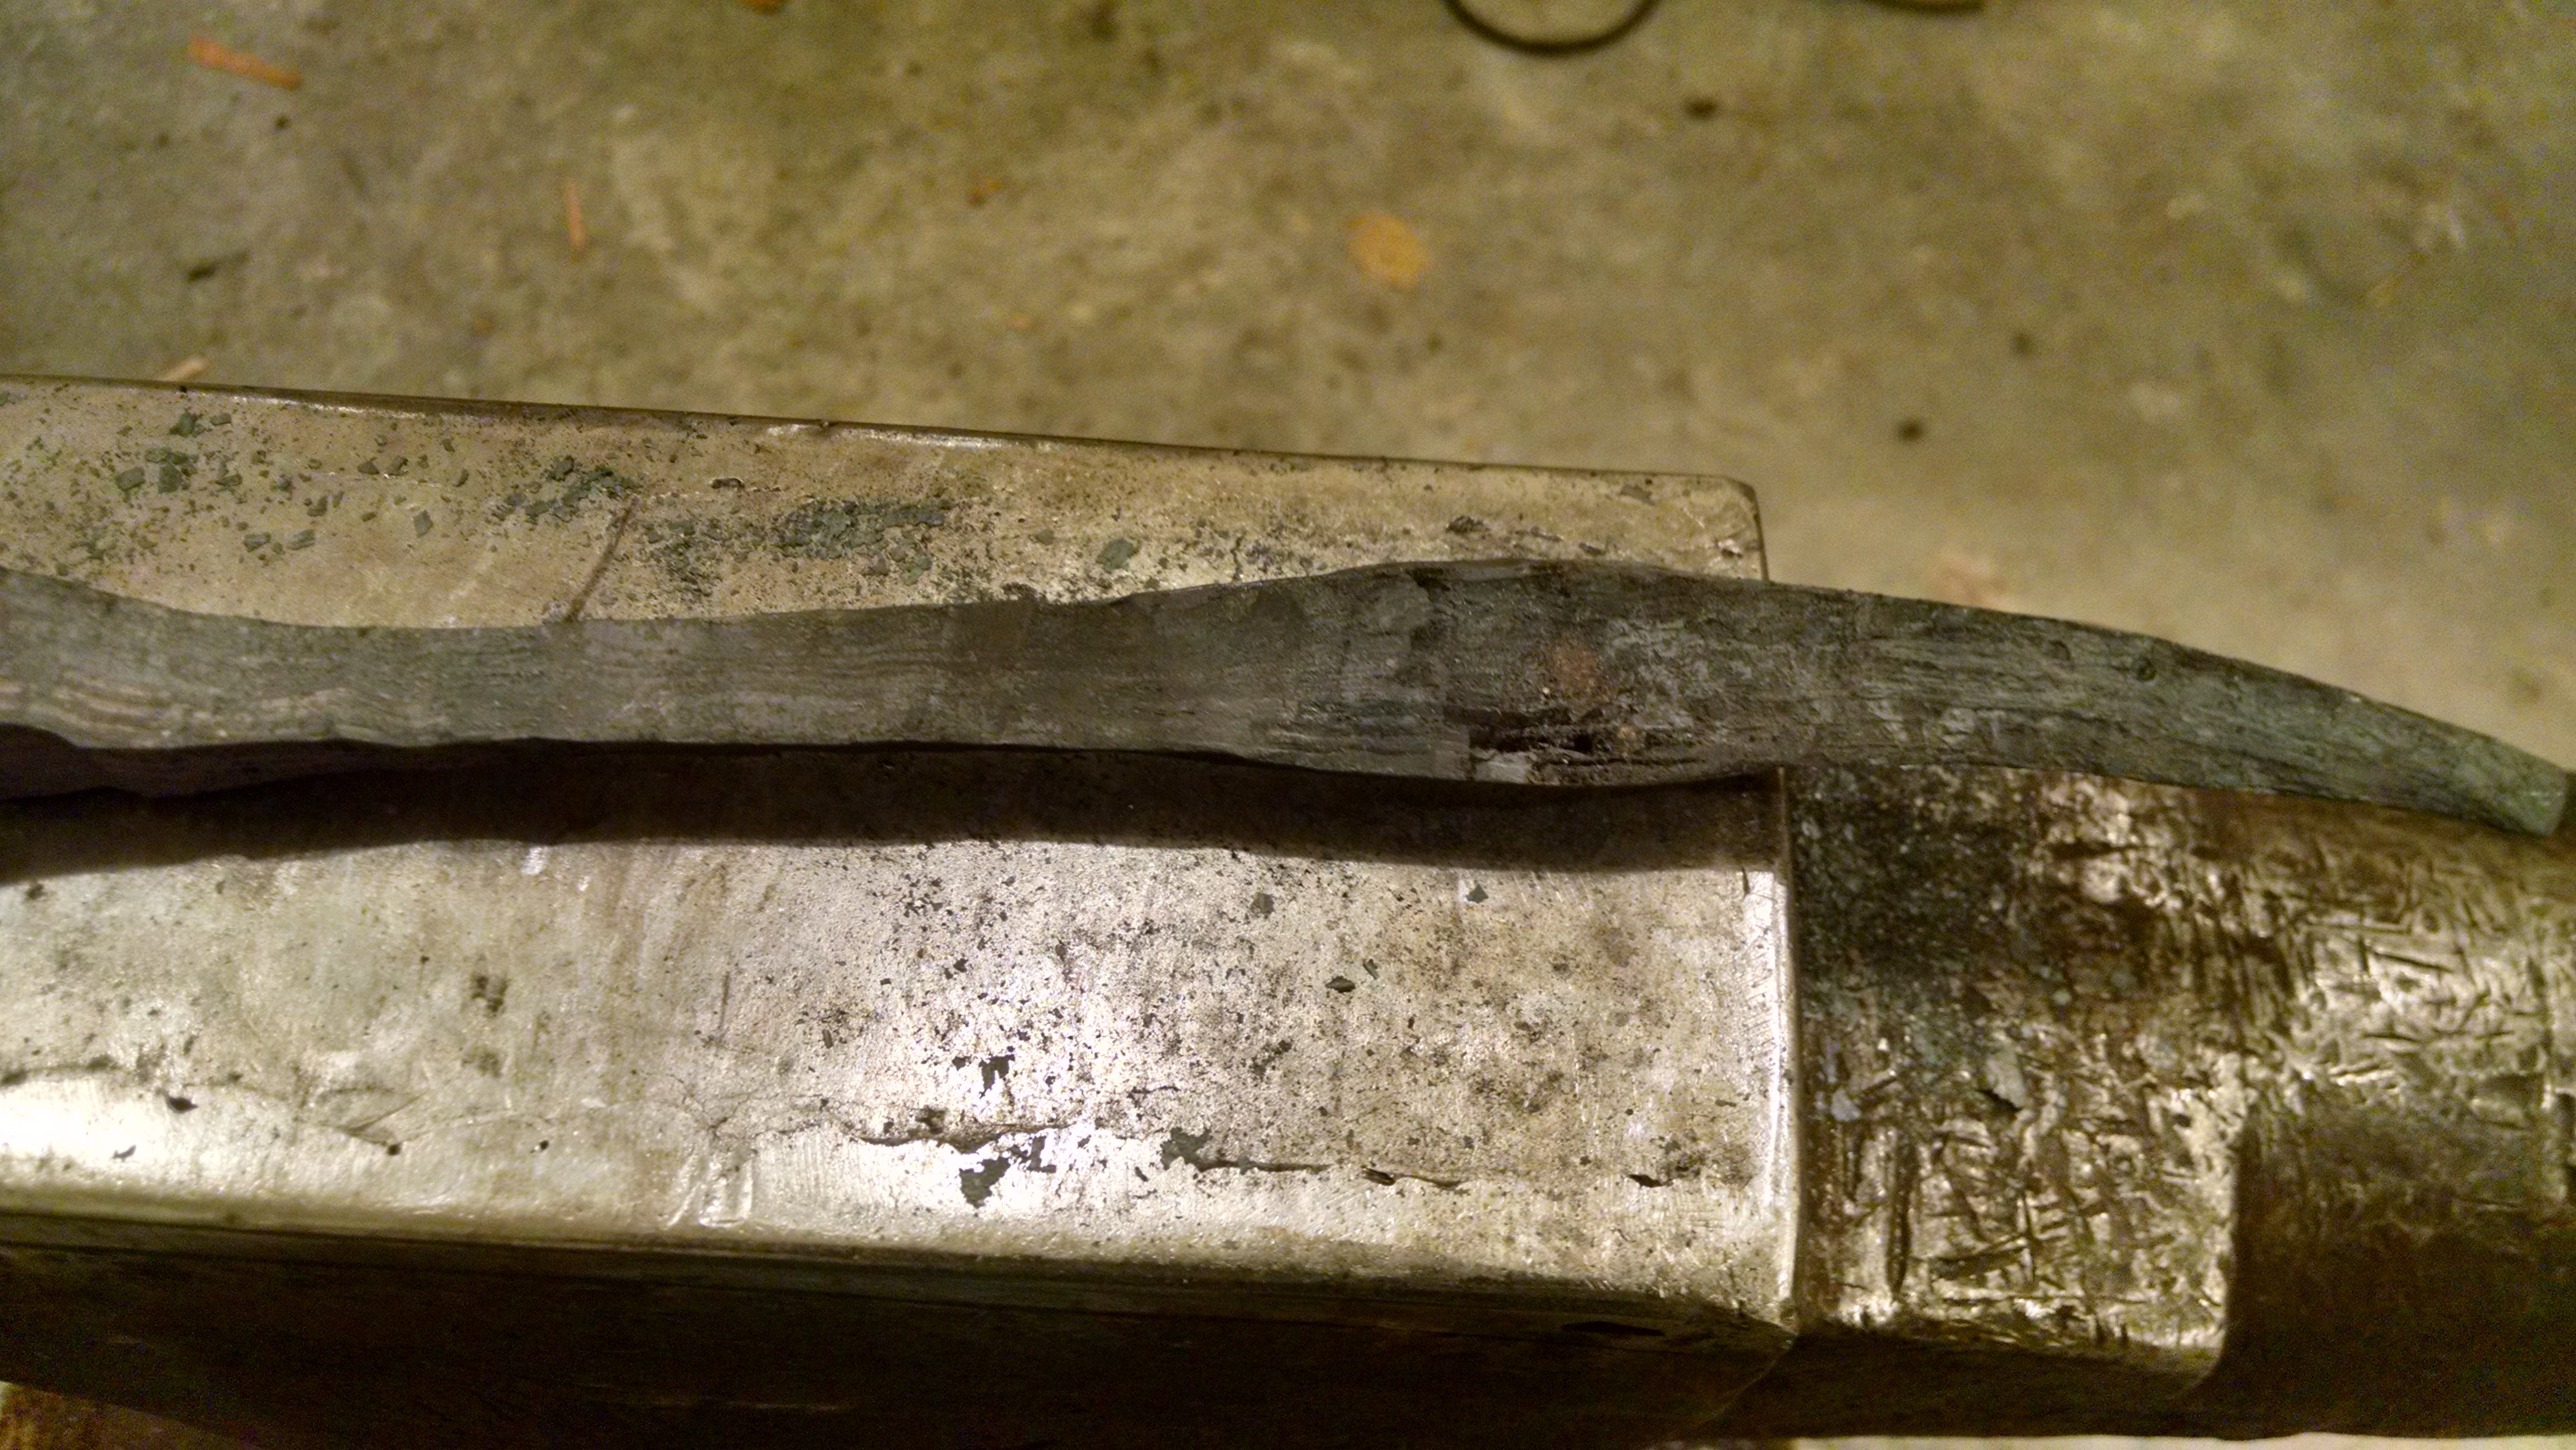
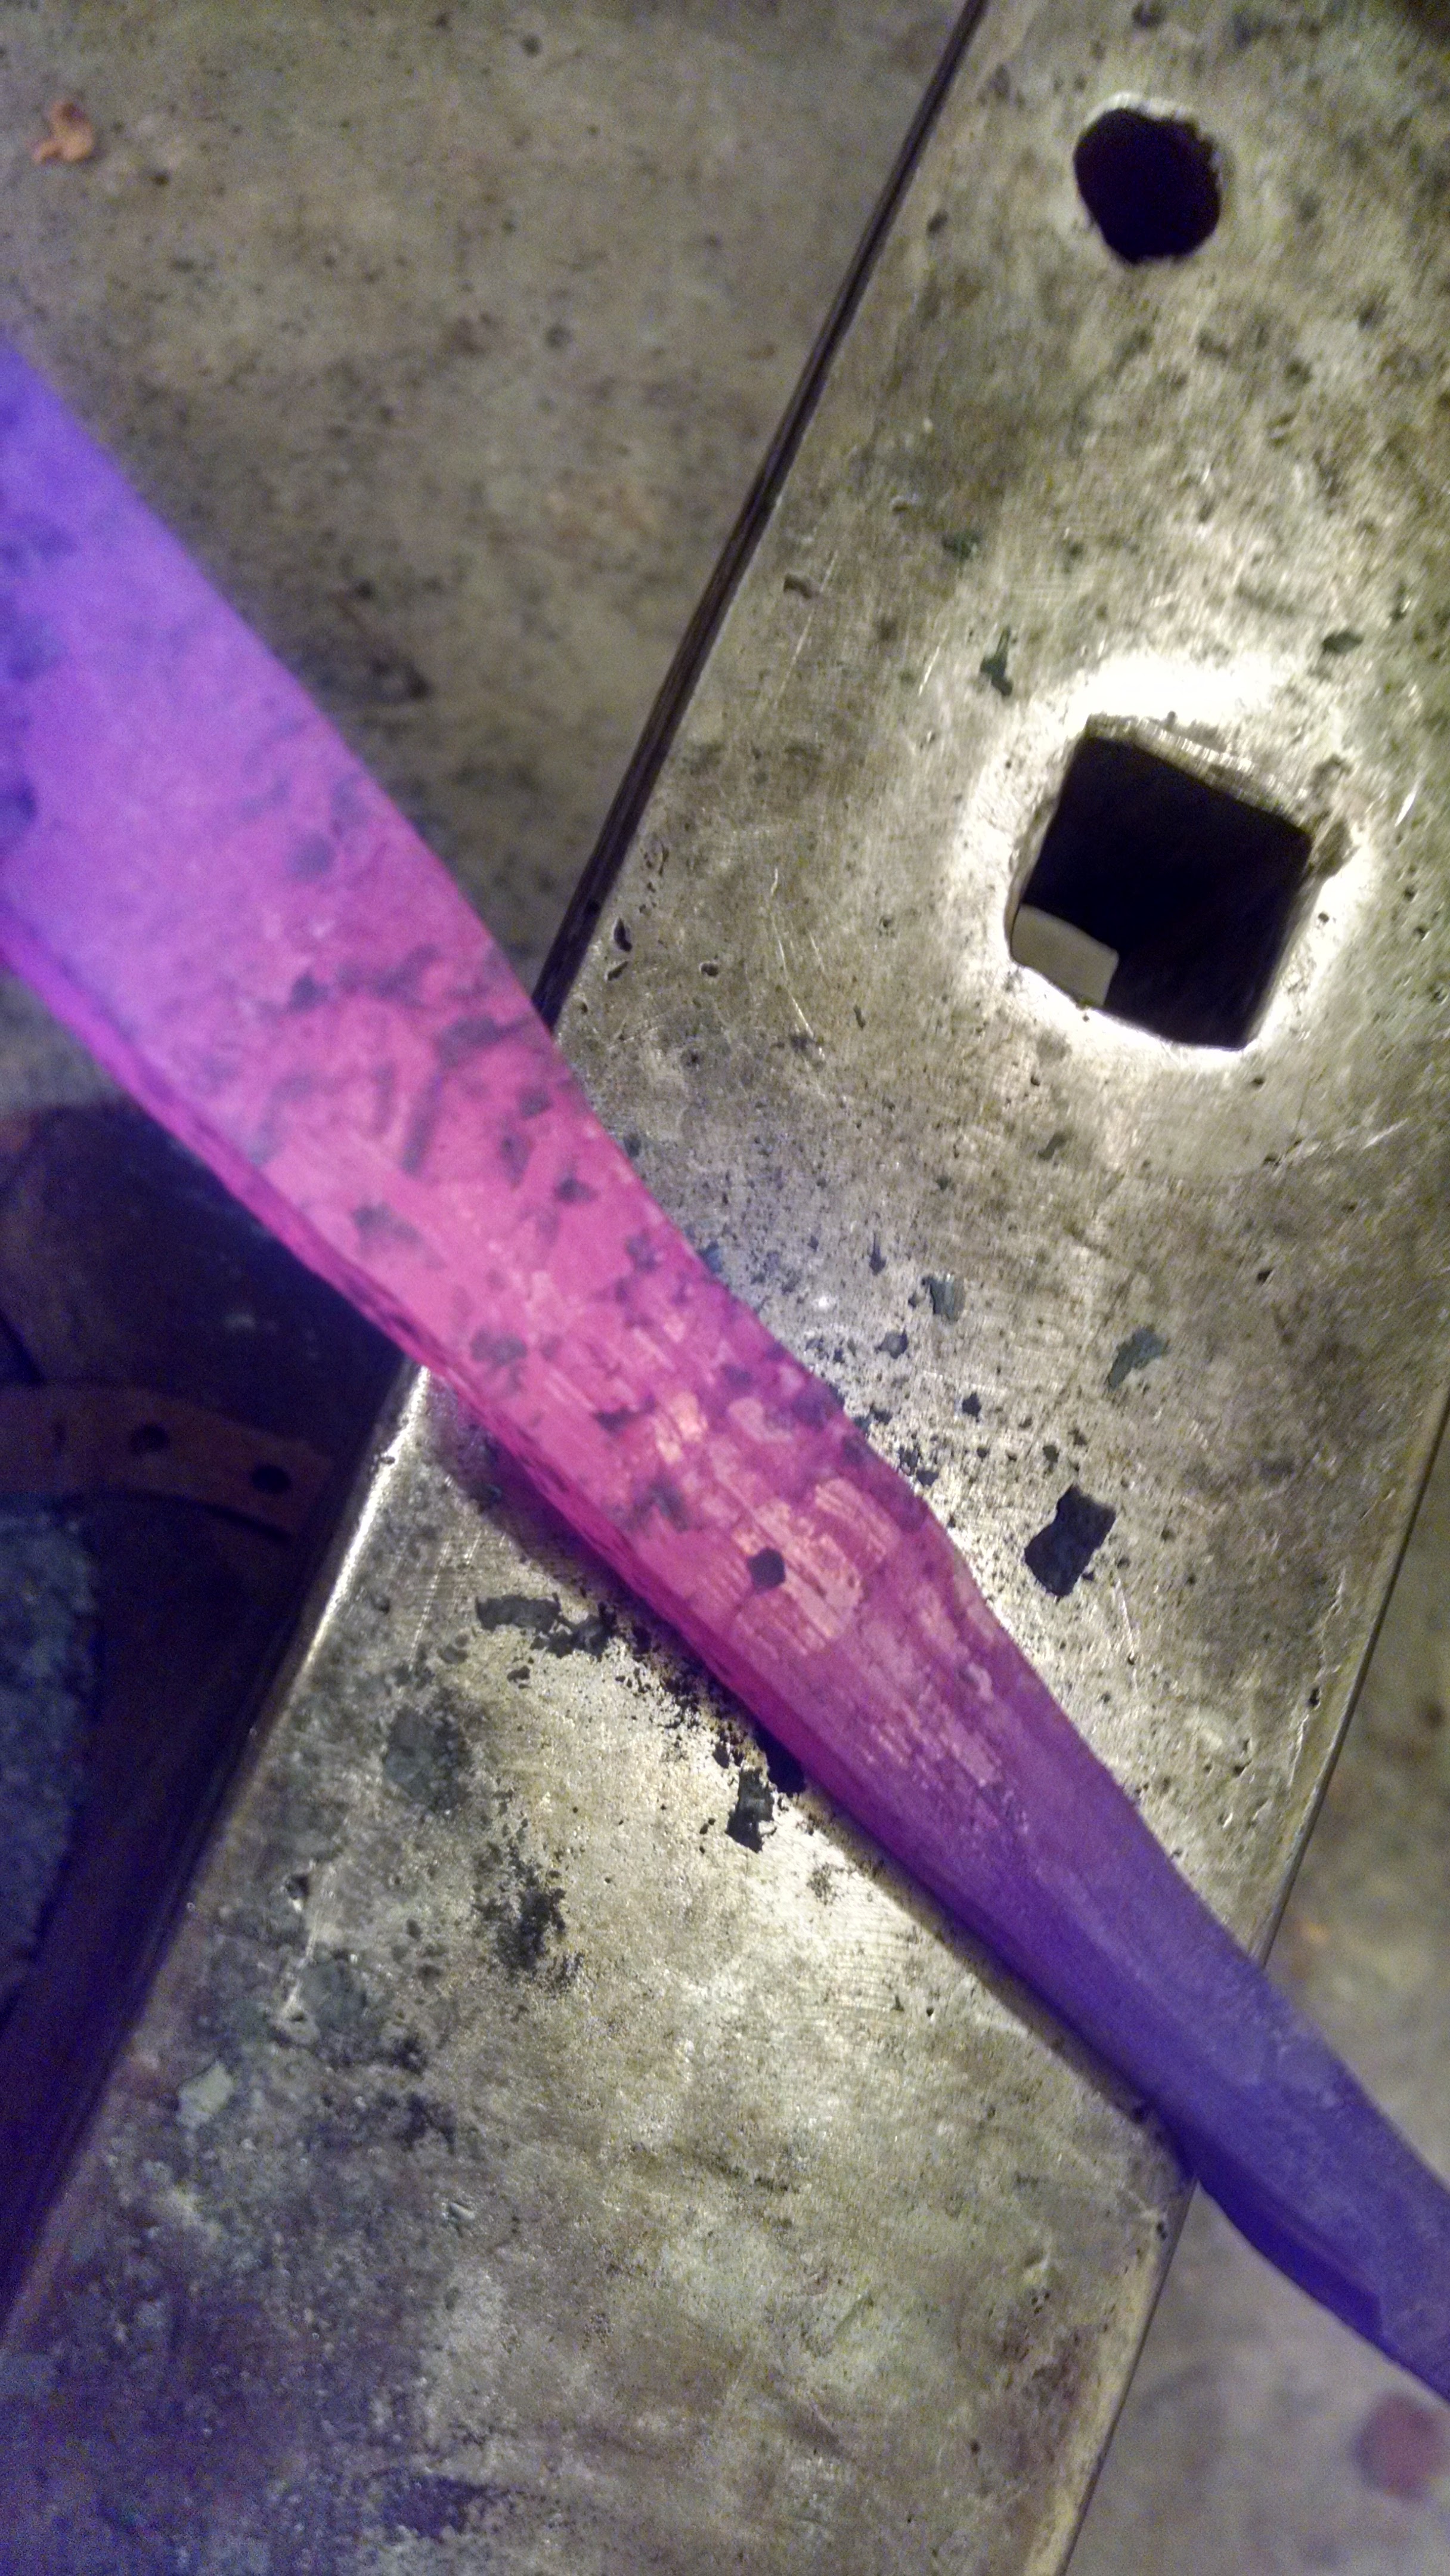
I got this piece of iron from the iron bone yard of an old cattle ranch. I believe it is wrought iron, since it appears to have a fibrous structure. When I was forging the end, it started splitting some and I trimmed it off. This would be my first time forging wrought iron. After I realized it was possibly wrought I started heating it up more. It forges really nicely. When I get finished it will be a replica of a Norwegian Viking Tong from found in 2014. http://sciencenordic.com/viking-blacksmith-buried-his-tools Is this wrought iron? What are your thoughts? In the darker photo the metal looks like it has pits in it, but that is just the lighting and scale.


-
One of the interesting facts about having a stone anvil is stone is naturally an insulator NOT a conductor. Your heated metal would tend to stay heated longer. I want one! So... What sort of stone would be a good anvil? My other hobby is doing lapidary work and I have a 20 inch lapidary saw capable of making pretty large cuts. Llanite would be good. Or a fine grained granite. Any sort of volcanic basalt that is tough would work. Diabase/dolerite would work. I am sure there are other tough stones that would make a suitable anvil. One made from alumina ceramic would be awesome. That stuff is tougher than all get out!
-
Went searching the internet for some photos and drawings of the old world pattern tongs. Came across this article. The discovery was made in 2014. Notice the tongs. Again it is that same pattern. http://sciencenordic.com/viking-blacksmith-buried-his-tools
-
Fixing (or trying to) a really sad Hay Budden
Matthew D replied to haddockkl's topic in Anvils, Swage Blocks, and Mandrels
Thanks for sharing! What an ambitious anvil repair. -
Good job on those tongs. So cool to use tools you made. 3/8 round stock seems a little to small, but I can see they would make good tongs without drawing out the reins. I went to a workshop with Mark Aspery and we made flat bit tongs and box jaw tongs. We use 3/4 square stock. At first I thought it would be difficult working with that large of stock, but I found it worked very well. The last two sets of tongs I have made from 3/4 round and 11/16 round. The bosses were much better formed. Also, I have gained some very valuable experience in drawing out the reins, which turned out really nice. I was amazed at how a 4 inch piece of 3/4 square would easily transform into 12-14 inch reins. I find drawing out the reins a pleasure now that I am familiar with the process of drawing them out, barring them up and rounding the corners. I have some 7/8 square stock I salvaged that I will make several of my next pairs from.
-
Finished my African style tongs this evening. I made them from 5/8 round stock I picked up from a cattle ranch bone yard. Seems like some sort of medium carbon steel. Reigns are about 12 inches long and the jaws at the tip are a little shy of 5/16 wide. Haven't had a chance to really test them out yet. I'll let you know how they work in a week or so as I use them. I am getting better at making tongs and find that making them is a good practice in several blacksmithing skills. Setting down, drawing out, punching and riveting. Also, barring out the reigns, making bevels, bending and planishing. After making 8 pairs of tongs the last 12 months, I am getting better.
-
Fixing (or trying to) a really sad Hay Budden
Matthew D replied to haddockkl's topic in Anvils, Swage Blocks, and Mandrels
Looking forward to seeing the end result. Incredible how that anvil plate pealed off the anvil body. -
Tool Handles. Yeah, I know, hickory is king, but...?
Matthew D replied to Leland Stone's topic in Tools, general discussion
I have made handles, which are working well, from the following materials: Walnut, Maple, Red Oak, Hickory. The maple cam from a neighbor's yard. We cut it up with my sawmill. Really pretty handle. I bought some hammer heads on eBay and I have made some handles from material I have and I also recently ordered some nice hickory handles from House Handle co, in Missouri. Their prices are very good and you can order handles without lacquer. Shipping was very reasonable. I have a couple trees in my yard, which need some larger limbs trimmed. I have Locust, Ash, Plum, Cherry and Apple. I will cut and dry them until I need a handle. I figure as long and the handle will stay securely in the head of the hammer then it will work well for a handle. I think the problem with a softer hard wood like poplar is the wood in the eye of the hammer will compress and loosen up after use. I might even figure out a way to place a handle inside the hood of my forge(without burning it) to cure the wood and get it bone dry before I haft it to the hammer. Just a thought. having good dry wood is important since you don't want it shrinking on you and the head then gets loose. -
Thanks for all the replies. John, thank you for posting the photos and information about "bow/collaring" tongs. I also noticed that this pattern of tongs are used by the Indian Lohars in the videos posted online. I have also noticed that they are used by the Nepalese and Filipino blacksmiths. I am sure other smiths from around the world use them as well. Why are they so common? One thought is that they are very versatile and I want to understand why. The pattern seems to be used among blacksmiths from many parts of the world which leads me to believe it is a very old pattern. The small amount of contact by the tong tips to the work piece would enable the smith to exert a lot of PSI in one small spot, translating to a strong grip on the material without exerting much energy. The long jaws and small tip permits the smith to maneuver the work piece in all sorts of directions. I see smiths who lay the work piece flat, on edge, etc to do their work. Also, the smiths we see using these tongs, tend to specialize in just a few types of work, or at least that is what the videos tend to show. They are also relatively poor, so having many tongs is not practical. I have seen the Filipino smiths use a type of top tool holder/tong made from bamboo. Seems like a blacksmith who does a variety of tasks tend to have tongs for all sorts of different uses and sizes of materials. I have made all my own tongs this past year, and some are more useful than others. I have 7 pairs now. My first two pairs were made without tongs. I keep making them and am getting better all the time. I can see how different types of tongs sold different sorts of problems. For example: Holding a horseshoe being forged versus holding a hot horseshoe when shoeing a horse. Or holding a bolt with a head and forging the shank. Or a blade of a particular size. Every time I watch one of the foreign smiths I learn some new things.
-
Take a close look at the tongs this African blacksmith is using. This video has a close up showing the details. I have noticed that most of the videos I see of African blacksmiths (and other blacksmiths from around the world) use tongs like this. Notice how well the tongs grip the material and how easily the smith maneuvers his piece with those tongs. I see them mostly used for flat work like knives and hoes. Has anyone on the forum made tongs like this? If so, did you find them useful? Any idea why this pattern seems to be so common in so many places around the world? My next pair of tongs is going to be made like this so I can try them out.
-
What a neat find! That must be disappointing to see that happen. However, it doesn't totally ruin the forge does it? Isn't it still usable? To rectify (or repair) that crack I suggest that you use some pieces of strap and sheet metal and patch it up as best as possible and get it working again. That is what an blacksmith would have done years ago... figure out how to get it up and running again. You can clean up the crack as best as possible and braze it with oxy/acetylene, but the stress of heating it up, after it is fixed, may just cause it to continue to crack in the same spot, whereas straps and sheet metal bolted or riveted to it will allow it to expand and contract as it heats up and cools down with each use. If you do decide to braze it, put a good thick bead of braze on there and then peen the braze to relieve the stress you put into the braze. Good luck.
-
There are some interesting things to glean from this historical video. Anvil height, striking techniques, types of hammer and tongs, and as Glen pointed out, how the master was directing the forging. There is a fire in the forge as there are little wisps of smoke. The other cool thing is these men probably have some descendants out there somewhere. How cool would it be to see your ancestors in an old informational film working in their jobs? My great great grandfather was a blacksmith in Missouri in the 1860's to early 1900's. I would love to see some of his work and a photograph or two. Does anybody have an idea what they are working on and making/fixing?
-
I purchased a lot of used Nicholson files on ebay a couple months ago. I am really happy with them. Turned some handles on my son's lathe and now I have some nice files. I can tell they are used, but they still cut really well. I figured they came from a machine shop since they weren't rusty and seemed fairly new. Once their files get to a certain point they dispose of them, but they actually have lots of life left in them.
-
Here's another idea if you want to keep a pretty finish on your hammer. Buy a cold bluing kit at the local sporting good shop. Follow the directions to blue your hammer. It would still get scratched up, but then you could always fix it up a little from time to time.
-
Jim, Thank you for the photo. That is a very clever design for the spring fuller. Thank you for sharing. The scrolls are very beautiful and quite artistic! I would love to hear more how you make them. Looks like others are interested as well. Would you mind starting a topic on that? D.C., Thanks for the compliment. My next set will be better. I like the duck head design and will keep with it. Functional art is always pretty cool. Forging, I was having a hard time understanding what you meant by making the insert longer and bending it back on itself, but after Jim posted his photo, your comment totally makes sense. Is that what you were referring too? Seems like I could do that for just about any size of spring fuller and then forge it down to fit snugly into the hardy hole, right? Thanks for all the comments. I really like this forum with all the helpful members! Matthew
-
Forgin-fool, That is a very nice compass. How did you make the double hinge on the one half? Also, how much of that is forged to finish, or did you do some filing work too?