Matthew D
-
Posts
68 -
Joined
-
Last visited
Content Type
Profiles
Forums
Articles
Gallery
Downloads
Events
Everything posted by Matthew D
-
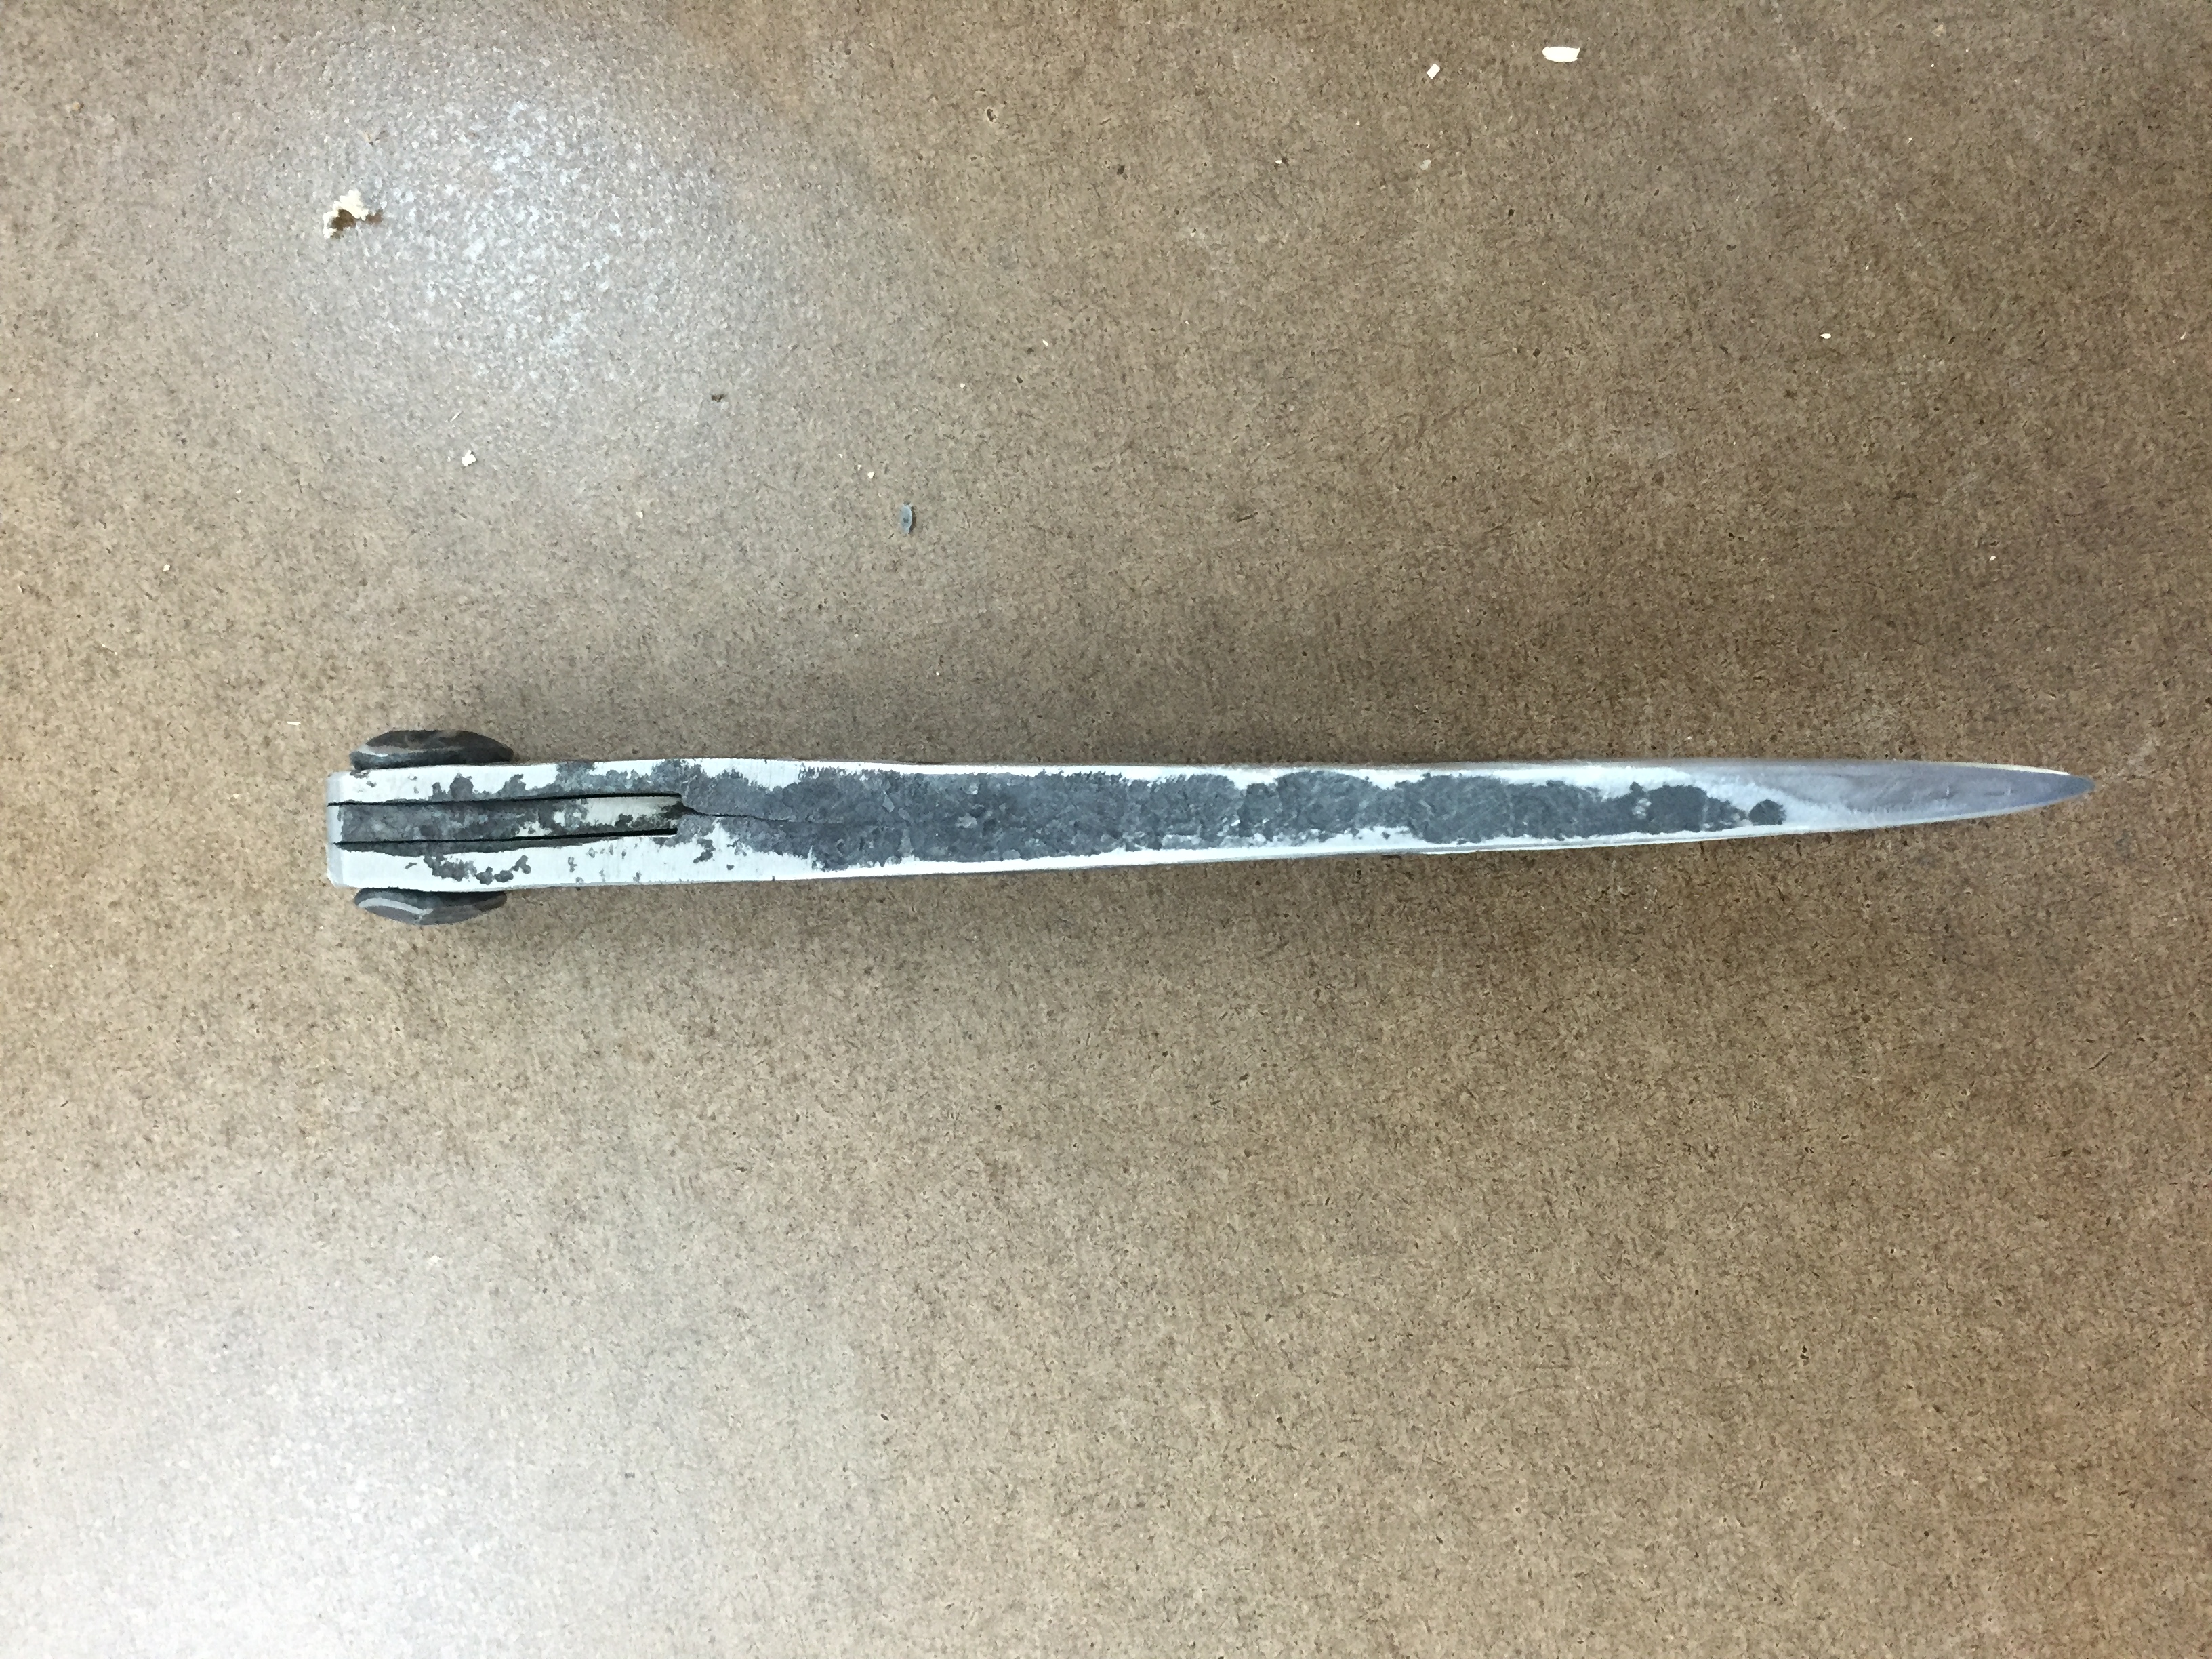
Little, the "crack" you are referring to is a forge weld seam. Most of the weld took but a small part at the edge of the weld near the hinge didn't.
-
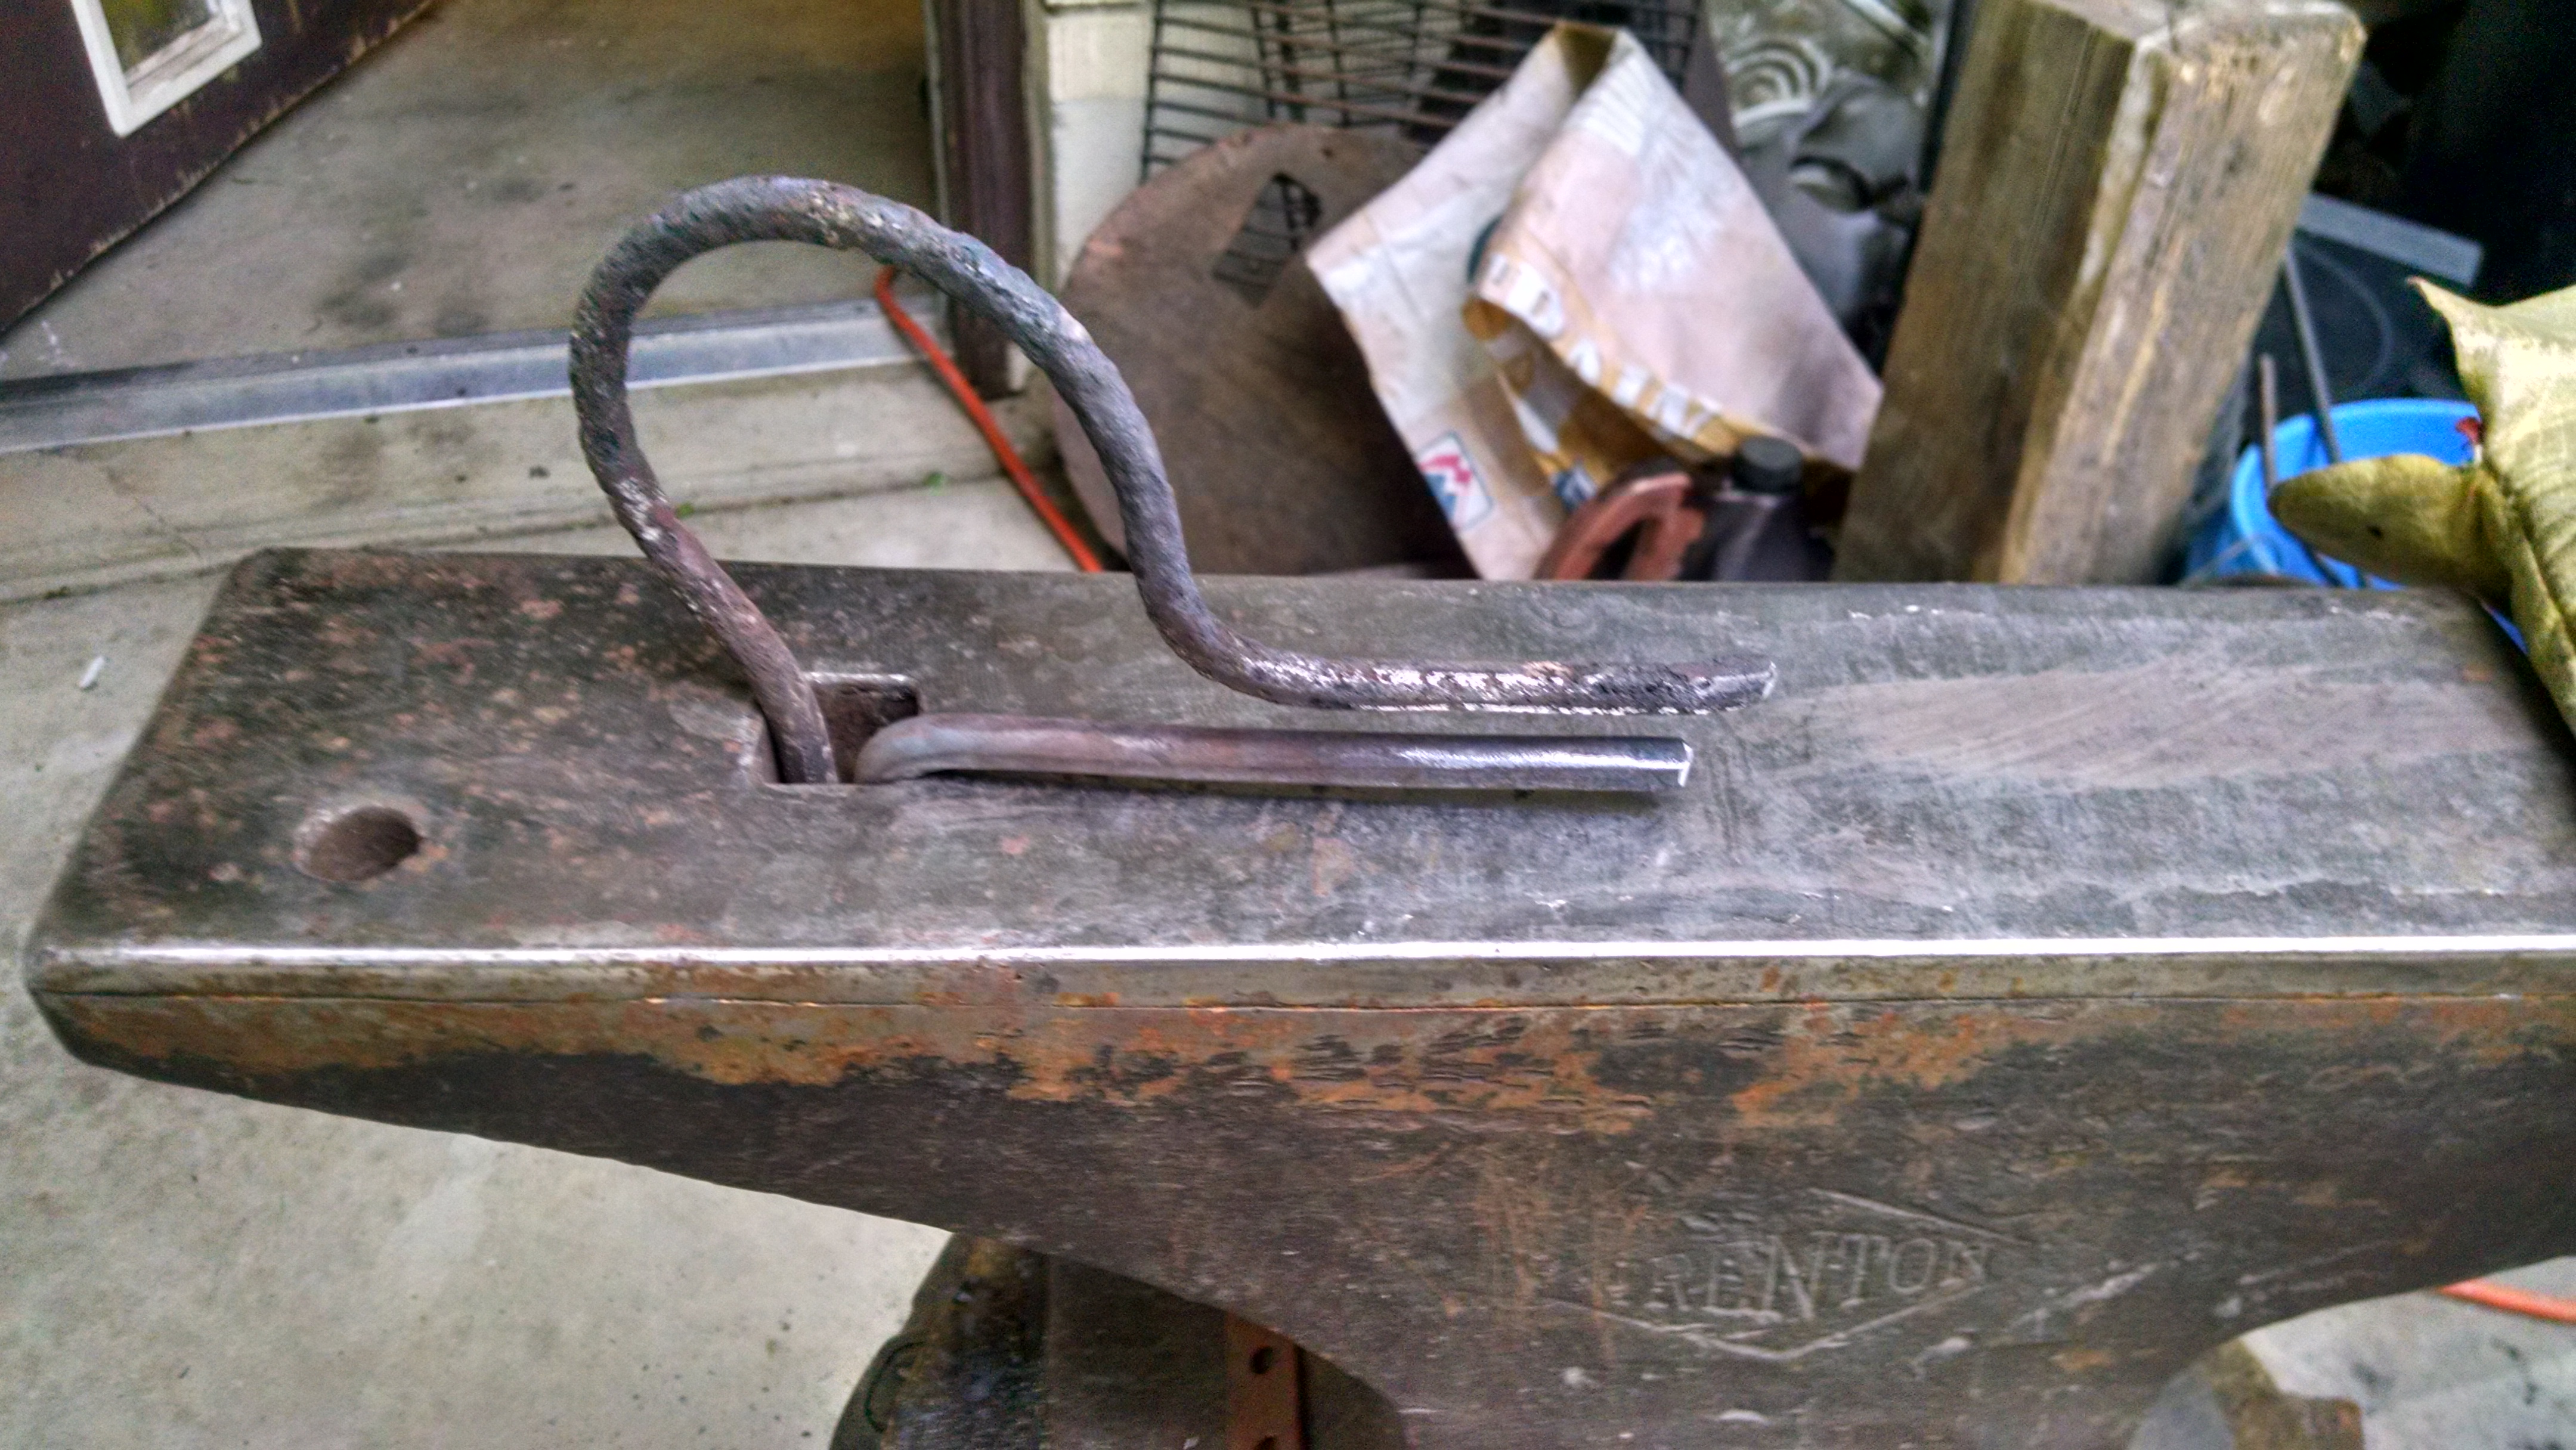
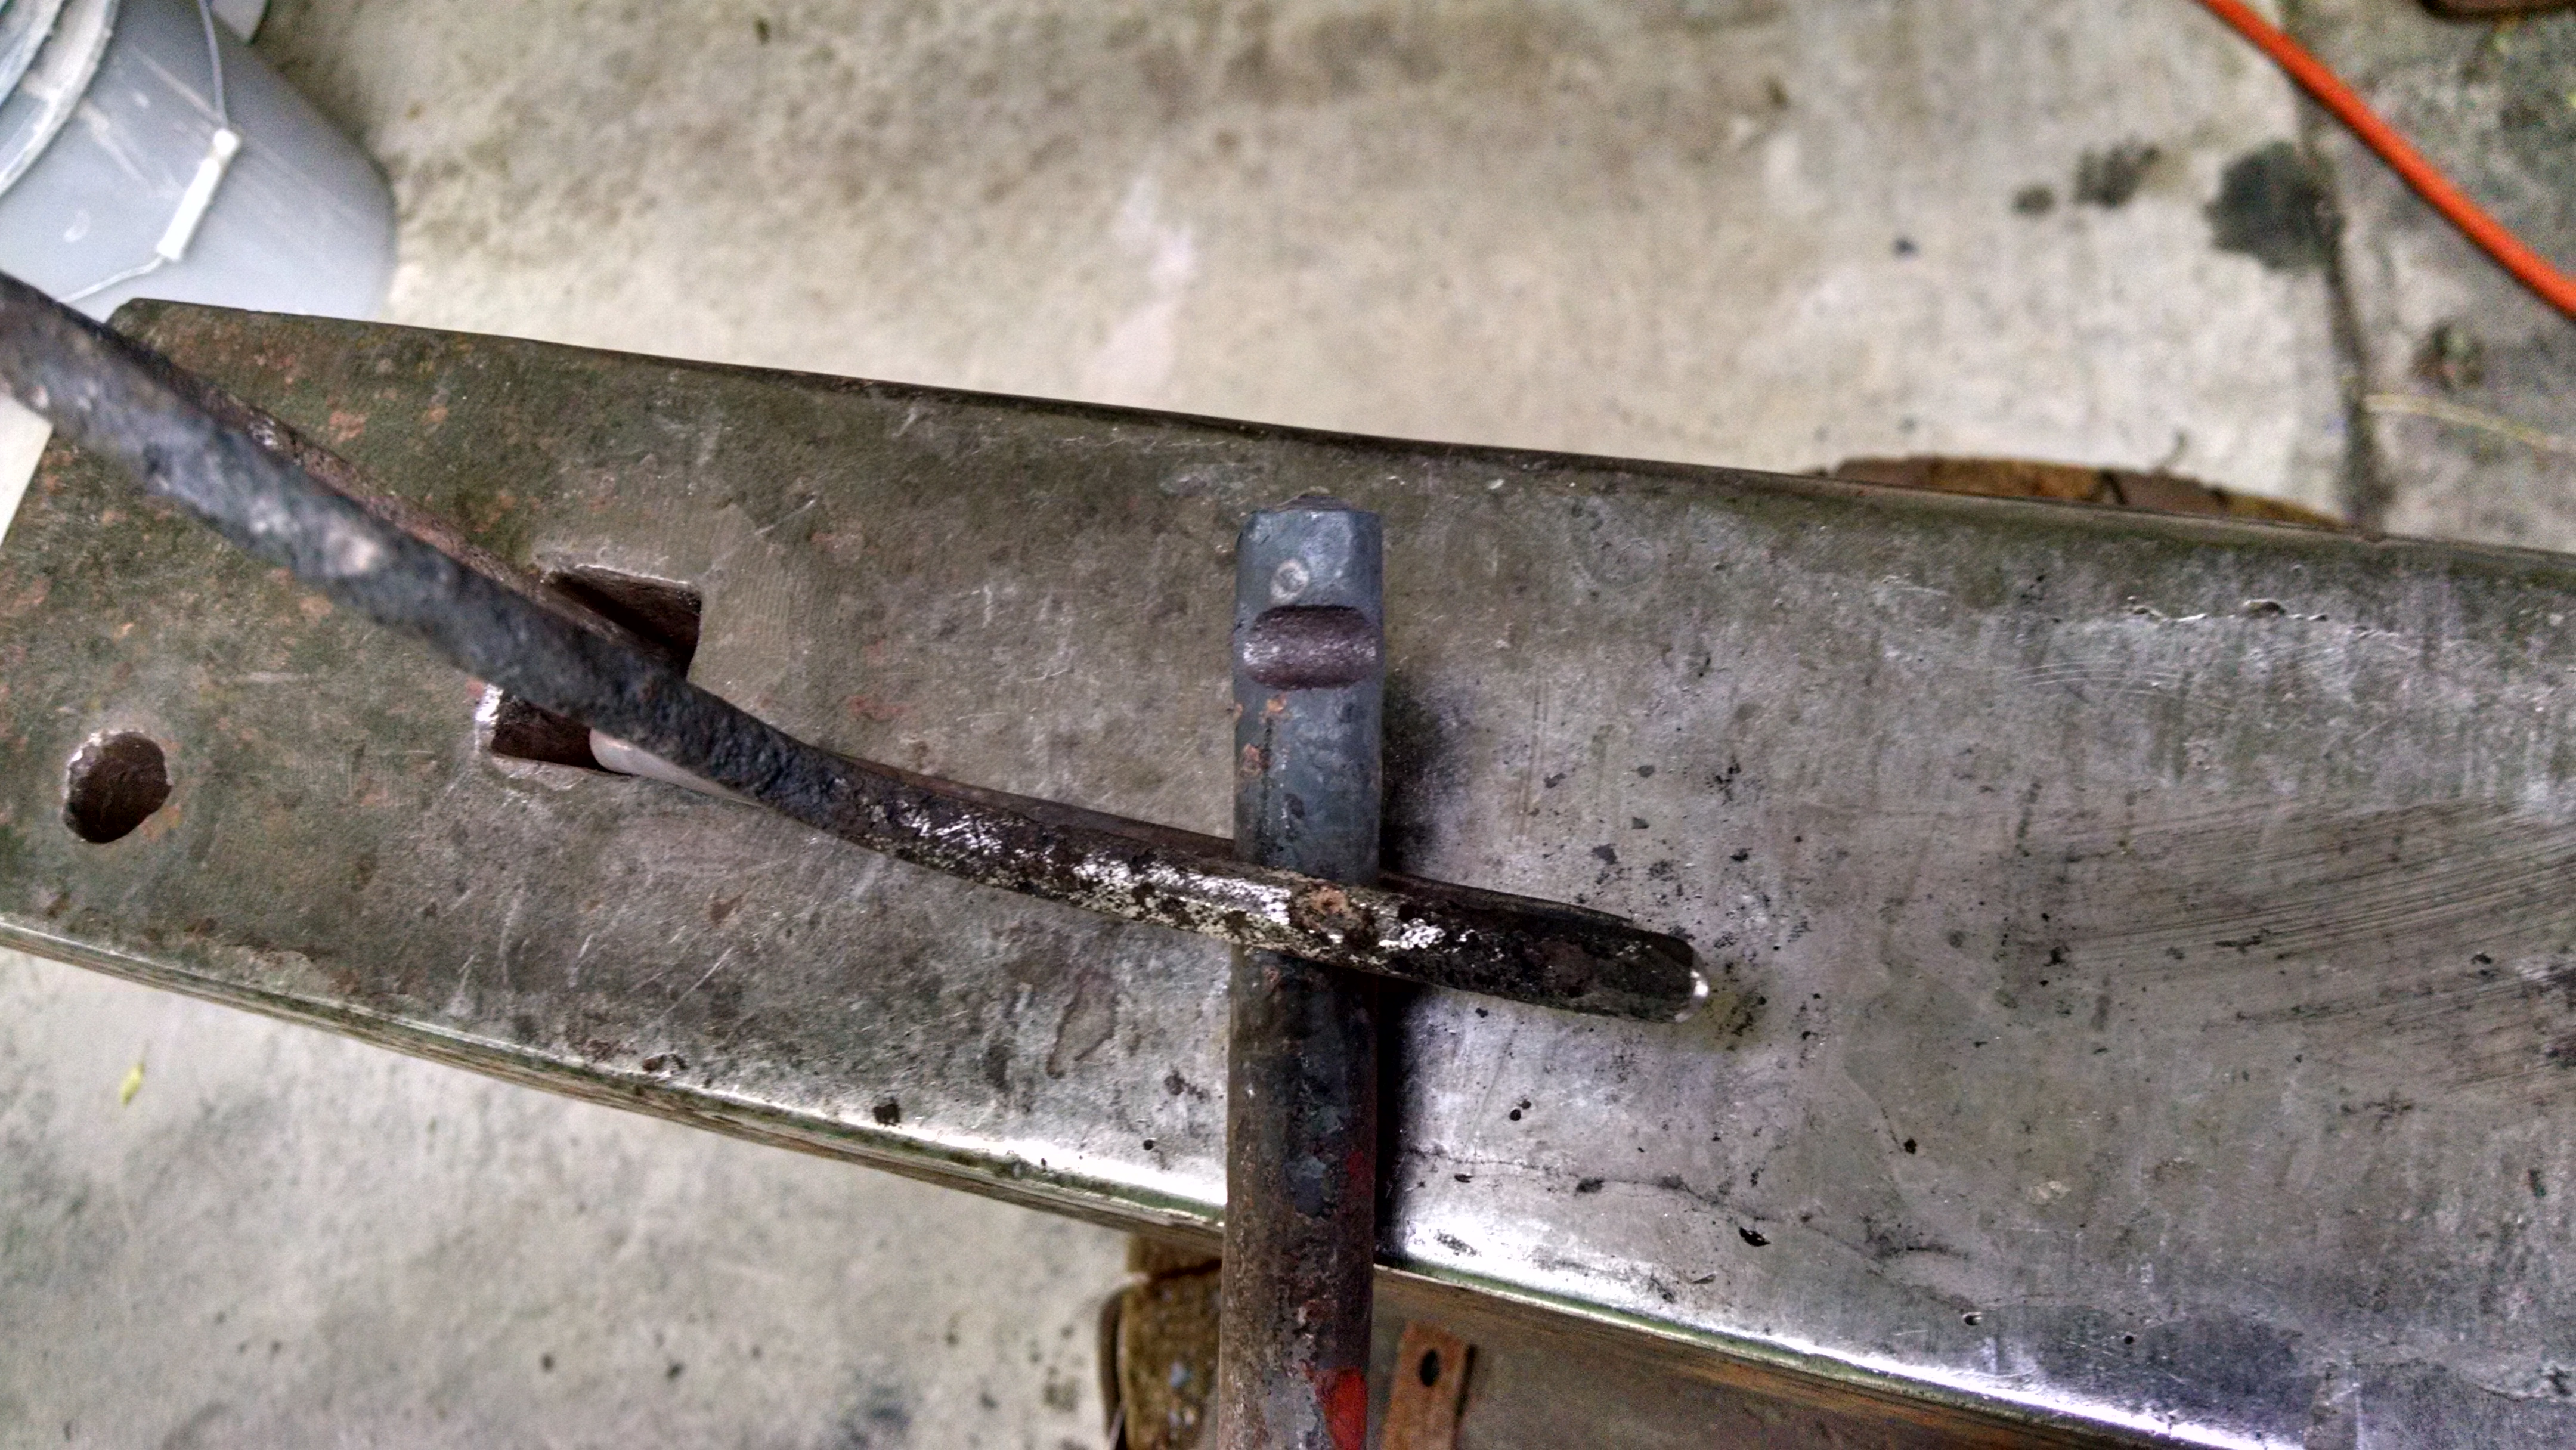
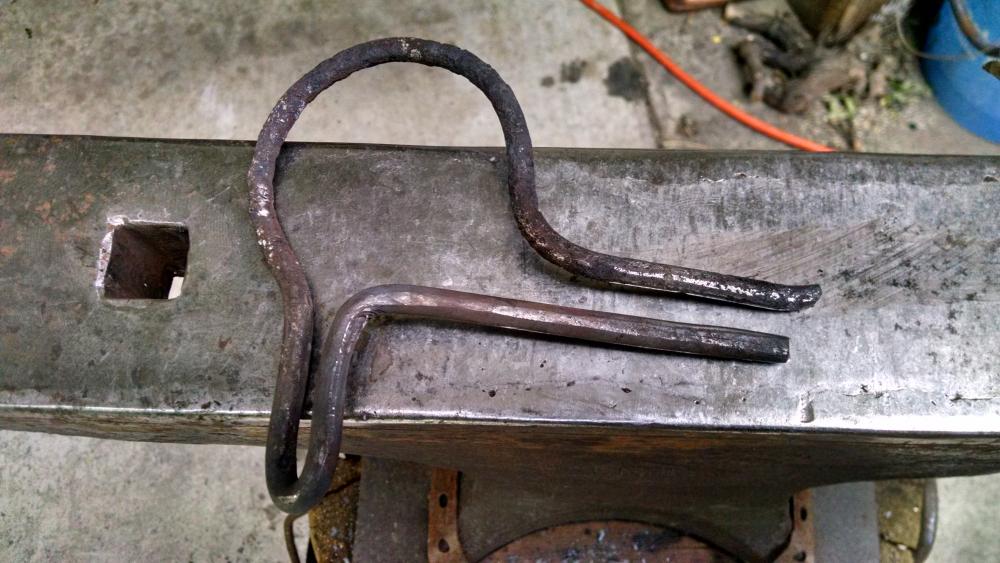
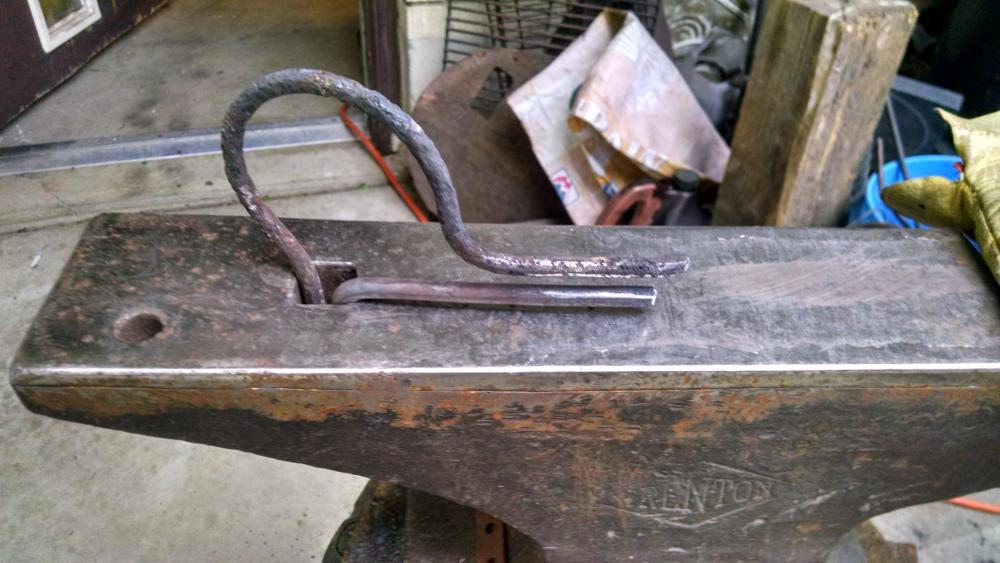
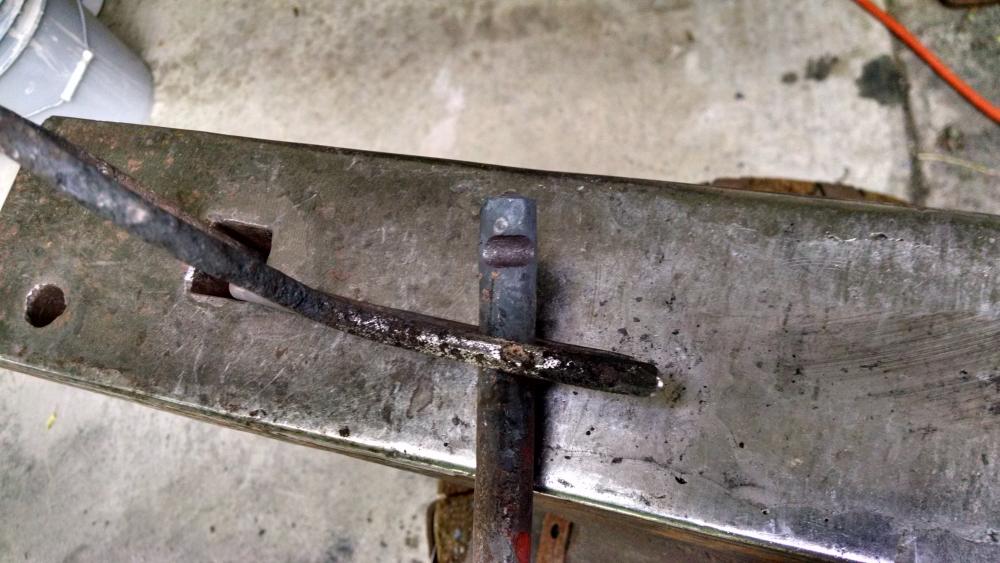
I needed a little fuller for dividing my work up when making a compass. Instead of welding a shaft to it to fit in the hardy hole, I made a bend so that it would lock into the hardy hole at an angle. Also, I decided I would make it look like a duck head, hence my duck head spring fuller. As you can see the hardy insert is bent 45 degrees so that it locks in and wont twist. The fuller is situated to rest on the near side of the anvil. Seems to work pretty well. Matthew Made this from an old 70 HM Evenrude shifting rod.
-
Break, Those look really nice. Thanks you for sharing. Please post a photo when you get them completed. When I first thought about a compass, that is the pattern I first thought of, with a simple single hinge plate and identical halves. I will probably make some like that as well. A little easier to make and you can hot punch the hole. Well out to the forge to work on another compass. Matthew
-
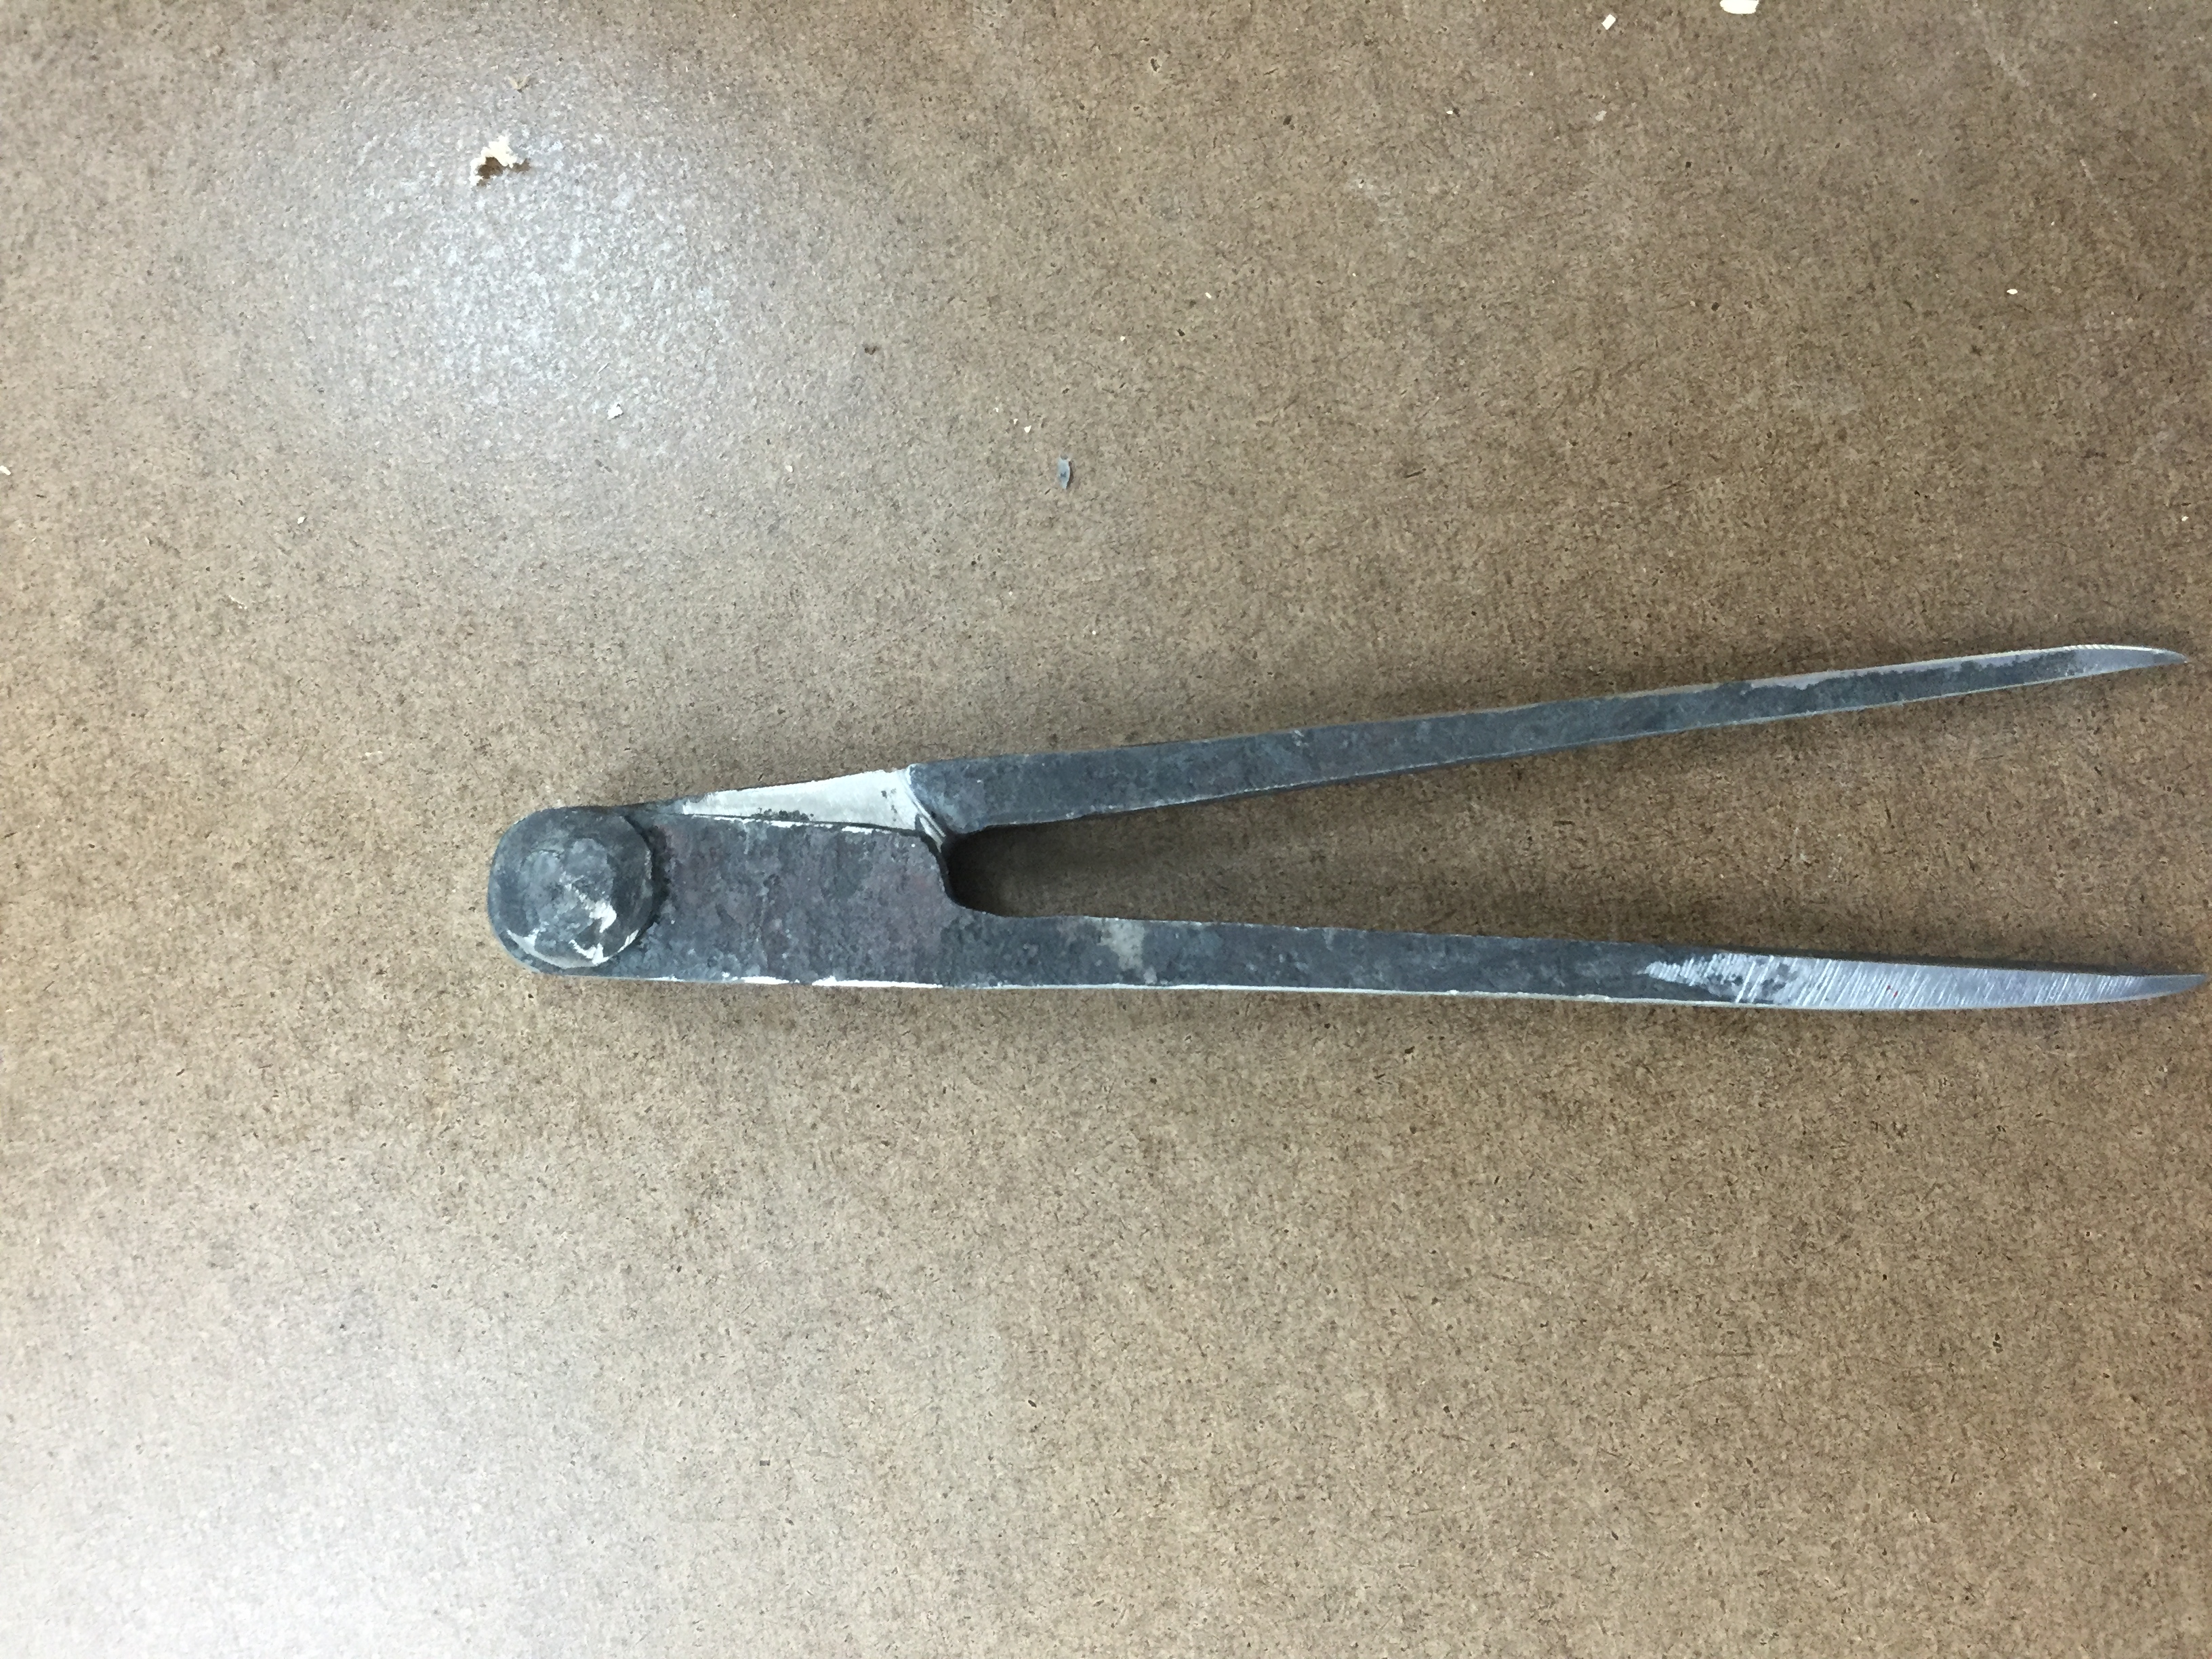
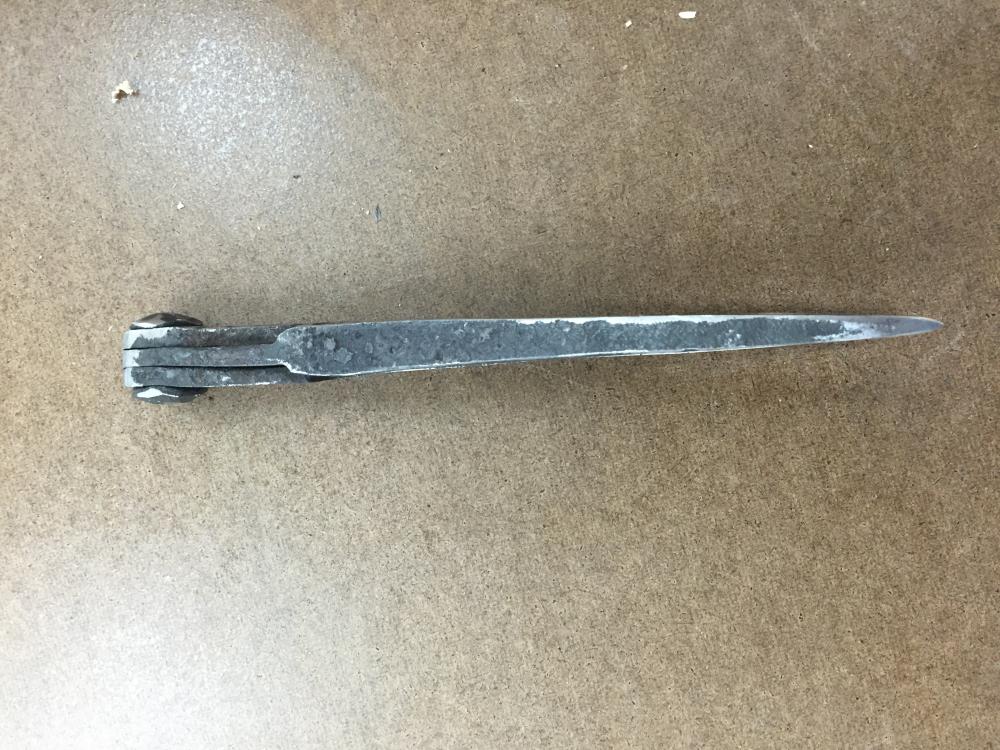
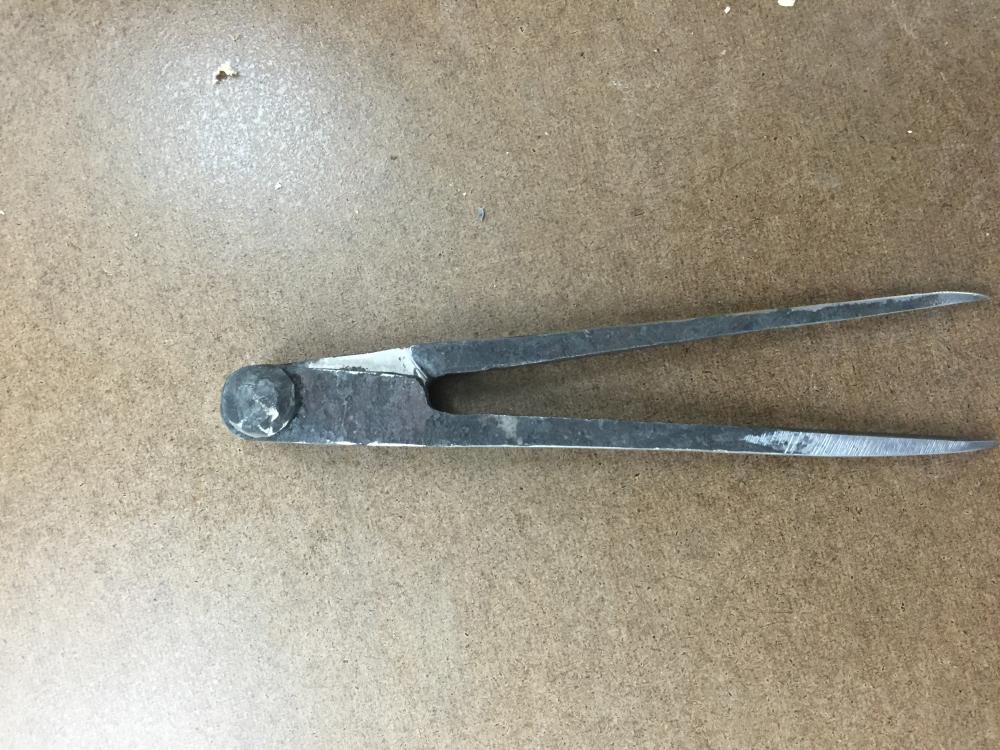
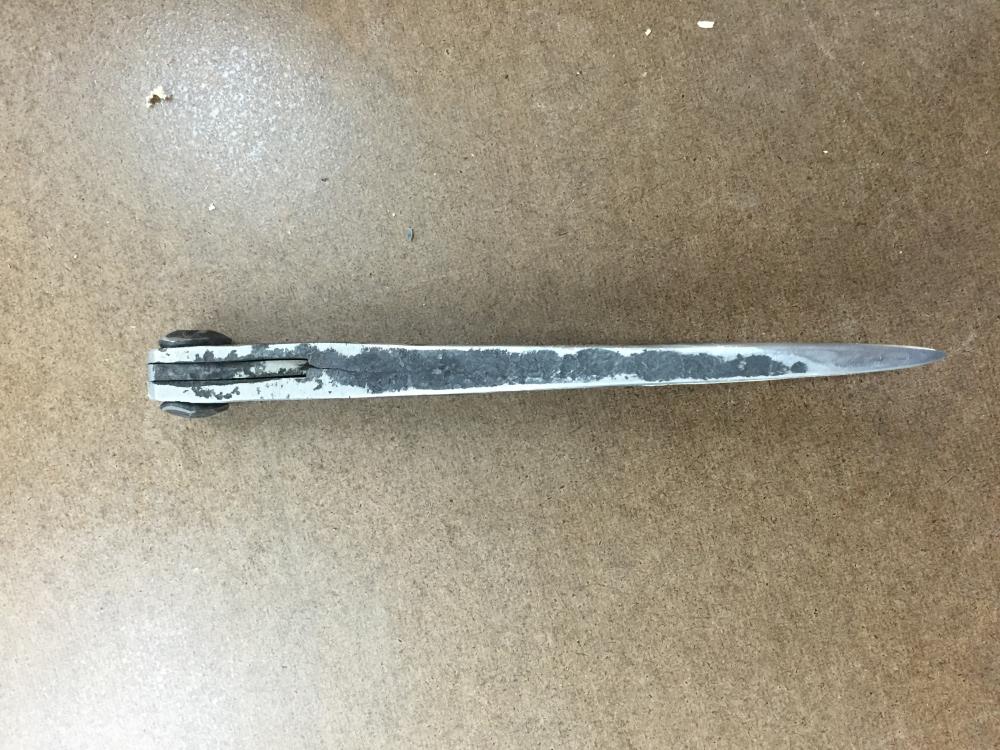
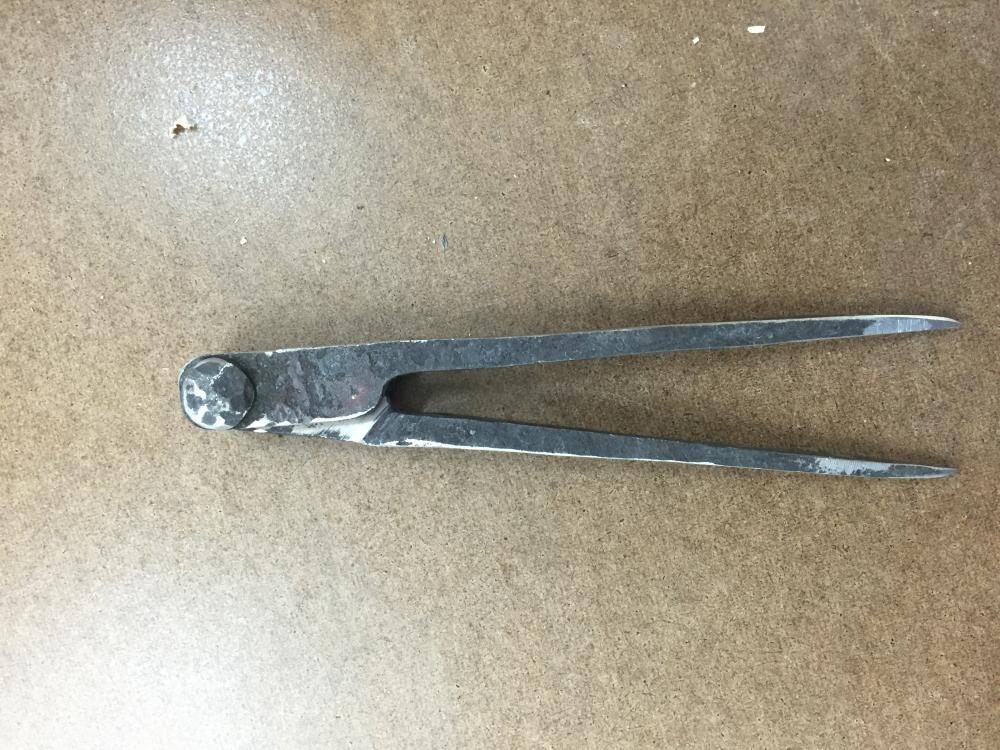
A couple months ago, I watched the Peter Ross video on making a wood worker's compass (divider). This is my first pair. I made these for my neighbor and he will finish doing the filing work on them. I thought they turned out really nice. Also, this was my first attempt at fire welding and I was very pleased with how it turned out. I plan on making many more pairs of these and getting good at making them. One improvement I want to try is fire welding a carbon steel bit into the tip to begin with so the tip is more durable. The one mistake I made was bending the hinge a little when I set the pin. They still work just fine though. This compass is about 6 inches long and my neighbor was thrilled to get them. He spent some time showing me how he would use them to lay out a dove tail. I had no idea how useful they were. Anyhow... super fun little project to hone your black smith super powers. Matthew D Provo, Utah
-
I bought an old Two Axe Brand 4 pound sledge off ebay for about $10, including shipping. I wanted it to be a rounding hammer. Using a 1 inch belt grinder and making sure the table was square to the belt, I carefully flattened one side with the hammer on the table. Then setting the table at different angles I rounded the other side with a nice 4-5 inch radius. The hammer works great and the price was right. Used a nice piece of maple to make a handle. So far so good. Plus it is a cool vintage hammer.
-
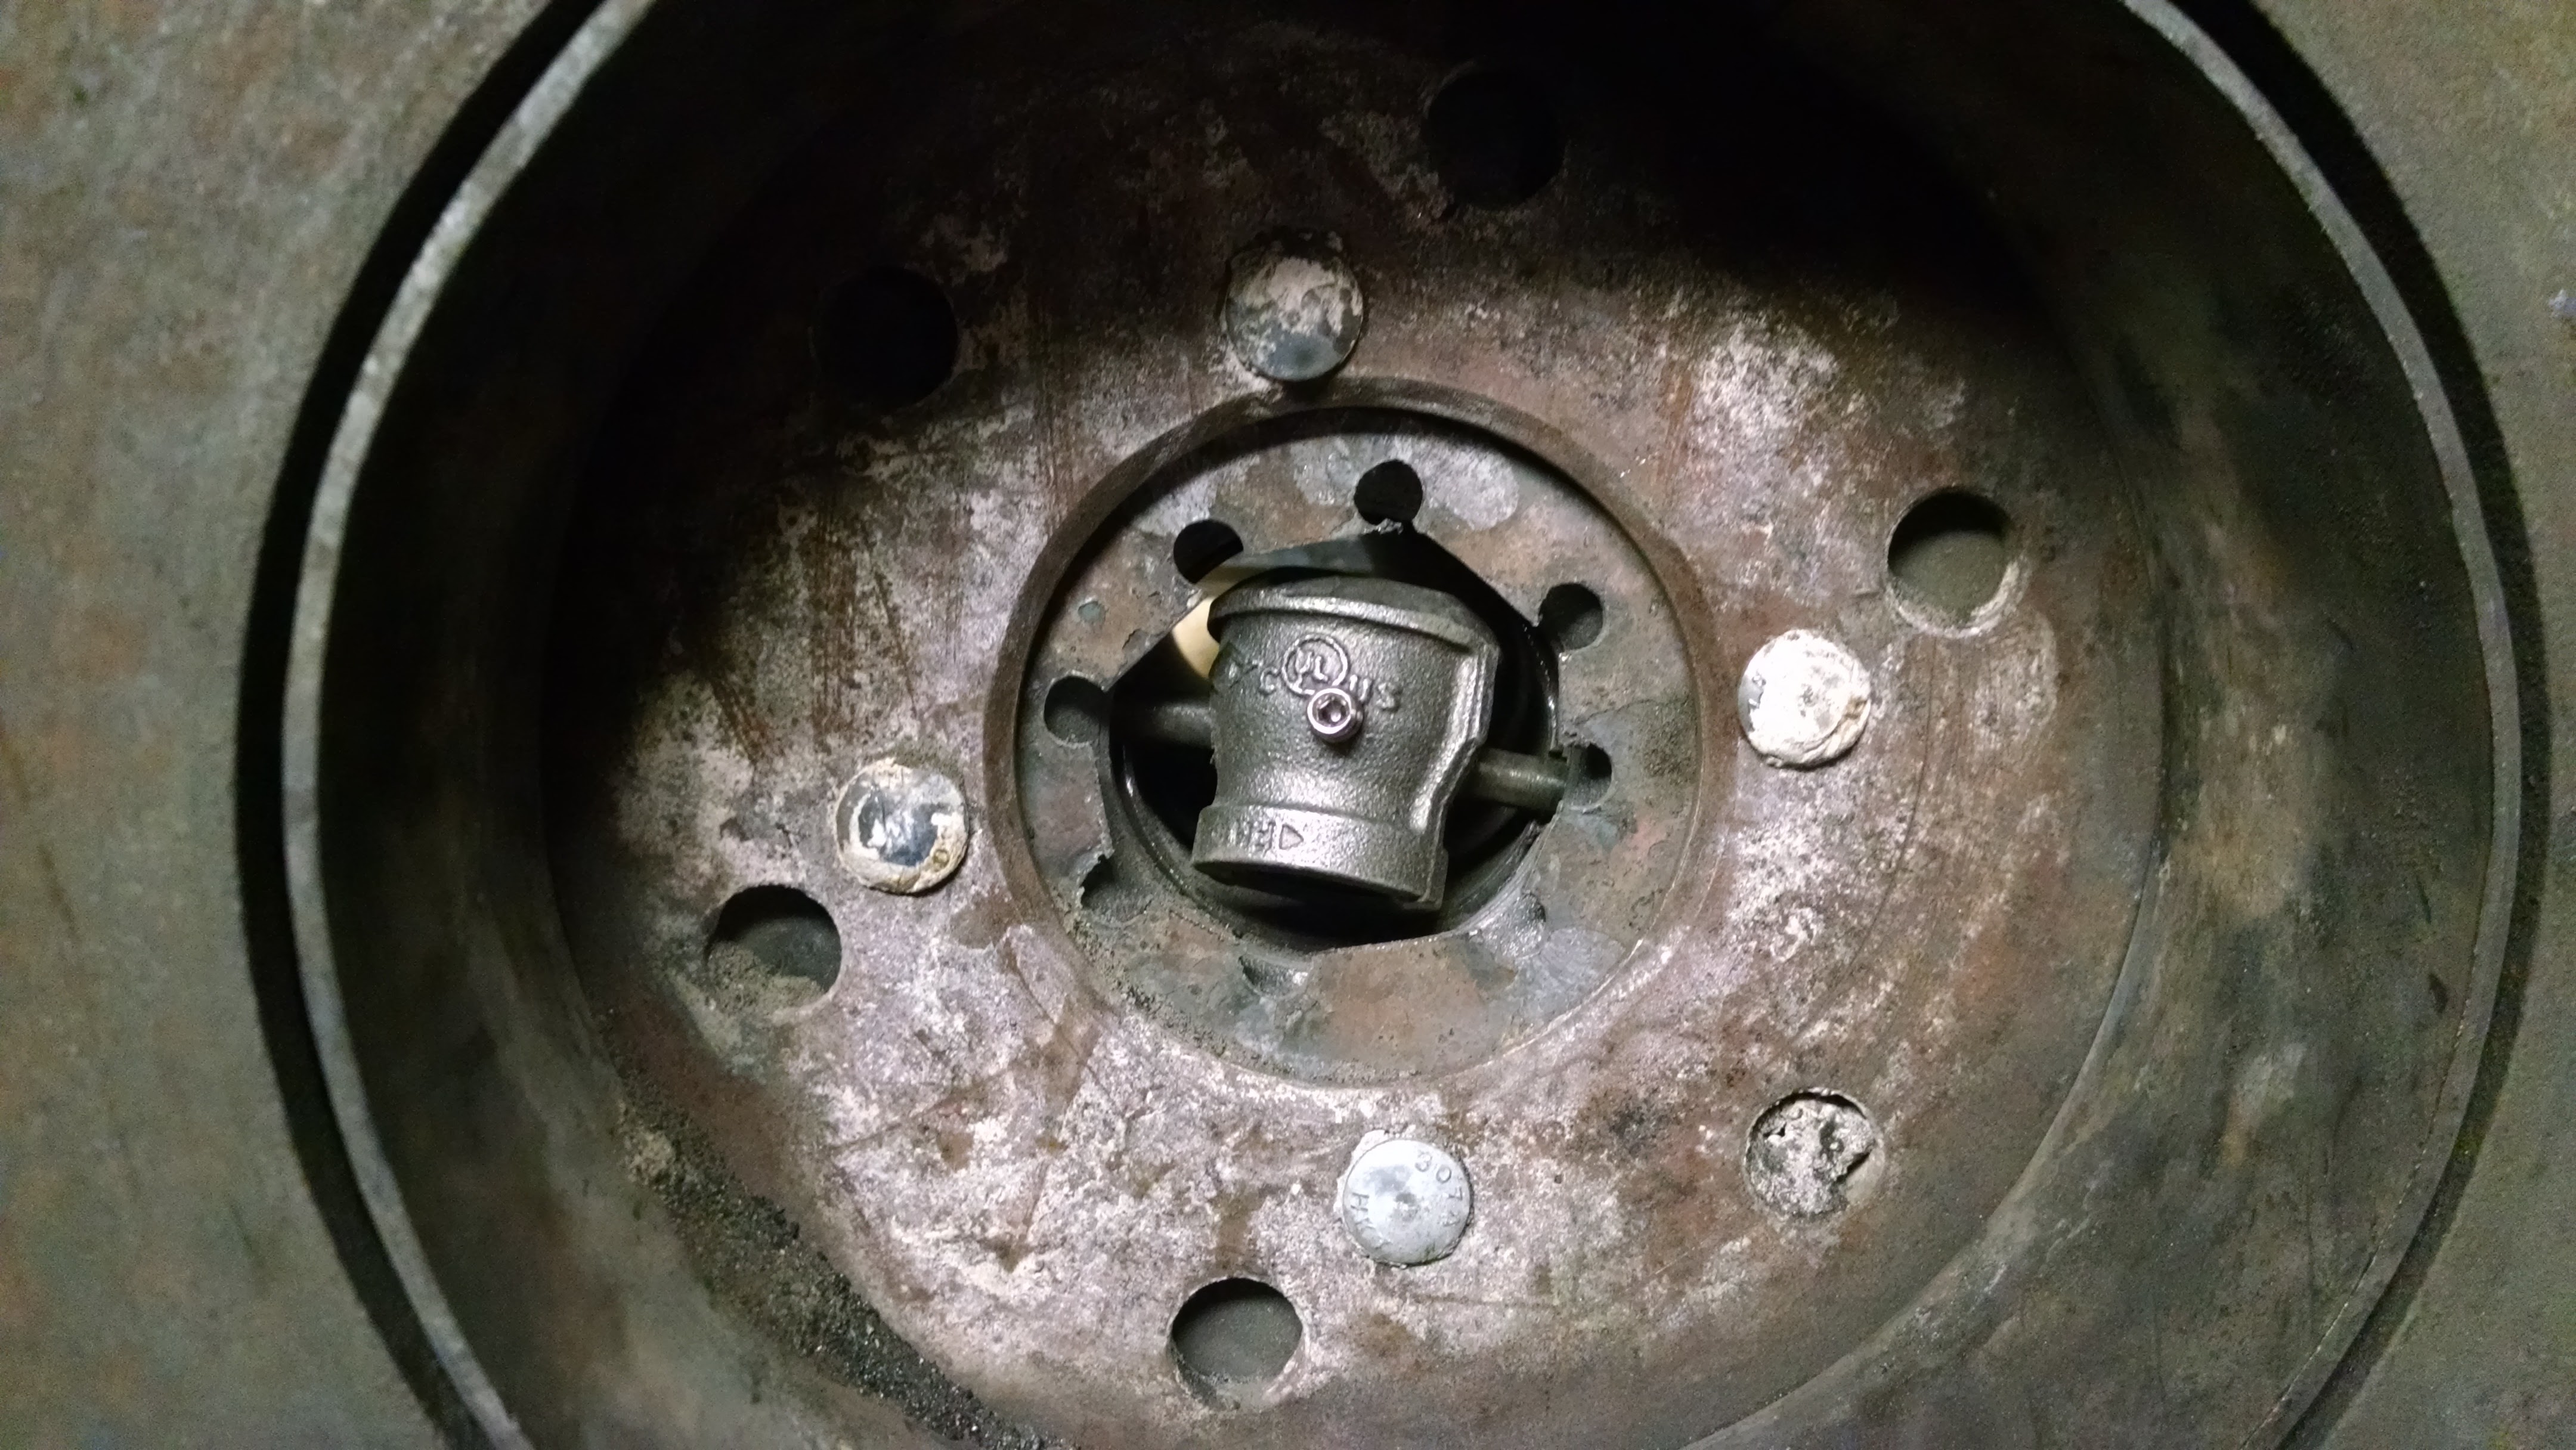
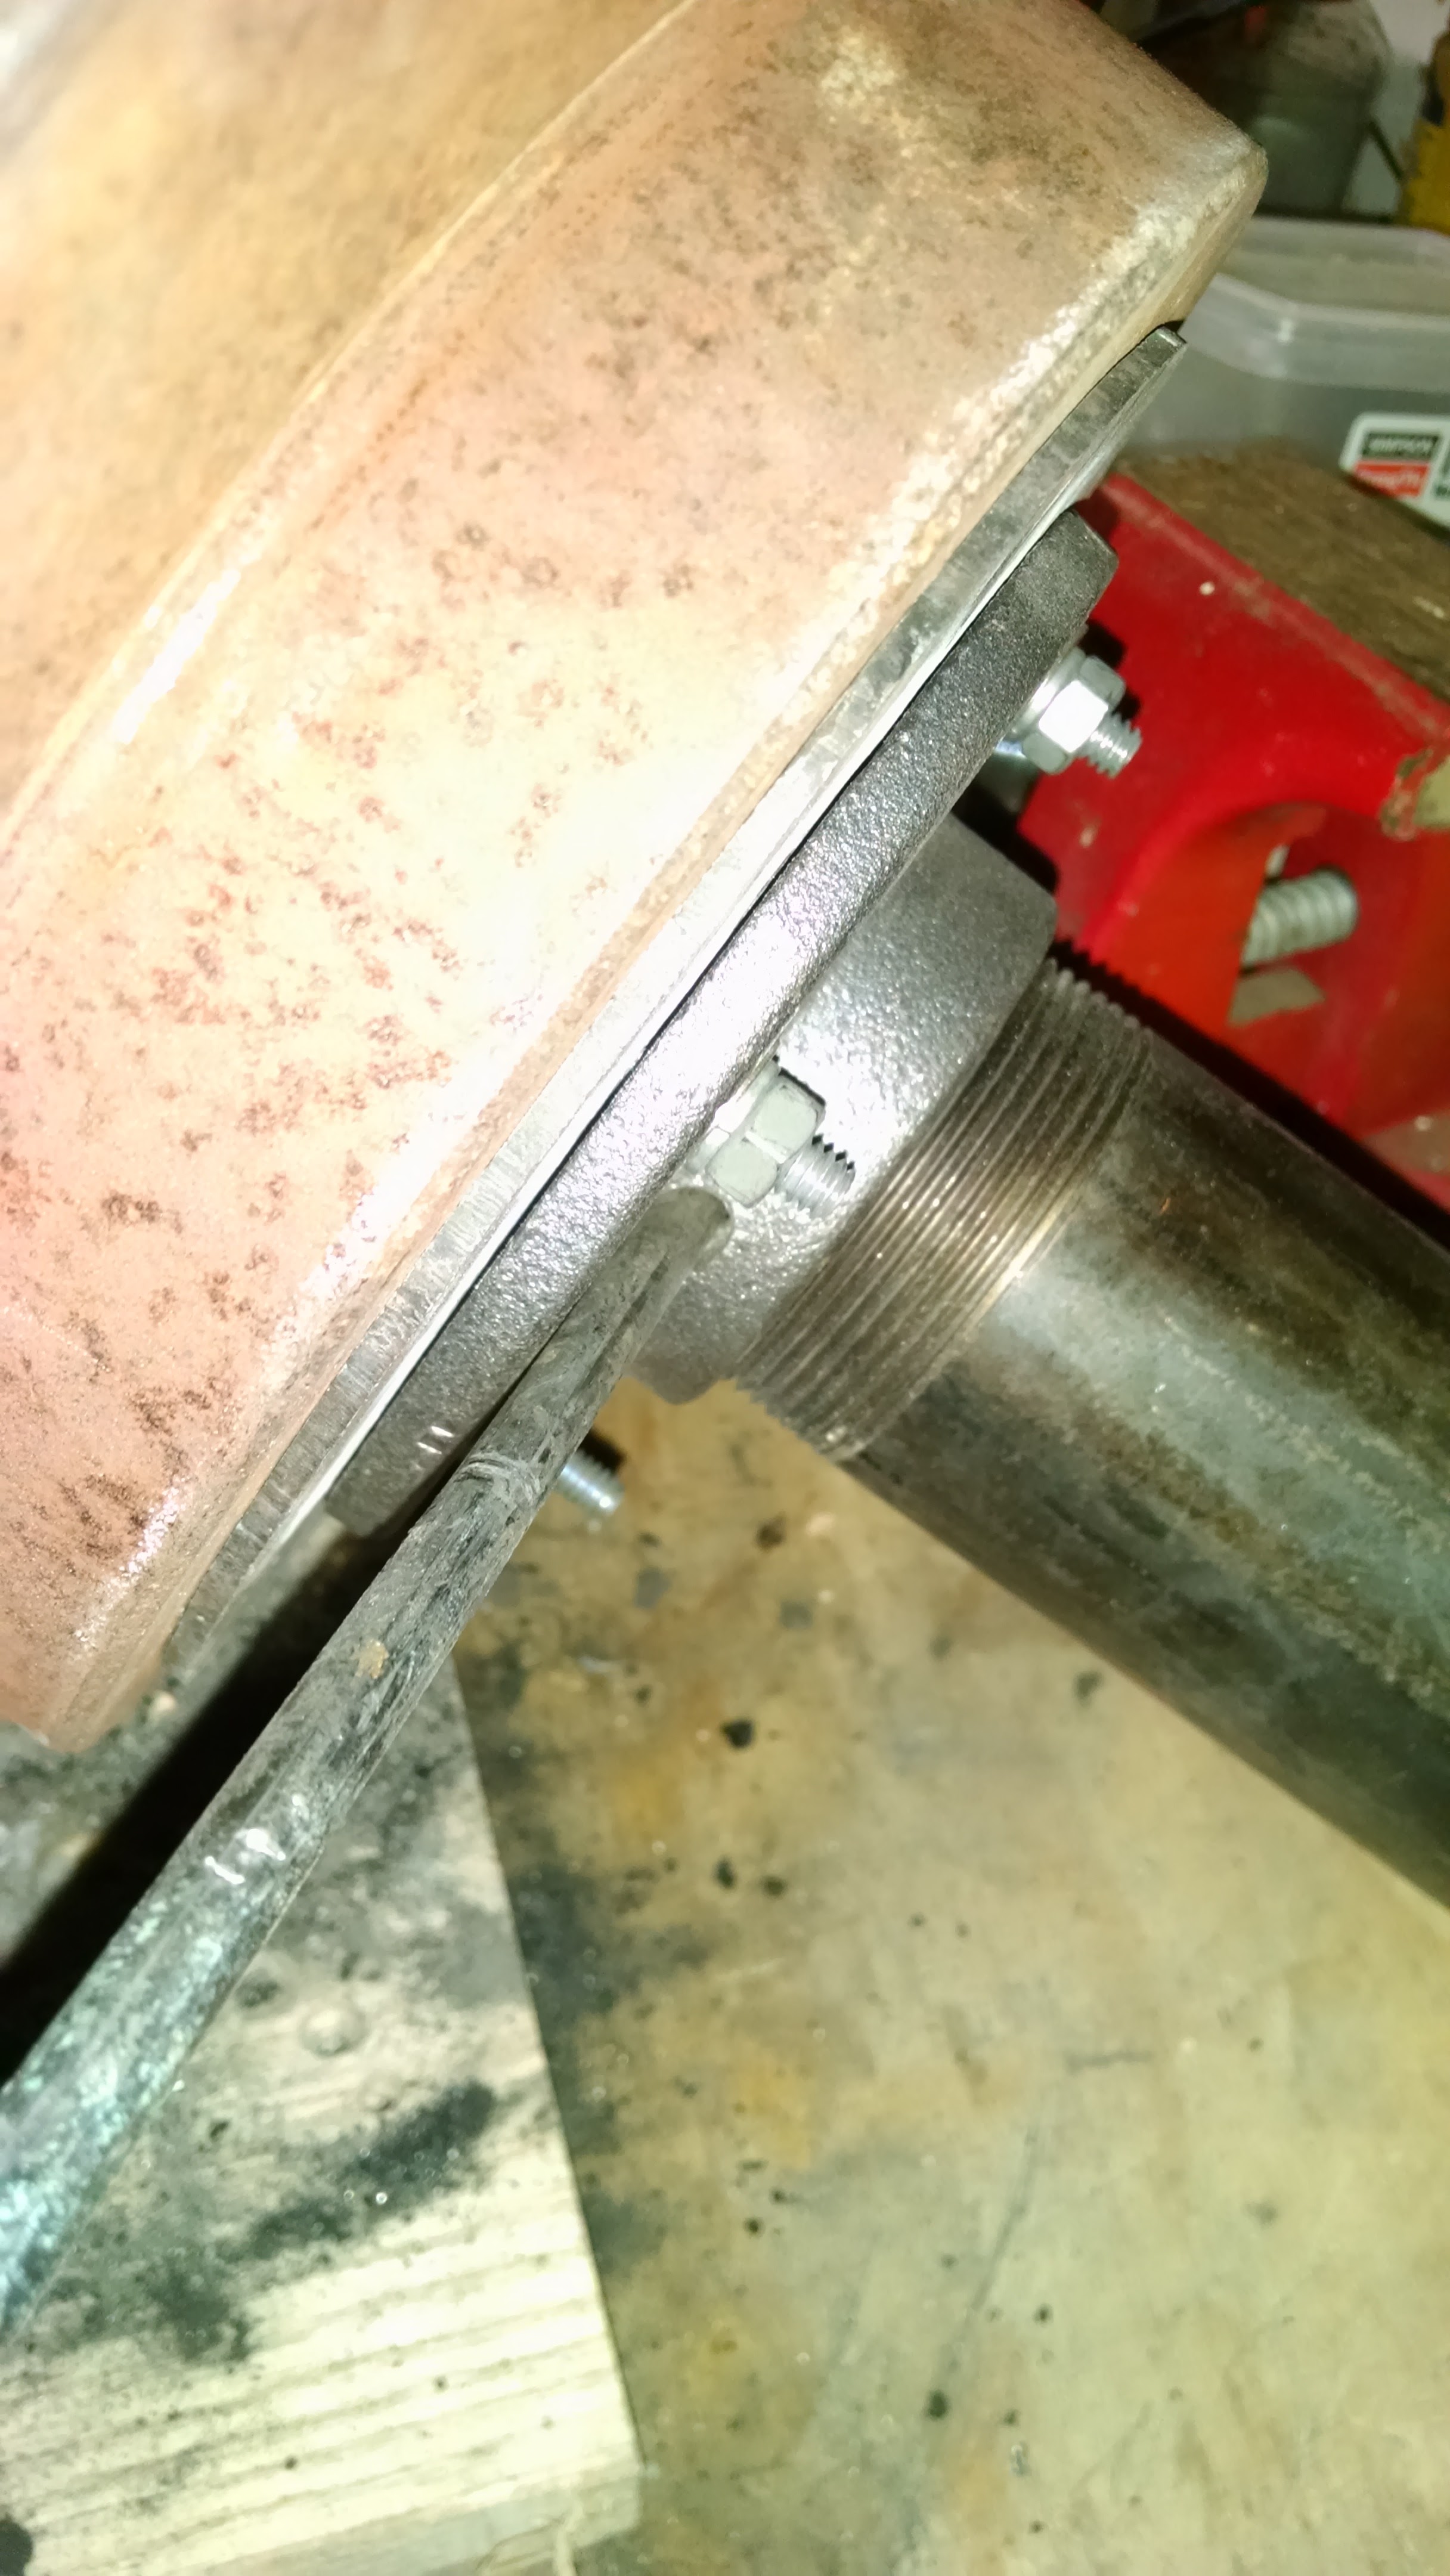
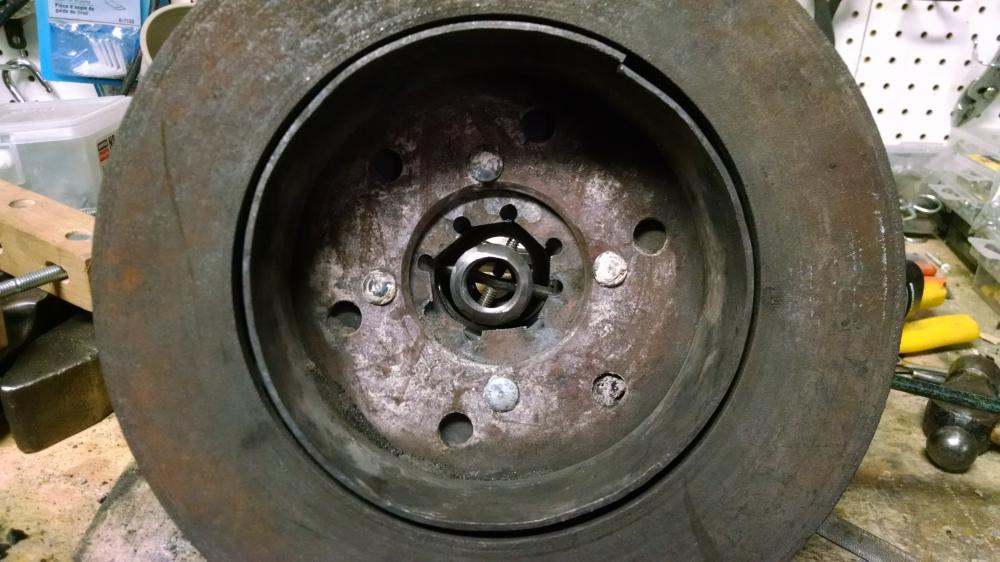
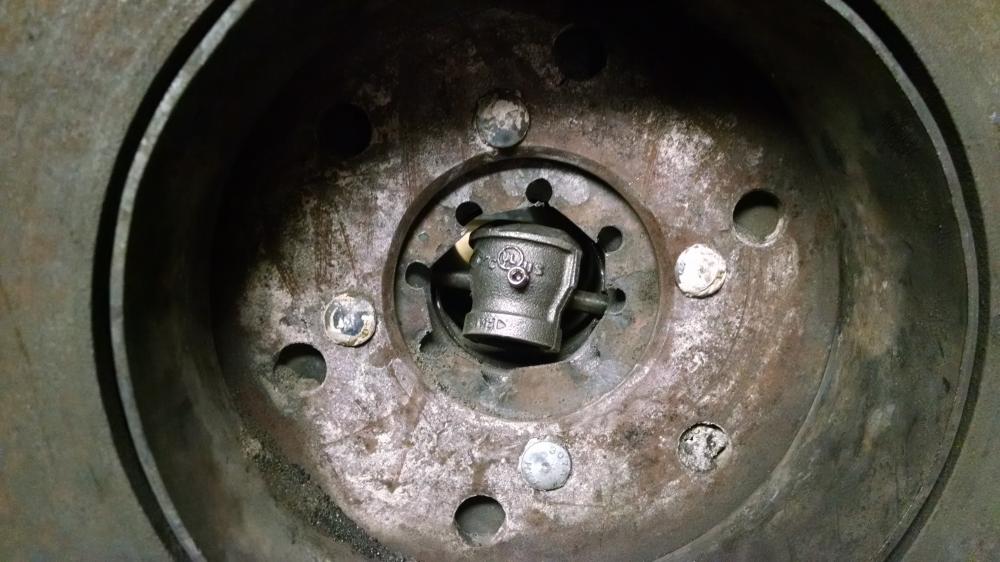
Thanks for all the input. Well, I ended up making a tuyere vent from some steel plate. I made a pattern of holes. That worked well, but clogged pretty quickly with clinkers. I ended up rigging up a smaller cast iron pipe fitting inside the 2 inch cast iron flange as a clinker breaker and regulator for the air flow. I put the two inch black pipe on and ground a couple notches in the pipe so I could fit a rod in to adjust the air flow and clear the clinkers and ash. It is working much better now. It is pretty rough, but I have a good idea what I want now and will build a better one in the future.

-
New blacksmith - semi-leaf springs
Matthew D replied to Volundir's topic in Blacksmithing, General Discussion
Well, I didn't have a furnace to do all the heats and cool downs at different temps to properly anneal the Chipper and D2. I just did it as best as I could. I heated it up, let it soak for 5-10 minutes without burning it and put it in dry coal ashes to insulate it while it cooled down slowly. I noticed that helped for forging and grinding. This method also helped when drilling holes in tangs. It is still tough but seemed to be much better after the treatment. I did this both for Chipper and D2 wood chipper blades. That was 20 years ago, but as a recall, I would occasionally heat a few chipper blades in my forge at the end of the day and then let the blades cool in the hot fire as the ashes cooled down. I don't recall what worked best though, the insulating ashes or the cool down in the forge. -
New blacksmith - semi-leaf springs
Matthew D replied to Volundir's topic in Blacksmithing, General Discussion
I have read that you may need to anneal metal like that before forging. That old leaf spring has been hardened, tempered and toughened though work. My suggestion is to anneal the piece before attempting to forge it. Get a metal bucket full of dry ash, clean kitty litter, or vermiculite and heat your metal to bright yellow hot and cover it well in the bucket. Let it cool slowly over 24 hours. You can do this with several pieces at once. After 24 hours you should be able to file it easily. Then heat it and see if that makes a difference. By annealing the leaf spring you will alter the structure of the steel molecules and renew the ability to forge it. I have done this with D2 and Chipper steel that were used in a wood chipper. Once the steel was annealed it was much easier to forge. Good luck. -
I am in the process of building a forge. Anyhow, I happen to also do lapidary work and know that silicon carbide (carborundum) is extremely durable material and has a melting point around 5000 degrees F. Has anyone used carborundum as a tuyere on a coal/coke forge? Crucibles for smelting ore or metals are made from Carborundum. I did a search and some furnaces use a carborundum tuyere. An old carb wheel with a 1 inch hole could be fitted or a piece could be cut to fit and drill some holes in it with a diamond bit in a dremel or drill motor. I would think that it would last for years and you'd probably replace the pot and reuse the tuyere. Thoughts or ideas? Just thinking.... I have a piece I am going to make a 2 inch tuyere with and see how it works out. I might get me a worn out wheel and just put in in the bottom of my brake disk fire pot.
-
Screwdriver and chisel?
Matthew D replied to Michael Cochran's topic in Tools, ID, and pictorial reference
I have a screw driver just like that one, only not as long. My cousin found it in the wall of a house he was doing some remodeling on. LOL. I can just see it now. "Hey, I dropped my screwdriver down the wall." "Guess it will be there a long time, because we are NOT redoing that lath." -
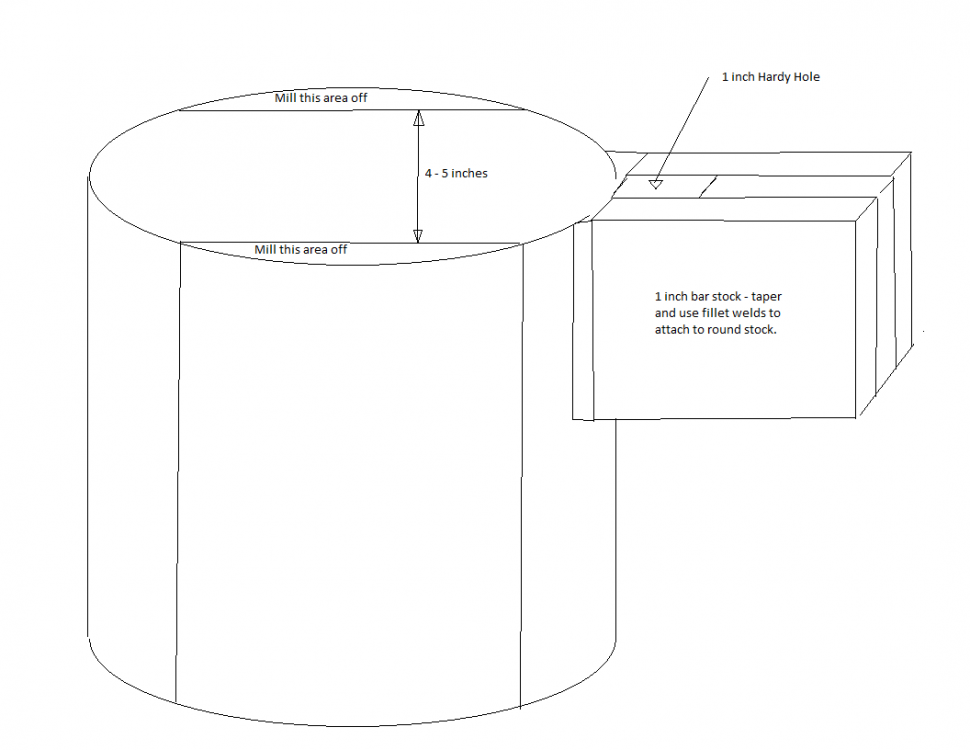
Exo, When I got started into smithing (making blades), some 20 years ago, my first anvil was exactly what you are describing. I was lucky enough to find a piece of 6 inch round about 14-16 inches long at the dump. (free is always nice ) Took quite a grunt to get in the back of the pickup. I never worried about hardening it at all. I think over time and use a non-hardened surface will work harden to a certain degree, just like WL suggests. I hear you on the scrap yards not selling to the public. Some will, some won't. Contact them through their websites and find out. They are loosing out when they don't. Another thought is to see if there a mining company or heavy equipment repair company in your area. Some of the axles from those big mining trucks get broken and need to be replaced. If you could get your hands on one of those and cut it to the length you want, you would have yourself a nice anvil. I have been thinking about doing the same. Another idea is to take the round stock and have a machine shop mill a couple parallel flats in it on opposite sides. See attachment. Keep the face 4-5 inches across. Then give the flats an 1/8 to 3/16 radius to work on. This would give you more versatility. One last thought is to take three pieces of 1 inch bar stock (two 3 inch pieces and a 2 inch piece) and weld them together and onto one side to make yourself a hardy hole. Attached is the basic idea of what I have been thinking about for an anvil. I want to make something like this just for a striking anvil. Anyhow, good luck. Look forward to hearing what you end up with. I'm a blacksmith. What's your superpower?
-
Restoring a Peter Wright need some advice
Matthew D replied to Blackcatbones's topic in Anvils, Swage Blocks, and Mandrels
Frosty, No, you must be thinking of someone else. -
Restoring a Peter Wright need some advice
Matthew D replied to Blackcatbones's topic in Anvils, Swage Blocks, and Mandrels
Frosty, Yes, I am referring to the article by Gunther and Schuler. Their article is one of the best I have come across in restoring an anvil. Even still, it isn't for the faint in heart or amateur with no welding experience to tackle an anvil restore. A competent welder and someone with some understanding can successfully accomplish it. I am no pro, but I do have ambition and patience. I recently attended a Bonneville Forge Council conference and learned from Brian Brazeal, tool making and forging techniques. During the conference, he preferred using a home built striking anvil with good corners to the big old anvil with chipped corners to demonstrate forging techniques. I was quite impressed at how much he stressed the need for good corners in half on/half off forging. That is the type of forging I am now interested in. I don't know if me or my dad is that mythical bladesmith you are referring to or not. Honored though if it is. Could be someone else. We have only made and sold less than 100 hunting knives between the two of us, all of which tend to be a modified sheep/buffalo skinners of the old fashioned type. My brother still makes knives and so does my father(He's still in Homer). We only started making knives because we could never find a hunting knife that we liked. Then friends started asking us to make them one. I gave away, traded or sold all the knives I made back in the 90s and early 2000s. I only have one knife that my dad put together for me in my personal collection anymore, and it has only seen hide once in 10 years. Dad still gets an occasional request and my brother tends to keep busy making them more on the side than as a business concern. Dad and I made most of our stuff from tool steel like Chipper or D2 we salvaged from the logging operation. When I made knives out of forged tool steel, I quickly learned to forge my blade on the best surface of the anvil, as I hated spending hours grinding out divots and pock marks in very hard steel. I liked to pack the edges of my blade and forge shape the blade tips and tangs. Often I went to the cut-off saw to do a little metal removal and then went back to the forge and anvil. My best blades were ones with minimal grinding on after forging out. I liked full tangs, where my dad liked hidden tangs, so I worked on getting the tangs as flat as possible. A good clean face on the anvil sure made life easier. With the old PW we used (on loan) I found a clean spot that I did most of my forging on. Anyhow, good luck to BlackCatBones and anyone who is considering restoring an anvil. Also, visit your local ABANA chapter and see what help or advice you can find. Remember it is your anvil and you will be the one working on it. Don't ruin it, but fixing up something right is all part of the joy of making something with it. Forge on... I'm a blacksmith. What's your superpower? -
BFC Conference Sept 11, 12, 13, 2015
Matthew D replied to Glenn's topic in Great Basin Blacksmith Guild (BFC) - Utah
Just have to say, the conference was amazing. Brian Brazeal and Brent Bailey presented. Learned the skill of tool making from two of the best. Learning from both these smiths is a privilege. Thank you to our forge council for putting this together and the time these two men took to come out to instruct us. Looking forward to the ABANA conference in July 2016 here in Salt Lake City. -
Restoring a Peter Wright need some advice
Matthew D replied to Blackcatbones's topic in Anvils, Swage Blocks, and Mandrels
New to the forum, but not new to forging, anvils and smithing. Frosty does have a excellent point and I agree with what he says. You don't need a perfect tool to get started. Use the anvil for a while without doing anything to it, except maybe a little face clean up with a fine sander. You will find it will be very serviceable. My first anvil was a foot long piece of 8 inch round stock of somewhat mild steel that I picked up at the Homer landfill (yep long time Alaskan till I was transplanted to the lower 48). I just turned it on end and used the flat face. Then I used a pretty beat up 200 pound PW for a while. I forged dozens of knives on my round anvil. Give your anvil a go and then take a look at restoring it. The bottom hardy tool option works great too. You can do a lot with a good hardy tool. Maybe I will get booed for posting my remark about restoring an anvil's edges and face back to a condition which gives you the edges and a face that are suitable to doing the type of forging you are looking for. I personally prefer taking the time to forge as close to finish as possible. Less grinding. Along with the features of a good tool steel face and weight, an anvil's edges and a smooth face are a very important part of the anvil allowing you to do a number of import forging tasks. I cringe when I see an anvil with a face that has arc marks all over it and edges that have been beat so hard that they are cracked and shattered. Every time I see an anvil with torch cuts in it I want to ask the person who did that, "what in the blankyity blank were you thinking?" At some point someone did some work on that anvil without really understanding what an anvil is for. They started using it for a welding/cutting table. An anvil is not a steel table to lay your welding work on! Edges are NOT cut off hardies. Oh well.. My first impulse is to figure out how to repair the anvil. I am currently in the process of restoring a Trenton back to the way I want it. Just keep in mind hundreds of anvils have been successfully restored back to like-new and are now great working tools and will continue to provide dozens of years of service. Most of these old anvils had thousand of hours of work done on them. They were used every day by a blacksmith back in the day. Unless you are going to be doing this for a livelihood, your anvil will see minimum use while you own it. You will find a very informative anvil restoration article published in 1998 in an online anvil magazine(I won't mention the website, just go do a search). Also, you will find pretty smart well experienced smithies, machinist and welders, who have personally restored many many anvils back to 99%. Follow the directions in that article carefully. Preheating the anvil to around 400 degrees is a must. Pick up a temp stick for that. For welds between the wrought iron and tool steel face use a suitable rod for that purpose. Stoody 2110 is a good rod for this. Talk to your local welding supplier. They are a trove of knowledge and will help you find the right rod to build up the wrought iron enough to lay in some hard facing. Welding to the tool steel which more than likely is W-1 tool steel, use Stoody 1105 or an equivalent hardface rod. Most hardface rod is pretty simple to lay in. Just watch your welding settings to get the bead you need. Cleaning the welding surfaces is very important. Remove the rust, scale and paint before welding. Good luck... I'm a blacksmith, what's your superpower?