
JHCC
-
Posts
19,313 -
Joined
-
Last visited
Content Type
Profiles
Forums
Articles
Gallery
Downloads
Events
Everything posted by JHCC
-
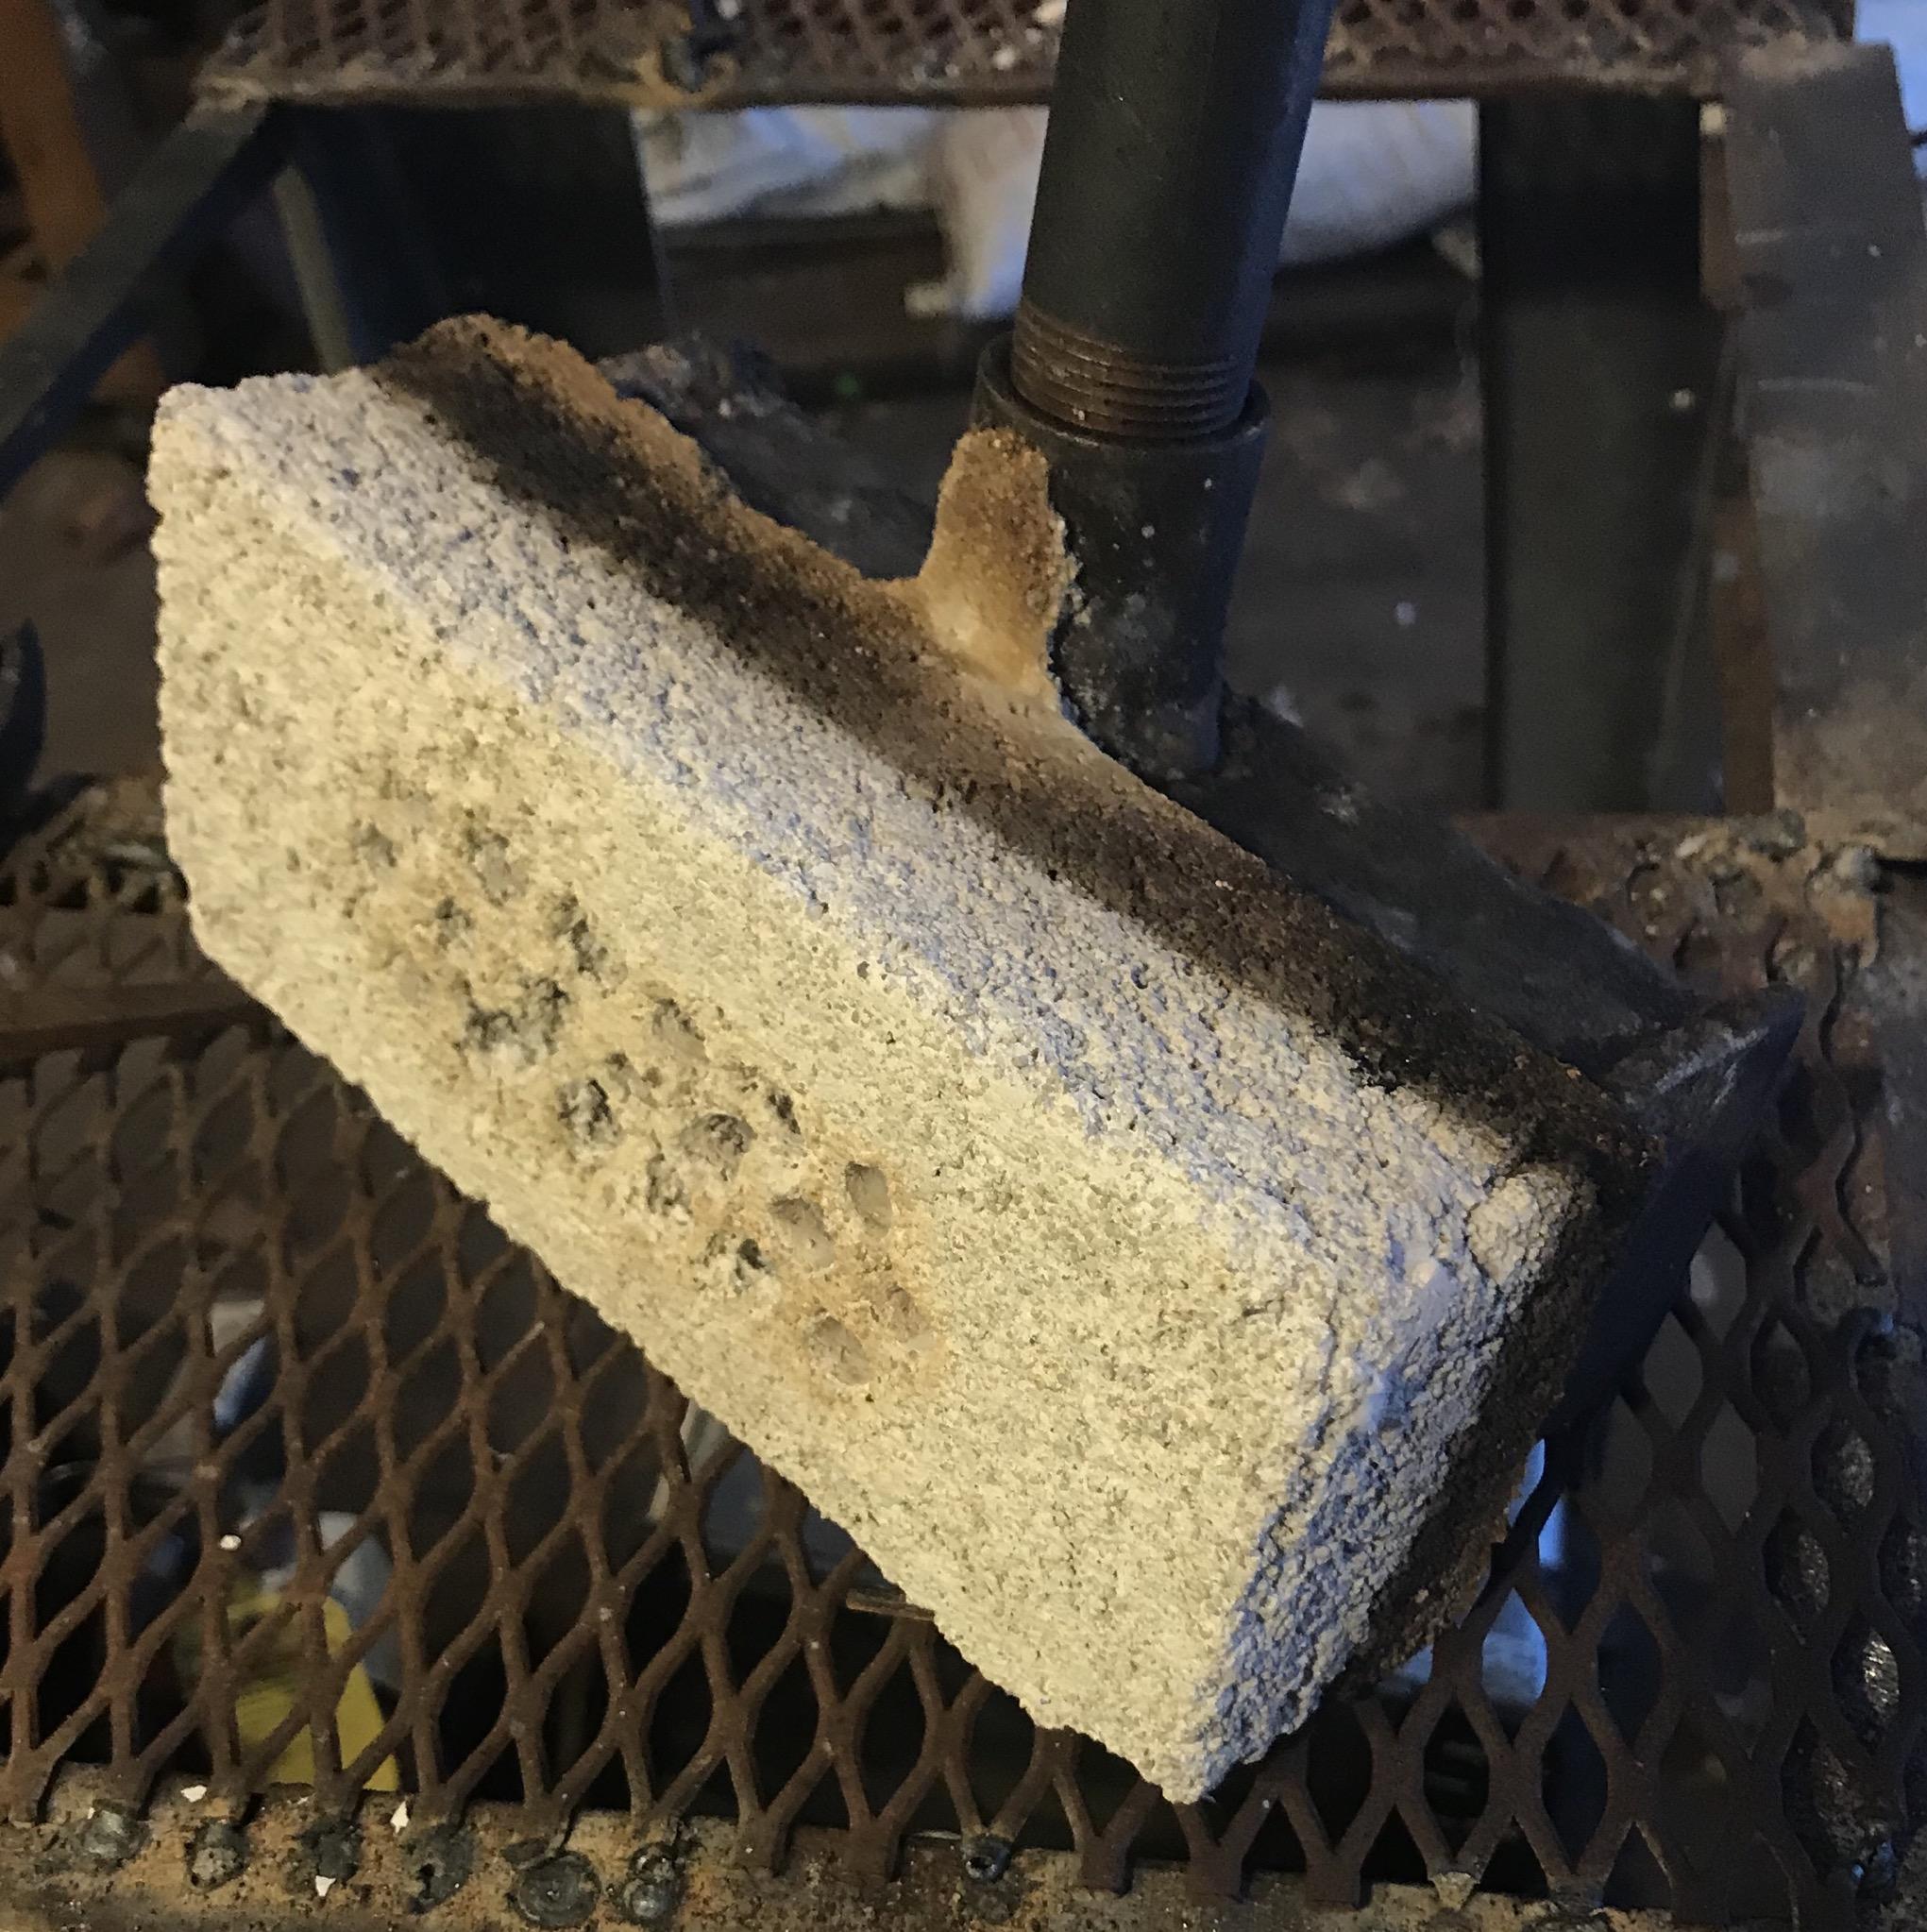
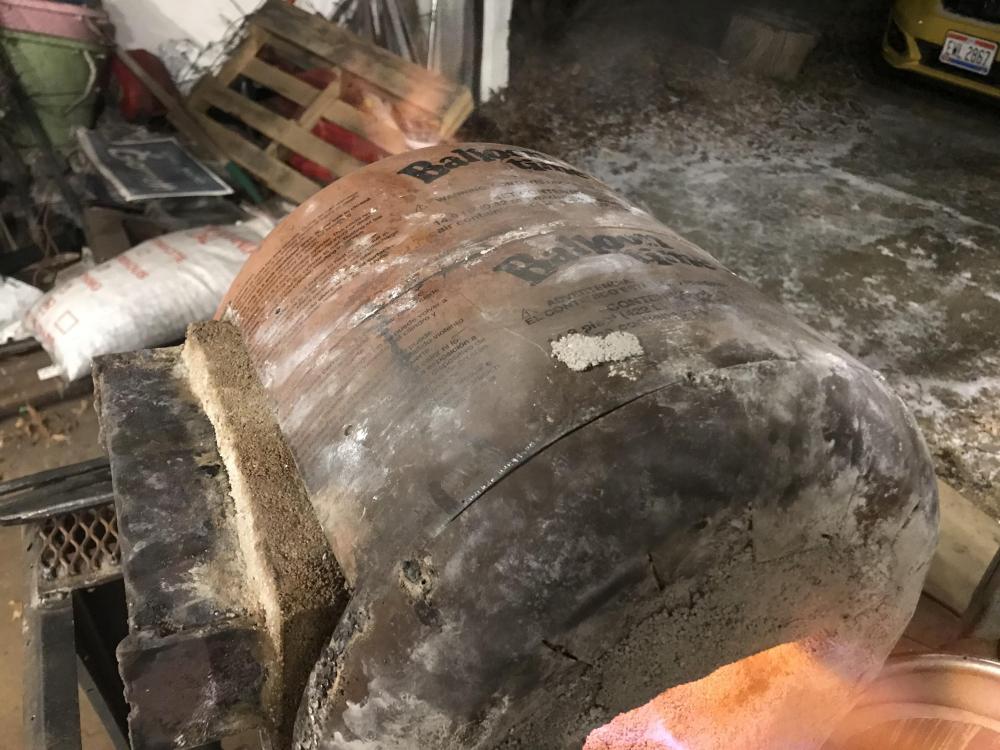
For interest’s sake, here’s the burner removed from the forge. Interesting difference between the parts that have been exposed to the high heat and those that haven’t.

-
Depends largely on the design. Can you show us an example of what you had in mind?
-
Carpenter's hammer with nail puller. Interesting design; probably someone's attempt at making a better mousetrap.
-
His words, not mine.
-
Cute kids, but don’t let them hammer on a bare anvil! If
-
I didn’t even want to go there. I may have typed the words “ineffective solution to a nonexistent problem”, though.
-
In a discussion elsewhere, a fellow in Ireland was talking a big game about quenching in what he called "lark", which by his description was a mixture of water and mud. According to him, this gives a very slow quench that bakes the clay around the blade, which then "cooks in the clay" and does not need additional tempering. This strikes me as arrant nonsense*, but it did get me wondering if anyone here has personal experience or knows of anyone attempting anything similar? *An impression not improved by his insistence that 5160 needs to be folded and welded to itself multiple times to knit together the molecules and equalize the stresses caused by modern manufacturing methods.
-
Where'd you get that? Never seen one with square cutouts on the edge before. Looks like a custom plasma or waterjet cut job?
-
The MSDS for Kast-O-Lite 30 lists HWI (Harbison Walker International) as manufacturer.
-

Arm and Hammer IDentification
JHCC replied to Father Grey Beard's topic in Anvils, Swage Blocks, and Mandrels
Nice anvil, and welcome to IFI! If you haven't yet, please READ THIS FIRST!!! -
Go back and get the rest of it! As you say, it’s great trading stock, and it doesn’t go bad!
-
What did you do in the shop today?
JHCC replied to Mark Ling's topic in Blacksmithing, General Discussion
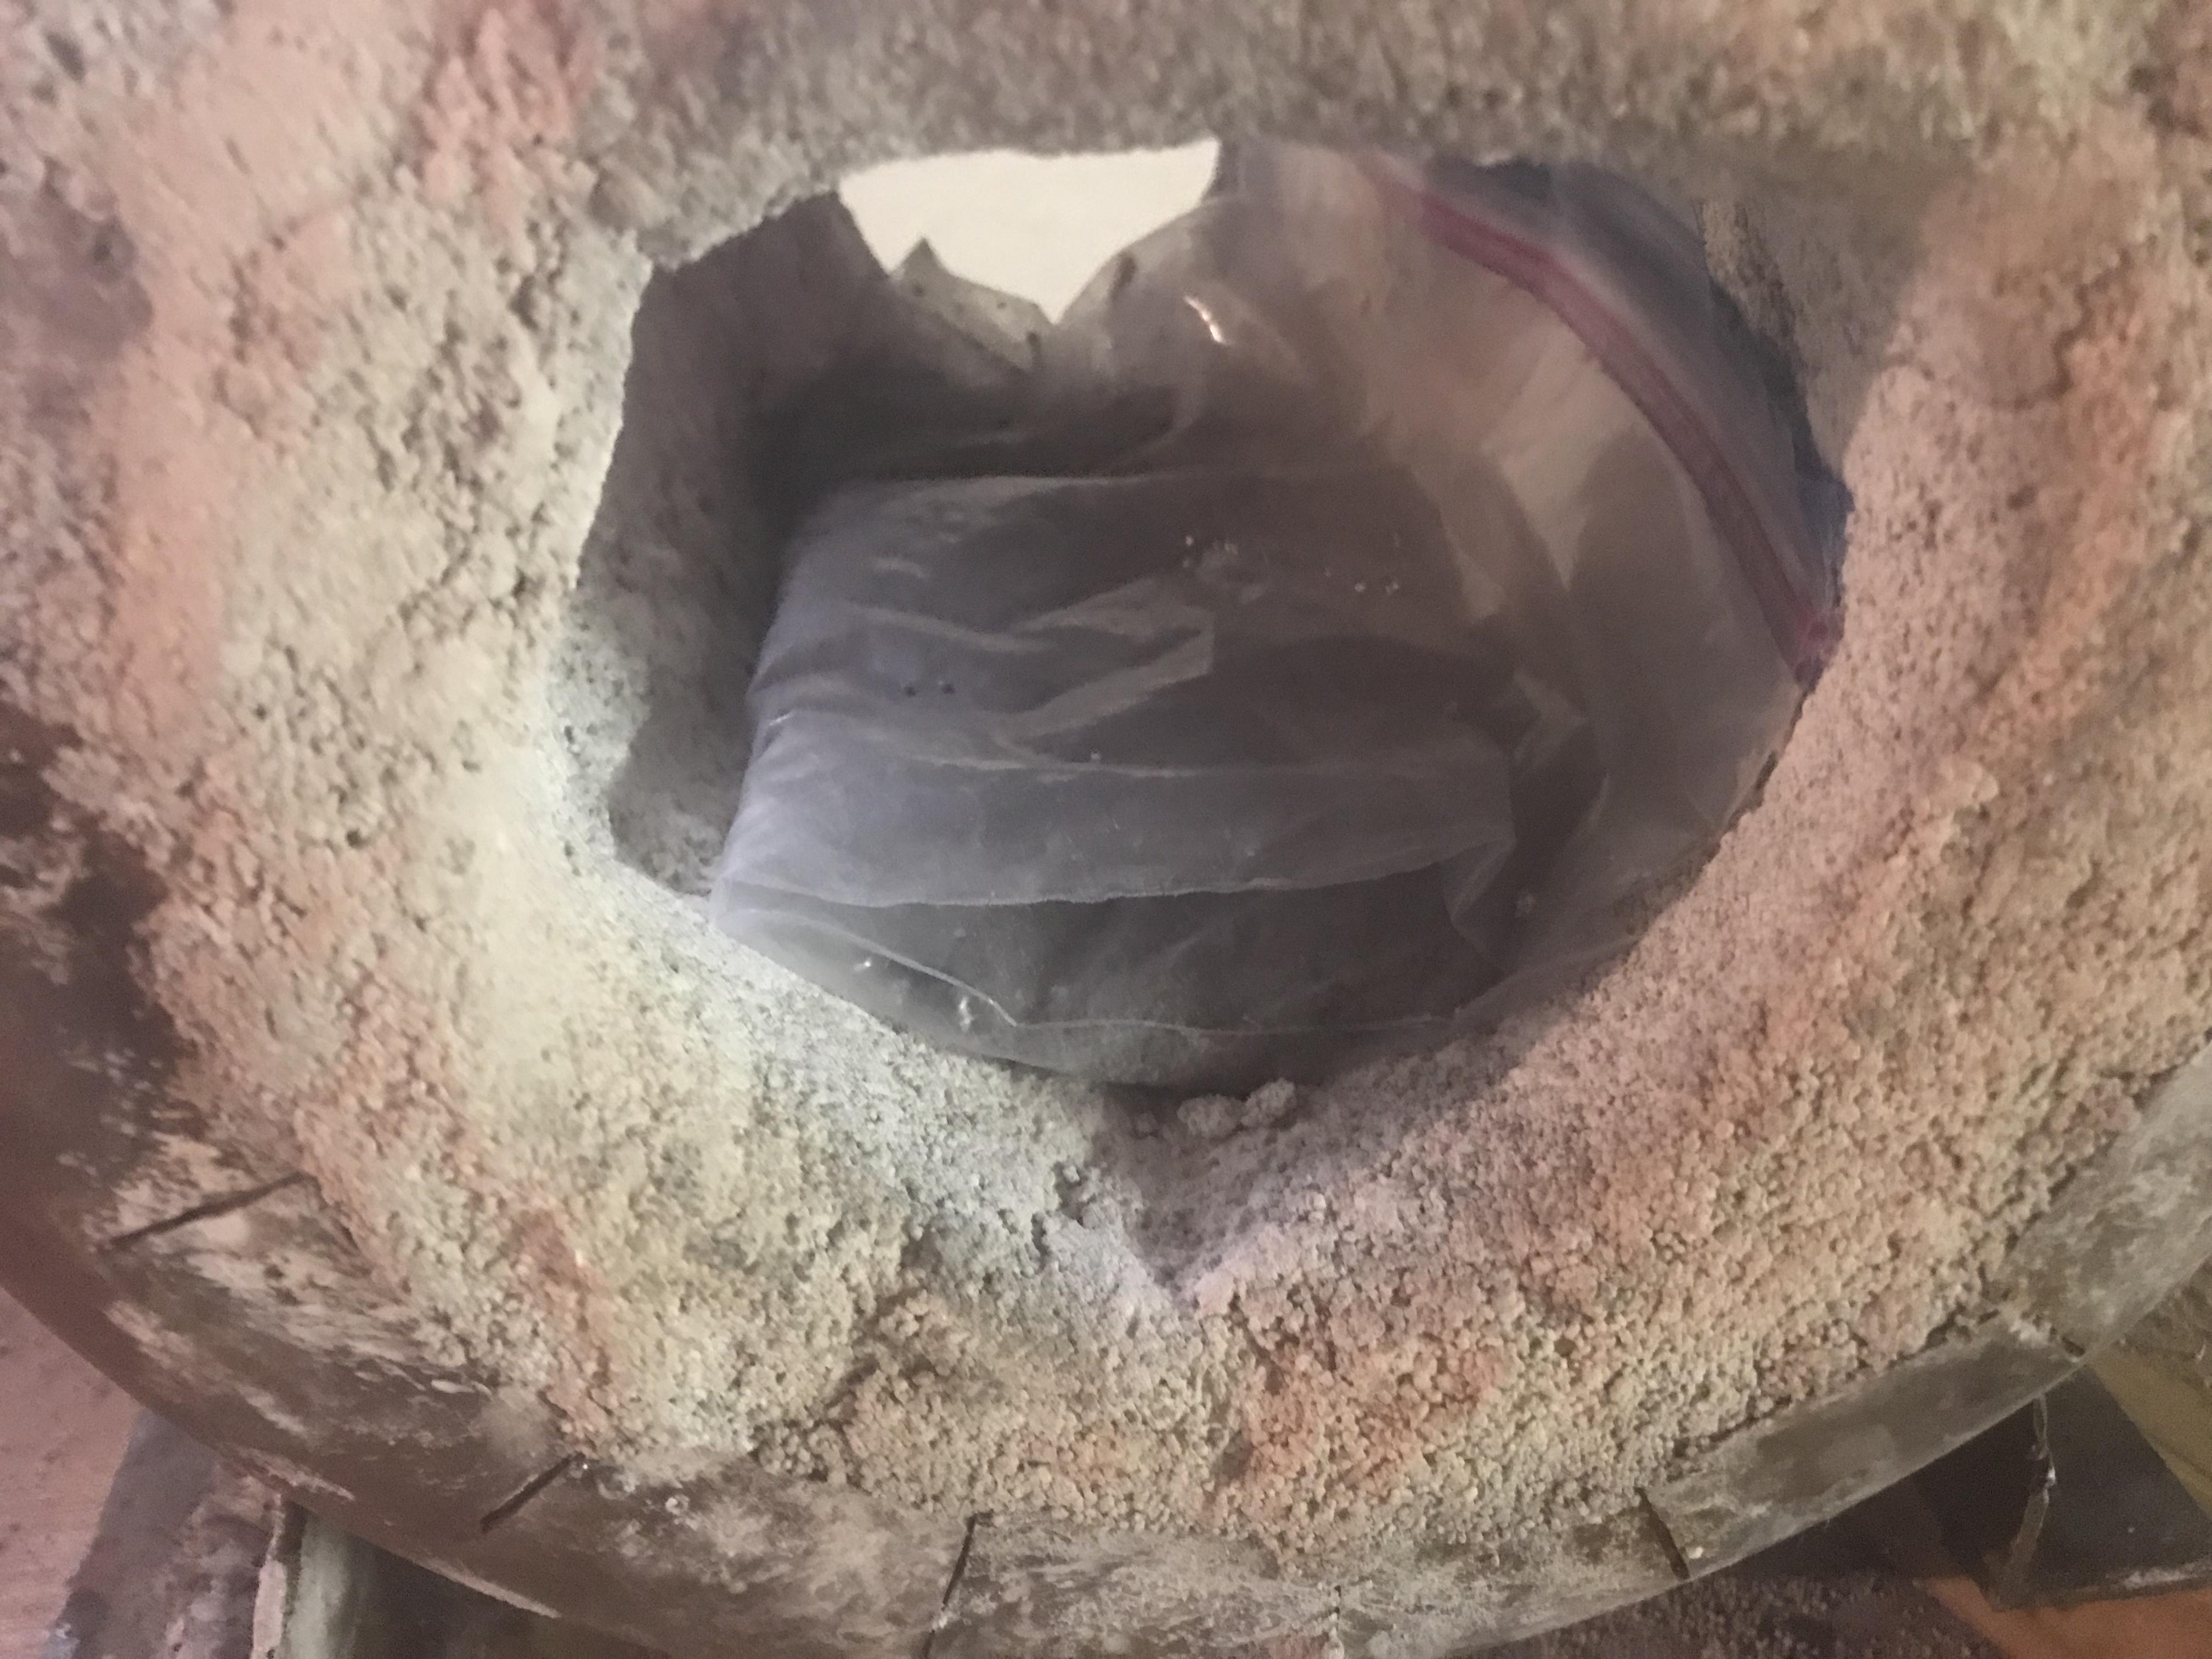
Looking good! (And a good place to hang the Christmas stockings!) I didn’t have any real shop time today, but did grab a minute to try something. I had the idea to make a little Kastolite “tile” as a replaceable floor for the gas forge, so I put a pound and a half of the dry mix in a gallon freezer bag with 4-1/2 oz. of water, kneaded it until mixed, and then plopped it in the bottom of the forge and pressed it into shape. When it’s hardened, I’ll take it out of the bag and fire it in the forge. If it works, I can use it as a consumable protection against welding flux. (Quite possibly a waste of time and material, but a fun experiment nonetheless.)
-
Emerson 1" x 42" Belt Sander / Grinder
JHCC replied to Anachronist58's topic in Grinders, Sanders, etc
"He peered sideways up and gave a long low whistle of call, then paused awhile in rapt attention, his even white teeth glistening here and there with gold points. Chrysostomos. Two strong shrill whistles answered through the calm." -- James Joyce, Ulysses My 2x90 runs off a 1 hp. I've bogged it down once or twice (usually a sign that I'm pushing too hard, need to replace the belt, or both), but even underpowered, it's still great. I imagine that you could get away with something smaller on a 1x42 if you had to. -
I've only used one screw press (in Latticino's shop), but that one had an adjustable depth stop so that you couldn't over-press your workpiece. For example, you could set the minimum distance between a set of fullering dies at 1/4" and fuller down a long section without any risk of squeezing any part of it too thin. This was adjusted with a knob on top around the spindle, but I can't remember if that adjusted the whole screw mechanism up and down, or if it had a movable stop that limited the ram's travel. Either way, it was pretty awesome. Also, welcome to IFI! If you haven't yet, please READ THIS FIRST!!!
-
Emerson 1" x 42" Belt Sander / Grinder
JHCC replied to Anachronist58's topic in Grinders, Sanders, etc
Adding a belt grinder was a revelation. I was going to say I don't know how I got along without one, but I actually do know: Not nearly as well. This is gold. -
Welcome to IFI! If you haven’t yet, please https://www.iforgeiron.com/topic/53873-read-this-first/ Pictures would help. In general, we recommend not trying to fix minor anvil issues, since the “fix” is often worse than the problem.
-
Yes. Frosty’s explanation makes sense.
-
Interesting. I shall keep that in mind next time.
-
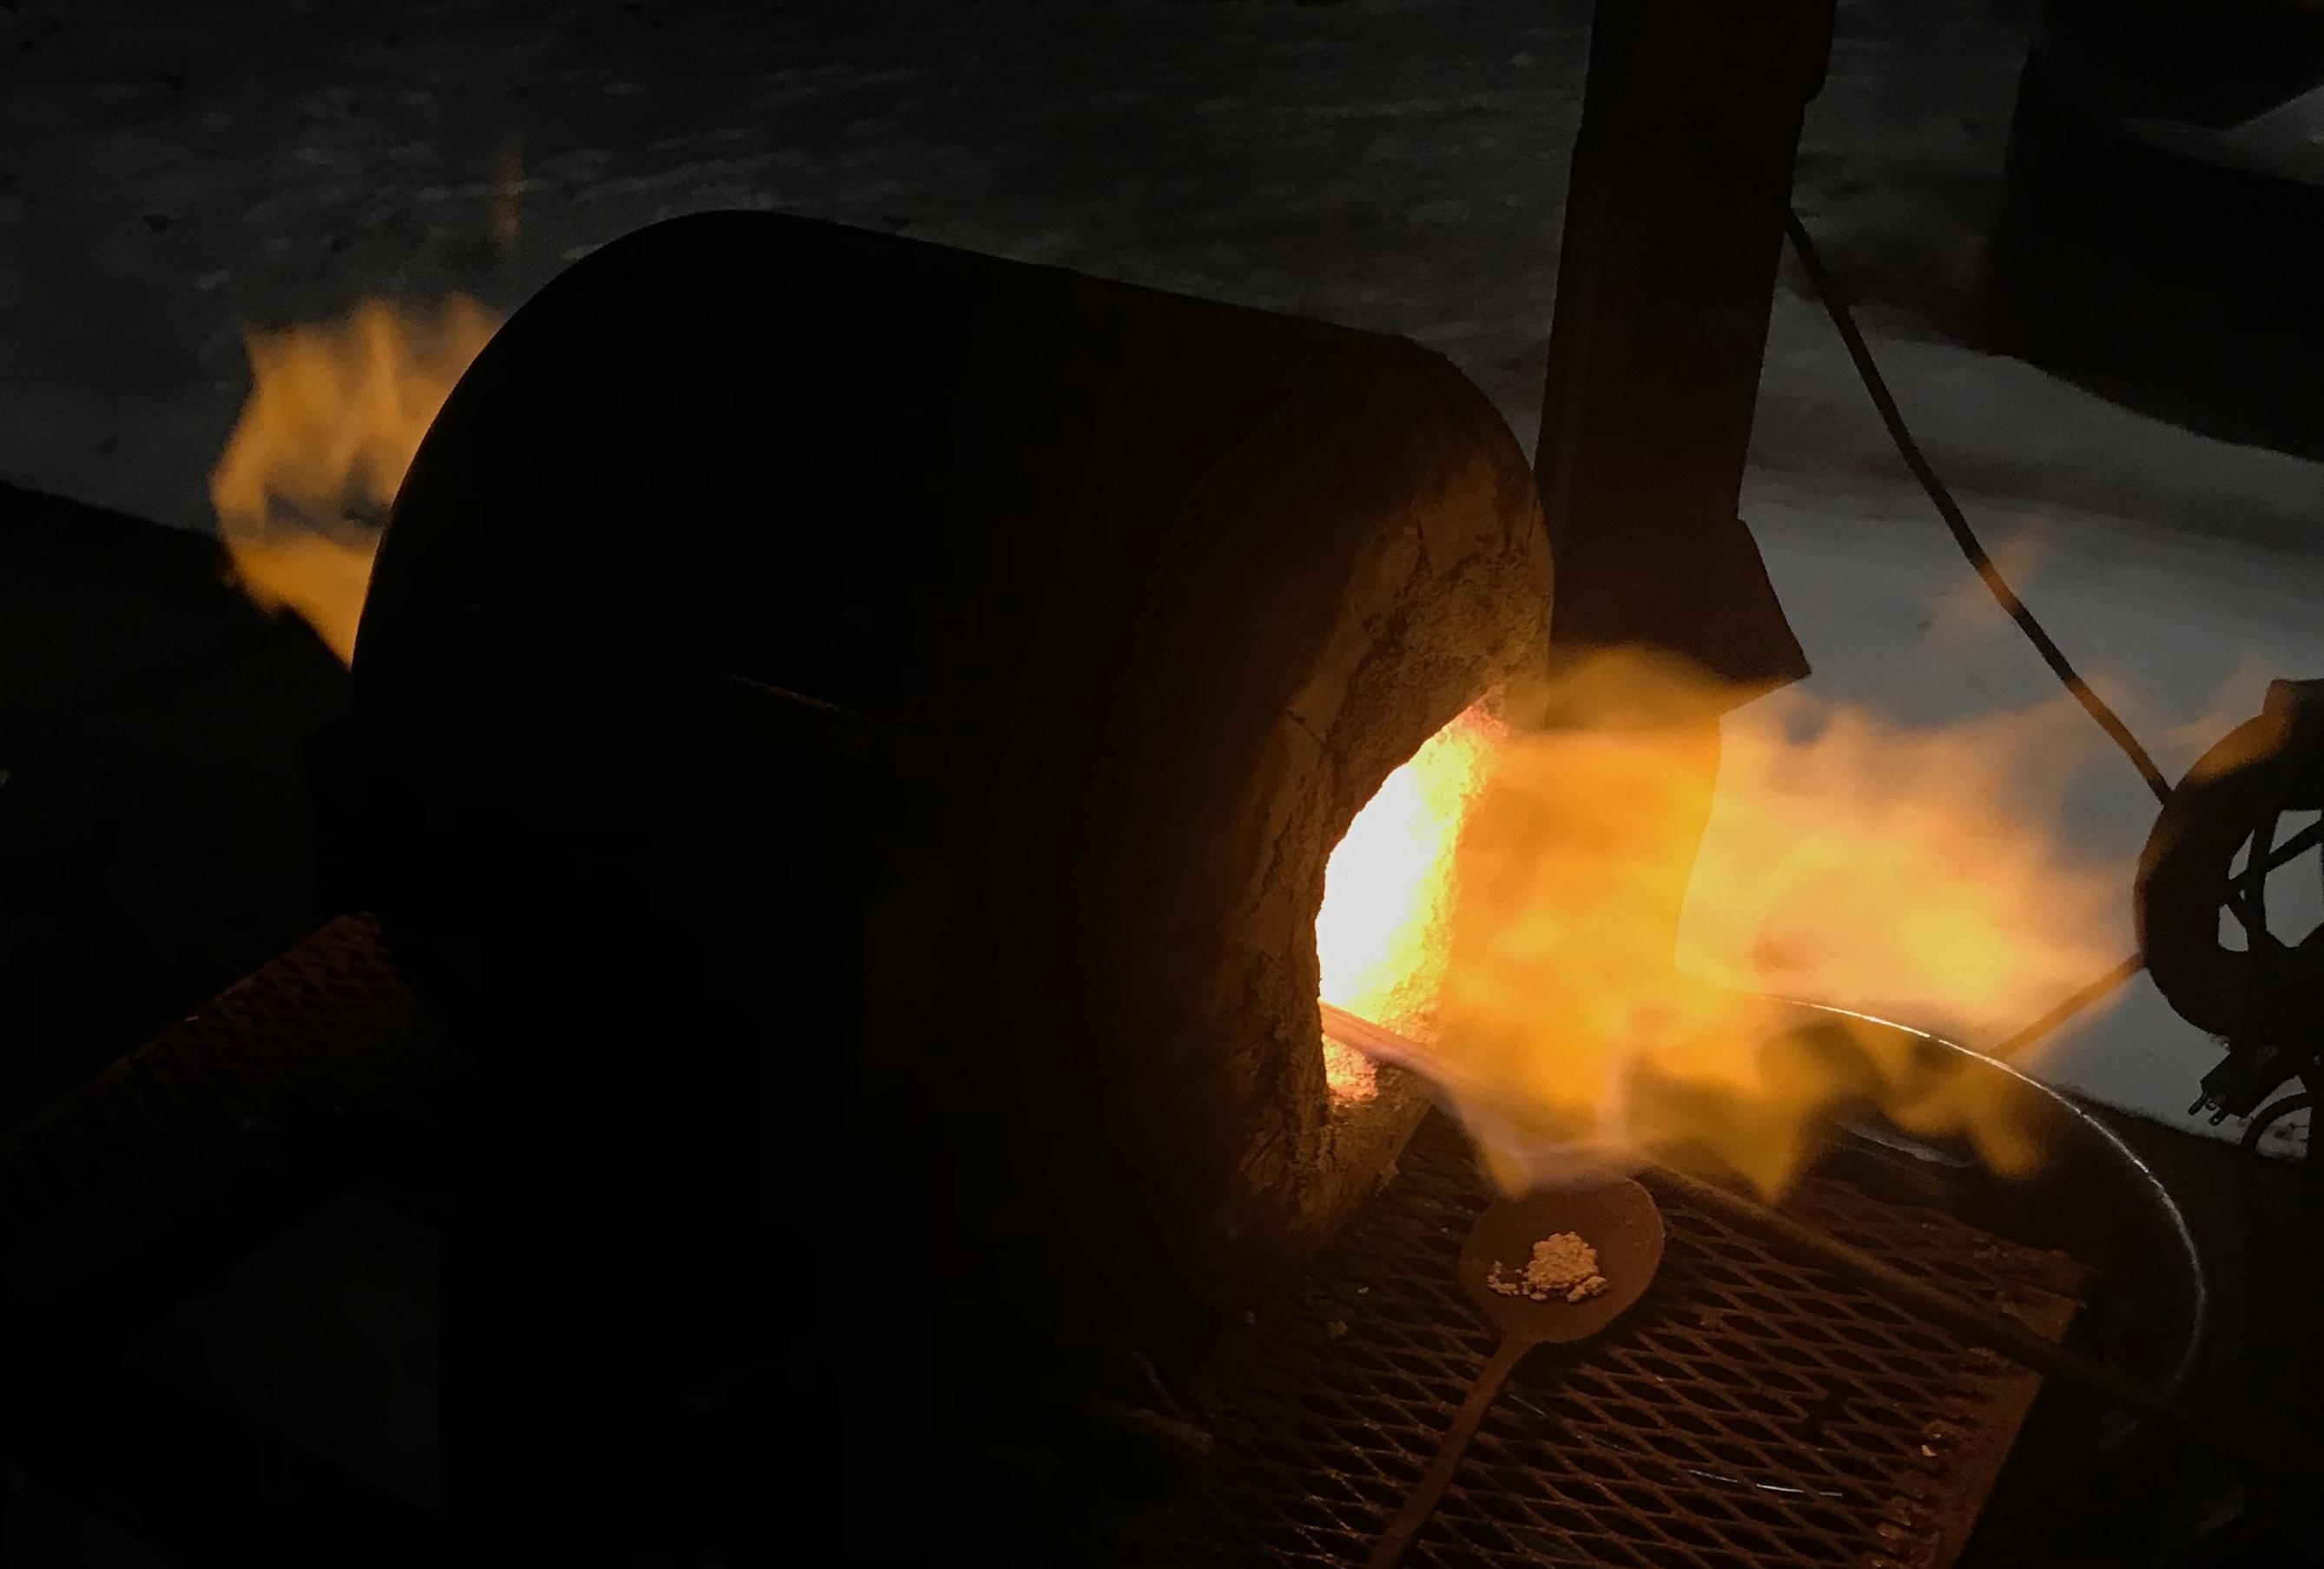
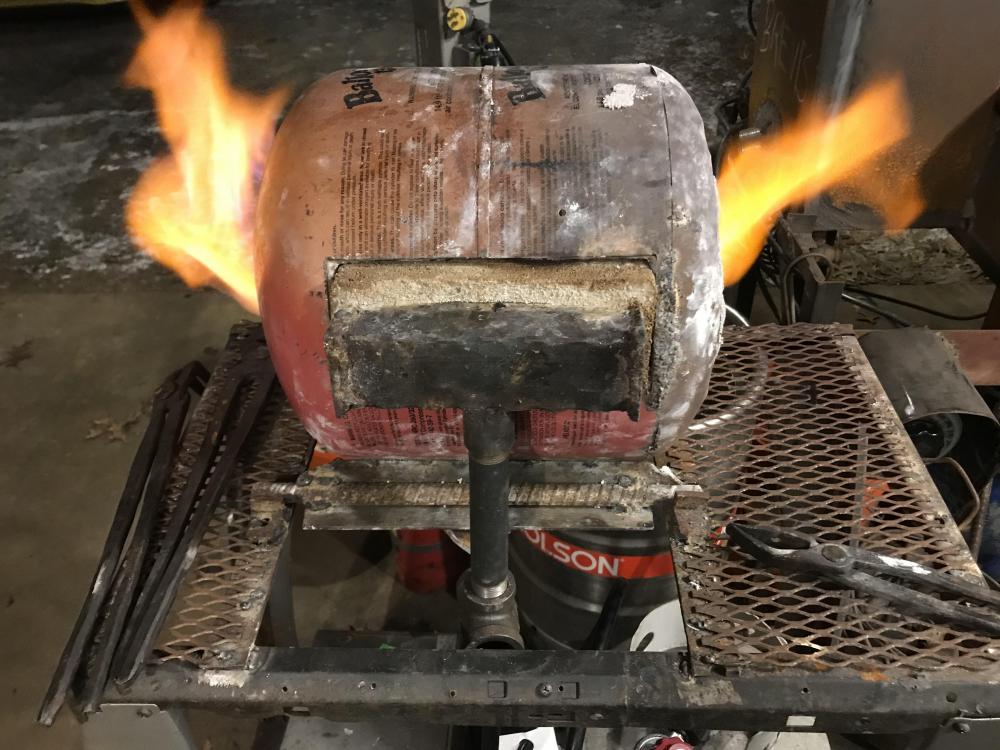
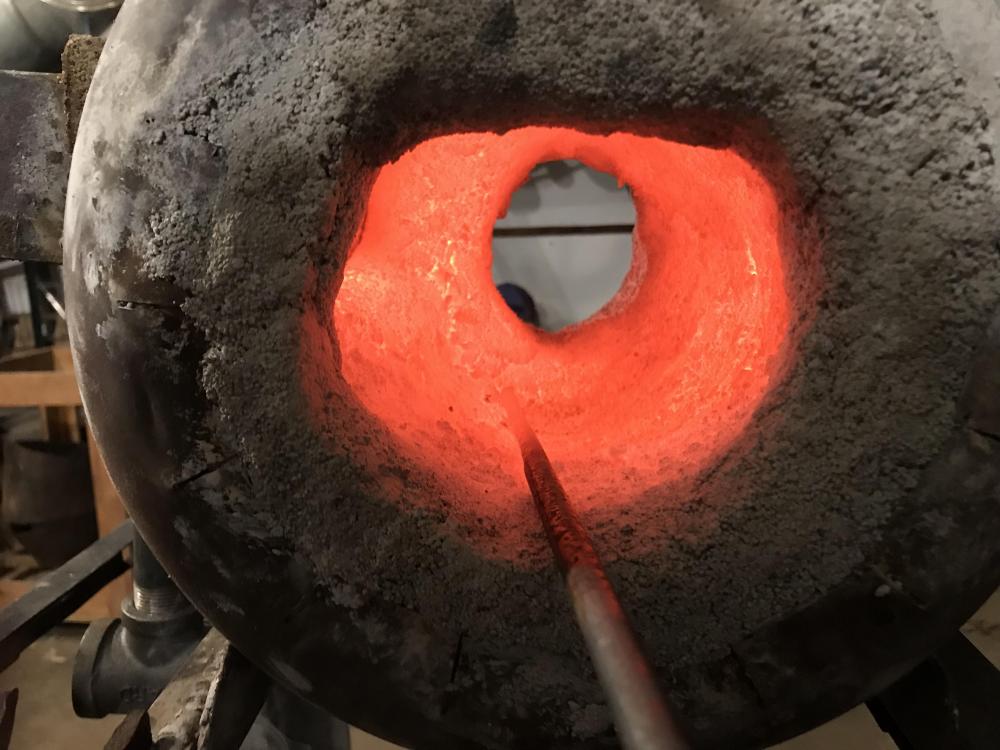
Here are the flames at ~15psi. There was much less of the smoke/vapor around the burner, and none when I shut the burner off.

-
What did you do in the shop today?
JHCC replied to Mark Ling's topic in Blacksmithing, General Discussion
Got the gasser up to ~15psi without significant issues. Did have a few crumbs of Kastolite shedding off the inside surface, but what remains seems solid enough. I took the opportunity to turn four feet of 3/8” round into 1/4” x 7/16” for a project I’ve had in mind. Worked very well, despite my anvil being cold.
-
What did you do in the shop today?
JHCC replied to Mark Ling's topic in Blacksmithing, General Discussion
Looking forward to seeing a photo of them installed. -
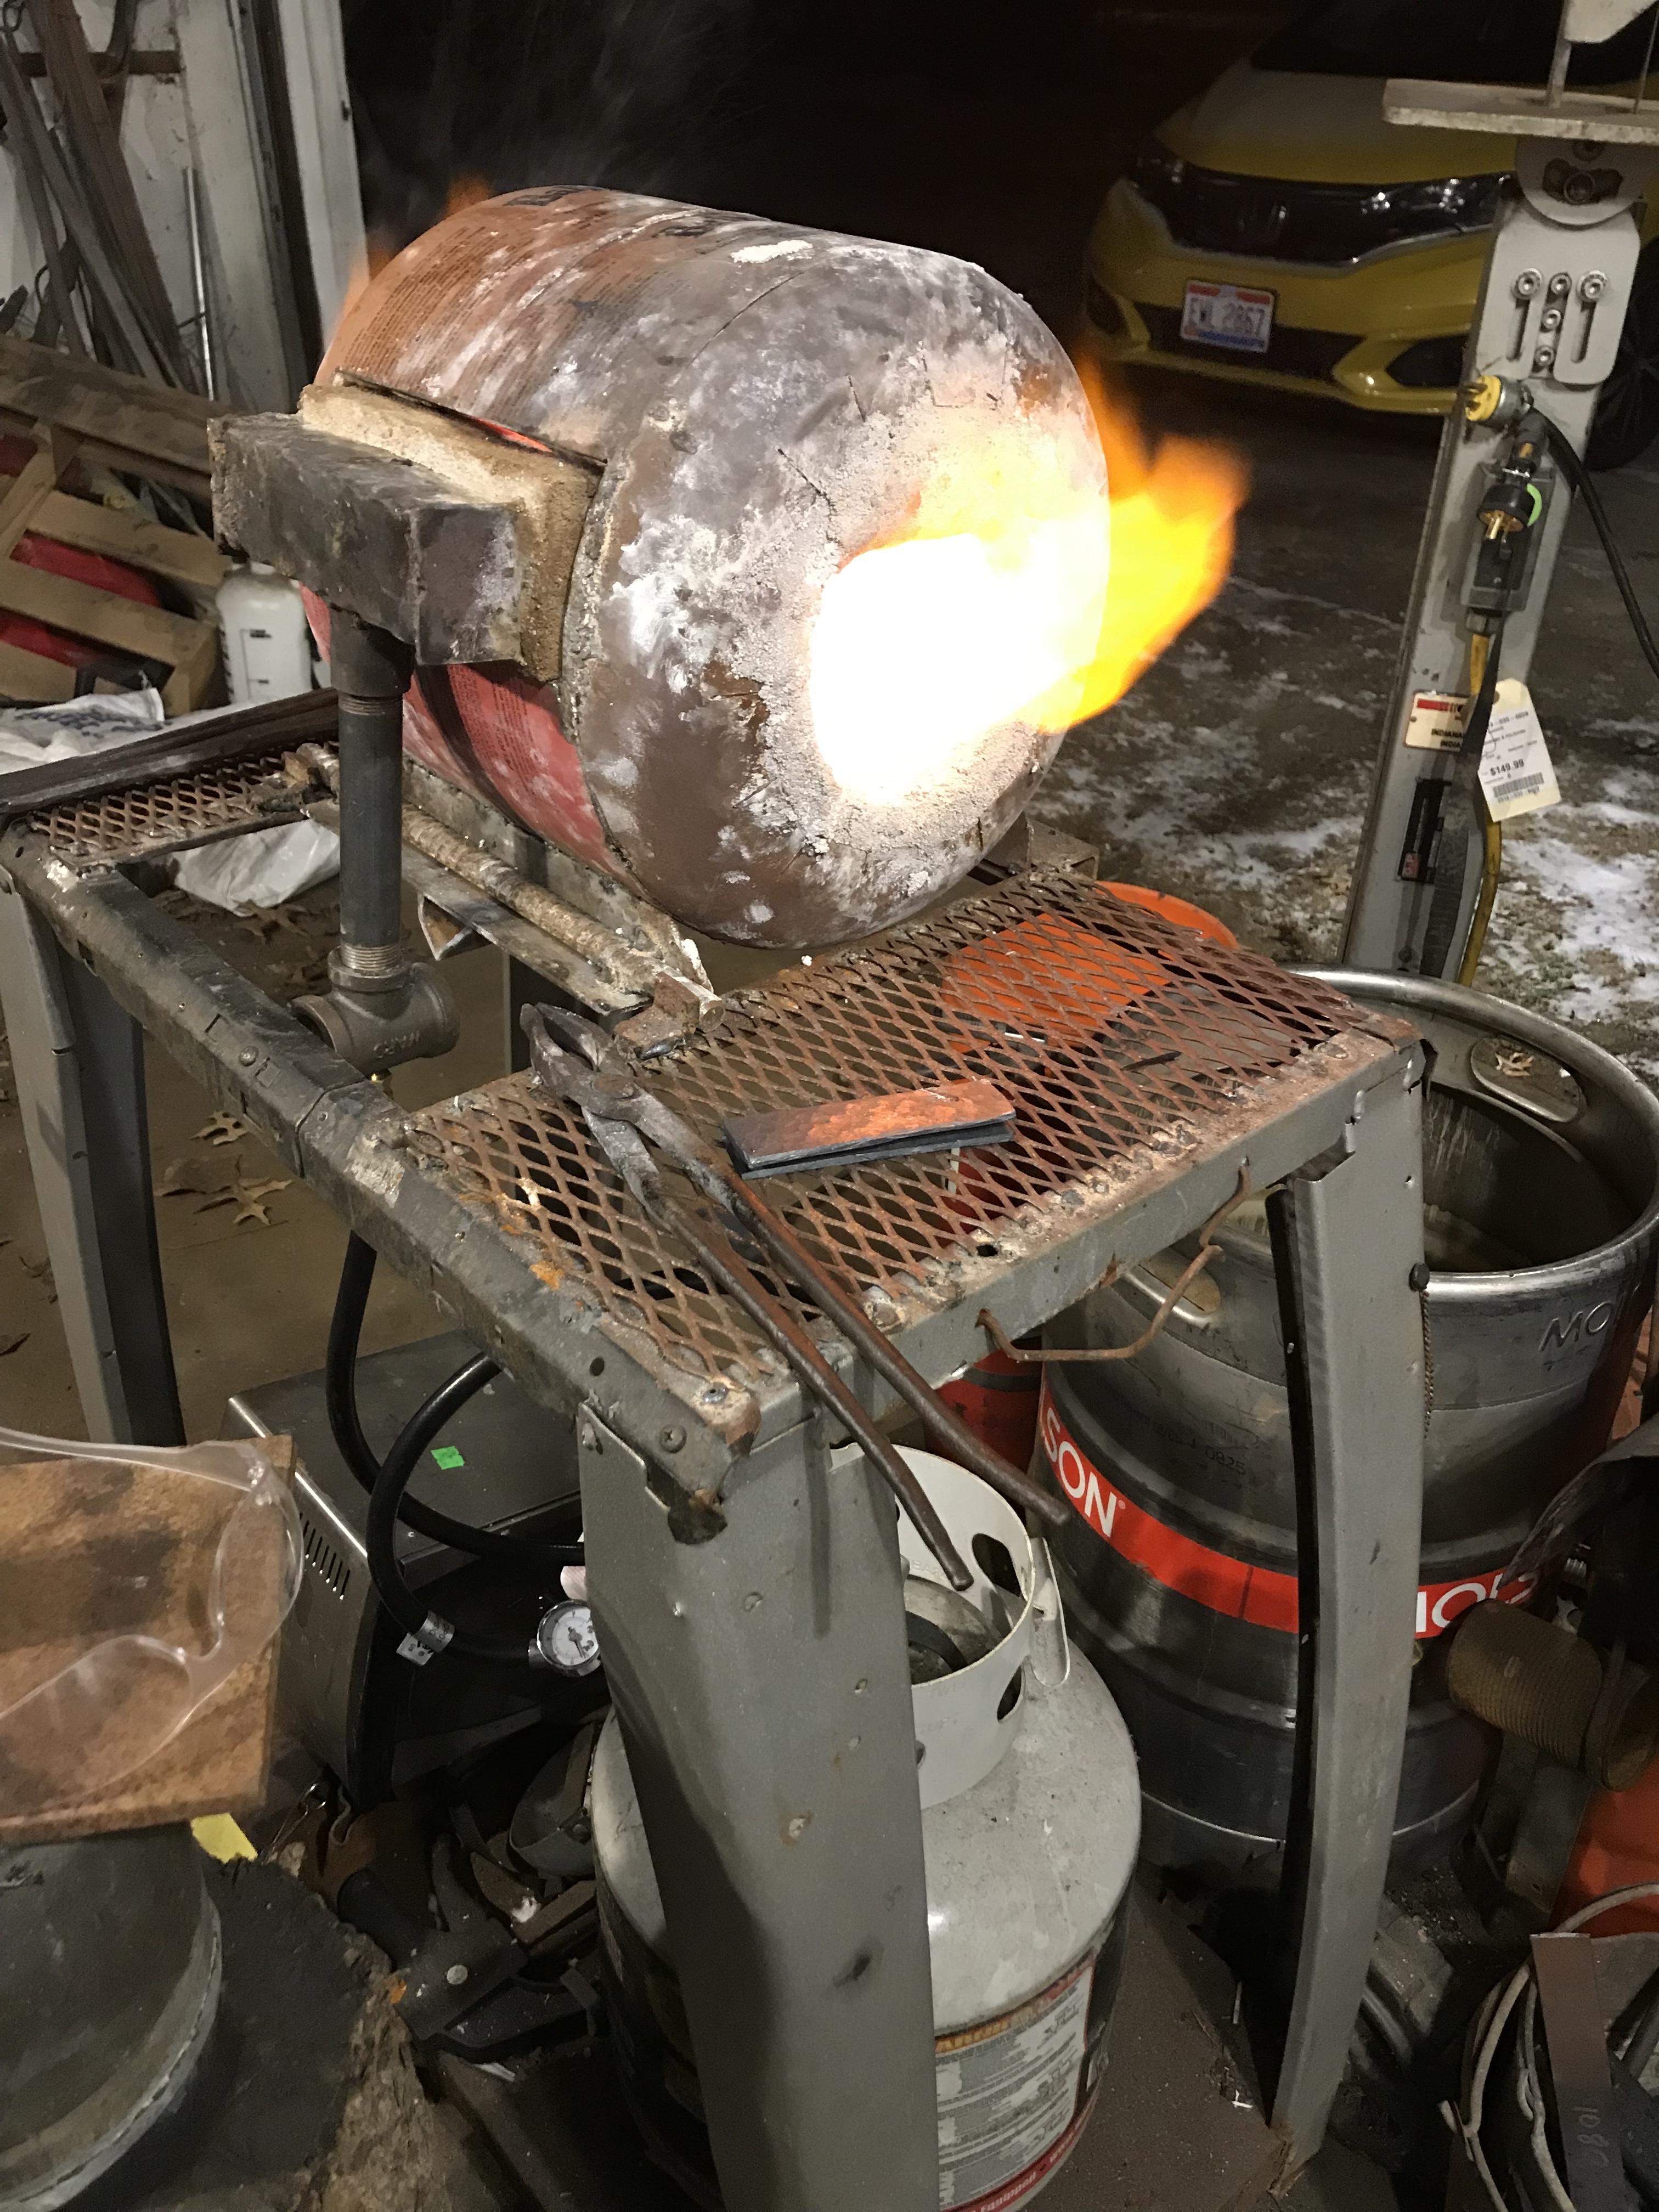
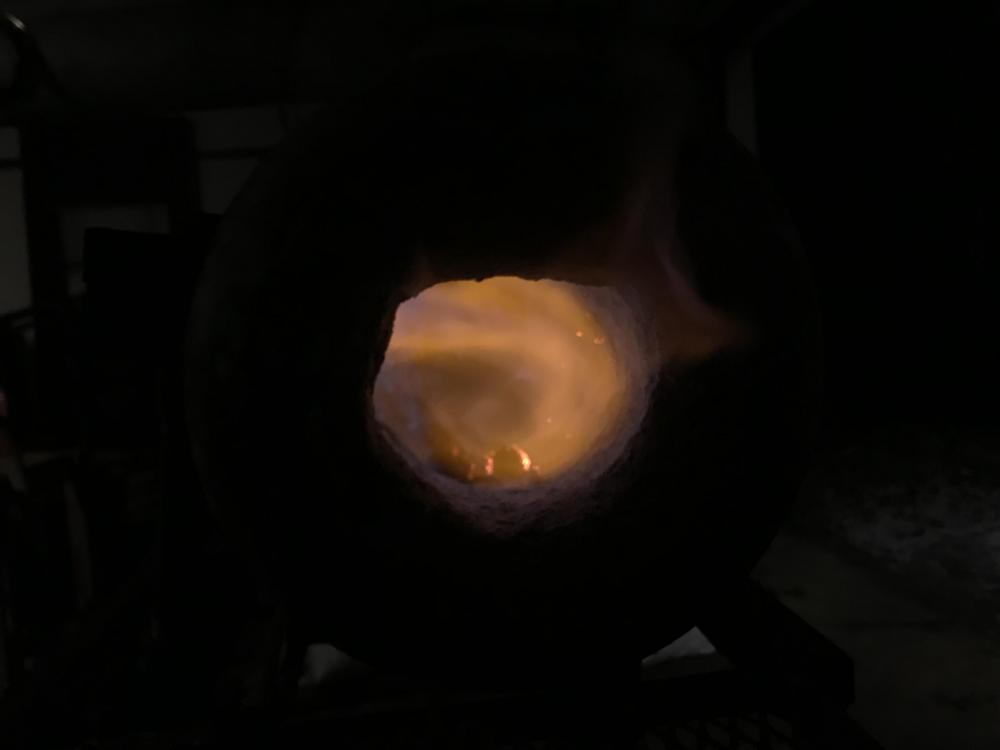
Finally got my forge set up last night for a curing test burn. Note that the T-burner runs vertically down, so the intake is as far from the exhaust as possible. I’ve been getting white smoke coming out of the T after I shut the burner down. I suspect there’s still some bits of crayon inside the plenum that will eventually burn out. And here’s the face of the burner, running about 2 psi. Ended up going up to about 5, but didn’t want to get too hot before the forge’s refractory was properly cured.
-
That’s the Japanese term, yes. Don’t know the Thai term.
-
What did you do in the shop today?
JHCC replied to Mark Ling's topic in Blacksmithing, General Discussion
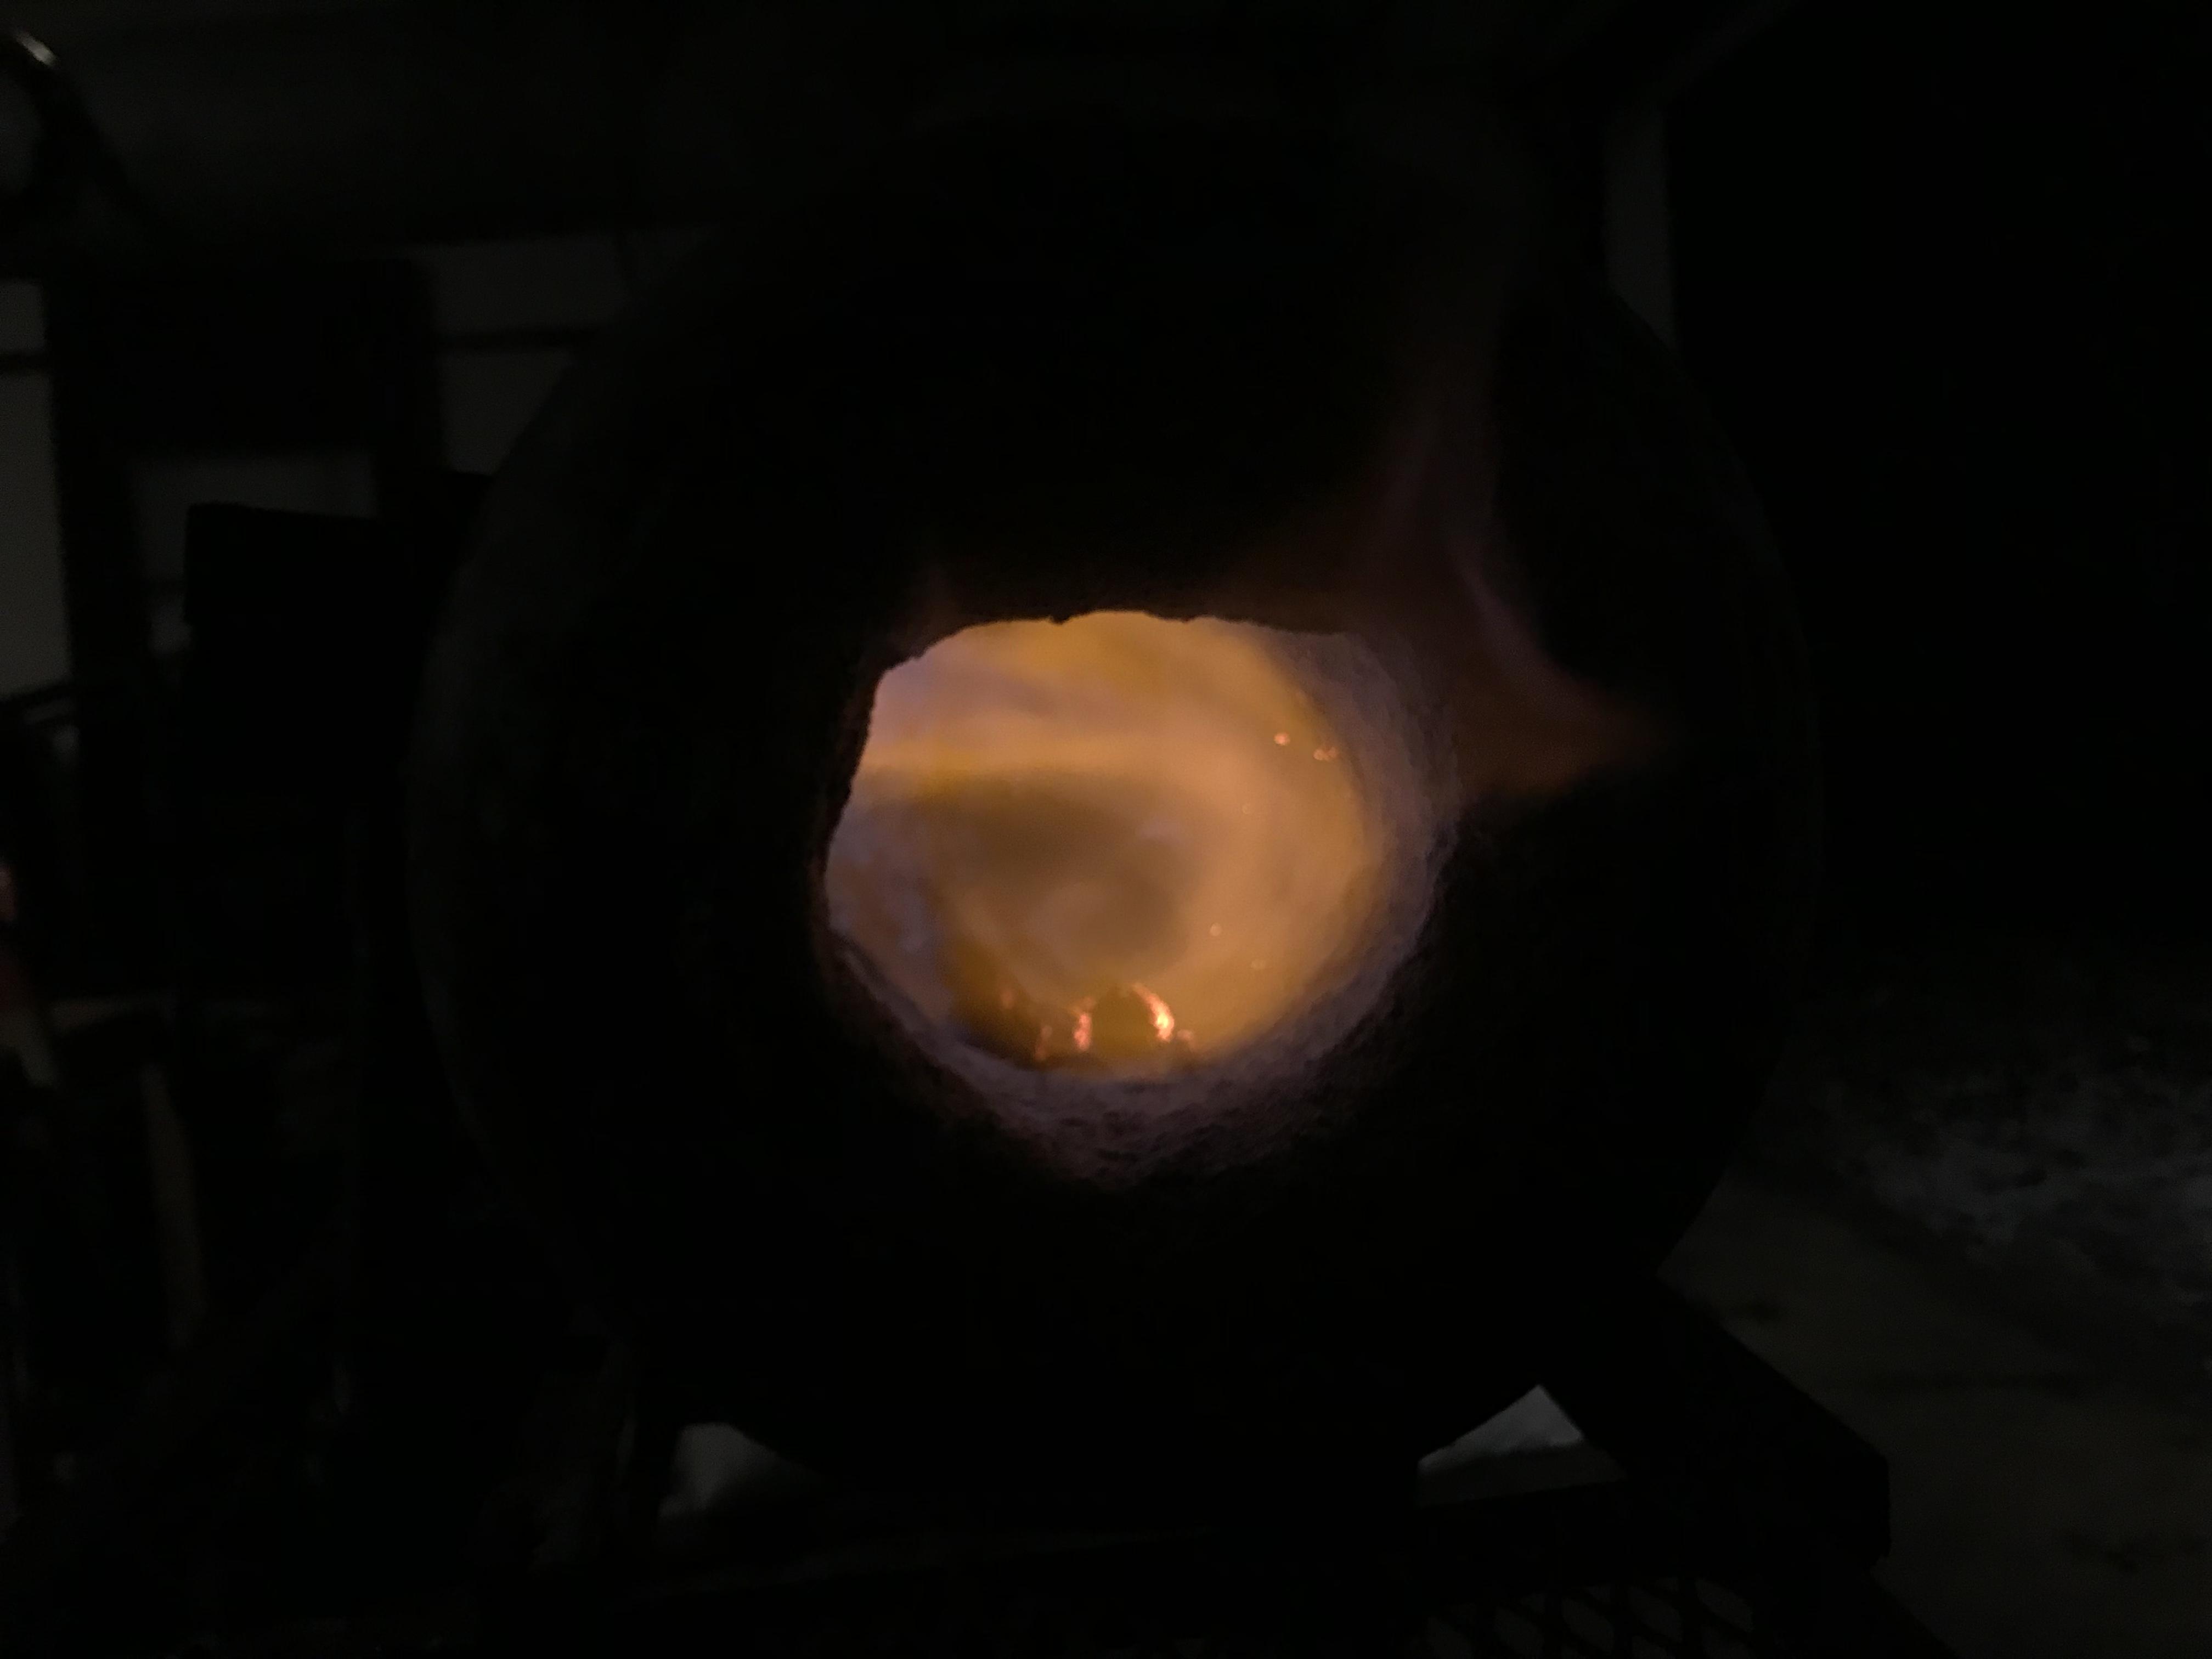
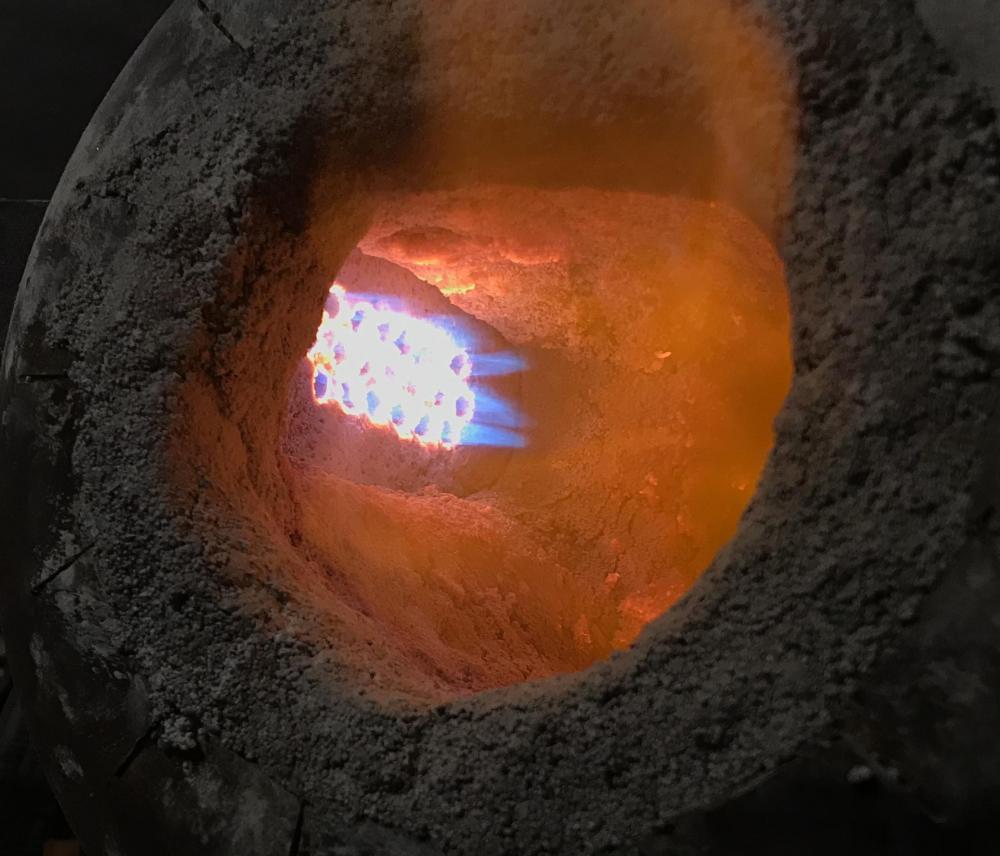
Definitely check out the tack shop. They may even have someone who can talk you through the best product. As for me, I test-fired the gasser! I only ran it for about half an hour, because I don’t want to rush it before the Kastolite is completely cured. Very happy so far, though. (A bit surprised that there’s more flame coming out the back than from the front.) I don’t know how well you can see it in this photo, but there were wisps of white vapor coming from around the ribbon burner block. And when I shut off the forge, a lot of white smoke came out of the T. I suspect that there may have been a little moisture cooking out of the refractory, but that most of this is from wax residue inside the plenum and Crisco on the outside of the block. Afterglow: Had a nice swirl in the flame: I will probably need to tune the burner a bit more, but for now, things look good. Addendum: for this first curing fire, I tried to keep the flame as low as possible. Started out at about 2 psi and went up to about 4 when it warmed up enough to backfire. No problems after that.


-
What did you do in the shop today?
JHCC replied to Mark Ling's topic in Blacksmithing, General Discussion
Clean off the mold with equal parts water and rubbing alcohol, dry thoroughly, repeat as needed, and then apply a leather conditioning treatment.