

Steve Sells
-
Posts
9,174 -
Joined
-
Last visited
12 Followers


.thumb.jpg.82c551d82d1c08398cf09695b4169412.jpg)


About Steve Sells
Recent Profile Visitors


-

Fusion 10 quench oil-has anyone used?
Steve Sells replied to ILoveSteel's topic in Heat Treating, general discussion
it compares to an 11 sec quenching what means tit cools to below the hardening temp in less than 11 seconds -
Fusion 10 quench oil-has anyone used?
Steve Sells replied to ILoveSteel's topic in Heat Treating, general discussion
try this https://fusion-chemical.com/wp-content/uploads/2022/04/Fusion-10-Curves.pdf -
Yes I didnt go into it much more than I posted here, its just a way to get started for those interested
-
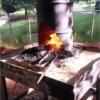
wootz IS a crucible steel after all try this taken from my second book A ratio of roughly 1 part white cast iron to 3 parts 5160 should suffice, exact amounts are dependent on the carbon content of the steel and cast iron used. Materials needed A6 graphite crucible 4.5 Lbs 5160 1.5 Lbs white cast iron Broken glass for a crucible cover Heat source Preparation It is important to know the carbon content of the cast iron you are going to use. We already know the base metal of 5160 is at roughly 0.6%. Weigh out the amount of 5160 and adjust the amount of cast iron to come up with a final total of around 1.5% carbon. Being a little off will not be a problem. Place the charge into the graphite crucible and cap with a covering of the broken glass. Furnace temperatures will take 60 to 90 minutes to reach above 2700°F (1500°C). Then allow 15 minutes to rest at temperature before placing in hot box to cool slowly to room temperature. Upon removal from the crucible, if the color of the Wootz puck has a very brassy appearance, it could indicate that the carbon content is too high. Any over-carburizing of the ingot from the crucible will turn the steel into cast iron. Now it is ready to be worked into a blade. Thermal cycling appears to be as much responsible for the final pattern as the contents of the recipe.
-
or cast iron (white iron is nice) and 5160 for the carbide formers,
-
Glenn’s Memorial Bouquet
Steve Sells replied to Irondragon Forge ClayWorks's topic in Blacksmithing, General Discussion
Yes send anything you can, else I will have to spends a while making things to full it out myself. and I am working 6-7 days a week right now -
JLP Blacksmith Teaching Center.
Steve Sells replied to jlpservicesinc's topic in Building, Designing a Shop
I braised (cheapo cad-weld) the junctions of the 5/8 rebar in my main floor and electrically bonded it, and laid over that the 4 inch mesh, It looks like Jen went above the basic code requirements as well, it should be very nice when finished many years of no hassle use -
that is the electrical transformer, it should not smoke, and the so called fins are coils of wire
-
please PLEASE do not send memorial packages to me that require a signature, I got a note from postman that I need to come to the post office to sign for a package for Glenn's memorial, but I dont get home in time normally to go there before they close, leaving the package in limbo until I can find someone to go and pick it up for me, unless they require ID from me, then I dont know what I will do to get it. I have an enclosed porch they leave thing on for me out of the weather and prying eyes of any porch pirates,
-
I cheated to avoid that problem, mine is brick
-
a few of us have tried to help, and you dont want to listen. You were told to not remove the oxide layer as that is what you are creating intentionally to show a pattern, you insist on removing it then complain when its gone. So no more kicking this horse this thread is closed
-
Glenn’s Memorial Bouquet
Steve Sells replied to Irondragon Forge ClayWorks's topic in Blacksmithing, General Discussion
so am I :( -
do not grind after etching
-
I hand rub it with my fingers to remove excess etchant, that is all
-
I etch AFTER all sanding. just neutralize and oil after etching, Else you are sanding away the etch You need to give us more info, what steels are being used? what chemical strength for etching