ILoveSteel
Members
-
Joined
-
Last visited
-
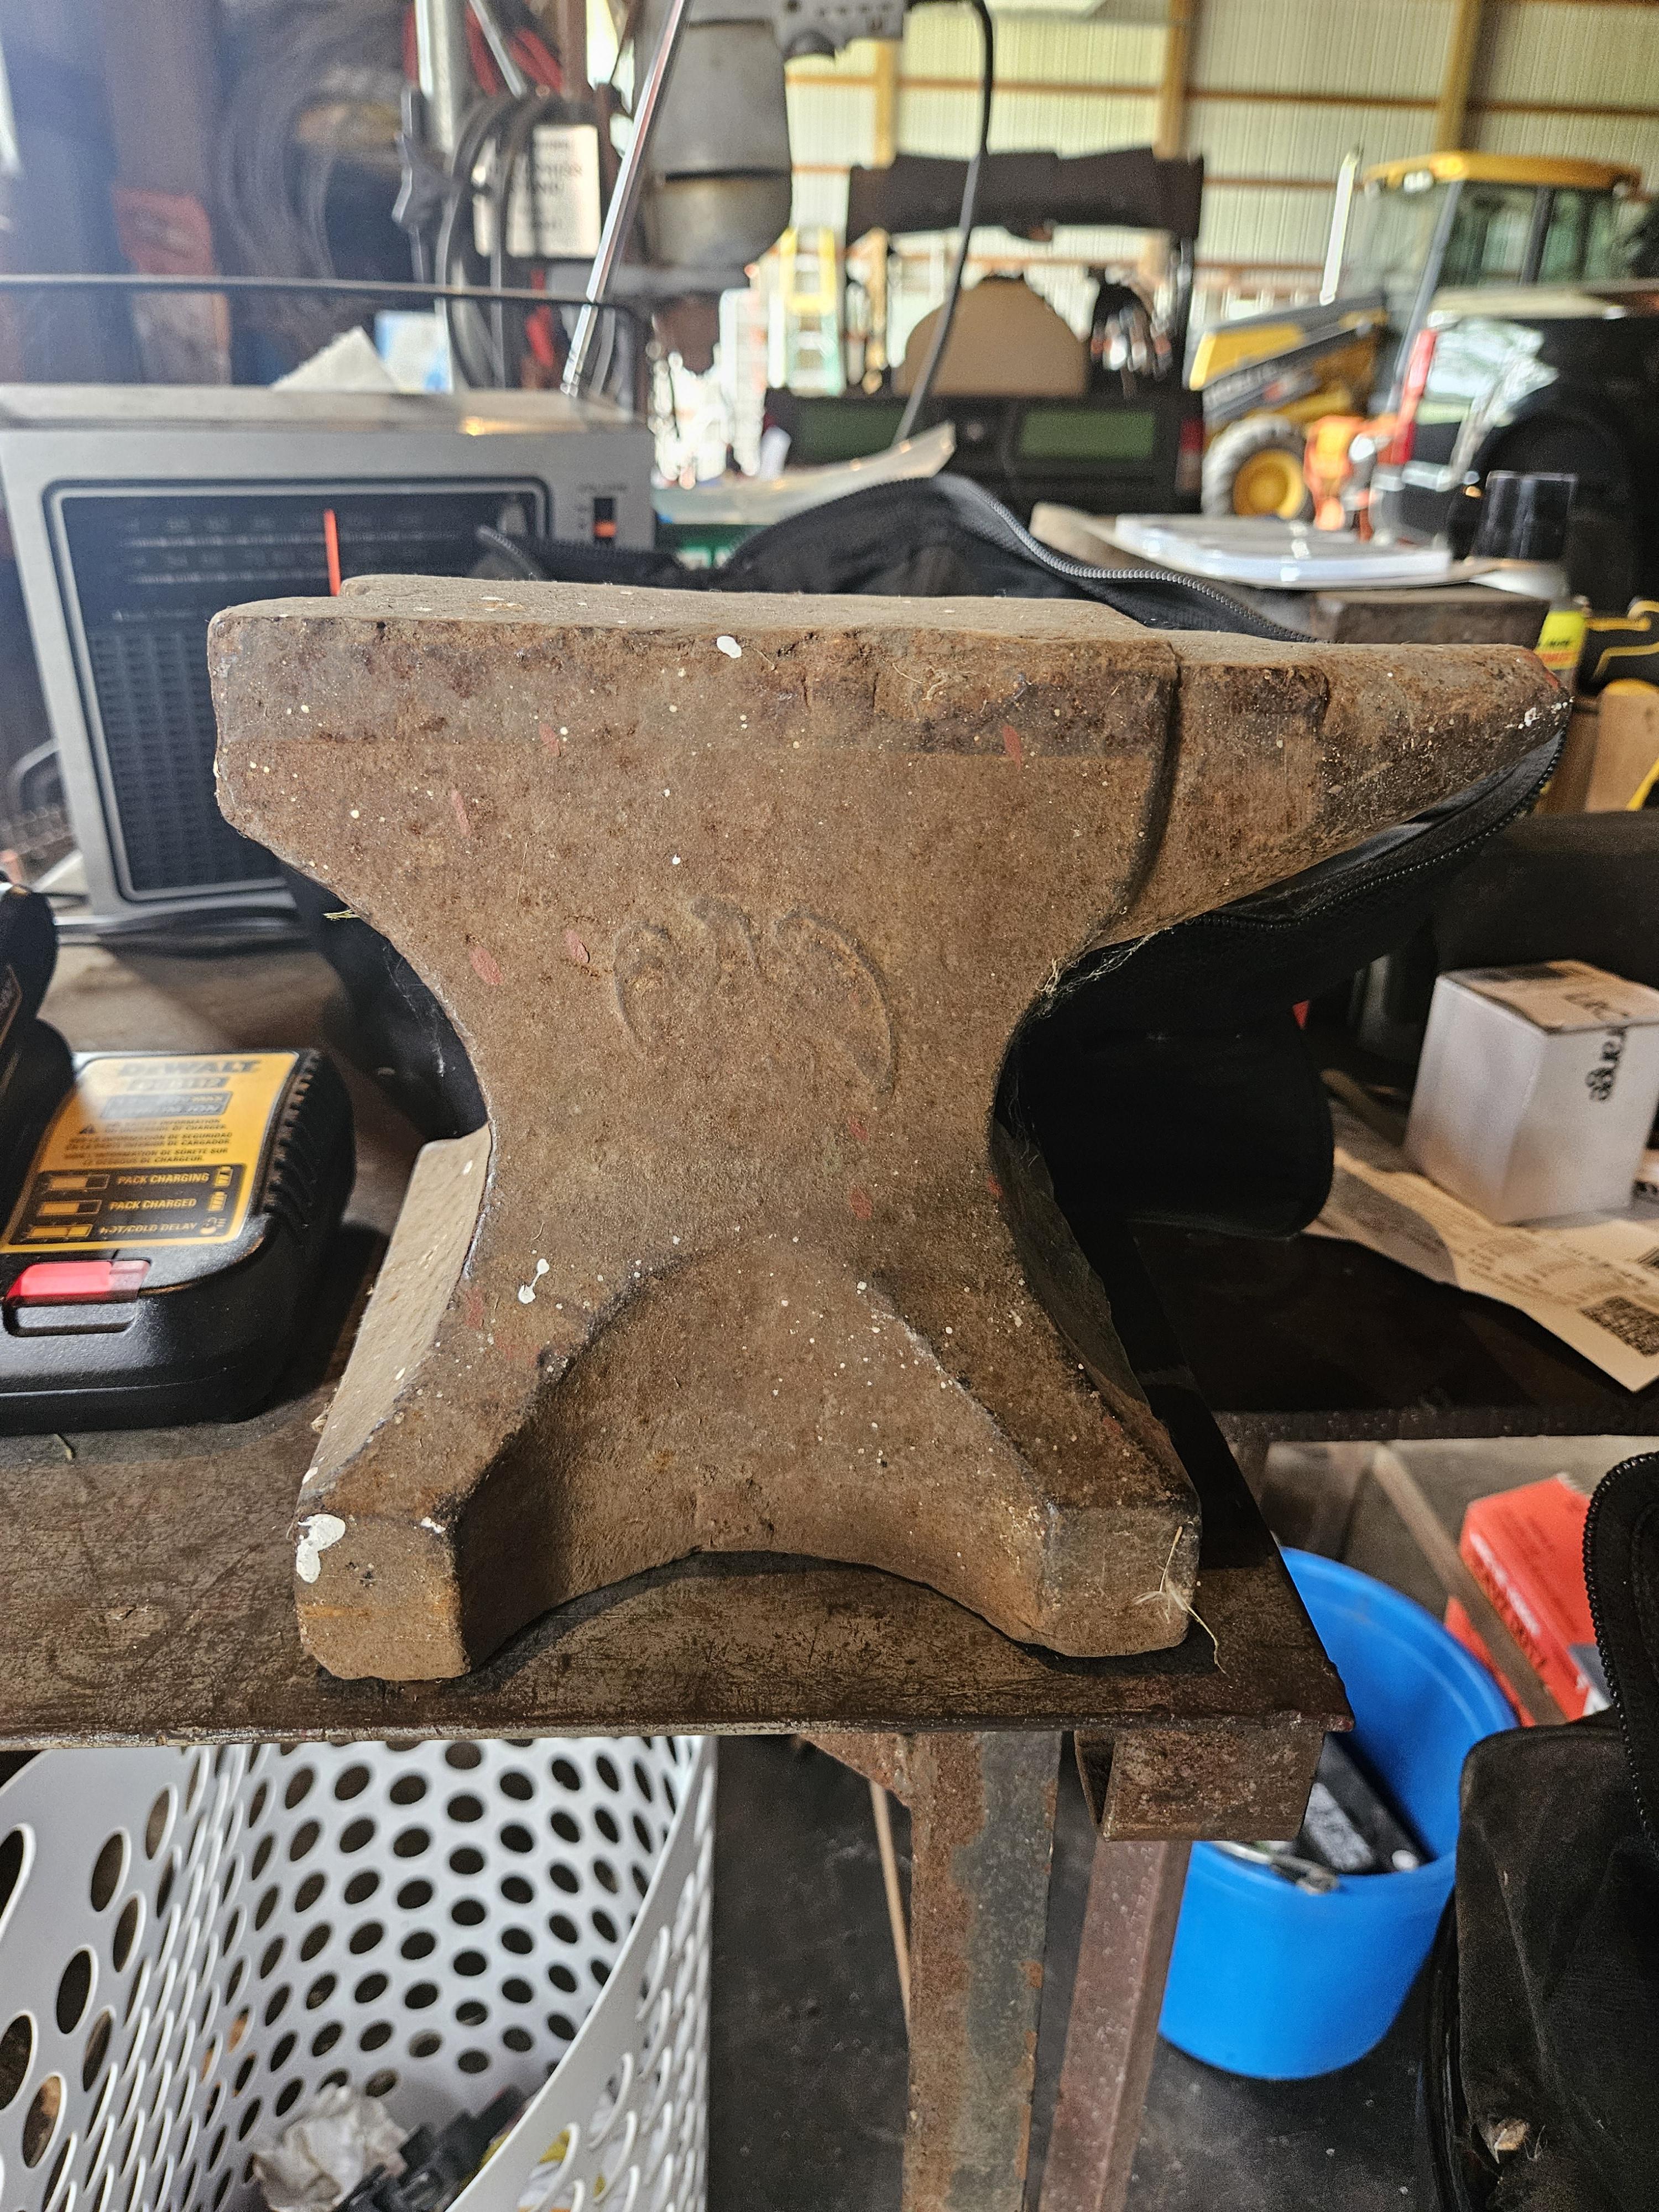
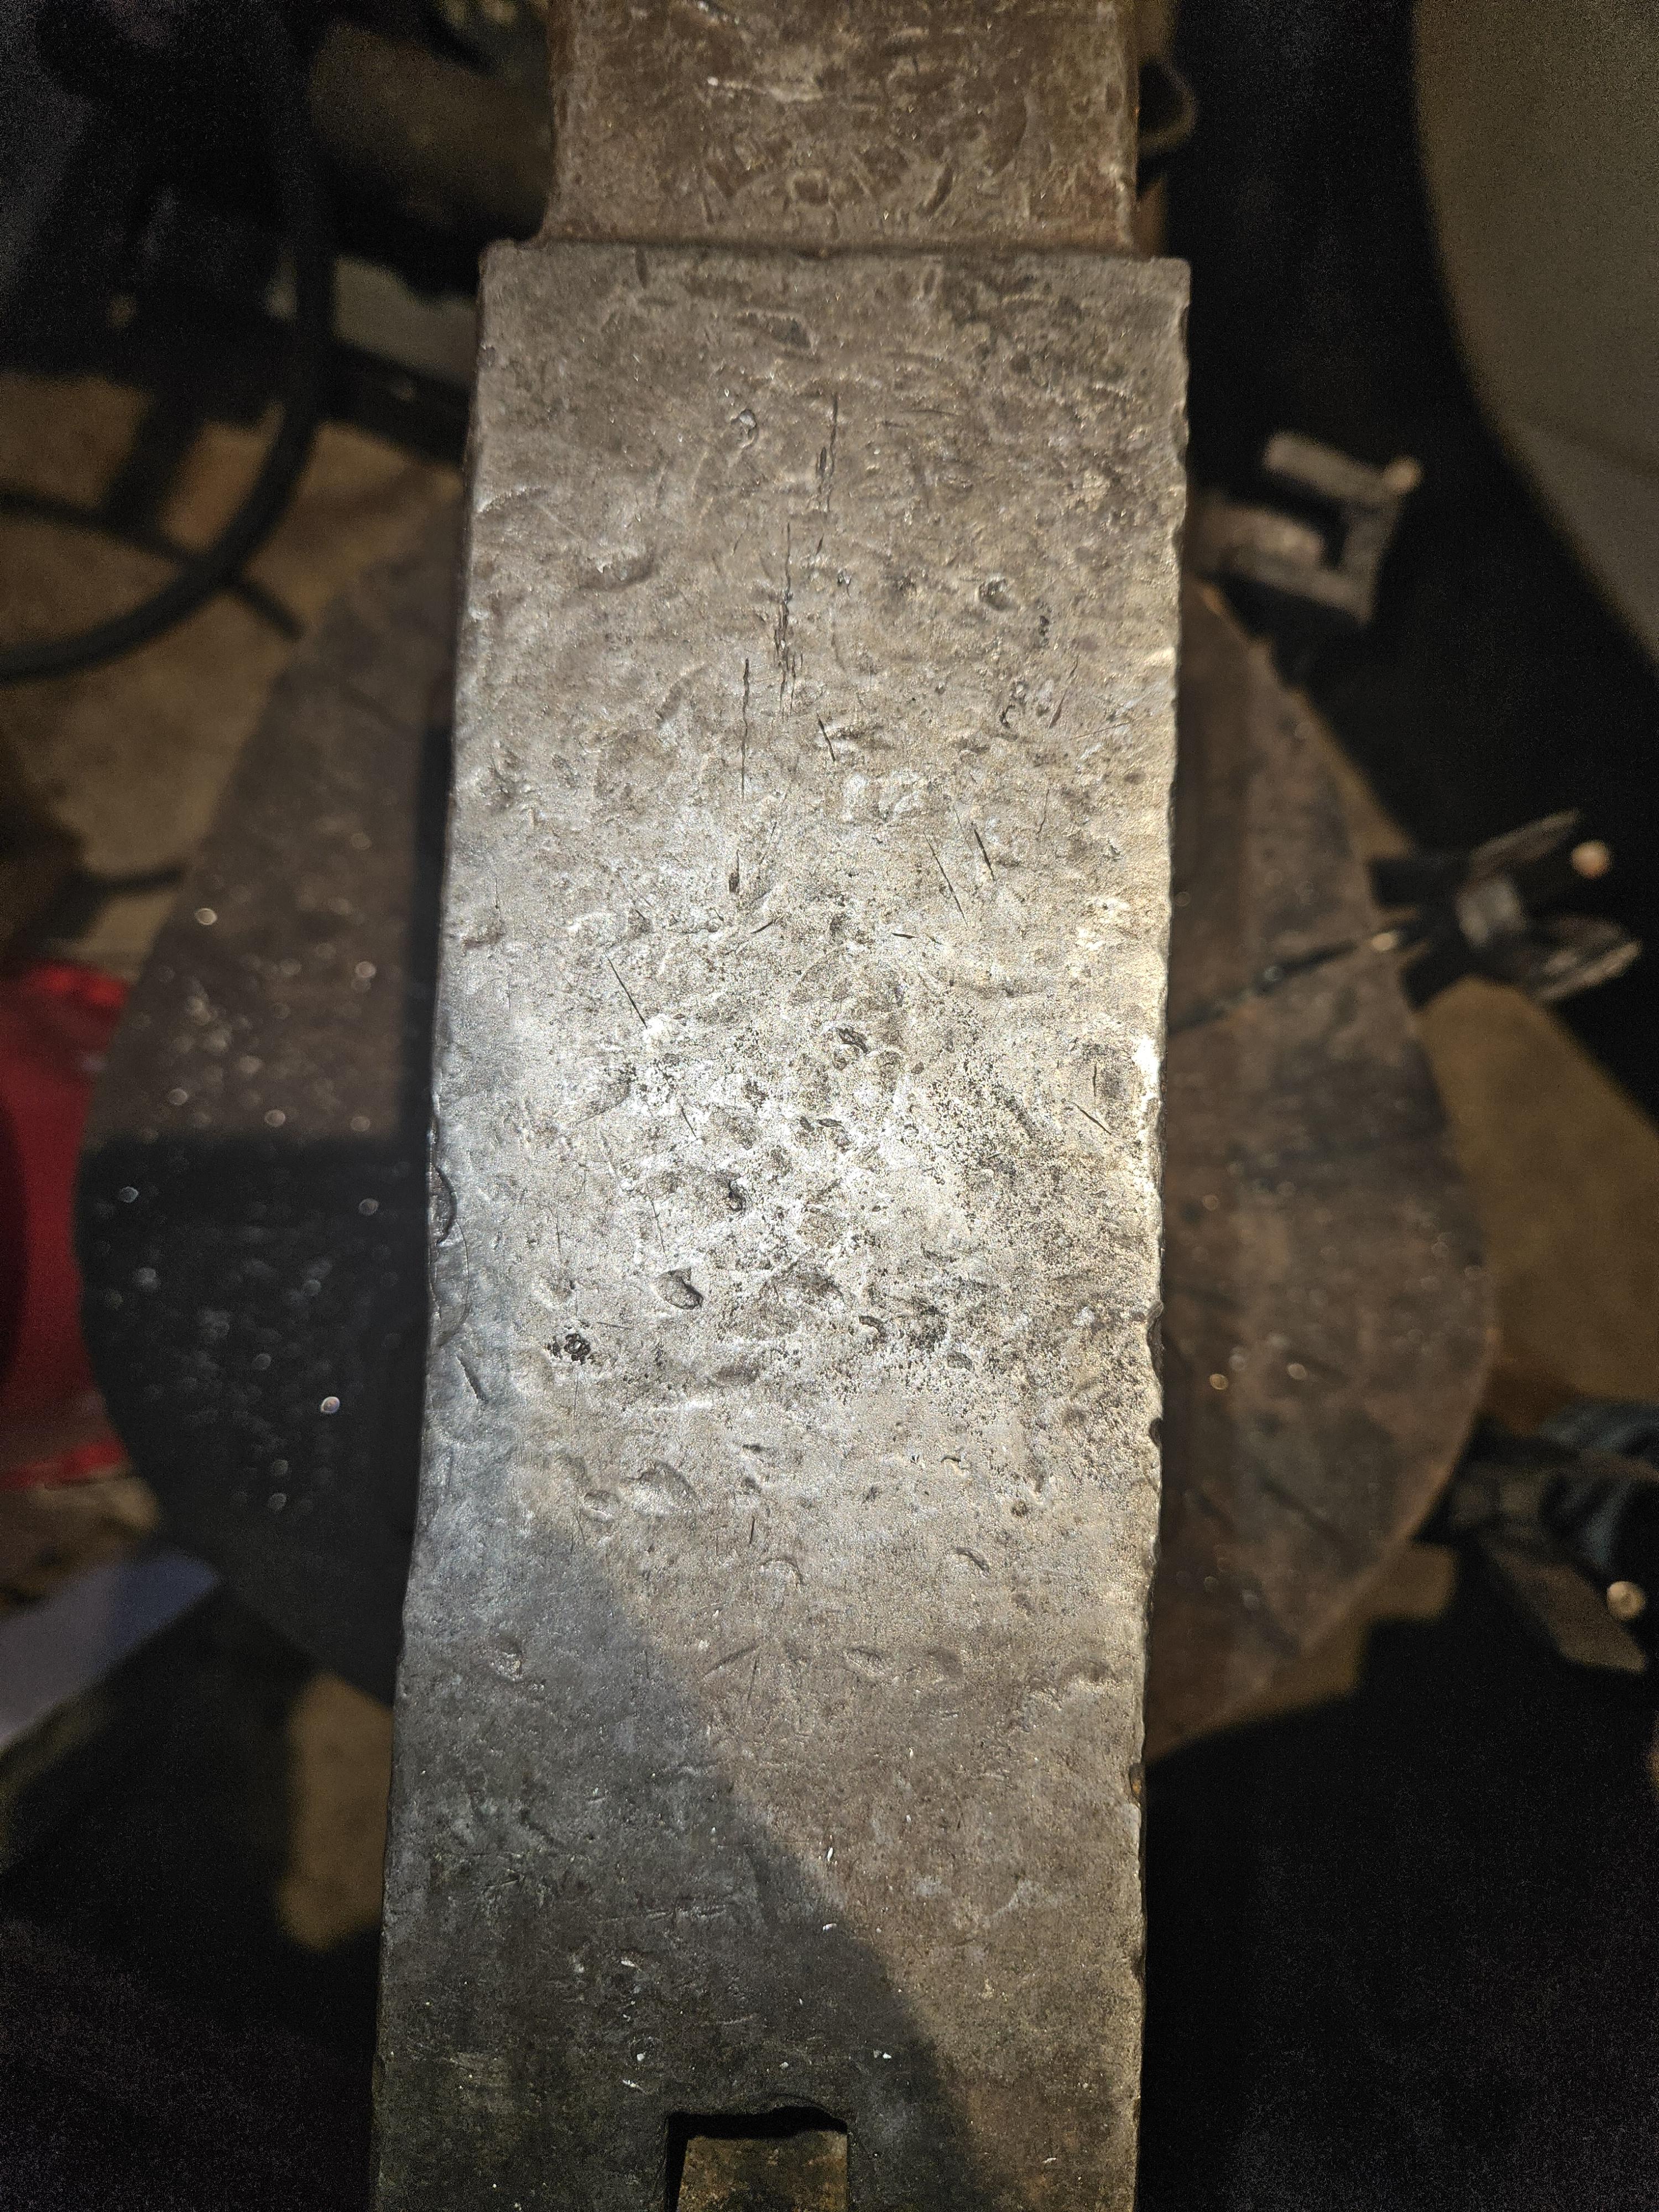
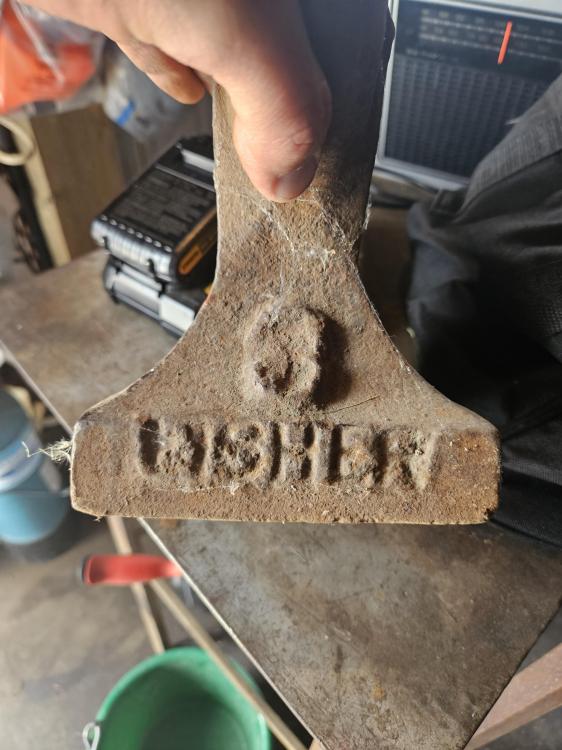
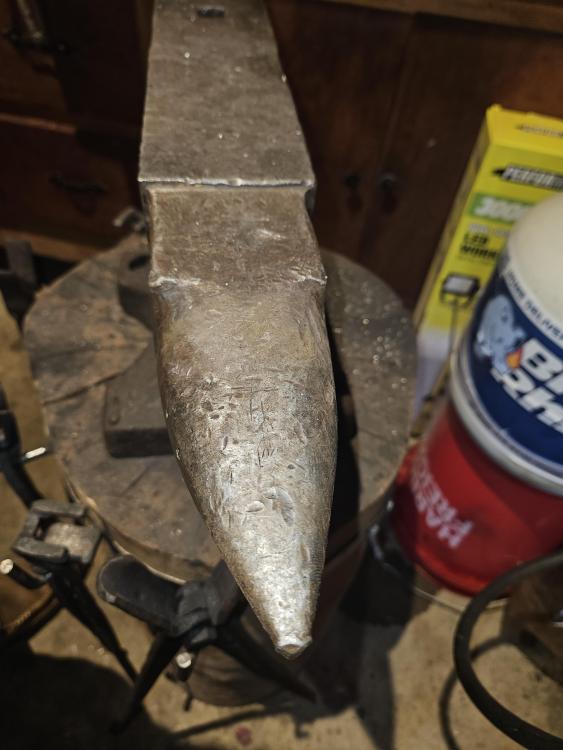
Visited a farm today near Syracuse IN, my Father-in-law knows the owner, to see if there was any metal scrap I could use. Picked up some miscellaneous stuff, but wanted to share this 1886 thirty-pound Fisher Norris anvil. Wasn't available to take, dont need it, and damaged, but still a neat REALLY old anvil.


-
I Like Shiny Steel-I think I might do a test piece in Ferric chloride some time, been debating that. Thank you. Billybones-I appreciate you sharing that, now I know I'm not the only one!! I felt I had read up enough, and something so apparently easy, wasn't as well for someone else. Irondragon-thanks for sharing that thread and your thoughts. I remember reading about different grades of WI refinement, it makes sense and your input feels correct. I definitely plan to forge with it, just haven't found the ideal project just yet (only have so much of it and not going back to Nevada soon, dont want to waste it). Florida Man-I did warm the white vinegar, but not the Muratic. Will try that, as well as get some Ferric Chloride.
-
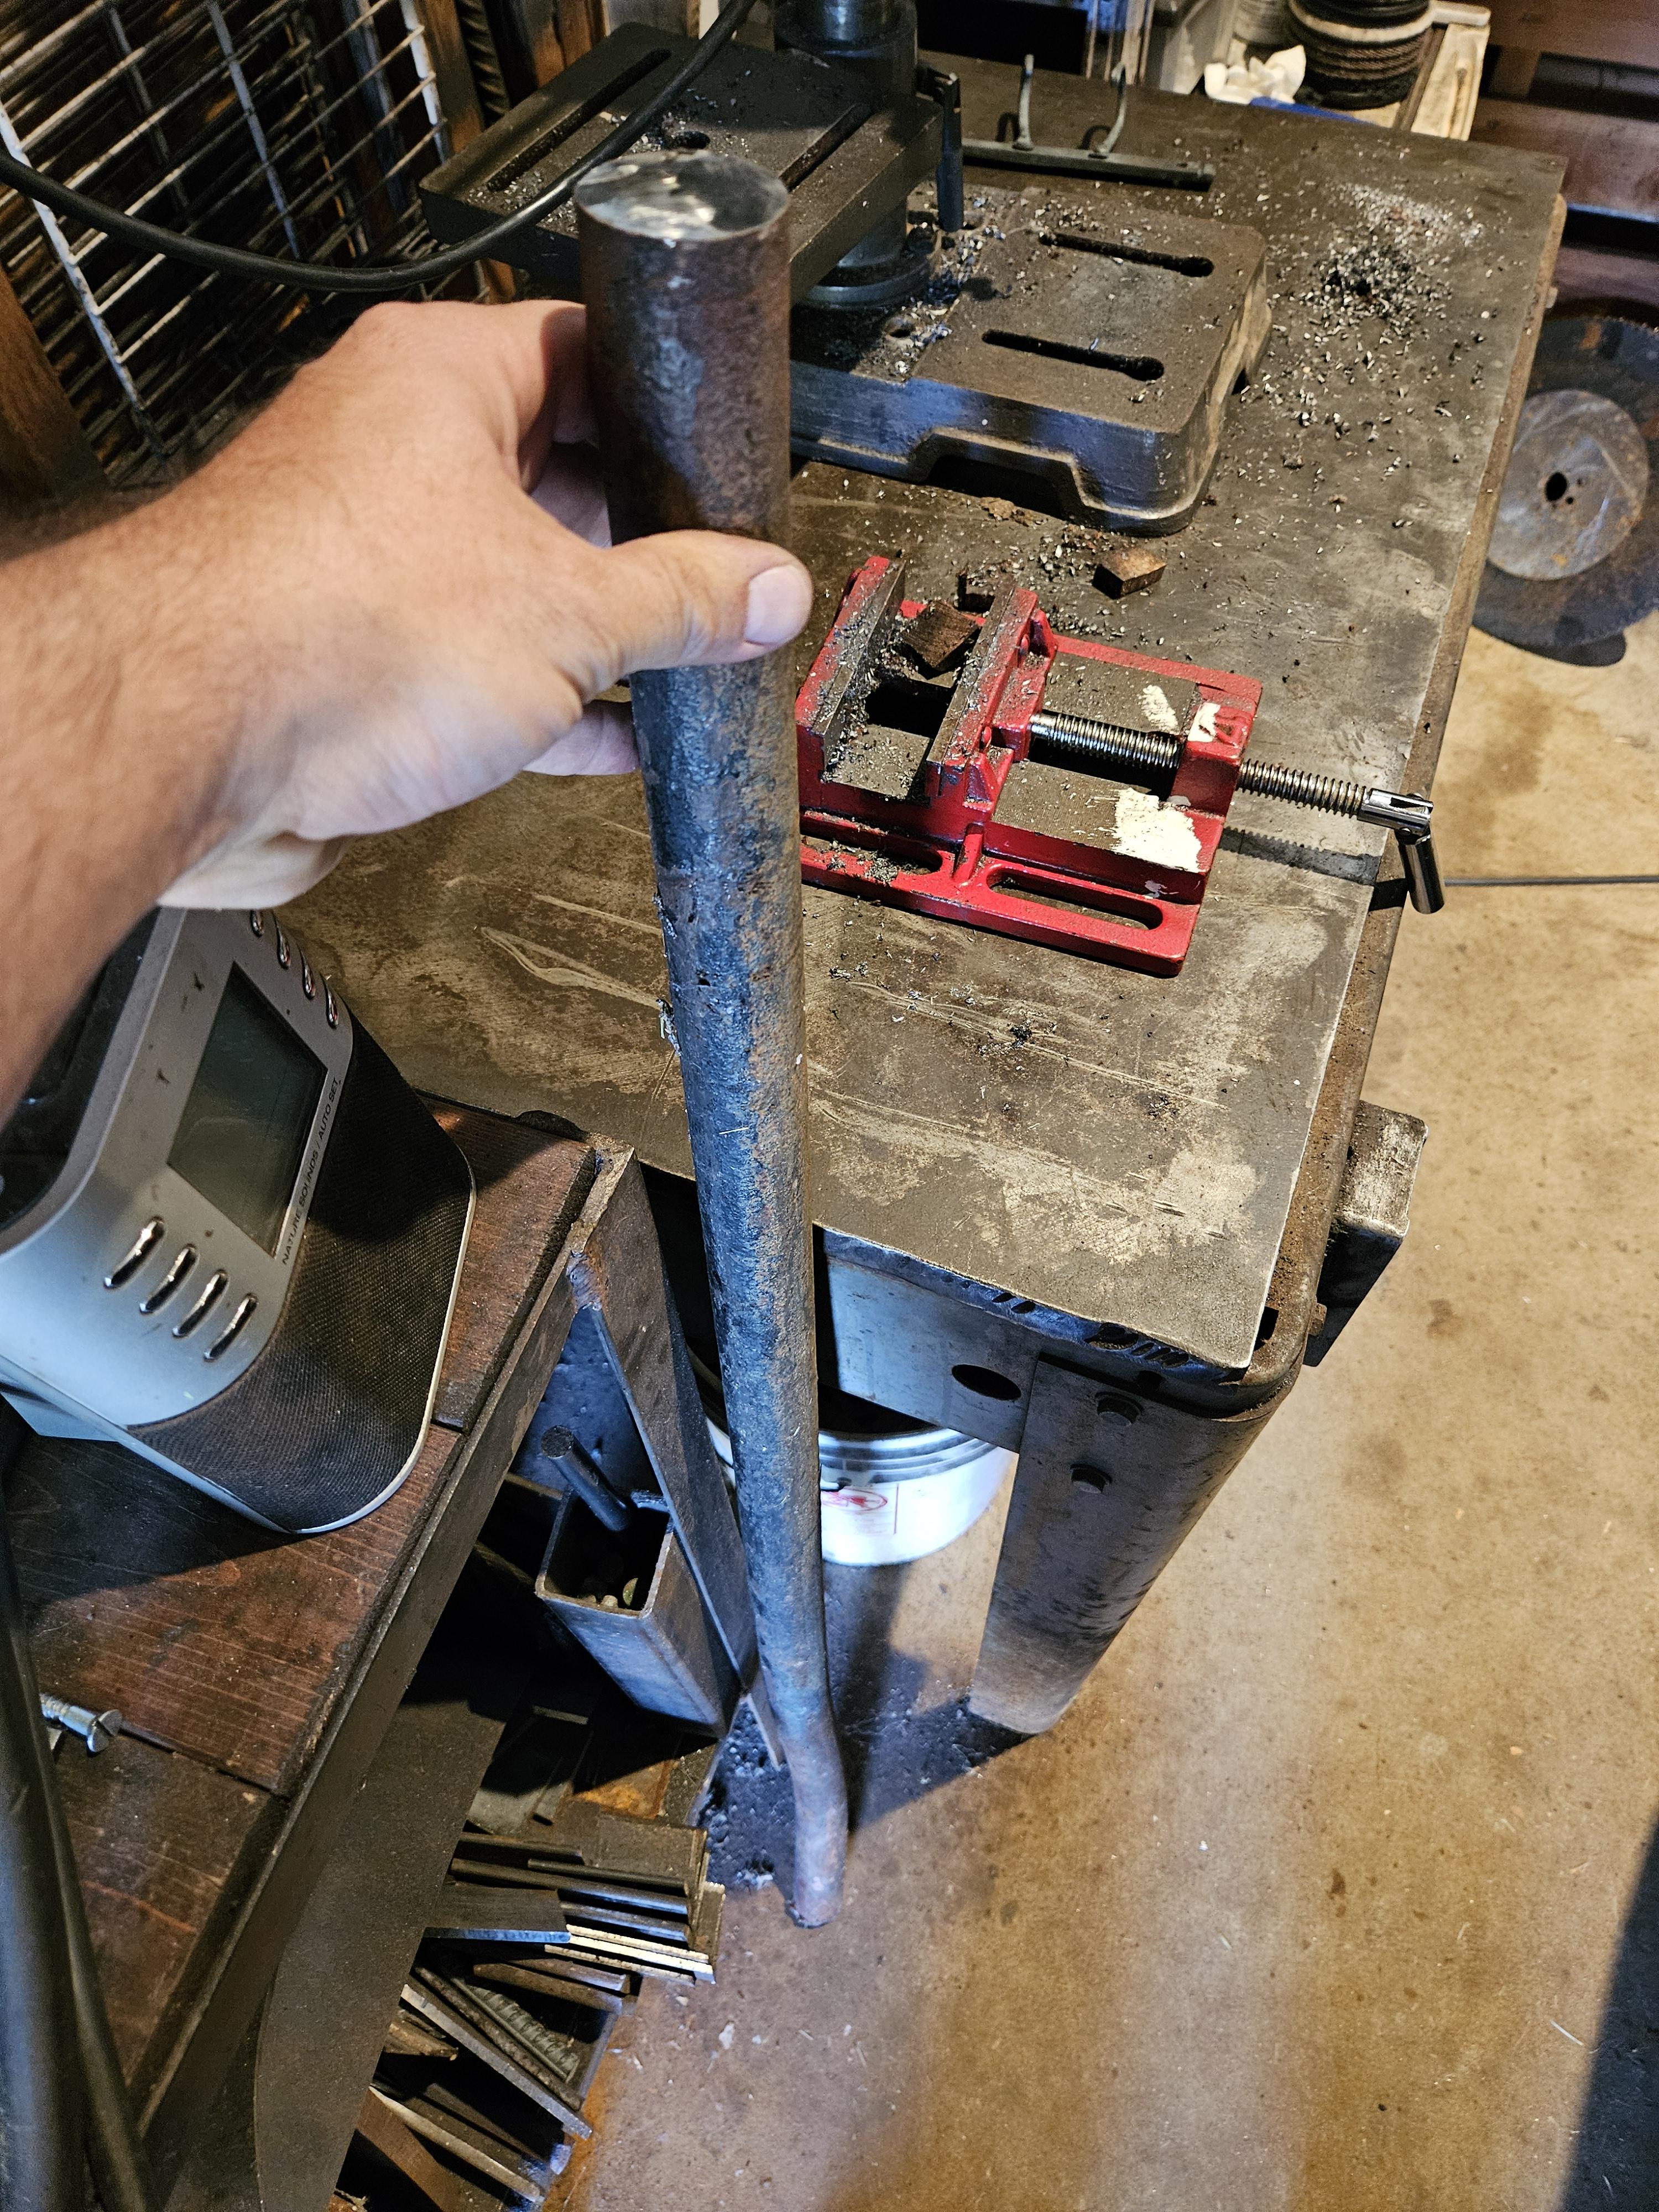
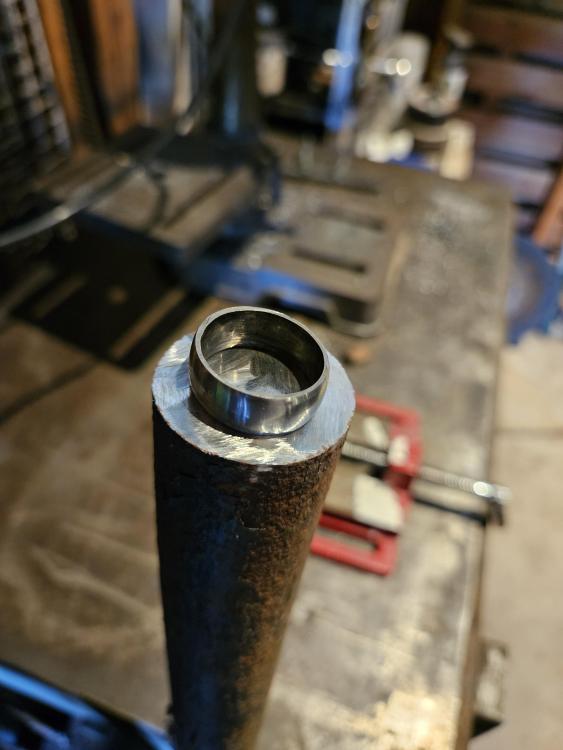
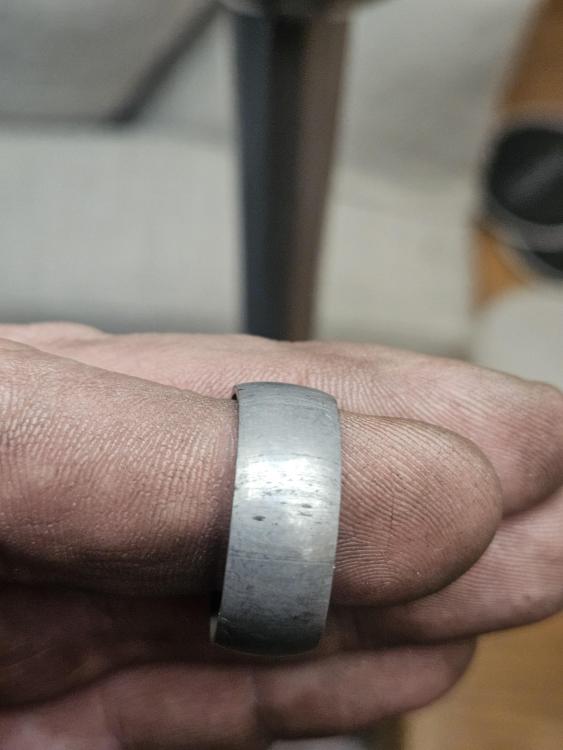
Hello Ridgeway-no forging, just drilled and dremel to fit my finger, and belt sander for the outer part. Supply was already round, so just did stockk removal. Here's a picture back when the ring was just made.
-
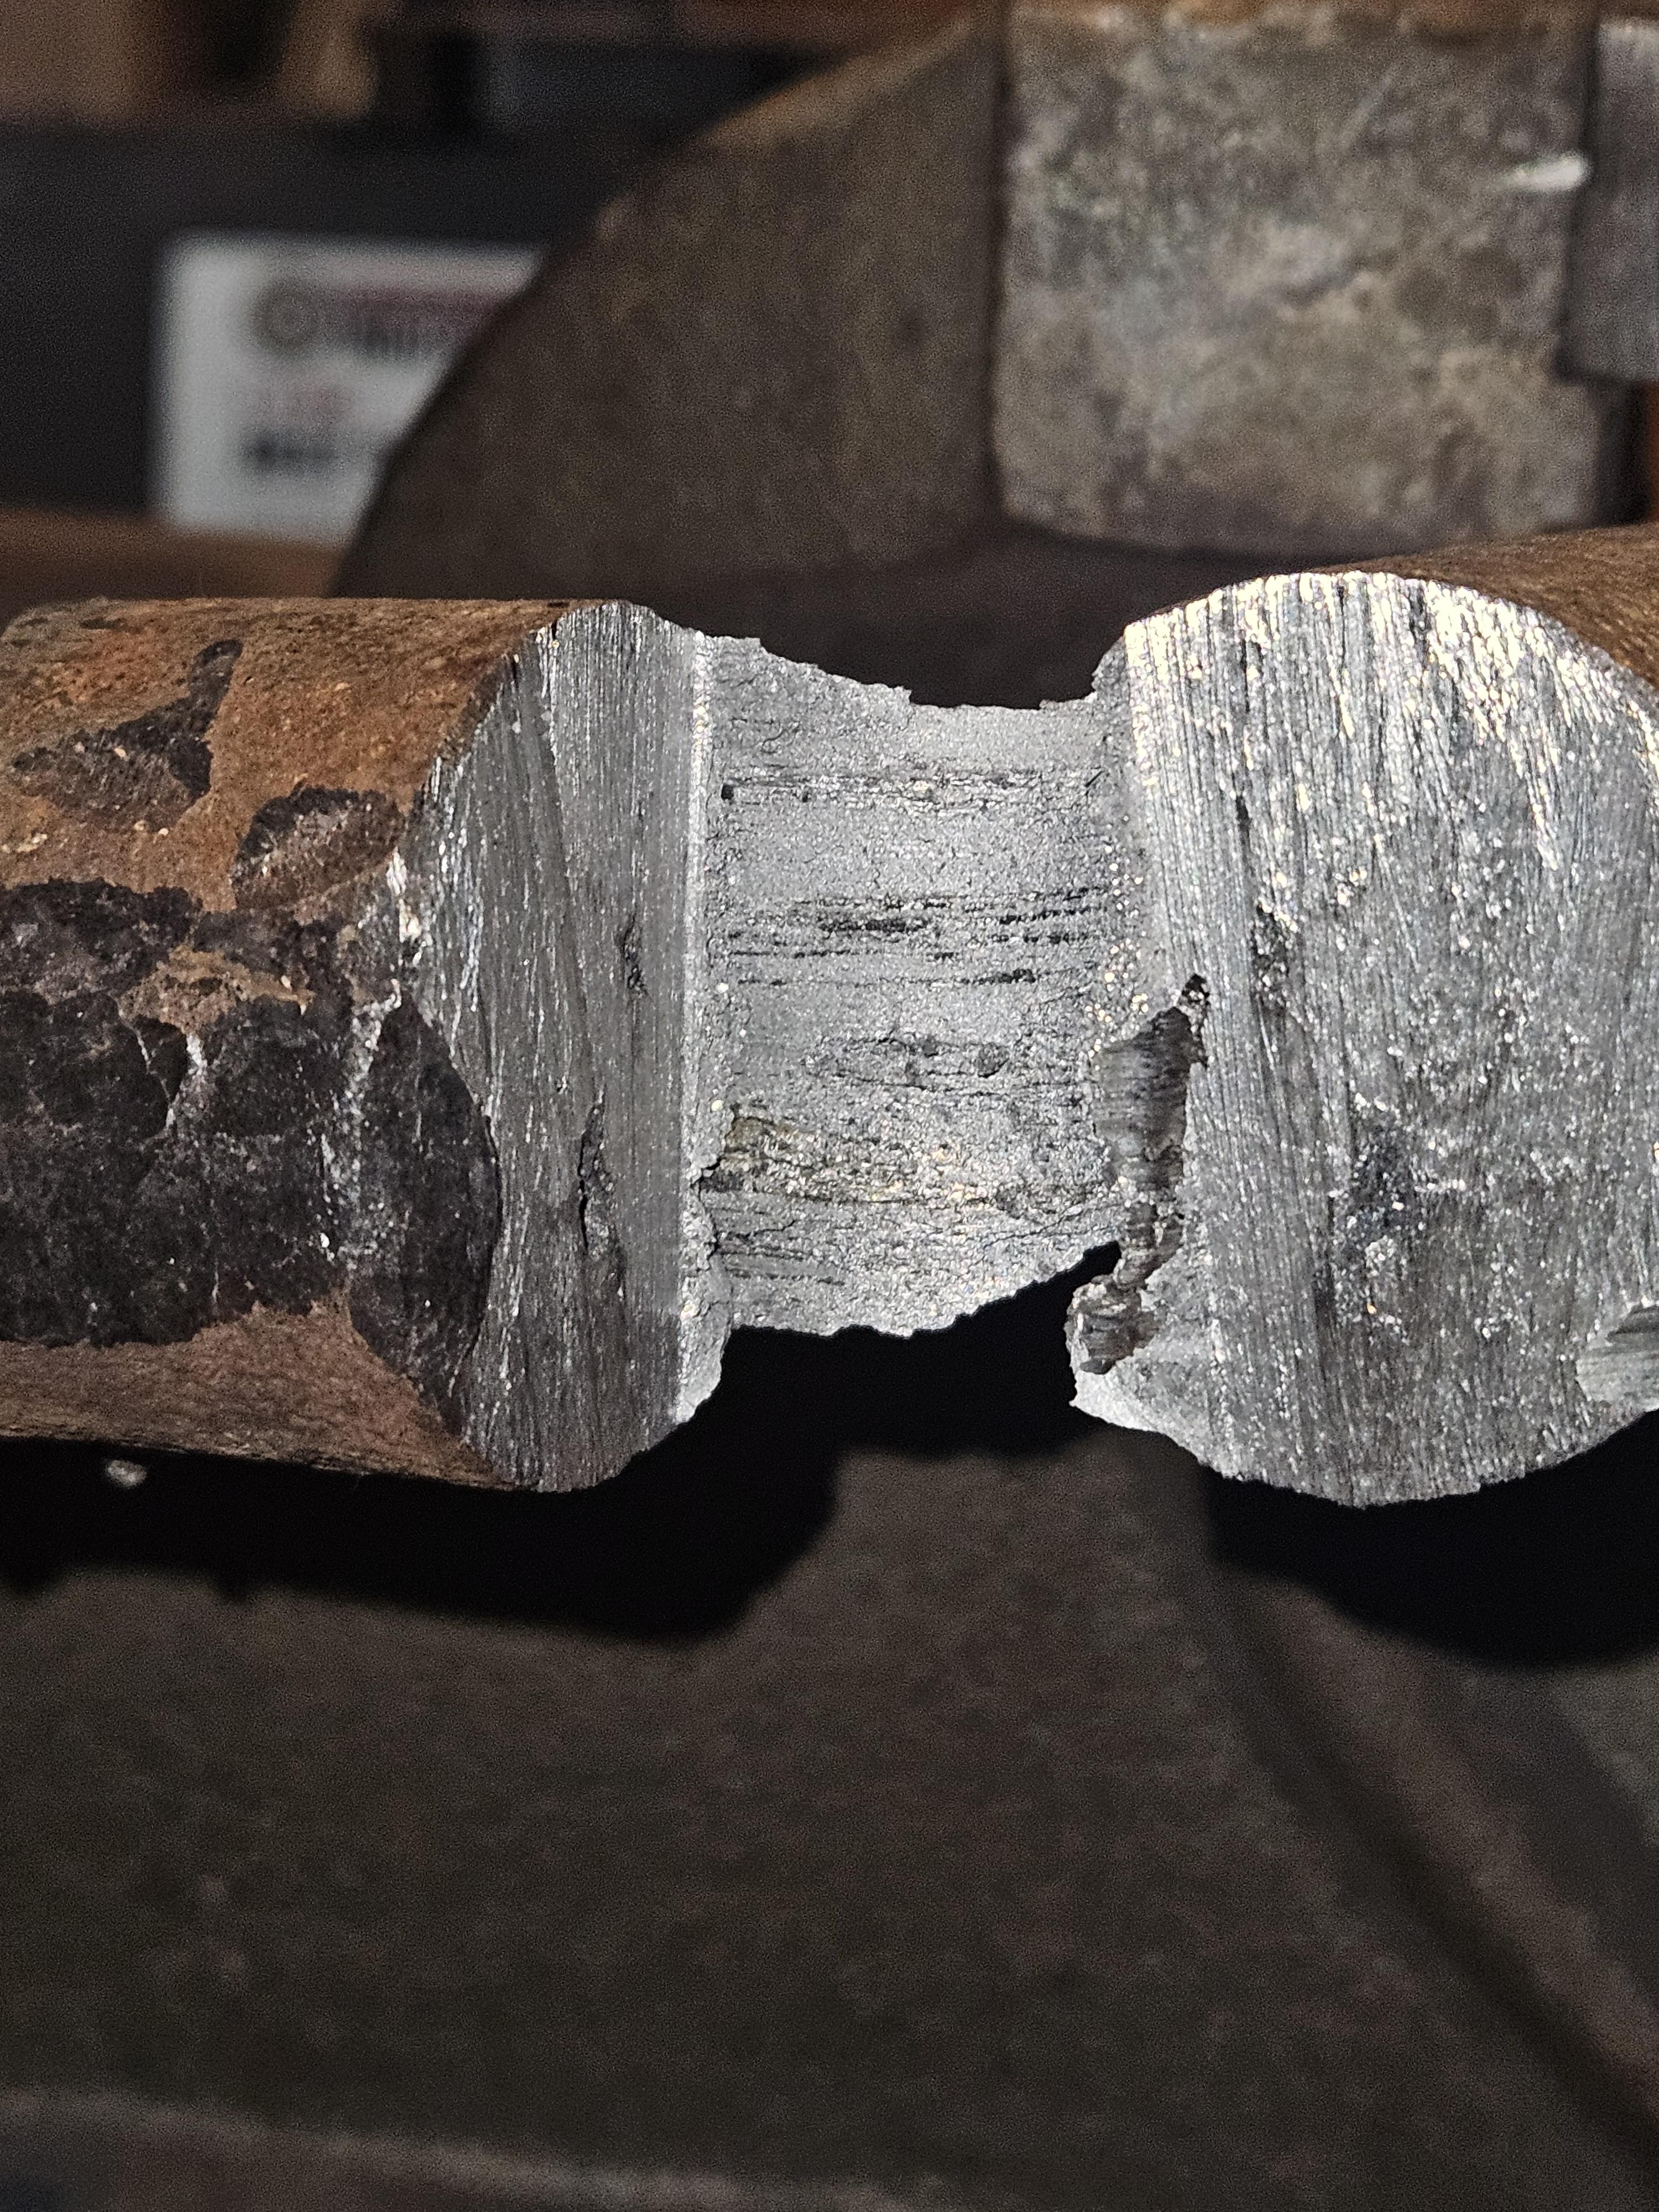
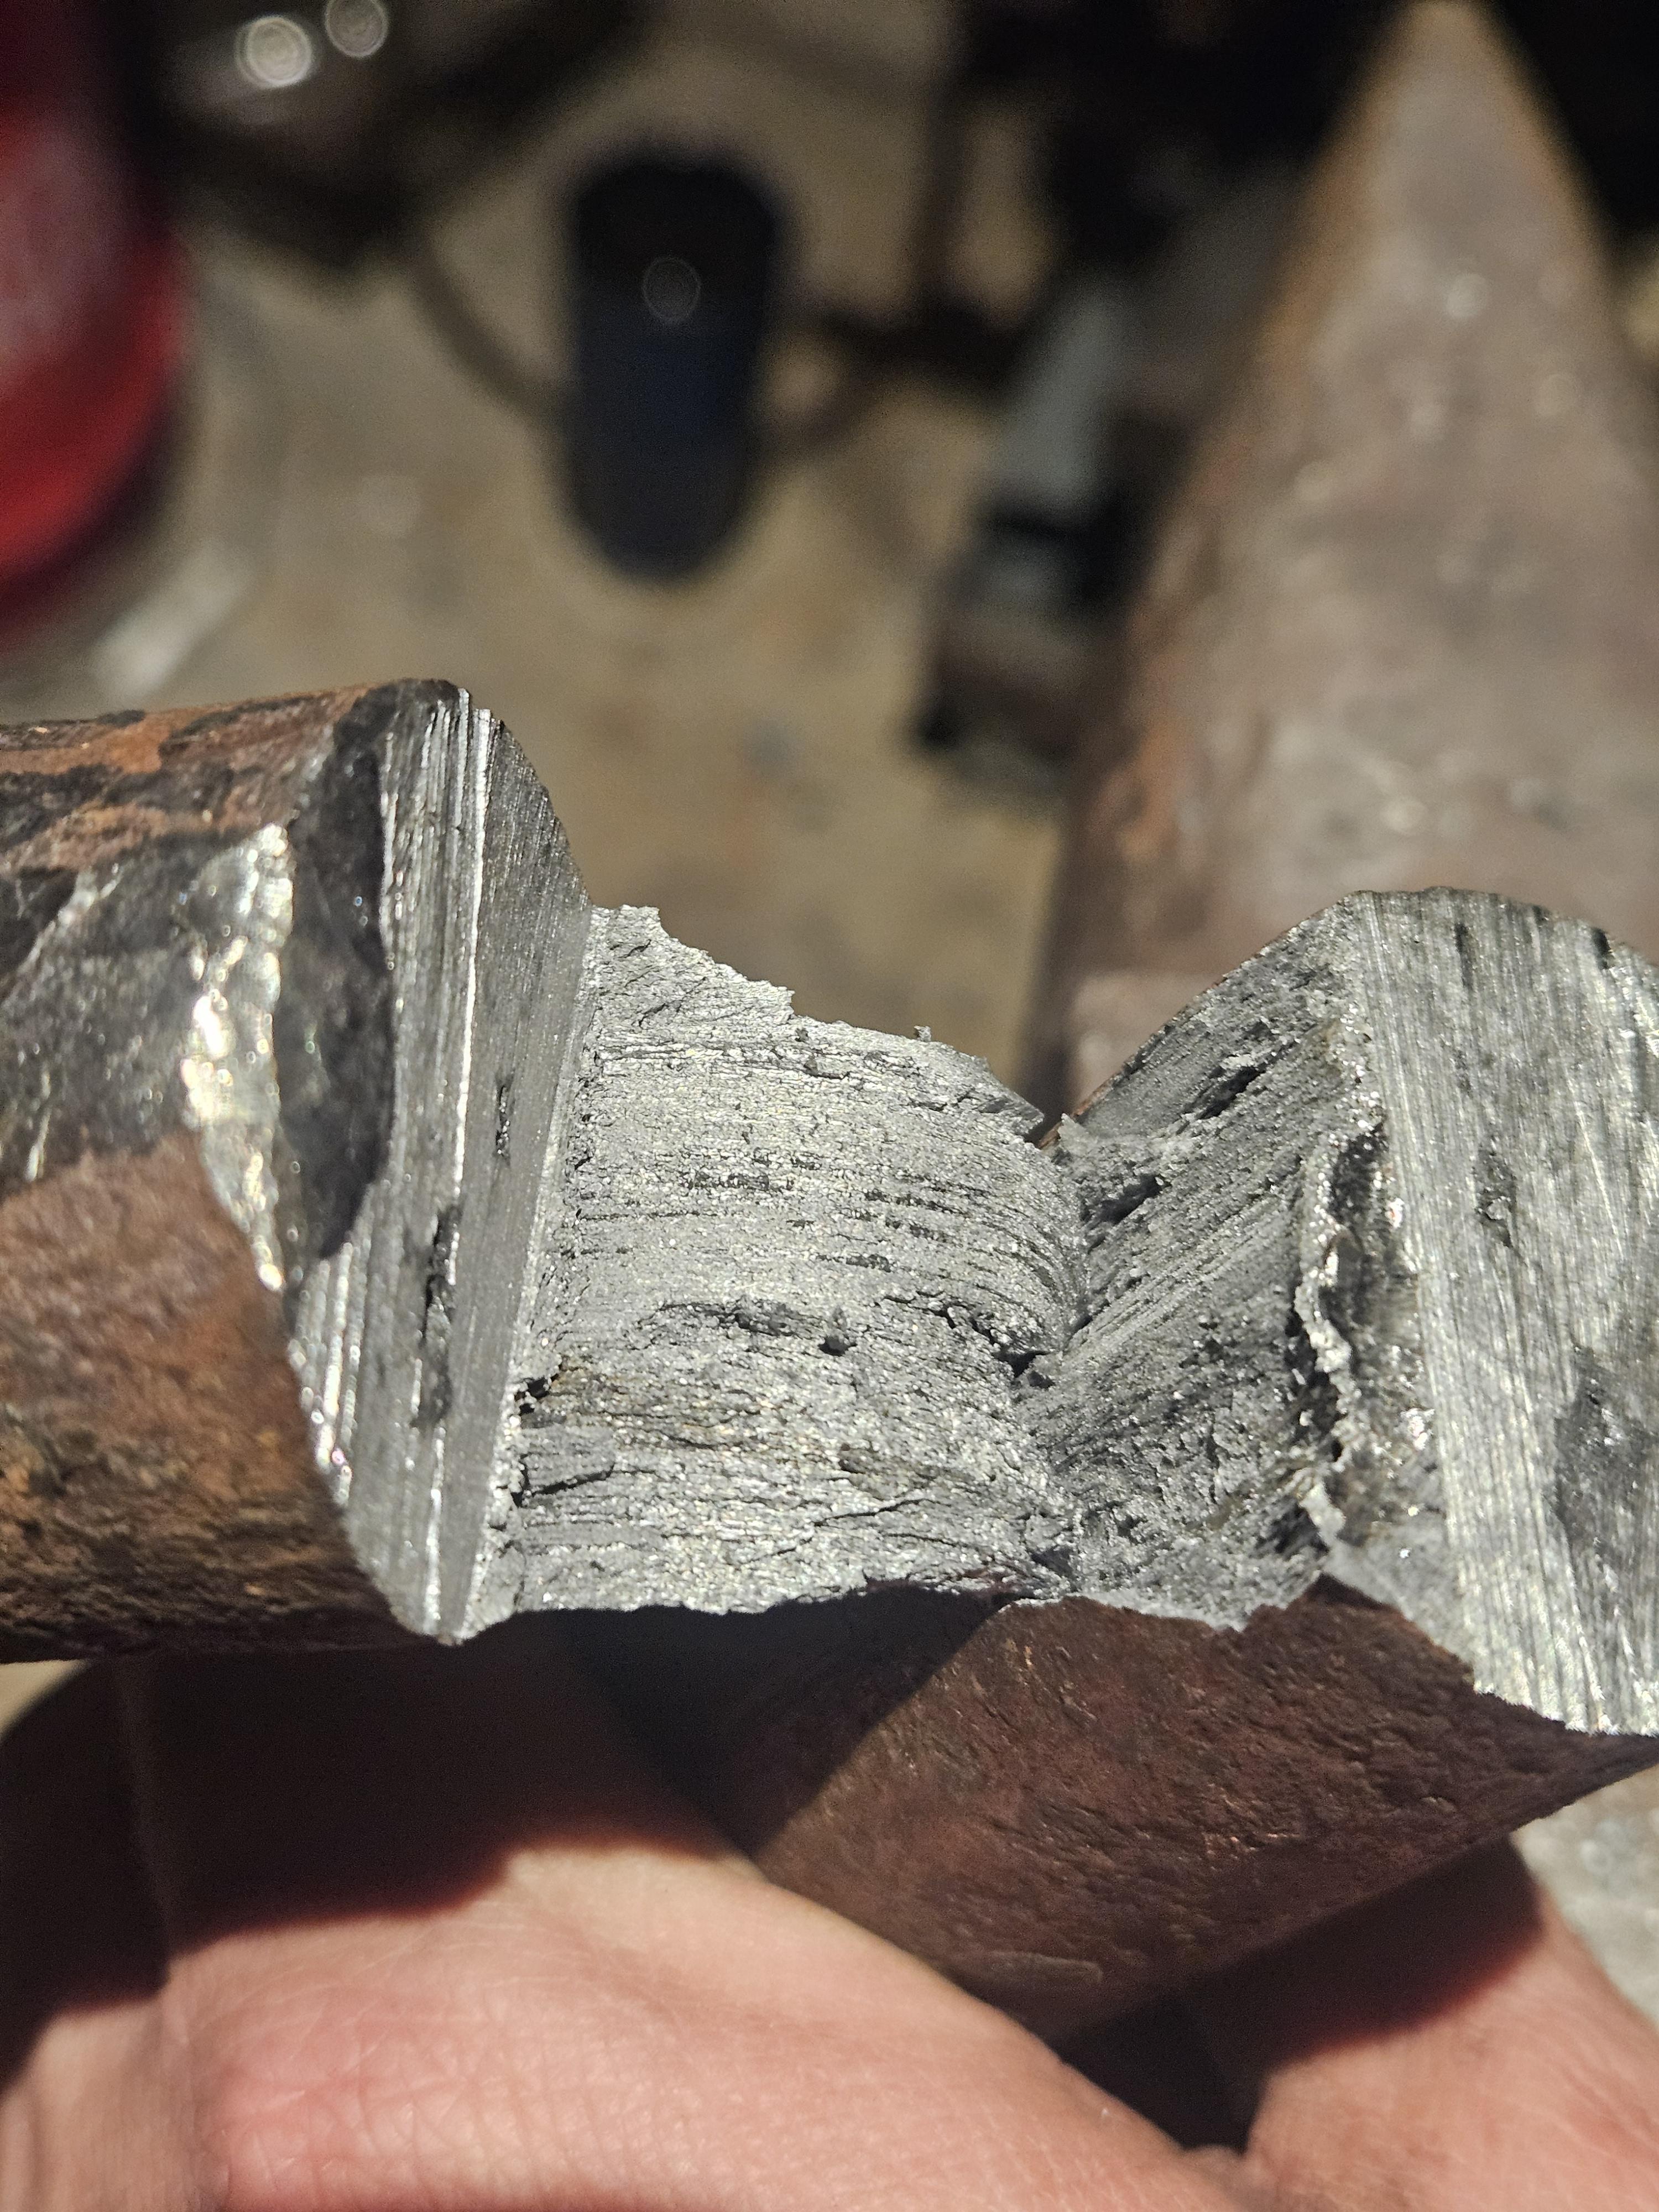
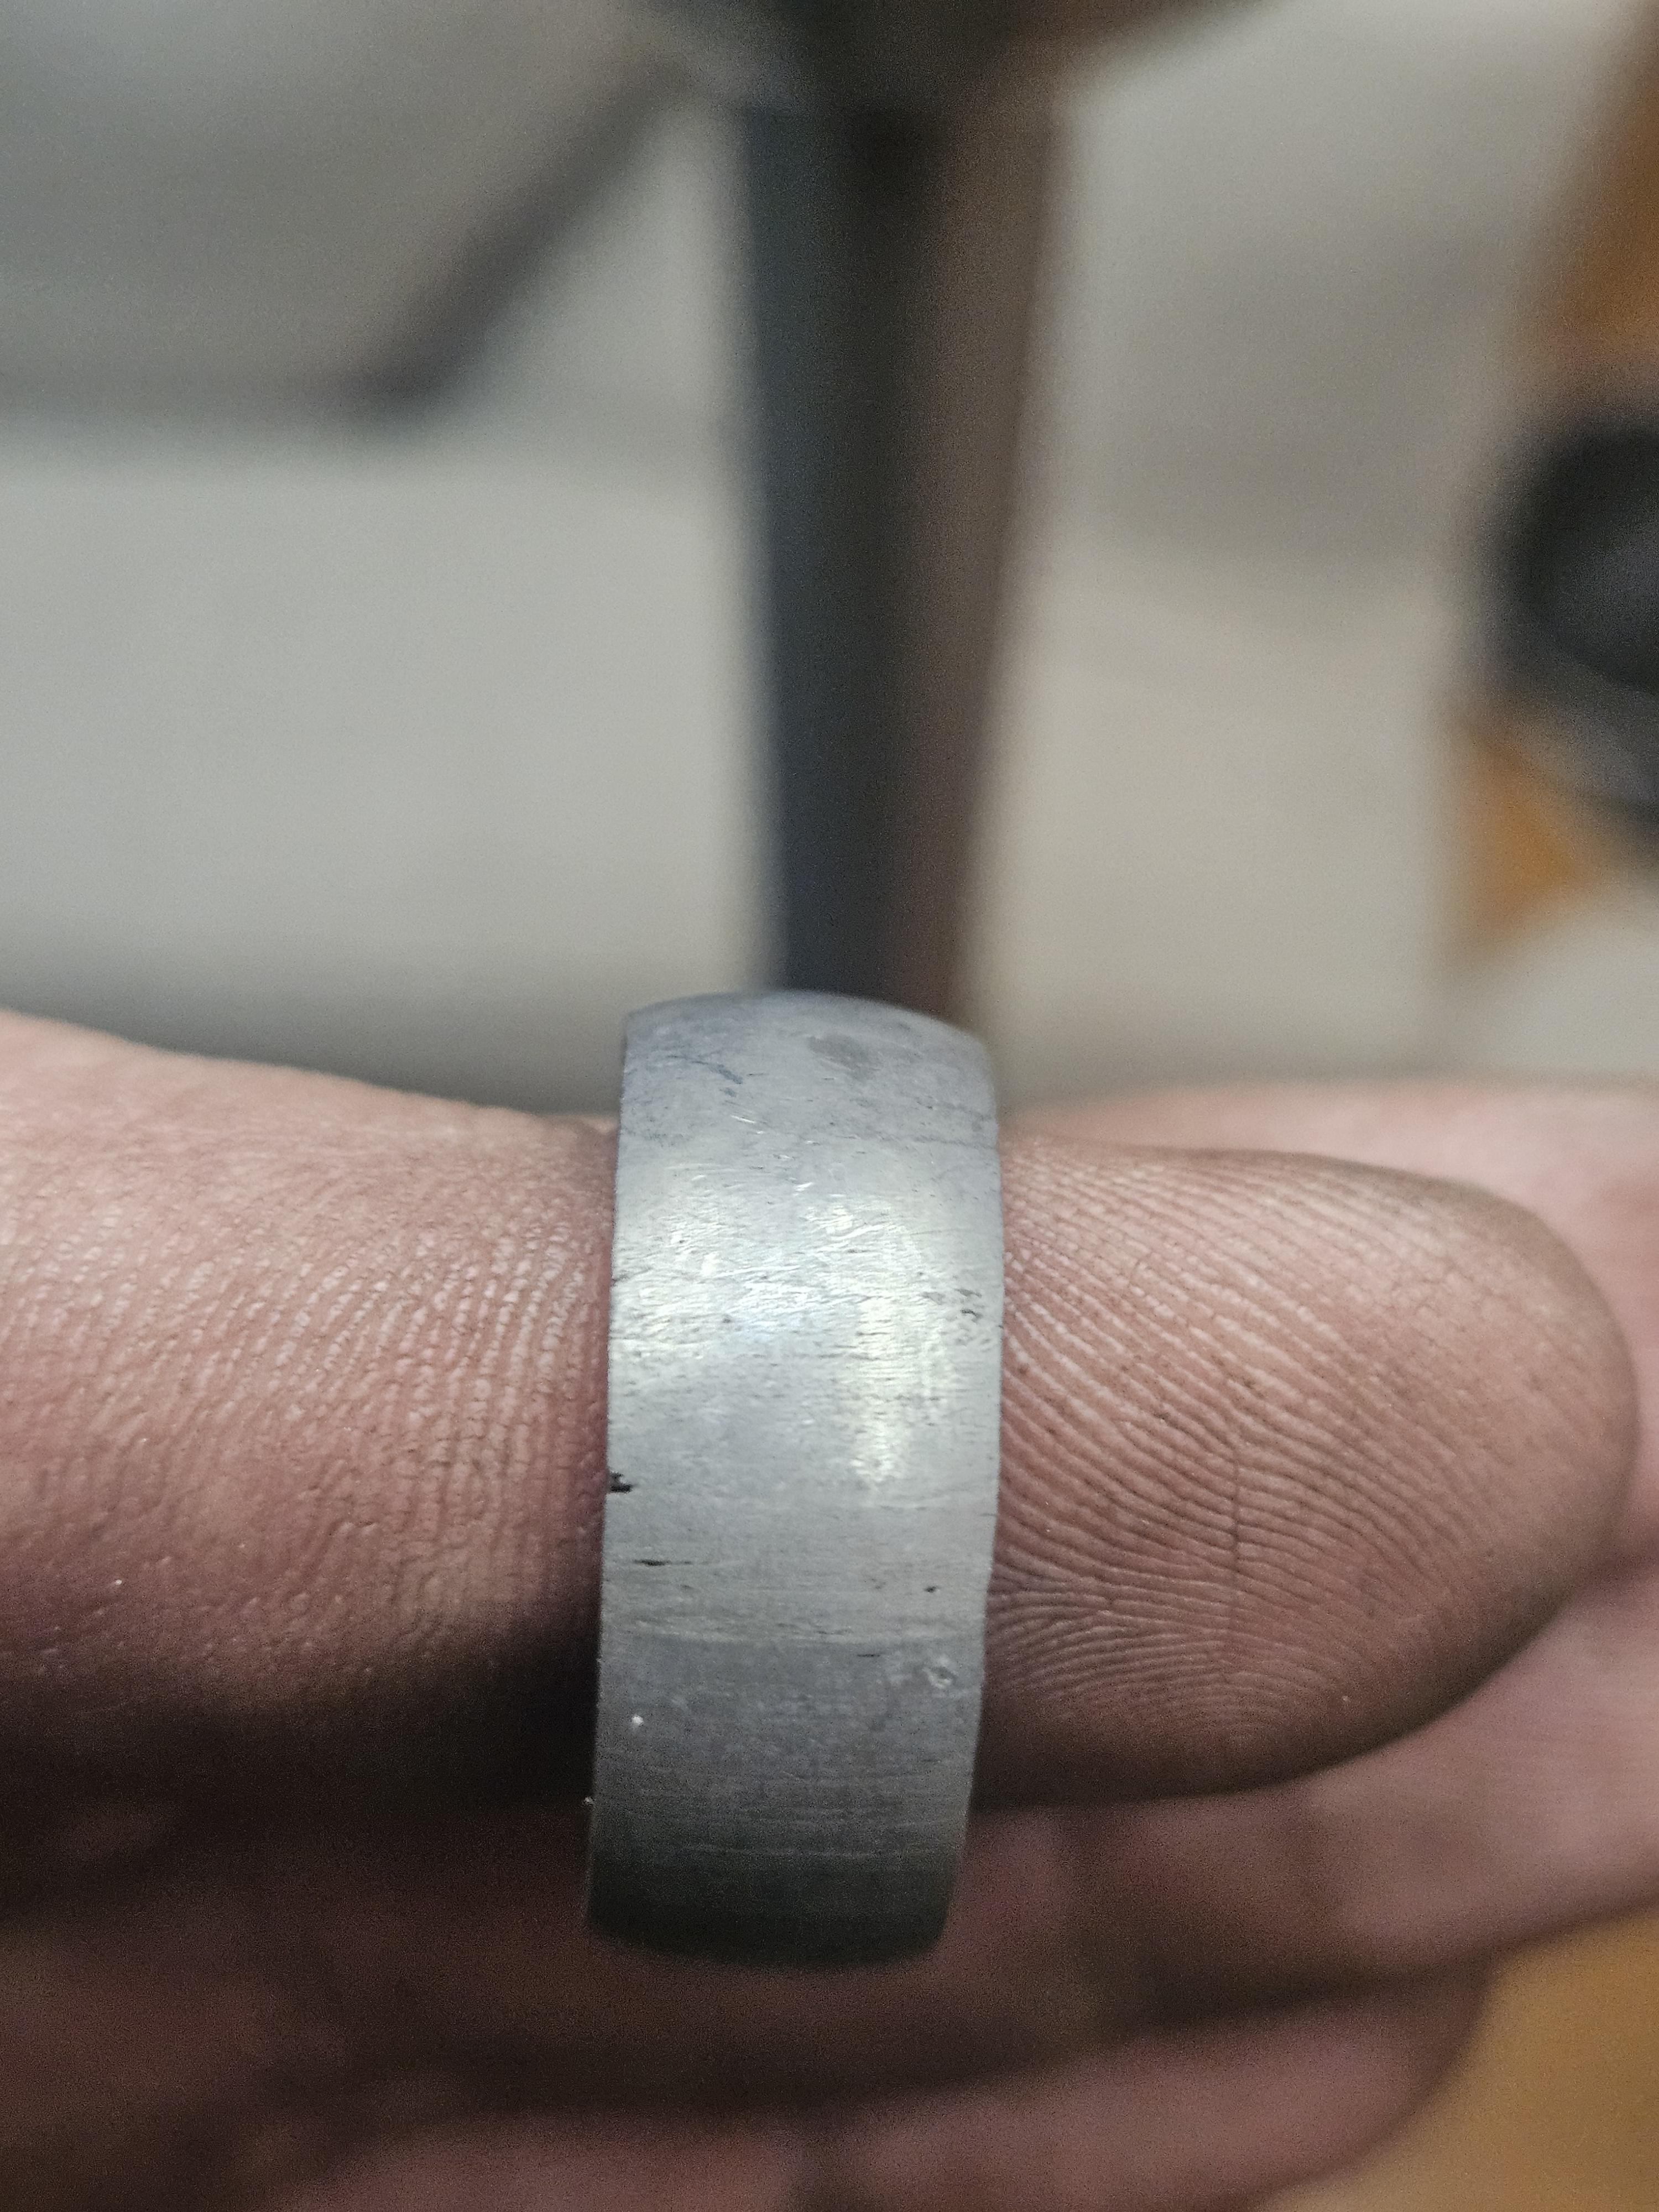
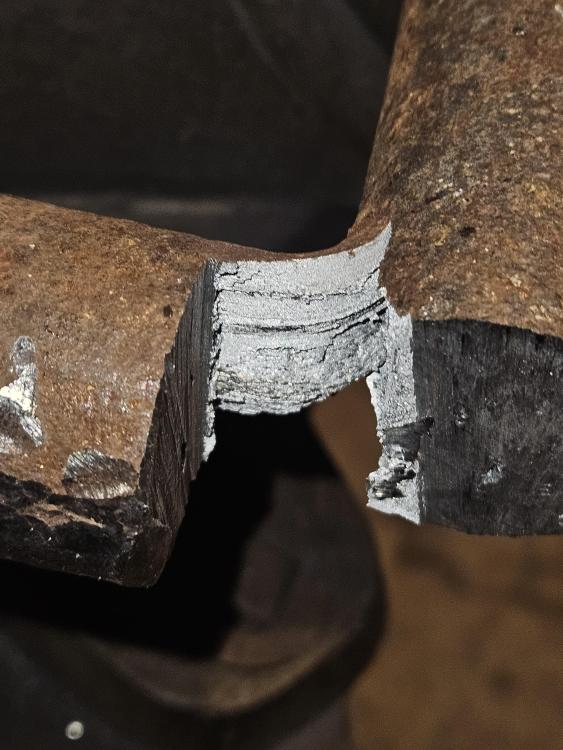
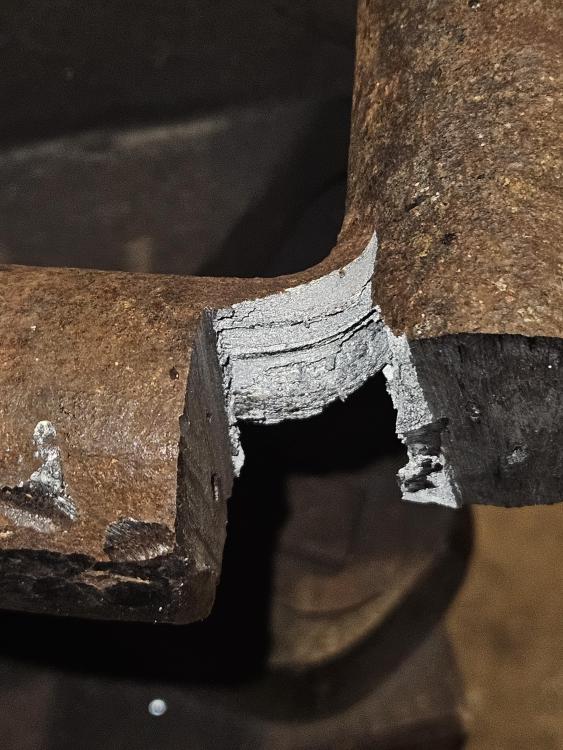
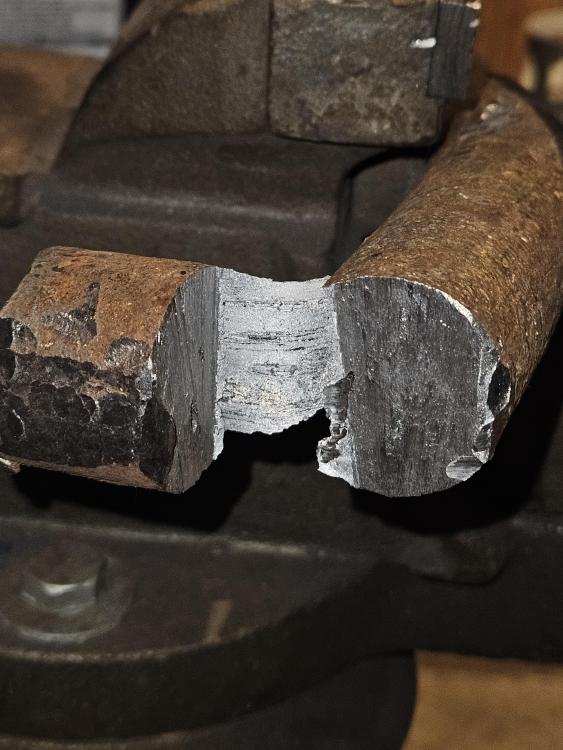
Good evening from SW Michigan everyone! I've shared photos on previous threads as well as the very popular "What did you make in the shop today?" regarding some Wrought Iron I have. Cliff's Notes backstory-I have a bar of 1-1/2" WI that I picked up from the Nevada State Railroad Museum while on vacation (Shop Foreman pulled it for me from a scrap pile). I shared pics of a men's ring I made from it. Frosty among others recommended etching it to see the grain when I posted. I cut a piece of the same bar (that the ring was made of) for etching testing. I went up to 120 grit on my belt sander to clean it up. Long story short, I was unsuccessful in etching. I used warmed white vinegar, soaking from a couple hours, up to 24, with basically no etching. I could see the inclusions a little better, but not like other etched WI I've seen pictures of. I also tried Muratic Acid, with no luck as well. Which leads to: Decided tonight to do the bend test to further determine if my assumed WI was actually WI. Cut the bar 3/4 through with my bandsaw, and hammered it over. Thankfully, I saw grain, and the piece also "peeled" back as well. Compared to other WI I've seen photos of, this grain (in my very greenhorn eyes) is super fine, not coarse like wagon wheel stock Ive seen on Ebay. I've also included pics of my ring after multiple months of daily wearing. The 1000-grit polish has worn off, but I like it better that way-the dark grey looks fantastic, and the inclusions in the metal give it character, to me. The inside only has a light surface rusting, which rarely stains the finger. The outside has never rusted. Is this a very very refined grade of Wrought Iron? Could that be why my attempts at etching haven't been successful? What else have I been doing incorrectly?


-
Frosty-I'm going to make a separate log with the tips you've shared. Seriously. Thank you. MeltedSocks-awww man, that's tough to hear!! Wish it would have been a different story for you. Would be nice if there was a show/etc out there where people could be reunited with the things that "got away" like they have with car owners being reunited with the old car they had from 30 years ago.
-
Frosty-noted and thank you for the insight. Jason
-
Thank you for your thoughts and tips Frosty! For hammering the face-Would a little heat (not glowing hot) with an oxy acetylene torch be okay to do, or would I lose the heat treat to the faceplate (if it was treated?) I guess I could take a file to an edge of the face and see if it skates or bites to assess that. I will fab up a finish forging plate per your recommendation. And embellishing a tale of grandpa...he was a great man, don't have to stretch at all to recant stories of his amazing life!
-
Feel free if to tell me if I'm thinking too hard: This is my one and only anvil, a 1938 vintage 80 lb Vulcan. My paternal grandfather owned it, dad held on to it for sentimental reasons, and when the smithing bug bit me, it became mine. Tons of sentimental value to me as well, I'll never part with it. Grandpa never did any smithing to our knowledge, so us descendants don't know why he bought it. It was pitted/worn when I got it, and of course my use added more. I know that Vulcans are cast iron bodies with a welded steel face plate, so there's not a lot that can be done in terms of machining a flat face to it. I don't have access to a Bridgeport nor any milling machines either (nor would I do this). My question-I have noticed the pitting transferring over into workpieces. If a clean flat finish is desired on the workpiece, I have belt sanders and angle grinders to clean up with, as well as an assortment of files. With that said, and keeping in mind the anvil's construction-any suggestions for adjusting around this? I bet there's someone using an anvil far rougher-but I only know this anvil, and am limited in my experience and knowledge.


-
Amazing JHCC!! That's awesome!!
-
Frosty, Billy- Thank you. Encouragement from you guys means a lot. I really really enjoy manipulating steel into shapes that Joe Q Public doesn't think about or comprehend how it's done, and it would hurt to have my work and passion ridiculed. I don't see that on IDI (hence why shared) but we've all had mal-intended strangers on other internet interactions make us doubt humanity. Once burned twice shy. Hammer control I will take that to heart. There's plenty of vids out there I could absorb and implement. The horns were tested after wire wheel-ing off the scale, using various grit flapper disc to take off all rough/jagged edges, and BLO for the blackened finish (and wiping down with WD-40 to take off any stickiness/gummyness). The hooks were a straight-follow-the-directions from an Alec Steele how-to vid. Longer lengths would make more sense, now that you mentioned that. I did make a bending jig for the hooks, as my over-the-horn attempts were too inconsistent. (And on said jig: need to weld on some square stock to the bottom of it so it can be a hardy-hole drop in). I will share future hammerwork. Experienced eyes and minds will help me to get better, which I absolutely want to be. I appreciate it.
-
Multiple finished things here. A railroad spike hook rack, two shoehorns, a simple riveted hook rack, and an adjustable/telescoping bathside table made to the wife's desired design. All but the RR Spike rack were Christmas gifts, as that was made to sell. I need to admit that I'm a little nervous to share my forge work, I'm nowhere near as good as a lot of what has been shared in this ongoing thread. I'm learning, gaining experience, reading, watching videos, teaching myself as I go.


-
Frosty- You mentioned that I should use the knowledge of someone who knows what they're talking about in regards to etching-I have Steve Sells' book "Introduction to Knifemaking", in which he has several paragraphs on said topic. I'm going to use ferric chloride, following his practices for knives, but applying that to my ring. I'll test on a section of the parent bar before I do my ring. Jason
-
Hello Frosty- Thank you! WI grain is undoubtedly the coolest part of WI, so yes, etching is basically required here. Just as far as today goes, I'm enamored with the shiny satin finish that was accomplished I will update when etching occurs. I've read up on several threads on IFI on etching, thanks to those who shared their experience! -Jason
-
Good evening (at least in SW Michigan)- Finally (probably finished) a project for me-making a ring out of Wrought Iron! This Wrought Iron came off of a 1800's locomotive scrap which I purchased from the Nevada State Railroad Museum. I cut off a piece of a 1.5" diameter bar, drilled it out, and ground it down to fit and feel comfortable for me. Started with 40 grit on a belt sander, ended with 1000 grit. I say "probably finished" since I might etch it. I'll wear it for a while and see if I change my mind.


-
Nobody Special, re: E4 Mafia: I did not serve, but I've enjoyed hearing plenty of good stories of the E4 mafia, if they existed, because no such organization exists... One acronym I've heard that made me chuckle is S.T.E.A.L. Strategically Transferring Equipment to an Alternate Location. I am not condoning any relocation of Wrought Iron without approval of the owner...but I understand!